


02fusoFG
-
Content count
24 -
Joined
-
Last visited
-
Days Won
9
Posts posted by 02fusoFG
-
-
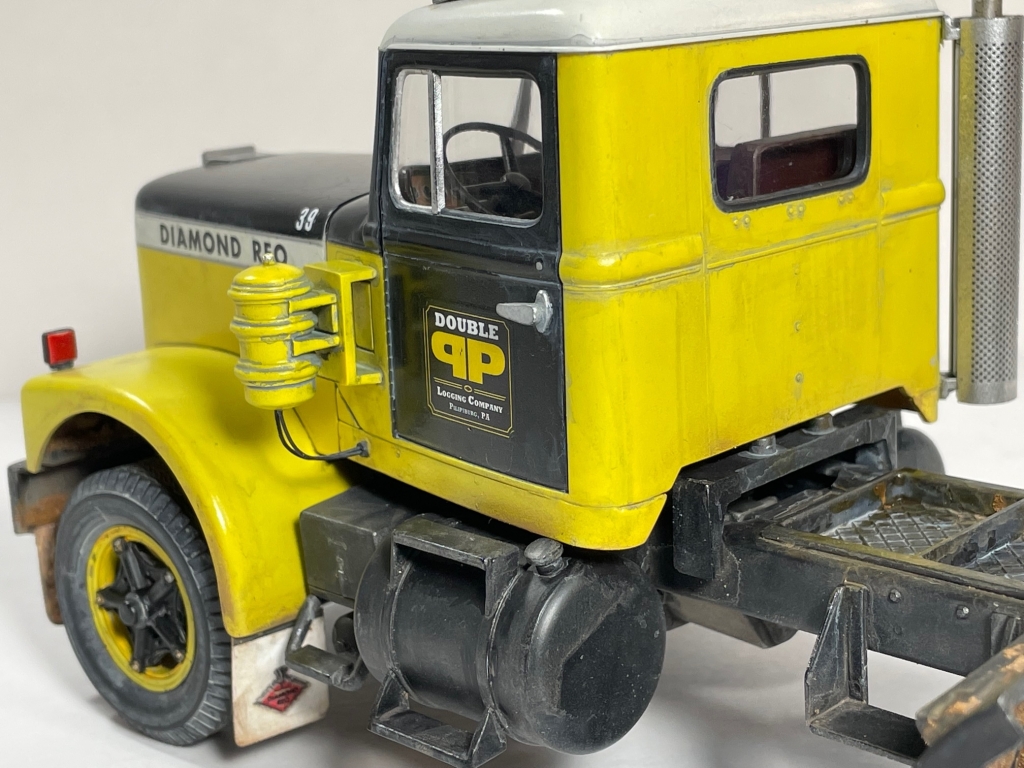
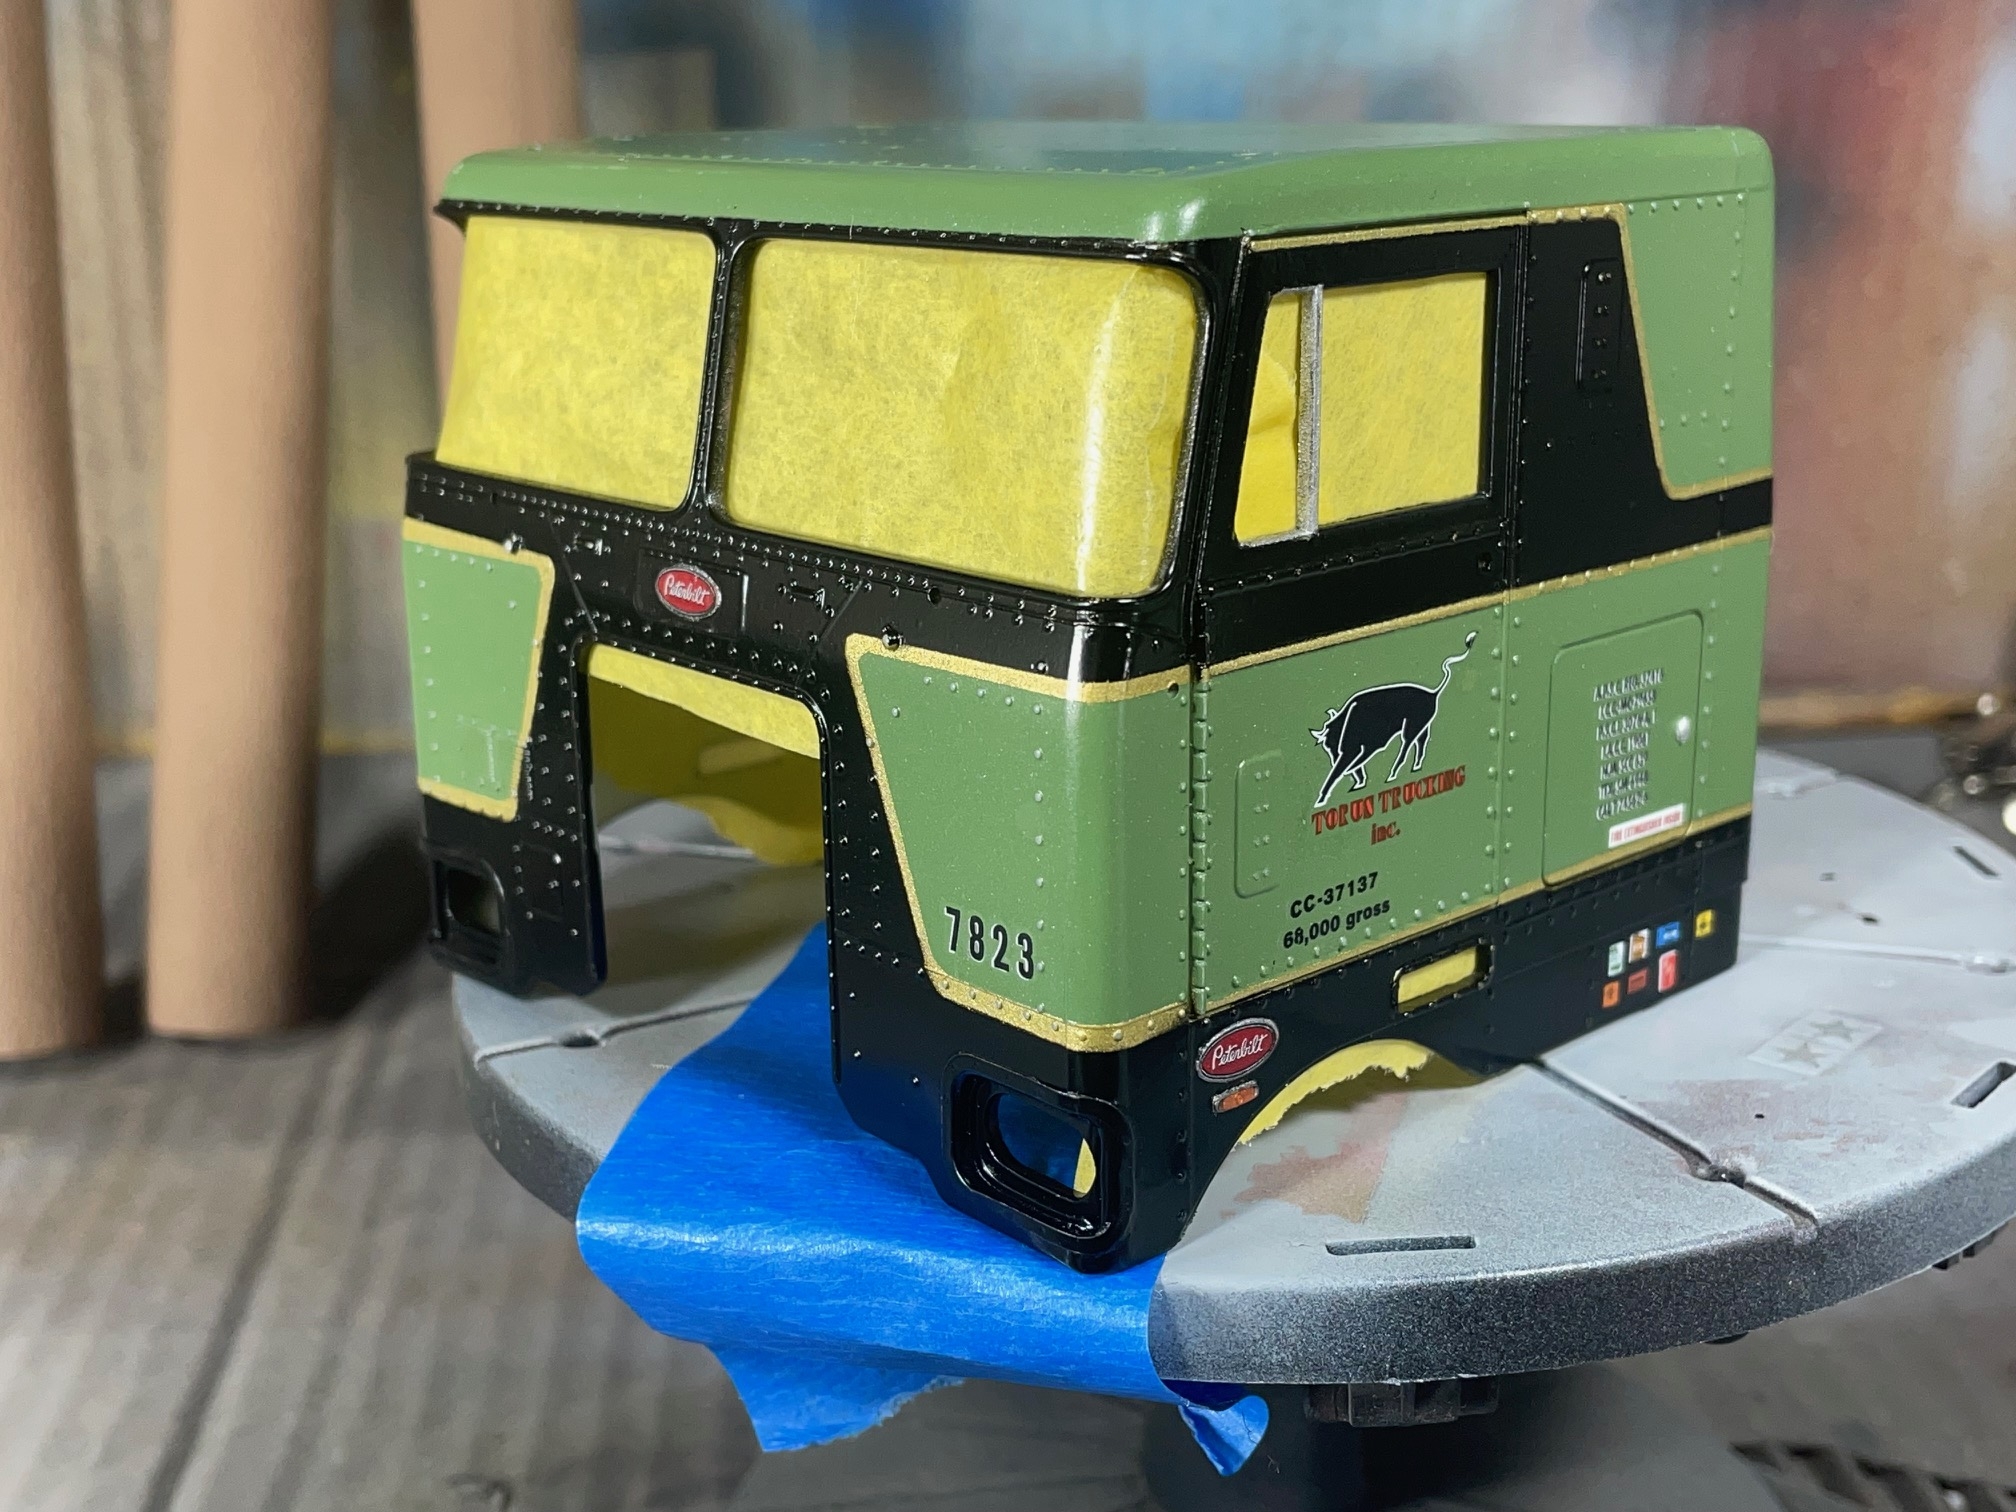
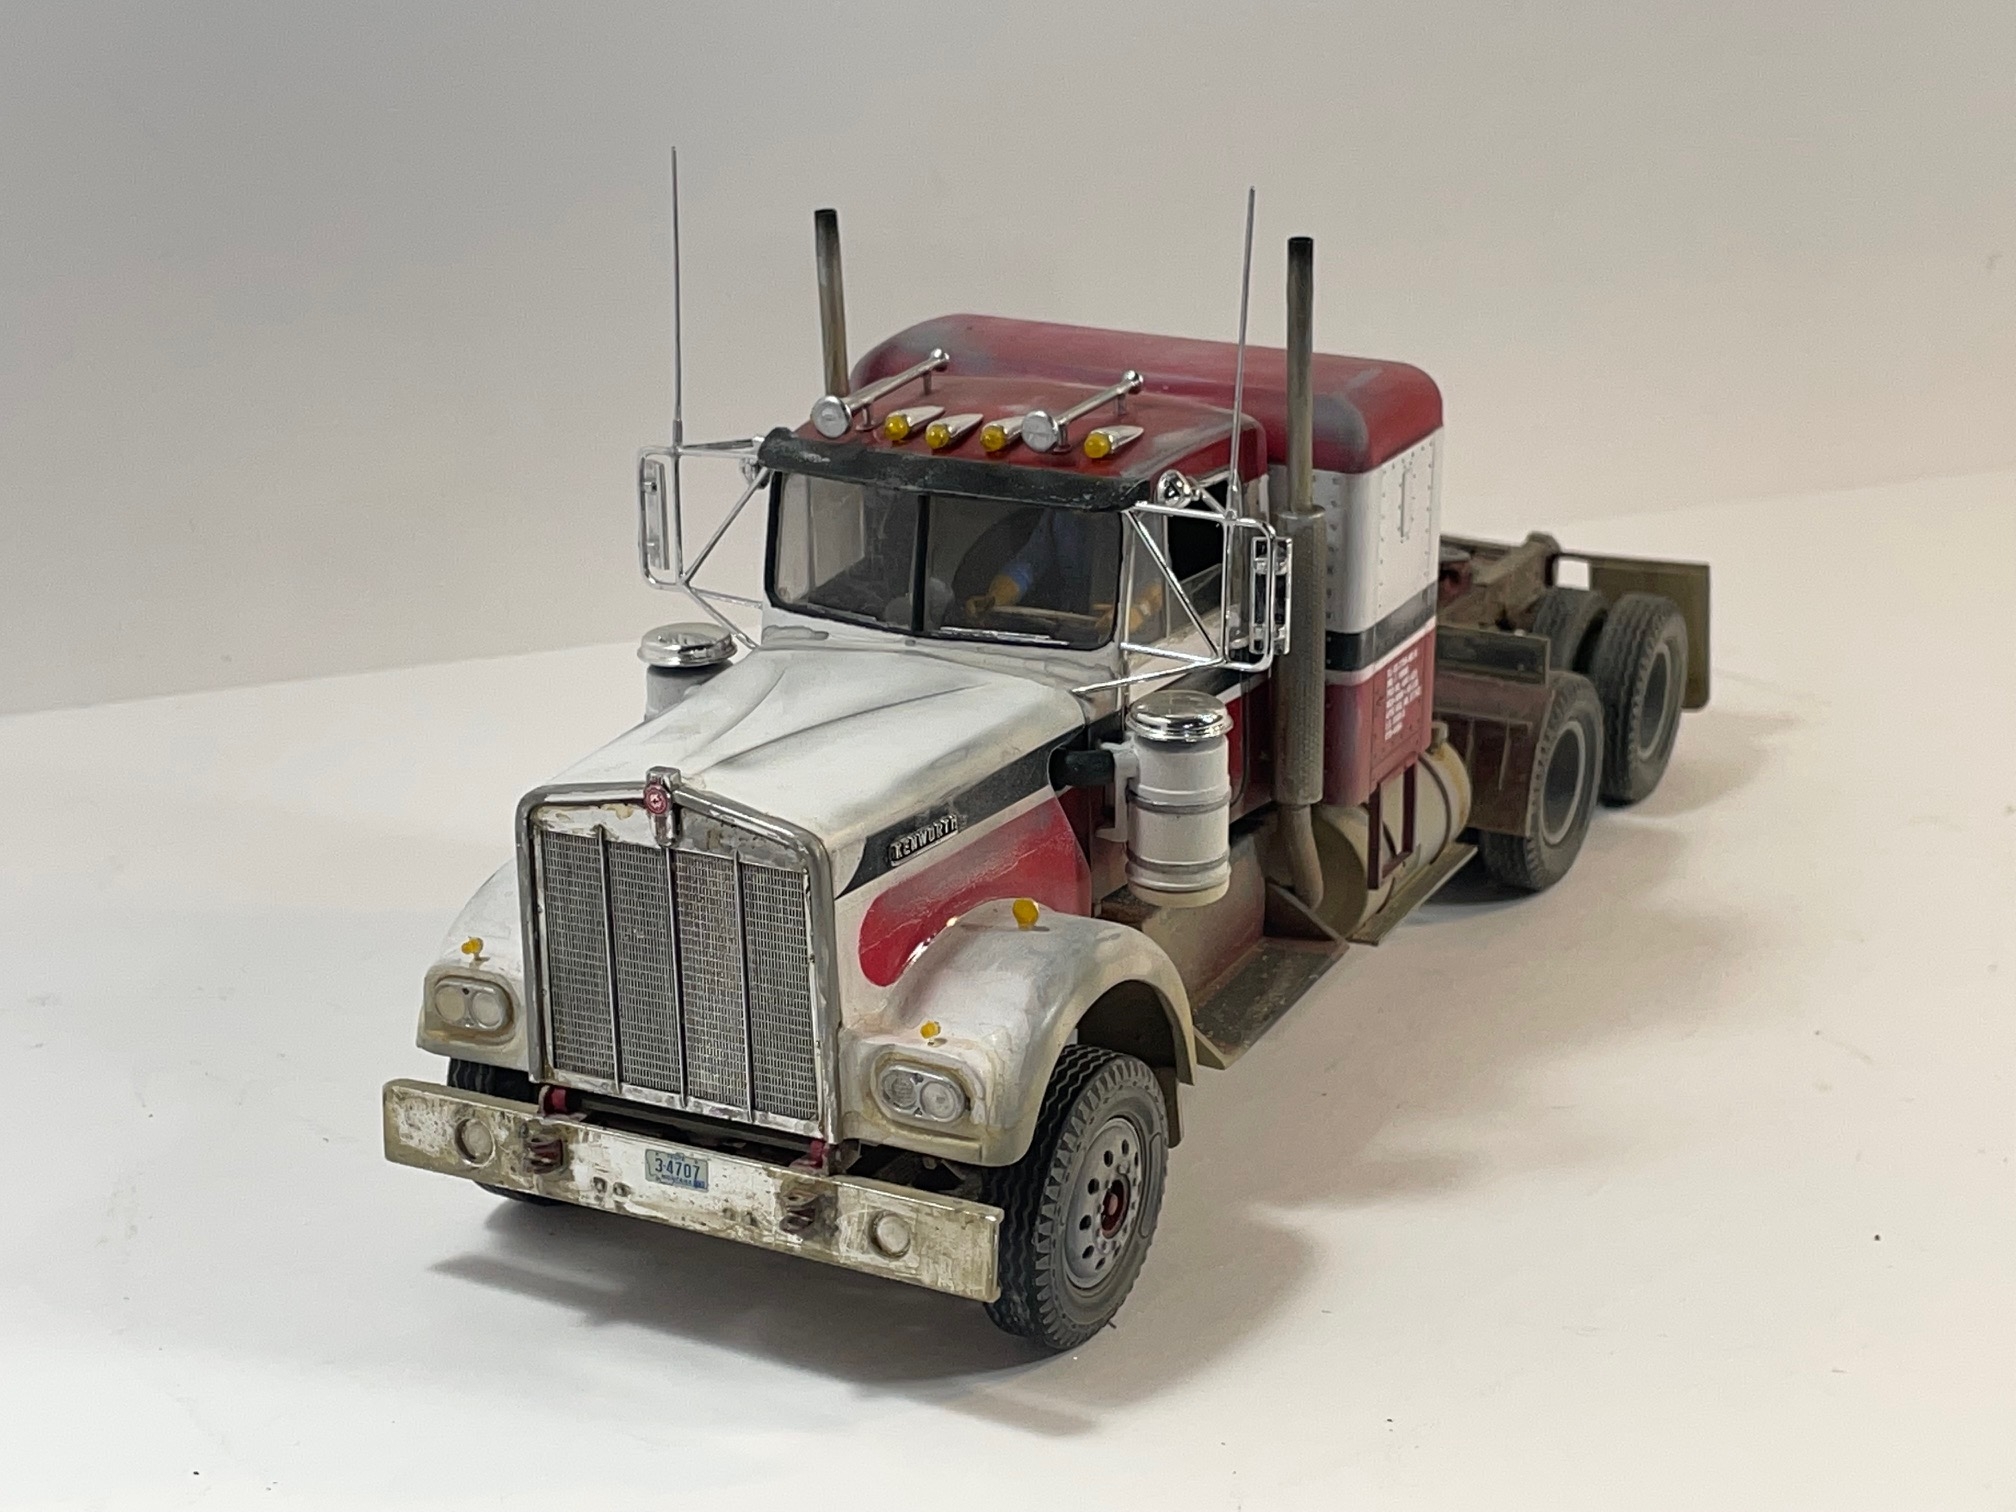
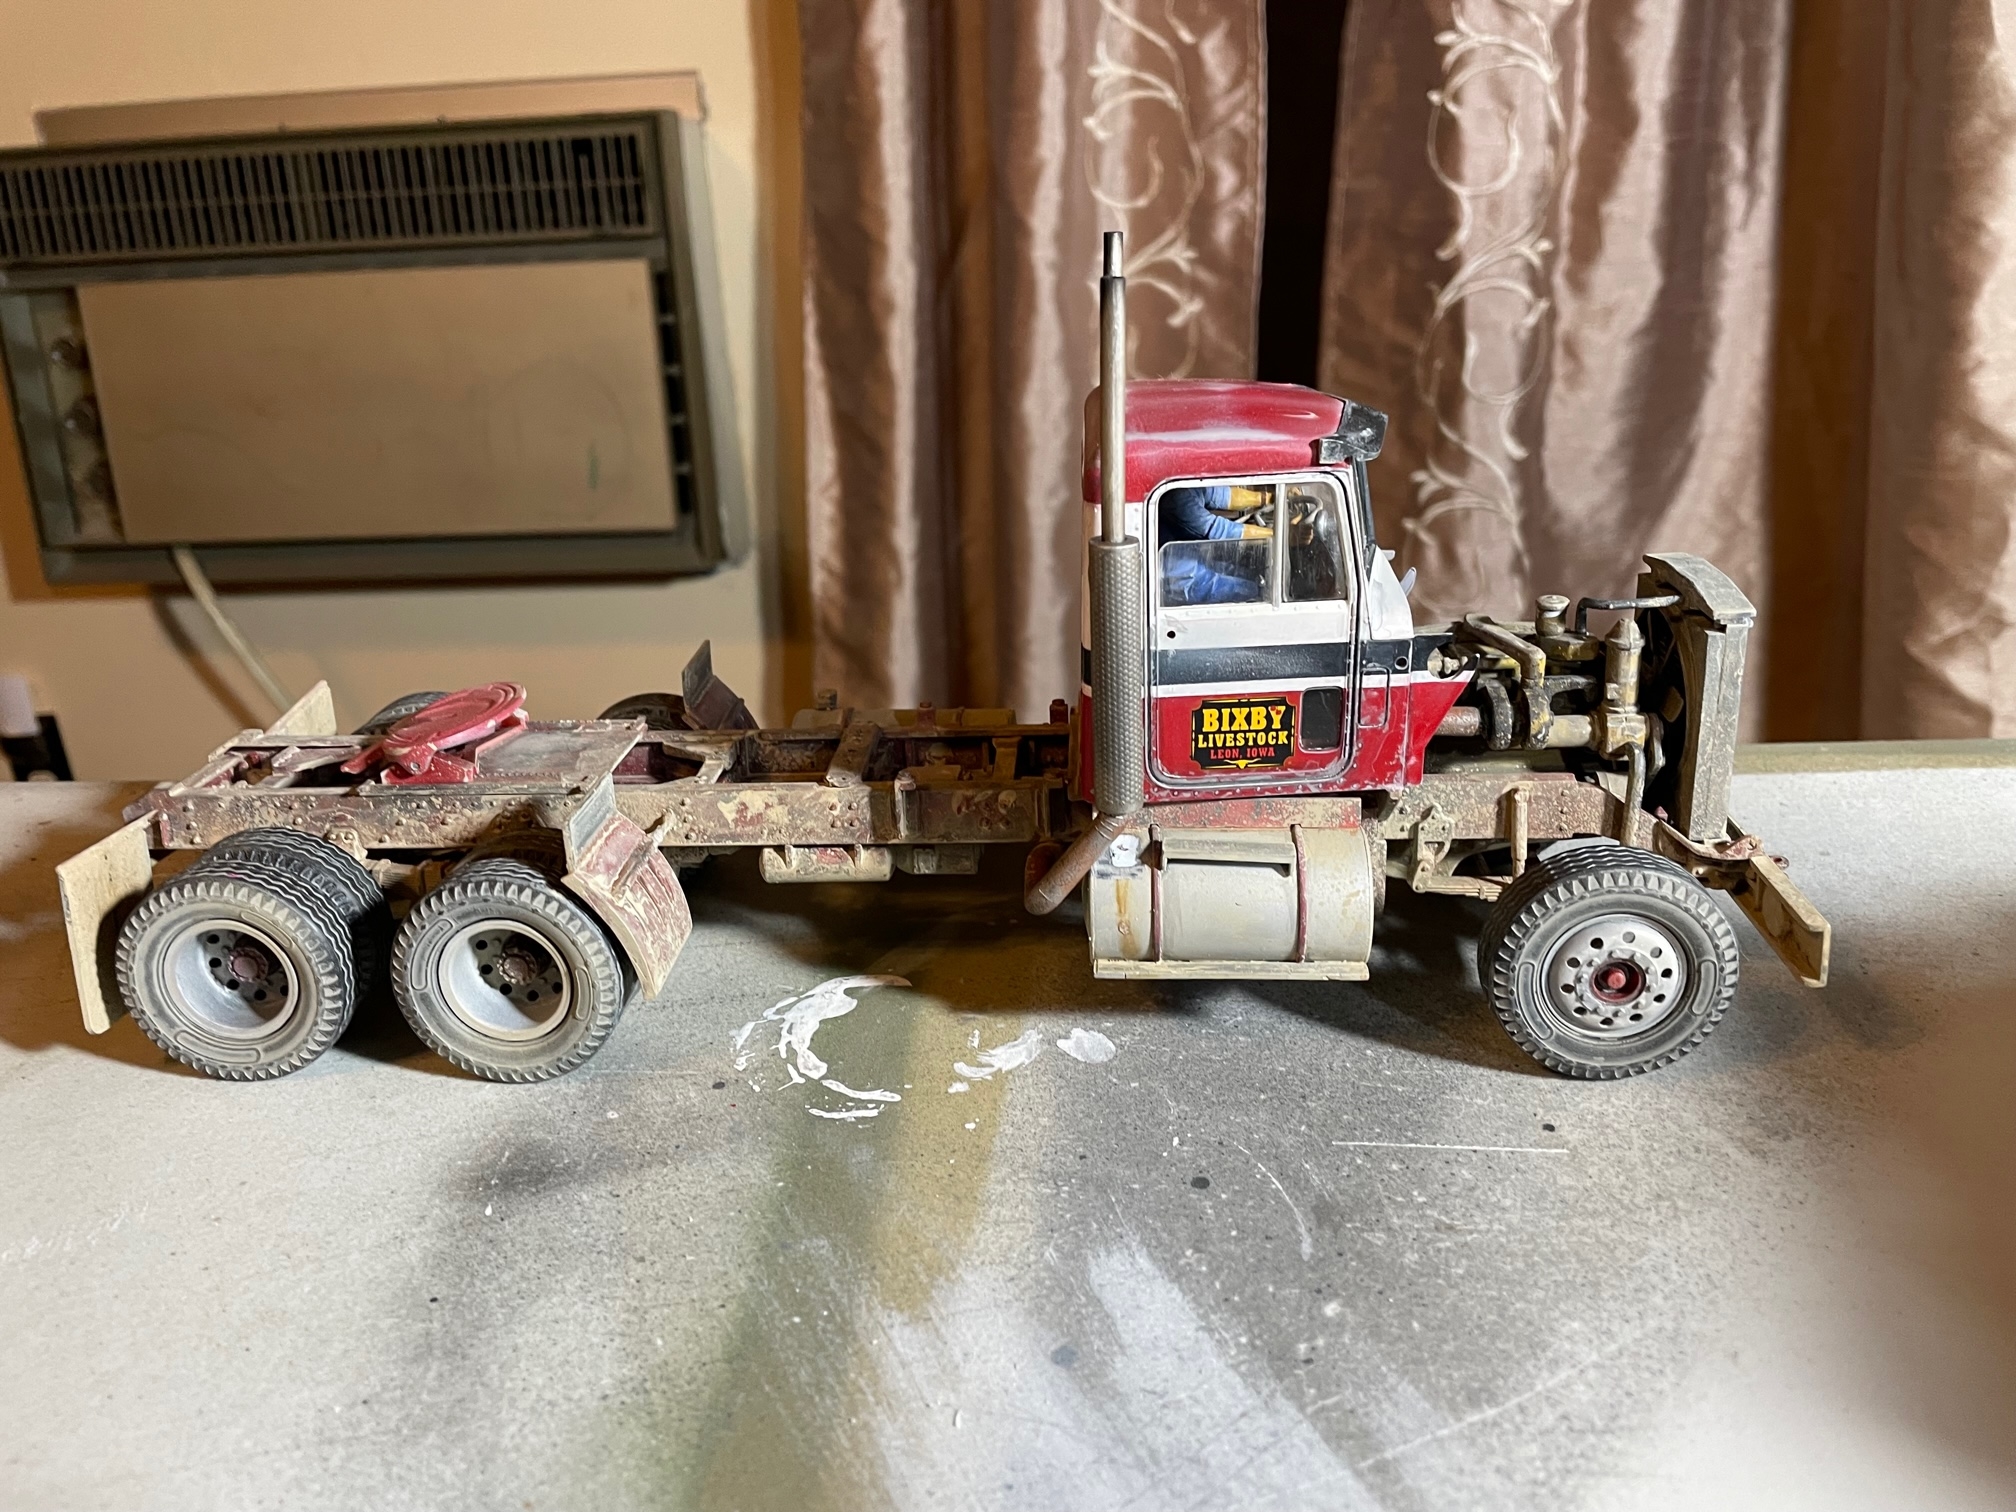
I used the white number decals, didn't like them so added the black ones over the top to look like shadow lettering.
-
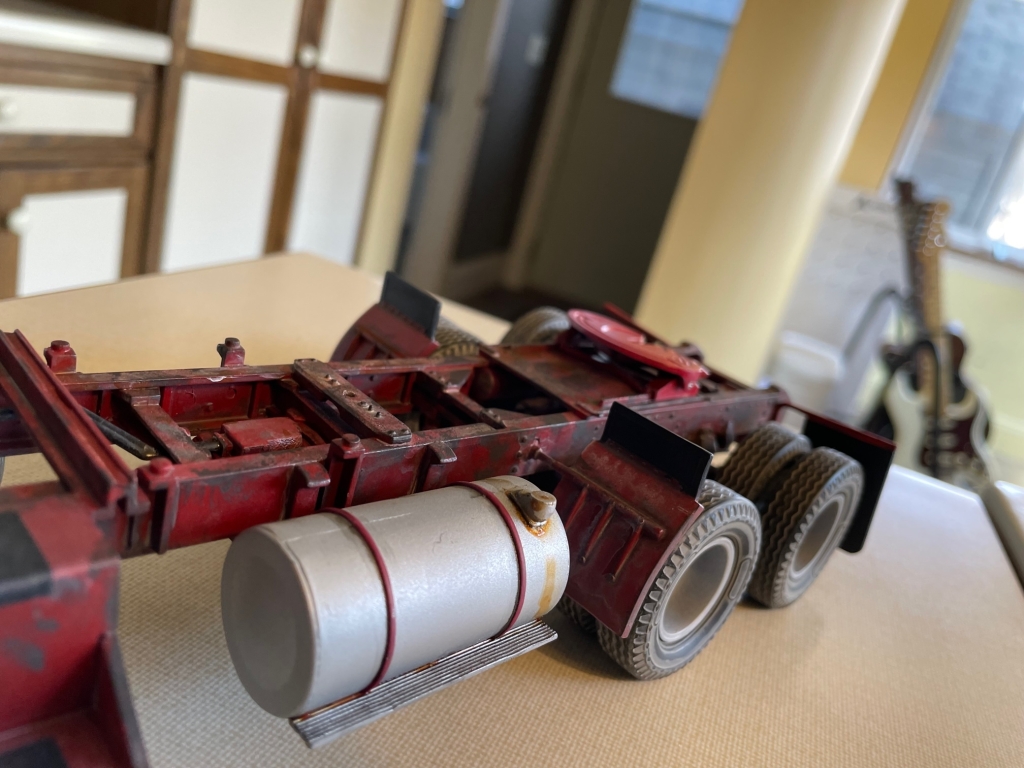
The frame gets some weathering.

Added headlight bezels, which was a mistake to do so after paint.
I tried to remove the orange peel on the cab with Tamiya compound paste. It is well hidden if the lighting and camera angle are right.
-
The boredom has worn off, and I am back on the bench. A new journey begins.
Now beginning my 4th build, IMO I have realized the painting and detailing of the cab is the most critical part of the model.
This will be an experiment. 5 kits will be built. Some of the mundane assembly and painting will be "production-lined" to save time with set-up and clean-up.
I will try new things and test the limit of my skills. Failure is learning. One (or more) of the kits will probably be sacrificed and end up in the junkyard.
I will try different paint schemes. It will also allow me to choose the "best of _____ part" for a showroom build.
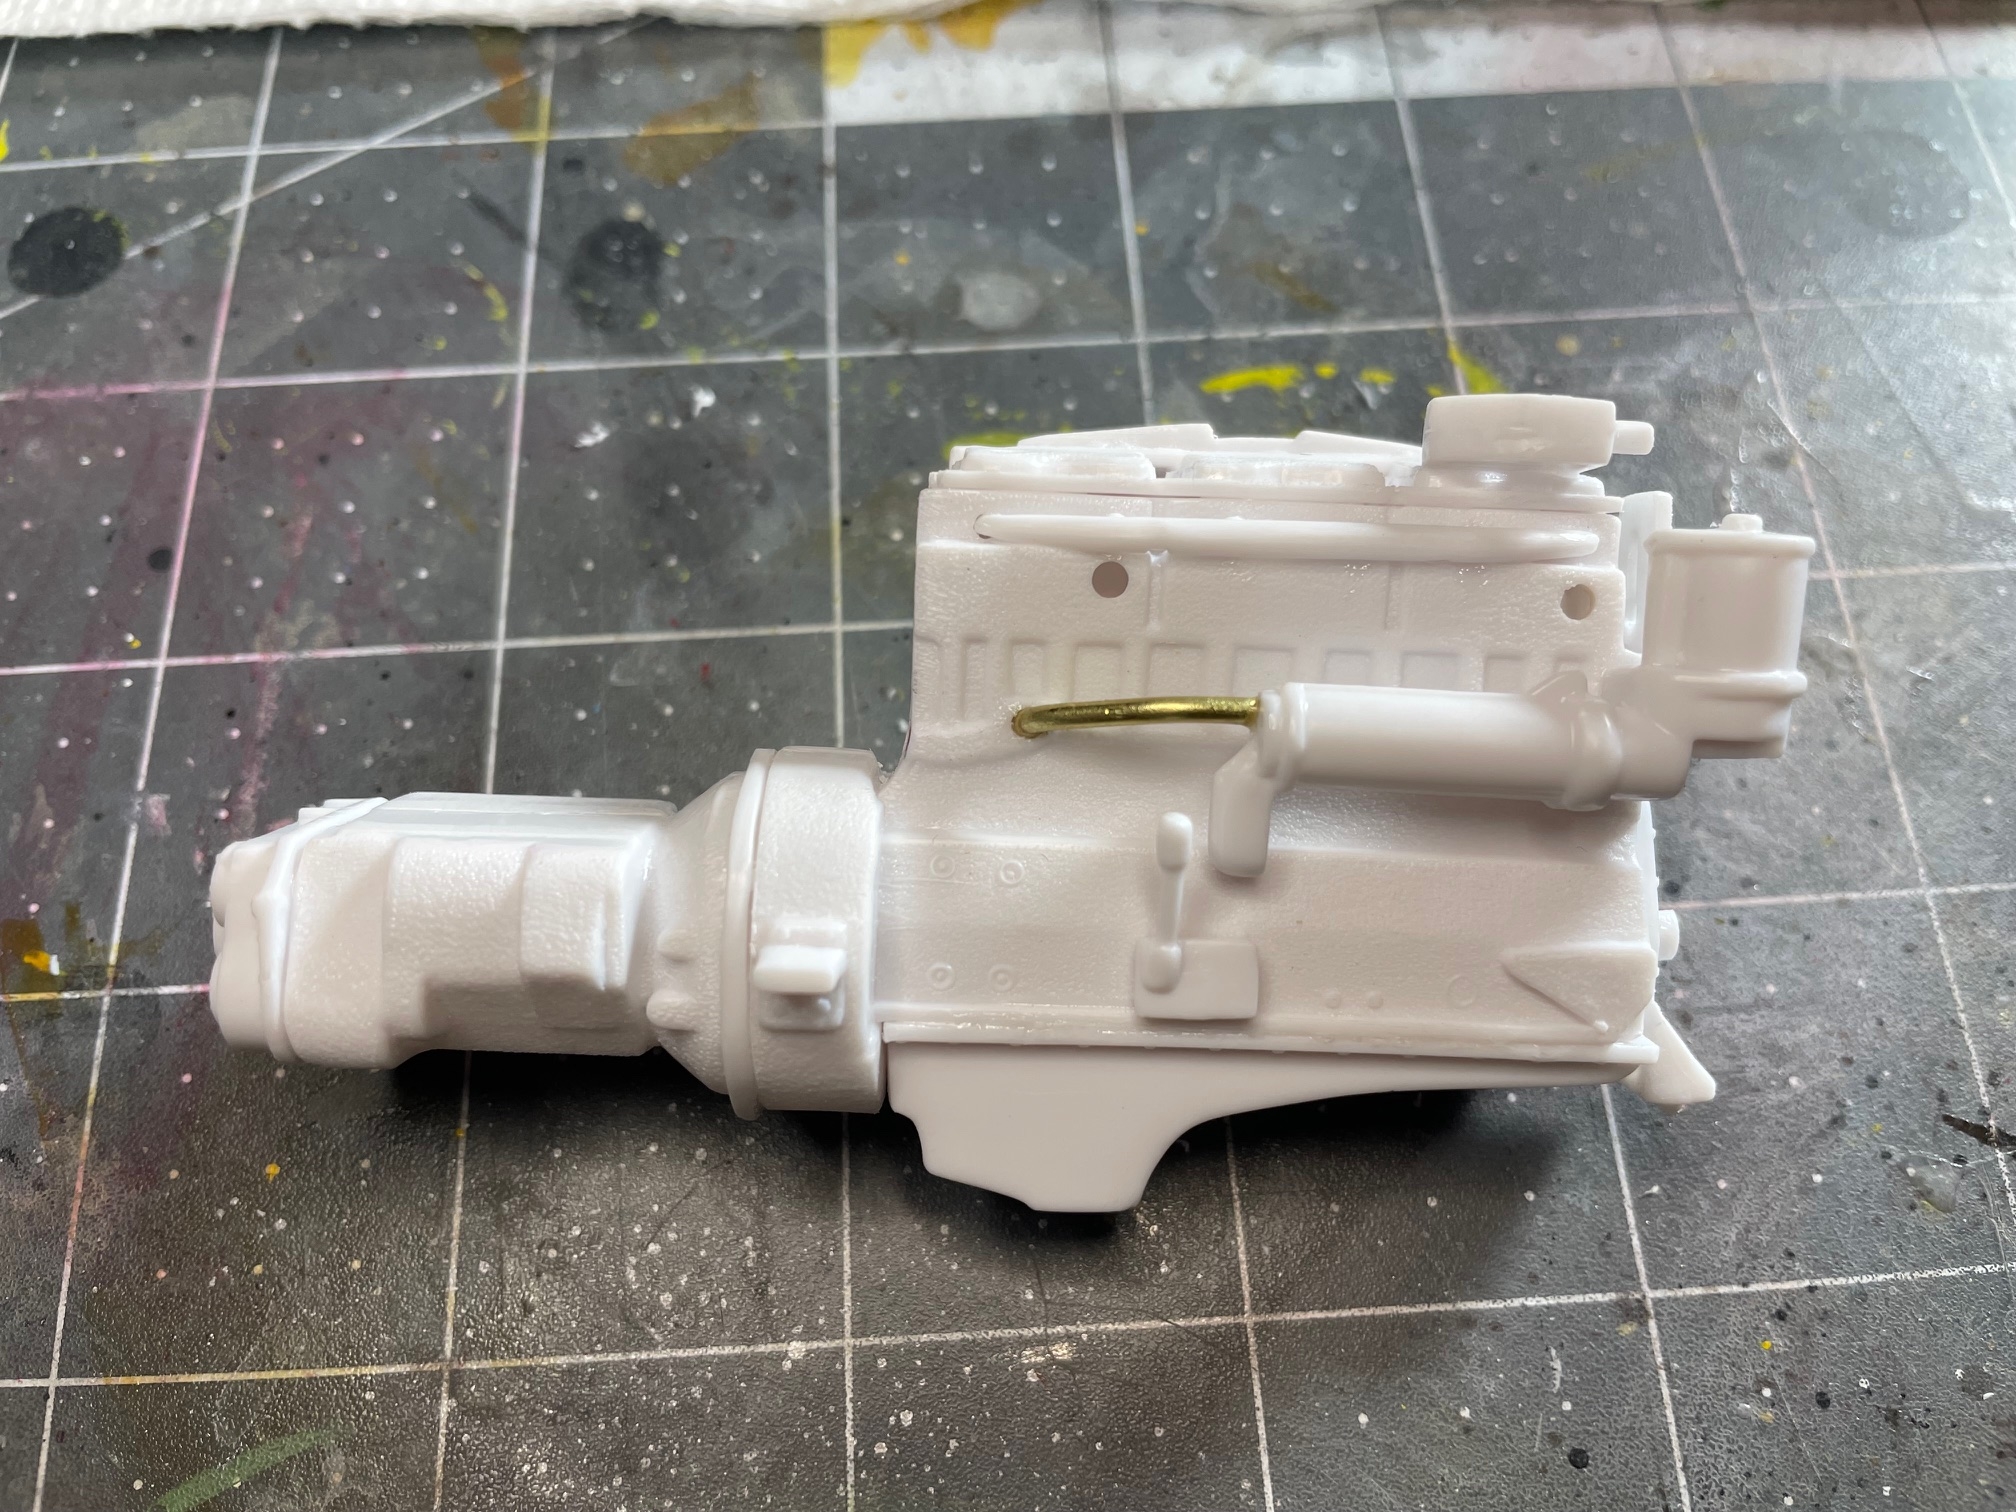
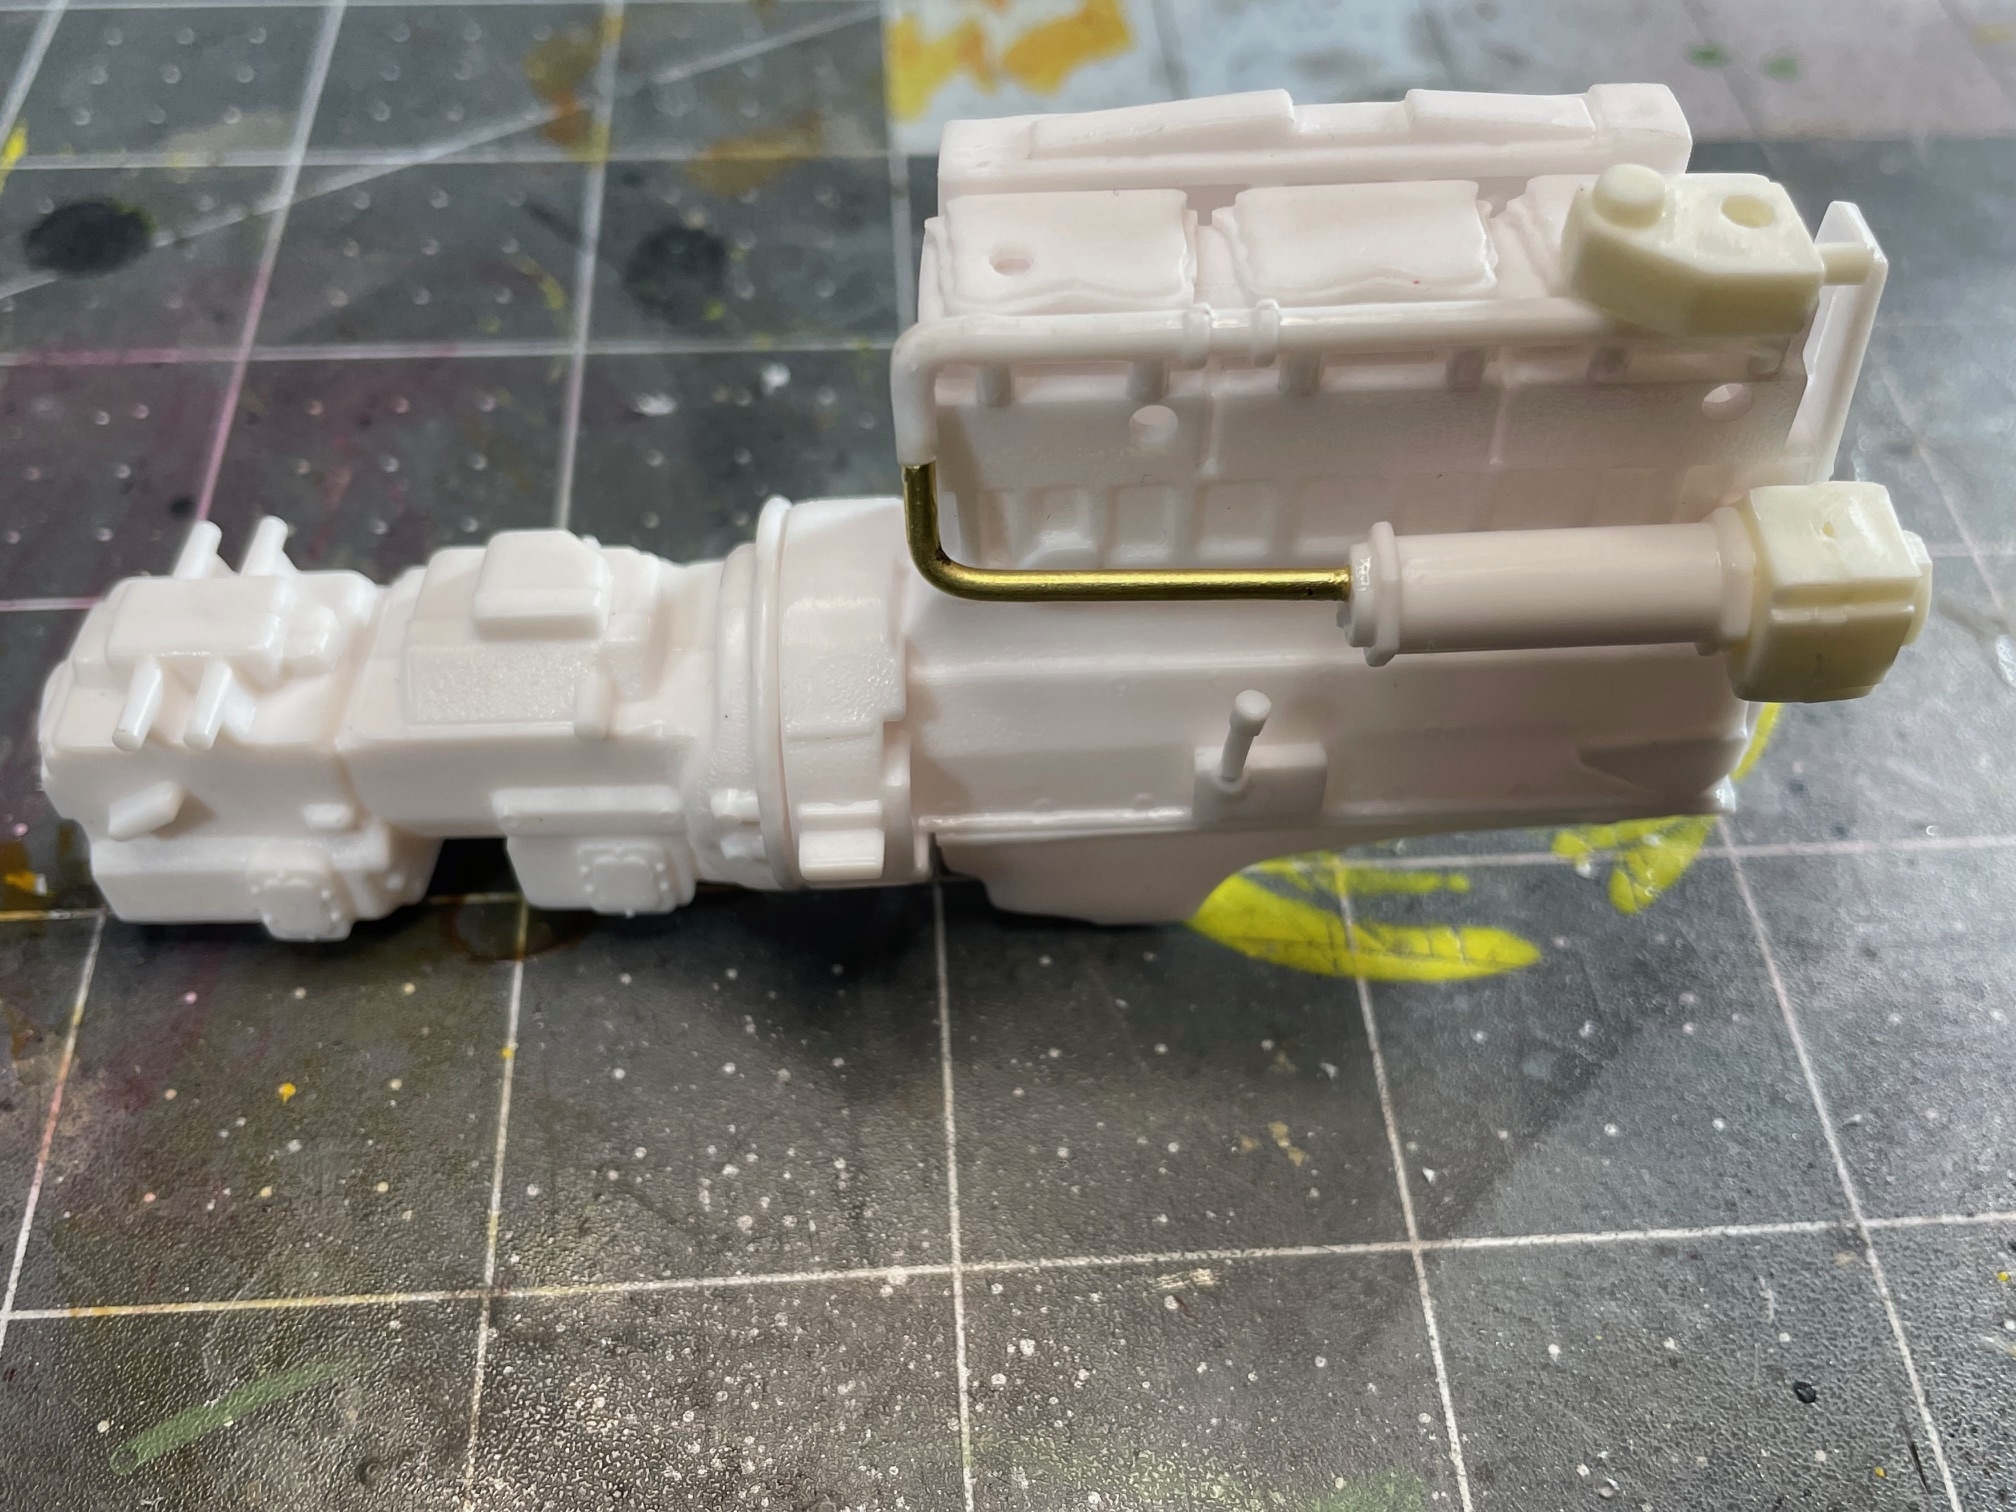
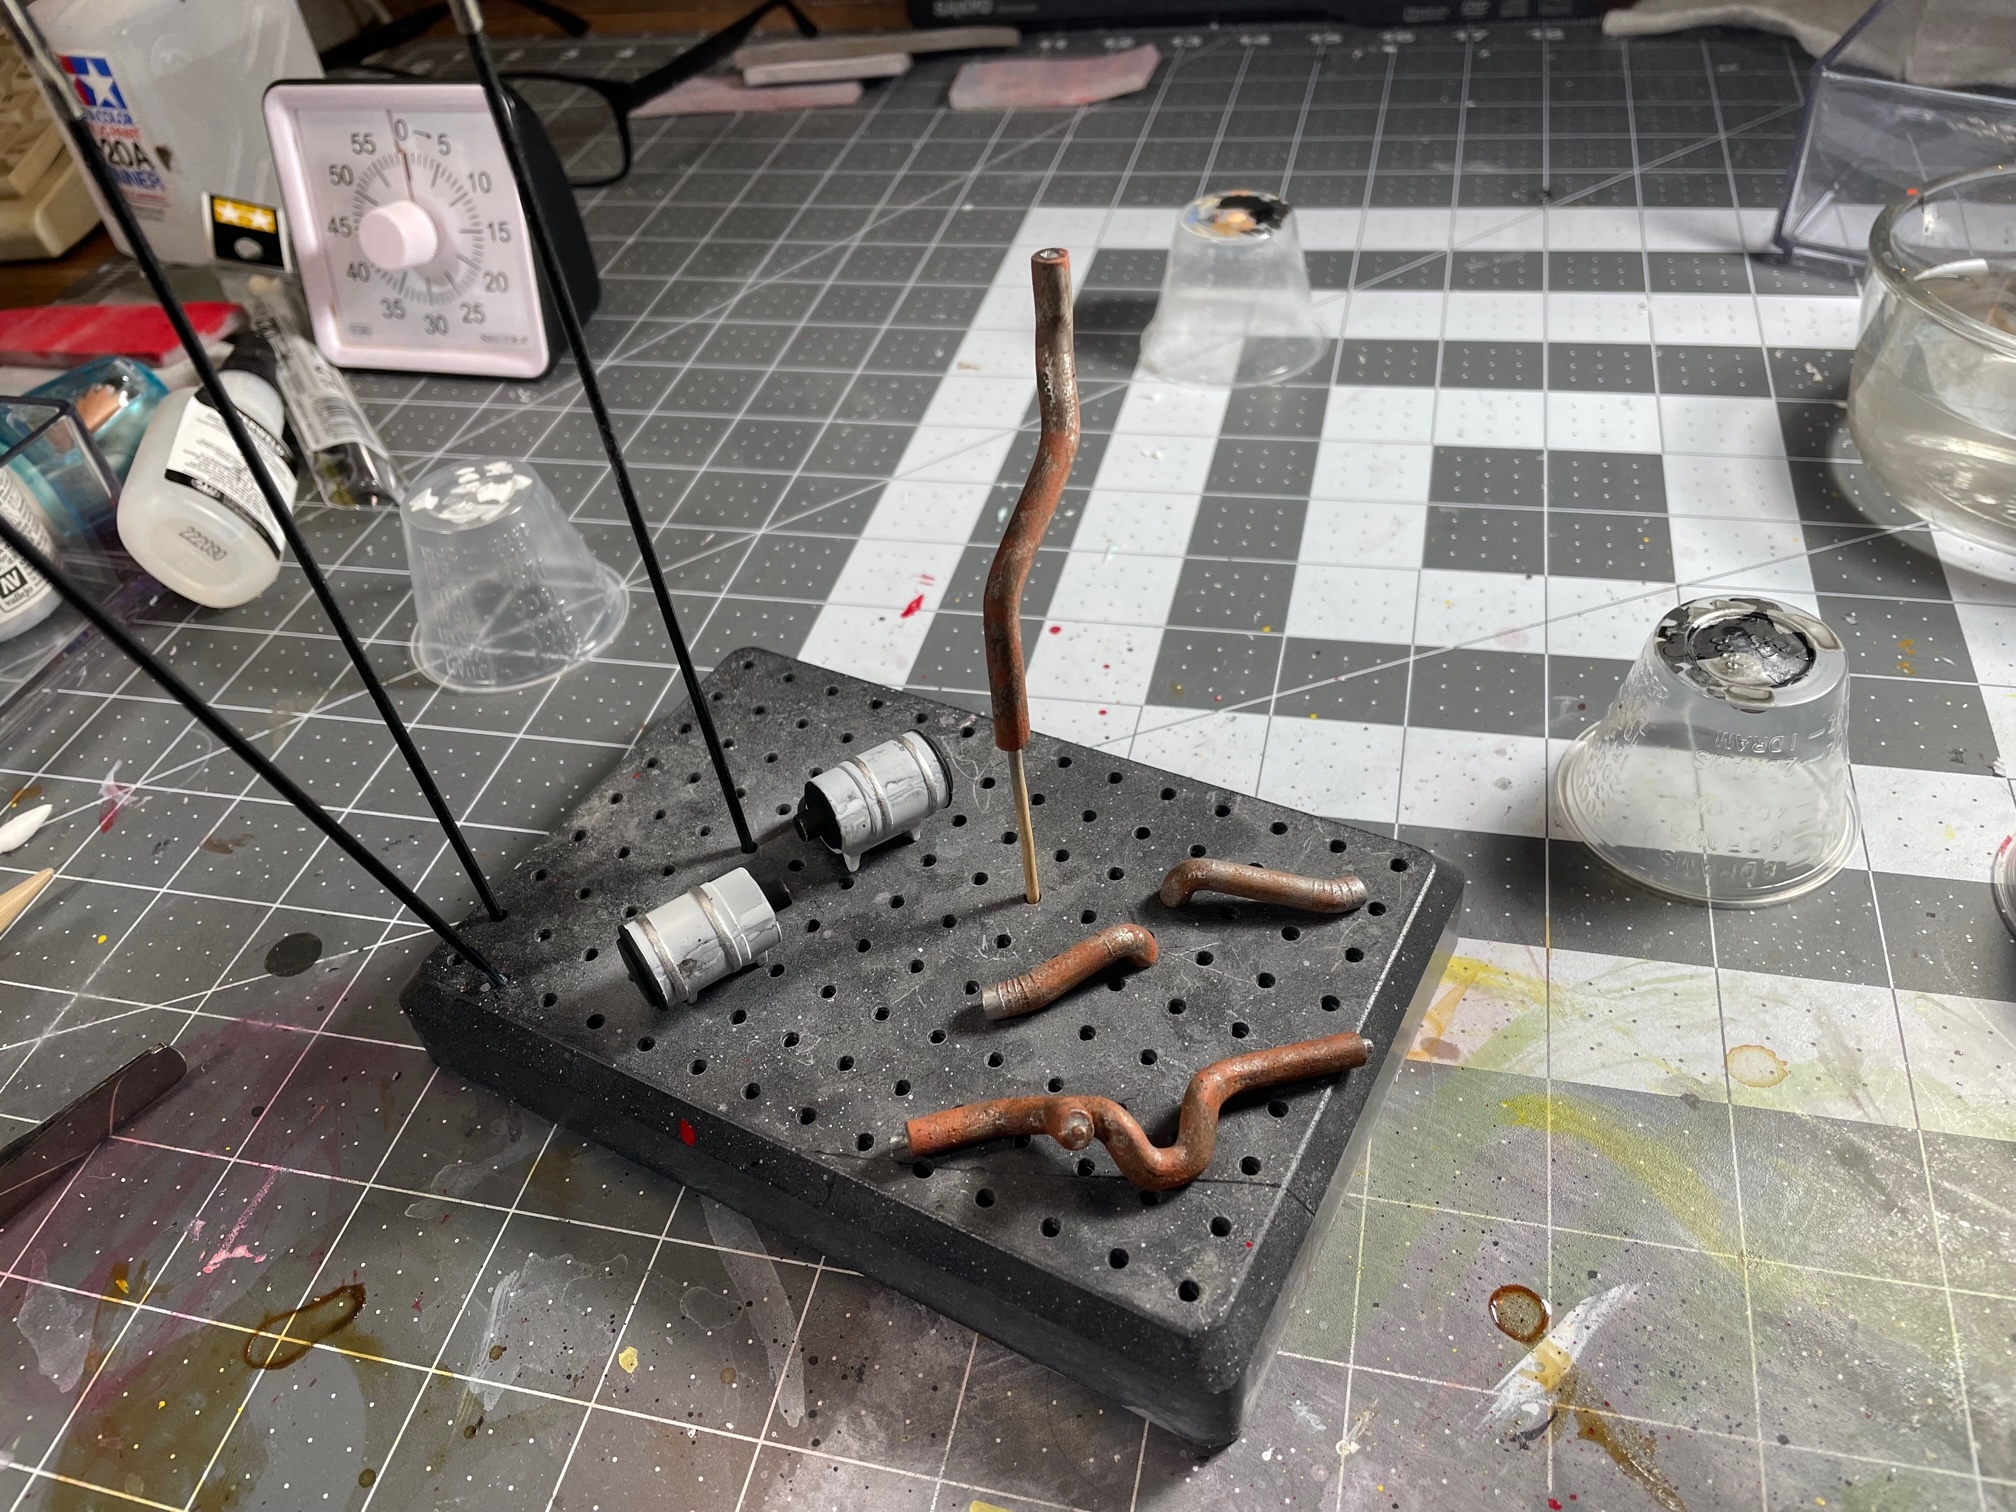
At the Cummins factory, holes are drilled for brass rod.
It will be nice to not have to relearn every step.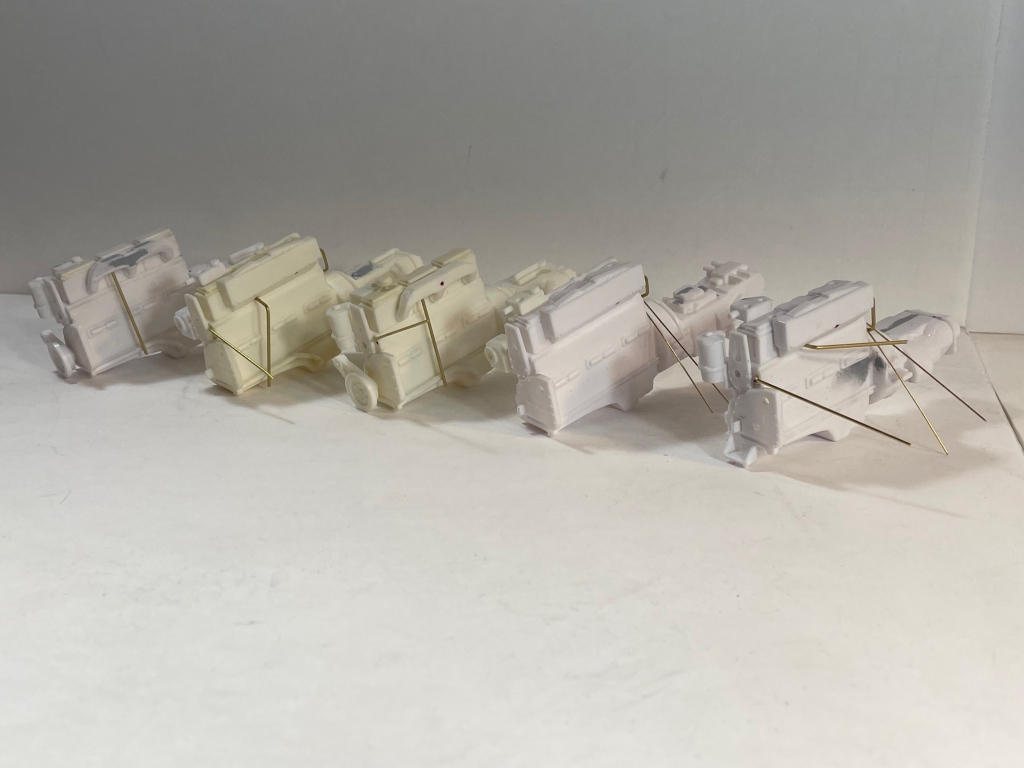
Some of these are from other kits with variations.


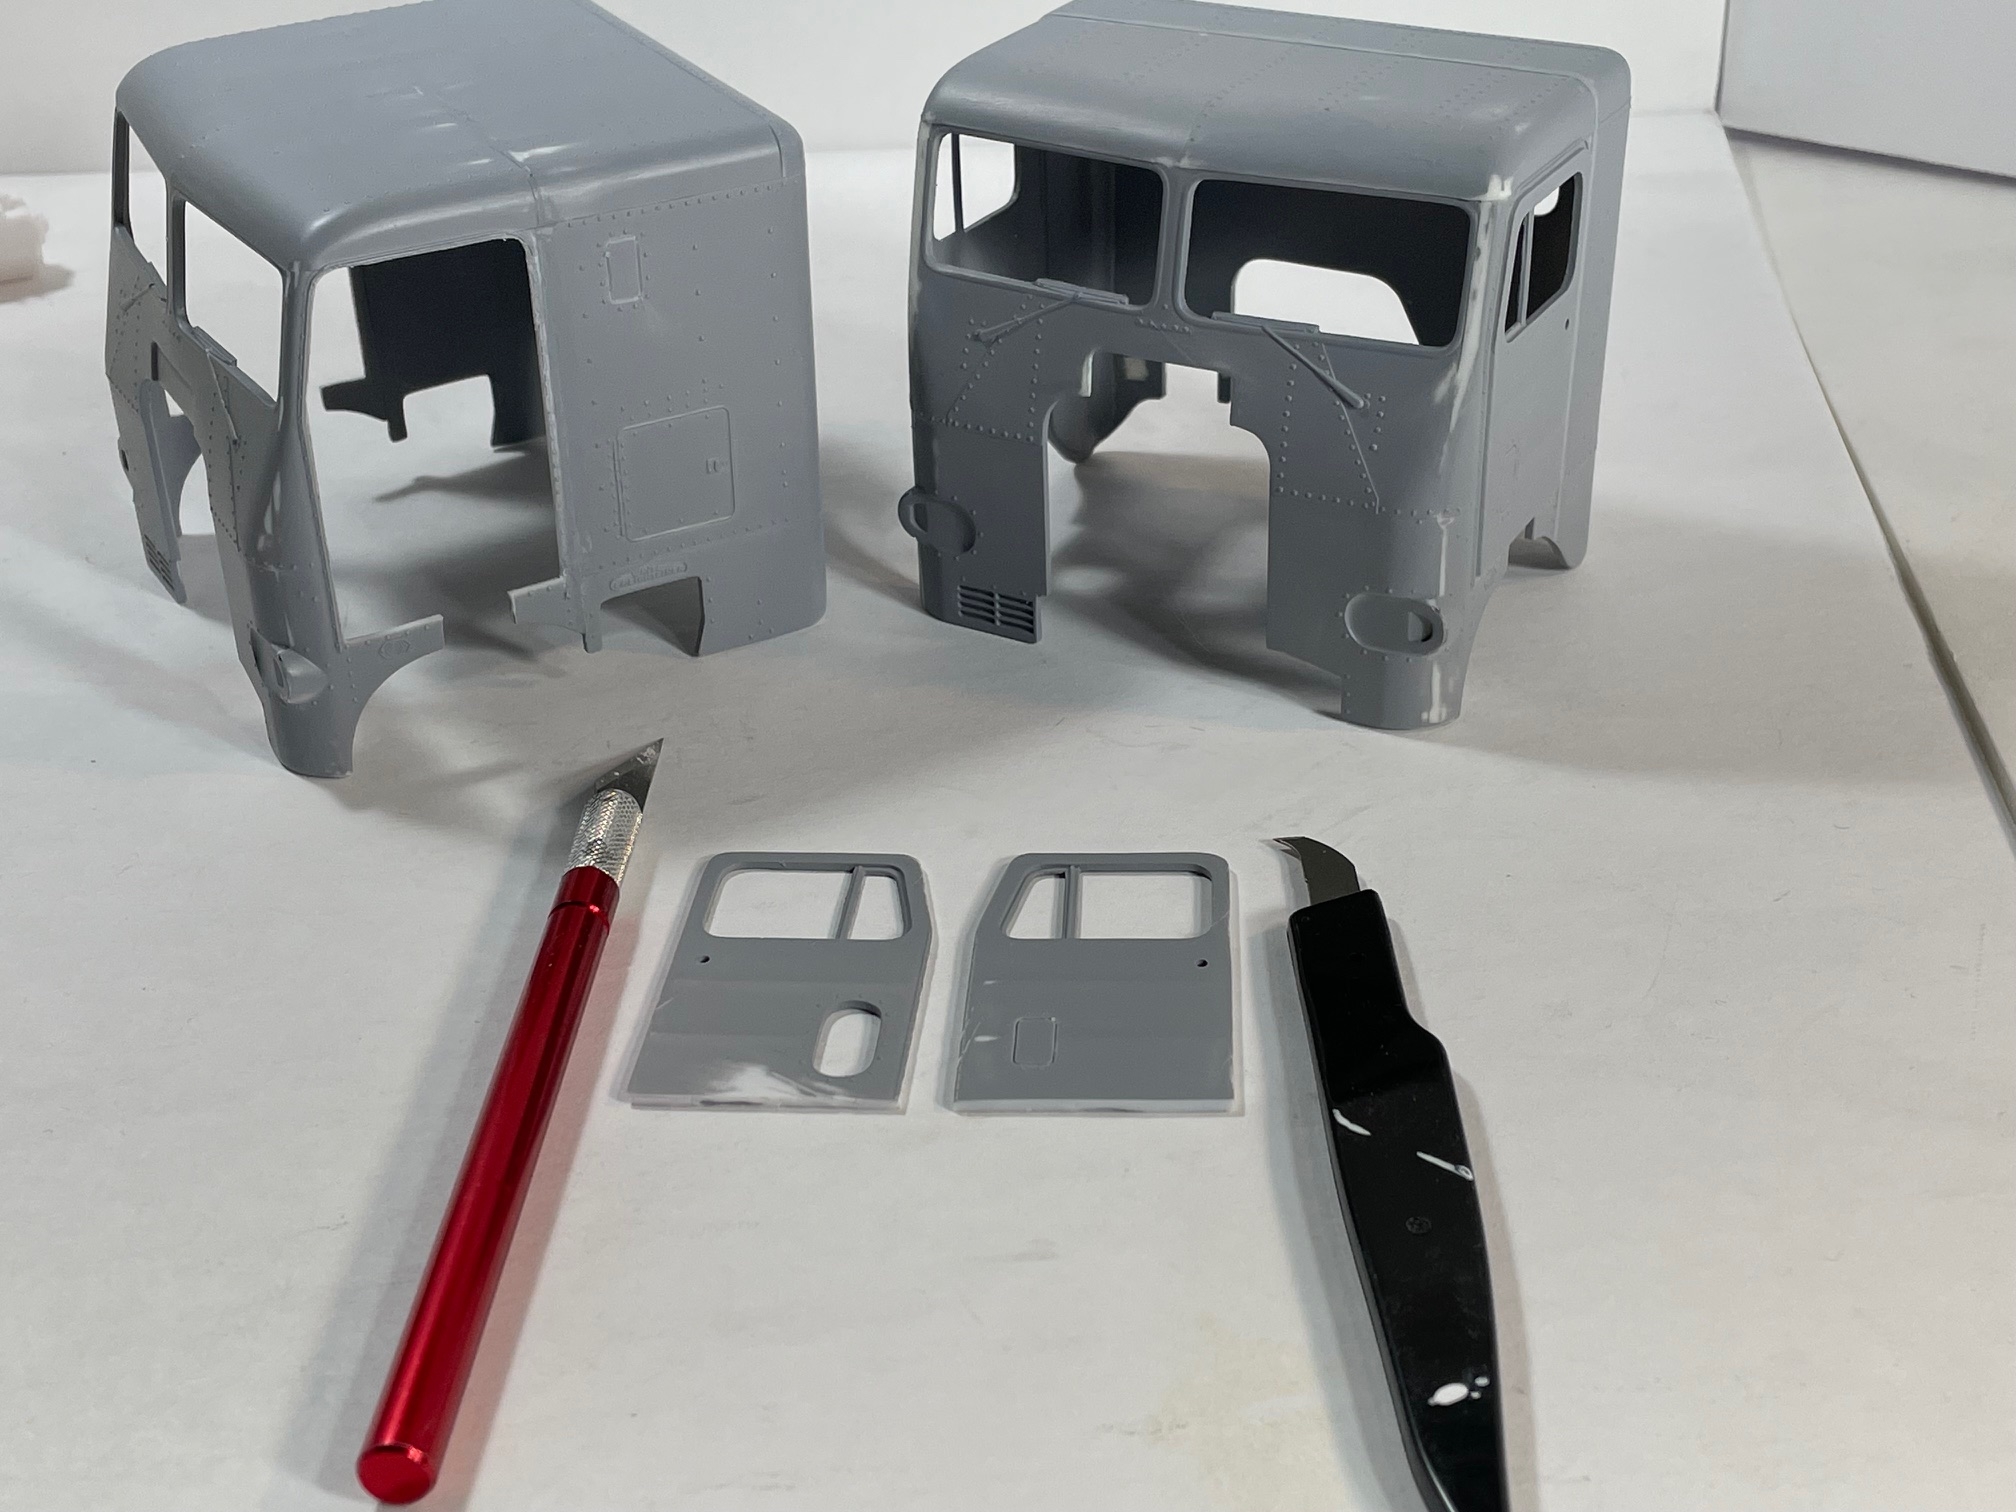
"The Seem"
First attempt at cutting out the doors was done with an X-Acto knife (an impossible task).
The panel scriber worked much better (but still required an insane amount of patience - be prepared to take your time).
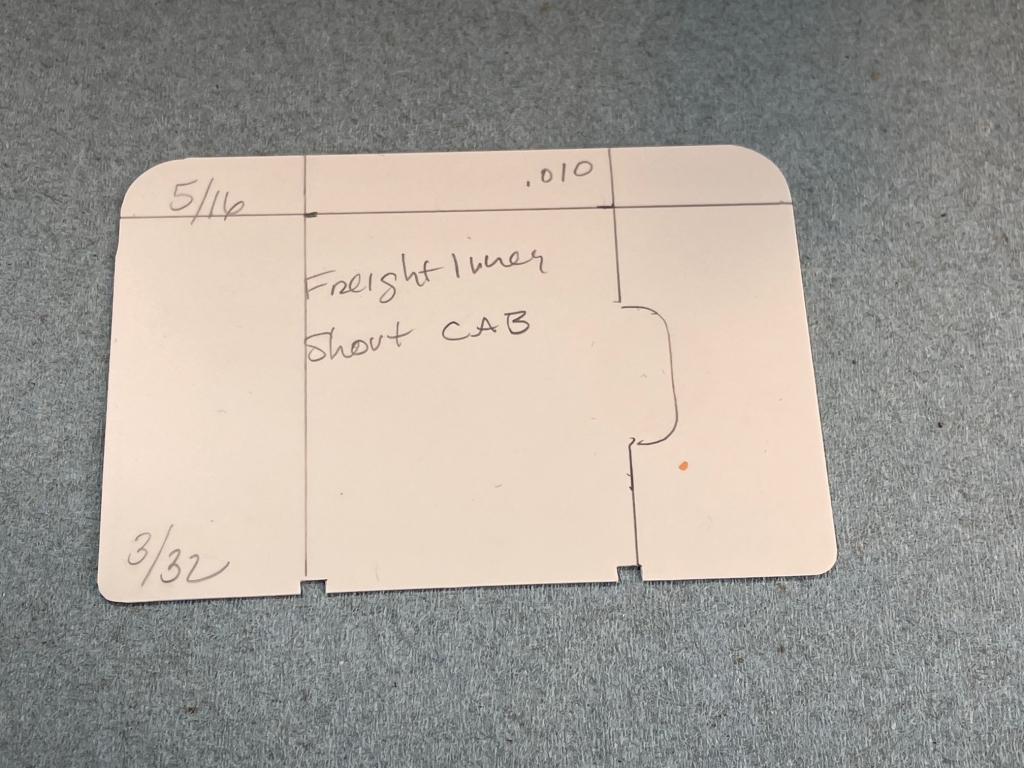
A template of the floor is made for quick fabrication in the future.
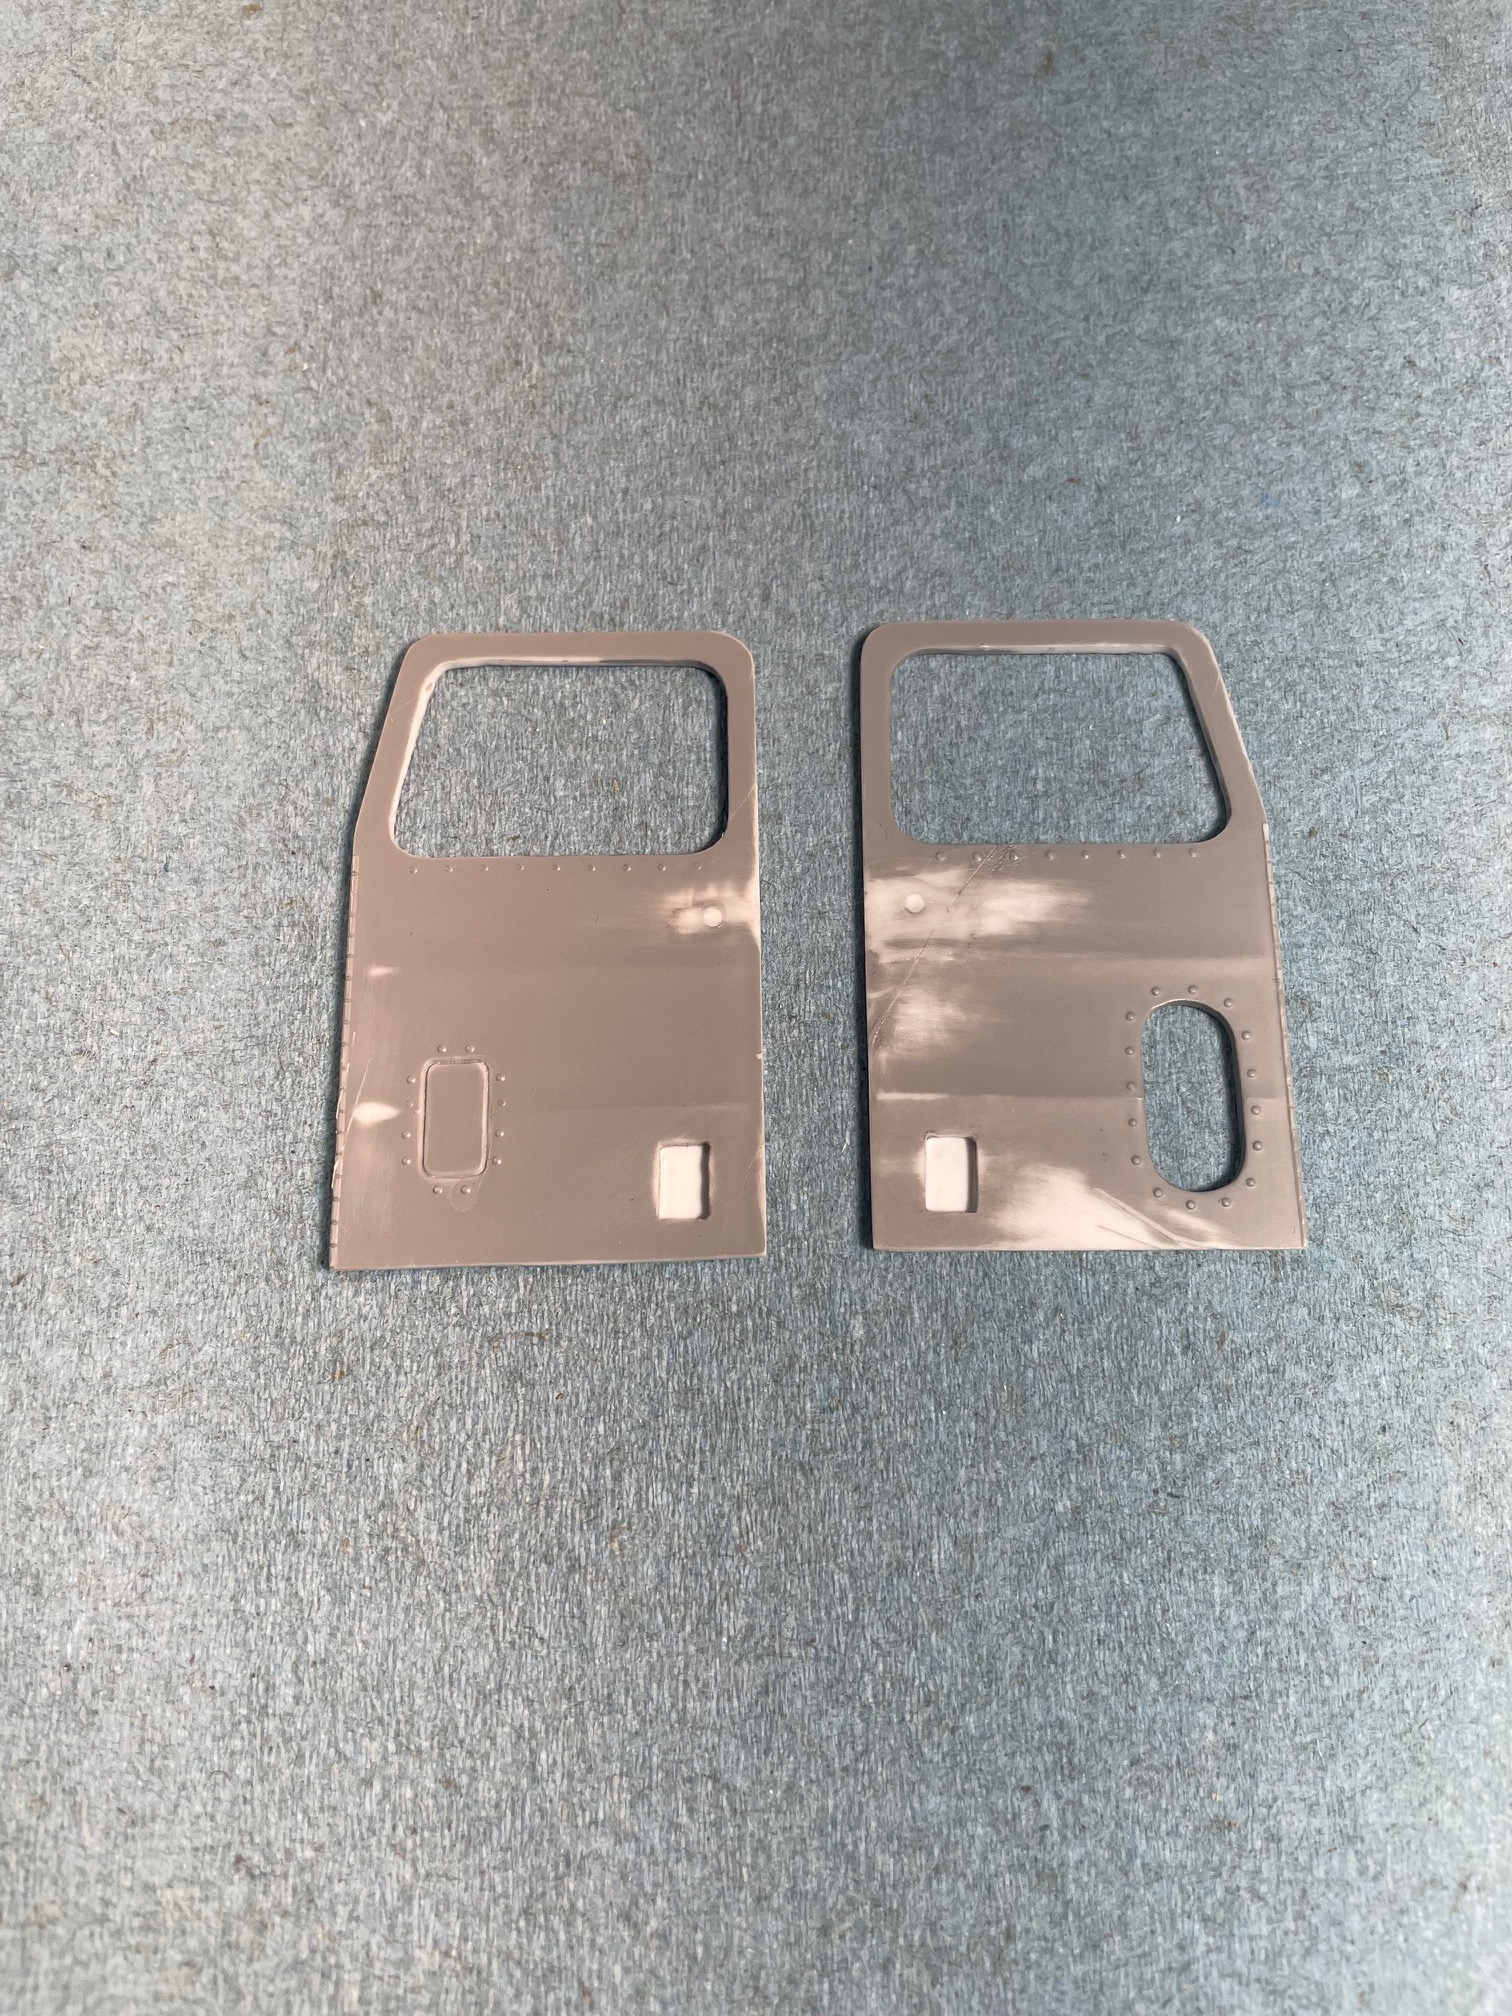
Pockets are fabricated for the new door handles.

A thin piece of sheet is glued to support and guide an more natural curve on this PE part.
The windshield wiper is carefully removed, I am getting lots of practice in manipulating the styrene.
-
 3
3
-
-
I have "embraced" PE (photo-etch) and am learning to work with the new material.
Every part is now a learning experience.
The details are removed.
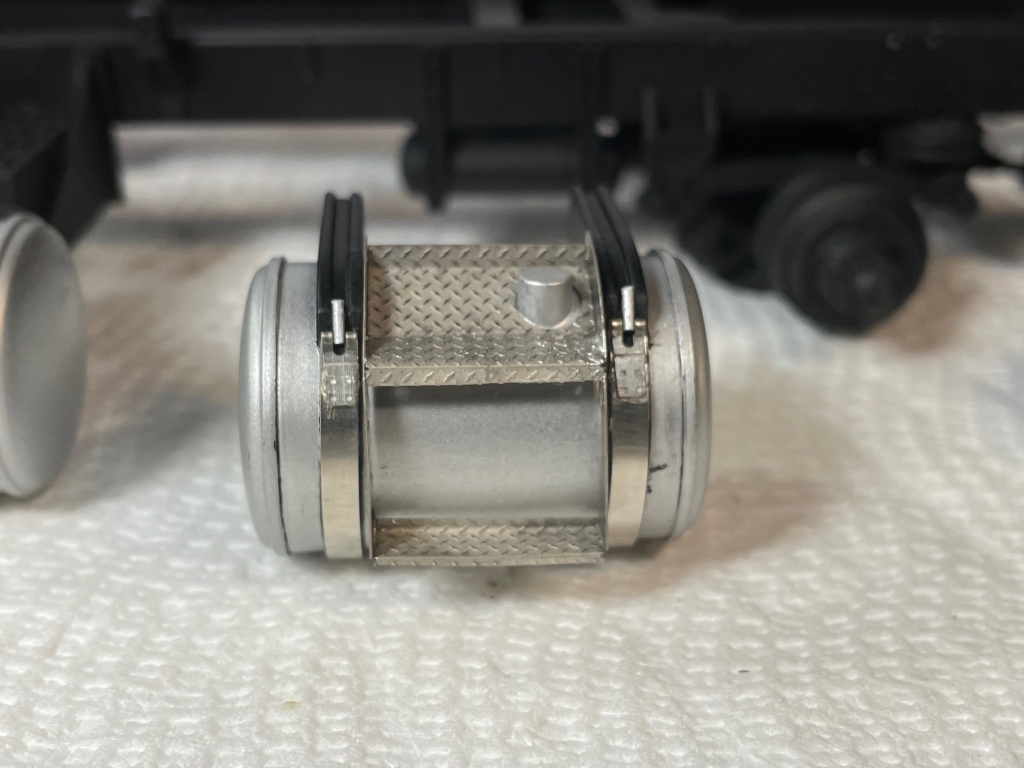
The fuel tank steps and straps gave me lots of trouble with adhesion. Most glues do not work well, and the steps had to be soldered.
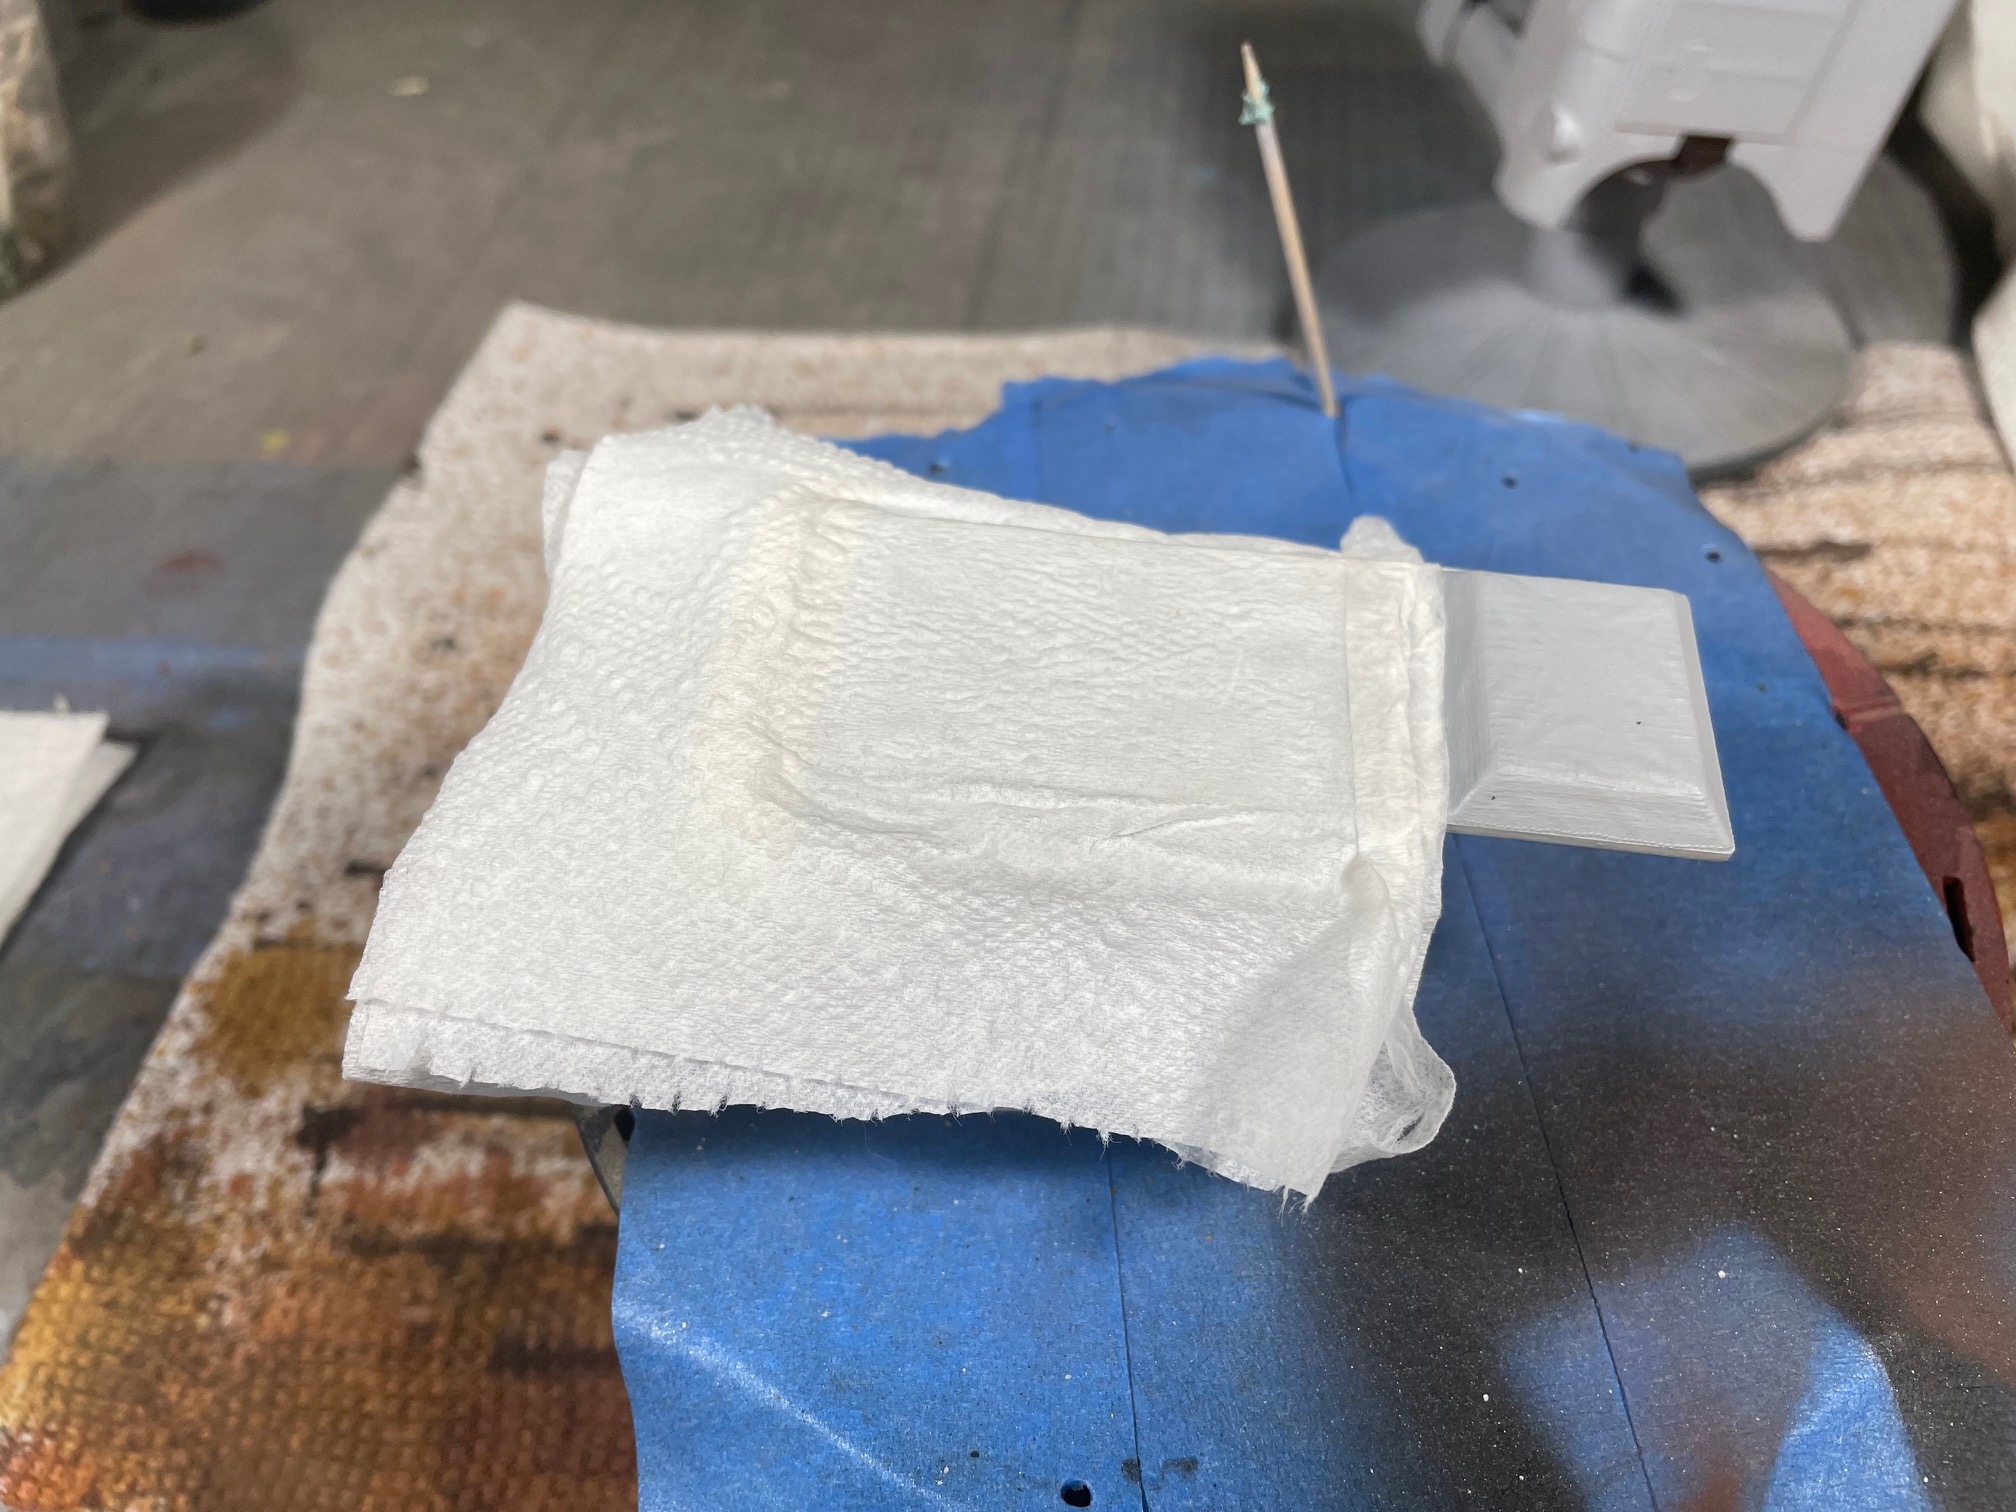
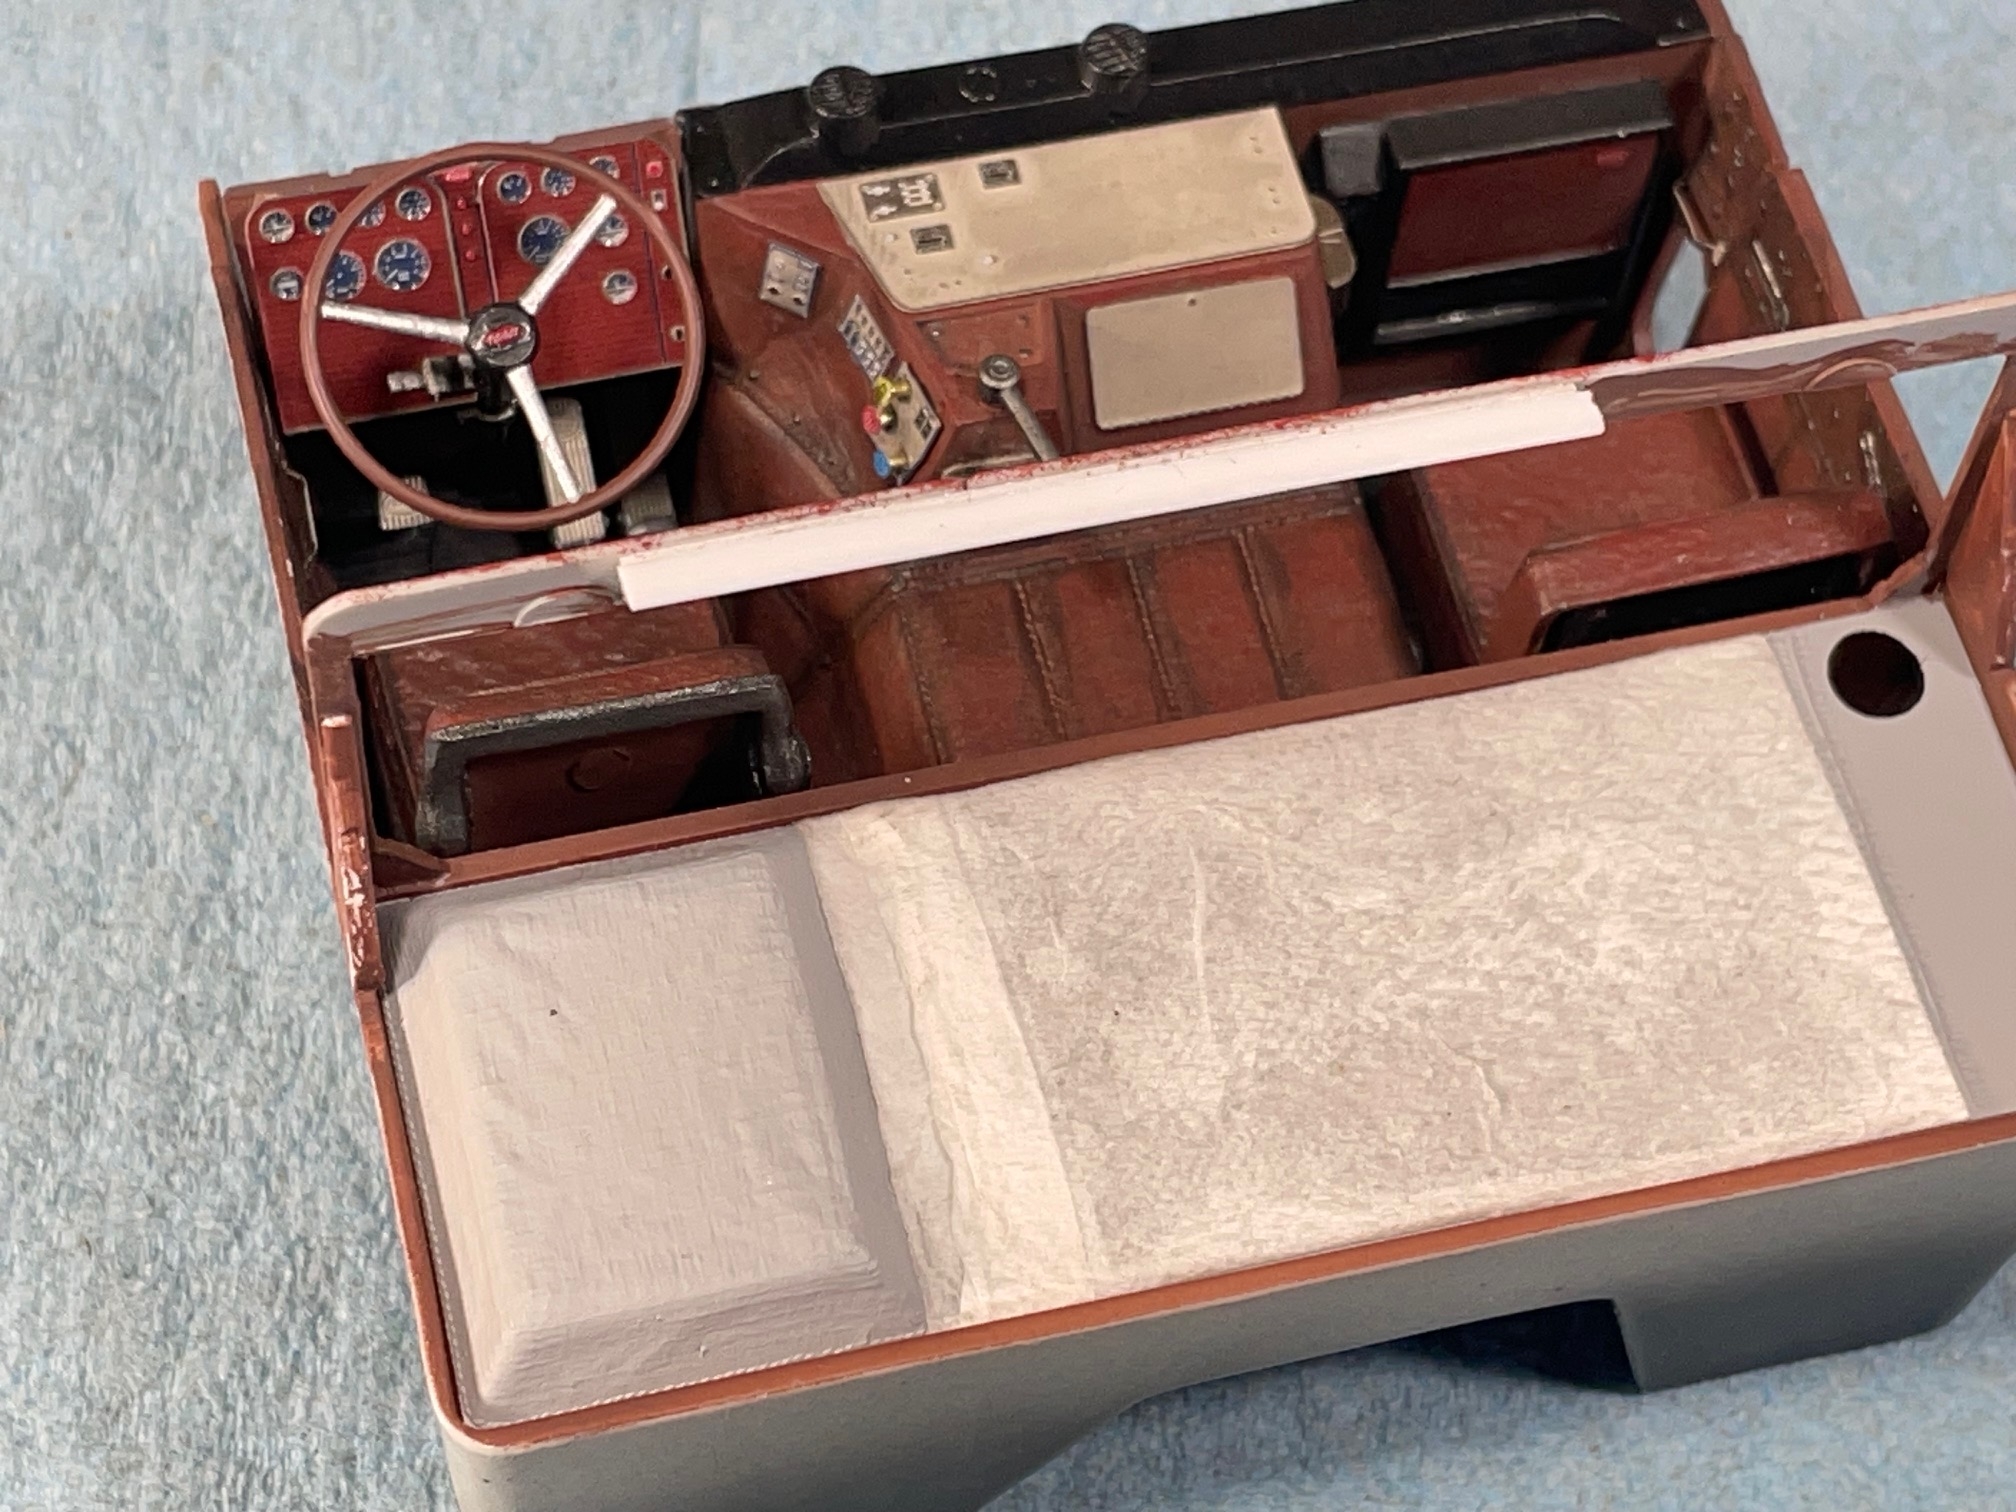
A piece of bathroom tissue is used with Elmer's Glue mixed with water.

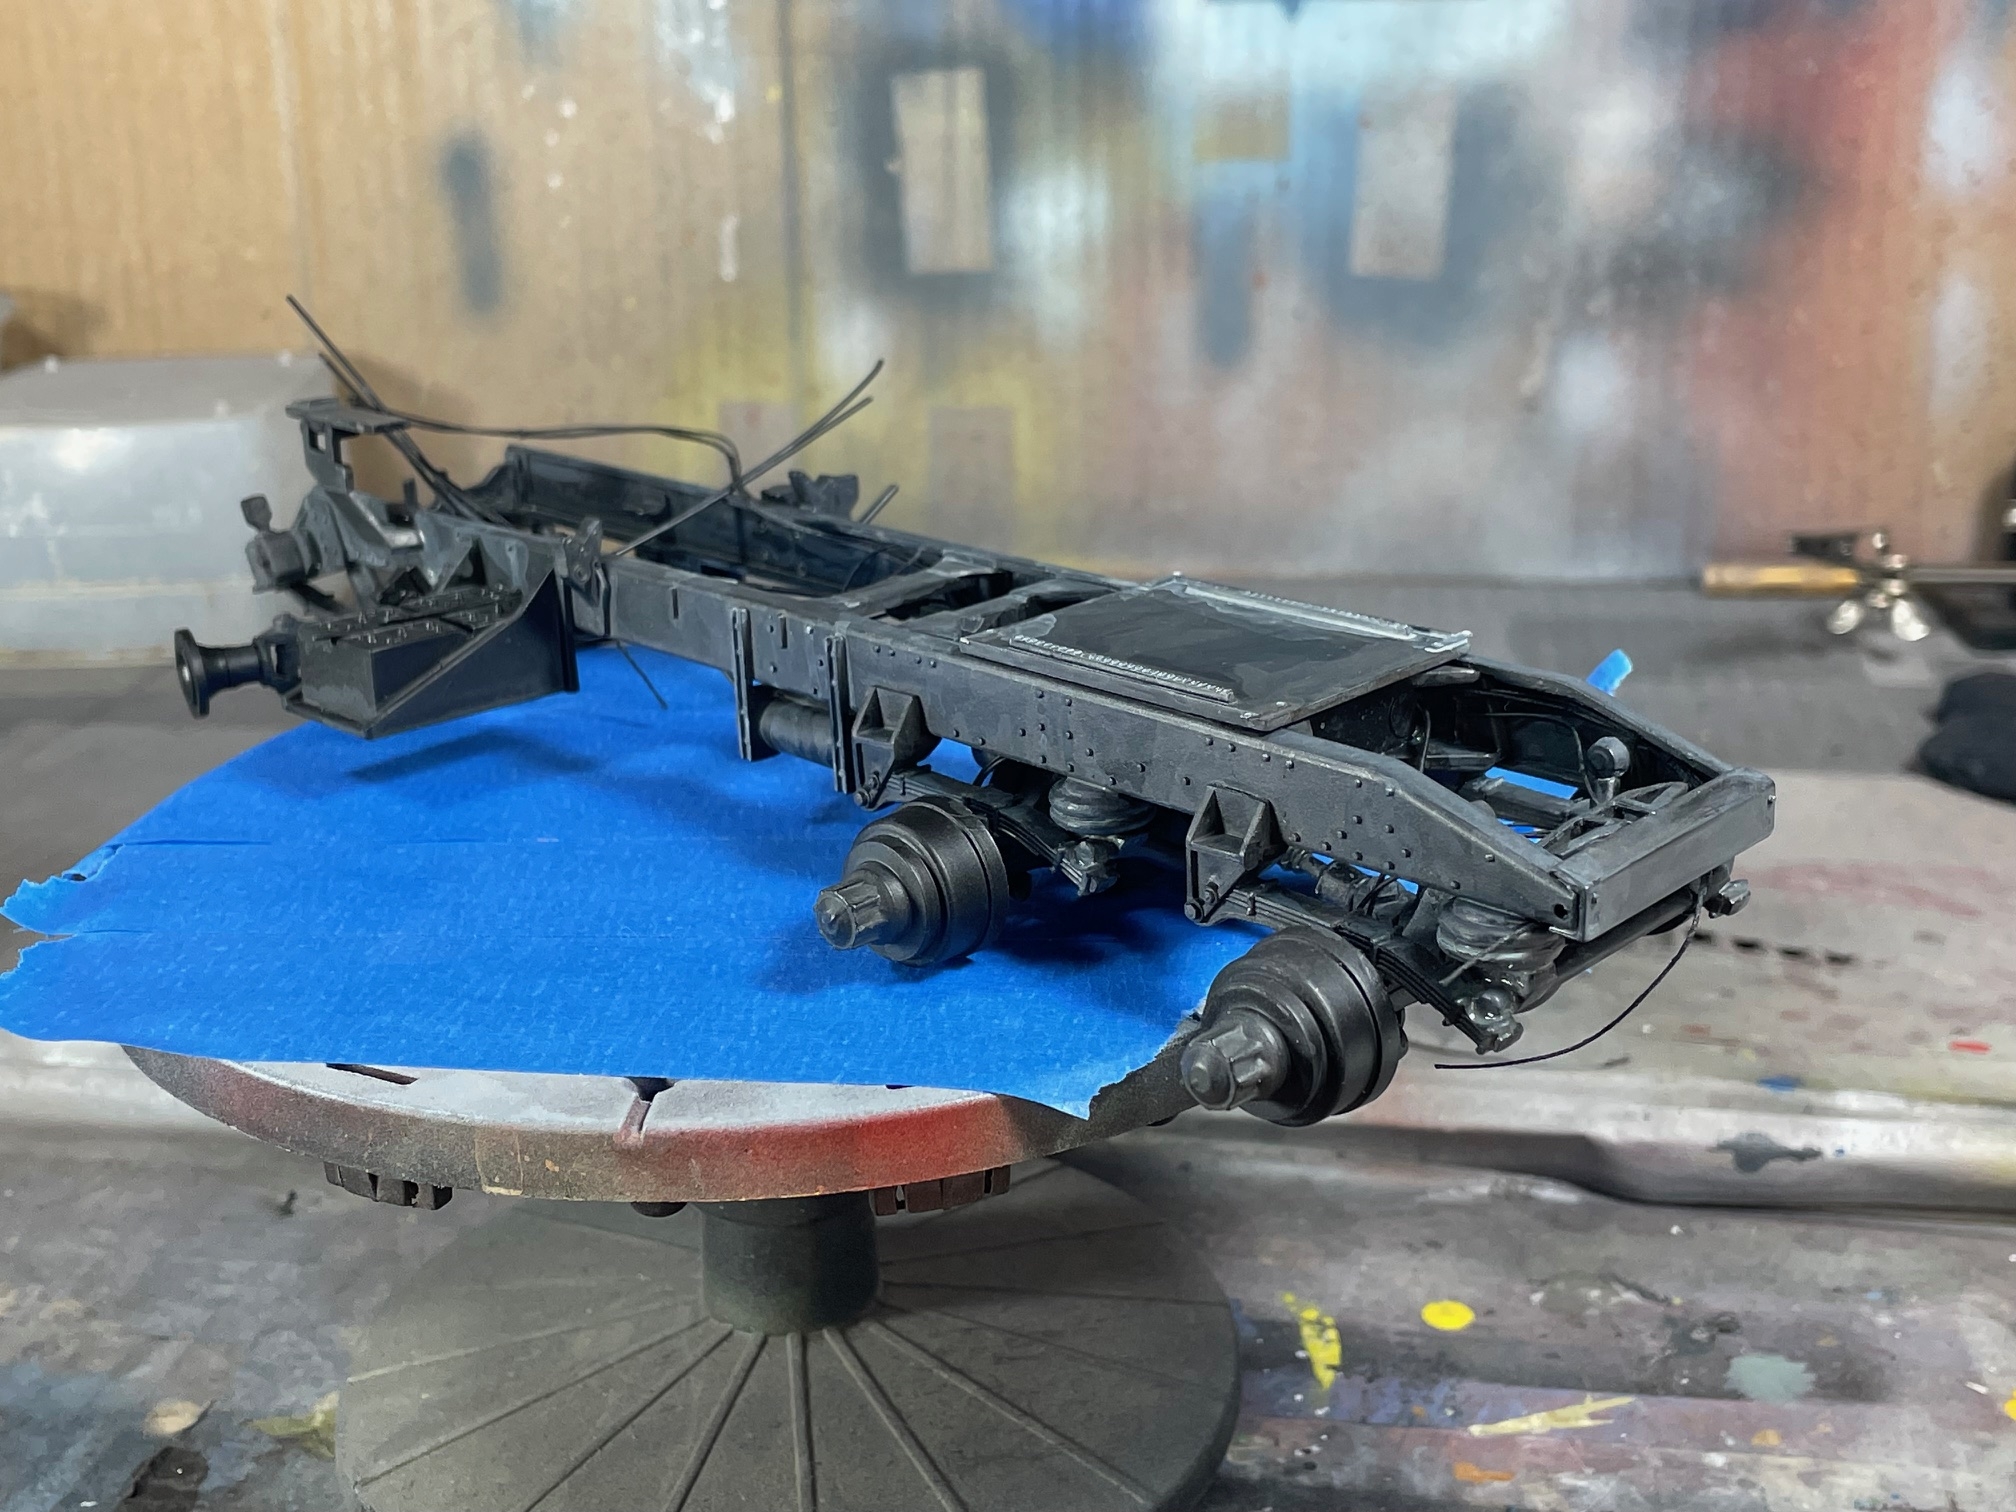
I have also taken the leap into adding some plumbing and wiring to this build.
Thin thread for electrical wire, .020" & .030" styrene rod for air lines, and telephone wire for the transmission.
The interior sub-assembly is finished and set aside.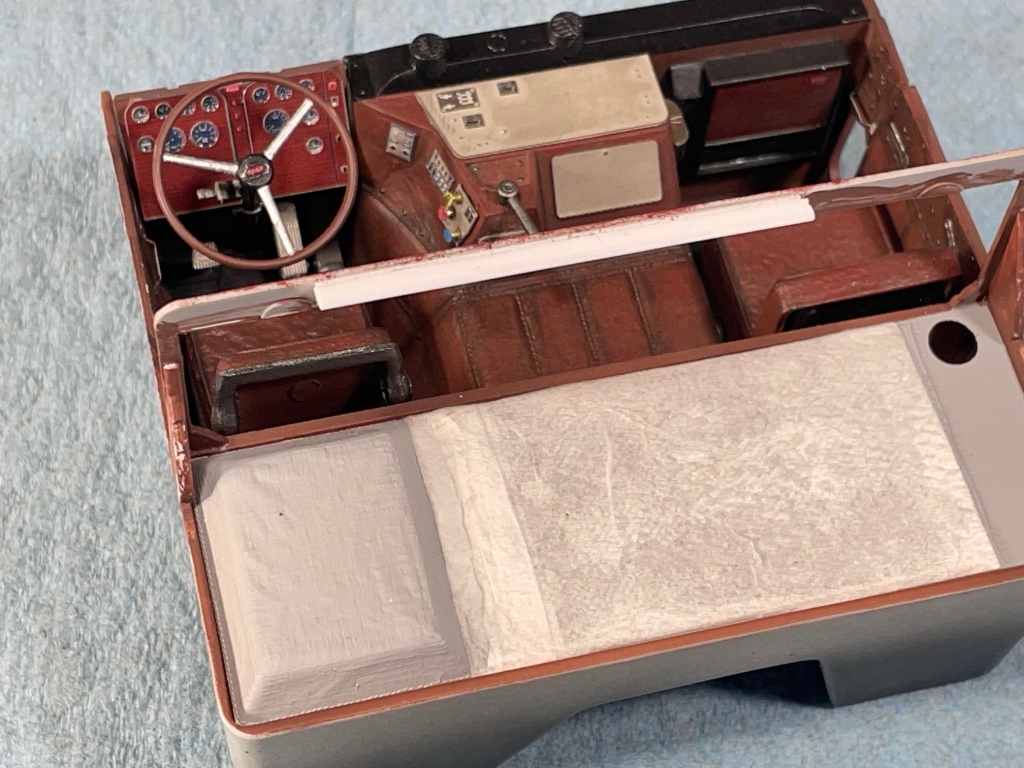
-
4
-
-
Up next is the Pete, and my mind is already three builds ahead. I miss scrapping styrene and sniffing glue (orange flavor) and need the space on the bench, so it is time to push this truck along.
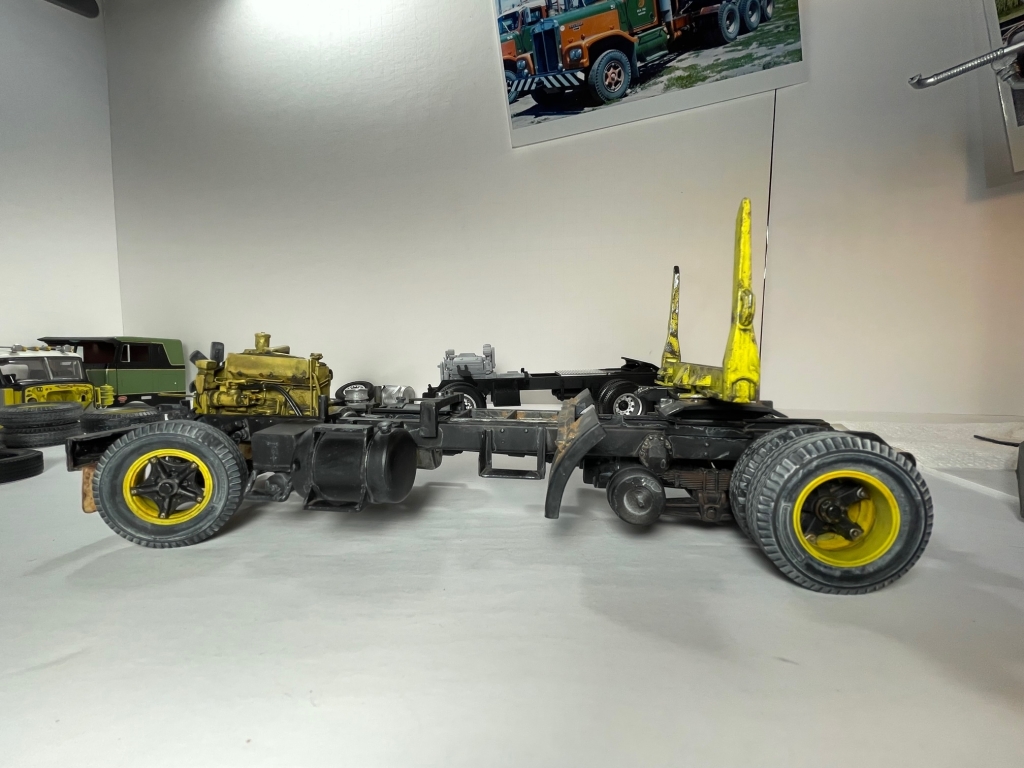
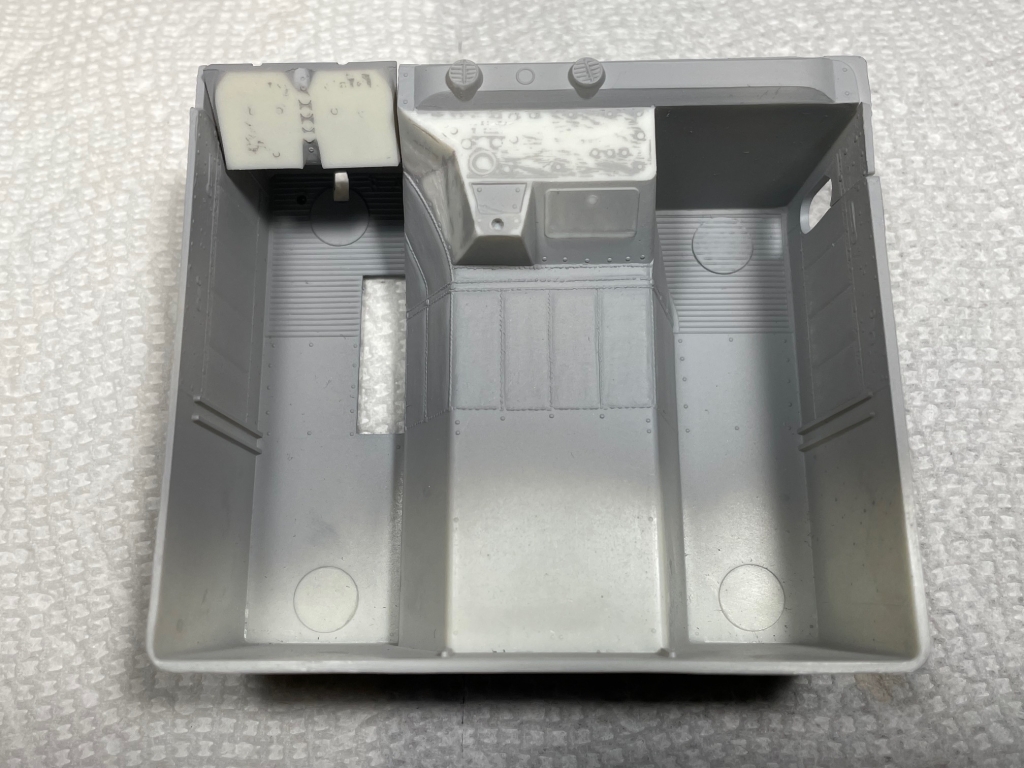
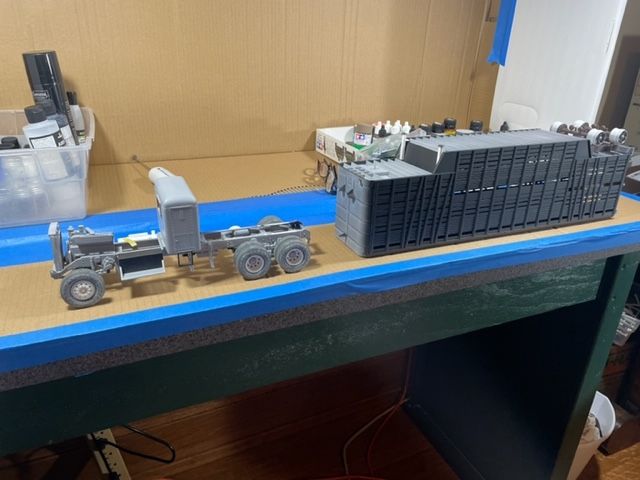
Some of the clean "before" photos. Bare bones.

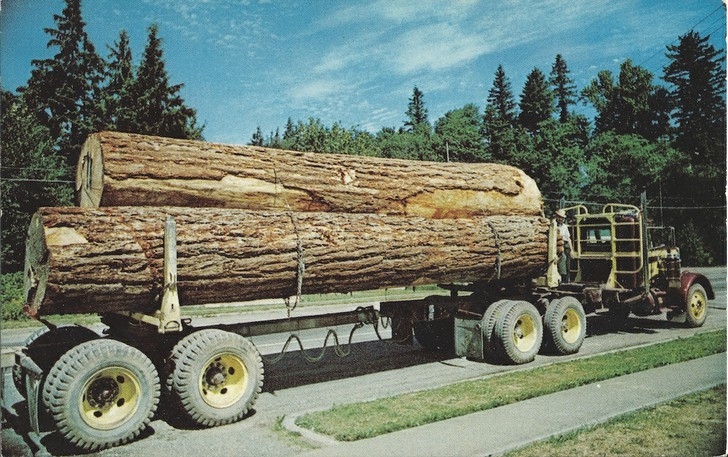
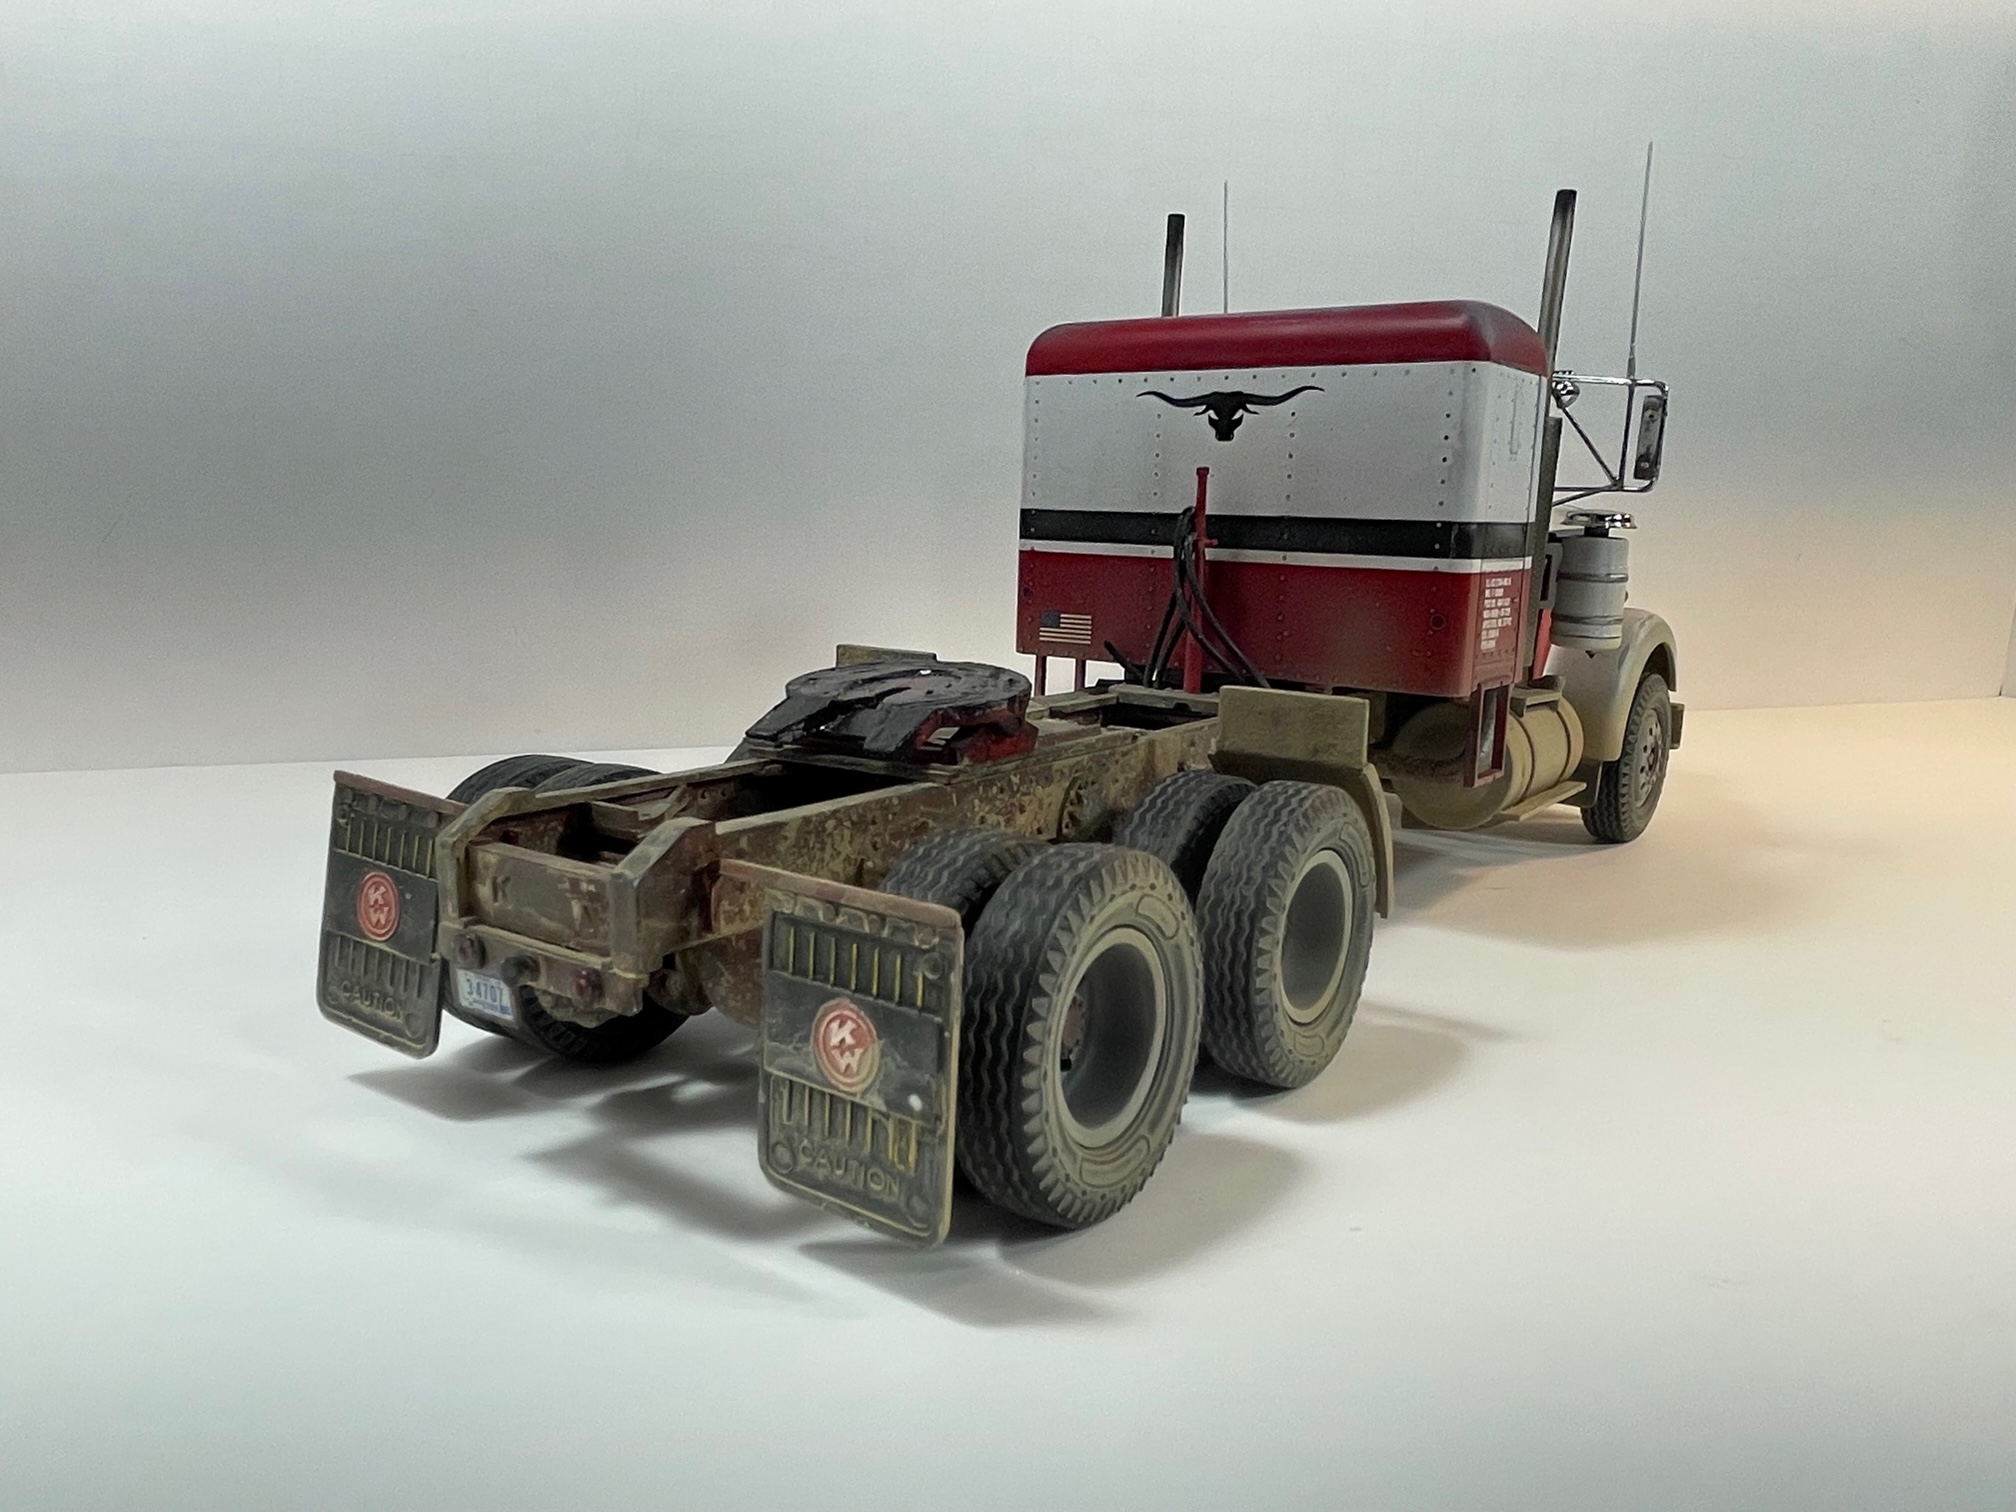
A view from the rear. It came as a surprise to me at how "perfect" it came together. Sure turned out pretty.

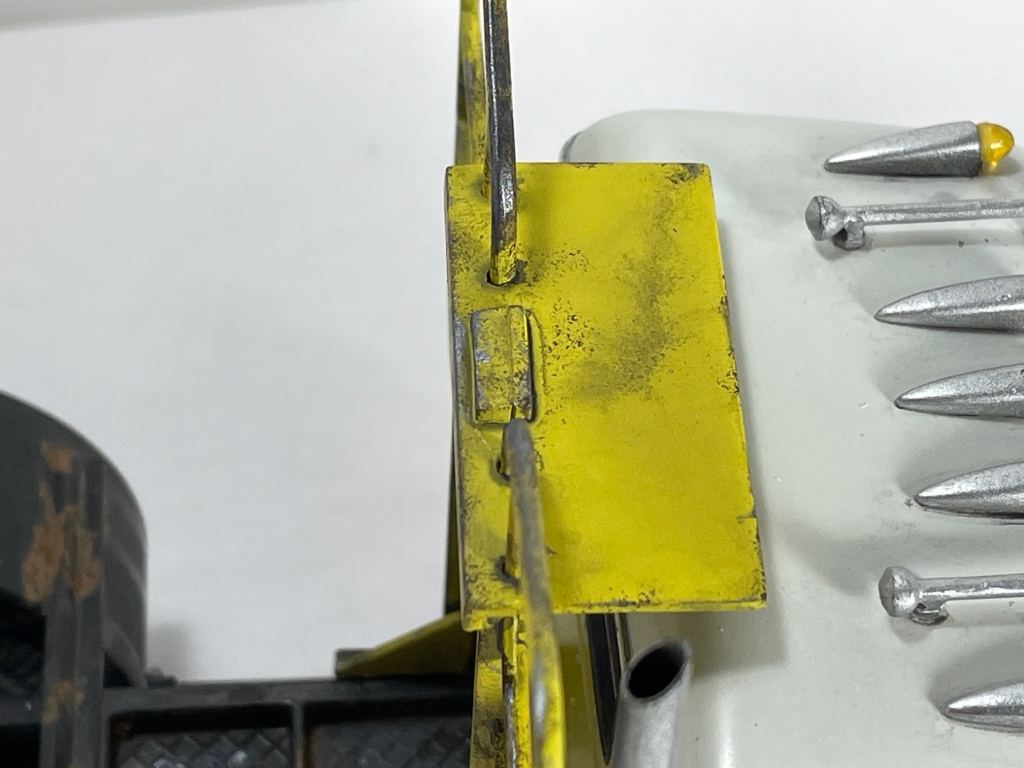
Maybe too pretty. A perfect yellow rack and bunk doesn't seem possible (in my imagination) for a logging truck.

Rust, chipped paint, and bare metal from wear was the effect I was aiming for.
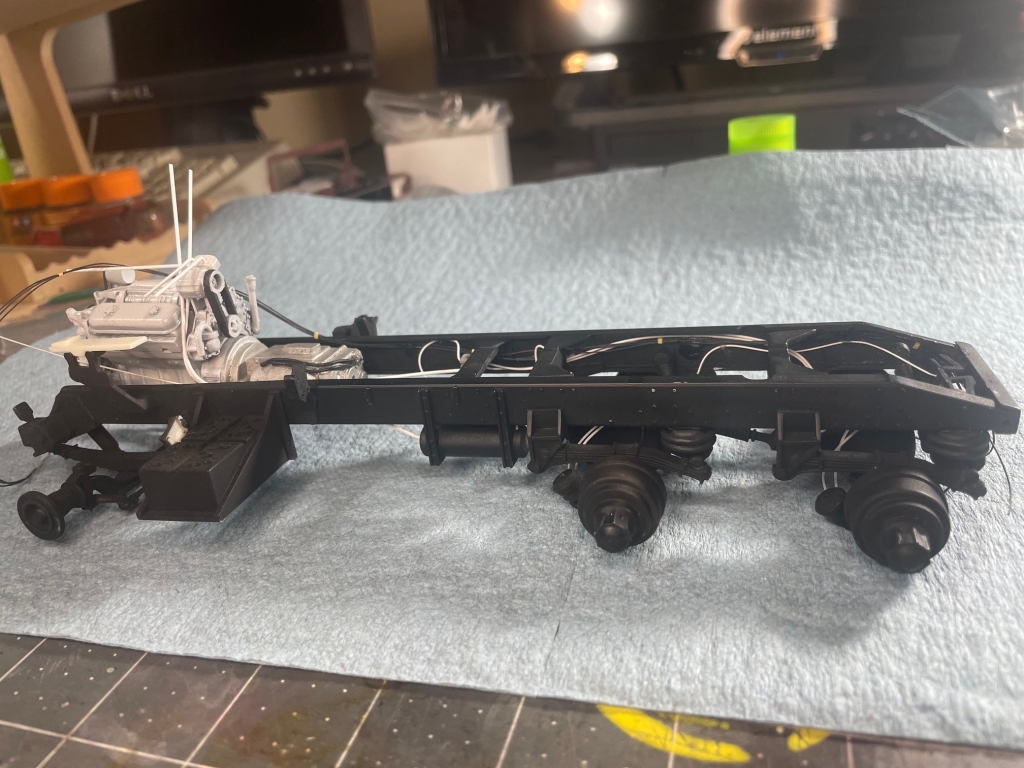
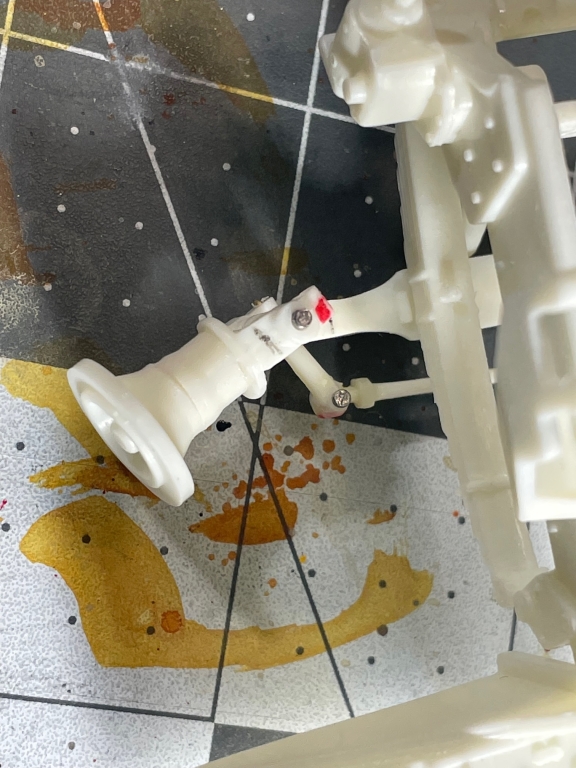
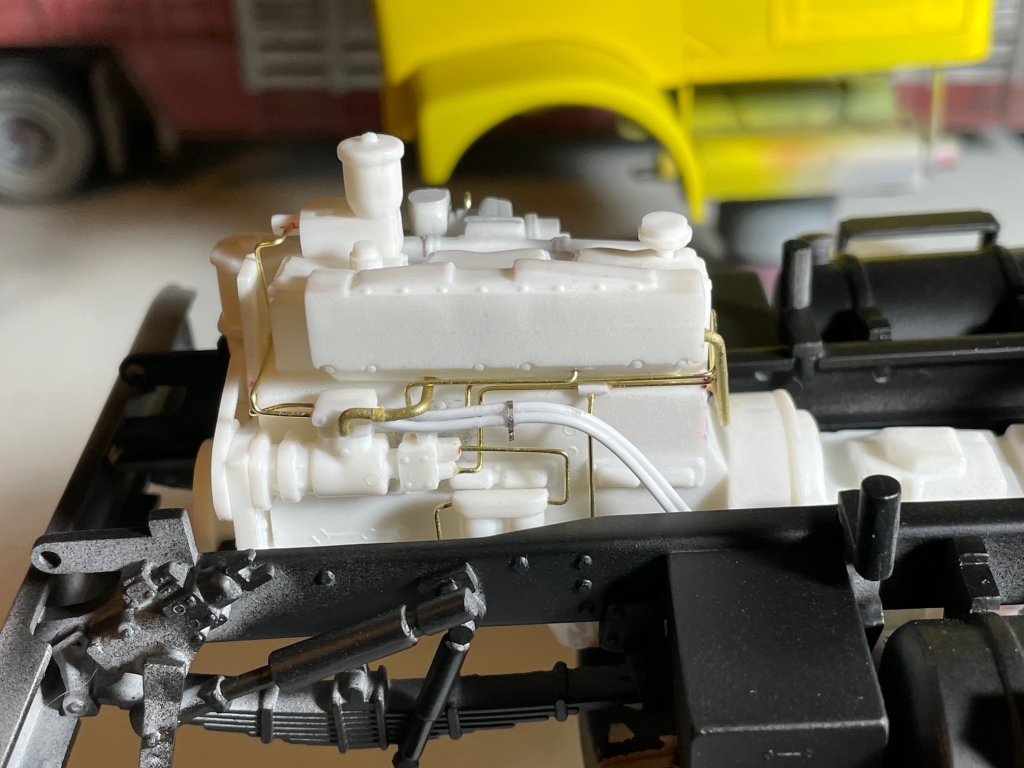
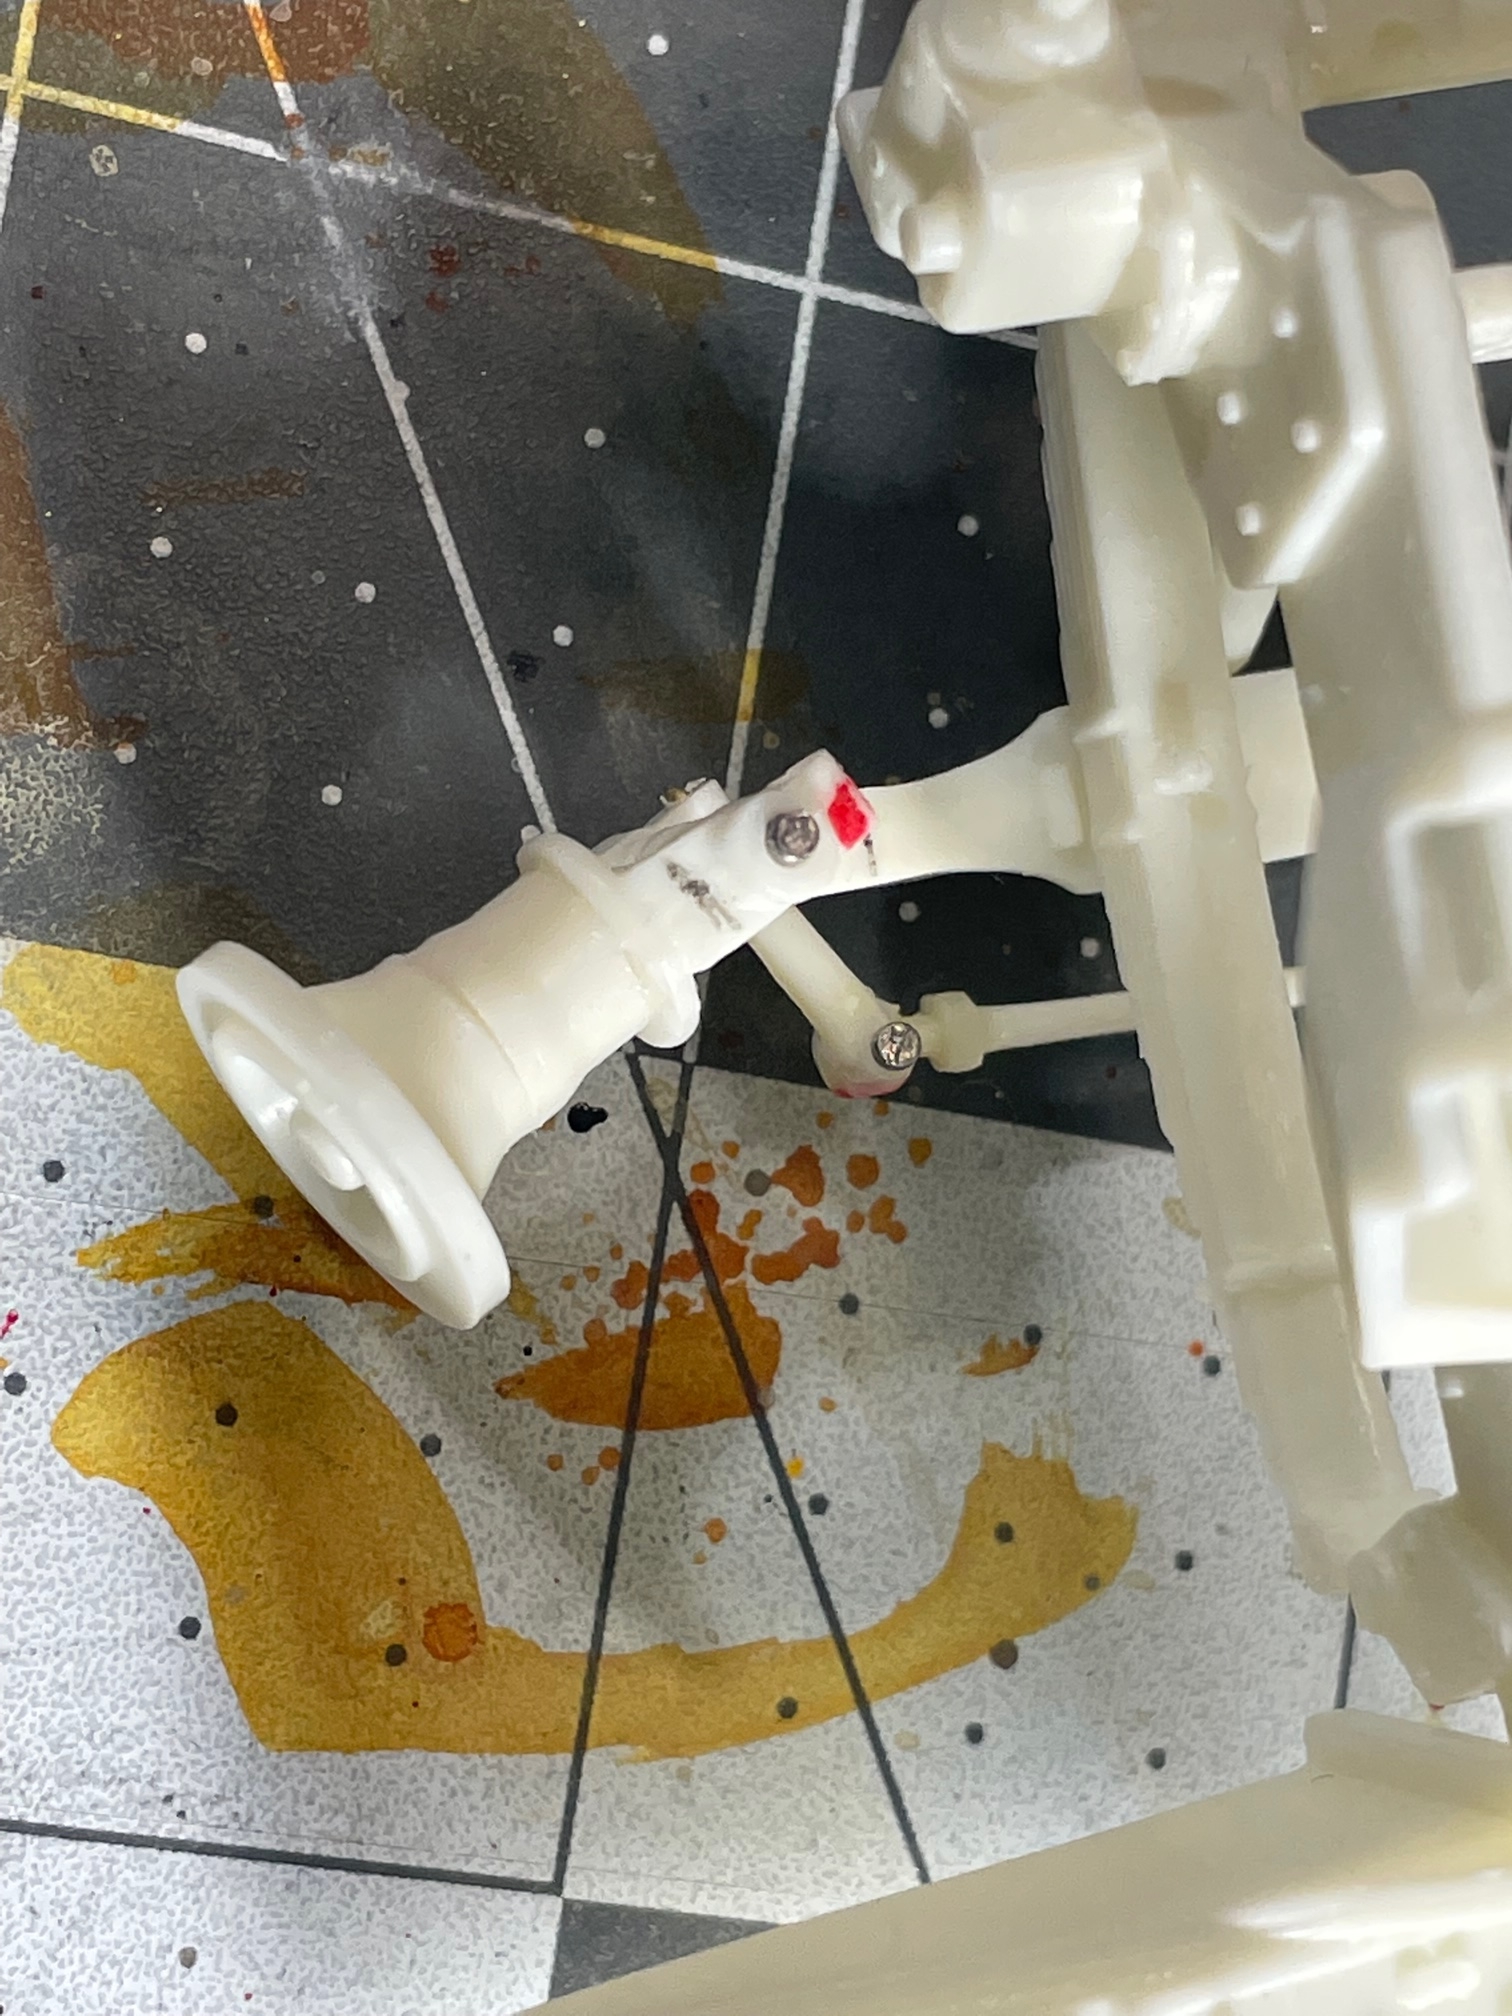
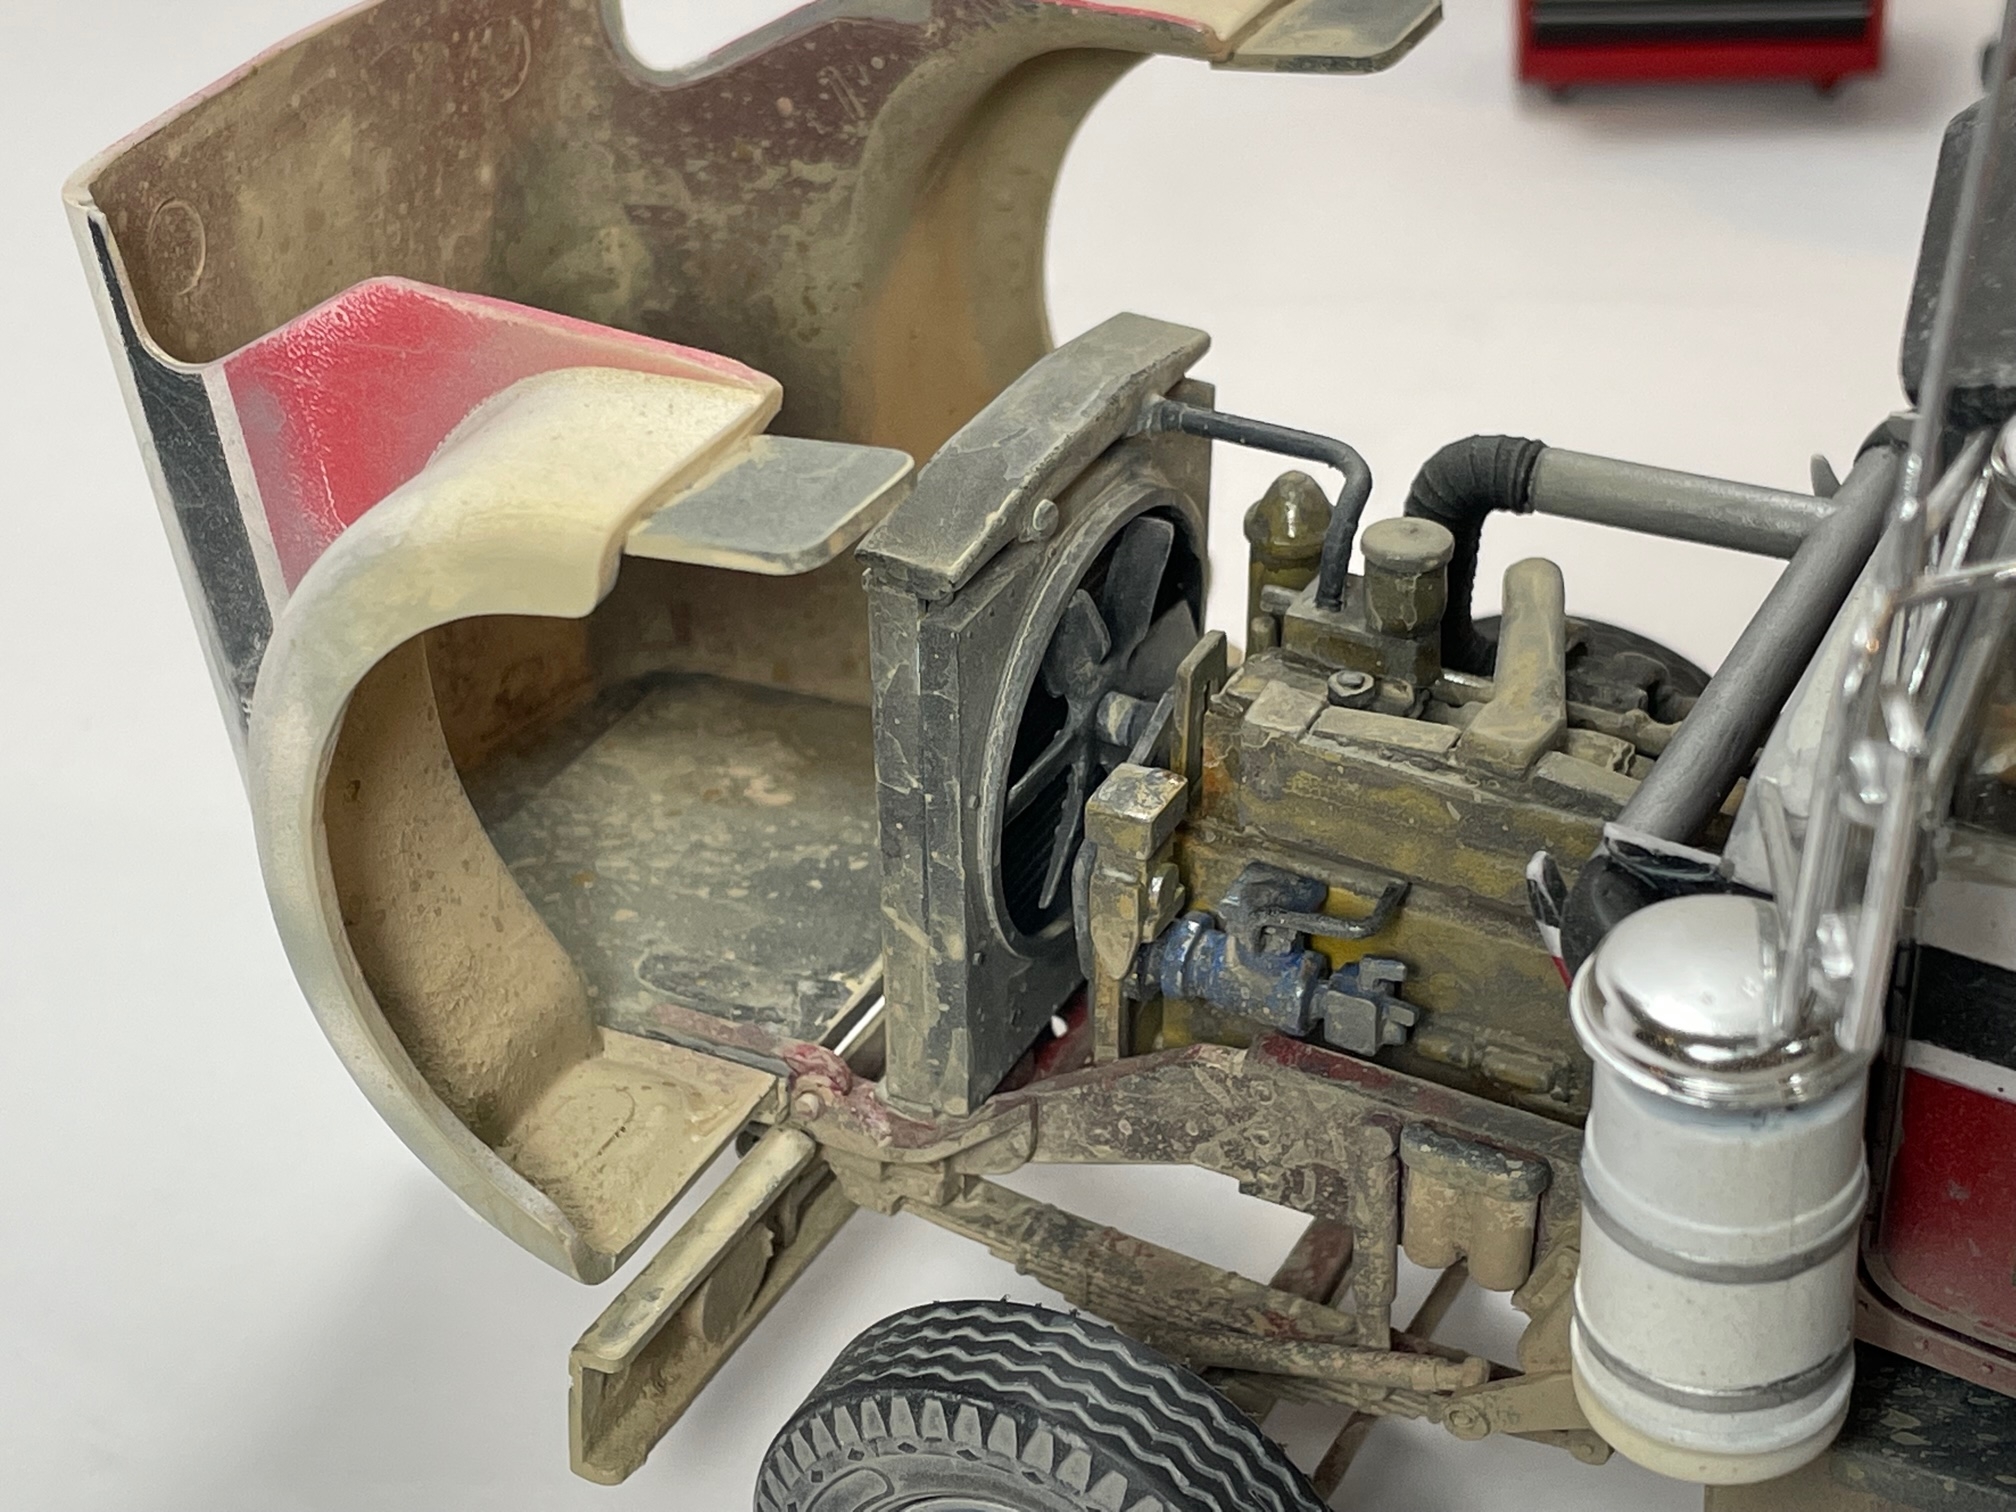
The fan (depth) wasn't fitting right, so I drilled a hole through the engine block and mounted it on a brass rod. Now it could be adjusted wherever for final assembly.
Careful painting of the pulleys and belts also added a nice touch.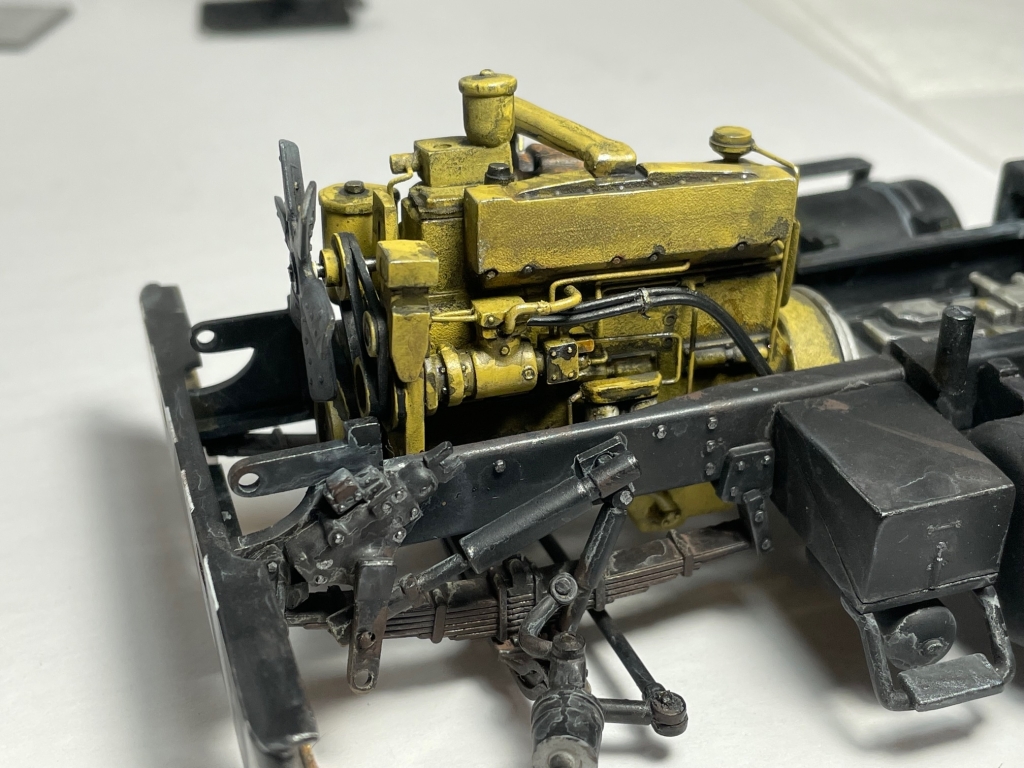
The underside was turning out nicely, so it was time to stop.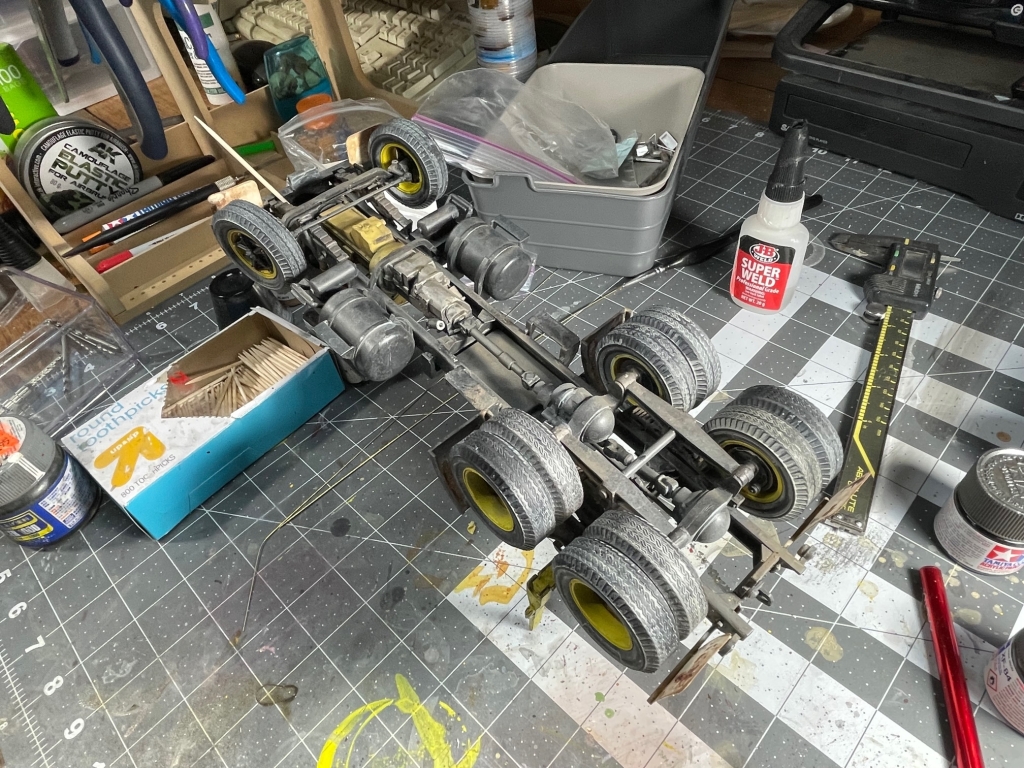
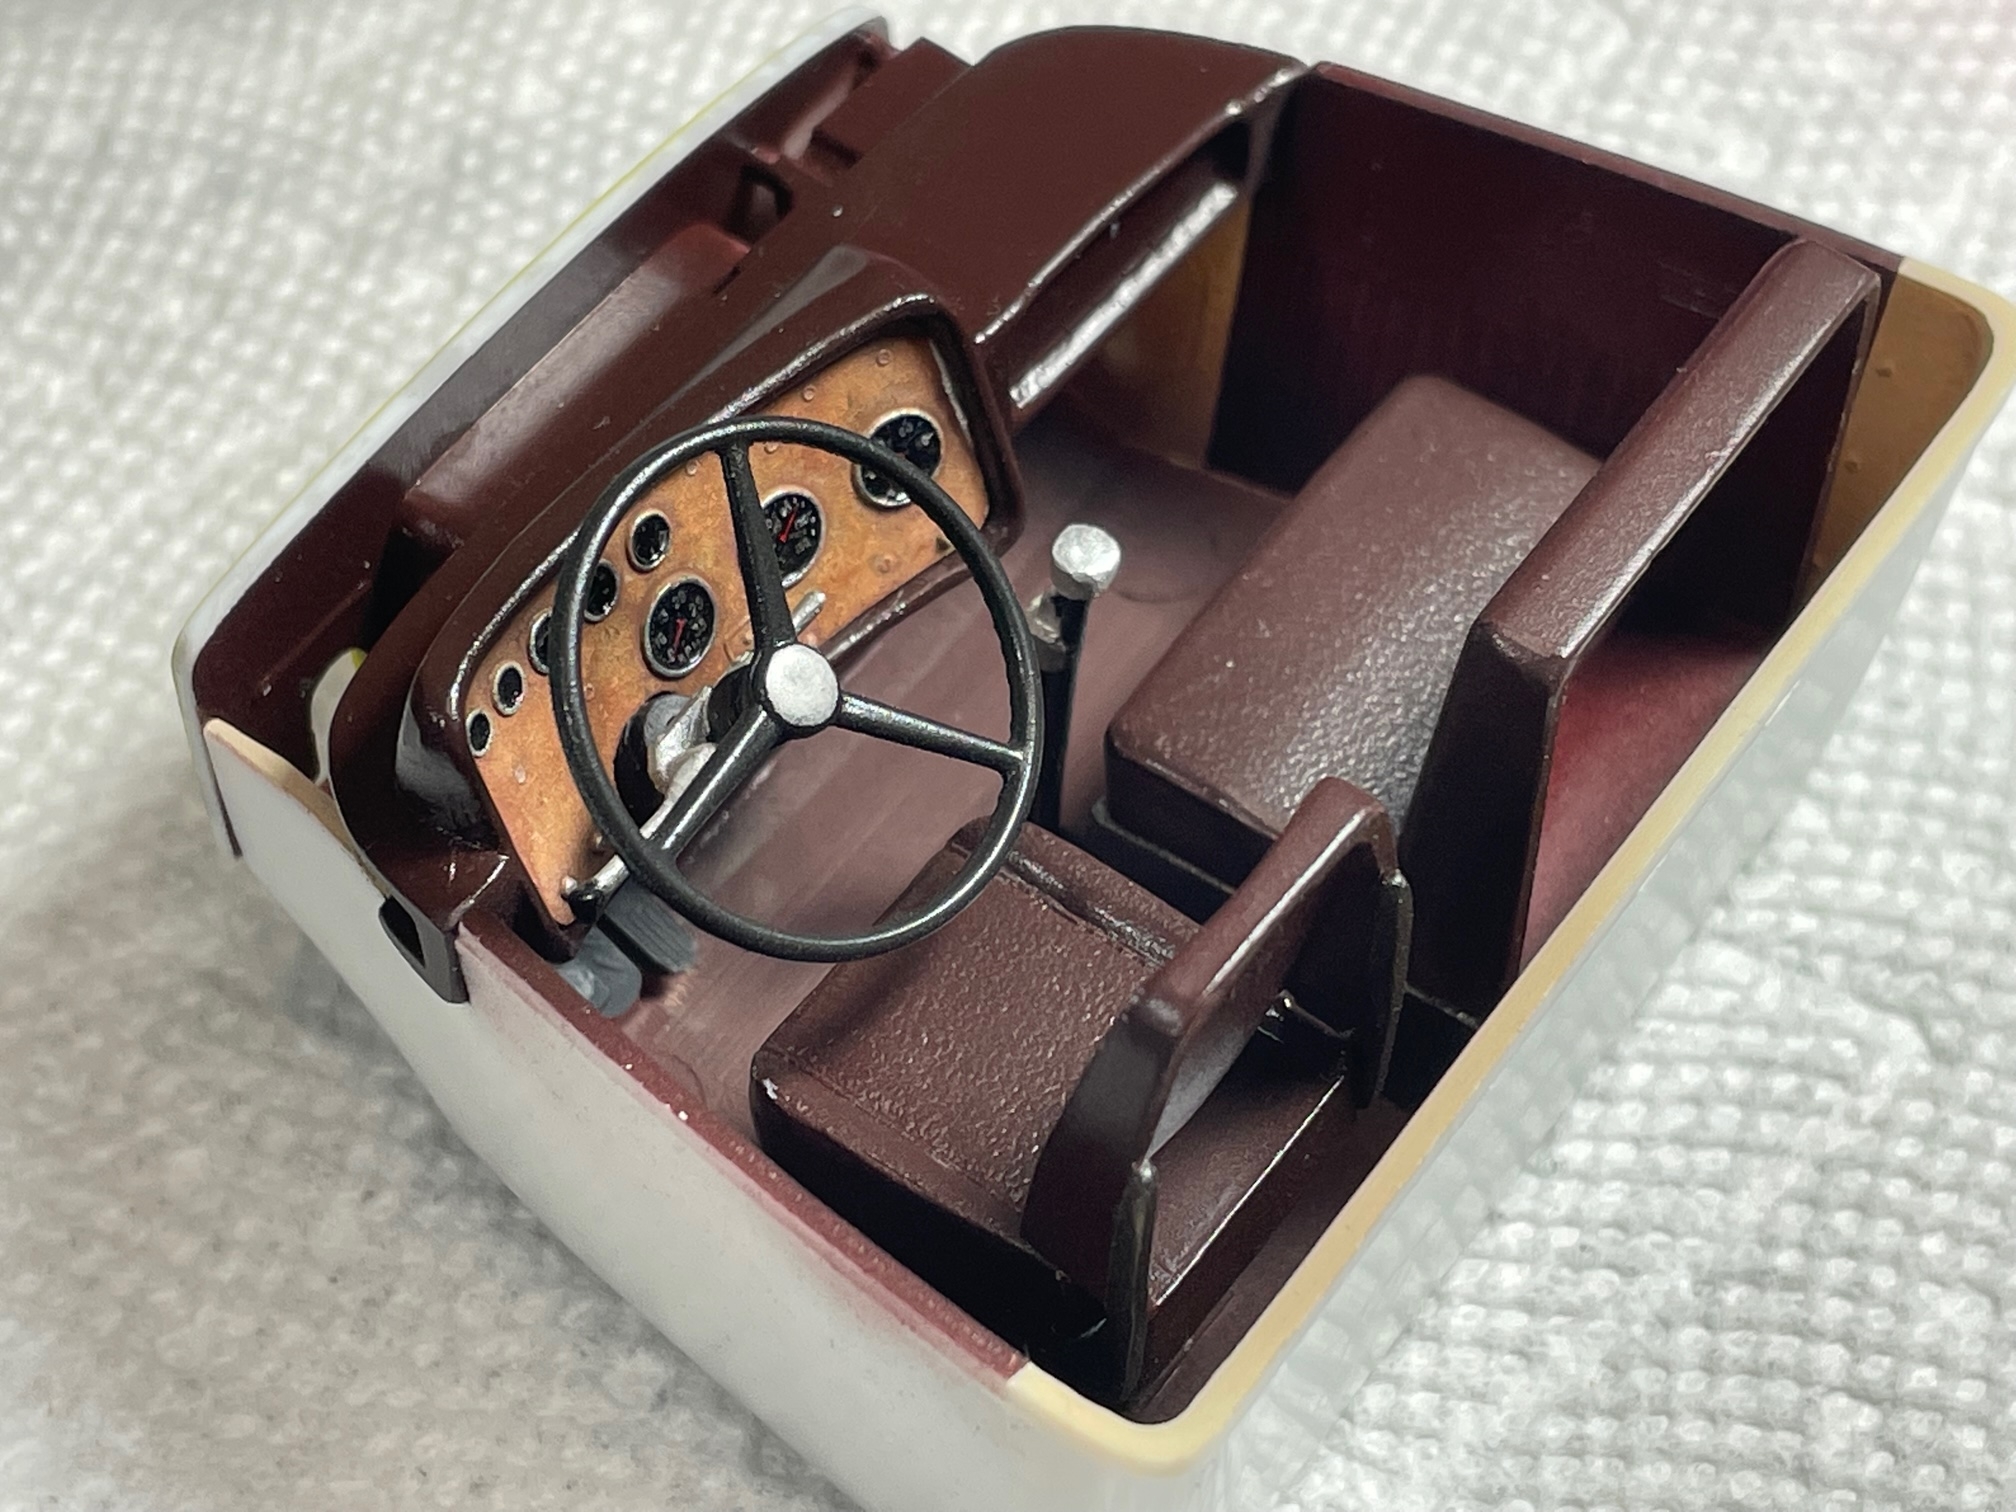
A view of the dash thru the back window. (120 ?,, I don't think so...ha!. kmh?)
I forgot to add a driver, or any misc. debris to the interior. It was already glued in place and too late.
Bought this product and it works fantastic. Will definitely be playing around with it in future.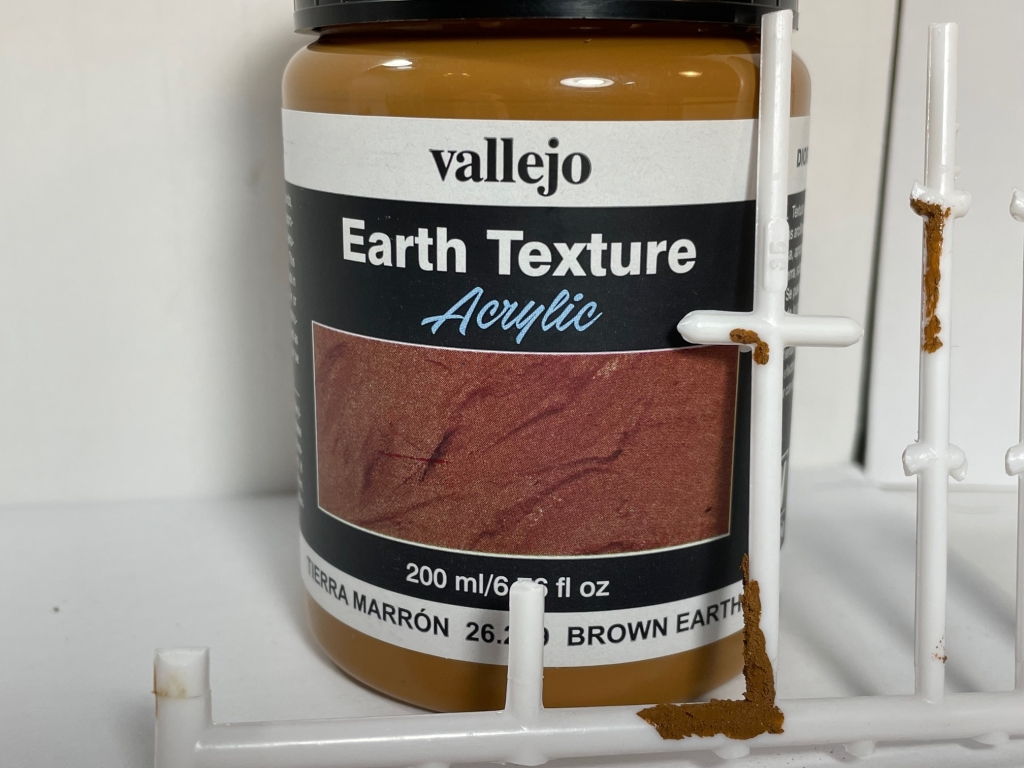
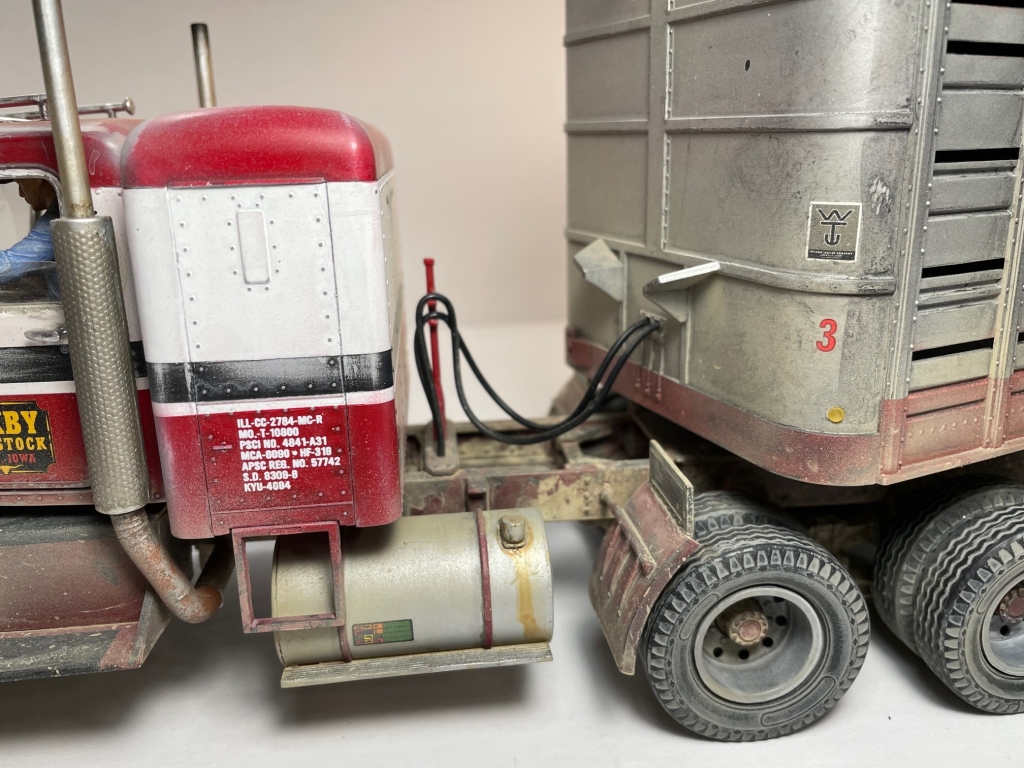
Used Vallejo Acrylic heavily watered down as a wash to add some grime and streaking to the rear of the cab.
A sixty thousands (.060) shim was added between the axle and leaf spring on the driver's side to give the frame a bit of twist (torque).
It is very subtle and you might not notice (only subconsciously, which is the best kind of affect).
The mirror brackets are four pieces glued together and were very intimidating to build.
We are nearing the finish line. I joke with my adult son on how AMT expected kids to build these kits.
-
1
-
-
The Rubicon has been crossed (can't go back).
For better or worse....

-
Option #1 it is.

-
4
-
-
Undecided.
-
It was my birthday yesterday and my son made this Wo-jack meme.
Thought I would share it, if it gives anyone else a chuckle. 😄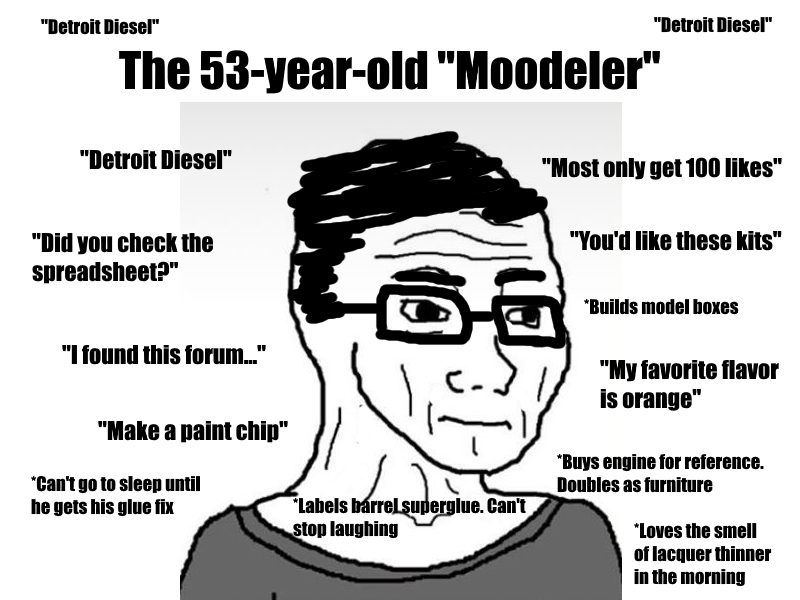
-
1
-
 1
1
-
-
Sometimes you got to set aside a project and let it stew. ....So, what do you do? Start another truck.
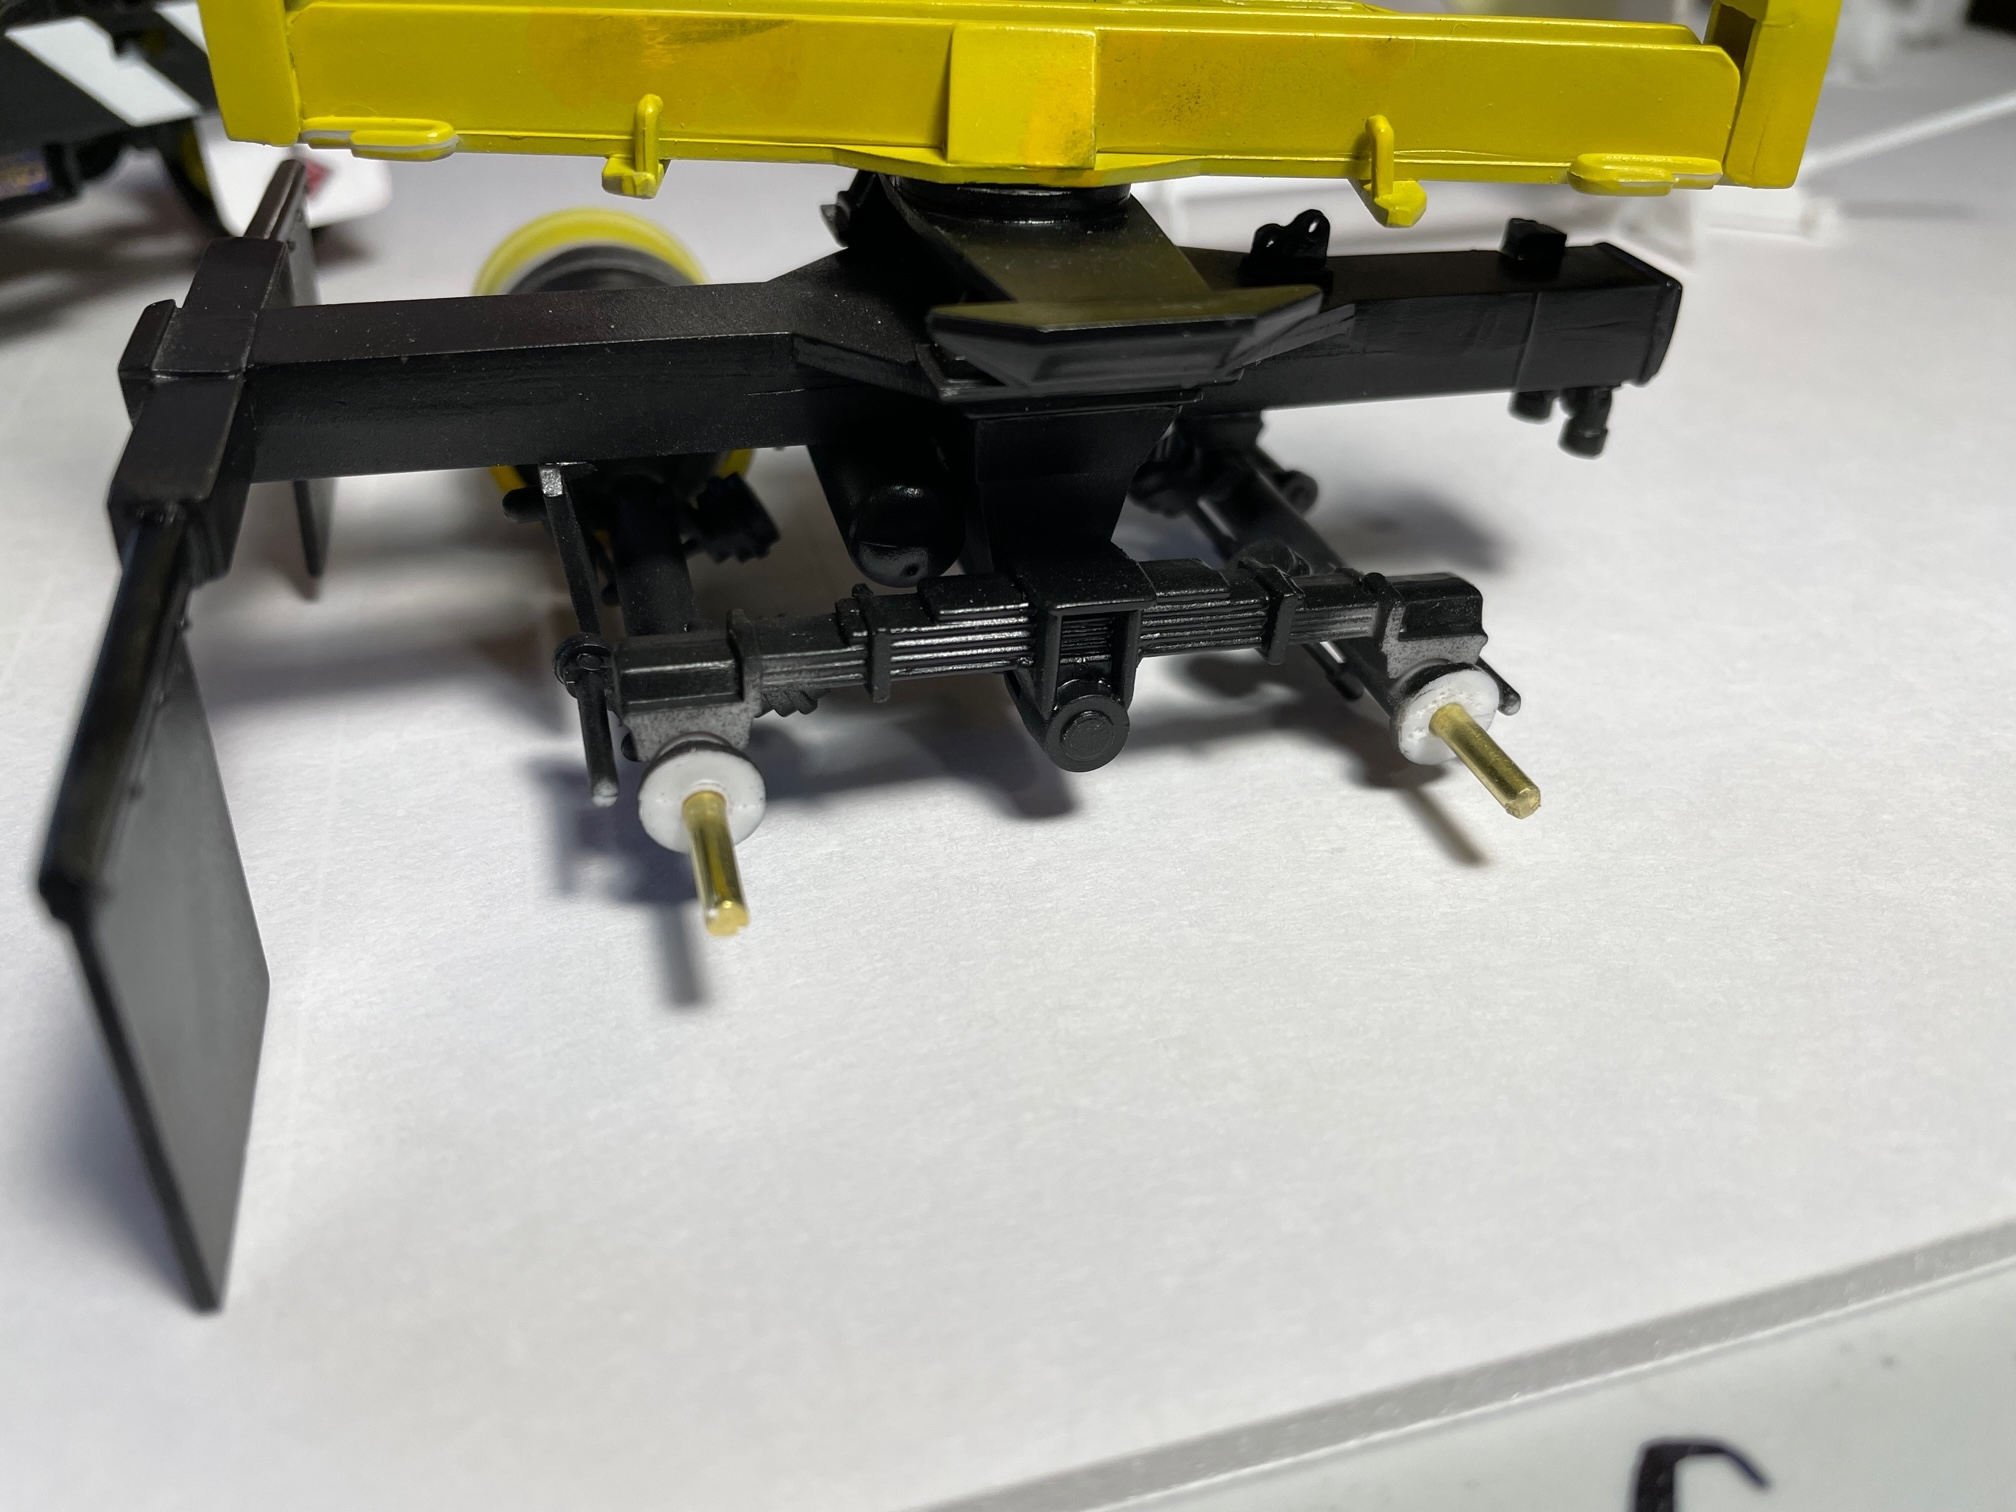
First up, the front axle and tie rod are pinned with small nails.
Next, working to develop a concept for the build.
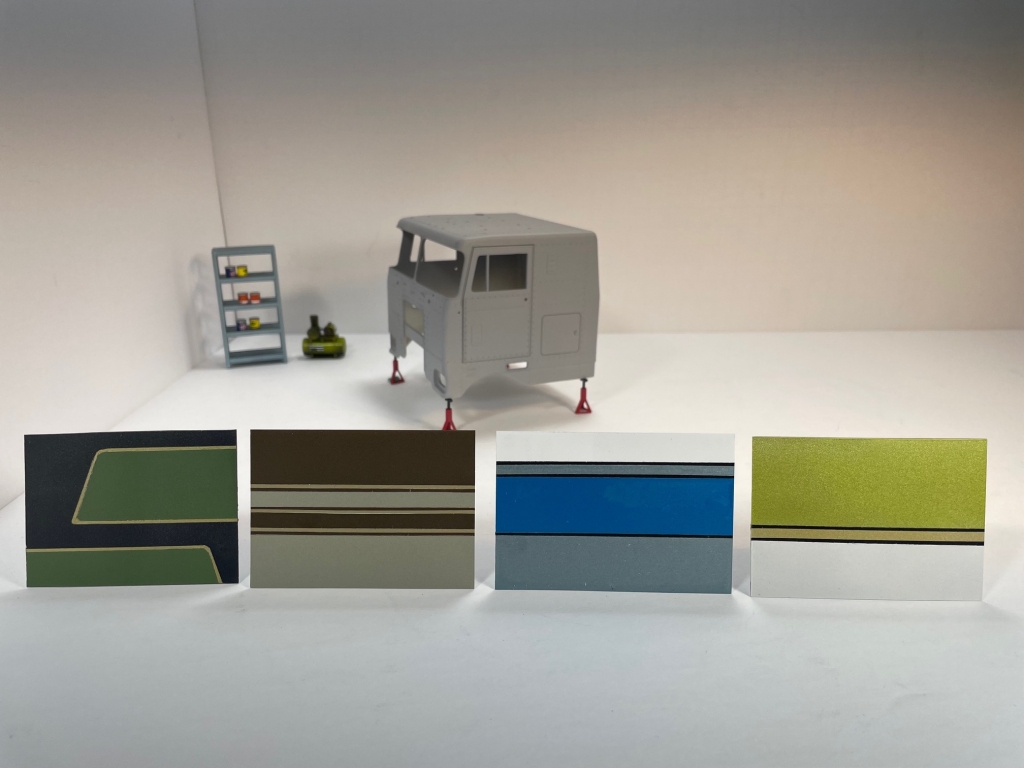
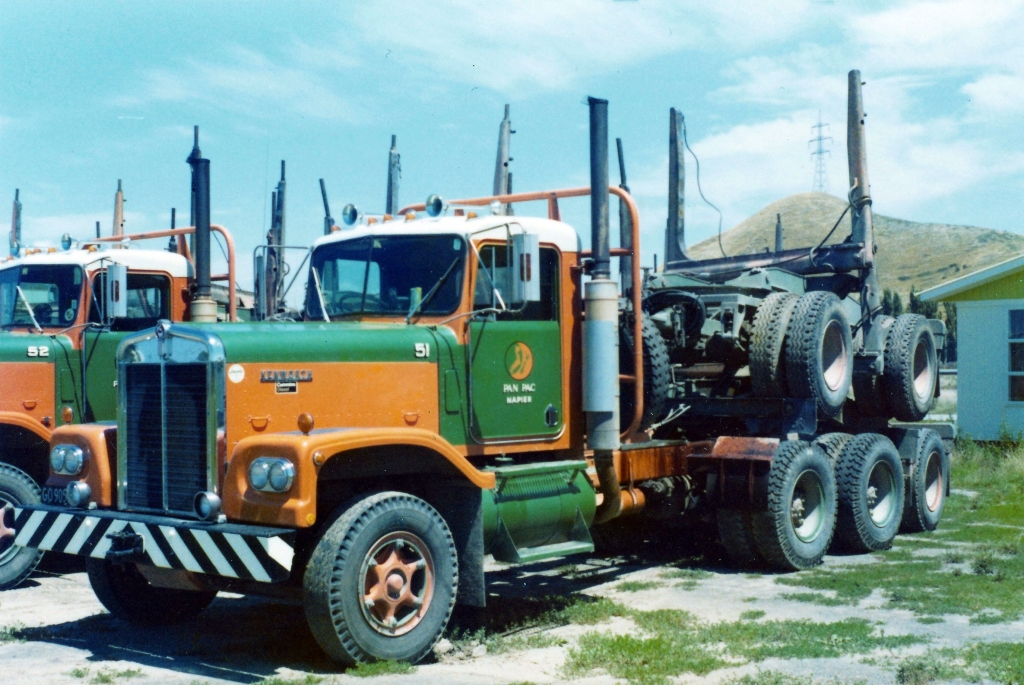
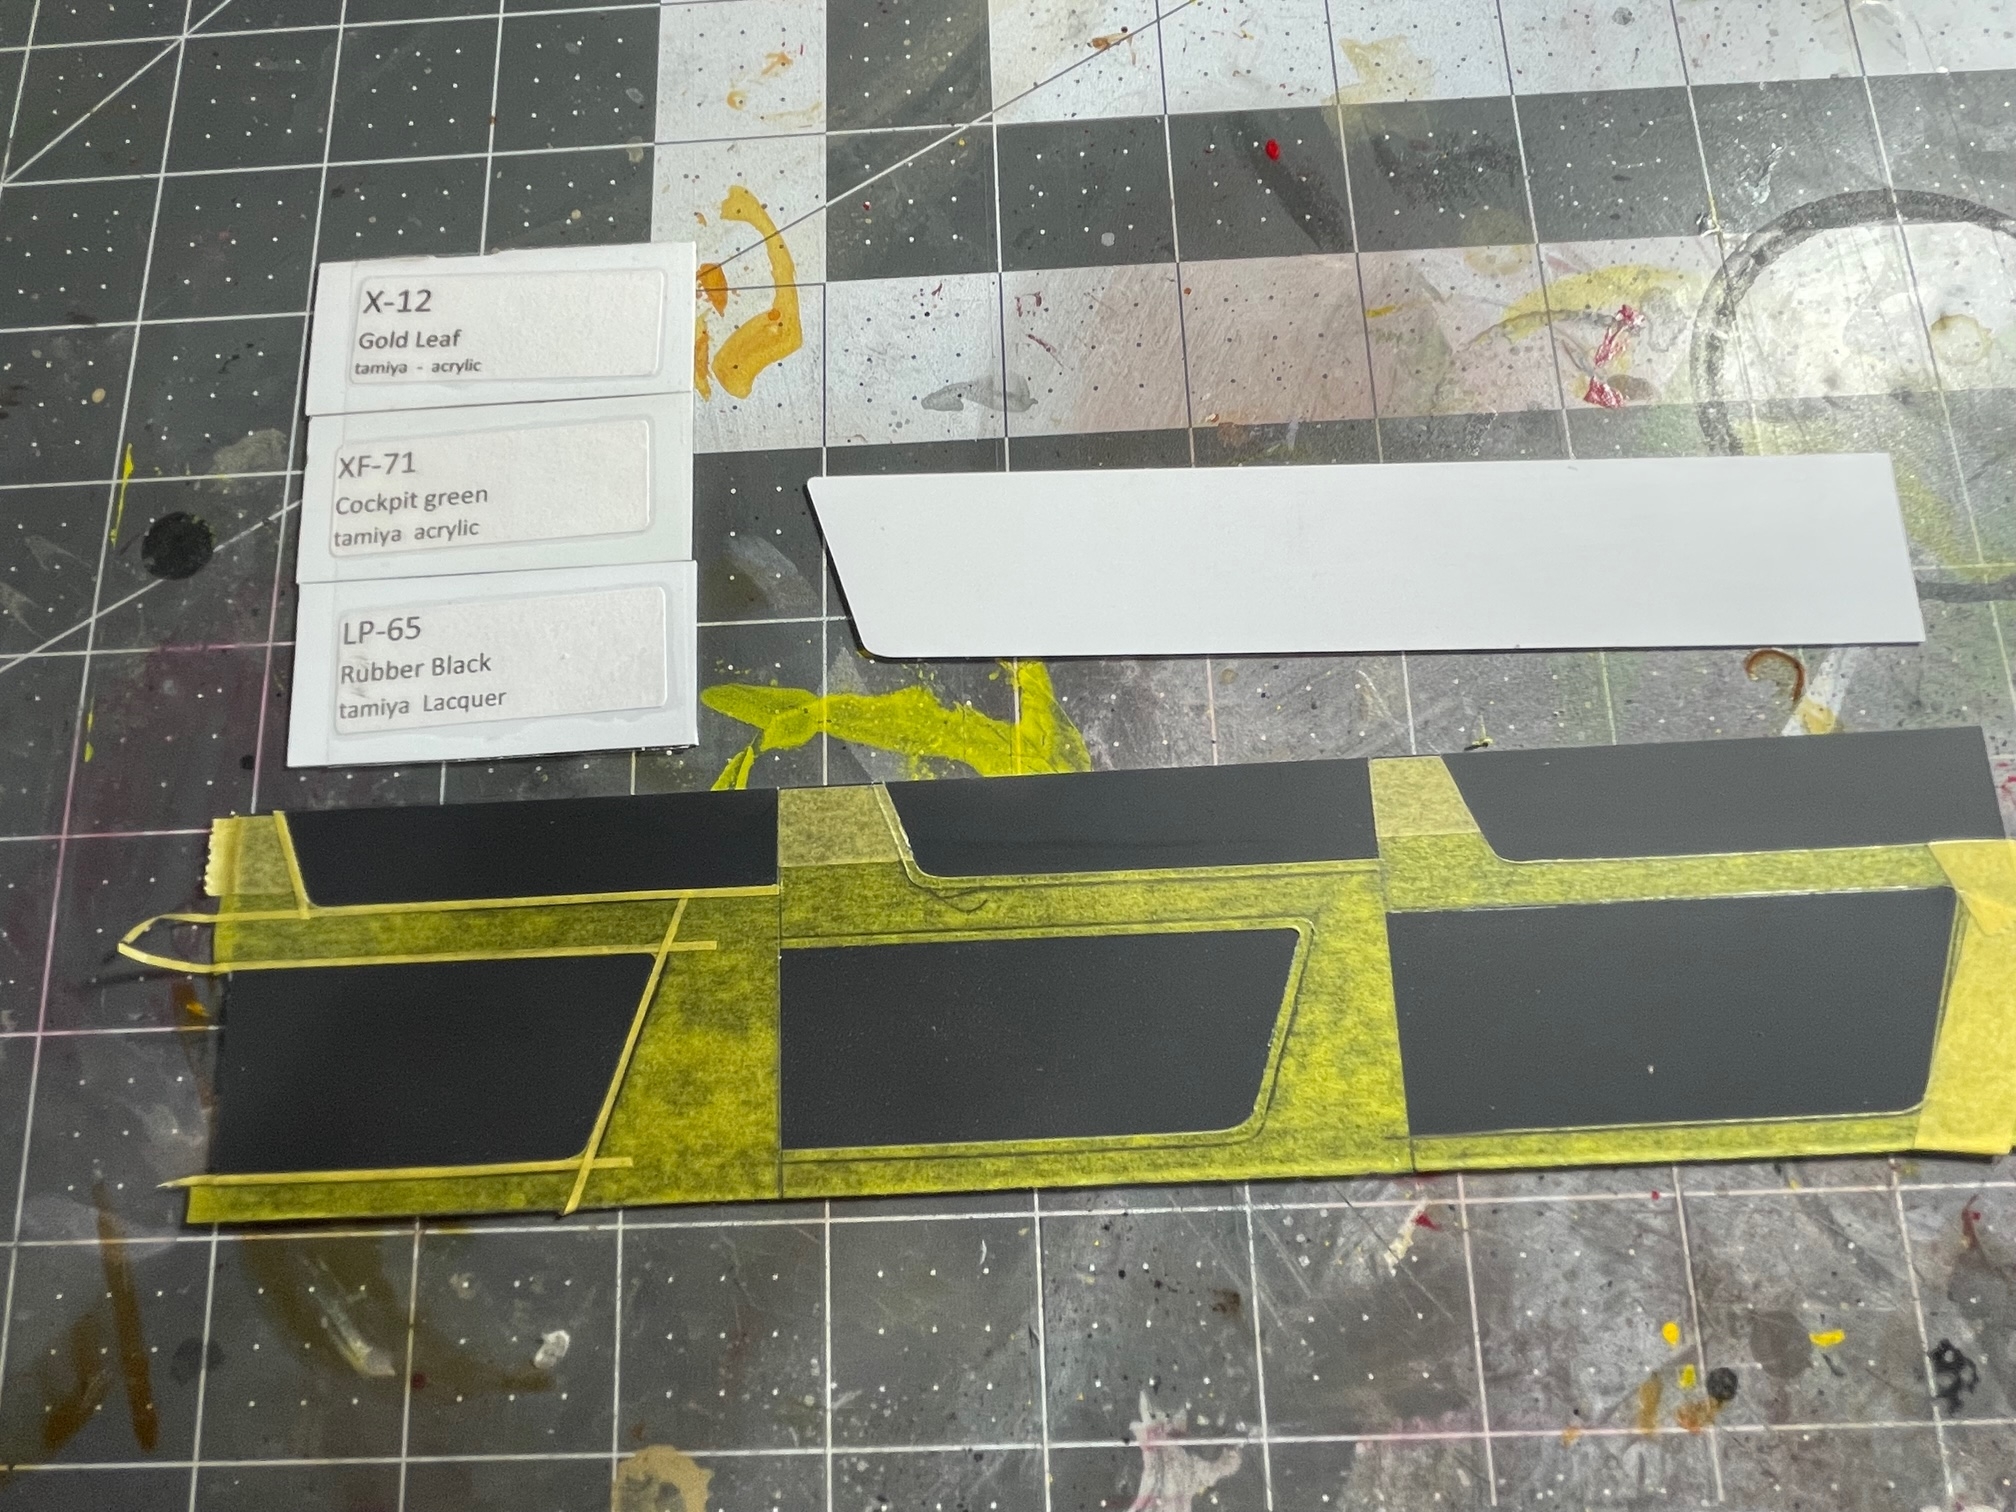
On the paint board are several photos from the internet printed on glossy paper.
Old trucker movies are also a good source of inspiration for those who want to capture the original colors of "their time".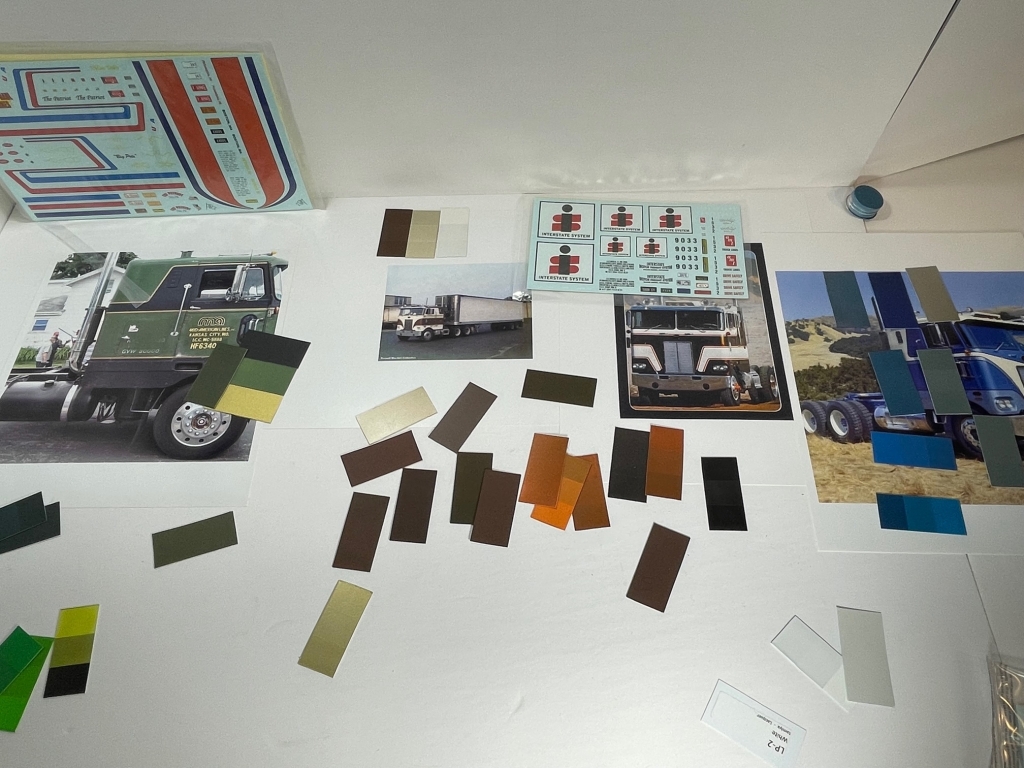
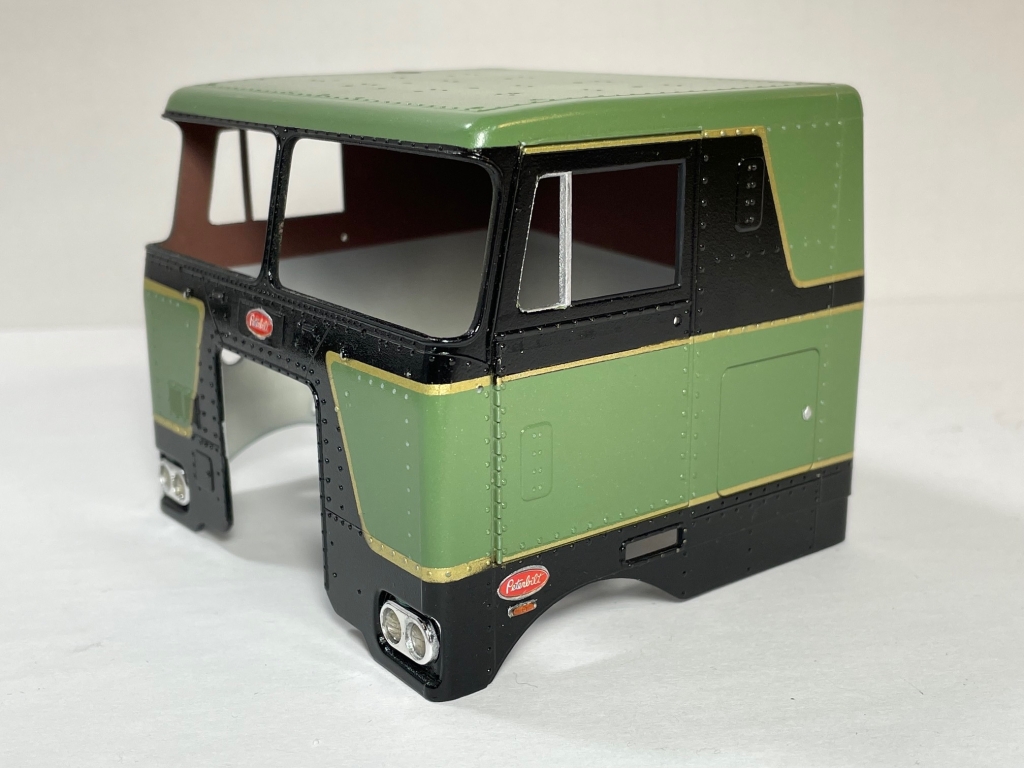
"Blue" on the right is giving me trouble finding the right color match. I will have to try custom mixing, but don't have any experience or feel for it. My first attempts have been unsuccessful.
None of the box decals are ideal, so I will have to buy custom made ones or learn to make my own. Does anybody have a good source?
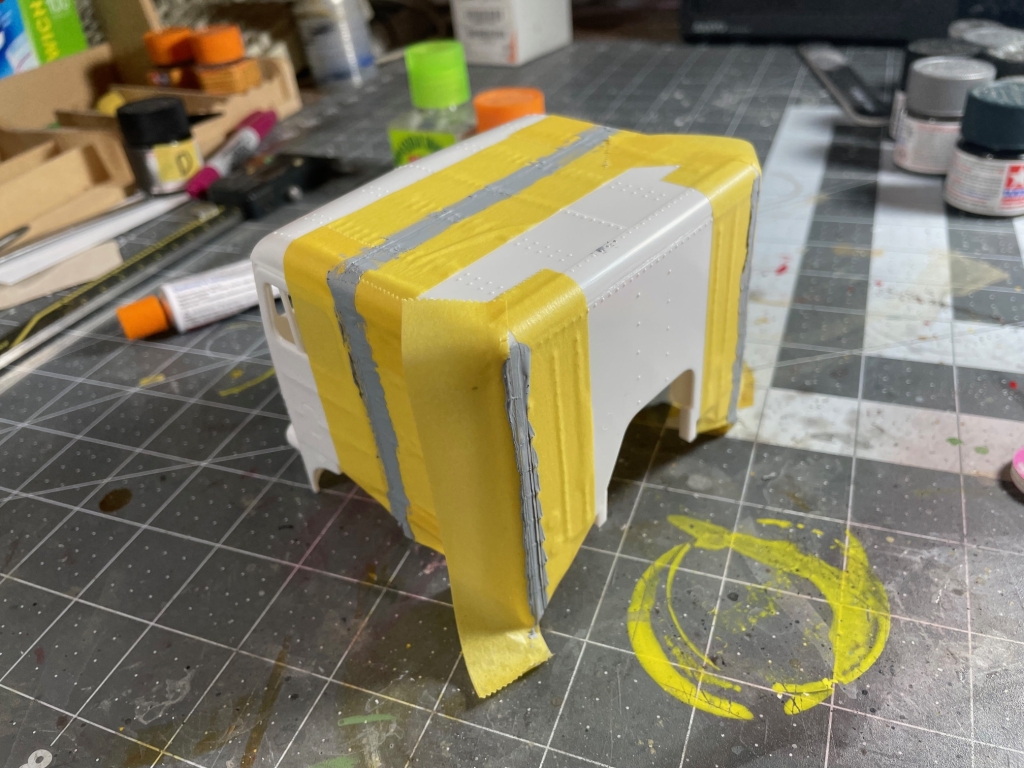
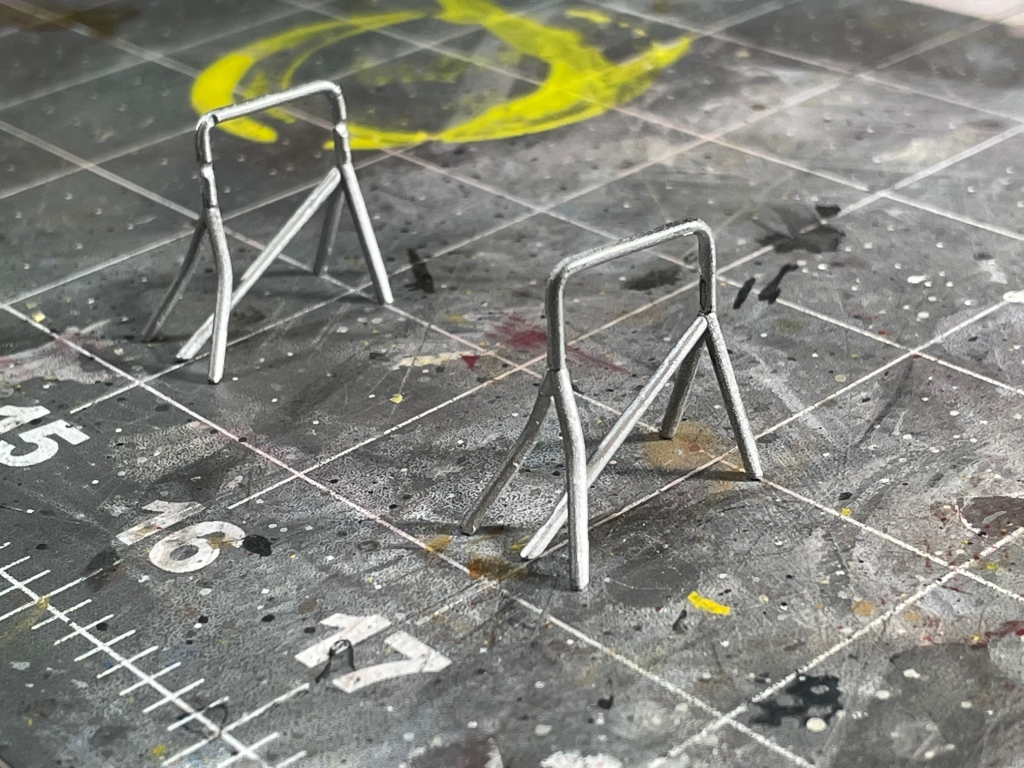
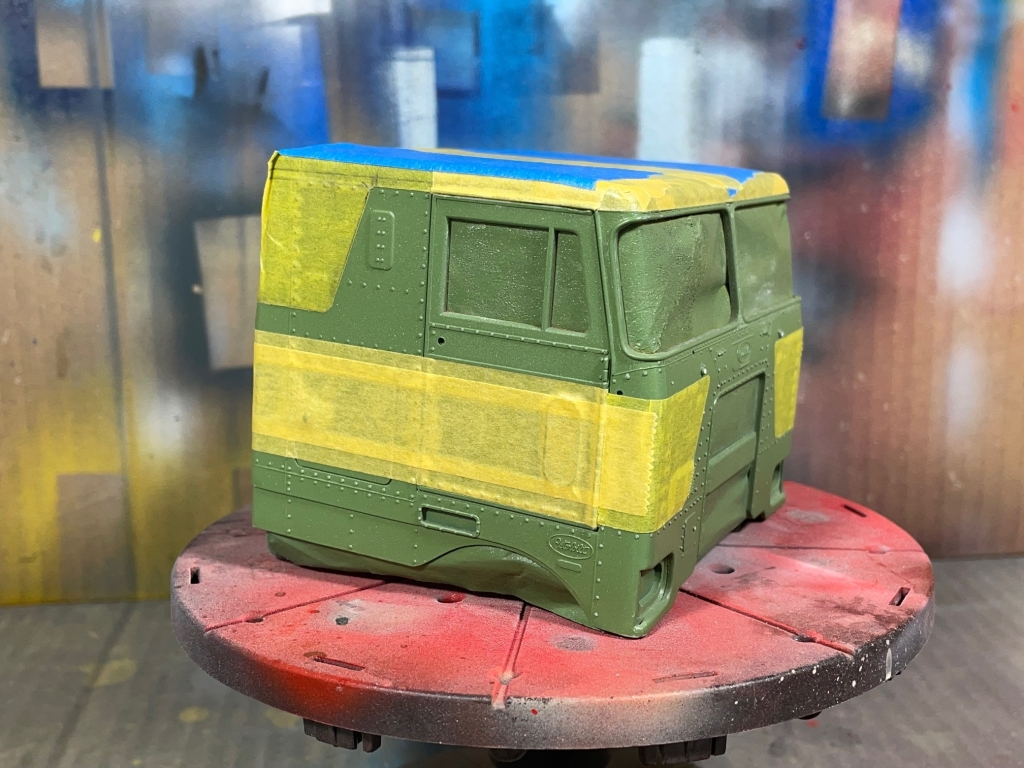
Up next is the paint trial. I don't want to risk ruining the cab. A template of styrene sheet was made to mask the body and try my hand at pinstripes.
3 copies initially are made so that I can play with the technique and the finish coat sheen.
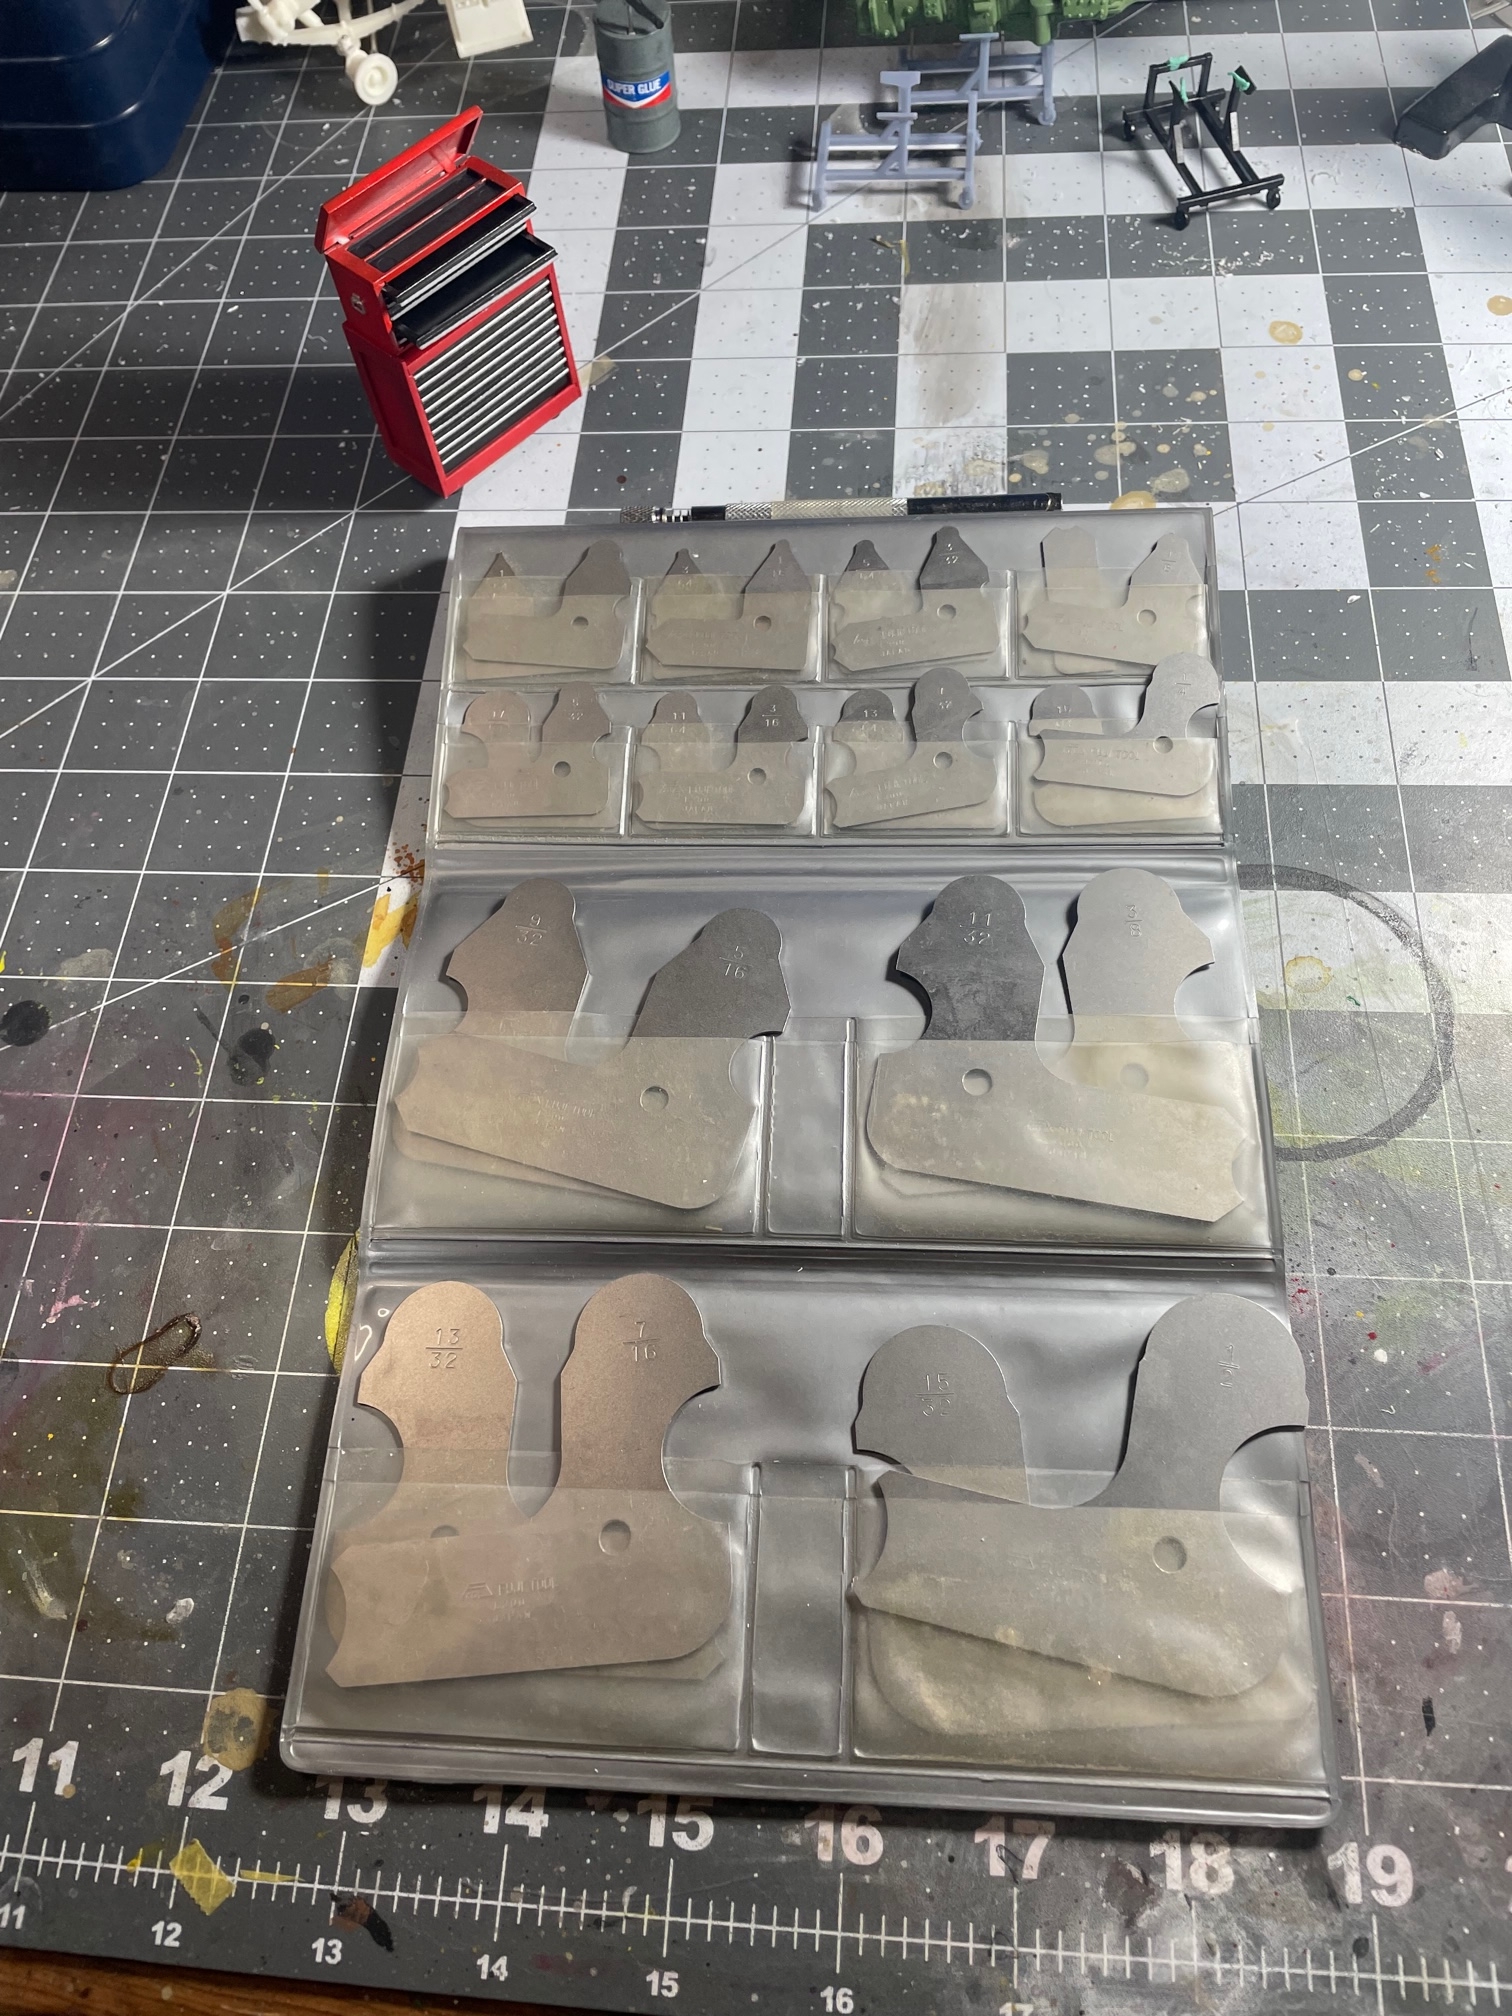
A set of machinists radius gauges comes in handy.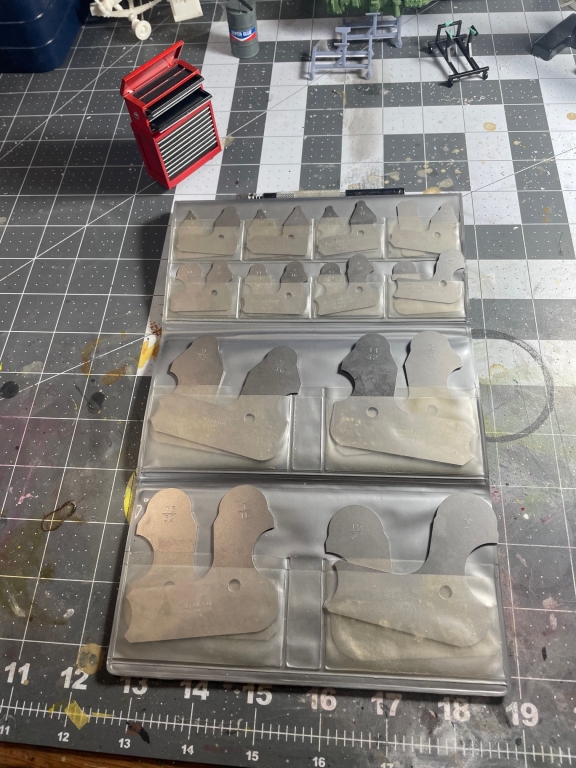
-
1
-
-
-
The air lines were quite problematic because they are Super Glue resistant. I tried to make them more pliable with a hair-dryer.

Holes were drilled into the trailer to simulate a hook-up.
Going to call this one done and move to the "showroom". Might add a few pics once I've finished a backdrop.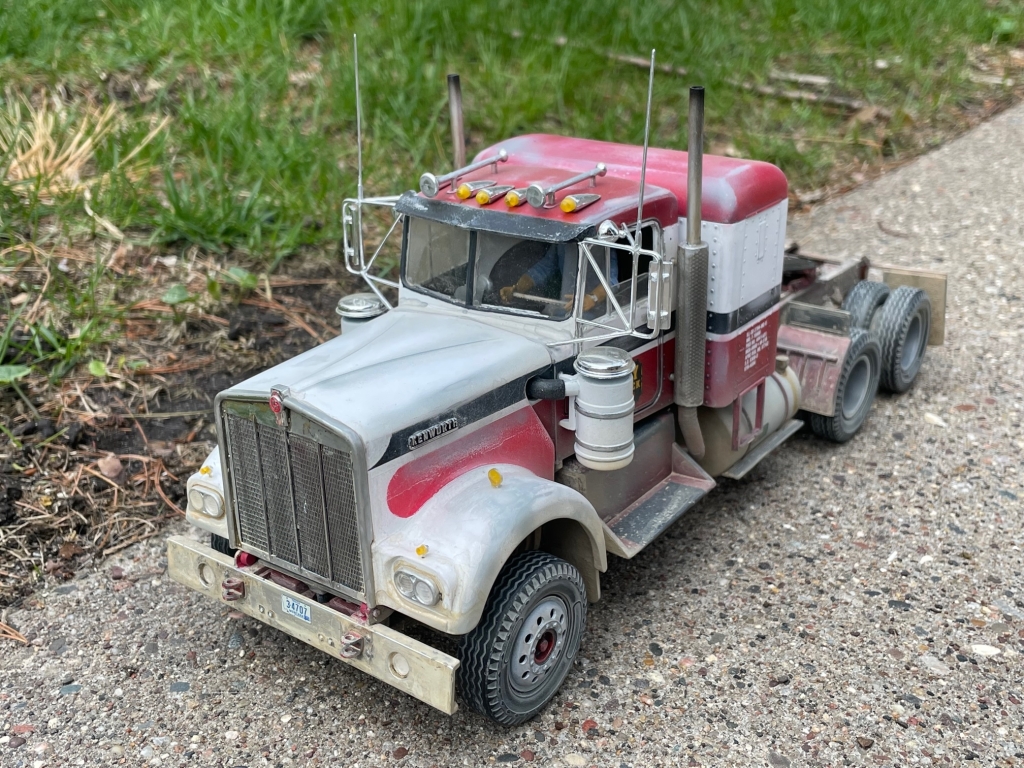
-
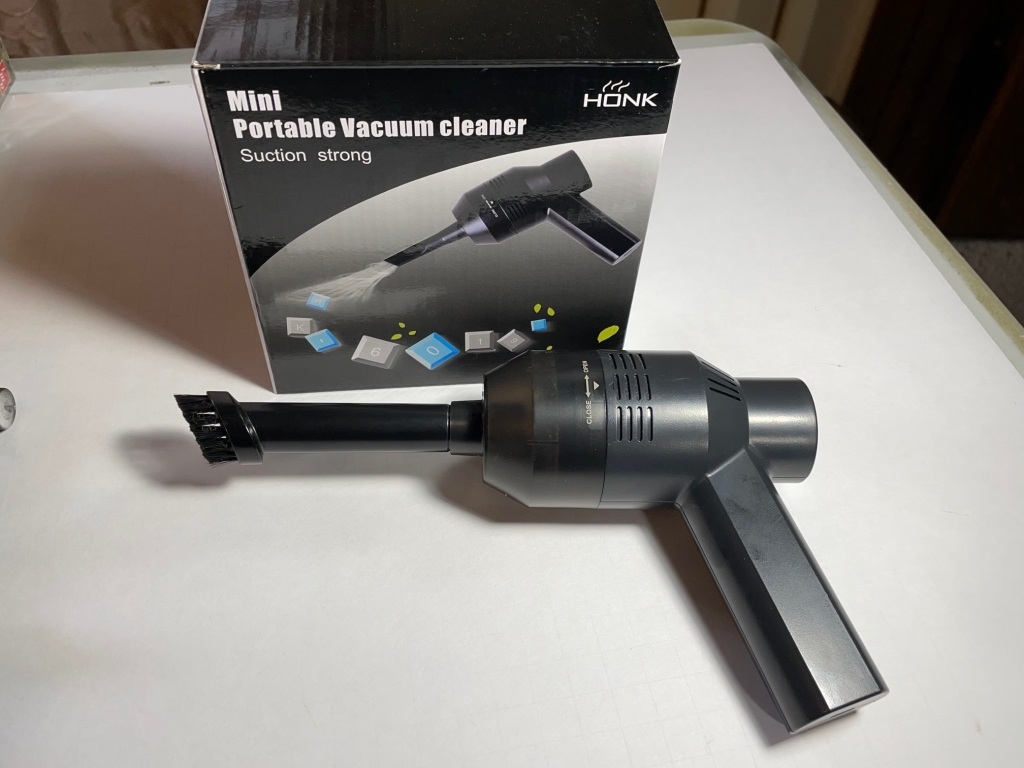
This mini-vacuum is the best $20 you will ever spend.
You can order it on Amazon. https://www.amazon.com/dp/B074SJLGXW?psc=1&ref=ppx_yo2ov_dt_b_product_details
As you know, building a model is full of challenges and one of them is keeping parts and the work area clean.
This little tool has just the right amount suction to gently remove the styrene dust and shavings that get everywhere.
I cannot recommend it enough.
It is always at my side.
-
 1
1
-
-
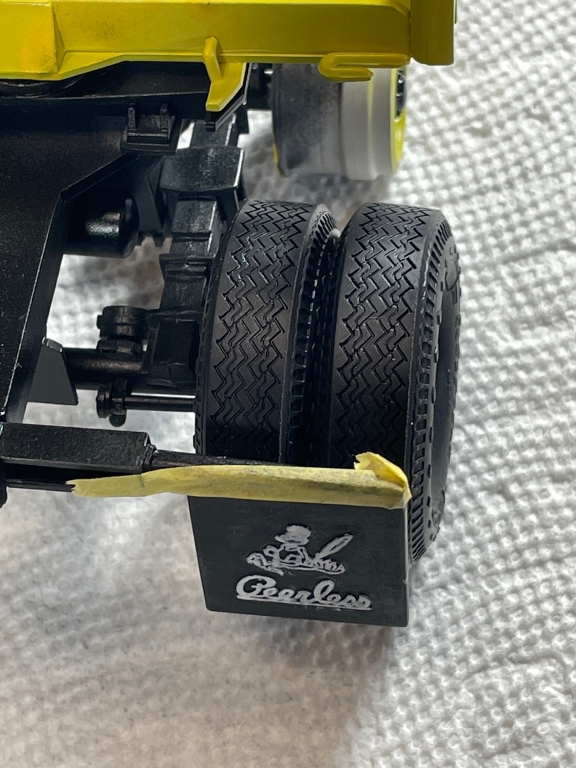
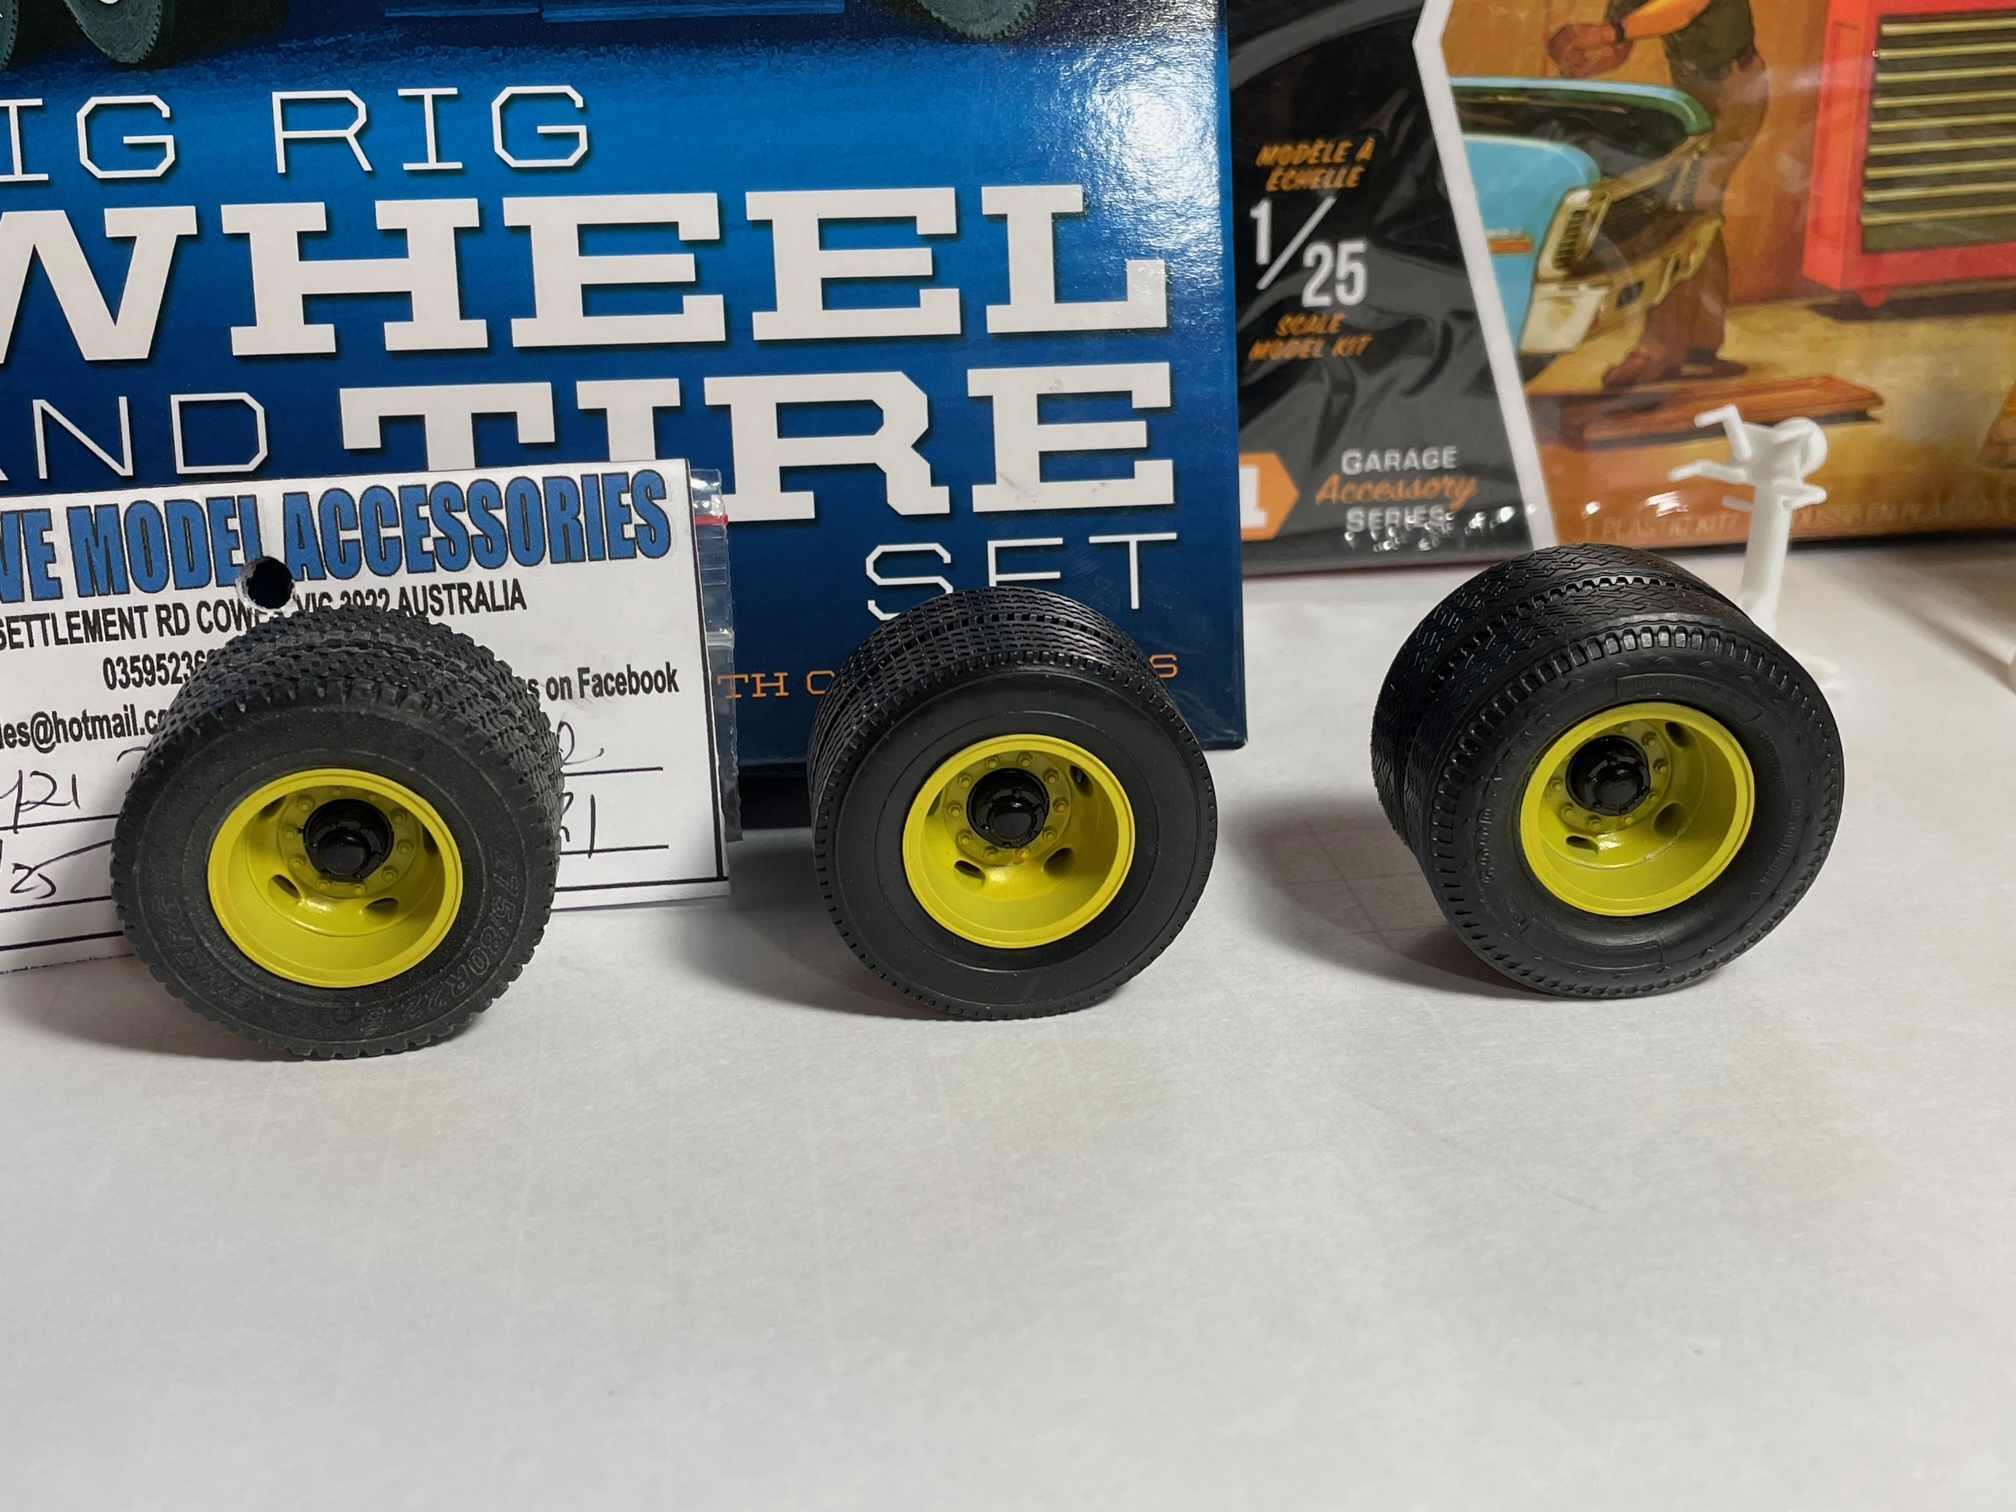
When I snapped an axle while removing a tire, I decided they were not up to snuff. Holes were drilled and new brass rod was installed.

Side by side comparison of tires.
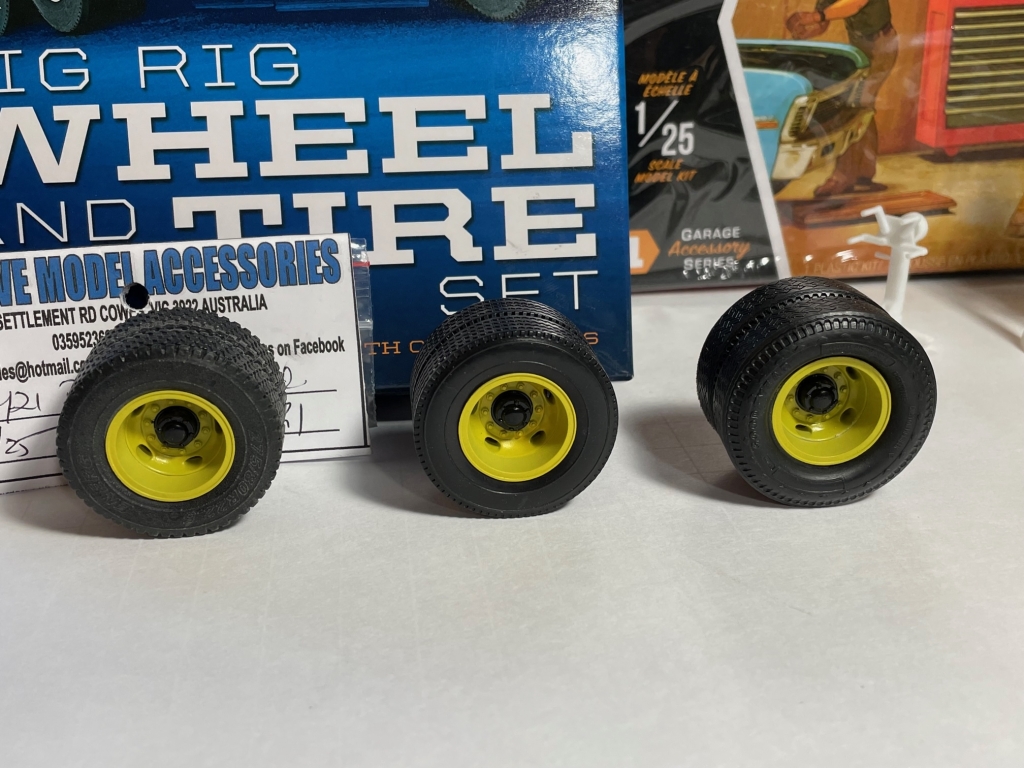
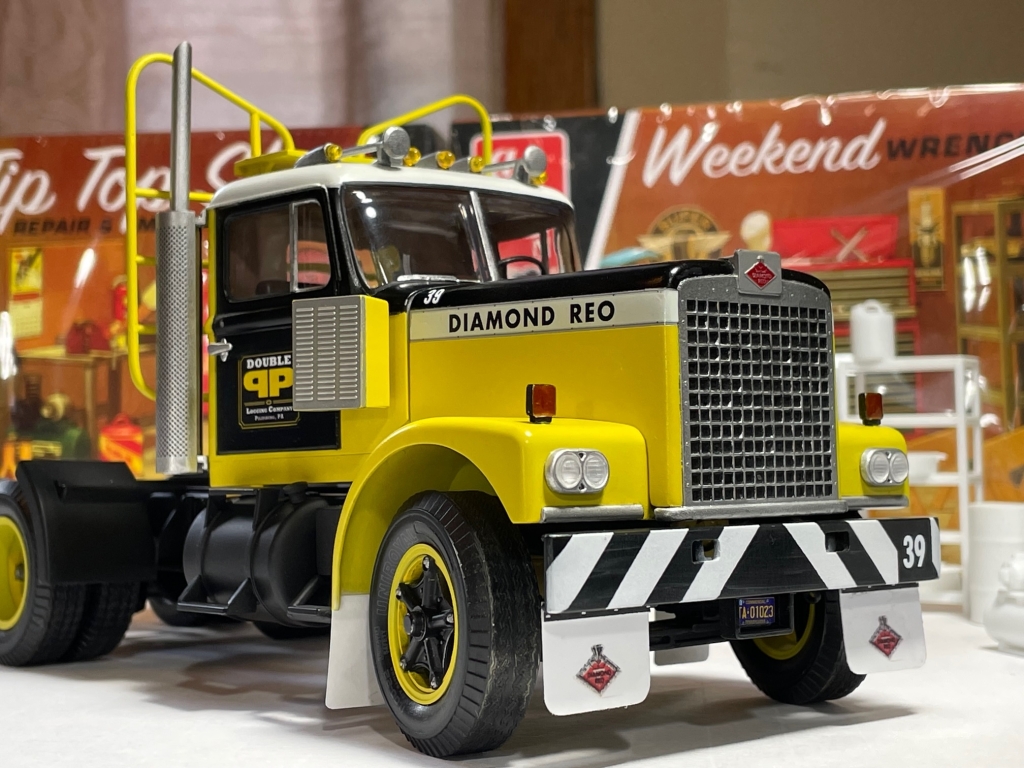
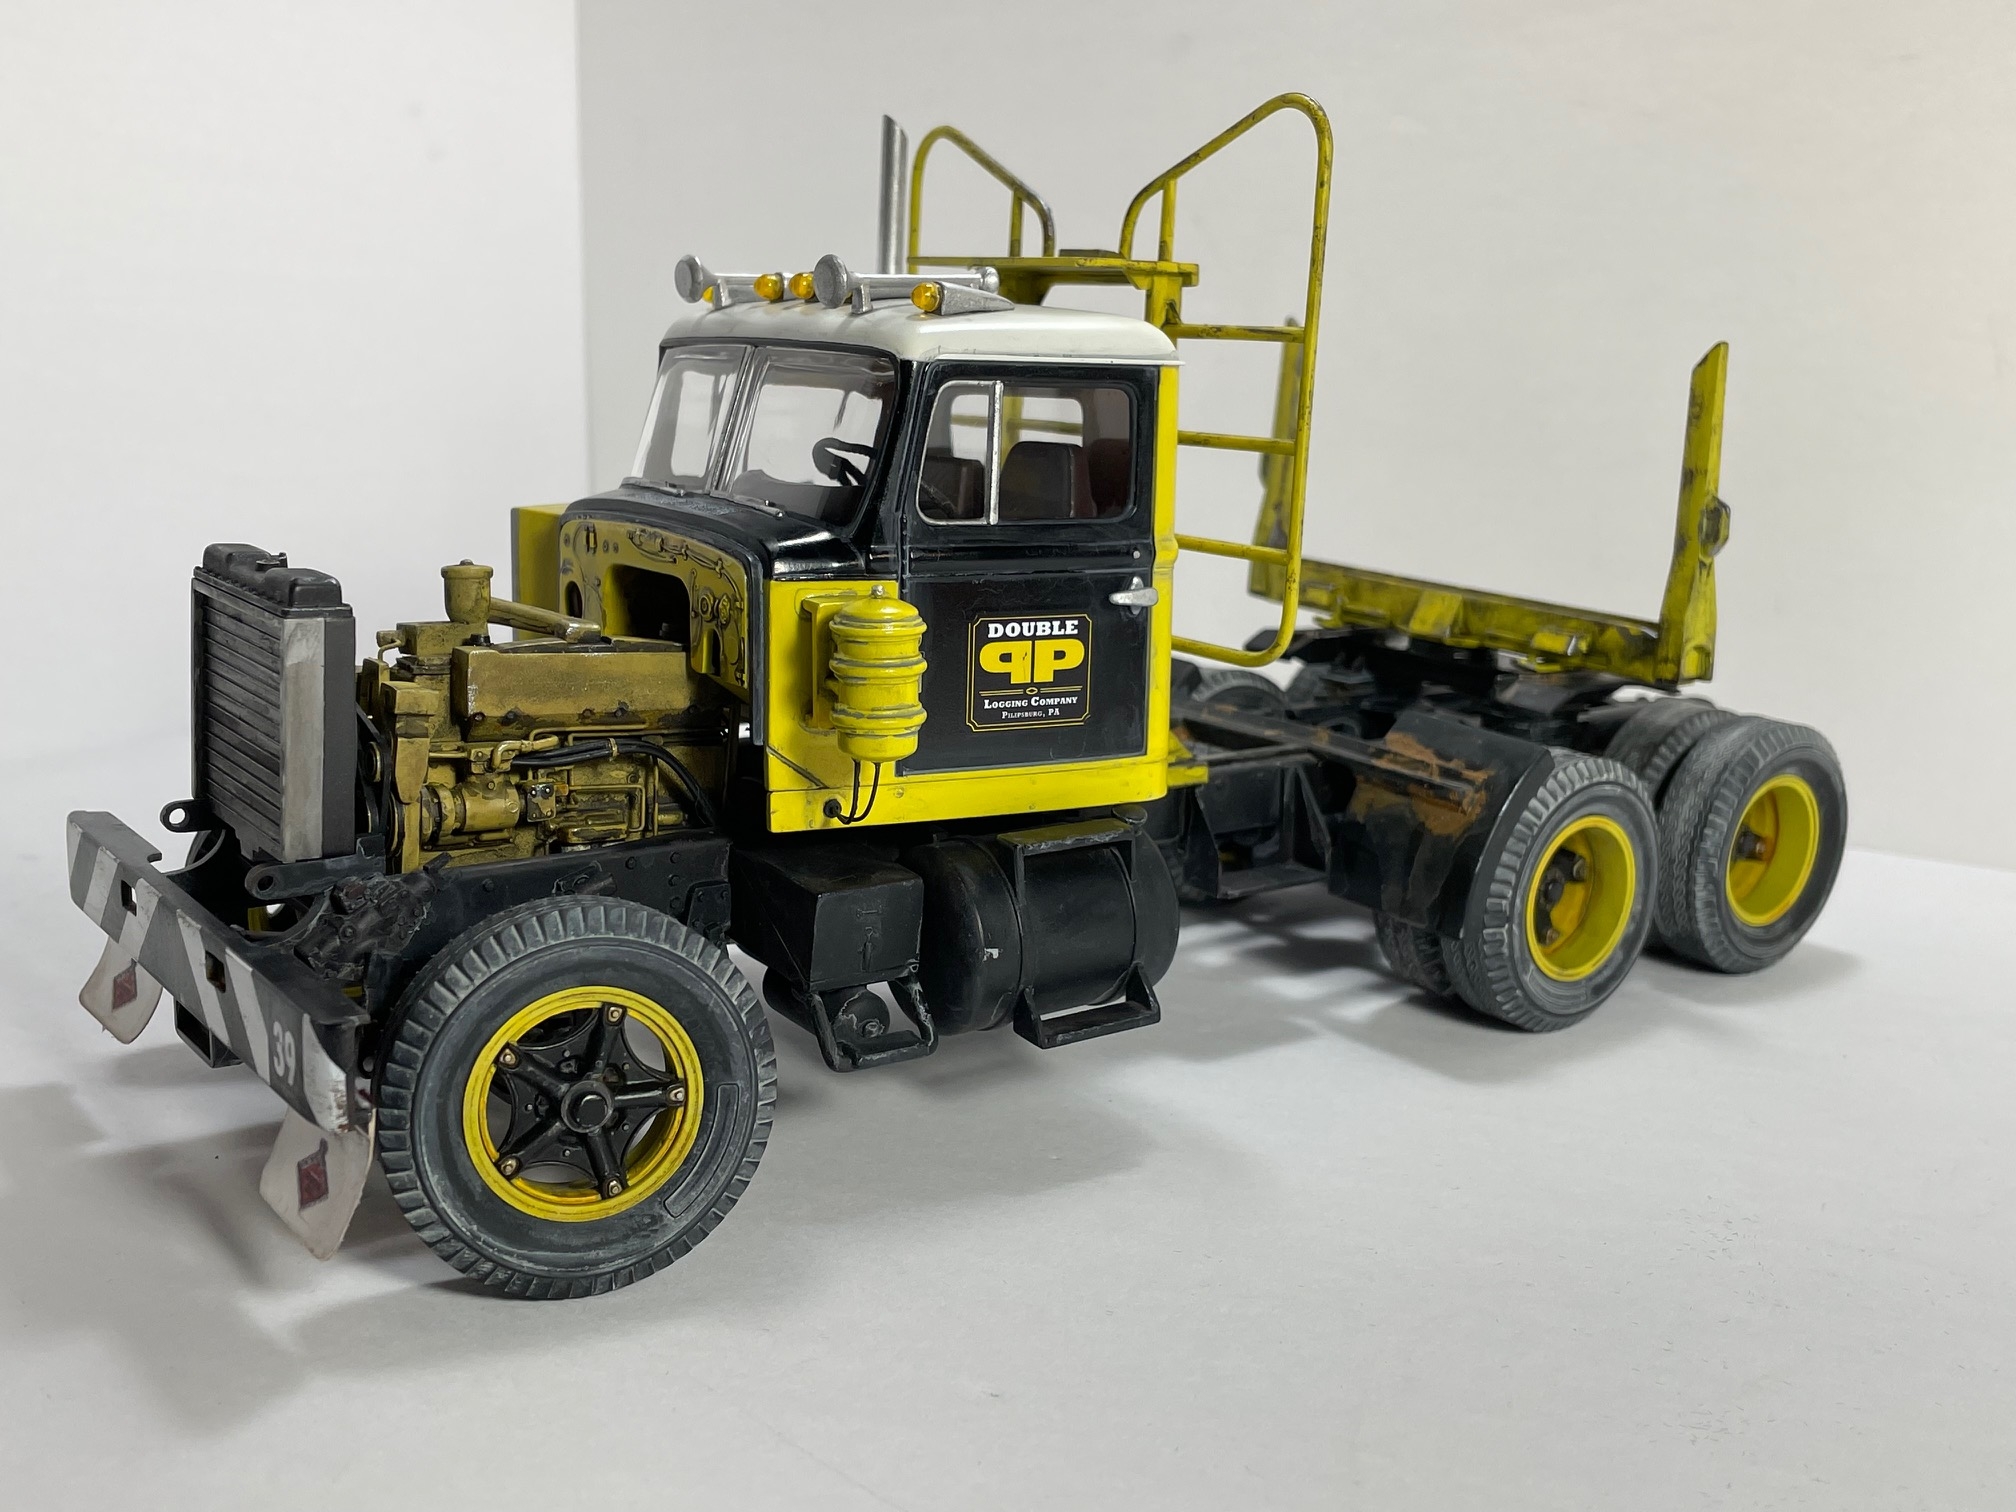
"Tip Top Shop" and "Weekend Wrenchin' " arrived by delivery. Replaced the exhaust stack with a photo etch and resin kit by Auslowe.
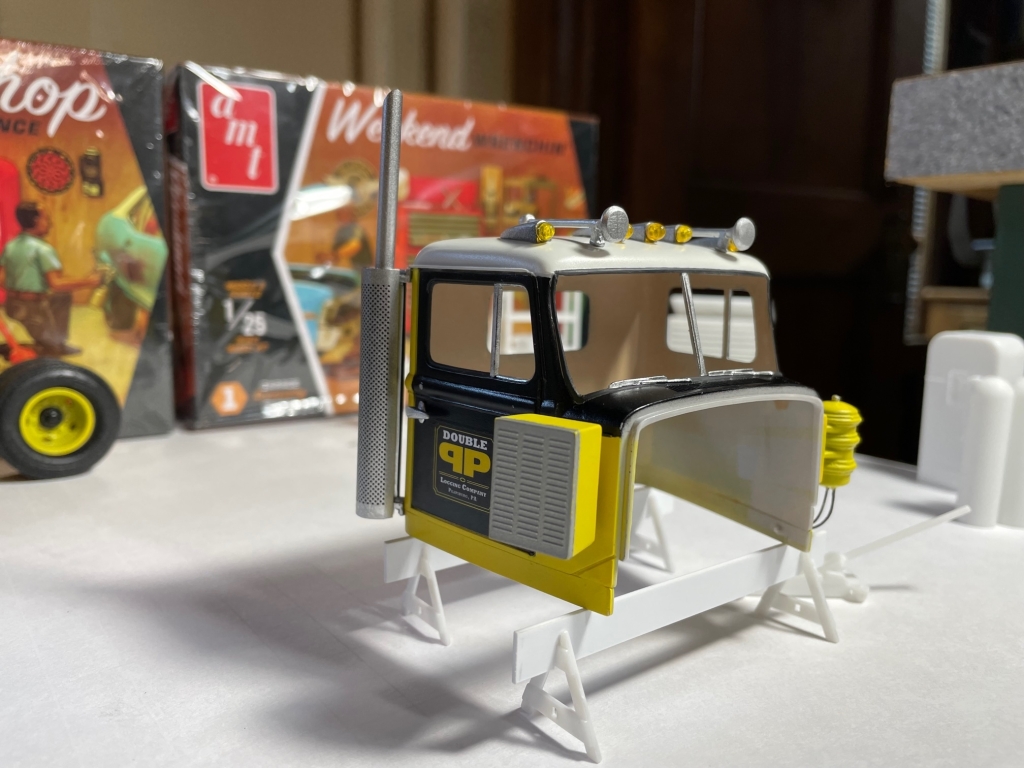
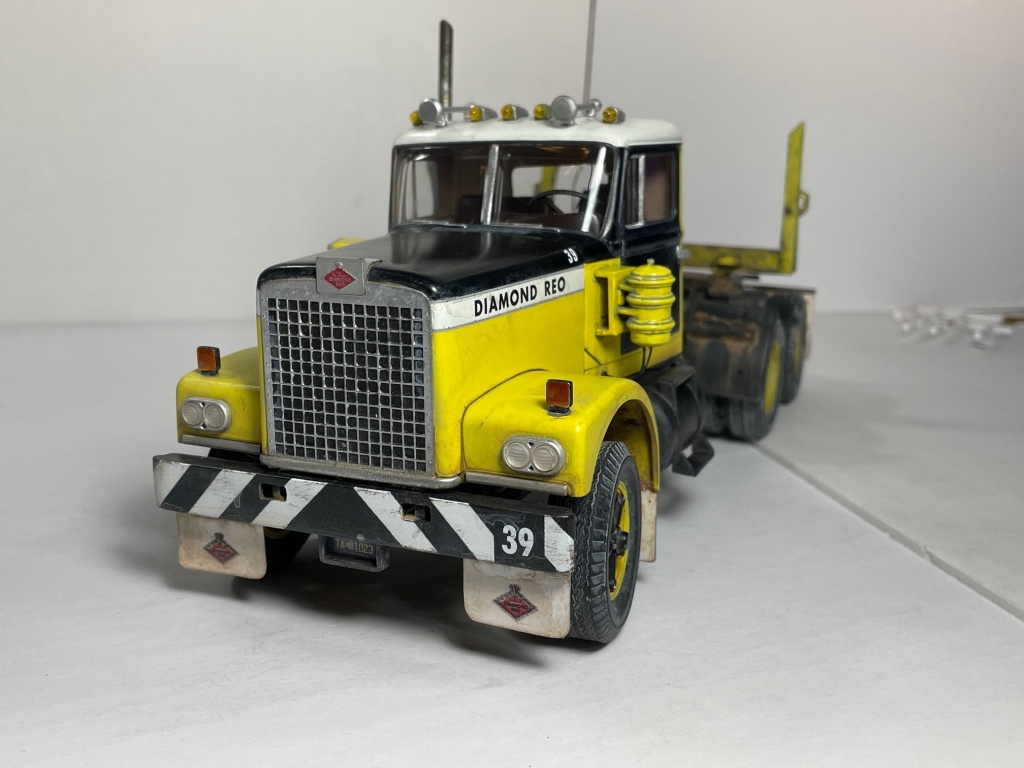
Details for the front bumper. This is now Double P Logging Company truck #39.
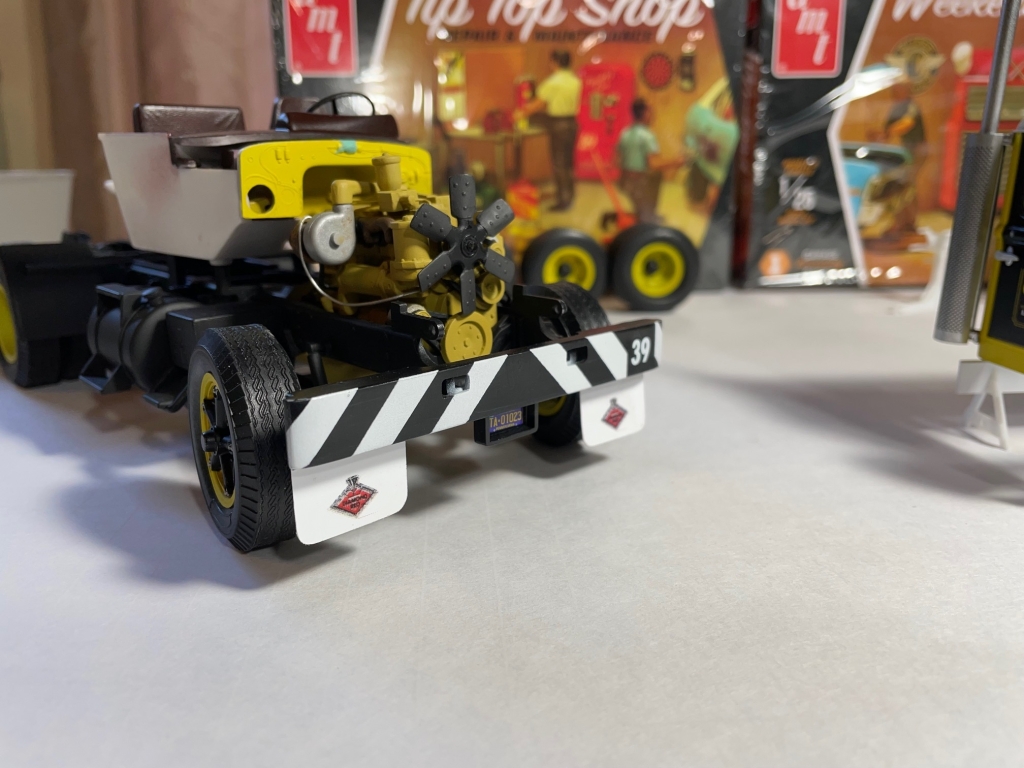
How the colors turned out is now easy to see. A few details lefts, and it will be done .
The question is "do I leave it clean?" Is this the end, or the start?
-
6 days on the road and I'm gonna make it home... tonight.
-
May I ask were you got the wheels/tires ?
-
7'6" 1/24 scale "Mike Barrington" had to have shoulder surgery (both), lose 50lbs from his back side, and both feet amputated in order to fit inside.
I was feeling miffed, so it was done without anesthesia.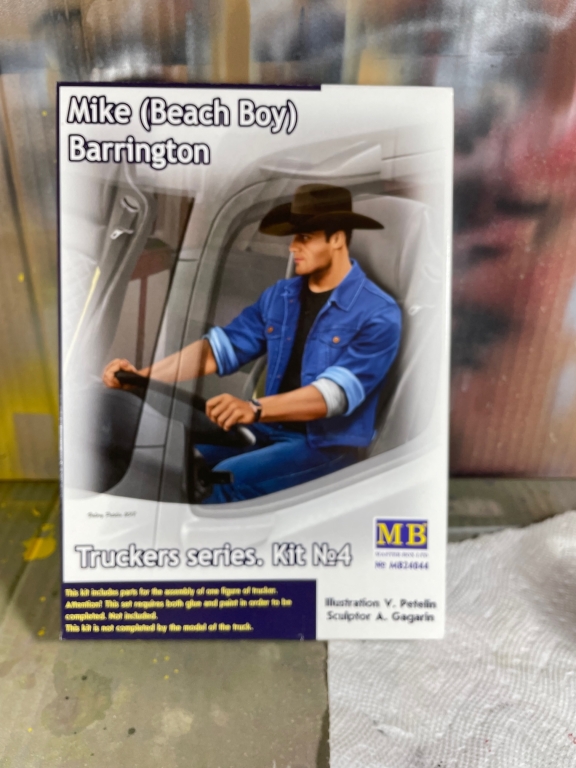
-
1
-
-
The KW-925 is nearing the finish line.
5th wheel grease is Tamiya gray putty applied with a toothpick and then painted 50:50 X-1 black and X-9 brown.
Not sure how to make the trailer air line hang "naturally". I want to keep this kit "stock".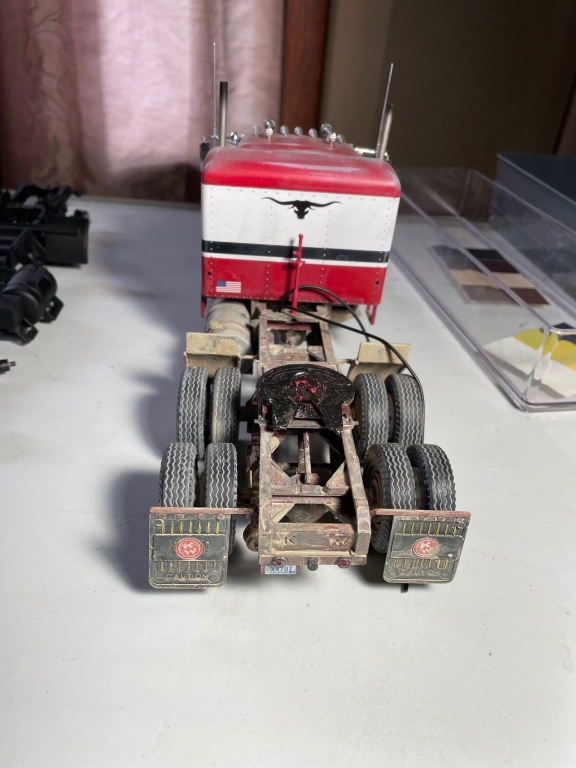
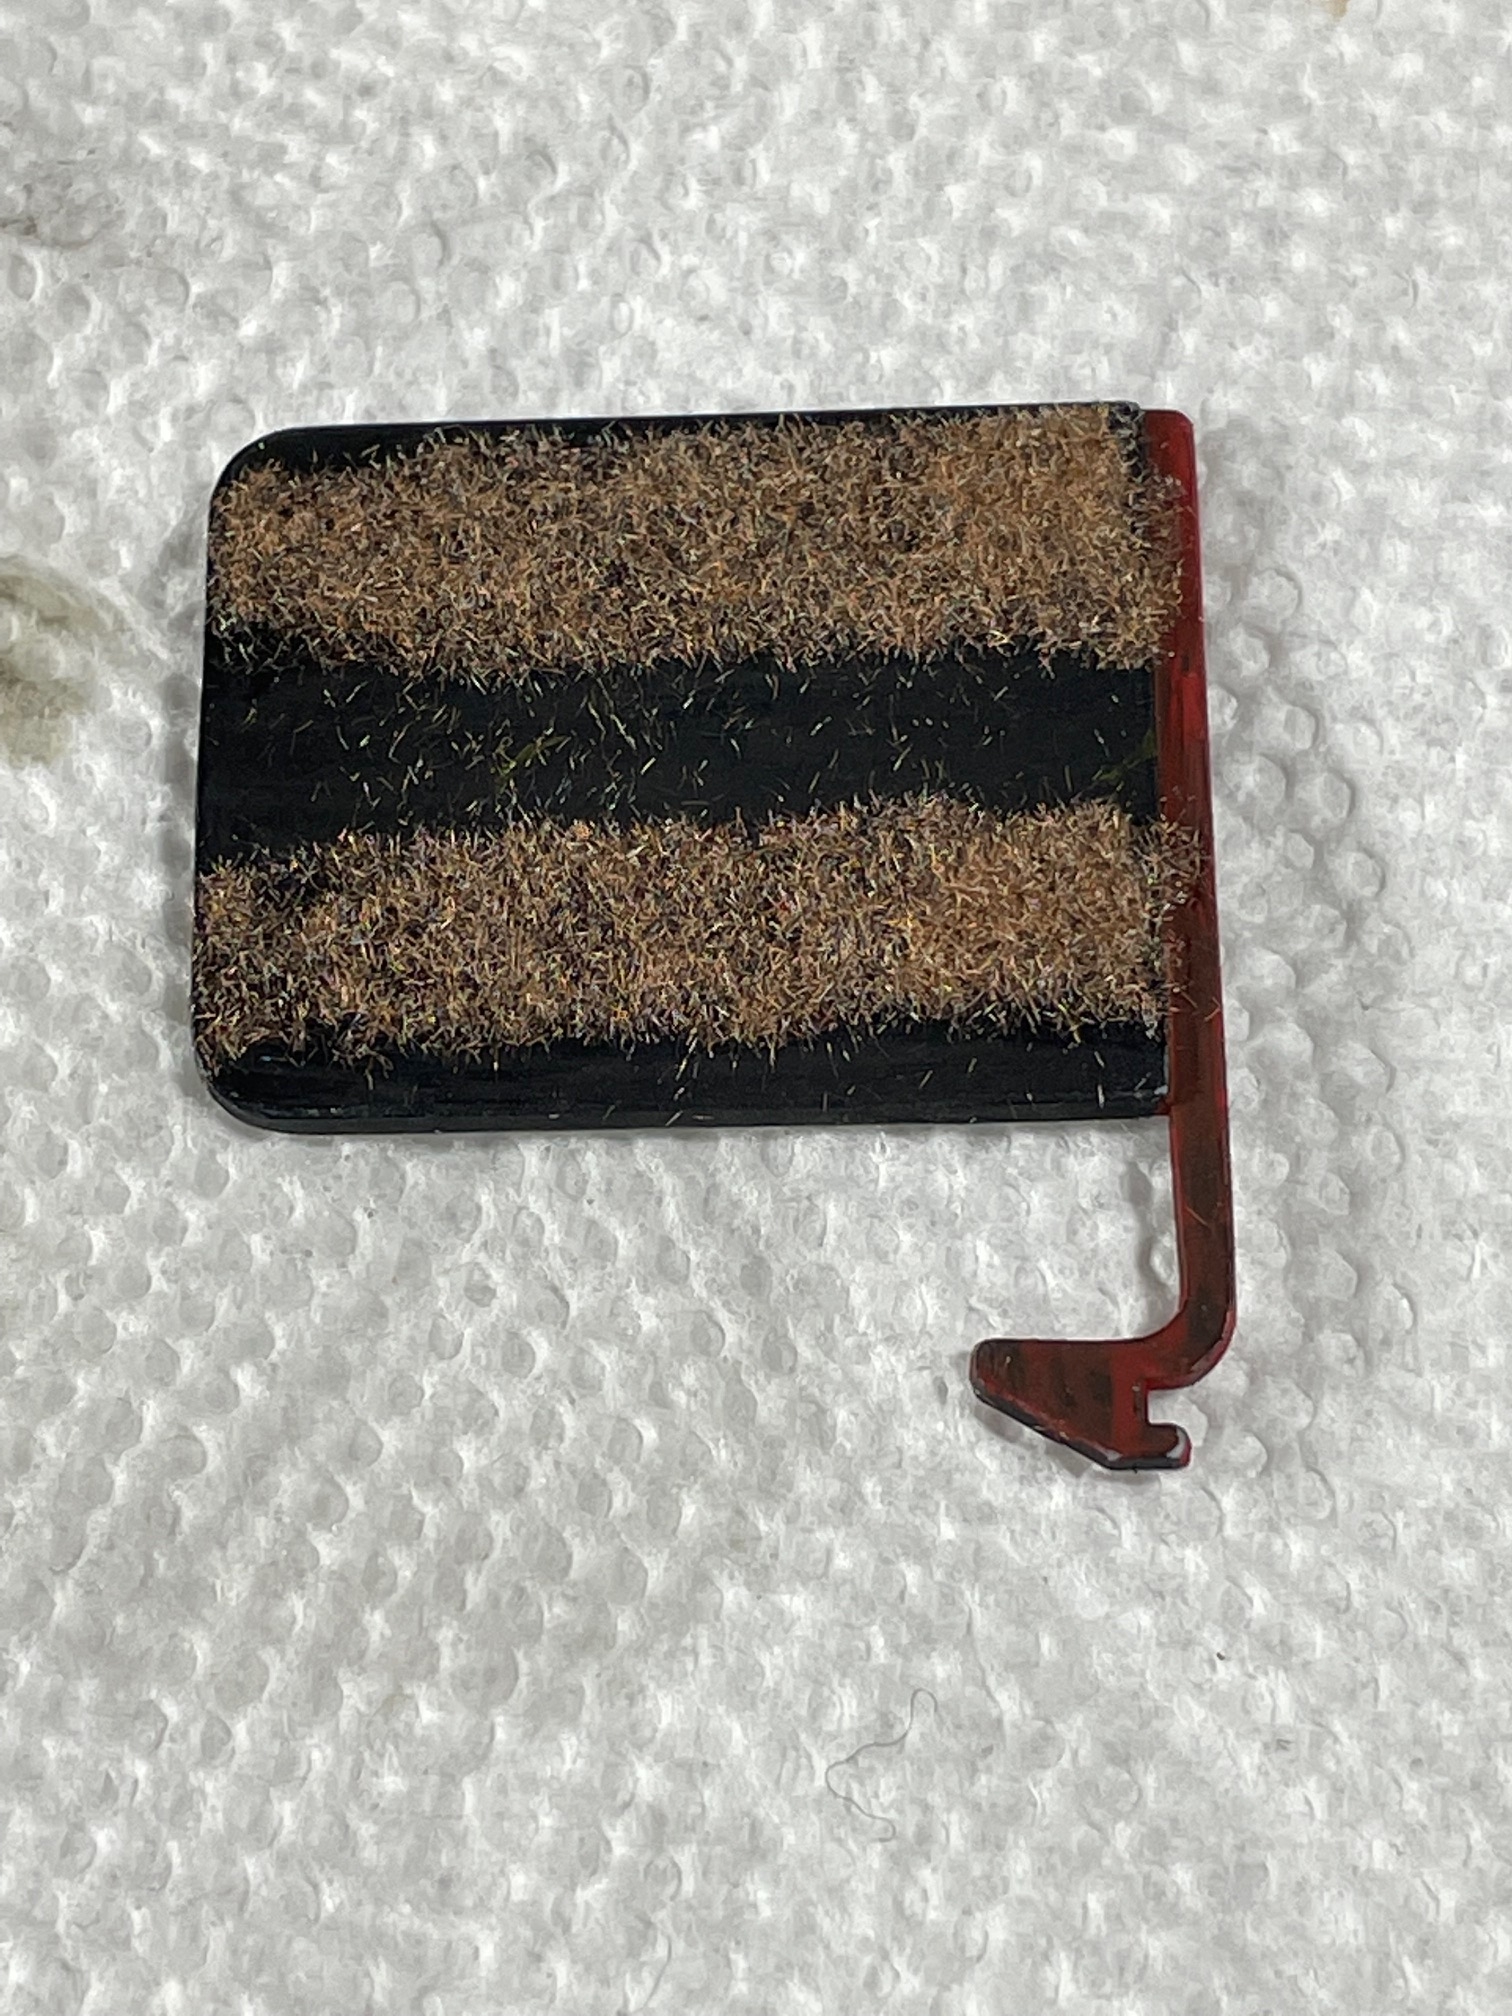
A bit of texture for gravel and mud splash was done with flocking and paint.

-
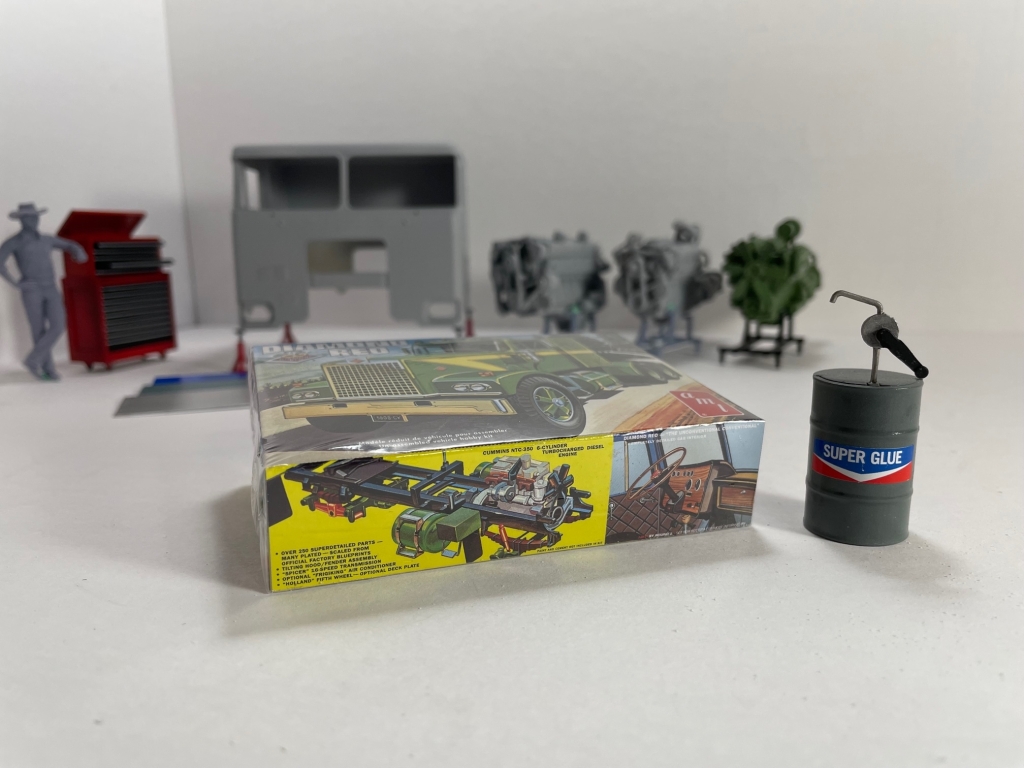
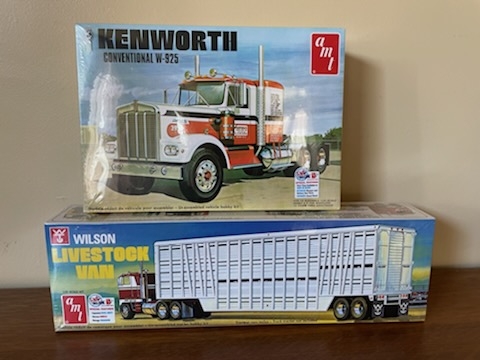
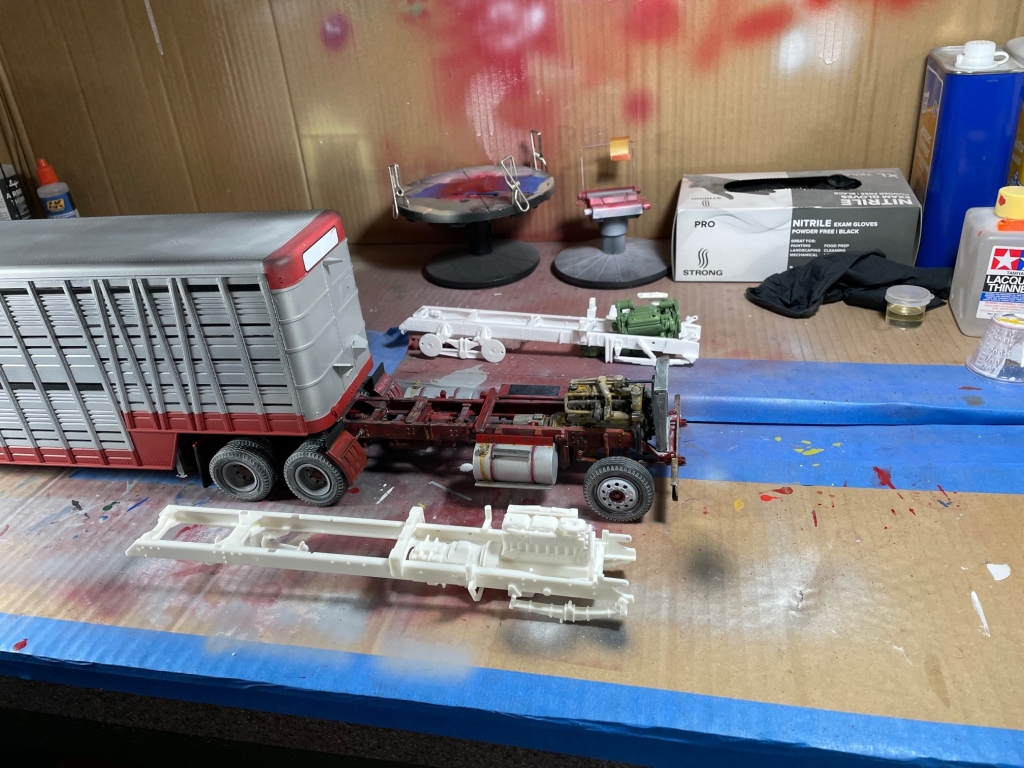
Kit #2:
My ambition is to build most of the AMT truck kits to get a feel for how to go from start to finish, learn the common techniques, and to also find which AMT kit will become my favorite.
After I have a couple of builds under my belt, I hope to purchase several (3?) copies of the "chosen" subject and attempt some really advanced building.
My hope is to throw some really great paint, like a Peterbilt with a 6-color color scheme, polished, piano hinges, full plumbing and wiring, lights, maybe smoke(?).
It is ambitious. Time will tell.
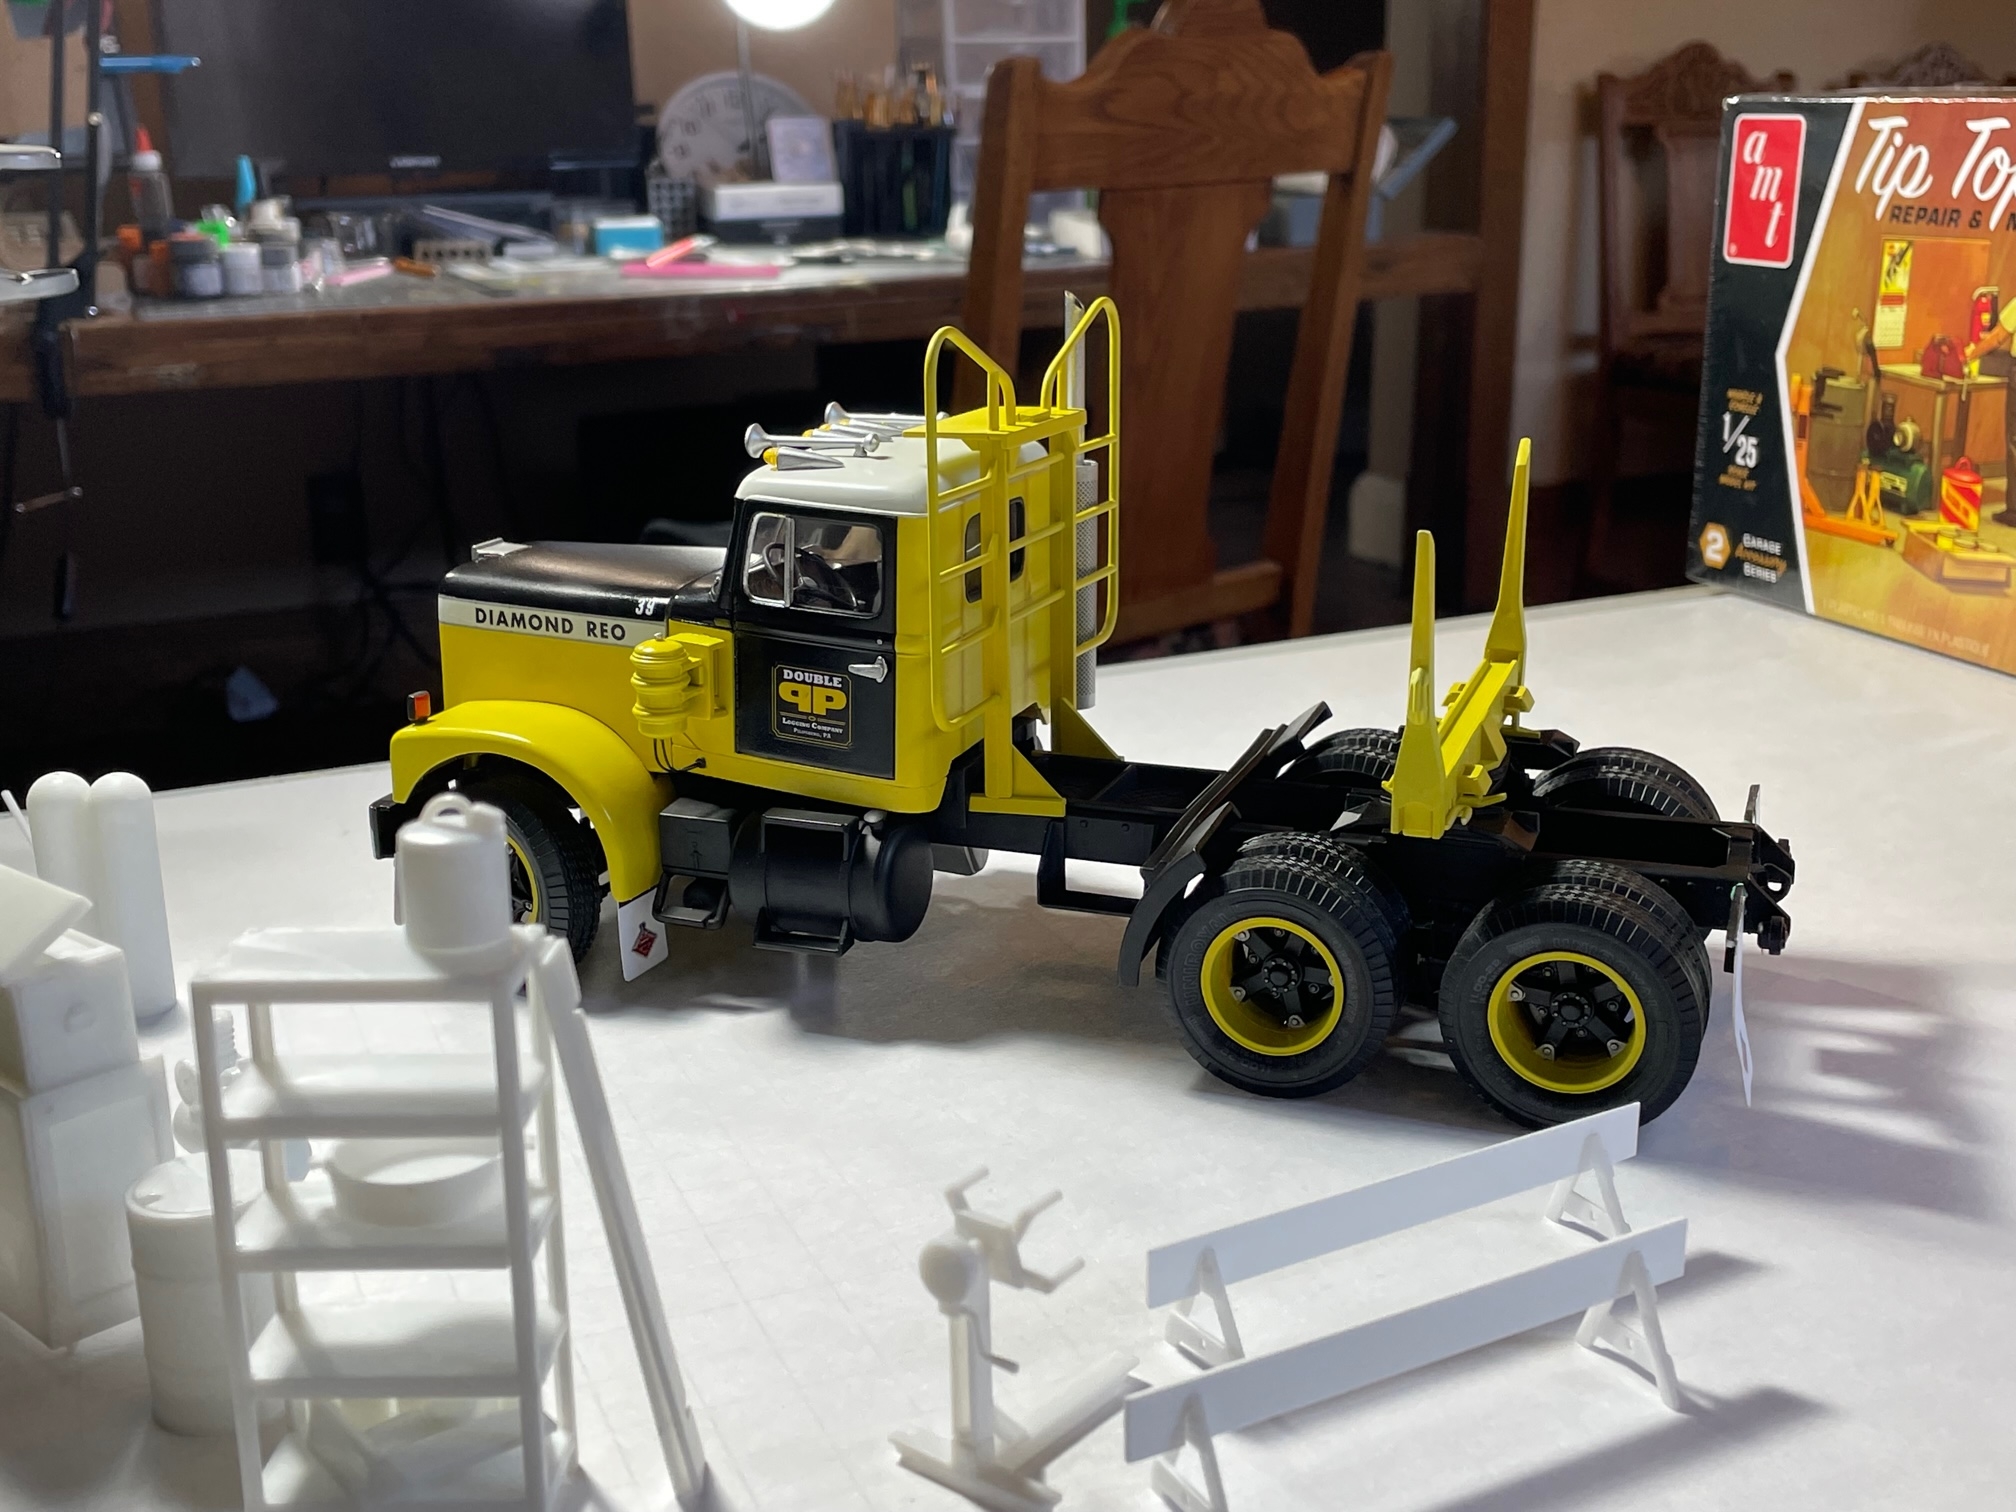
After test fitting the Diamond Reo, this will not be my chosen subject.
The kit has several big fails. The hood and rear axles are poorly fitted.
I have heard the "AMT Freightliner" also has major flaws ( I still want to build one).
The wheels and tires are nice. I will keep this in mind as a future donor kit.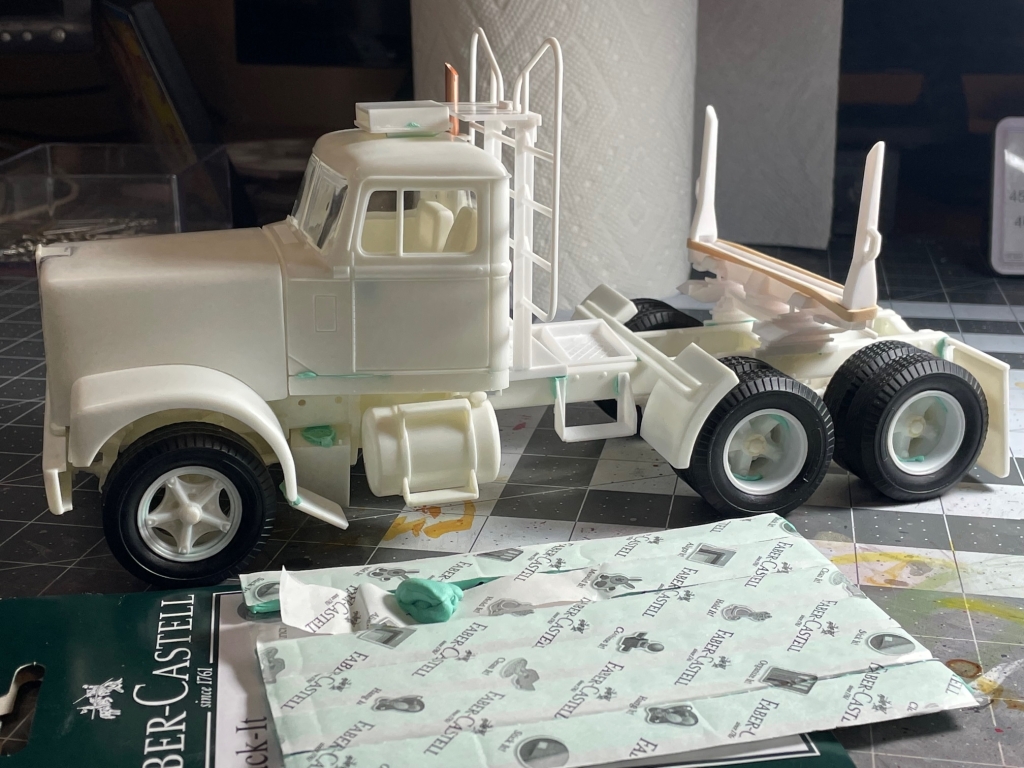
Satisfied with attempted plumbing of the engine. The hardest part was doing the research.
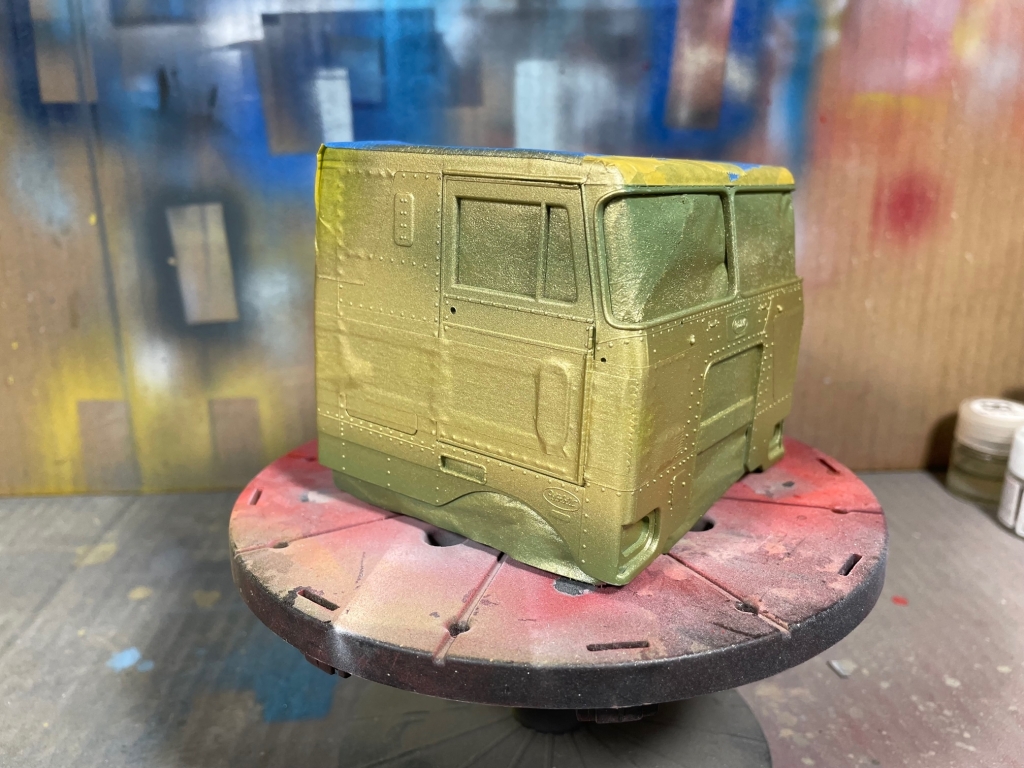
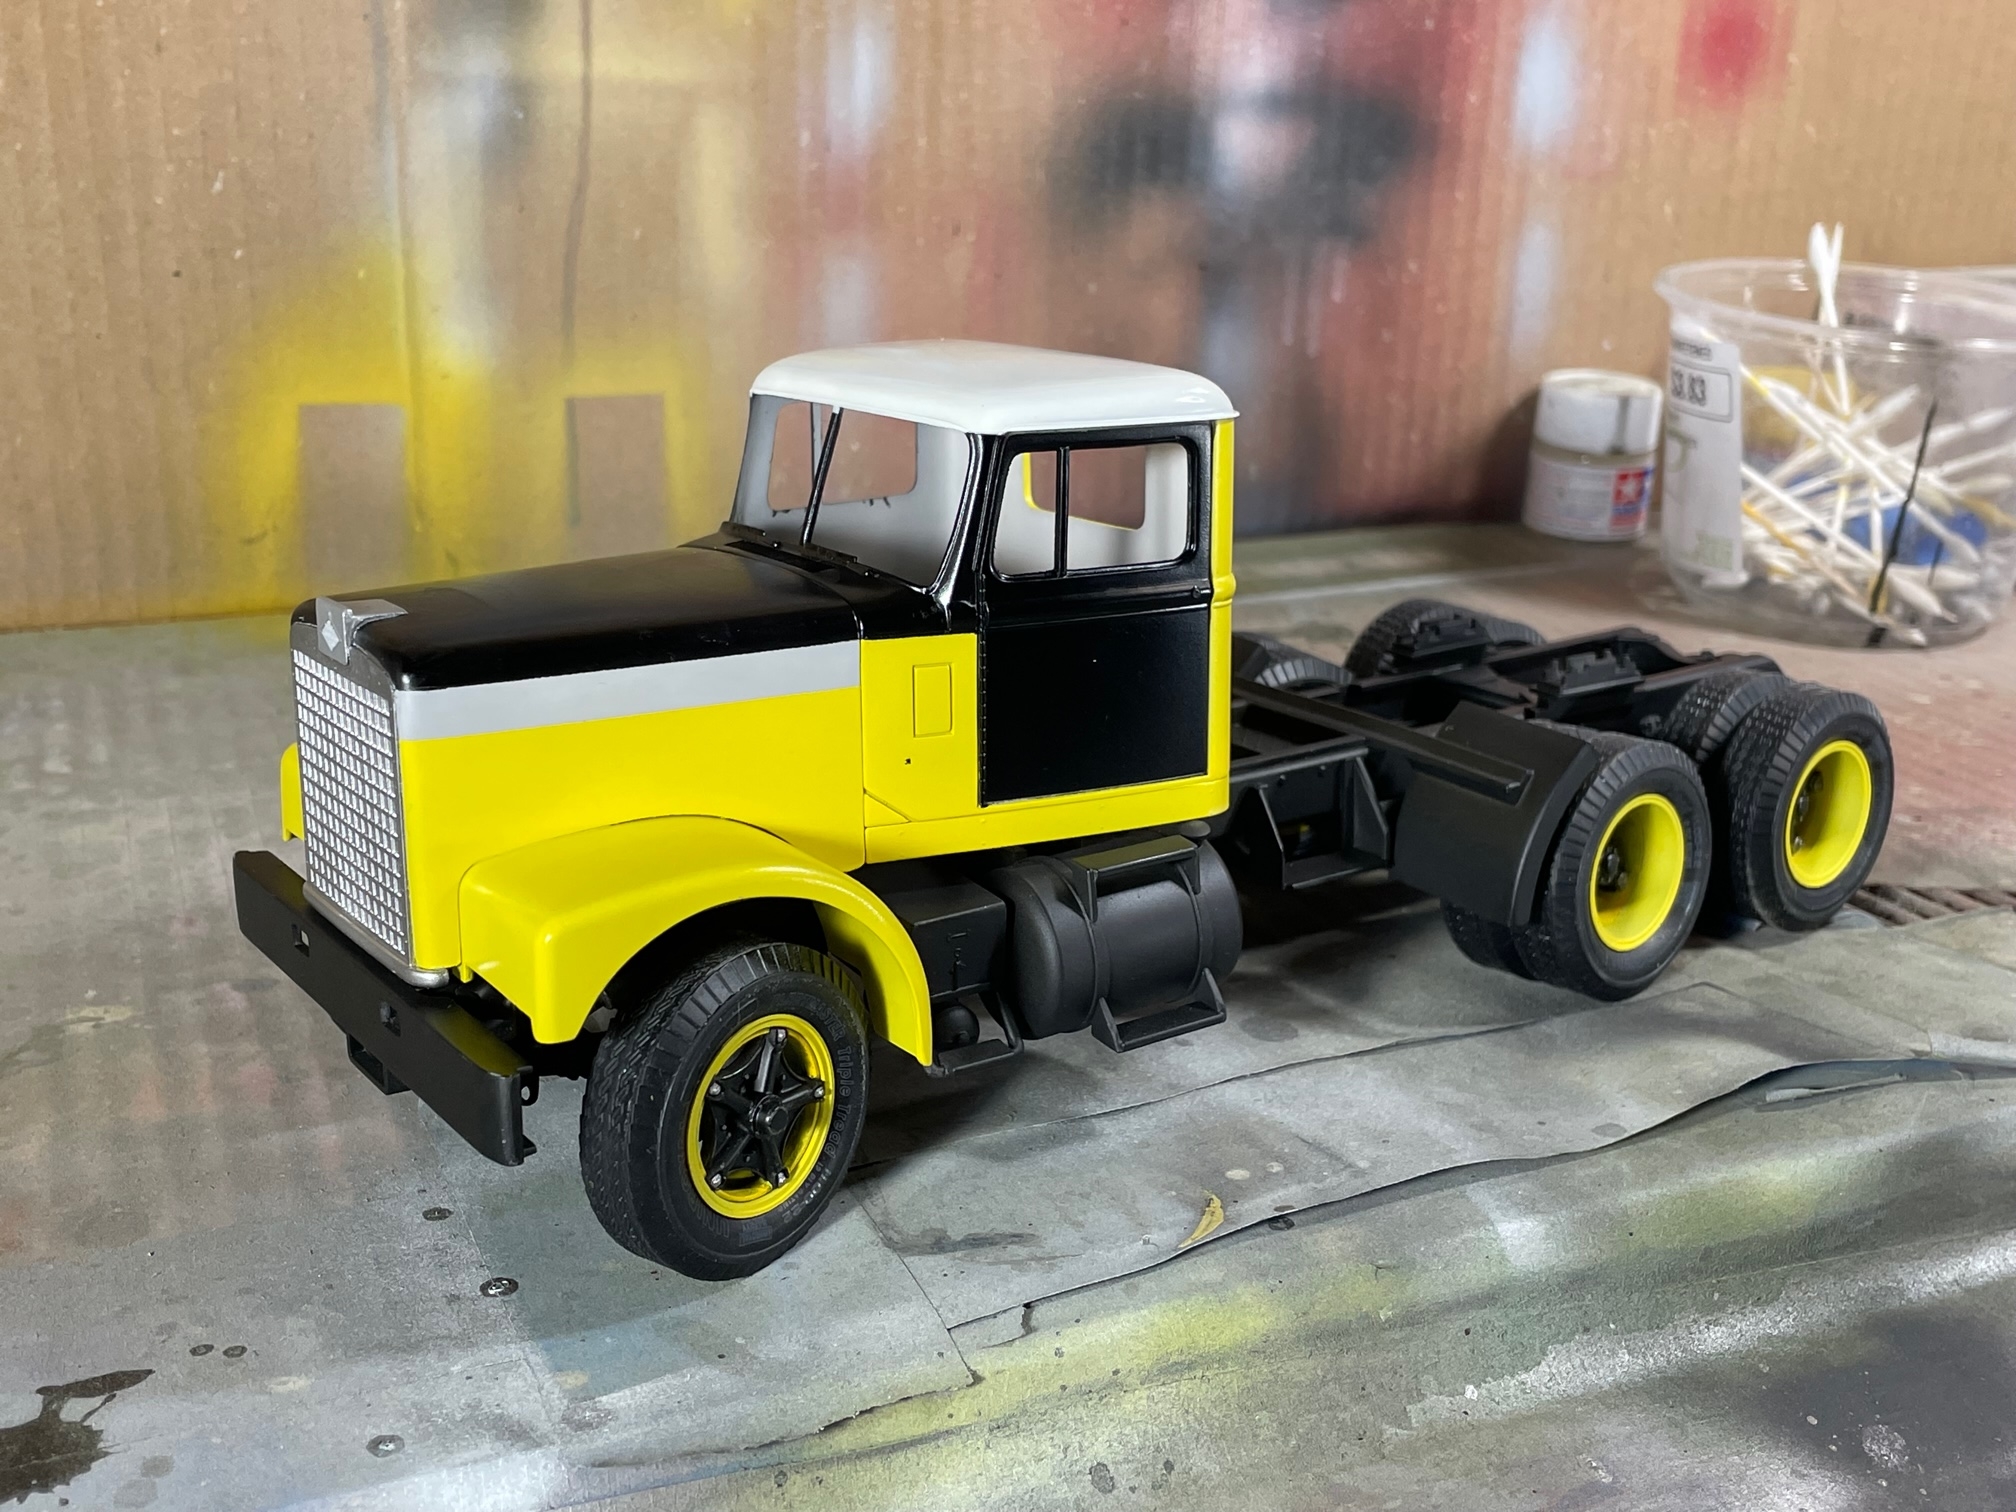
My son had mentioned that "getting the right color is everything". I didn't understand this at the time he said it, but do now.
My "Cummins Yellow" is a 50:50 mix X-8 Lemon Yellow: XF-88 Dark Yellow2 plus X-20A thinner for the gun.
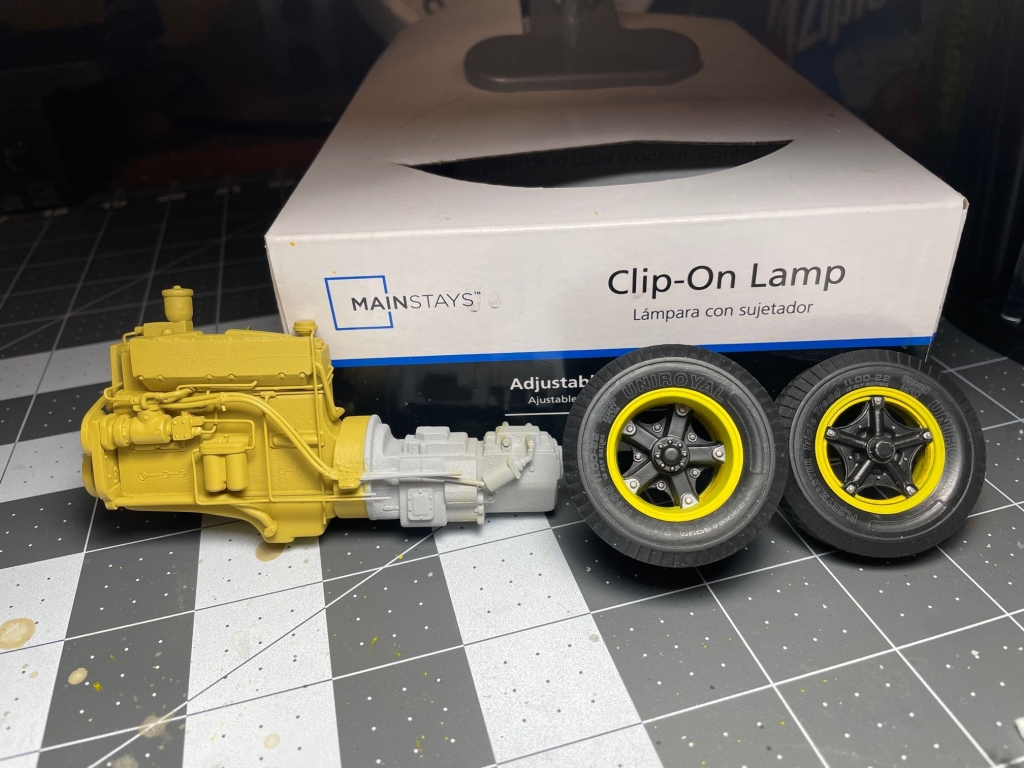
Doing some visual comparison of the kit mud flaps vs. an aftermarket part from Sour Kraut Model Trucks.
I'm going to use the aftermarkets because the kit mudguards are unusable with a tilting hood.
https://www.sourkrautsmodeltrucks.net/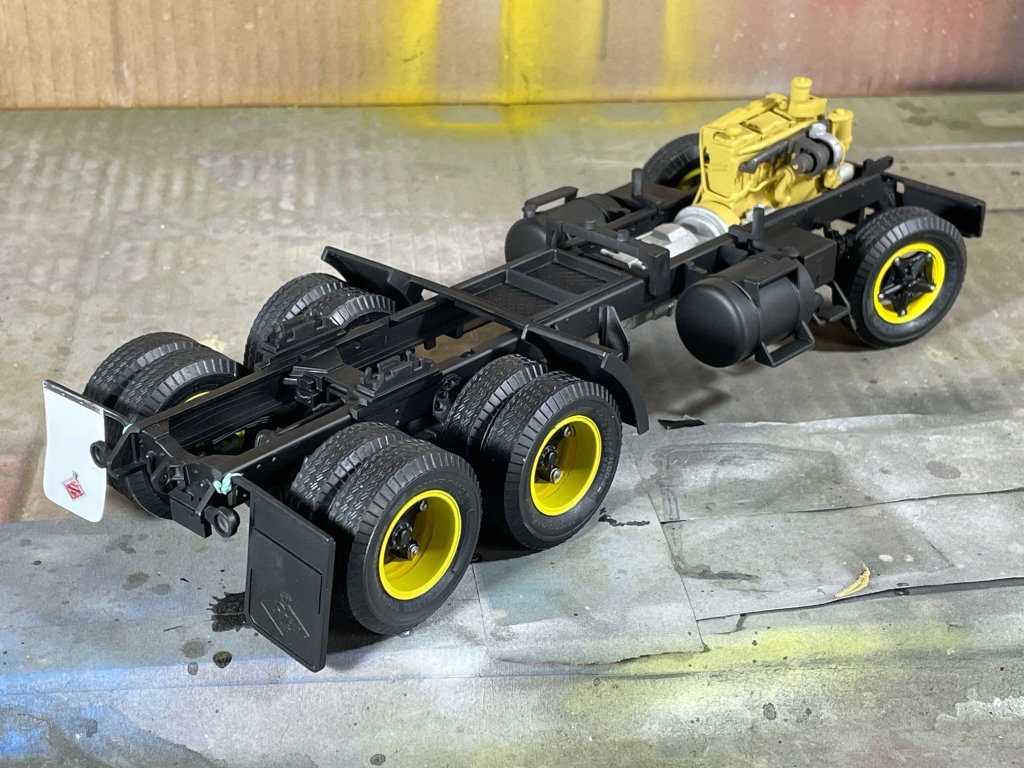
Began to question my color choice. But am not willing to start over. I don't like this kit enough to care.
Will continue by "faith" that the decals along with some in-service weathering will rescue it.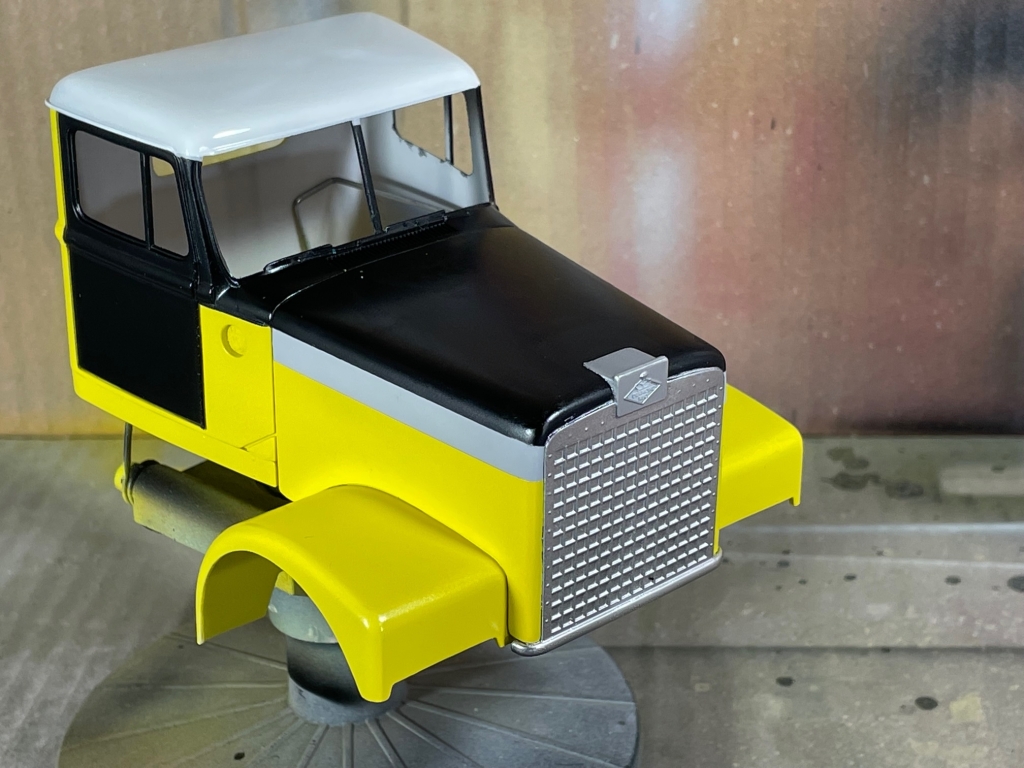
Dash and interior detail is "good enough" for under the over-thick glass canopy.

Not satisfied with the kit exhaust stack. Might replace with an aftermarket and scratch-built brackets.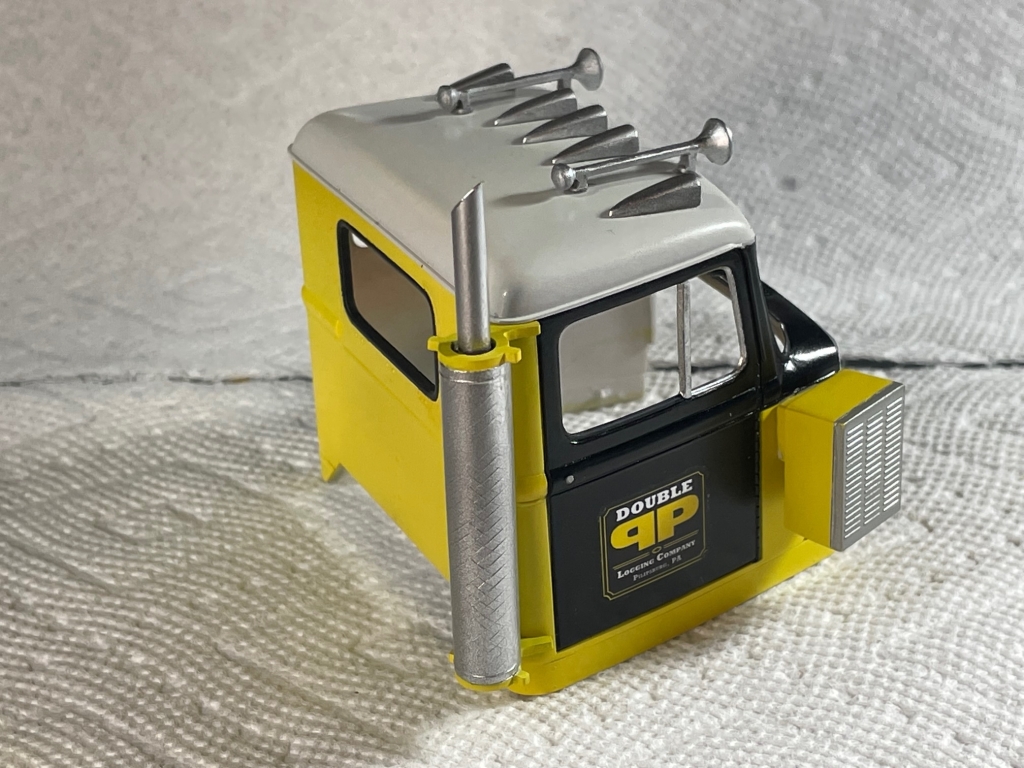
Also suspect the AMT trailer tires are over-sized.
-
-
That's a real bitchin' ride ! I love the "for sale" sign, it gives the model "life".
I find the mirror brackets and brake cylinder lines impressive, along with the heater hose.
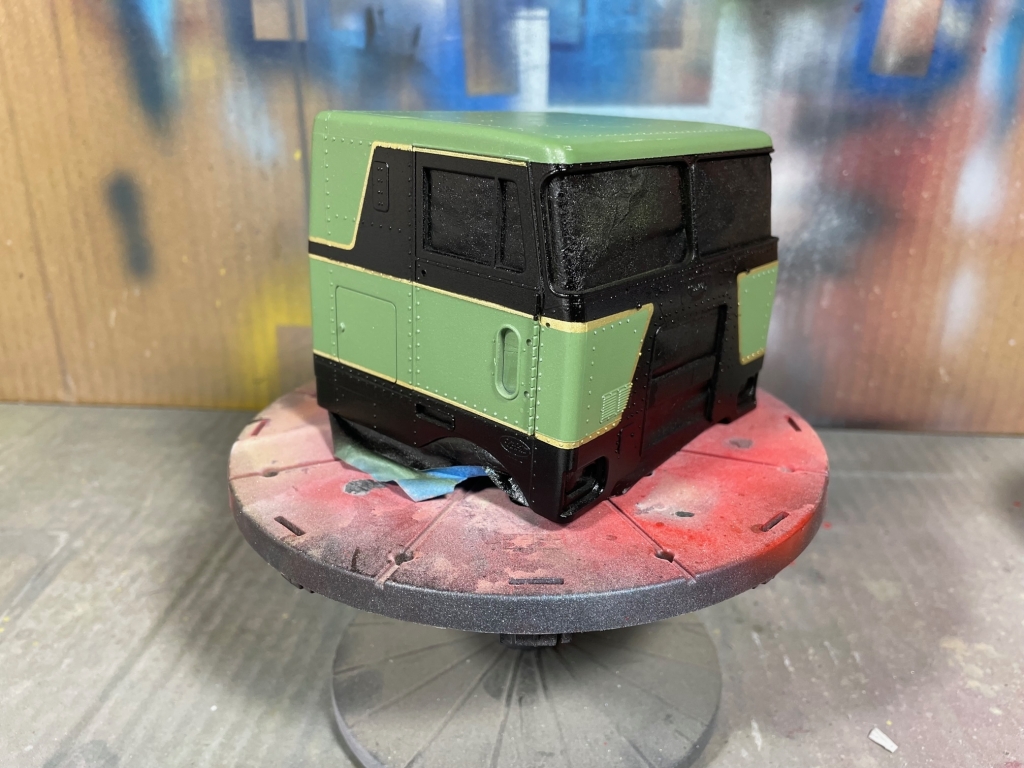
Color really fits the era (imo).
And look at the iconic air (oil bath ?) cleaner... -
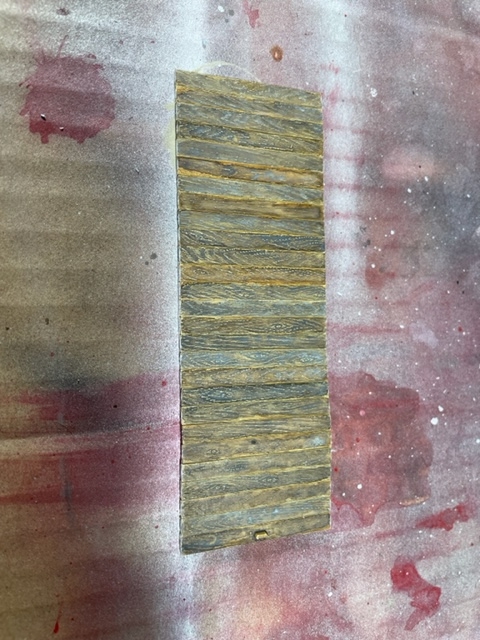
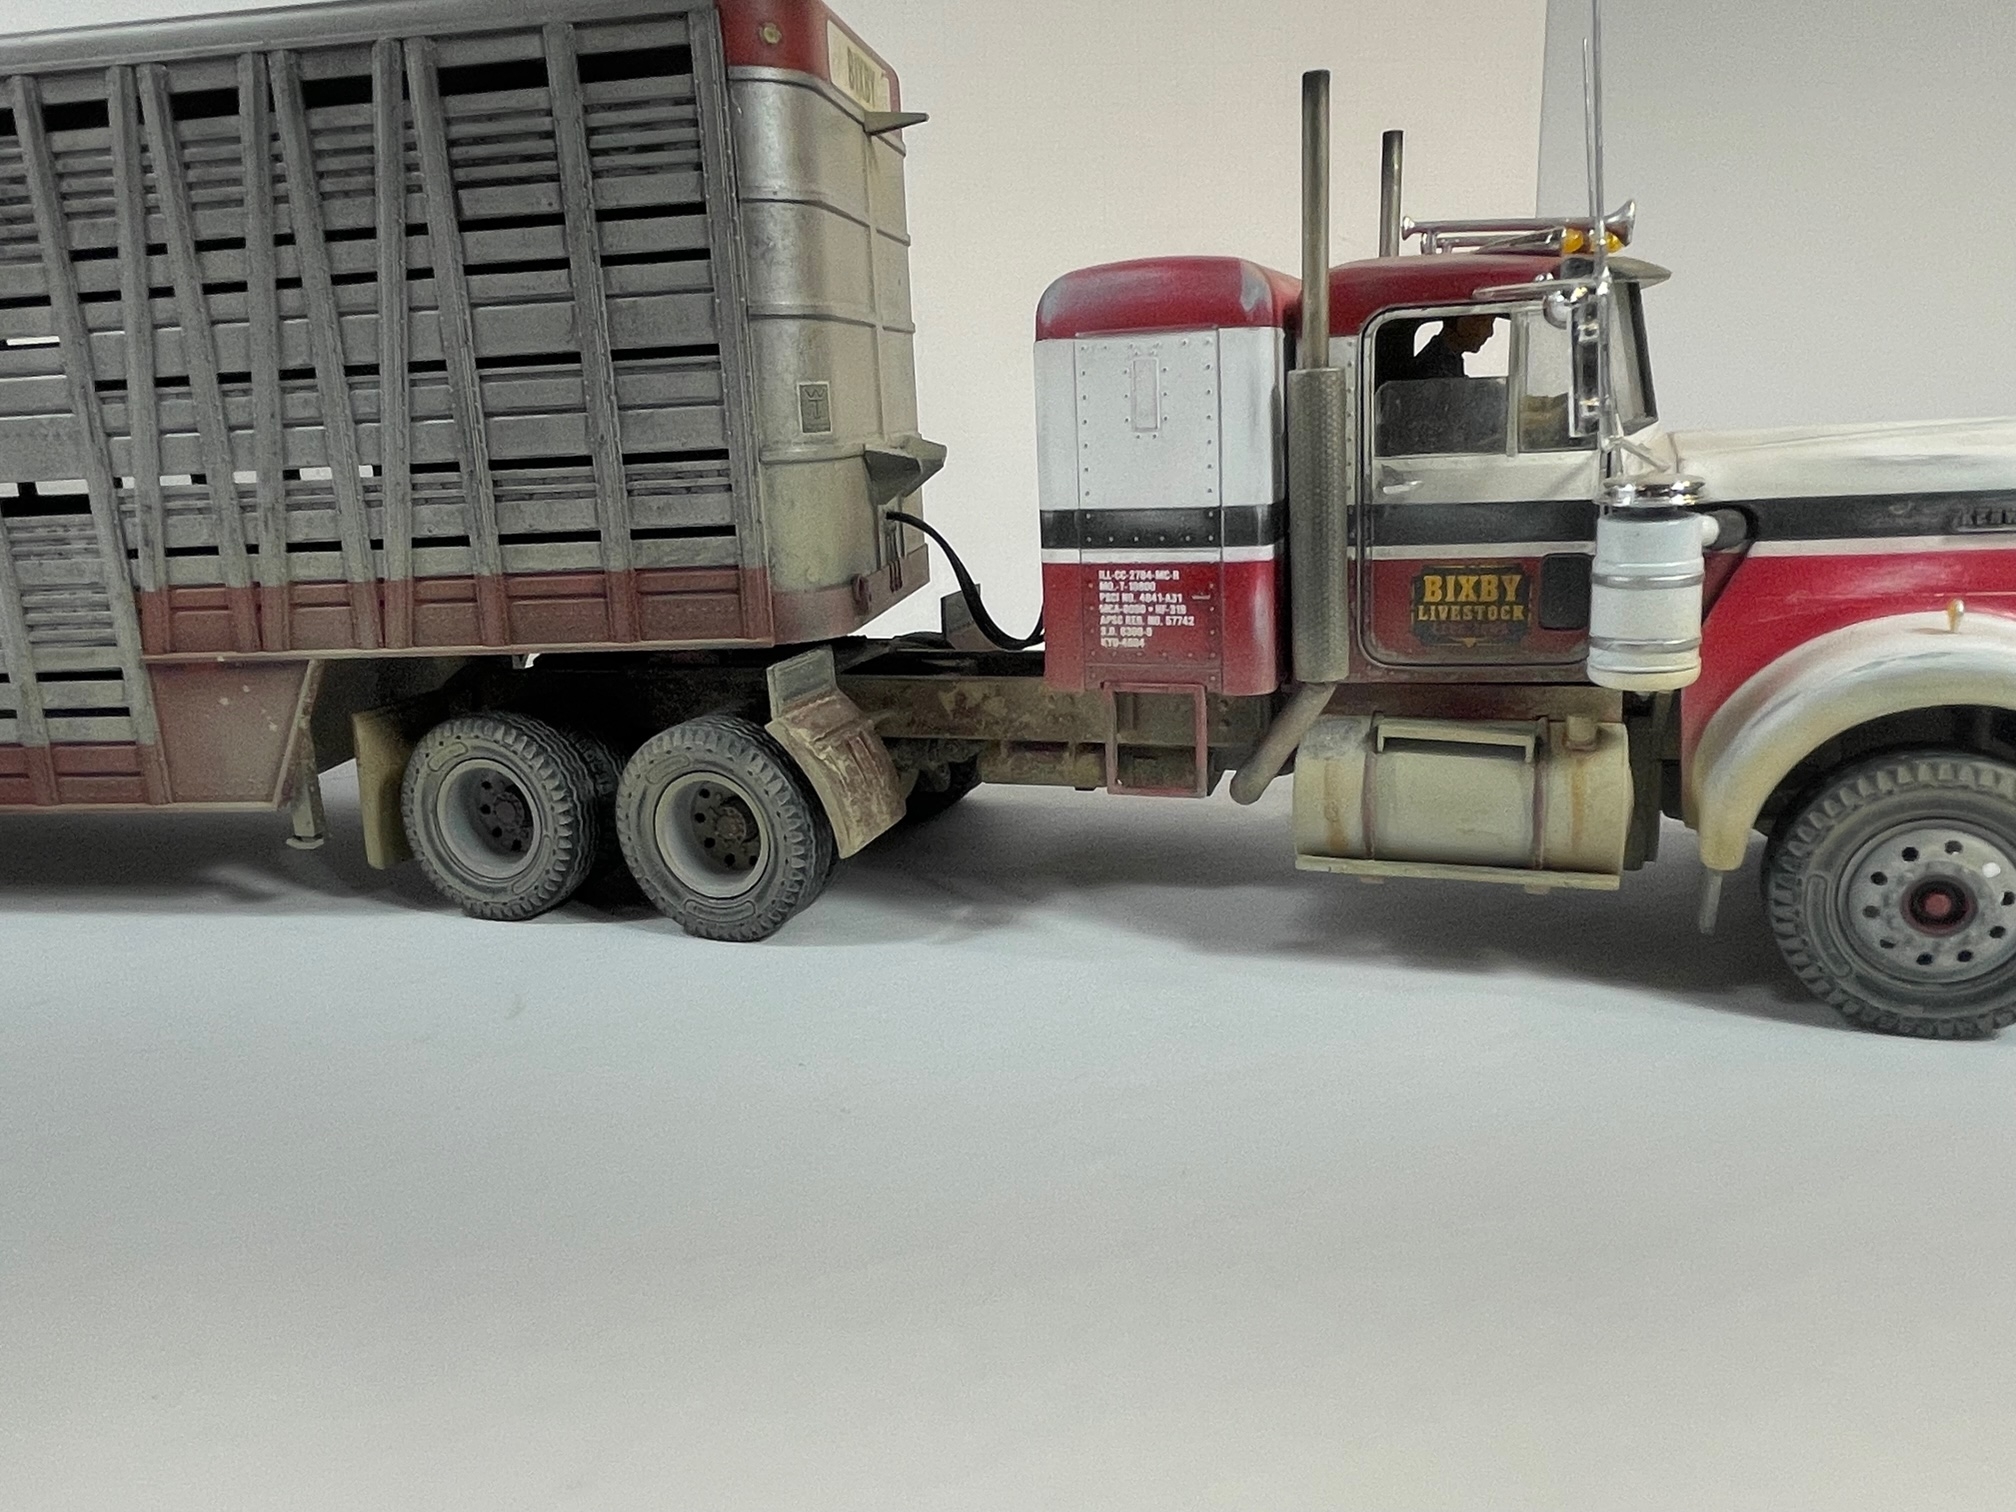
The theme of this build is a farm truck that is nearing the end of it's service life and is no longer loved by the hired help.
It is spring and the ground is muddy.
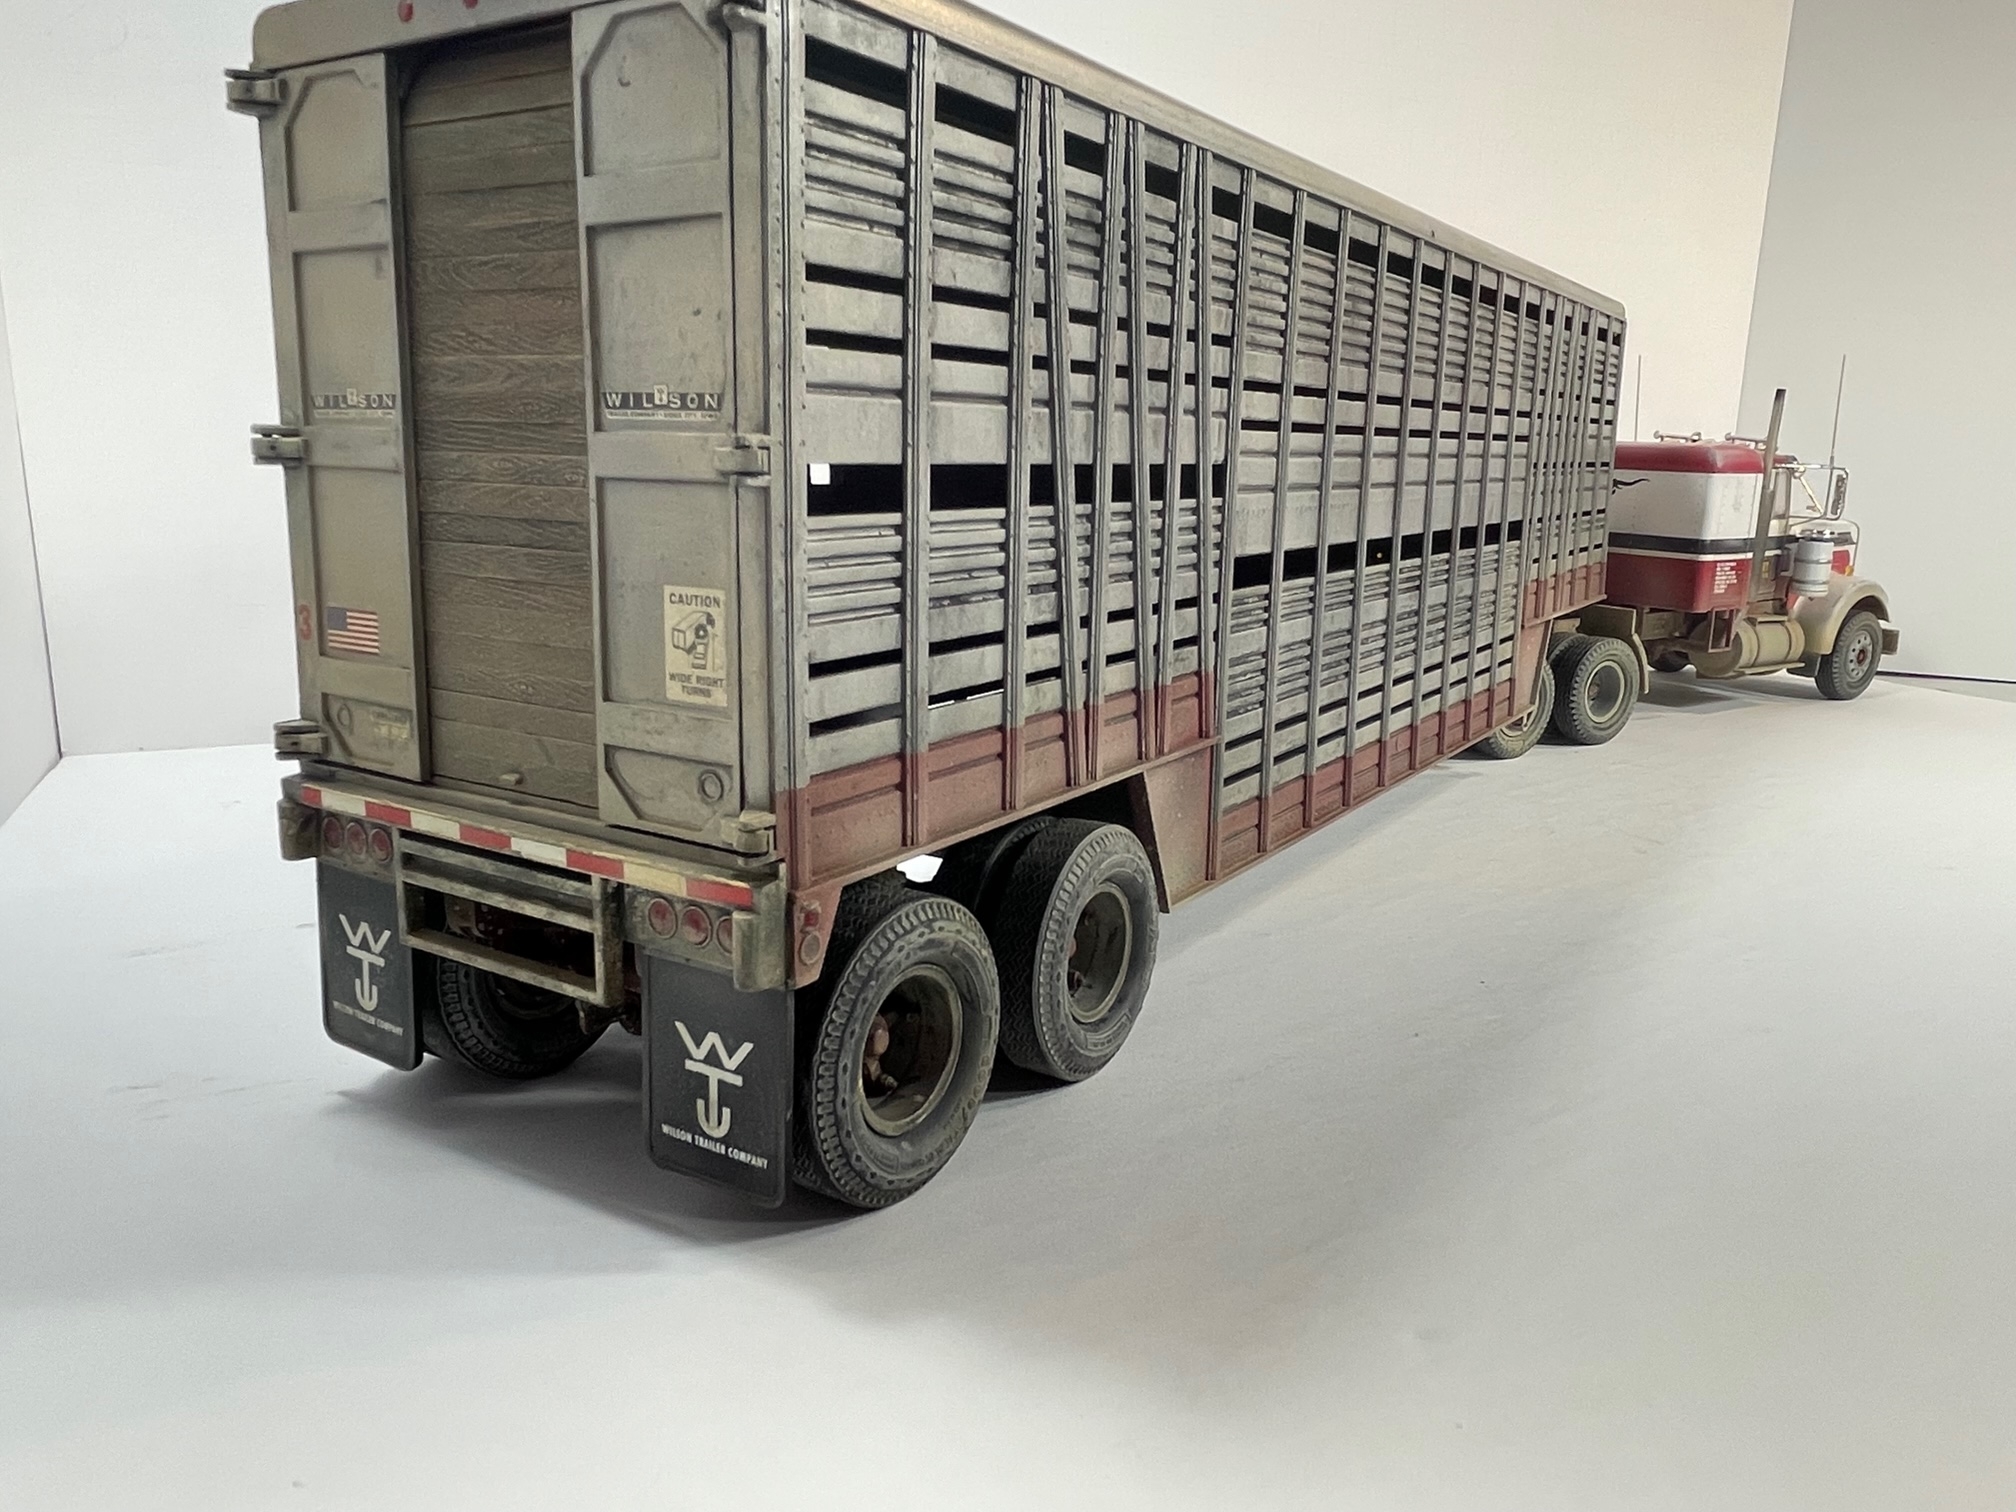
I am satisfied with how the wooden sliding door and the "rusted" exhaust turned out, especially because the techniques used were a "first time" experience for me.
The hood decals were a disaster and broke instantly while trying to get them in place, so I ended up having to paint the body stripes.


-
Hello, my name is Jason. I like trucks and models, but don't know much about either. I have an adult son who likes to build tanks, and he helped me get started with using an air brush. Model building is a way for us to have a common interest.
I'm learning fast with the help from the internet, but the curve is very steep at this point. Made lots of errors with my first truck kit, an AMT Kenworth W-925.
- Thank you for any technical help and glad to be aboard MTB.


.jpg.df010e41834a87bb604204ca4808f107.jpg)


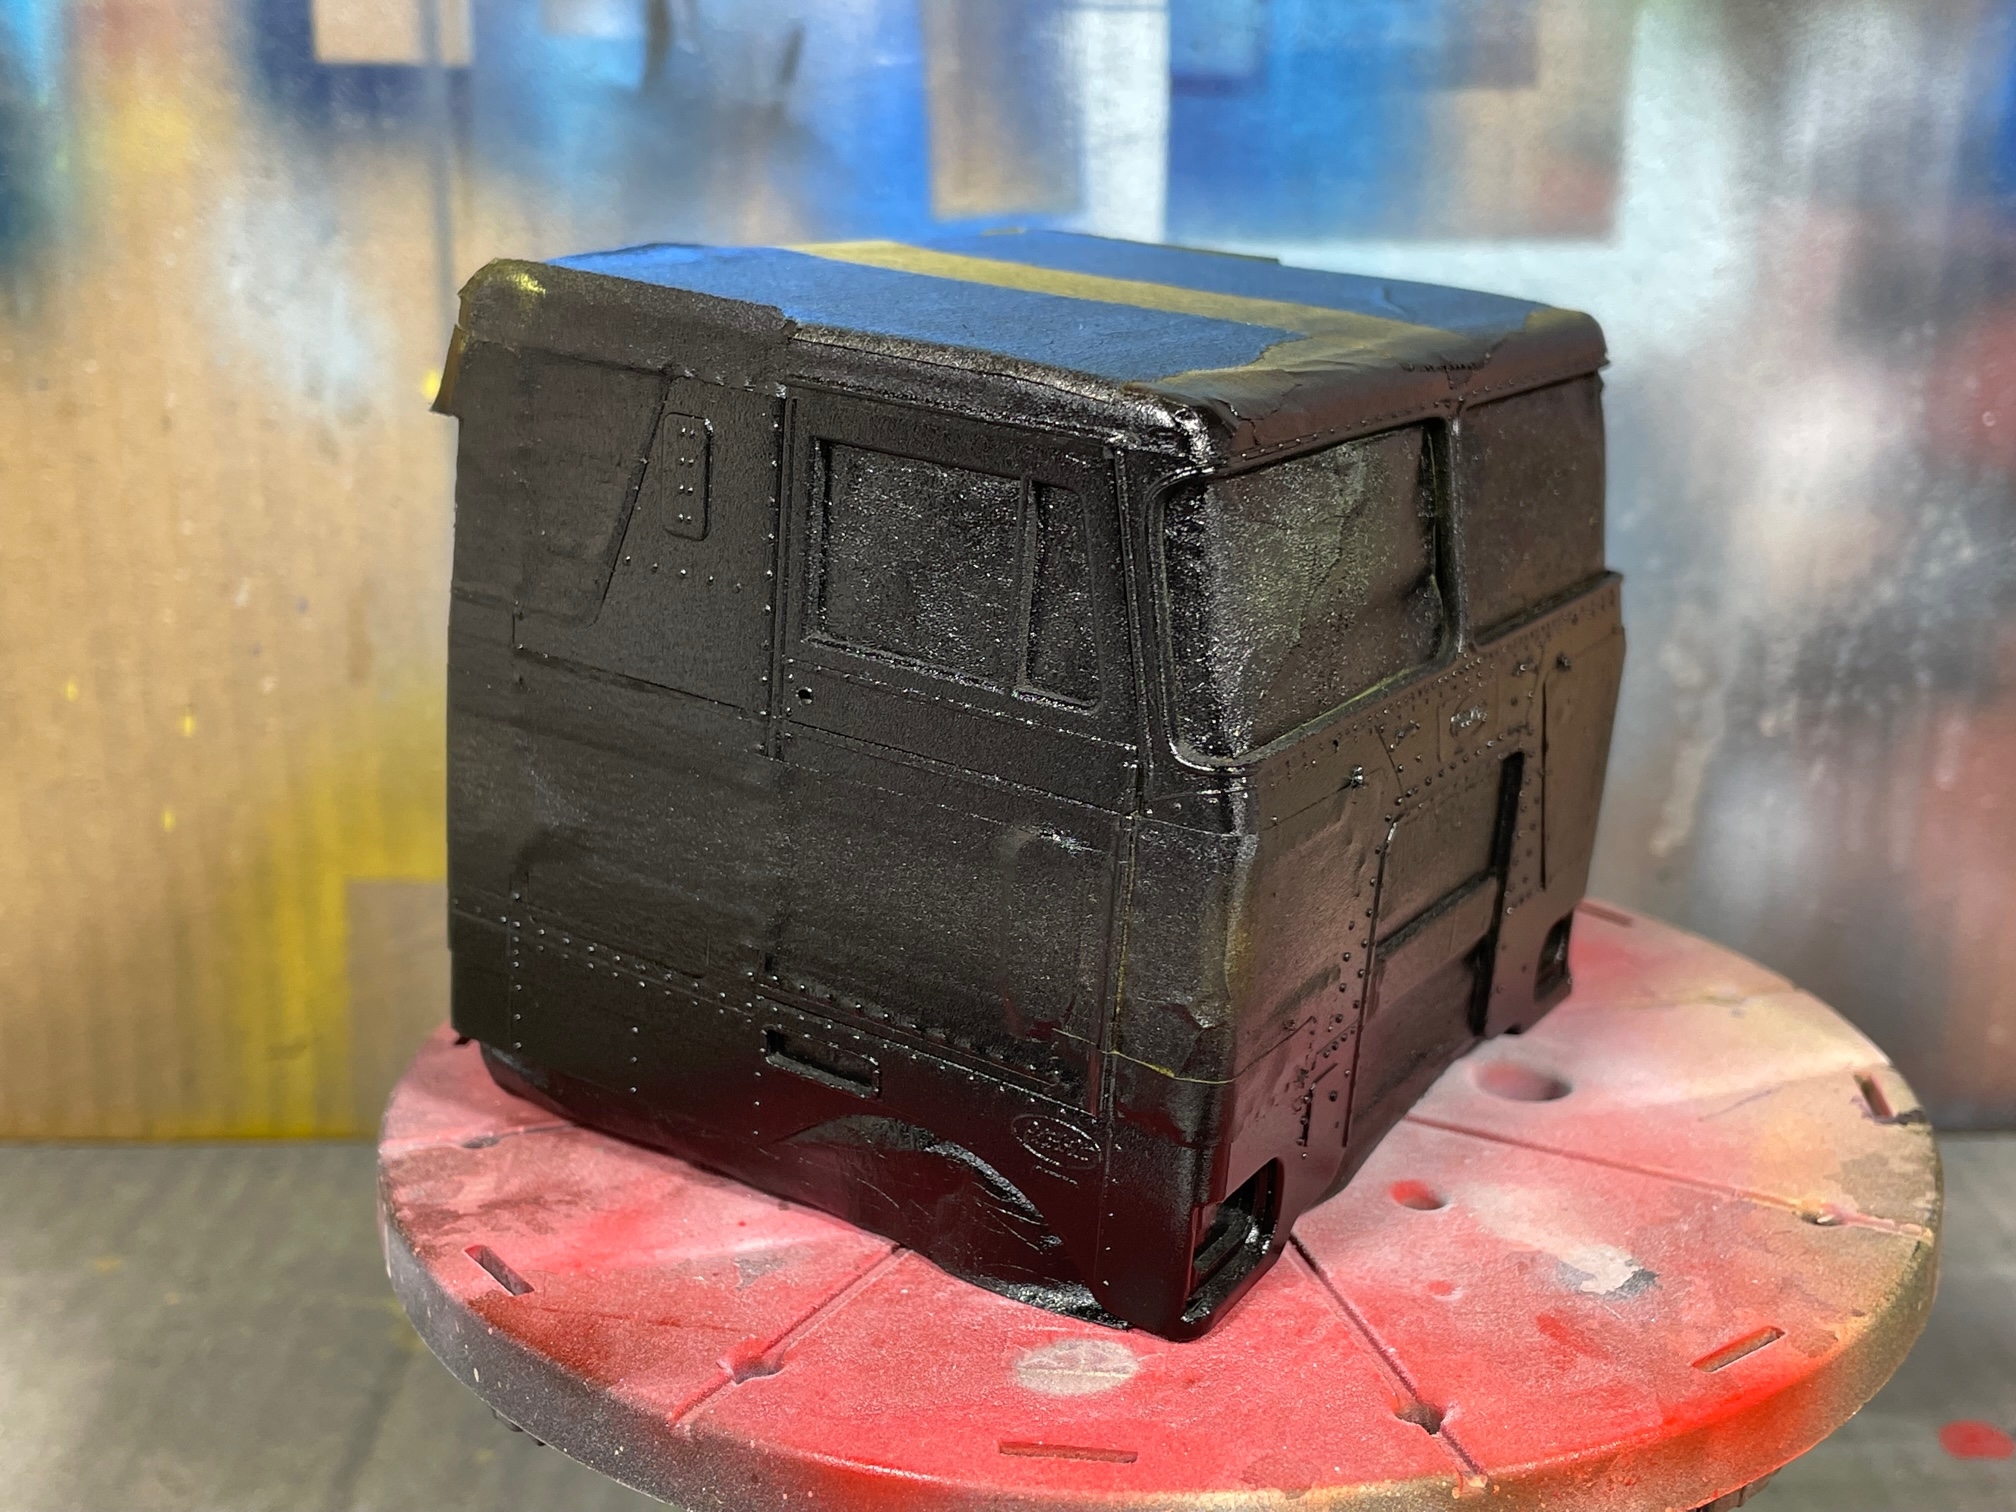
A fleet of Freightliner COEs - AMT
in Model Truck Workbench
Posted
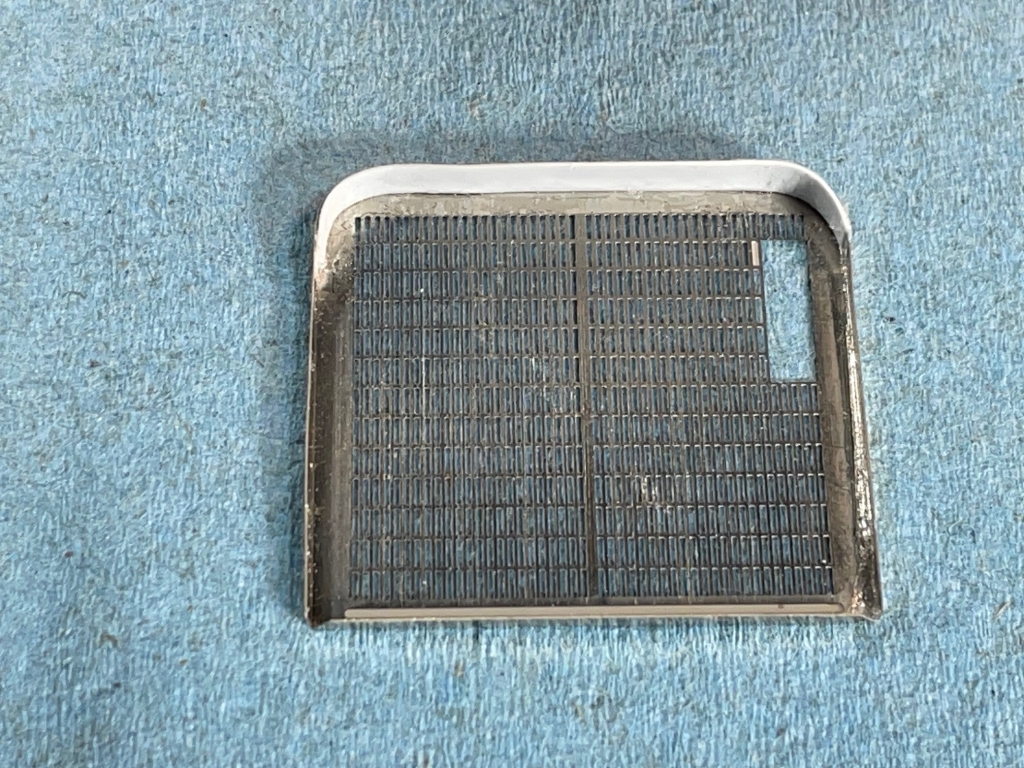
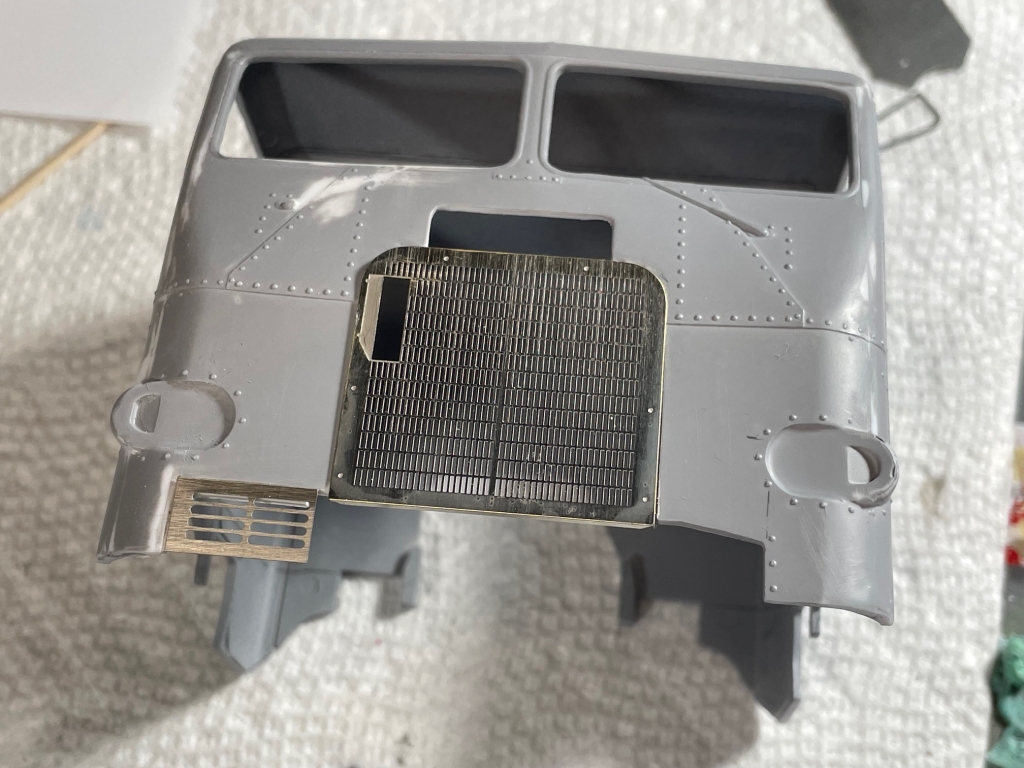
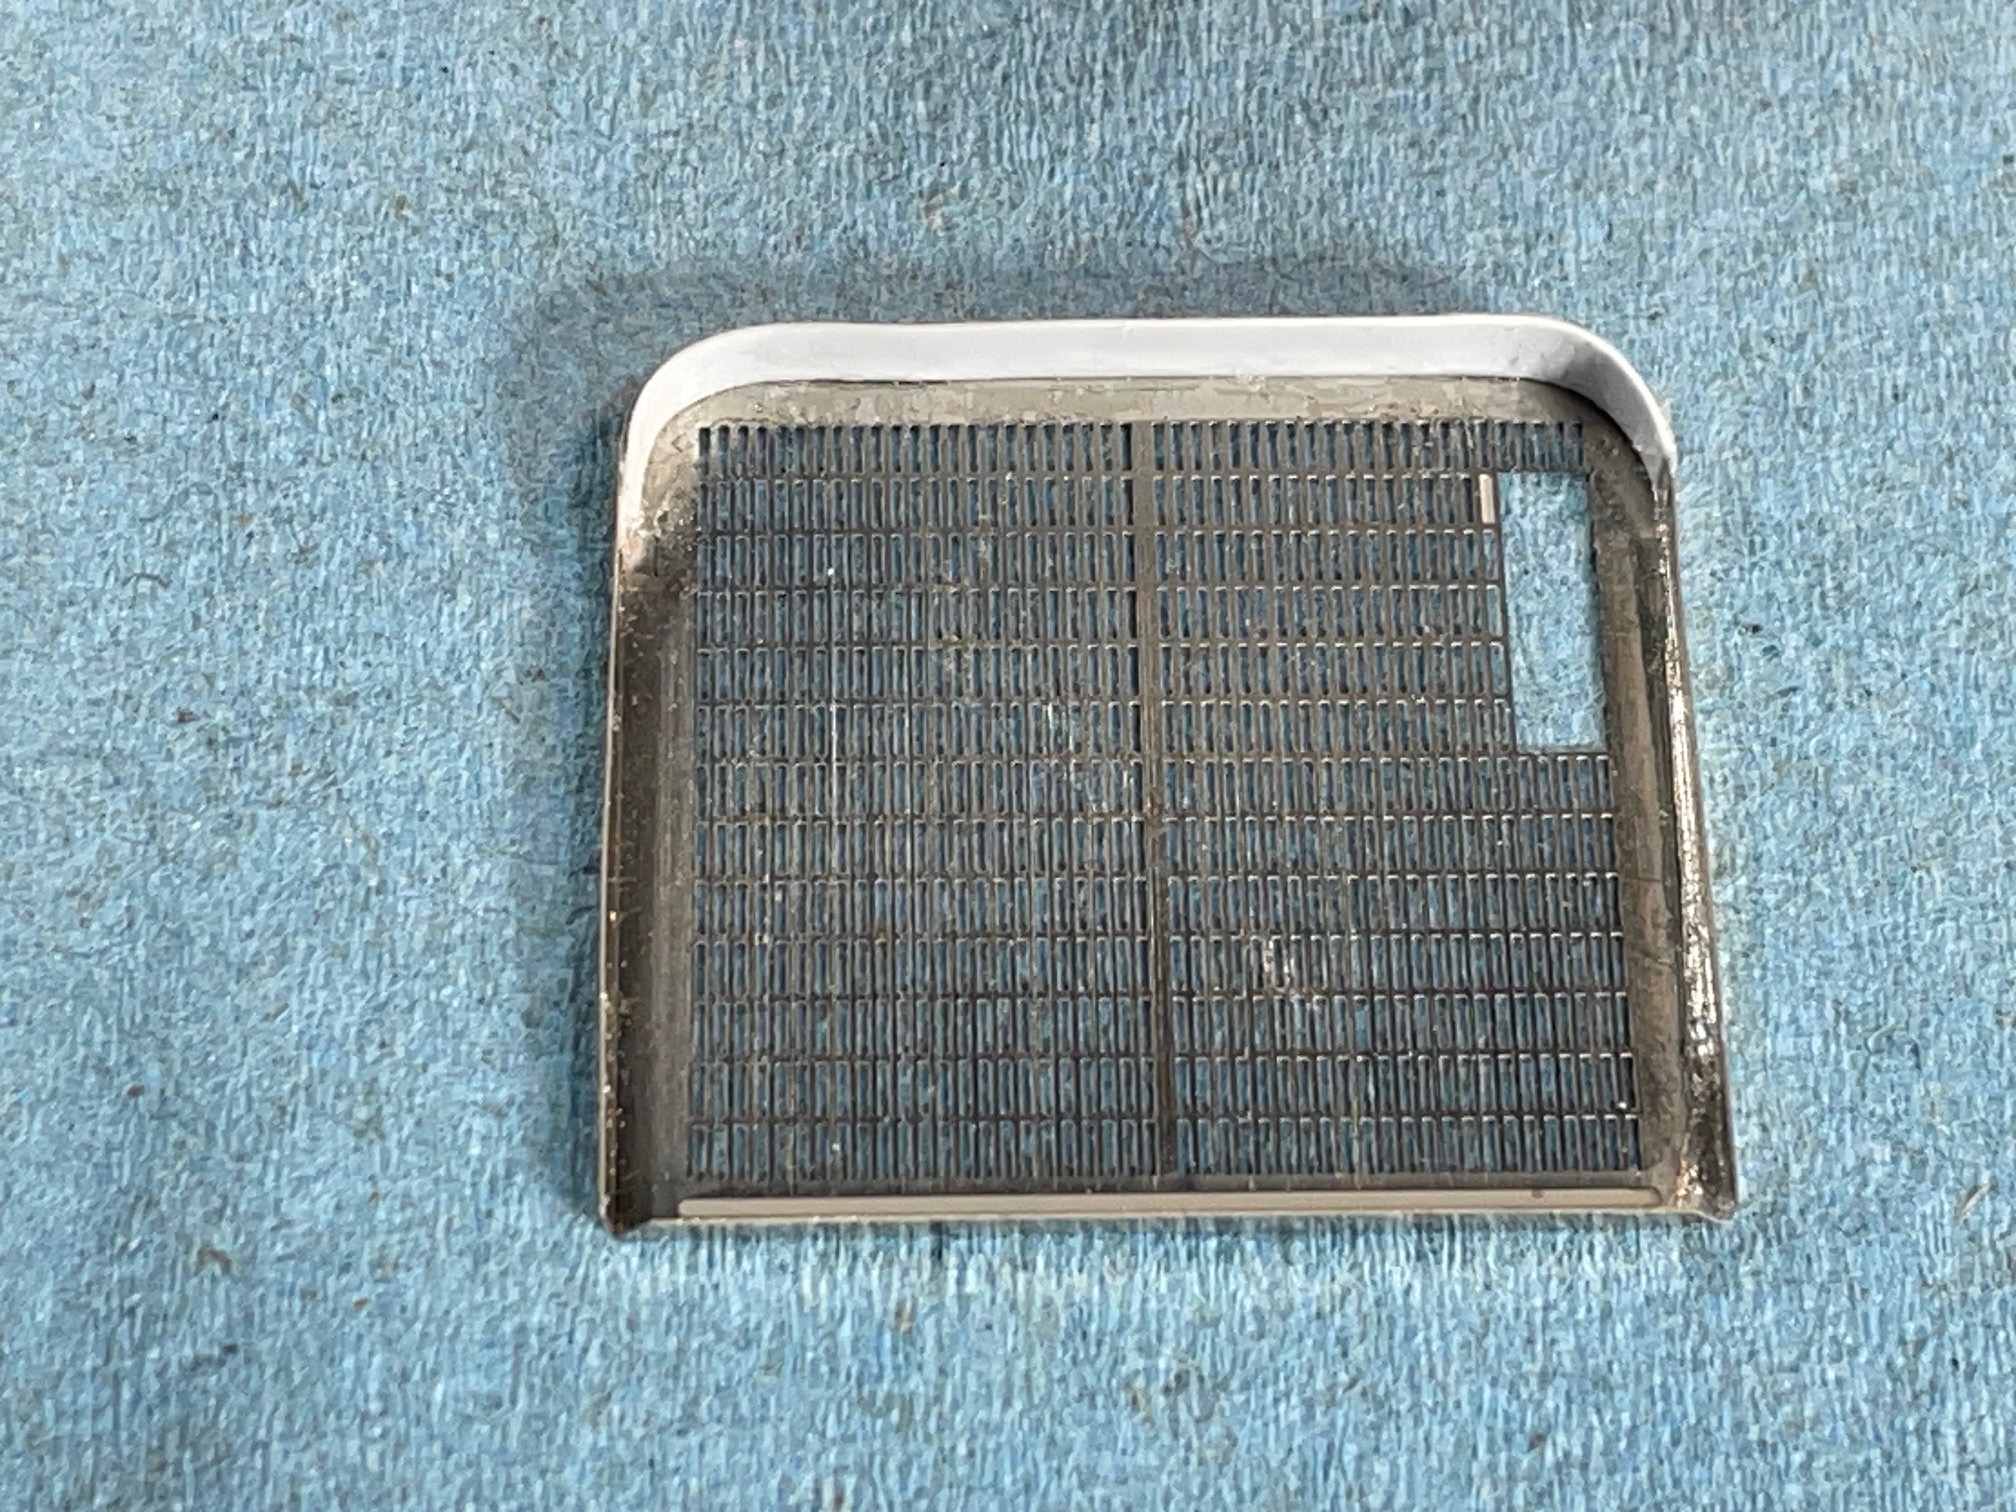
It was much easier and quicker to use the PE part above than cutting out the grill detail on this cab.
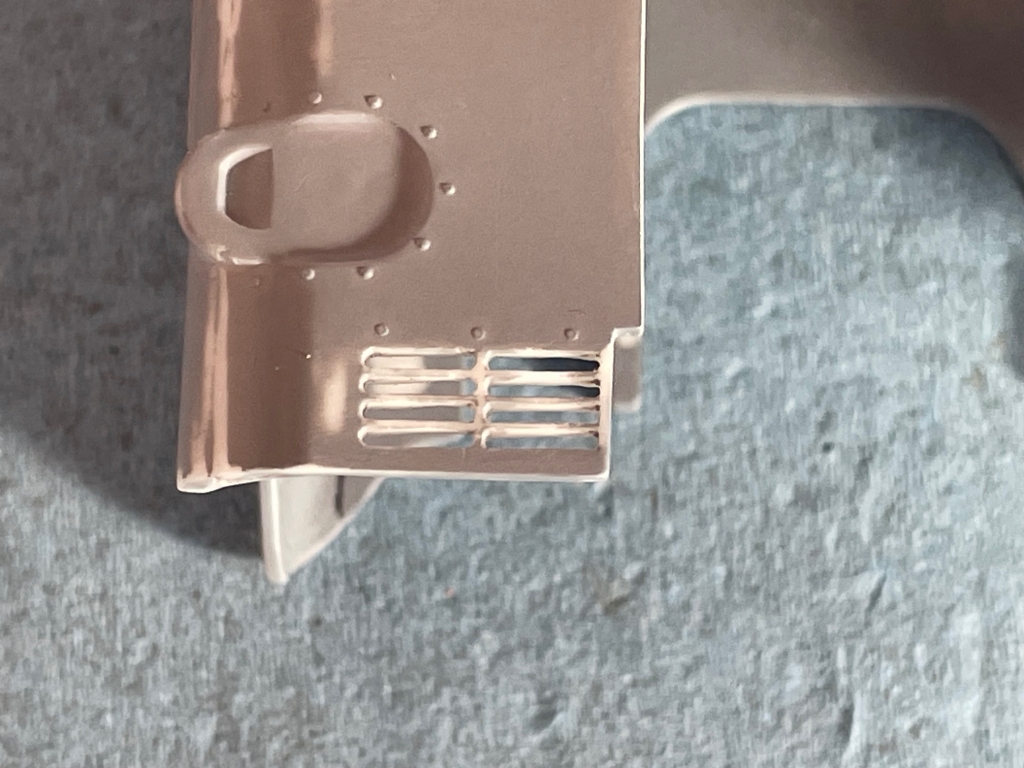
This experience will certainly make me think twice before trying to do a whole radiator.
The third window is added to a short cab. PE window gaskets applied.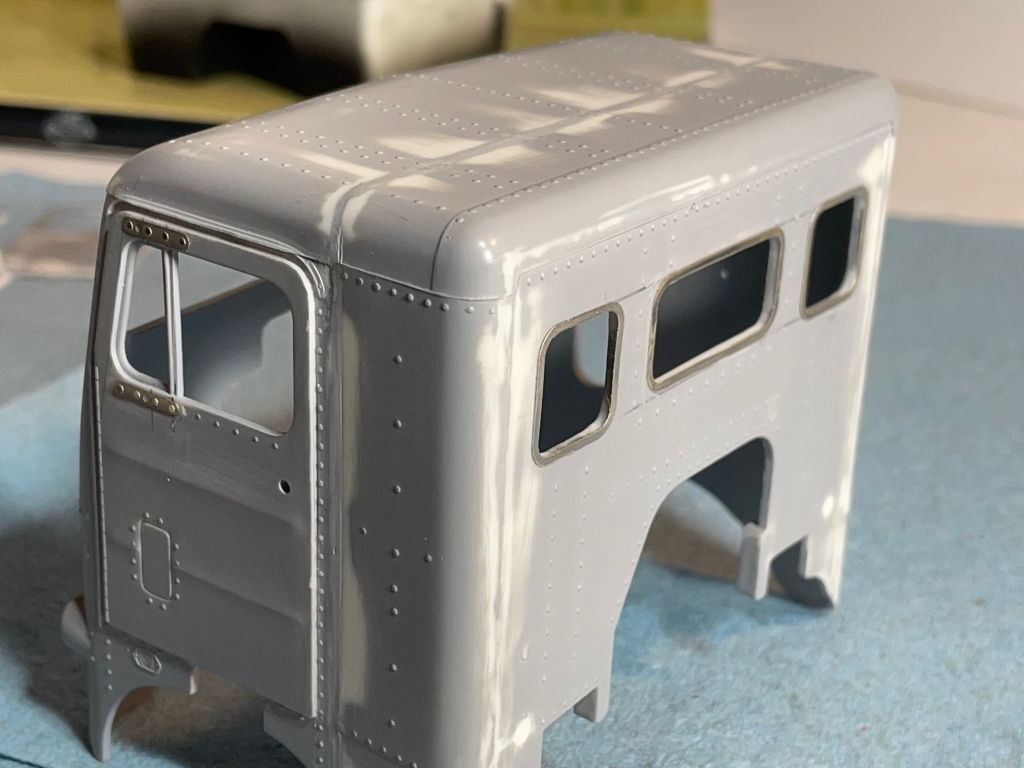
Using a sanding sheet taped to a flat surface greatly improved the problematic cab seam.