

Chariots of Fire
-
Content count
155 -
Joined
-
Last visited
-
Days Won
13
Posts posted by Chariots of Fire
-
-
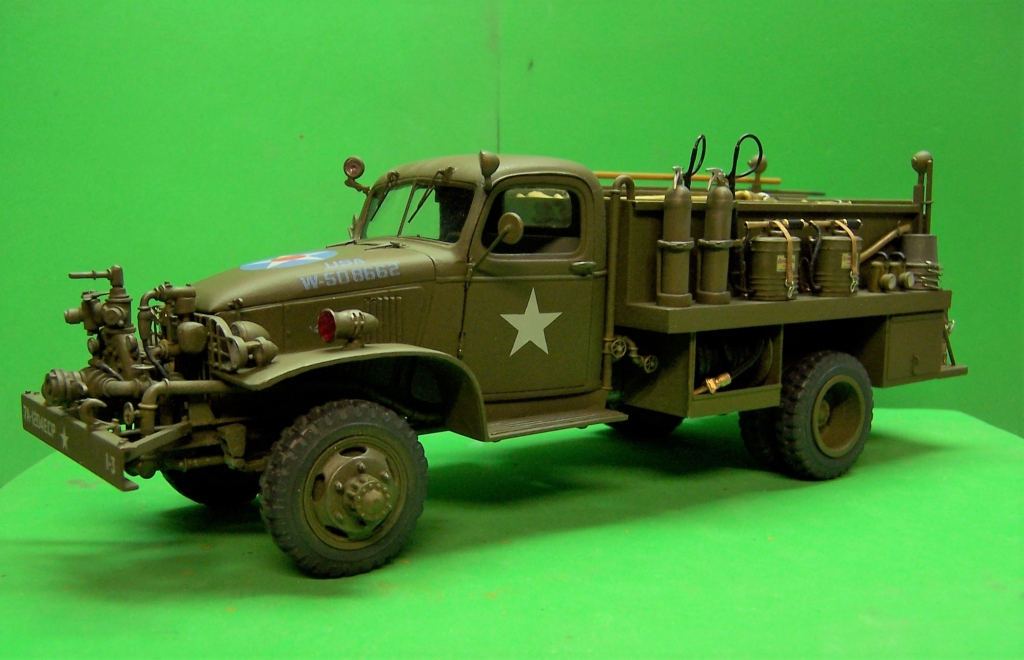
Continuing right along we got the decals done today after a bit of a struggle. Seemed like nothing would go right. Had to reprint them several times on the ALPS due to either marring the decal, not quite fitting right or other struggle. But they are there now.

-
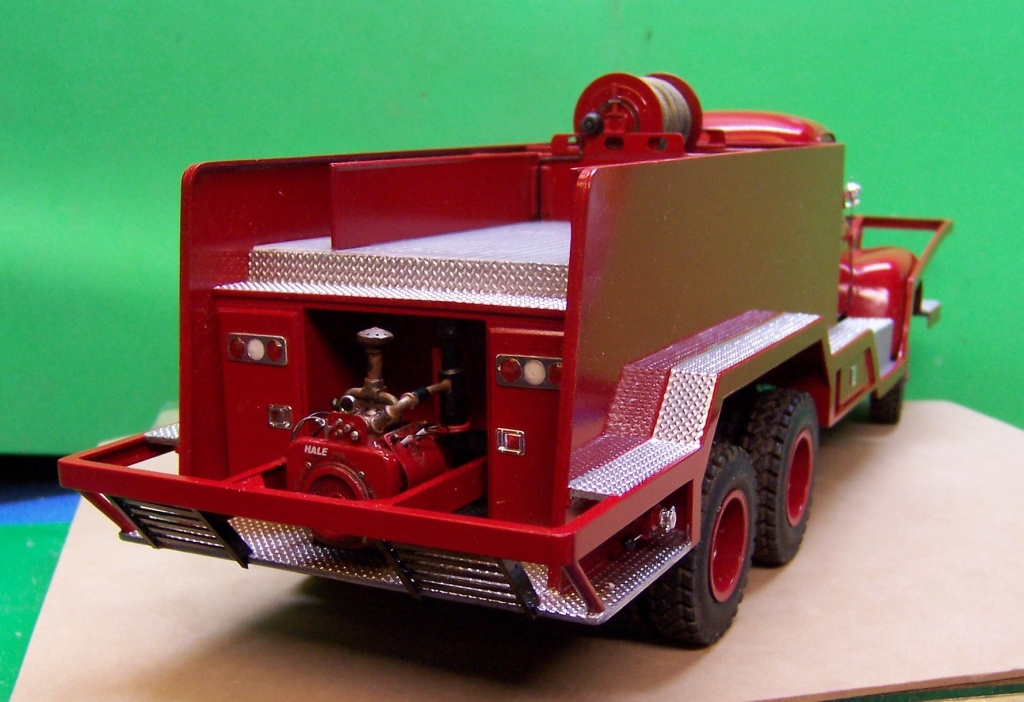
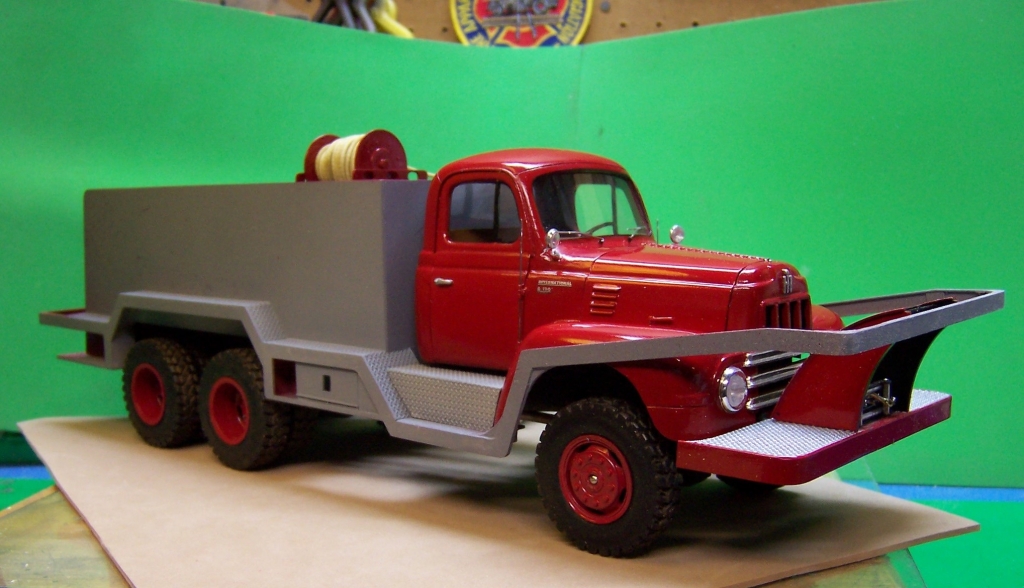
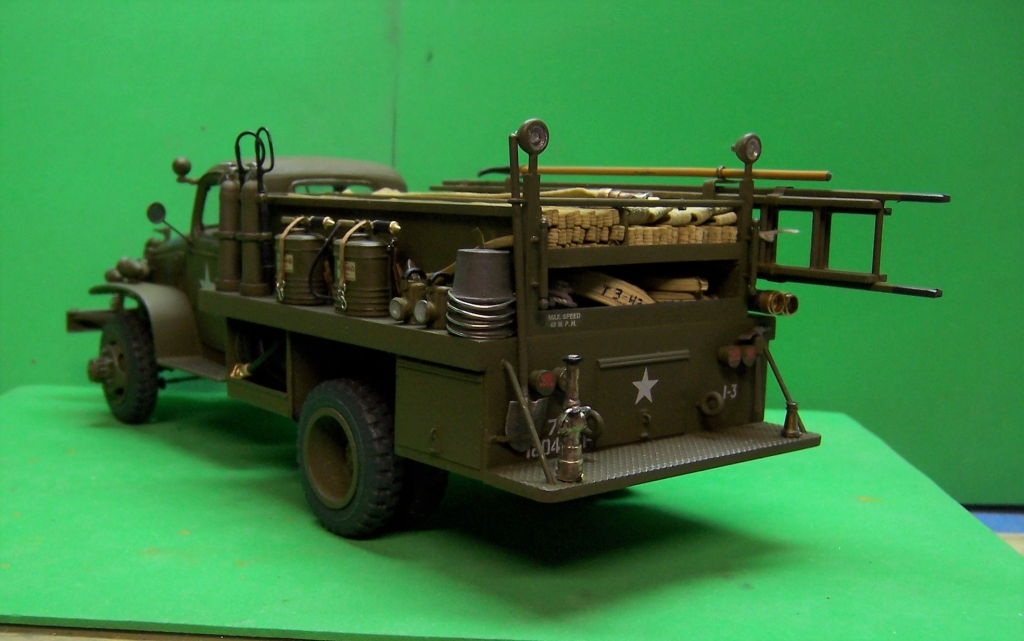
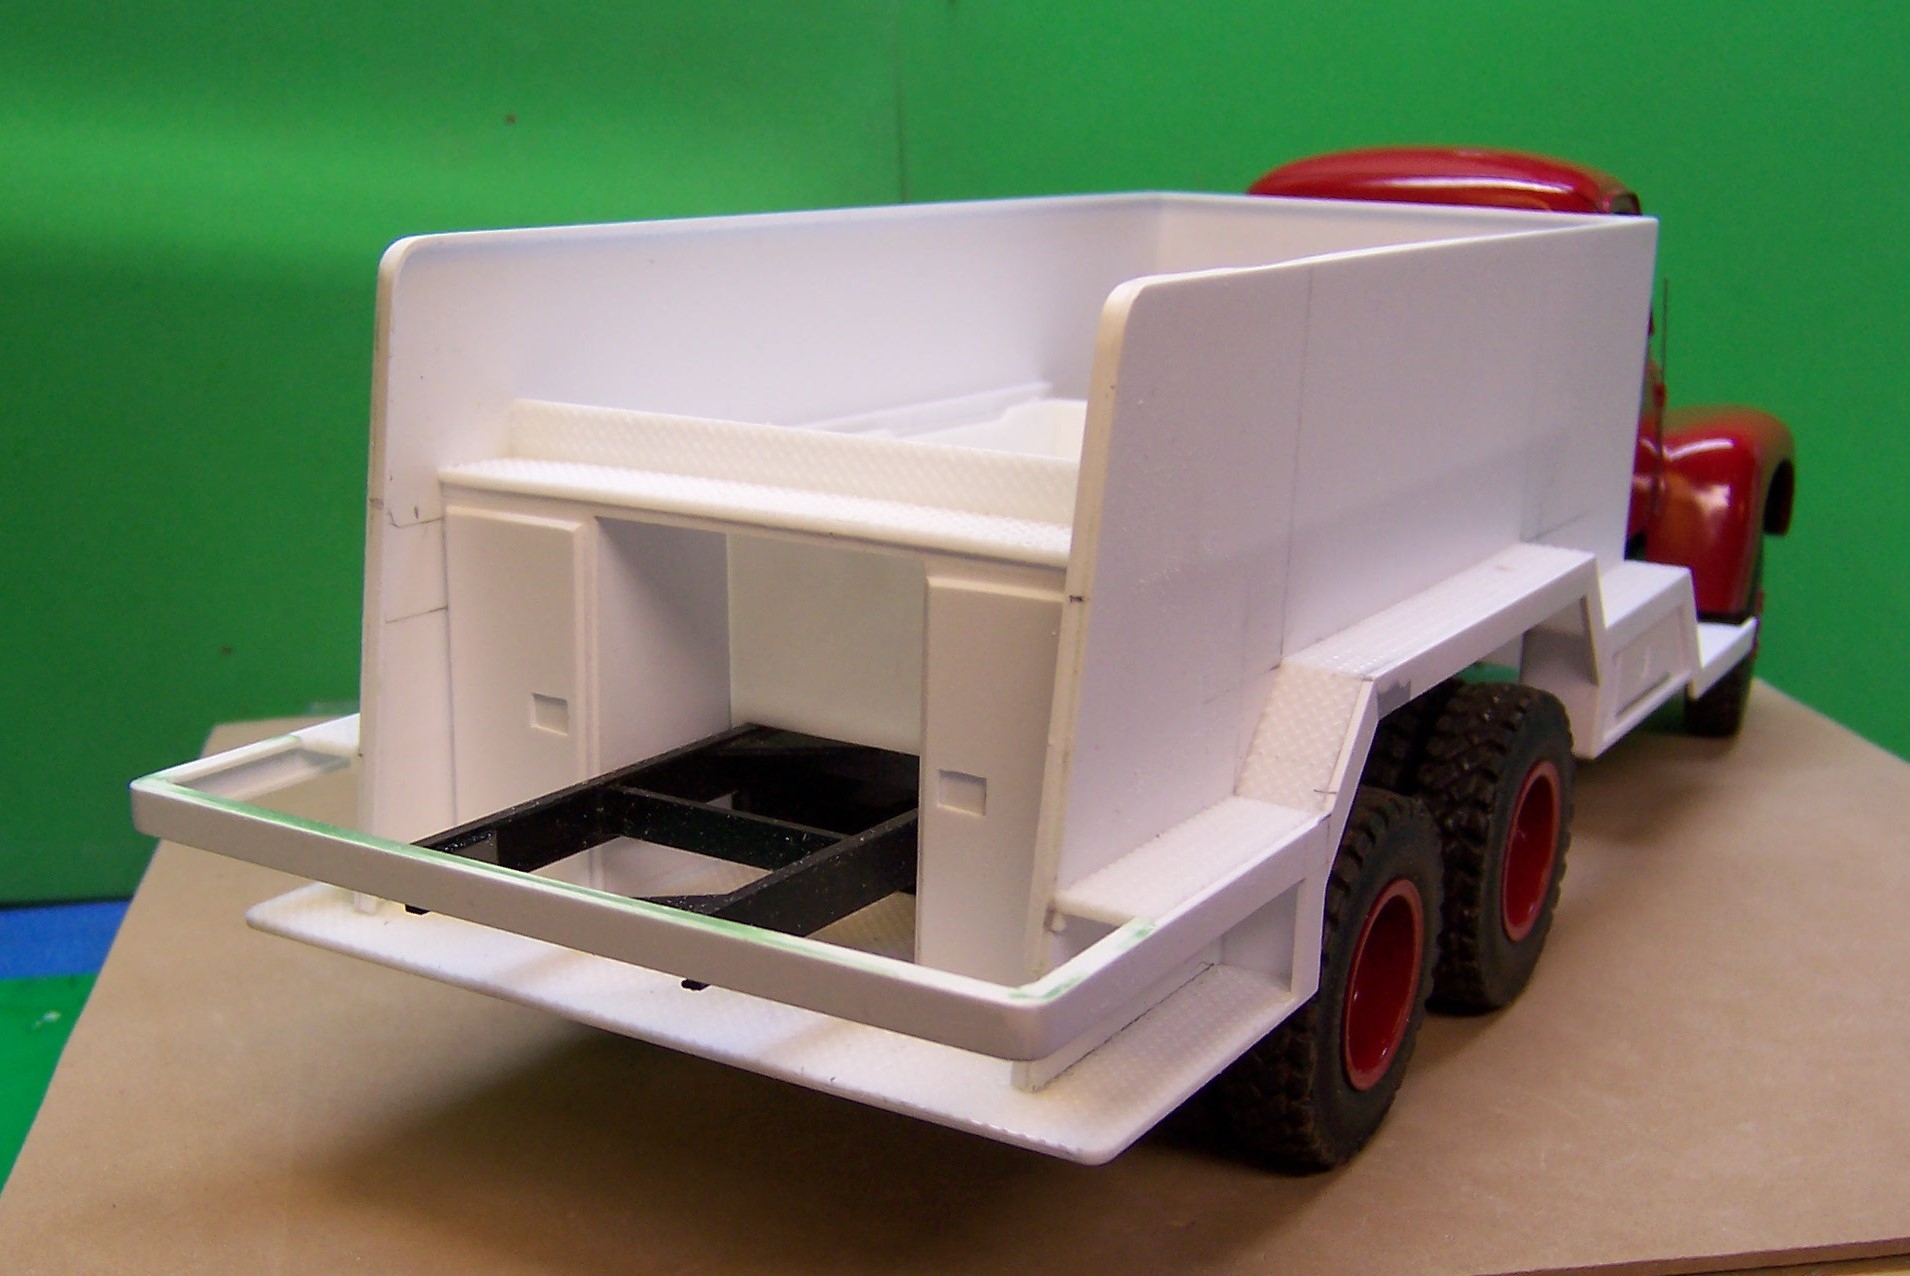
Still working on the details. Latest additions are the tail light clusters and 2/3 of the protective grill work at the rear step. Still have to do the part right in front of the pump.
-
That looks pretty good to me. Nice job on the interior details.
-
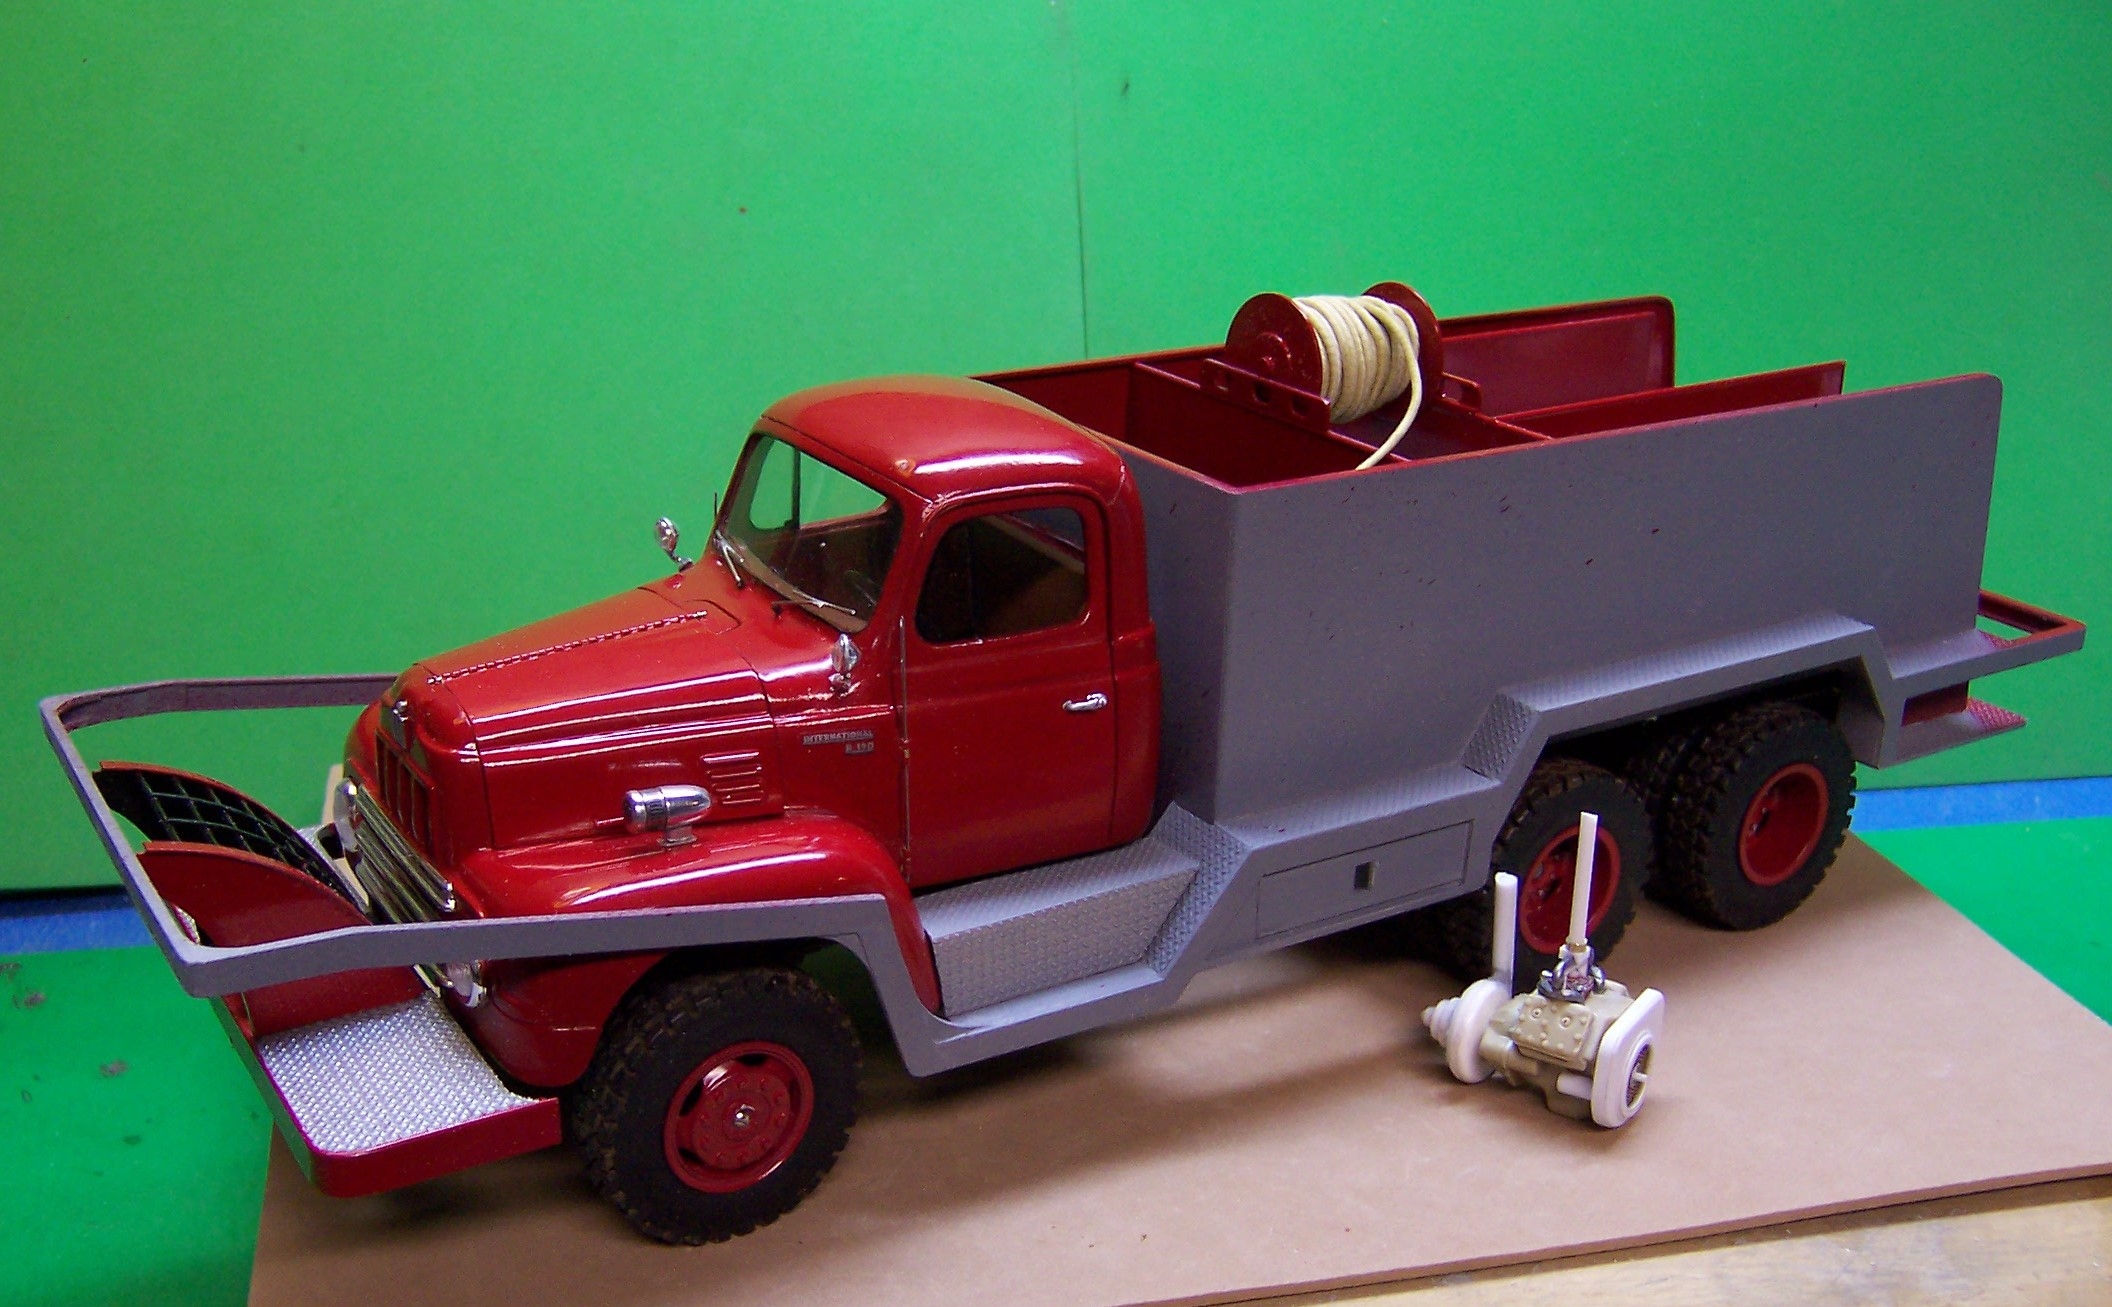
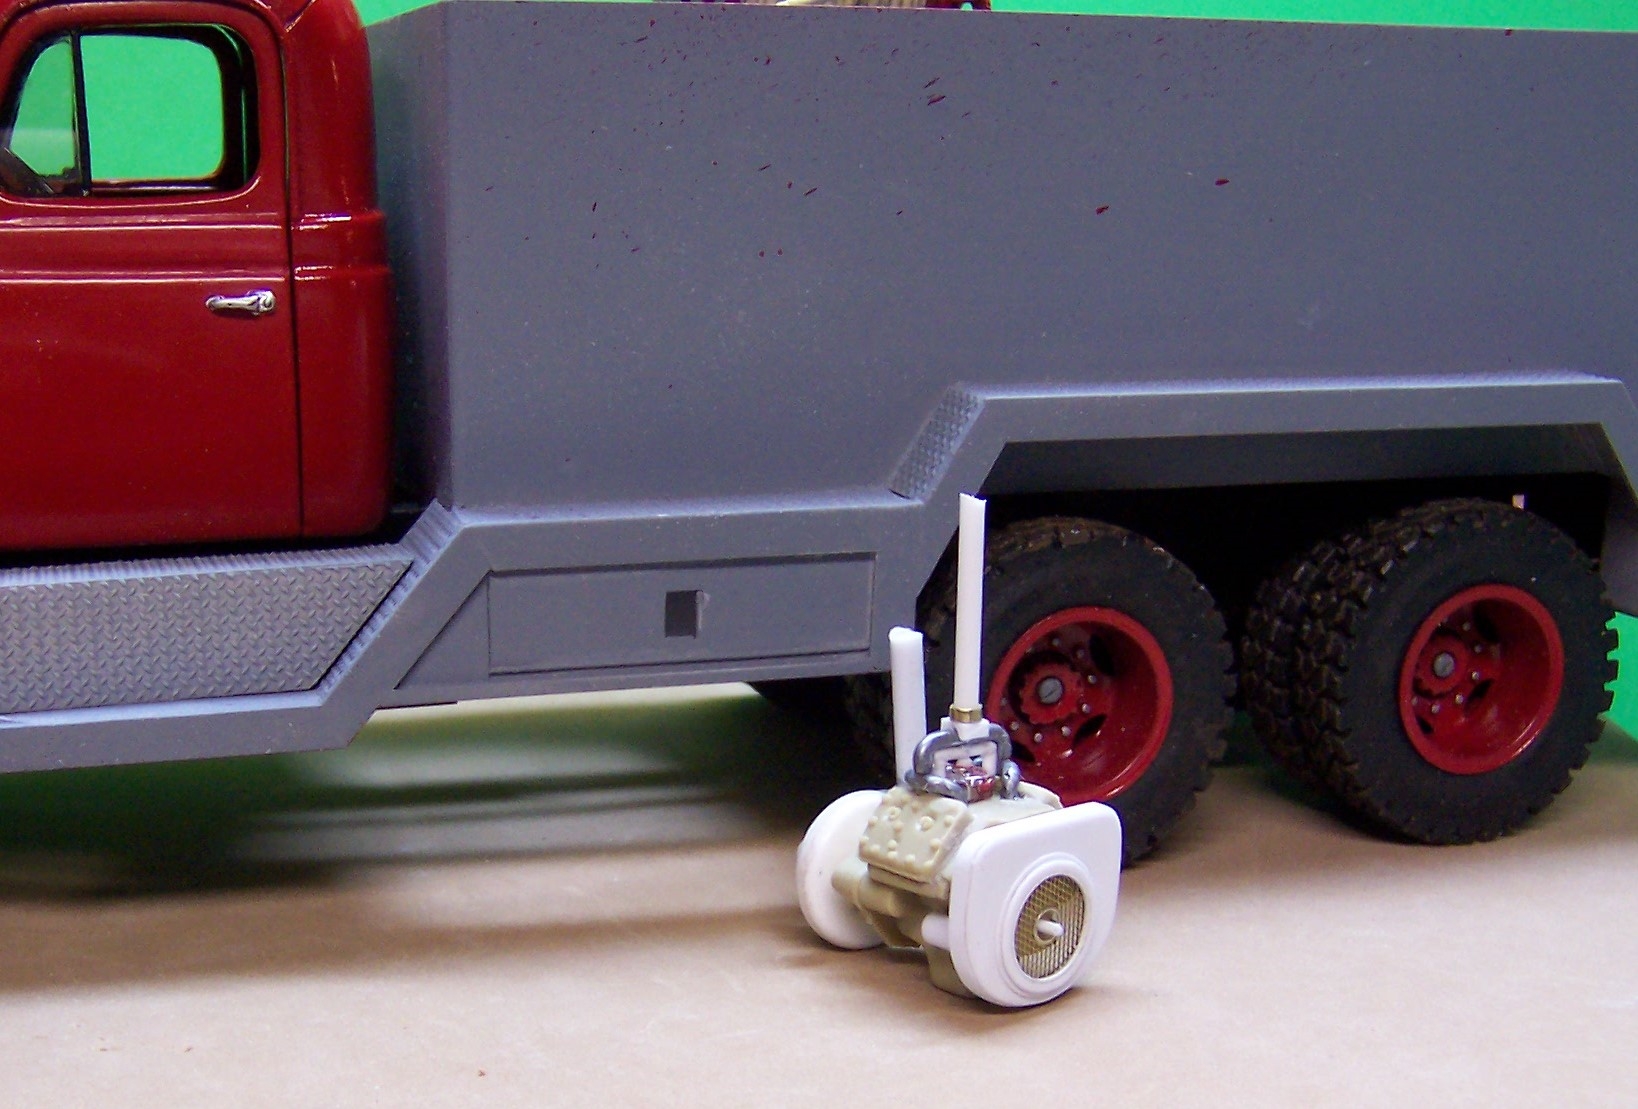
Here's a little update on progress so far. Working on a Wisconsin V-4 powered Hale pump for the rear deck. Paint is coming along. Got to get another rattle can of "Flame Red" from Duplicolor to finish it off.


-
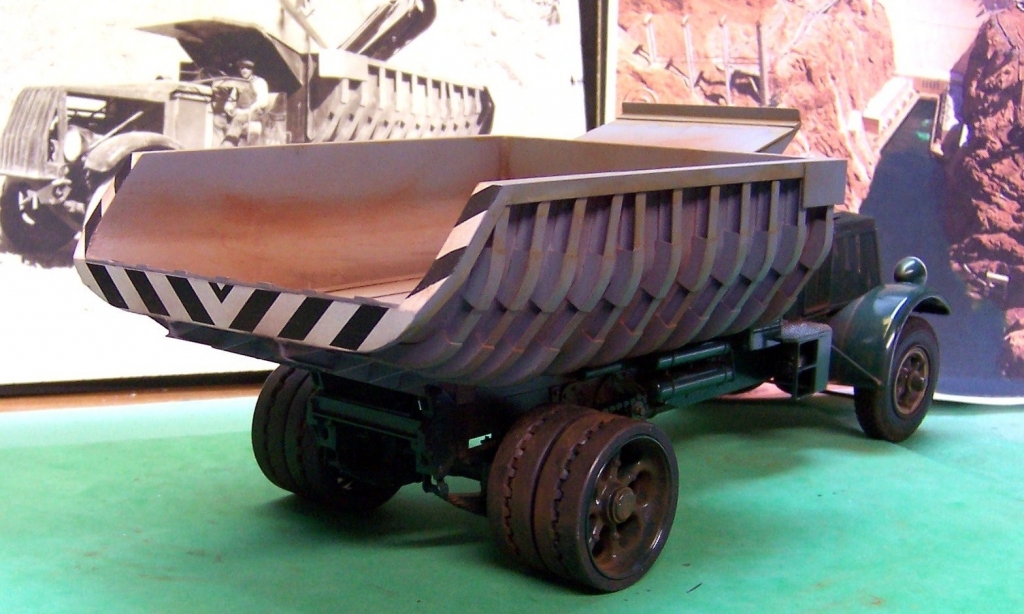
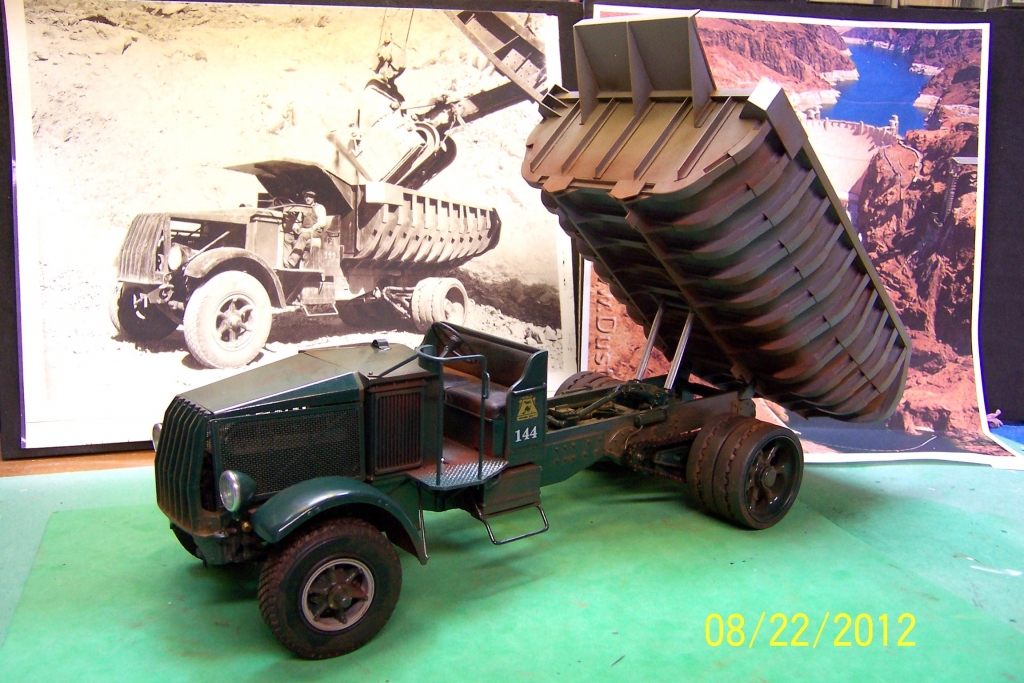
It's hot on the Nevada/Arizona border where the dam was built. Open cab and lots of air around the engine was the only way to go. They extended the cab protection after the first batch of AP's were delivered. The bodies were steel and carried 16 cubic yards as I recall. Later on they changed to aluminum bodies which meant they could carry heavier loads.
-
Thanks! One thing about resin cast tires; they'll never go flat!
-
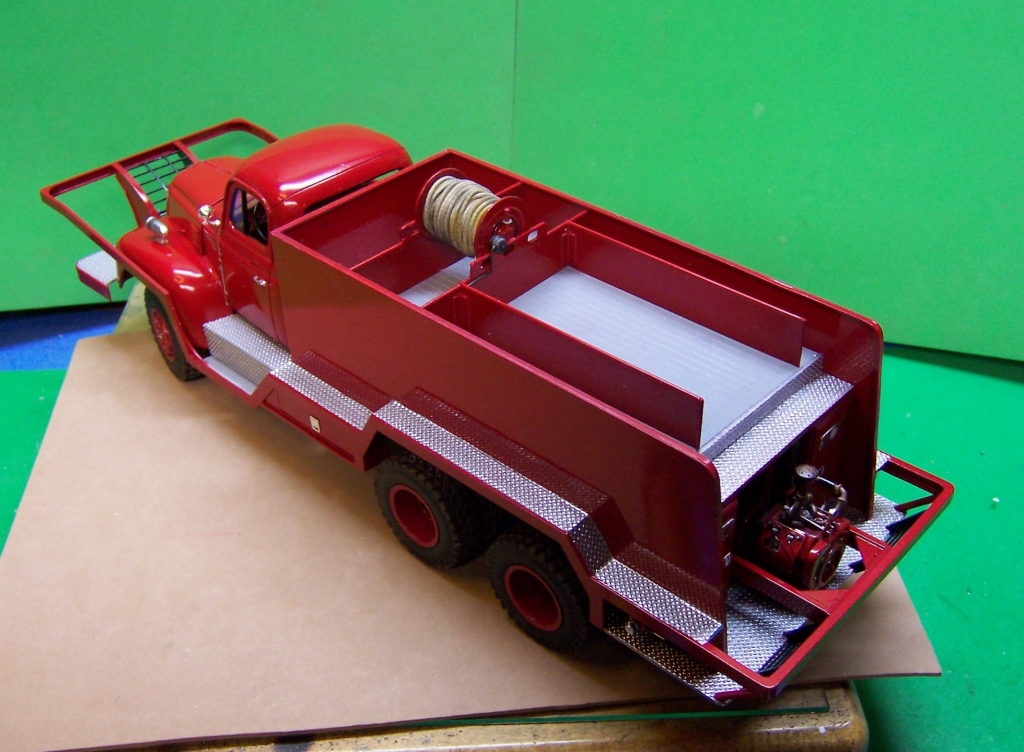
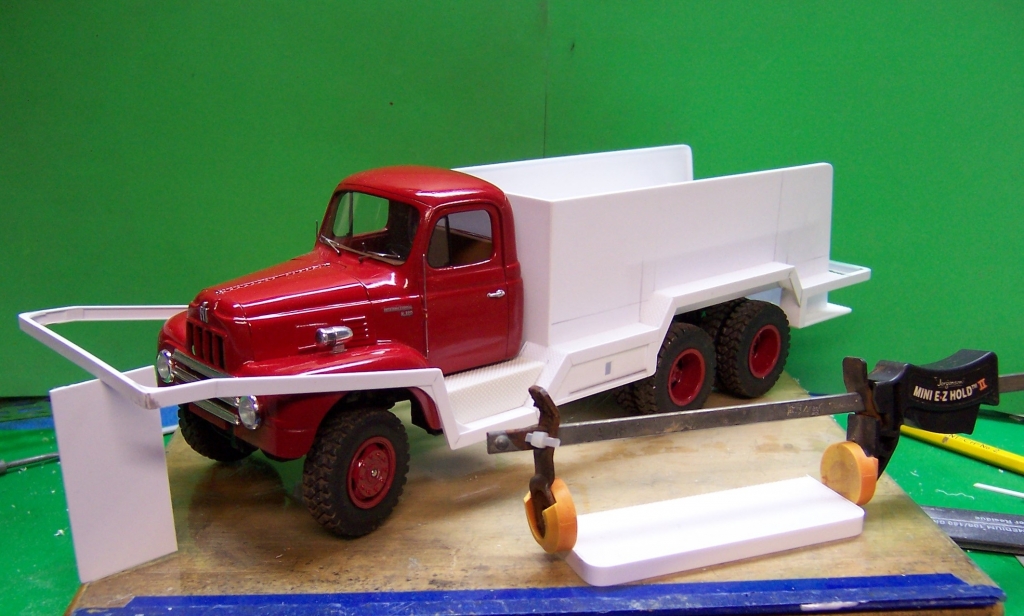
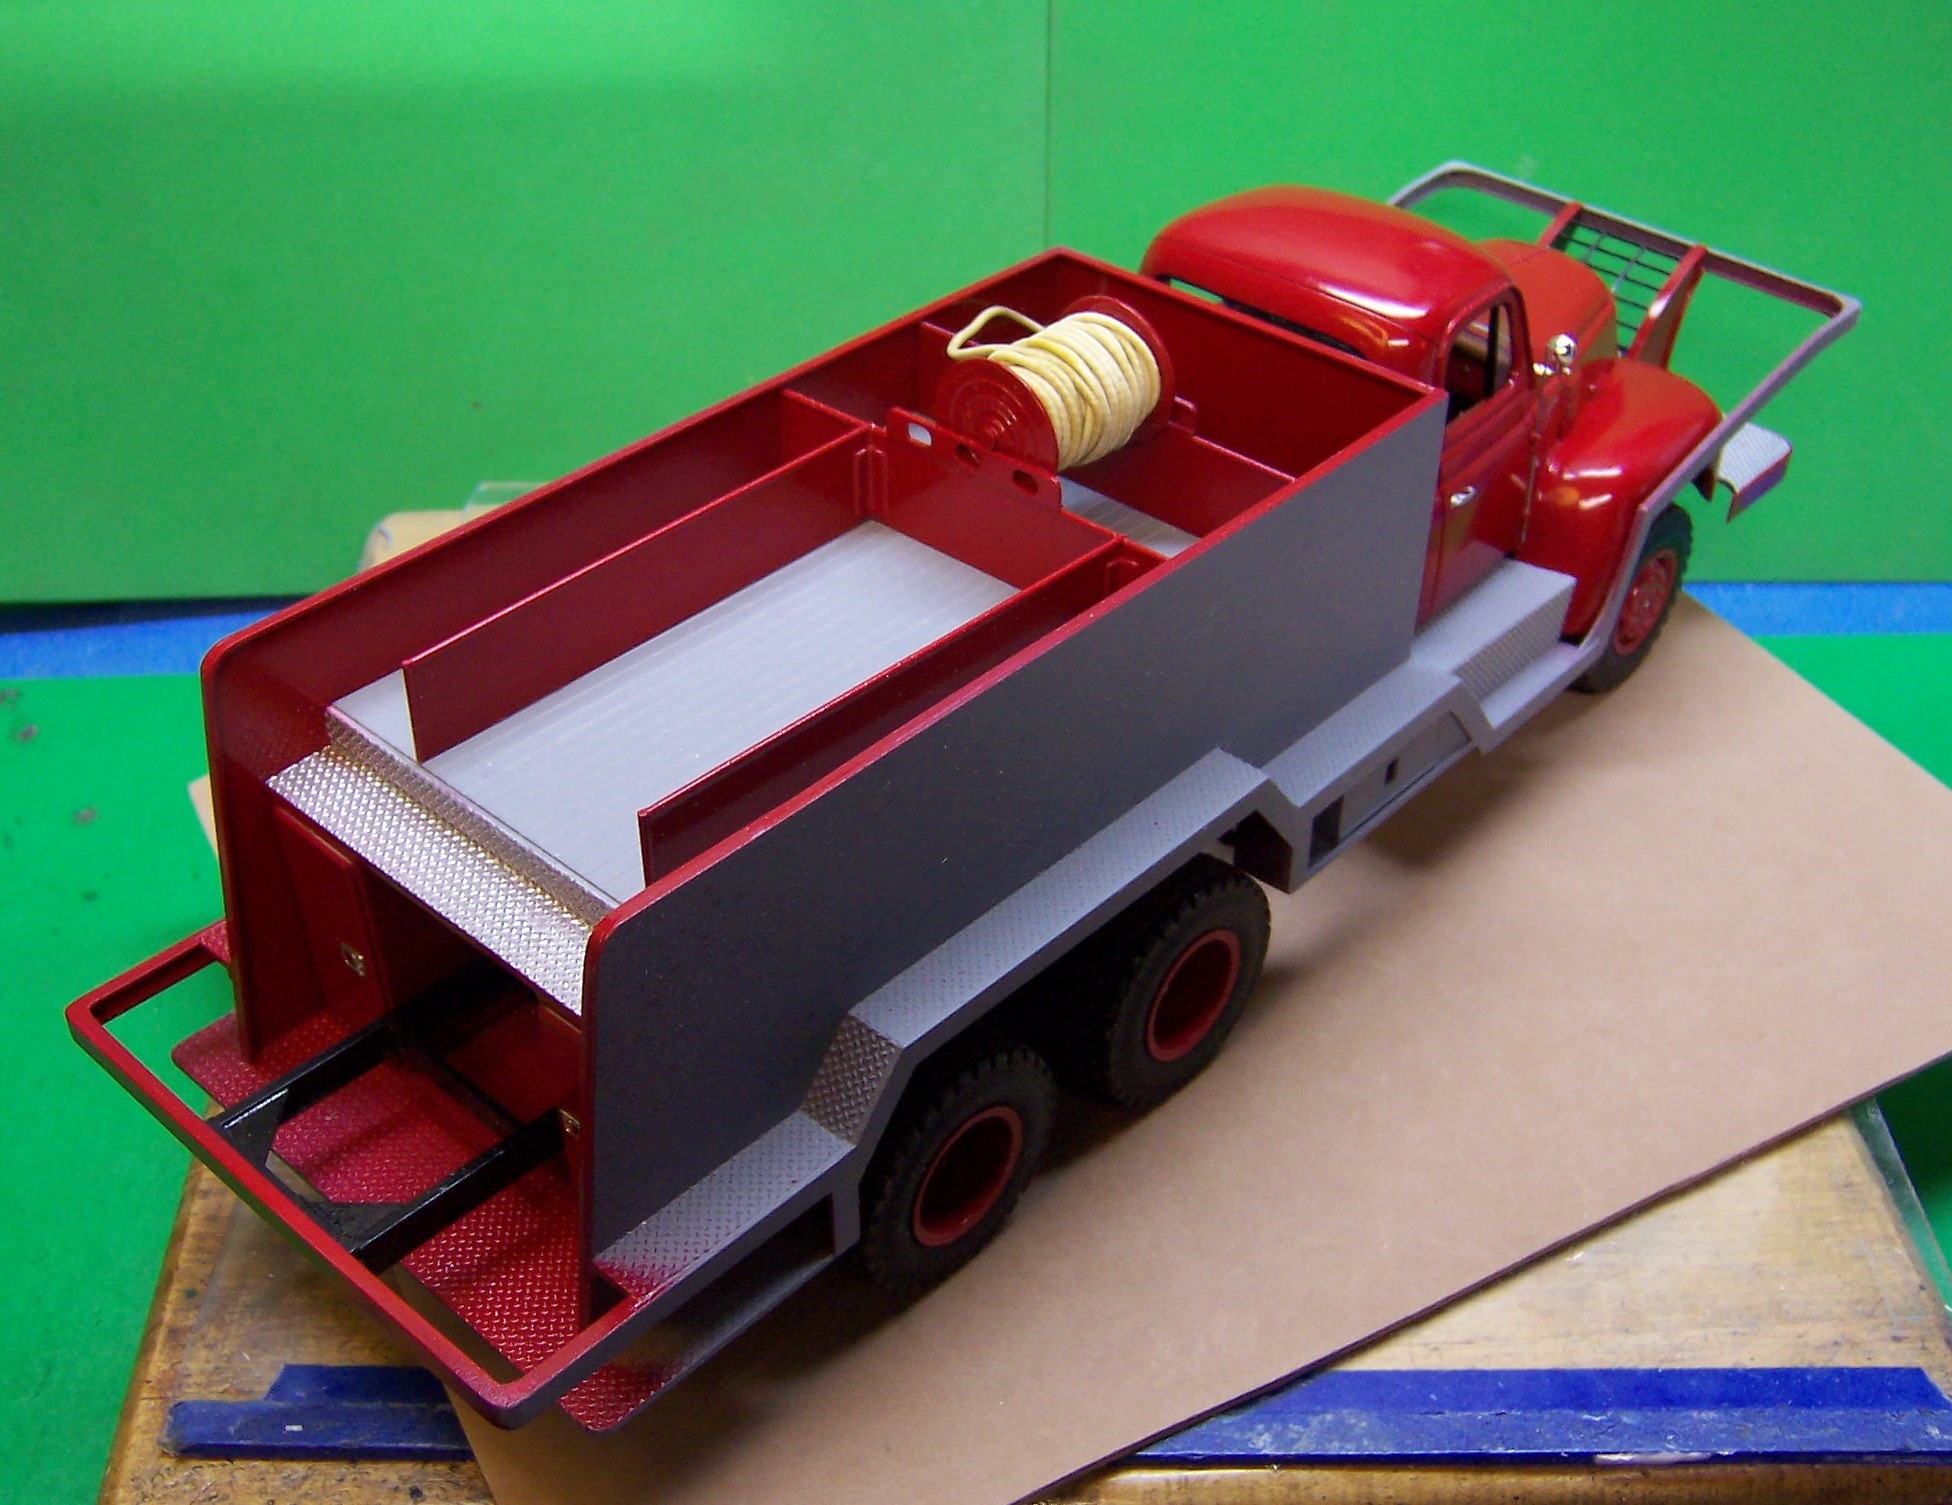
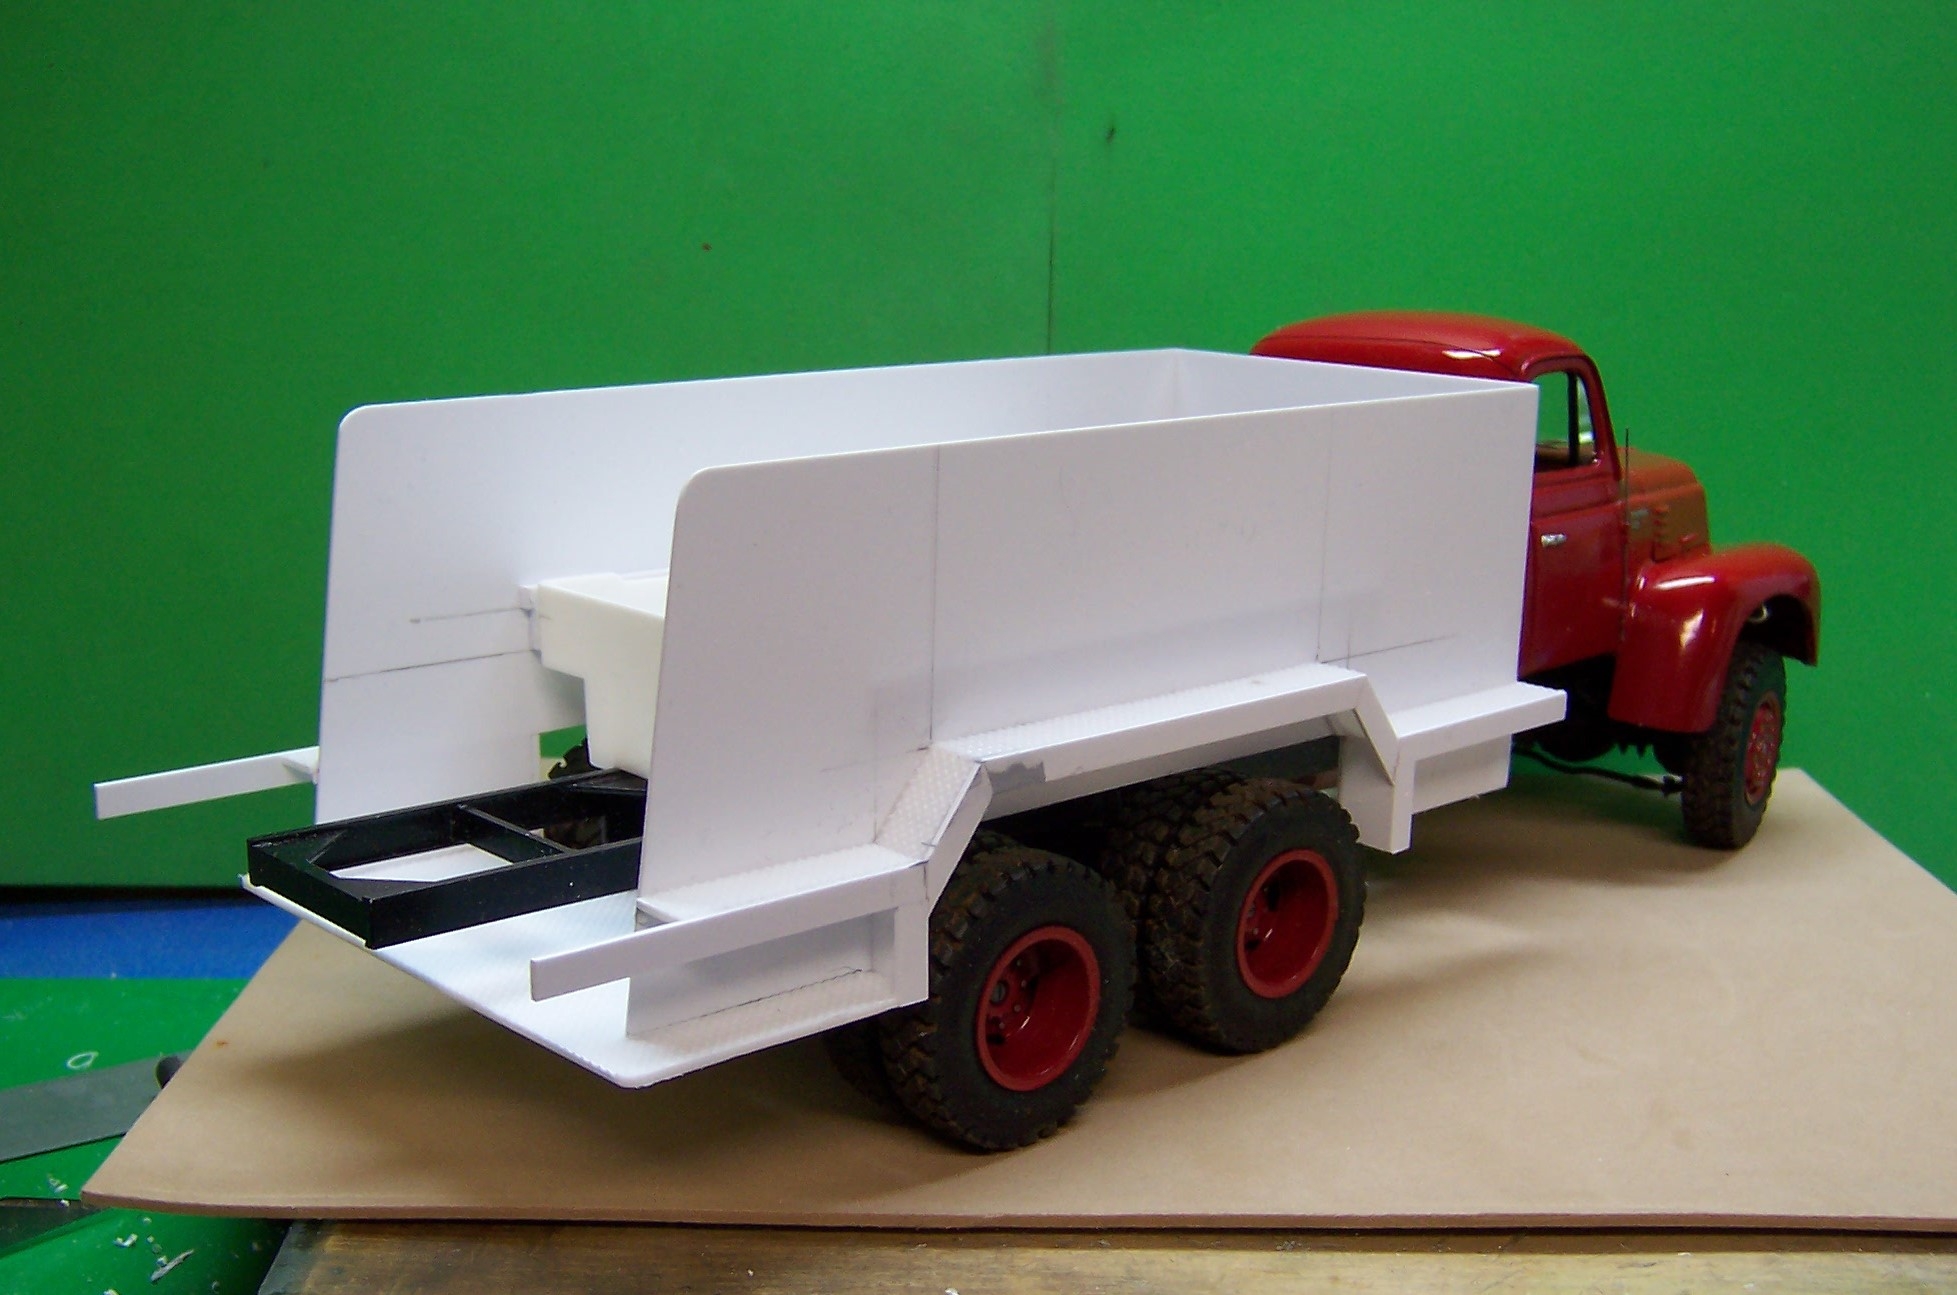
Here's an update on body progress. Got a set of rear compartments made and started on the bar work for the front.


-
 1
1
-
-
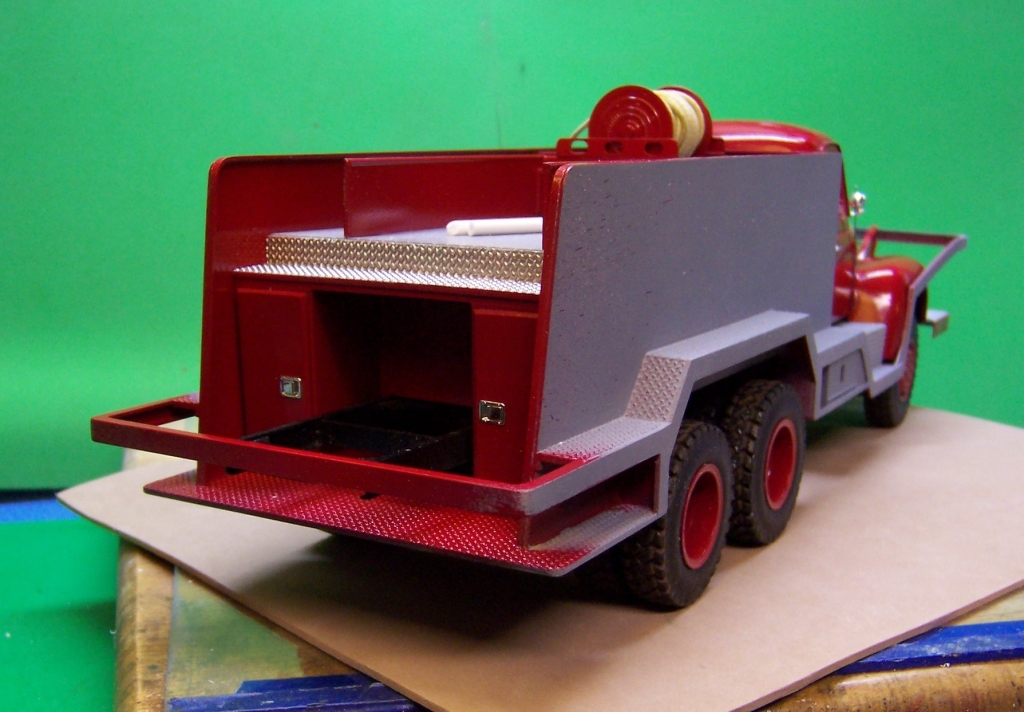
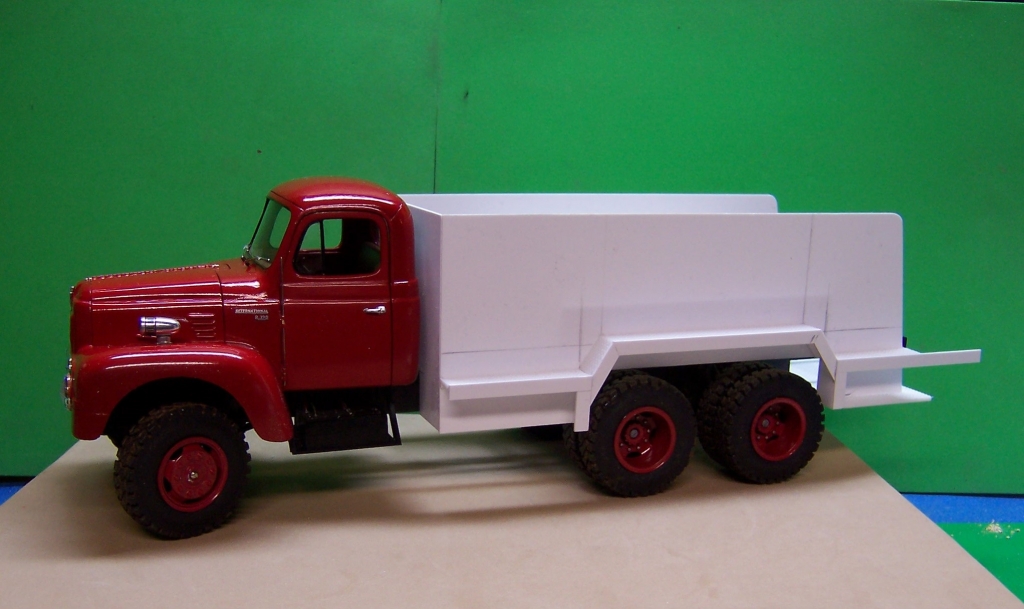
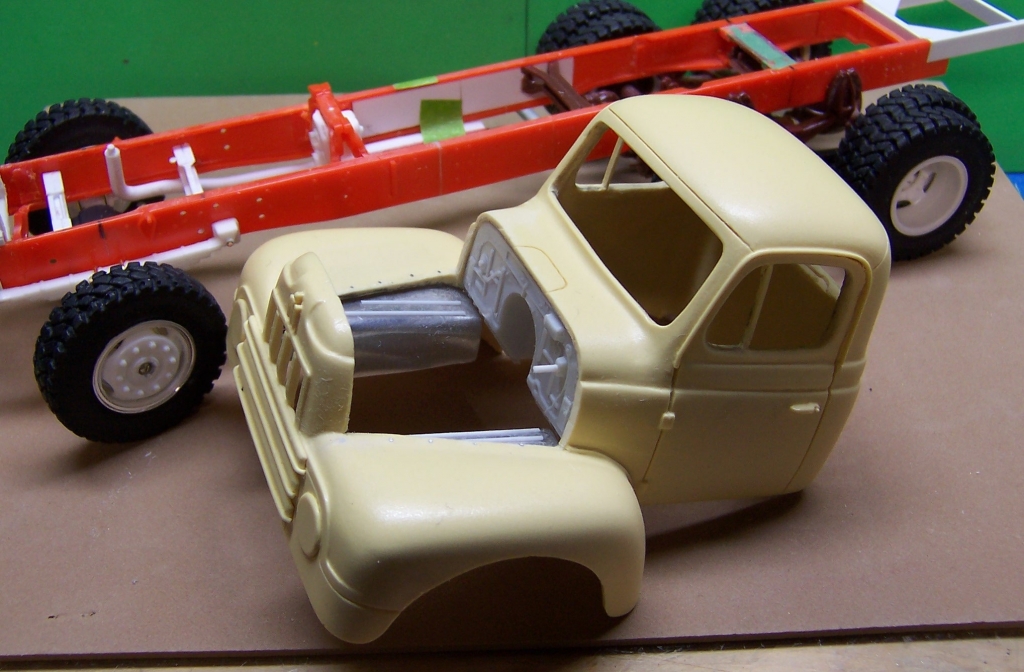
Got started on the body. Lots of work to do on it with some basic details to be worked out.

-
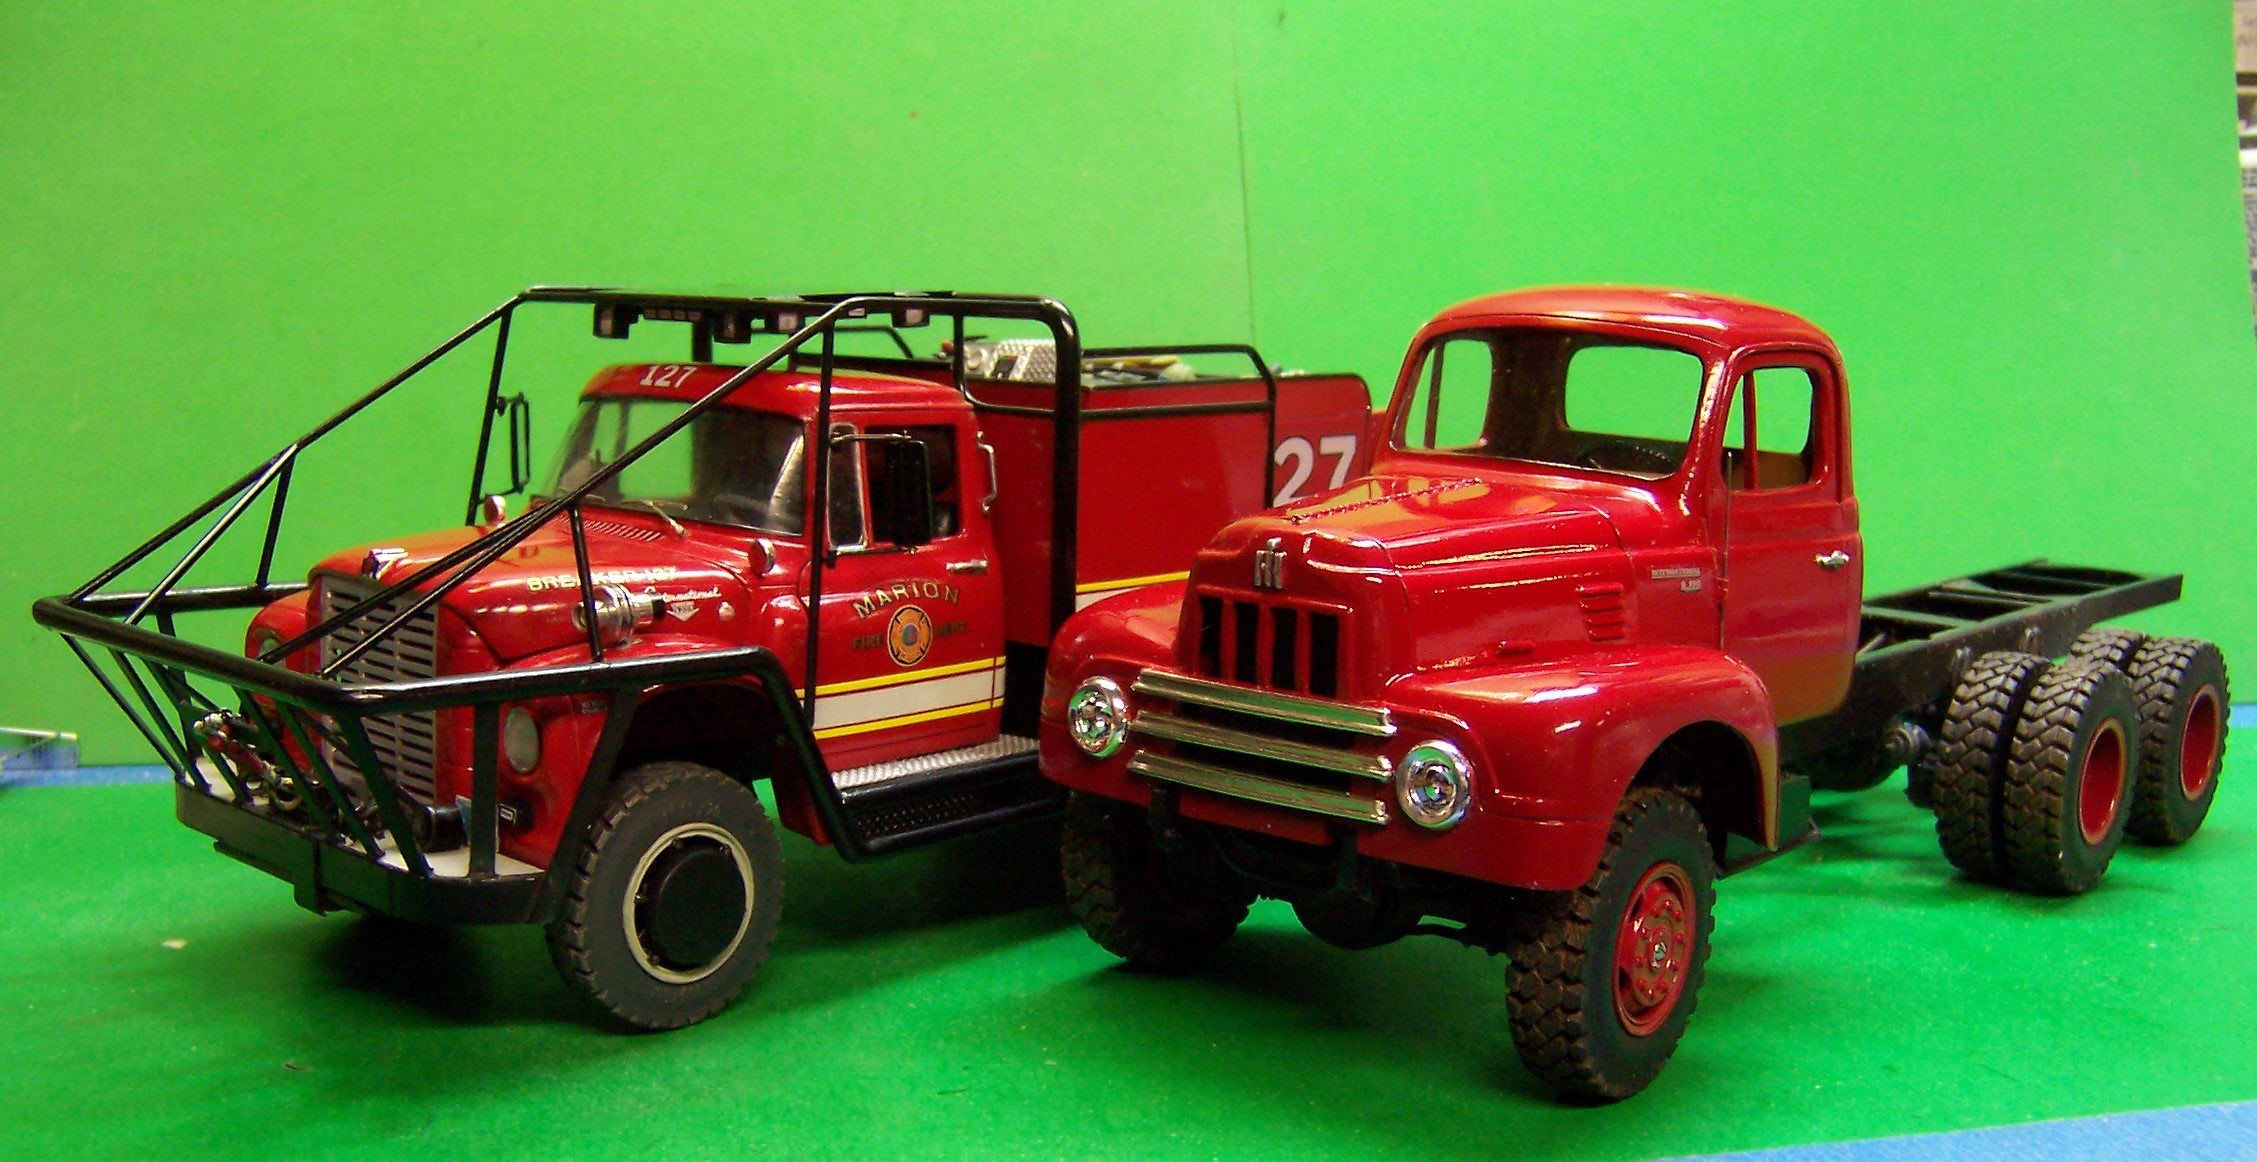
Some additional photos of progress made today.

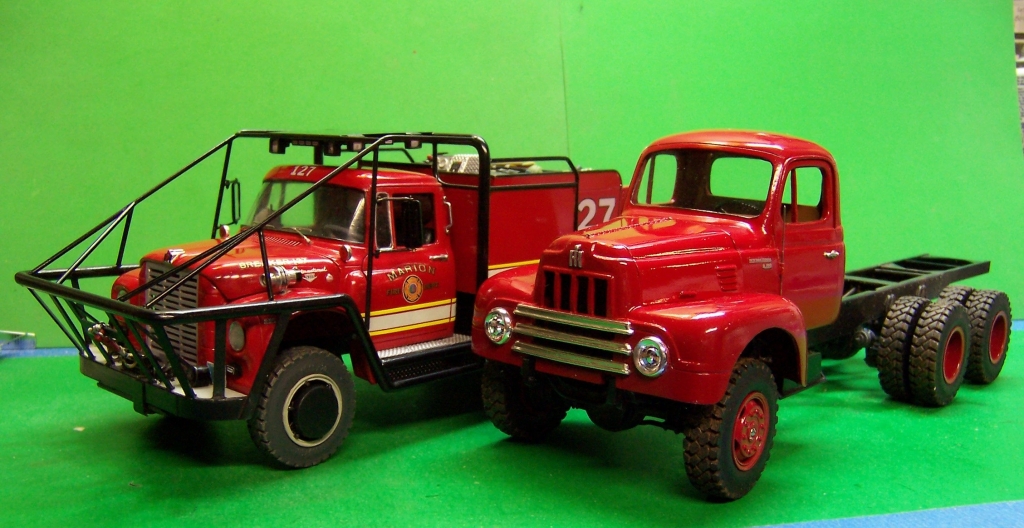
The last photo shows the next generation IH and the styling differences that make them up. The Loadstar was finished a couple of years ago.
-
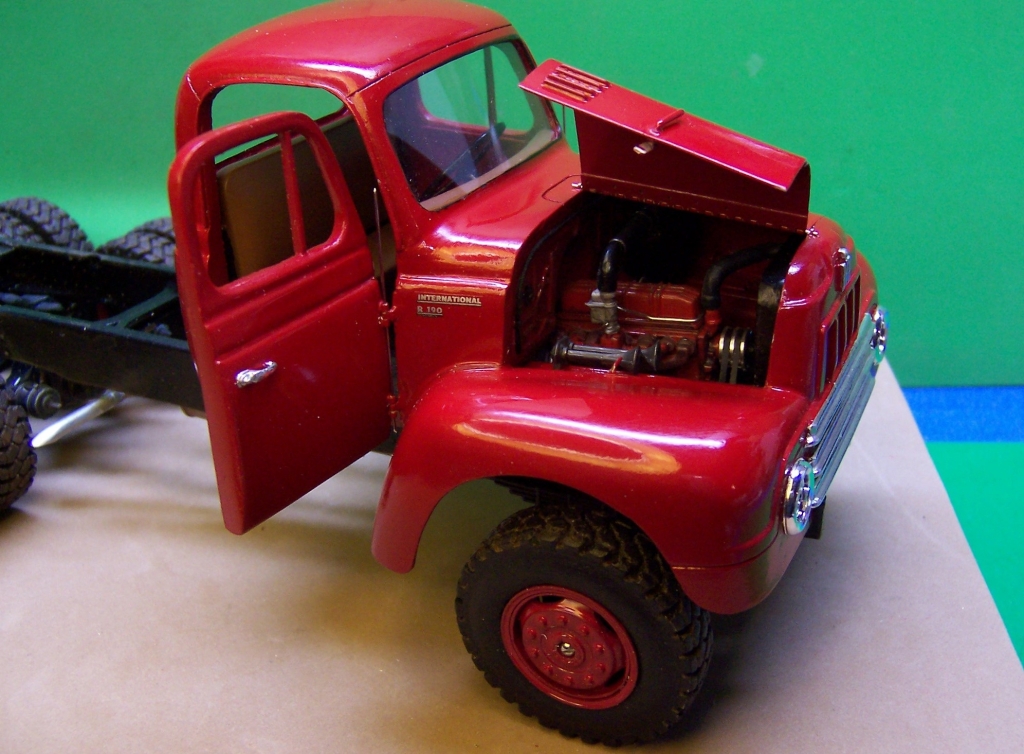
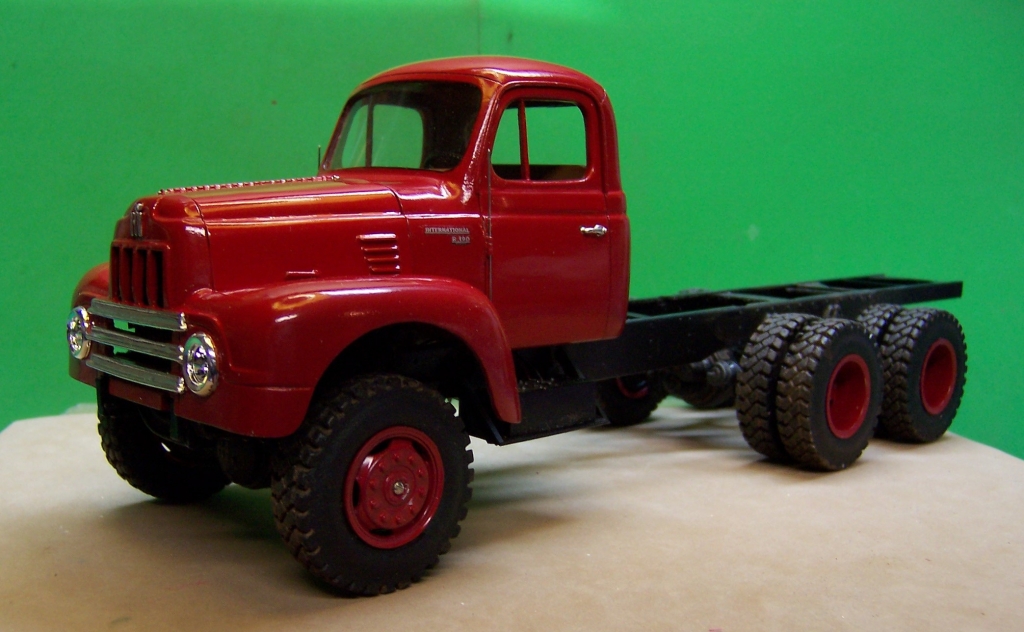
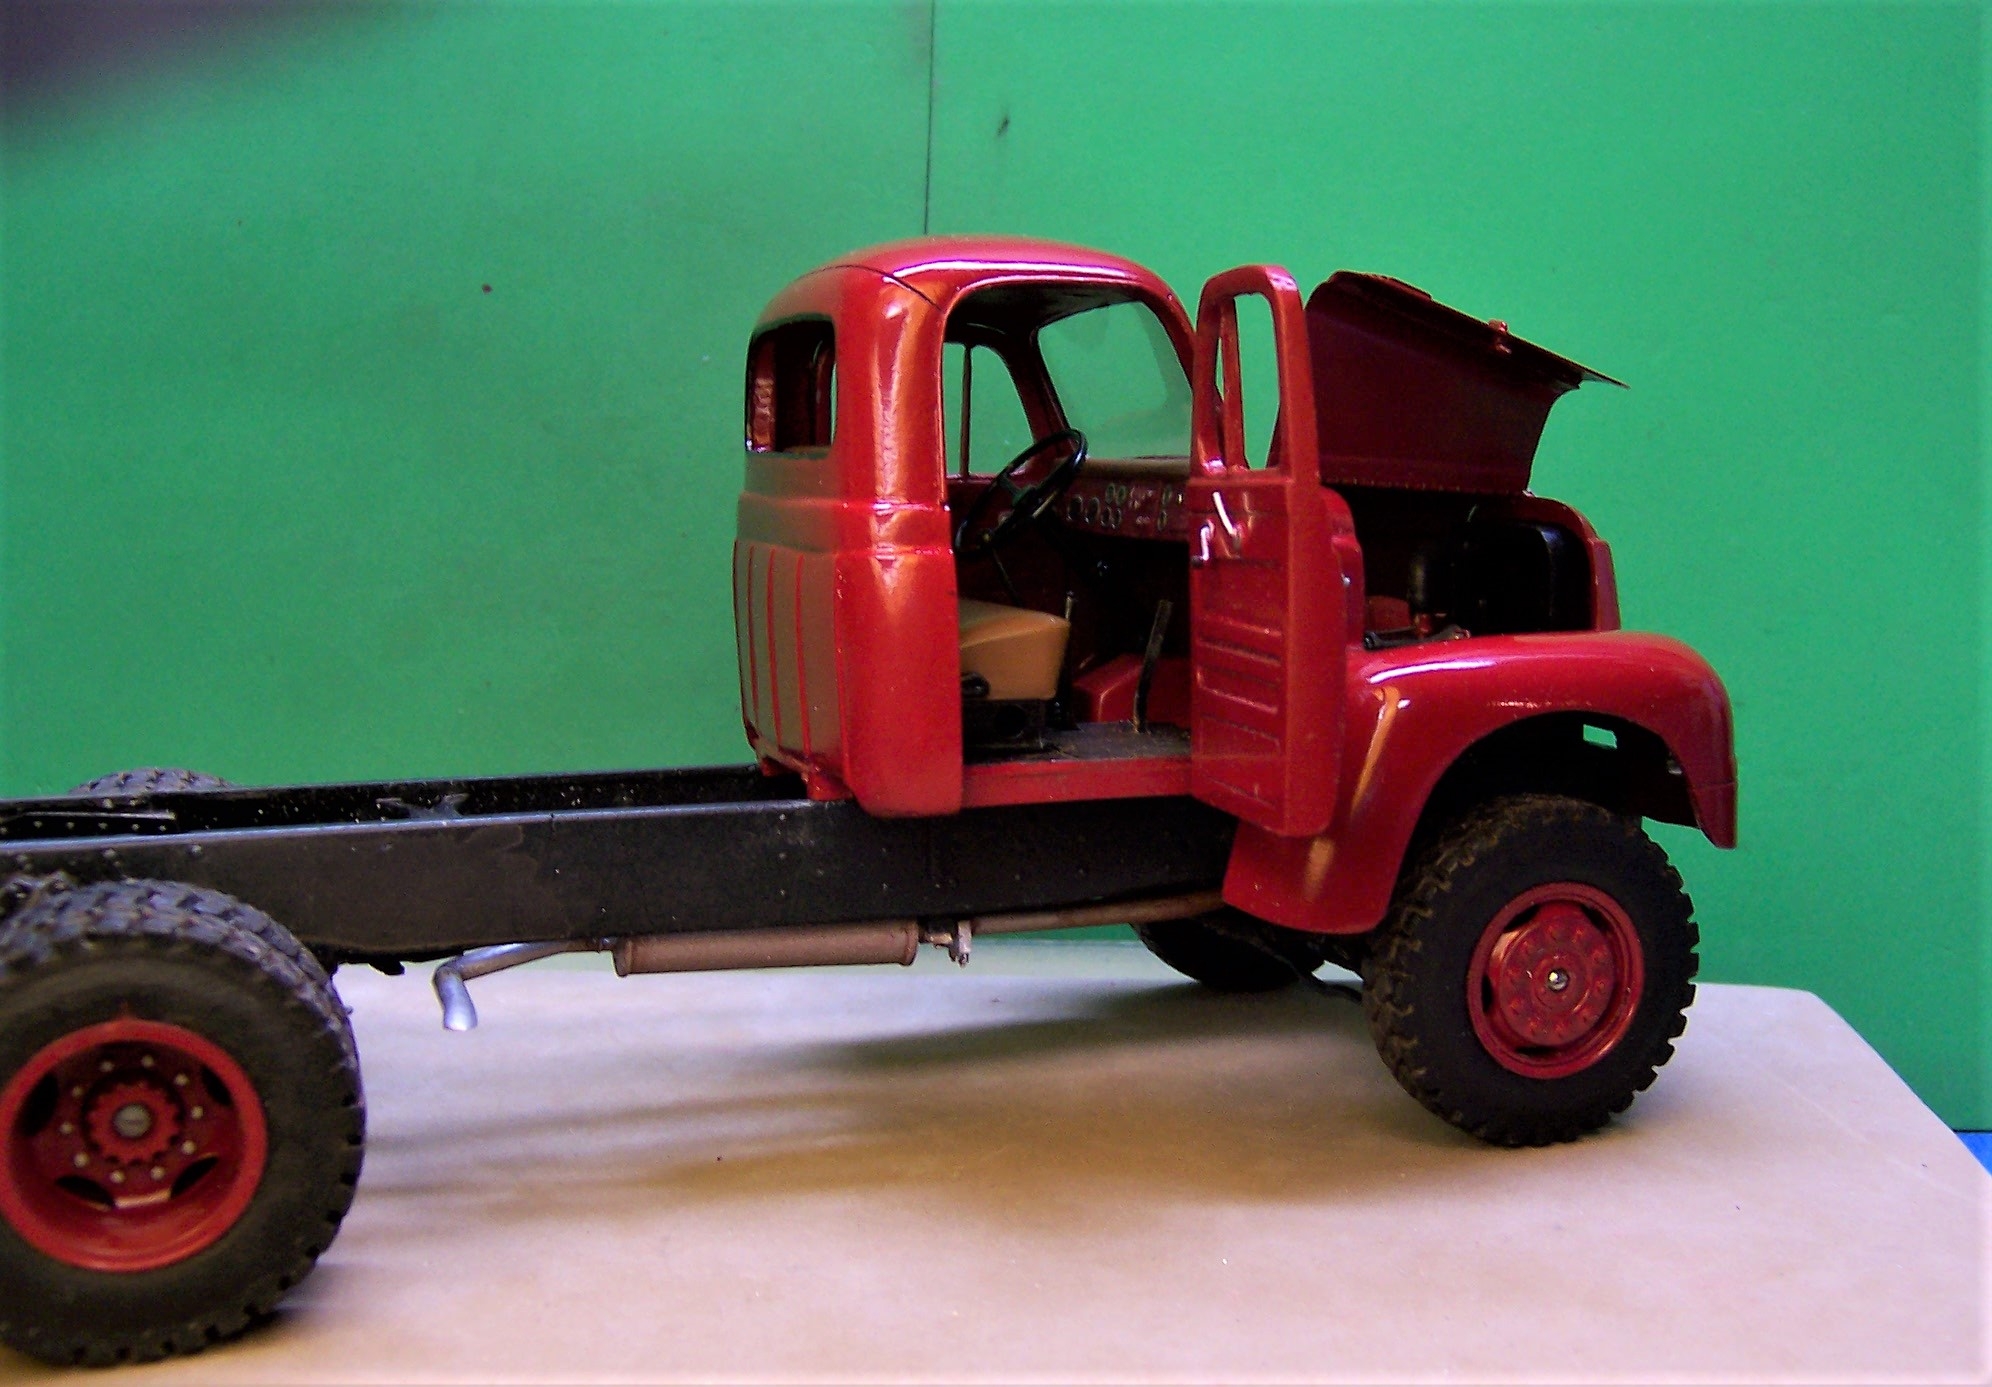
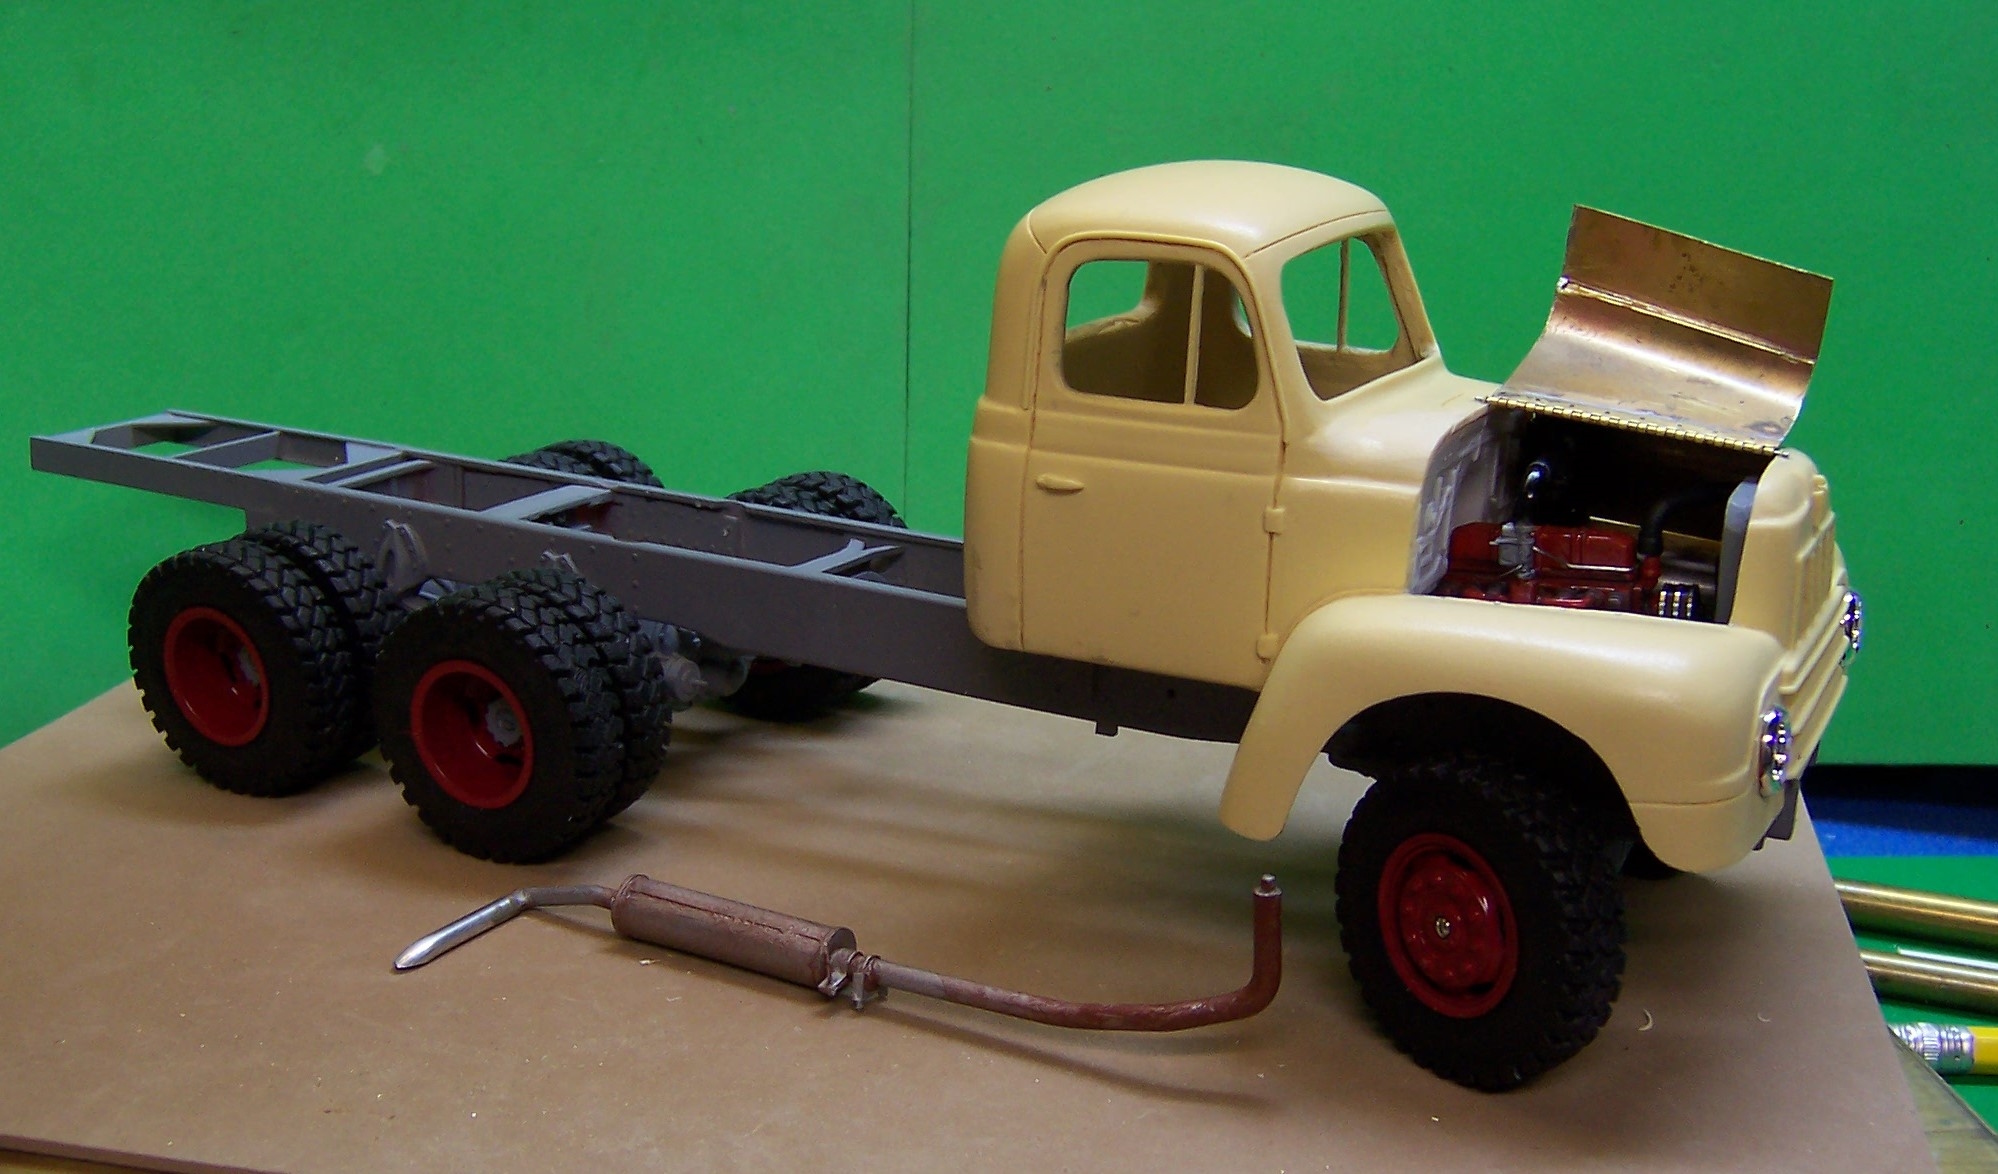
Here are a couple of updates. The cab is now in paint and some of the details have been added. Still lots to do but now and then it is fun to deviate from the general build and concentrate on the fun stuff. The paint is Duplicolor right from the can. I like it because it dries quickly and is a hard finish. Easy to polish out. I did the IH decals on my computer copying the logo from a photo of the real one. Then it was downsized and printed on an ALPS printer. The seat came from the '50 Chevy. It was brush painted with acrylic Model Master medium tan. When put on over Duplicolor primer it flowed perfectly into a nice even coat.


Bare Metal Foil was used on the grill bars. Headlight bezels are now glued in place. Next up is to lightly sand and polish the hood and doors.
-
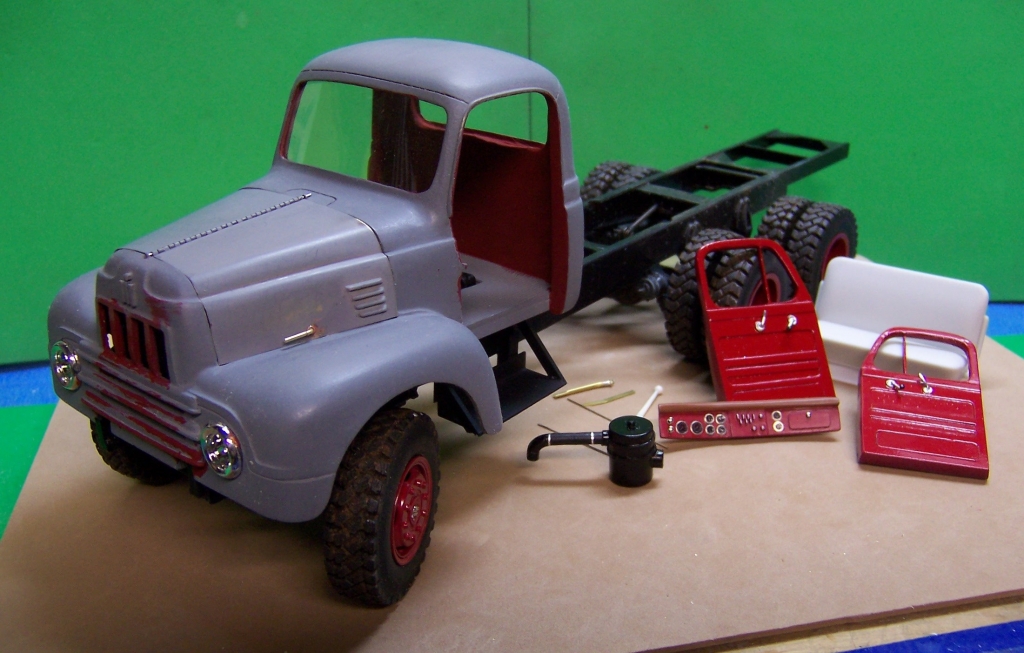
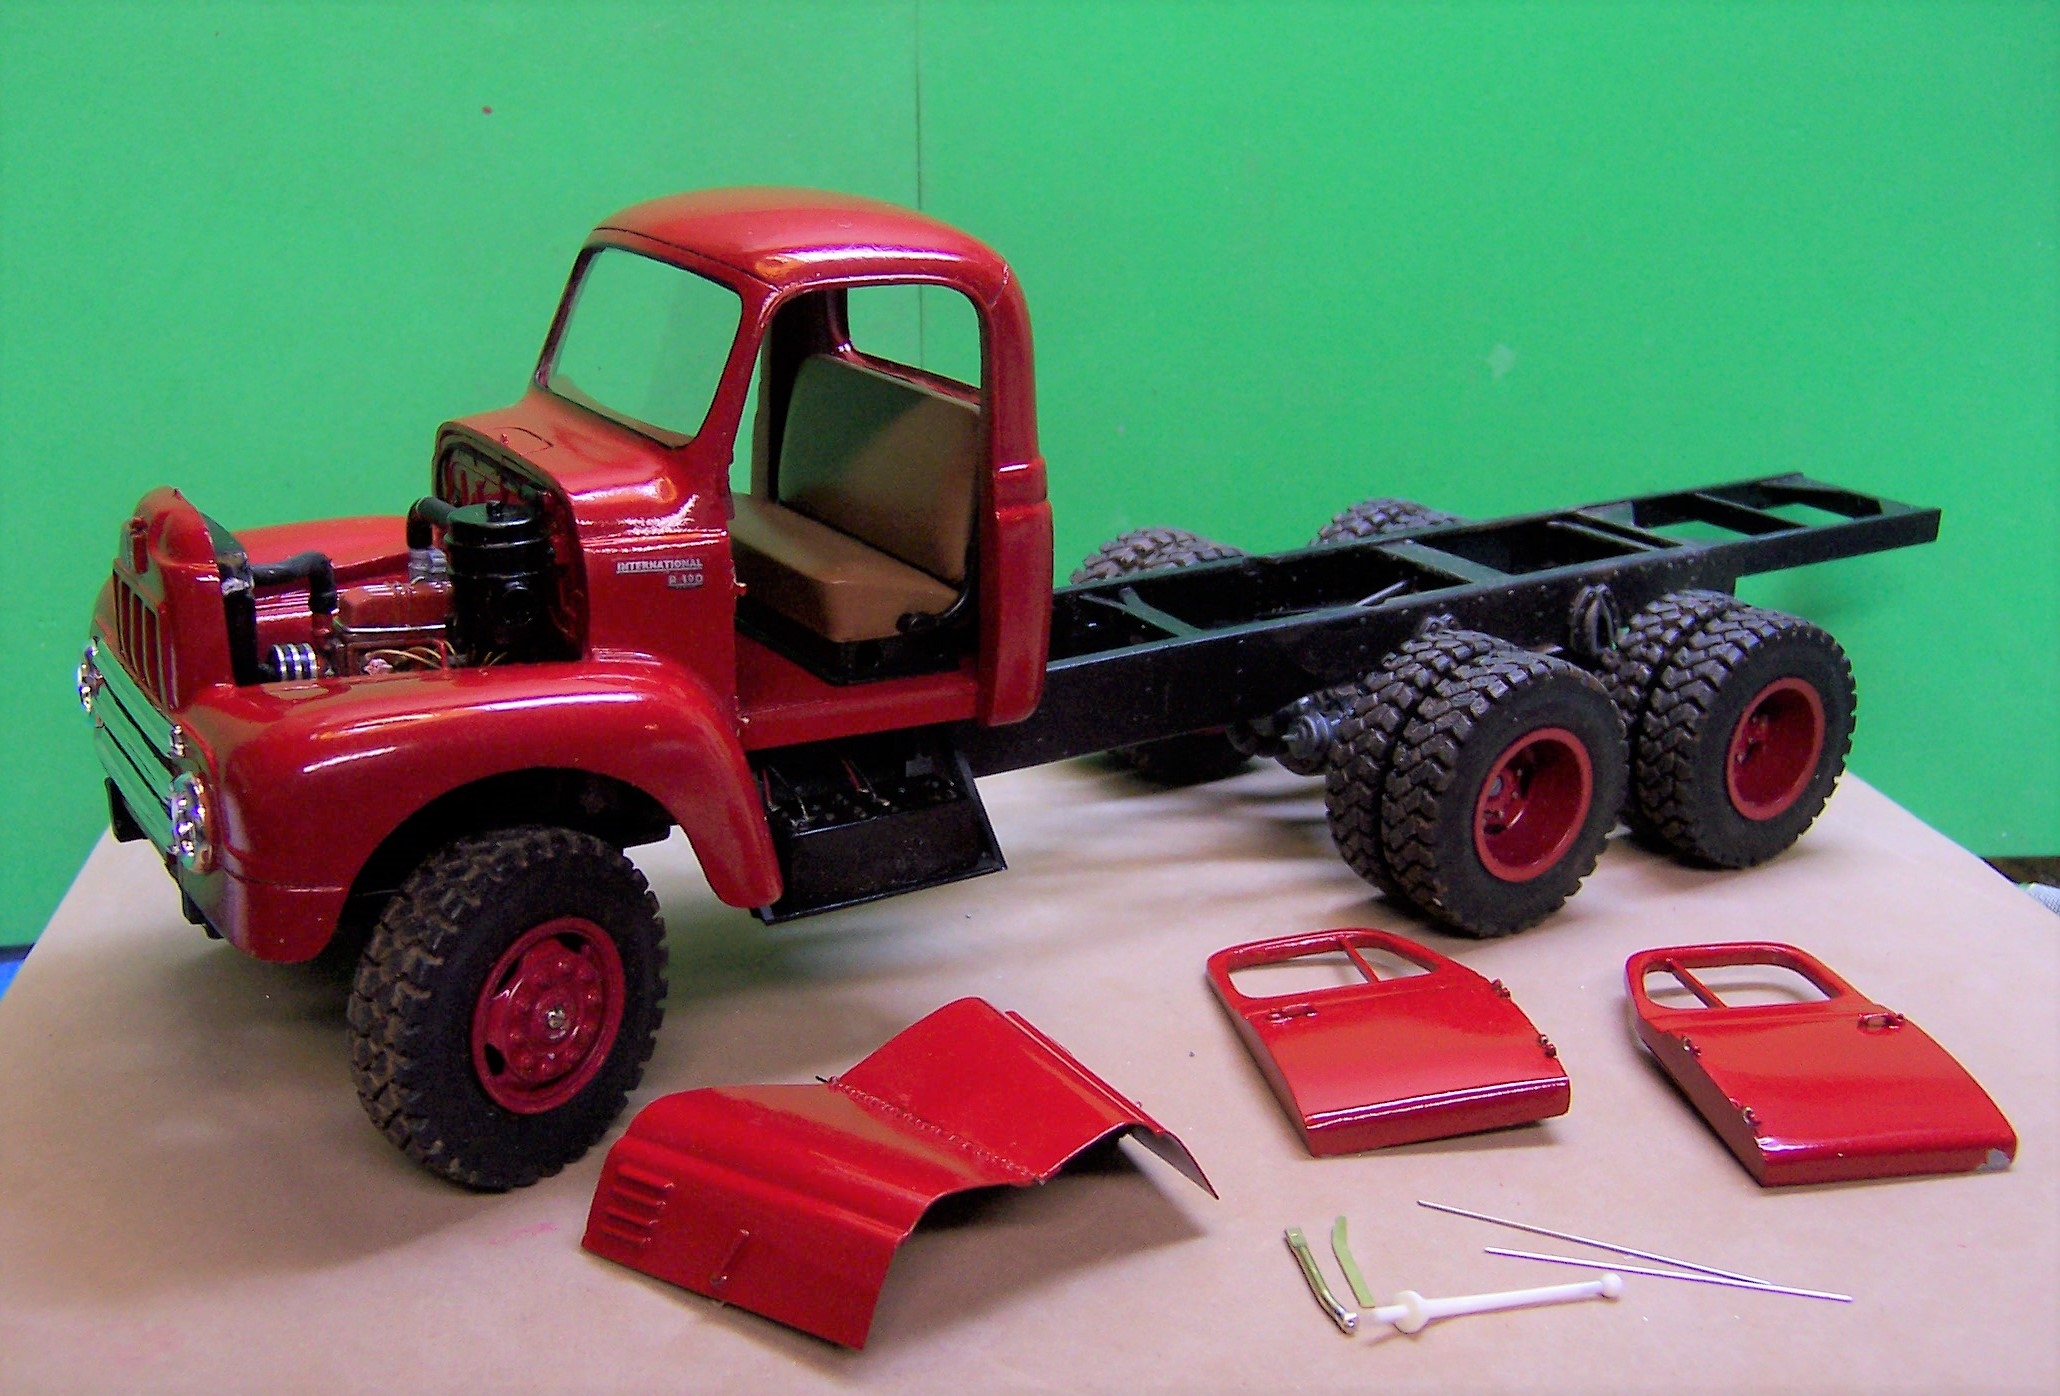
Since the last post several things have been done. Doors have been opened by scribing and sawing. Then brass butt hinges were added to the cab and doors. The interior tub has been put in place also. When the doors were cut away the cab became very flimsy since it was only held together by the A posts at the windshield. I also cut away the cast in place headlight surrounds and substituted the chrome ones from a Ford truck kit.

The door interiors have been painted with inside latches and window cranks made from bright aluminum wire. The dash board has been sanded for fitting and the cast in place gages were cut off. A decal was made of all of the gages and overlaid with photoetched bezels. The seat will be painted the same as the top of the dash as an accent color. Gear shift, hand brake and 4 wheel drive lever are ready for installation.
-
A scratch built 1932 Mack AP used in constructing Boulder Dam. Chassis is a stretched AC frame and modified wheels for hard rubber in the rear and pneumatic tires in front. The radiator was stretched also. Body is constructed of sheet plastic stock. Chains and sprockets at the rear wheels are from MicroMark.

-
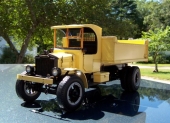
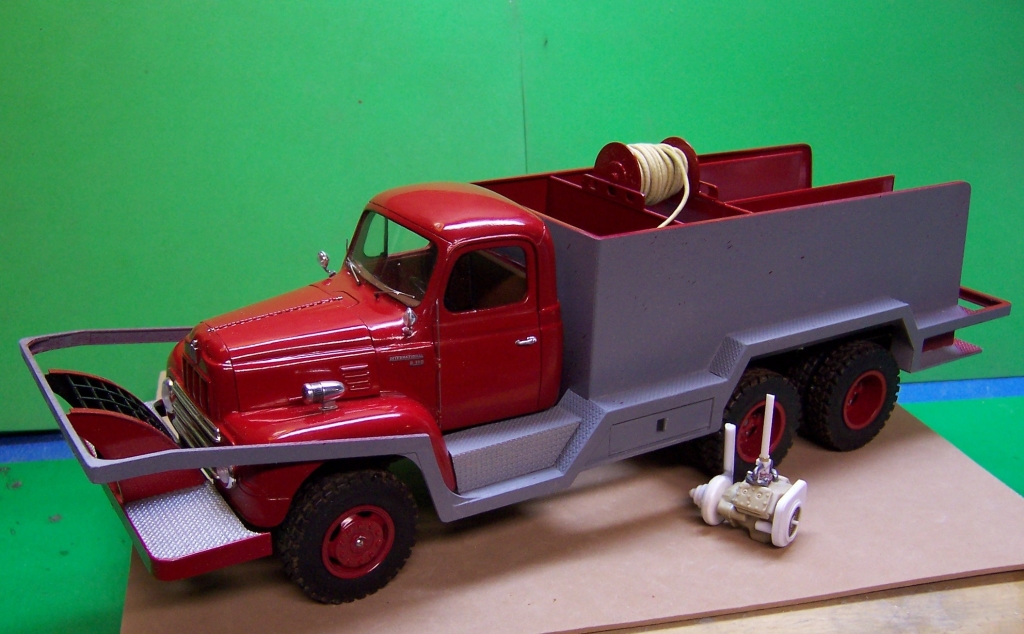
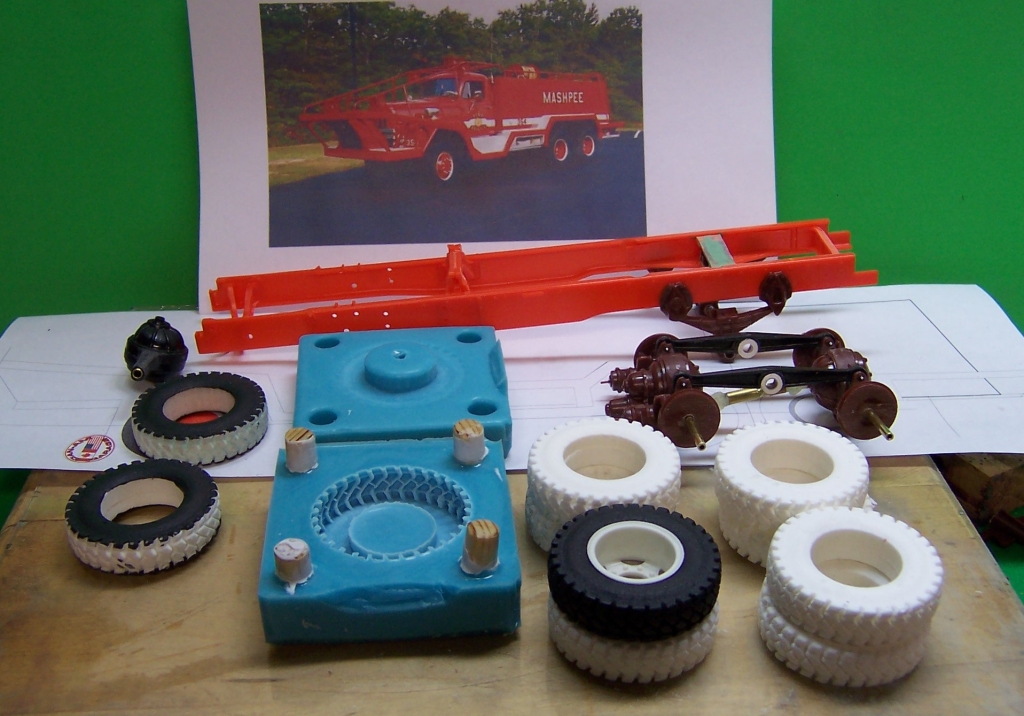
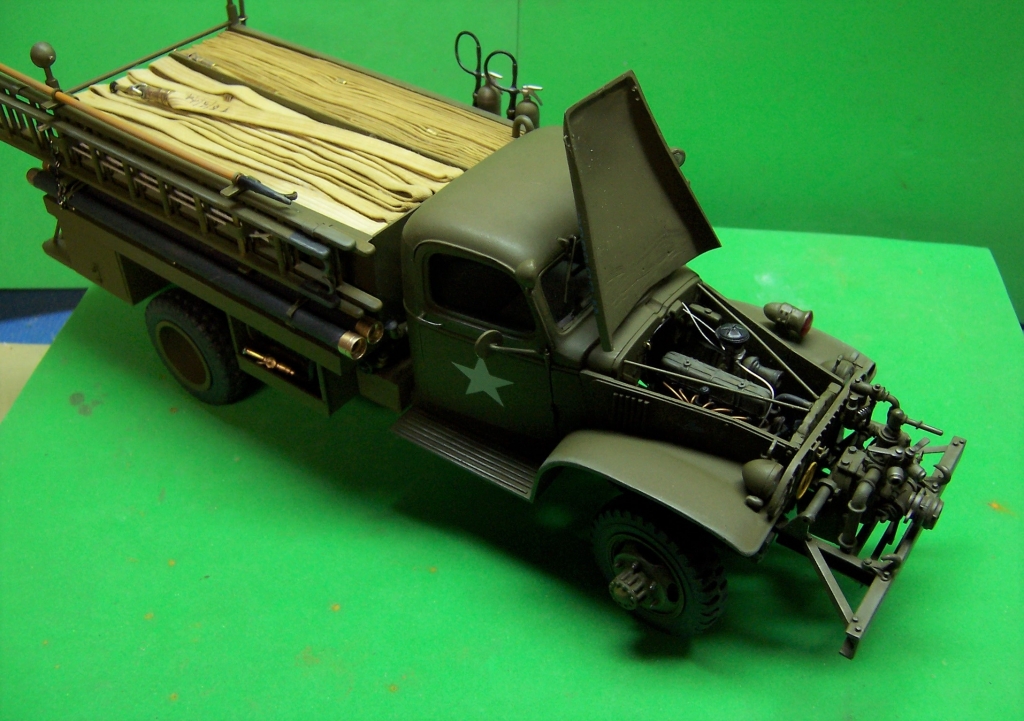
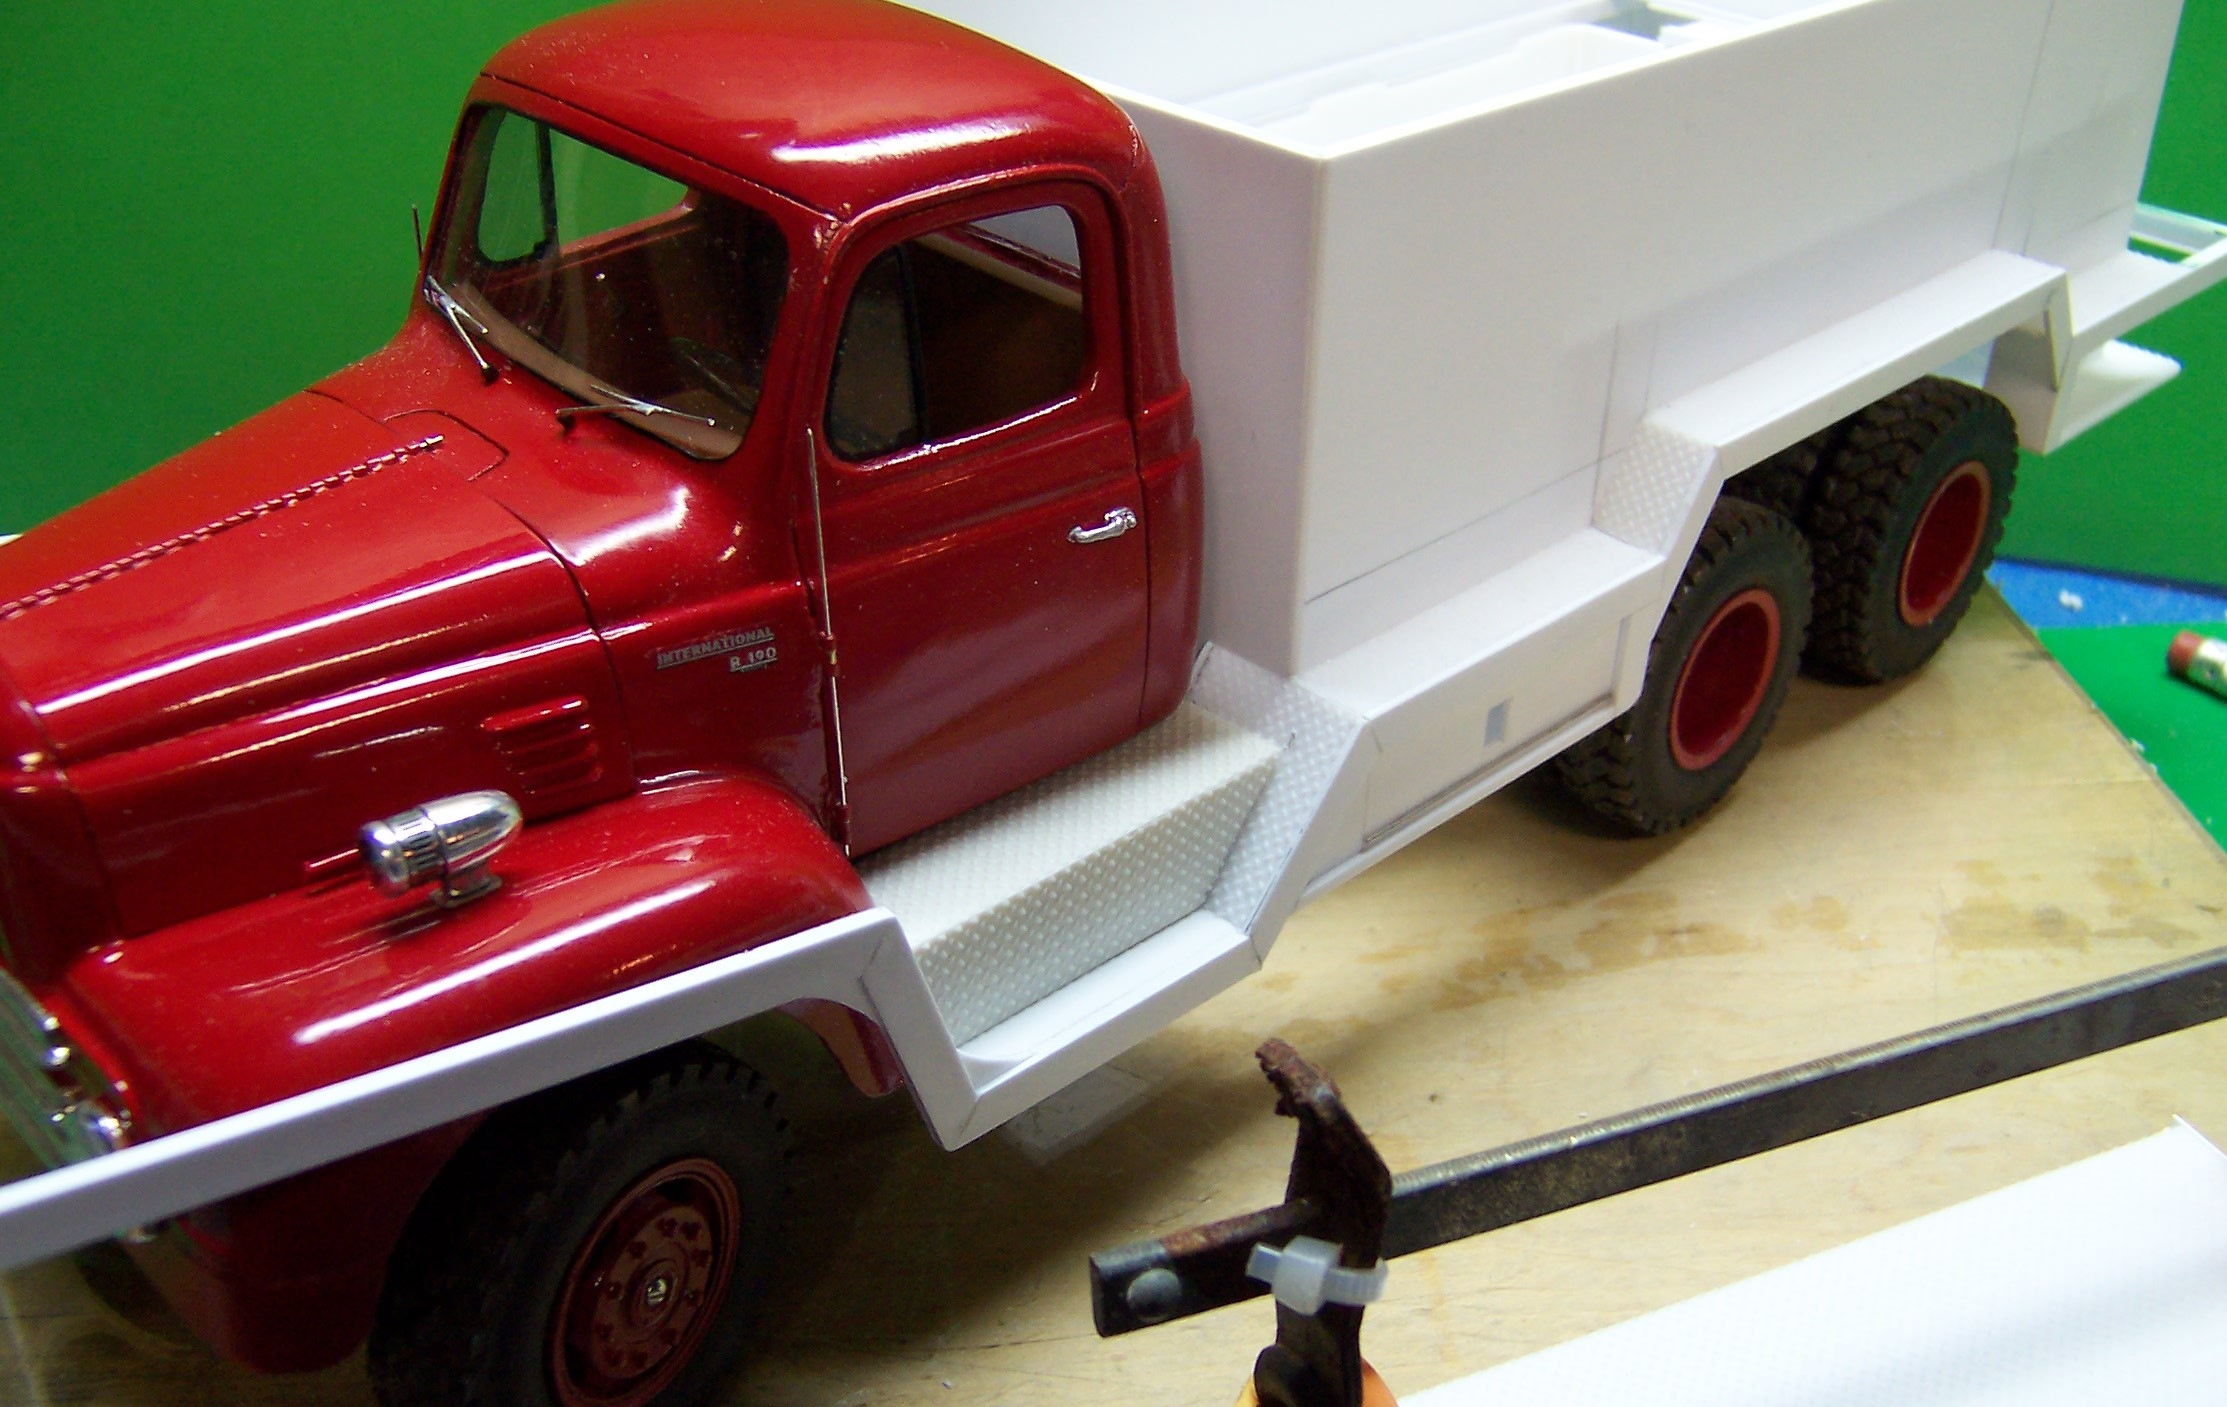
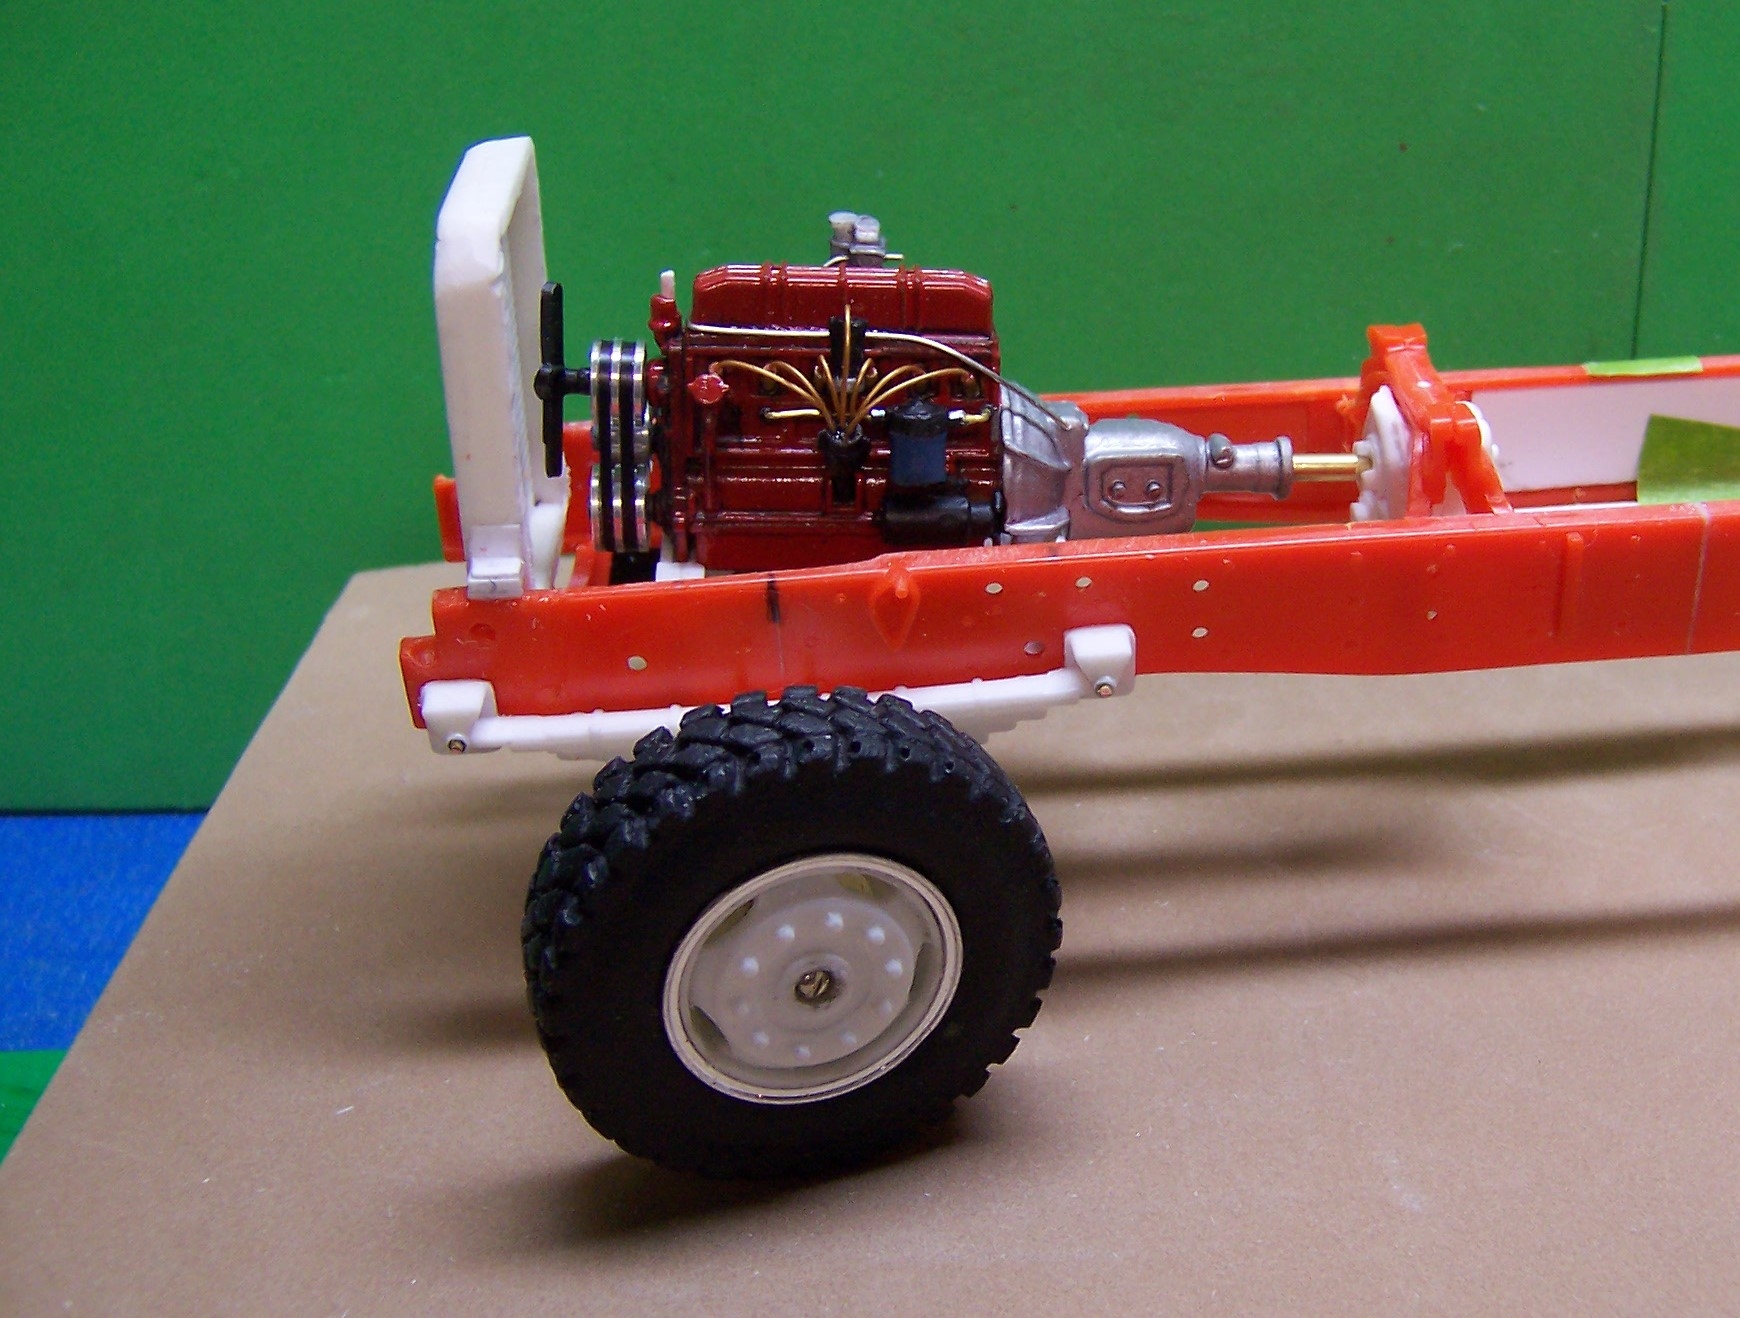
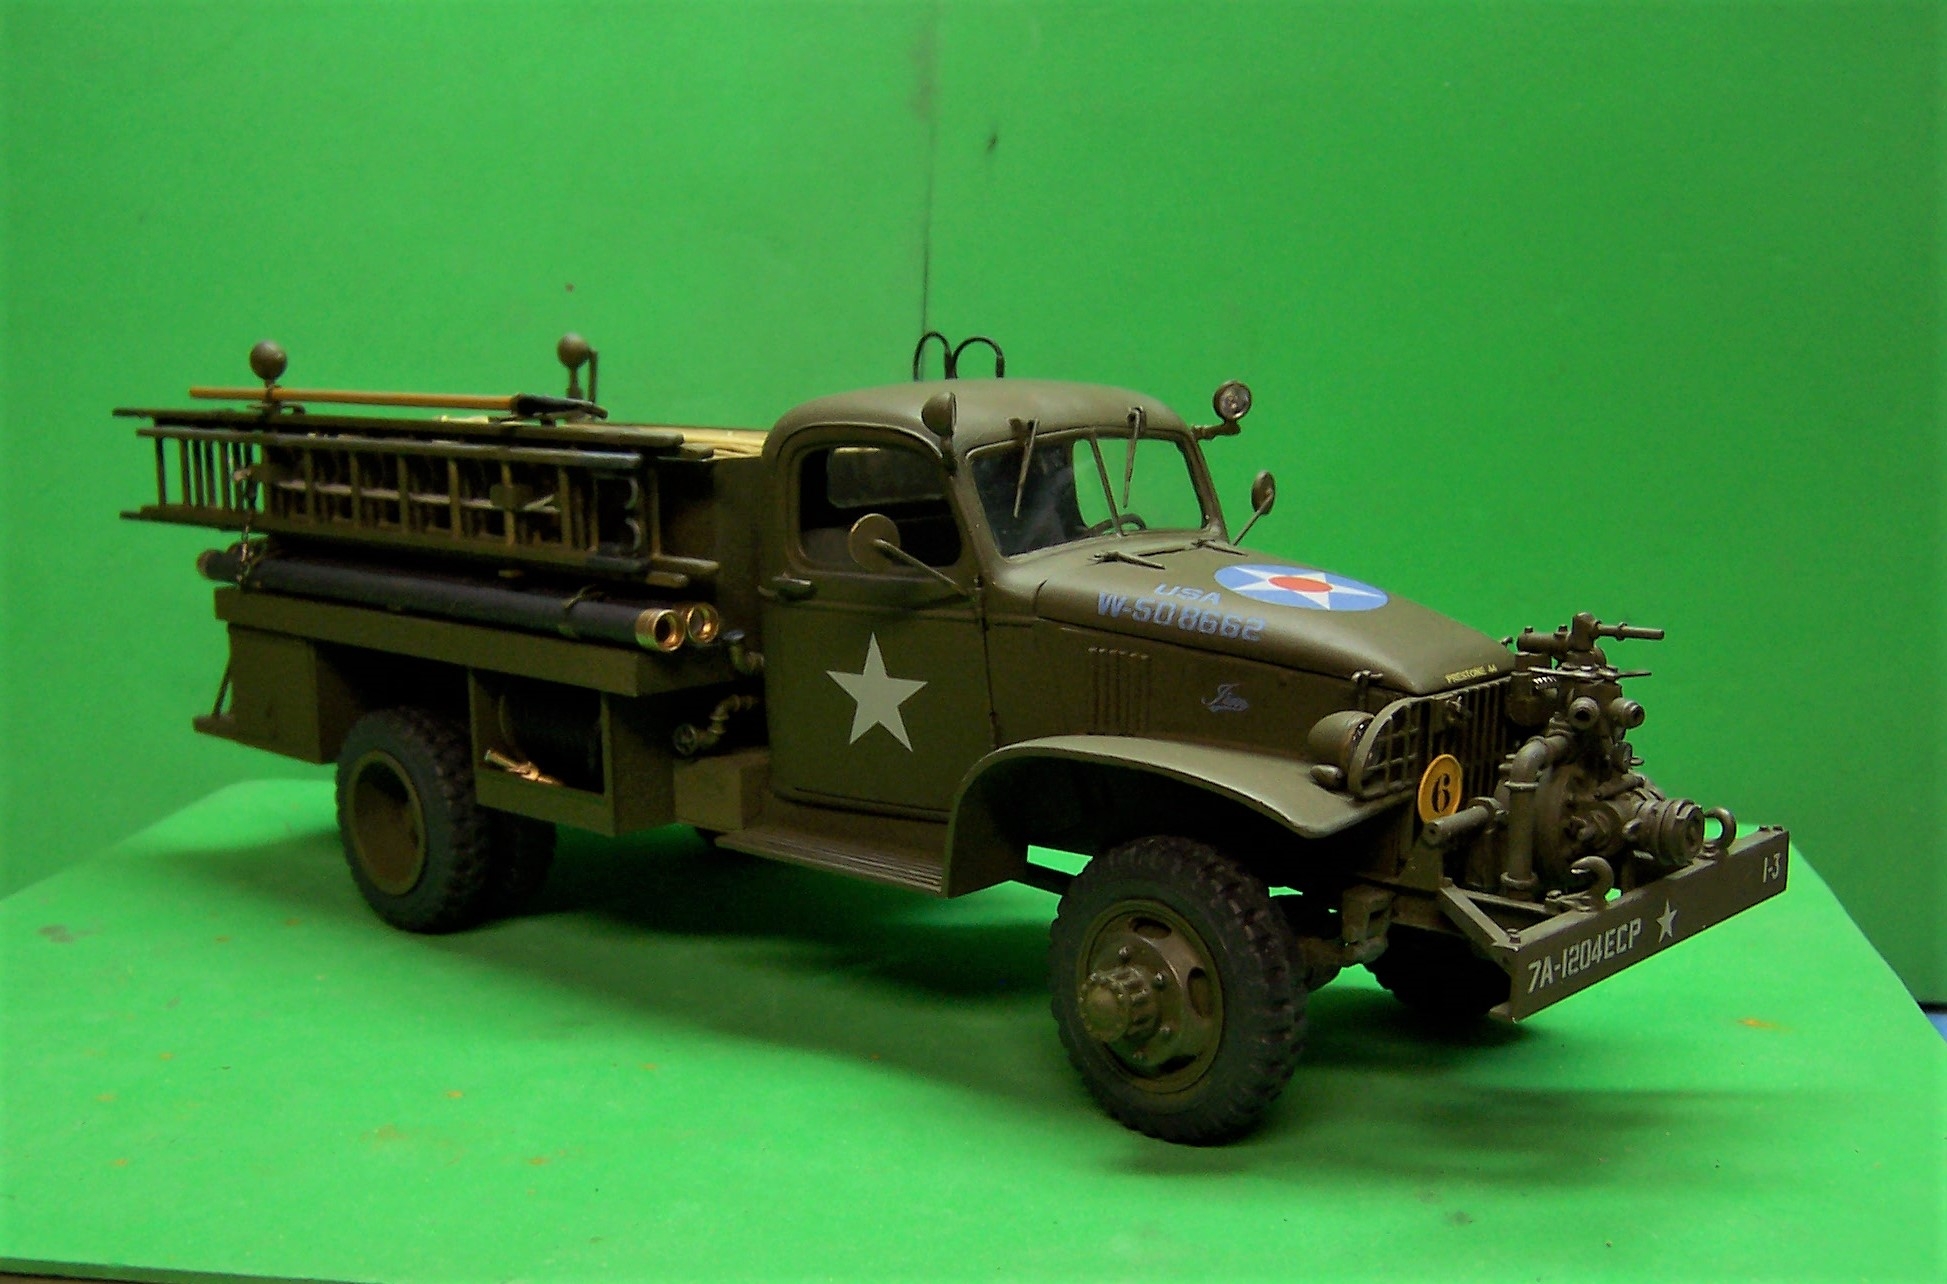
This is on the workbench and will eventually be a model of Mashpee 354, a brush truck for the Town of Mashpee Fire Department. The cab is an Illini Replicas casting. Frame is from an Ertl kit and was extended. Tires are resin castings made from a 3D printed master. The engine is re-worked from a 1941 Chevy kit engine.


-
Got to finish this for my better half before going back to truck building. I may try another old Mack. We'll see.
-
On 9/20/2019 at 4:34 PM, Dennis said:Thank you. I ordered AIT's Sterling kit. I've always liked early Sterlings since I was a kid and saw them on the road. Not cheap, but...... Now I need to research what base kit/chassis to buy to build the conversion on. All AIT's kits/parts appear to be 1:25, which is what I've settled on.
Back to more shopping/homework.....
Don't forget that Sterlings of that era were chain drive.
-
I agree. Self etching primer is the way to go after the brass has been thoroughly cleaned. You will still find that the primer will wear at sharp corners and may require a bit of touchup before painting the finish coats. Wear and weathering should come after the finish coat has been applied. Military modelers seem to have this technique mastered for sure. But you can achieve good results using washes that have a base other than what was used for the finish coat. Acrylics do well. They there are weathering powders such as Tamiya that can be applied to small areas to bring out highlights. Check out IPMS and some of the shows they sponsor. You can pick up all sorts of tips on weathering and making things look beat up there.
-
Watch out for Snap, Krackle and Pop!🤣
-
Wings and Wheels will be hosting a model show this Sunday in Chickopee, MA. Plenty of info regarding the show on their website.
-
I'll surround it with soft foam with appropriate cutouts for the wheels, pump, ladders and spotlights. That all goes in a plastic tub which in turn will go in a cardboard box filled with packing peanuts. Then I'll pray it gets there in one piece!🙄
-
Nice clean work! First model of Wally World I have seen. I like it!
-
Thanks, Guys. I will be keeping this one for a short while but eventually it will be sent to its future owner in Belgium. He has the restored rig that this one was modeled after. Done to his spec.
-
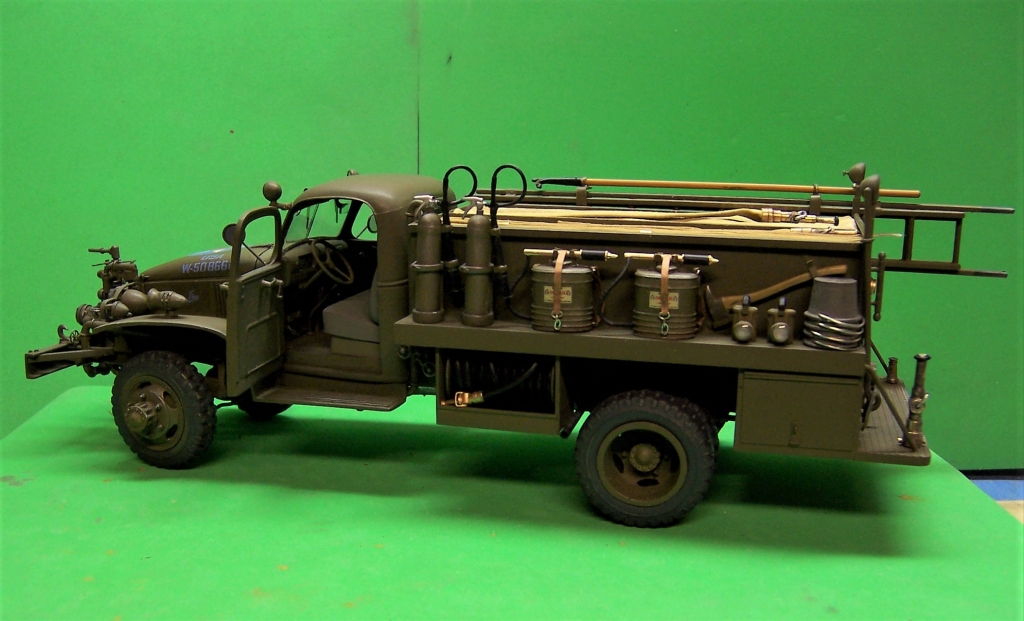
Been working on this one since last October. Last of detailing was finished today with the addition of the ladders, pike pole, some running board brackets, pump cans, CO2 extinguishers, etc. 🙂


-
1
-
-
Pretty unique piece! Well done!
-
Tape the two together before painting so that they fit as they should. Then place the combined pieces on the frame to see where the attachment points are Chances are you will have to make some slight adjustments. That is where some plastic pieces, some pins and glue will help. If the hood is to tilt make sure everything is square and level when it sits on the frame.


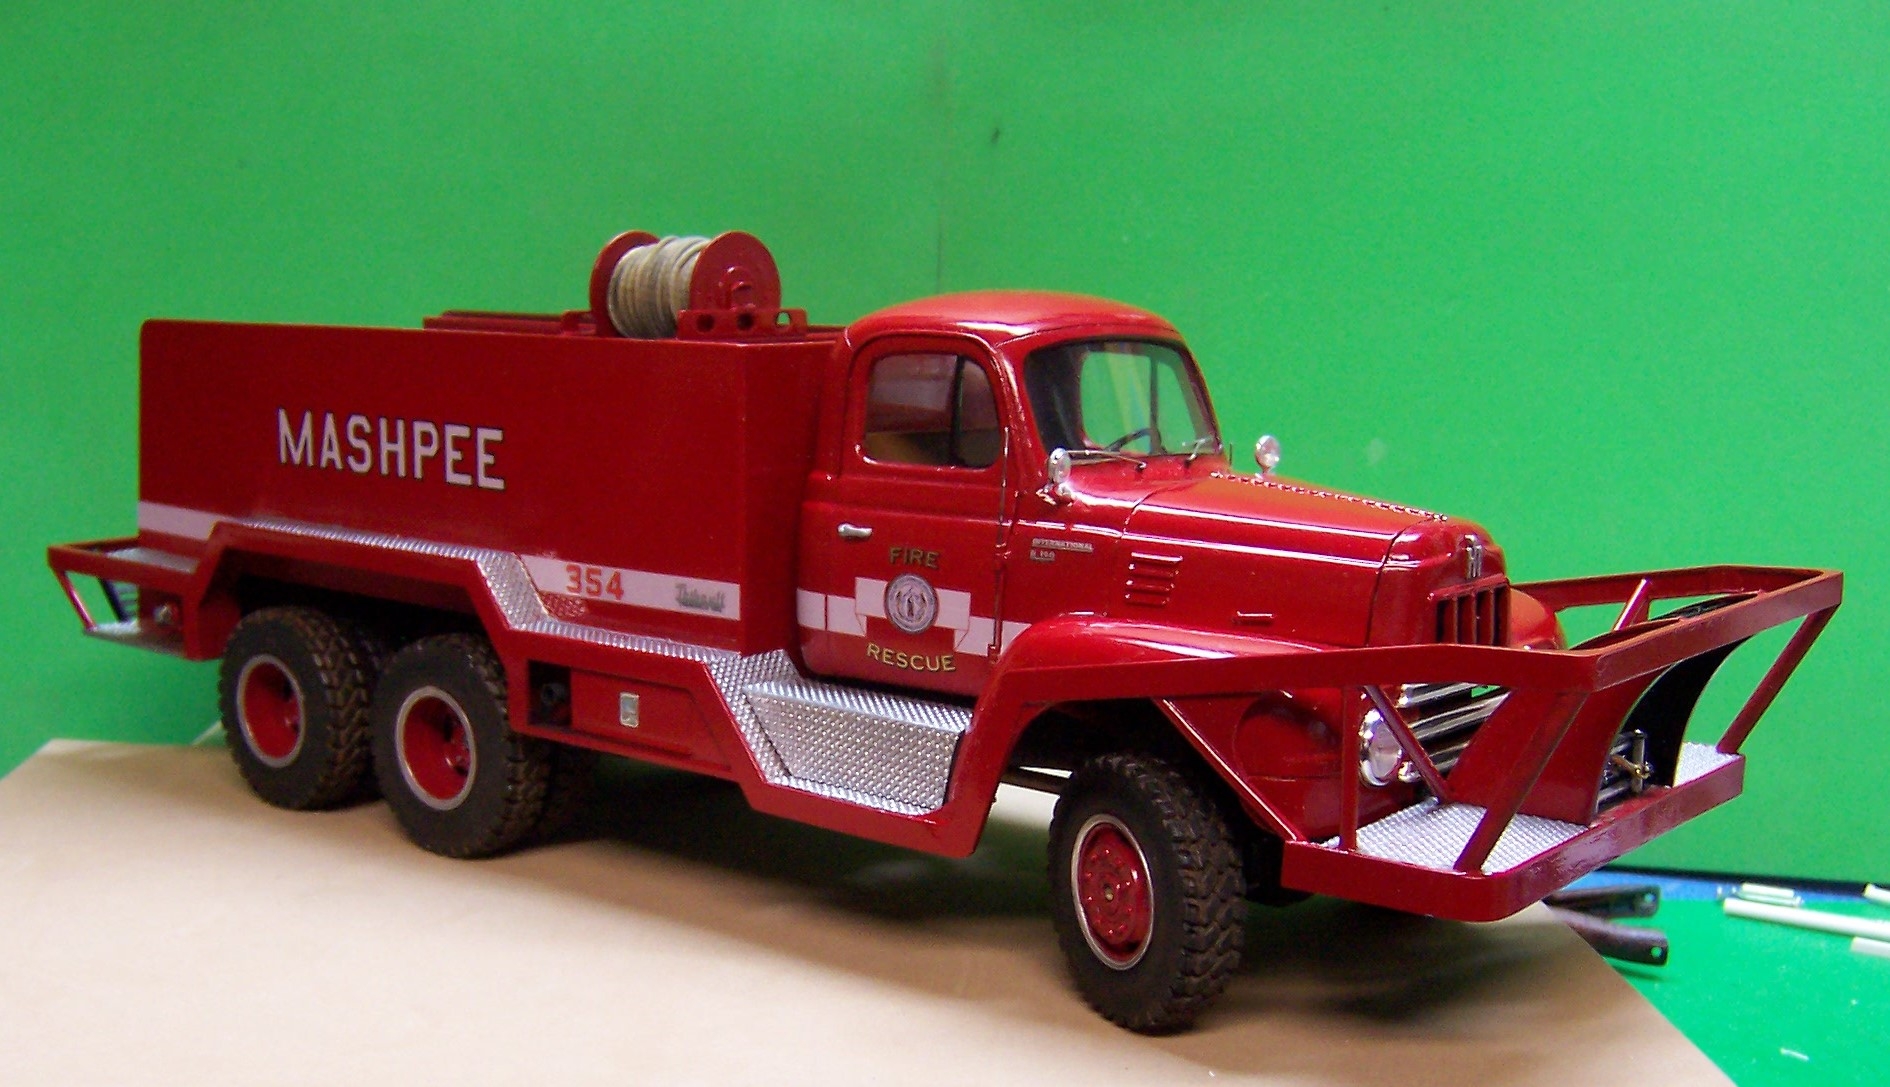


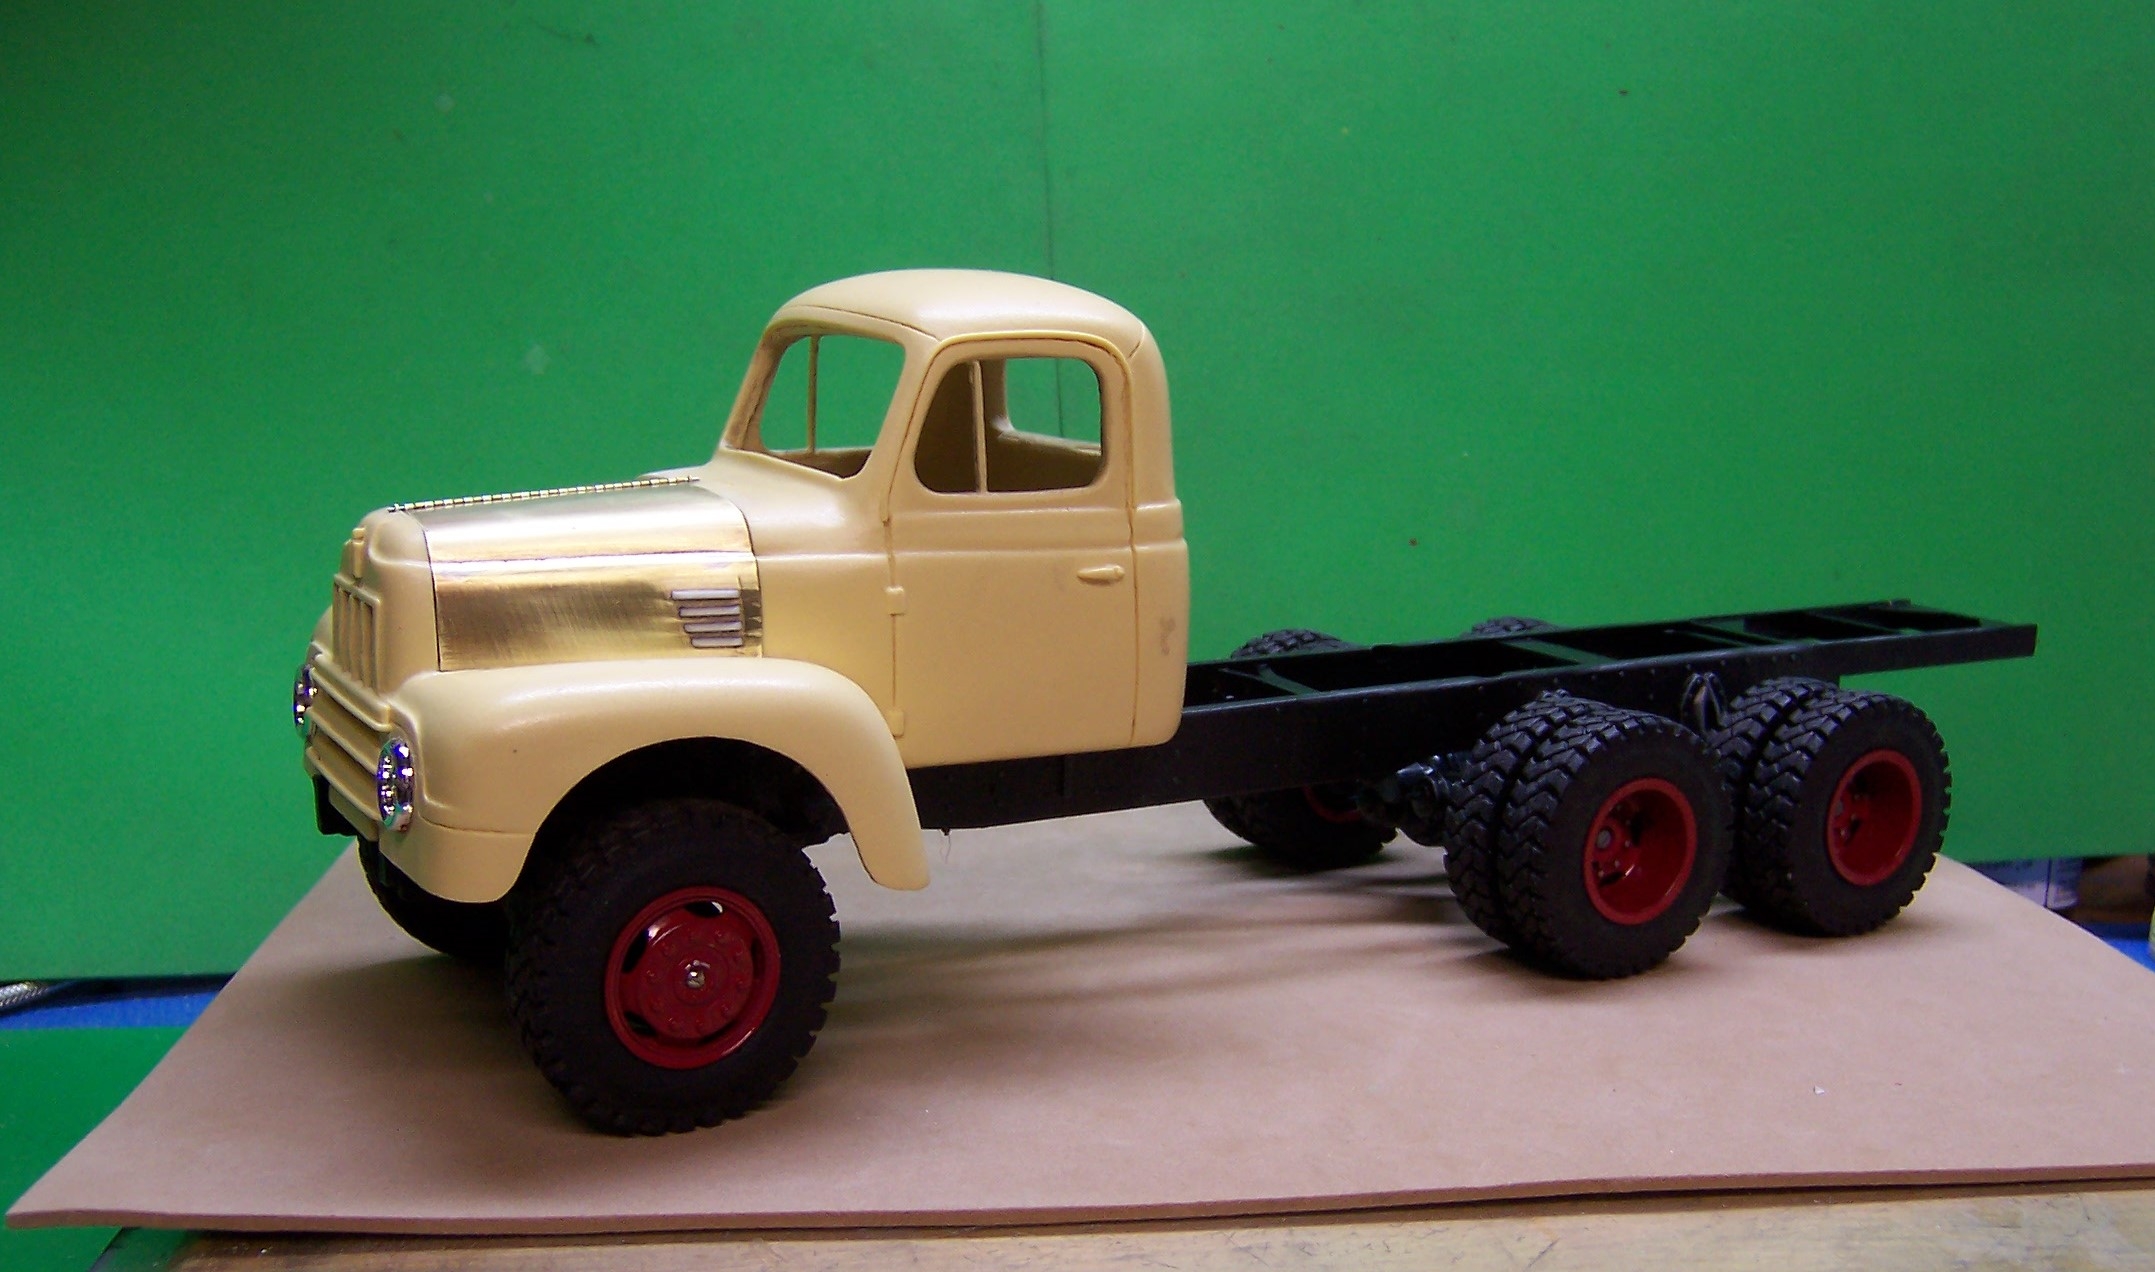


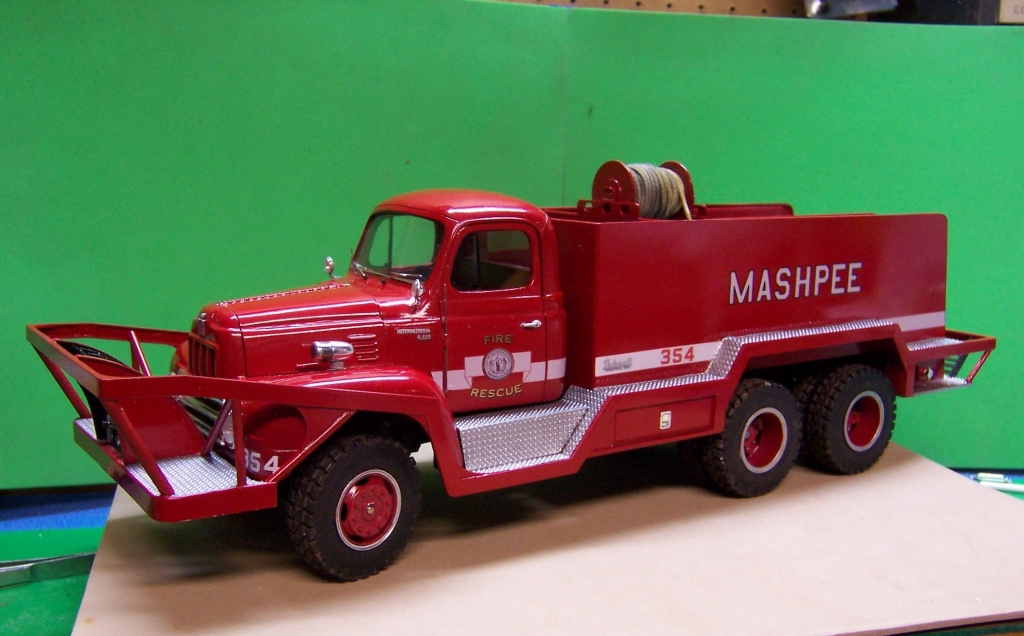
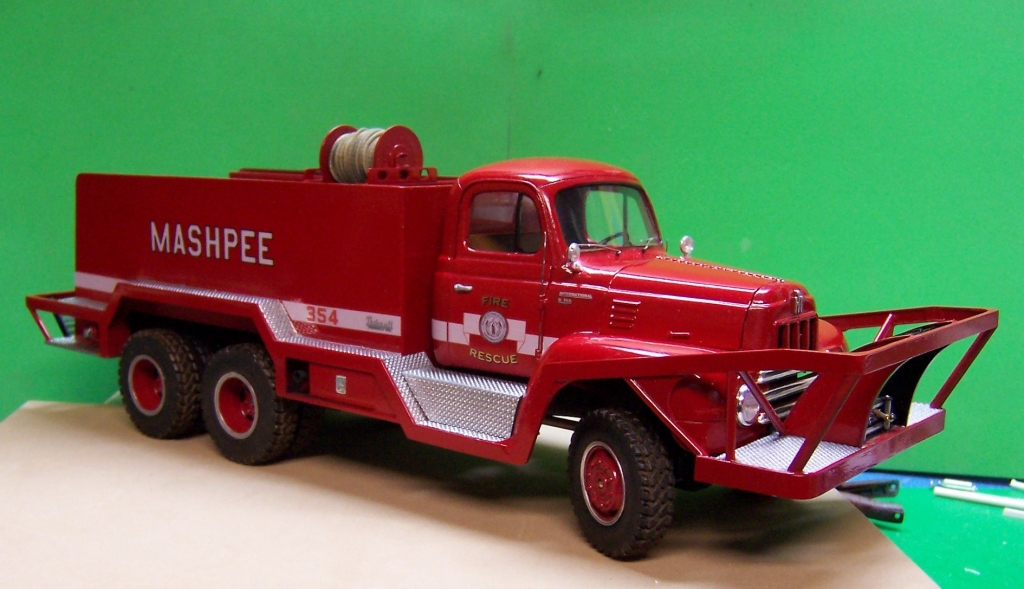
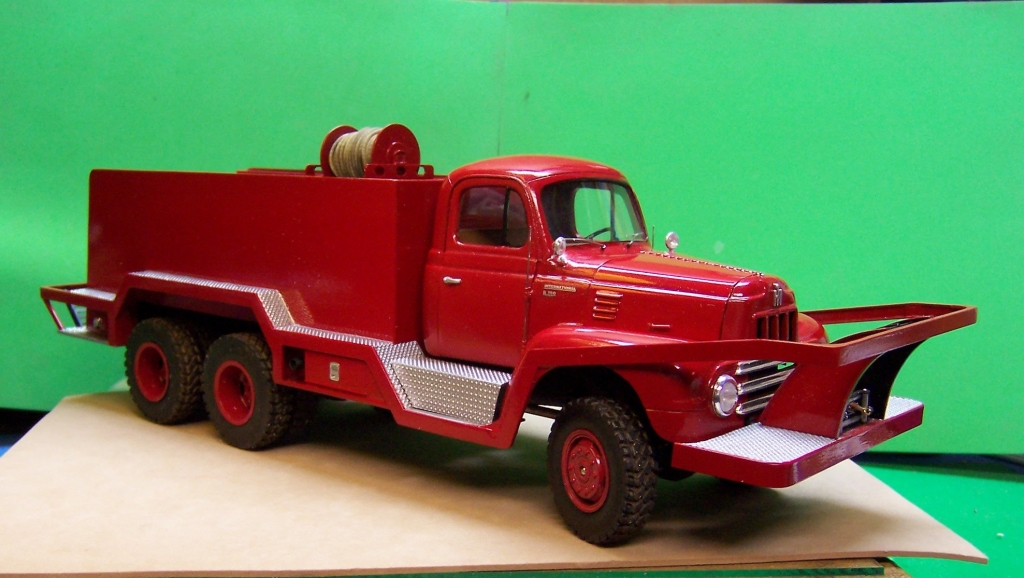
Mashpee 354 International R190
in Model Truck Workbench
Posted
Work continues on the top bars that are made of soldered brass rods. The rods were ground down at the lower ends to form pins for pre-drilled holes in the lower bars. Brass tubing was used for the uprights that connect to the long horizontal bars on top of the body. The tubing allowed for plastic rods to be inserted for attaching to the top of the body sides.
With the brass work completed as one piece it could be removed for painting. Note the pins and plastic rods at the ends of each piece.
With painting completed the bars were re-attached permanently to the model.