

Chariots of Fire
-
Content count
155 -
Joined
-
Last visited
-
Days Won
13
Posts posted by Chariots of Fire
-
-
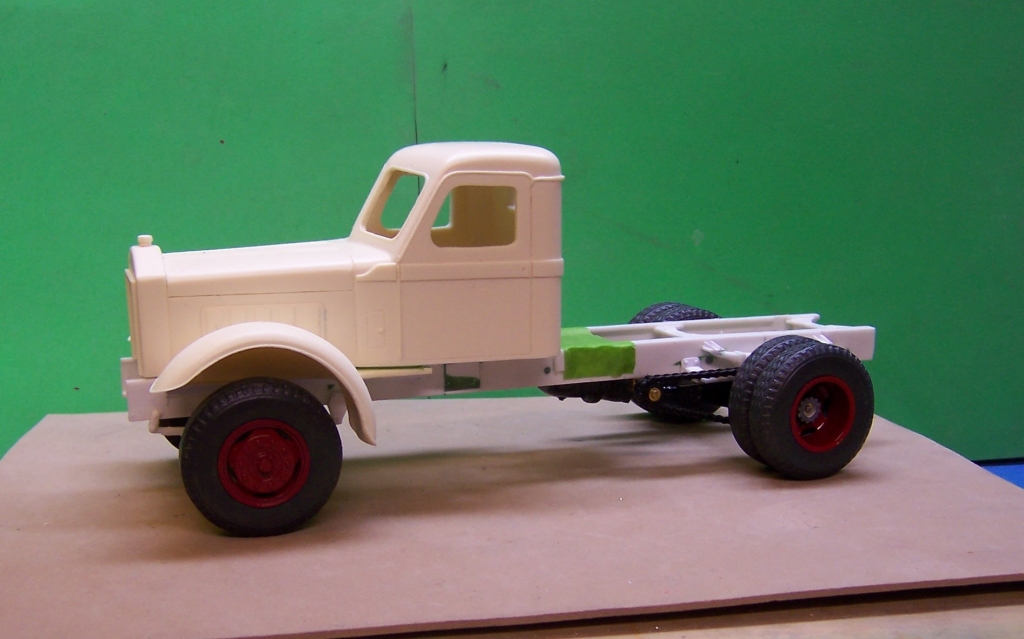
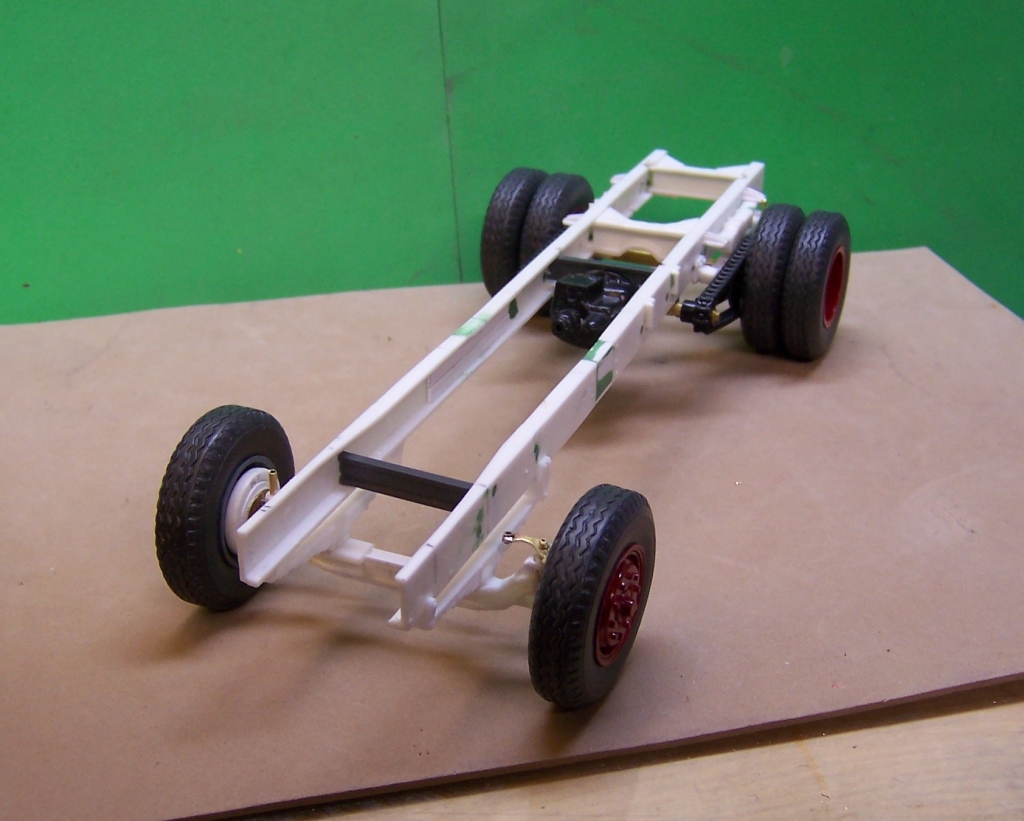
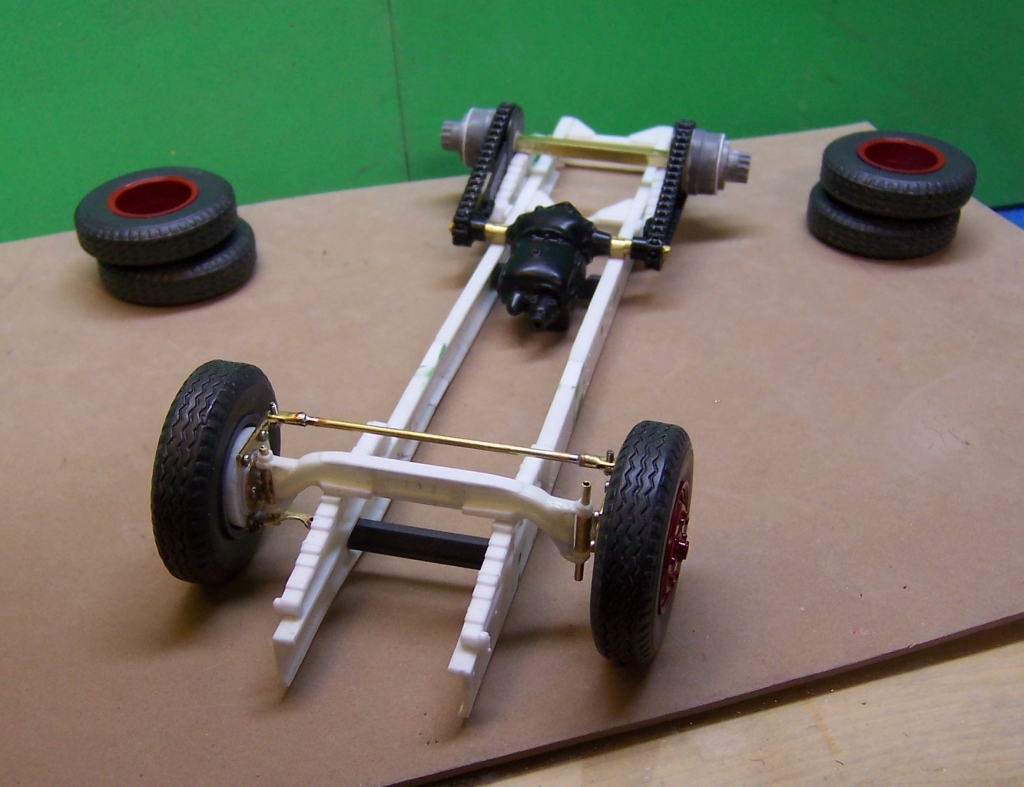
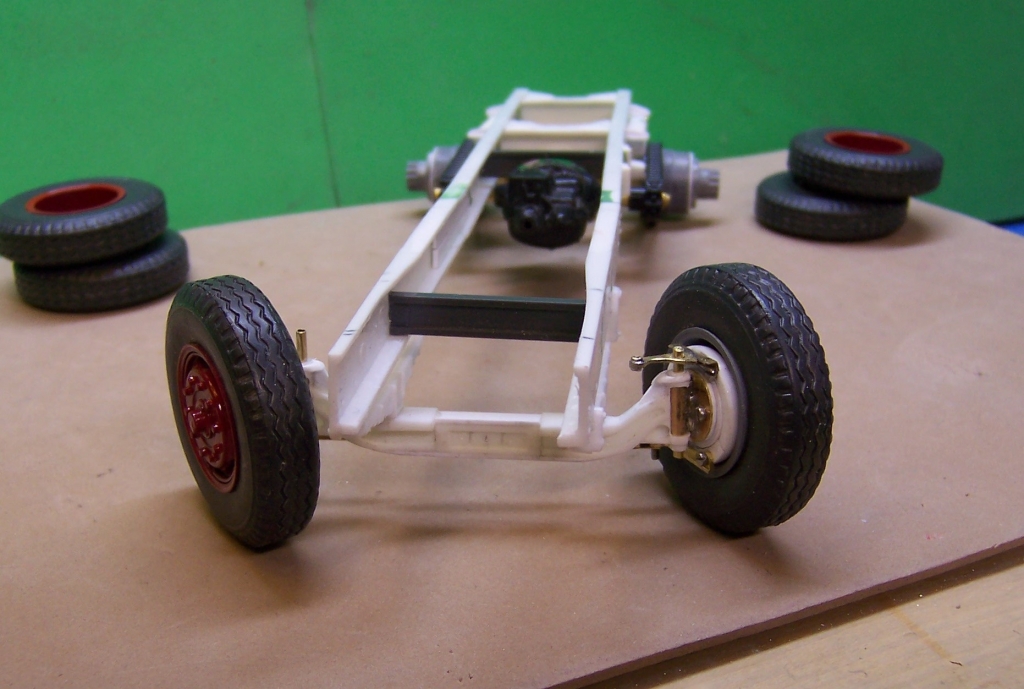
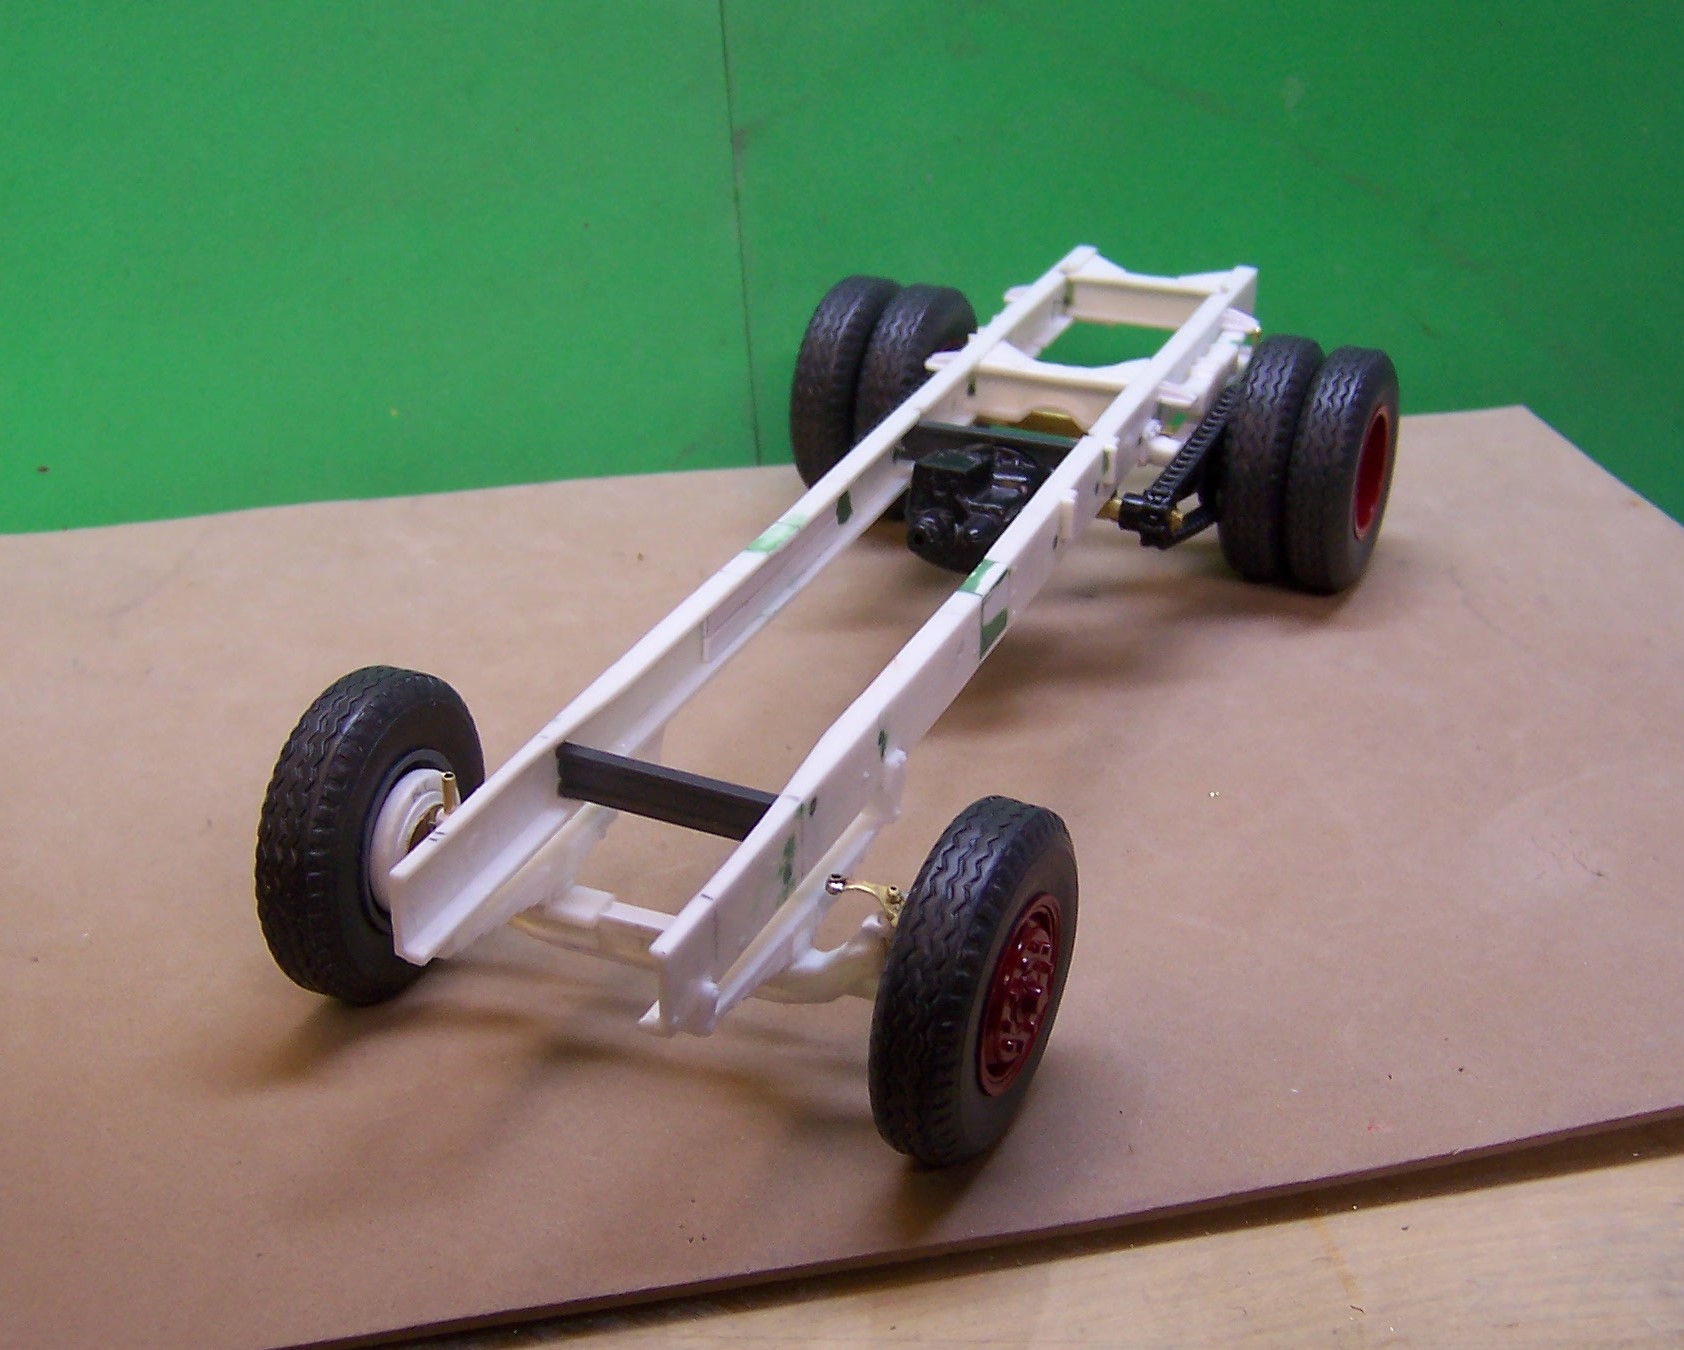
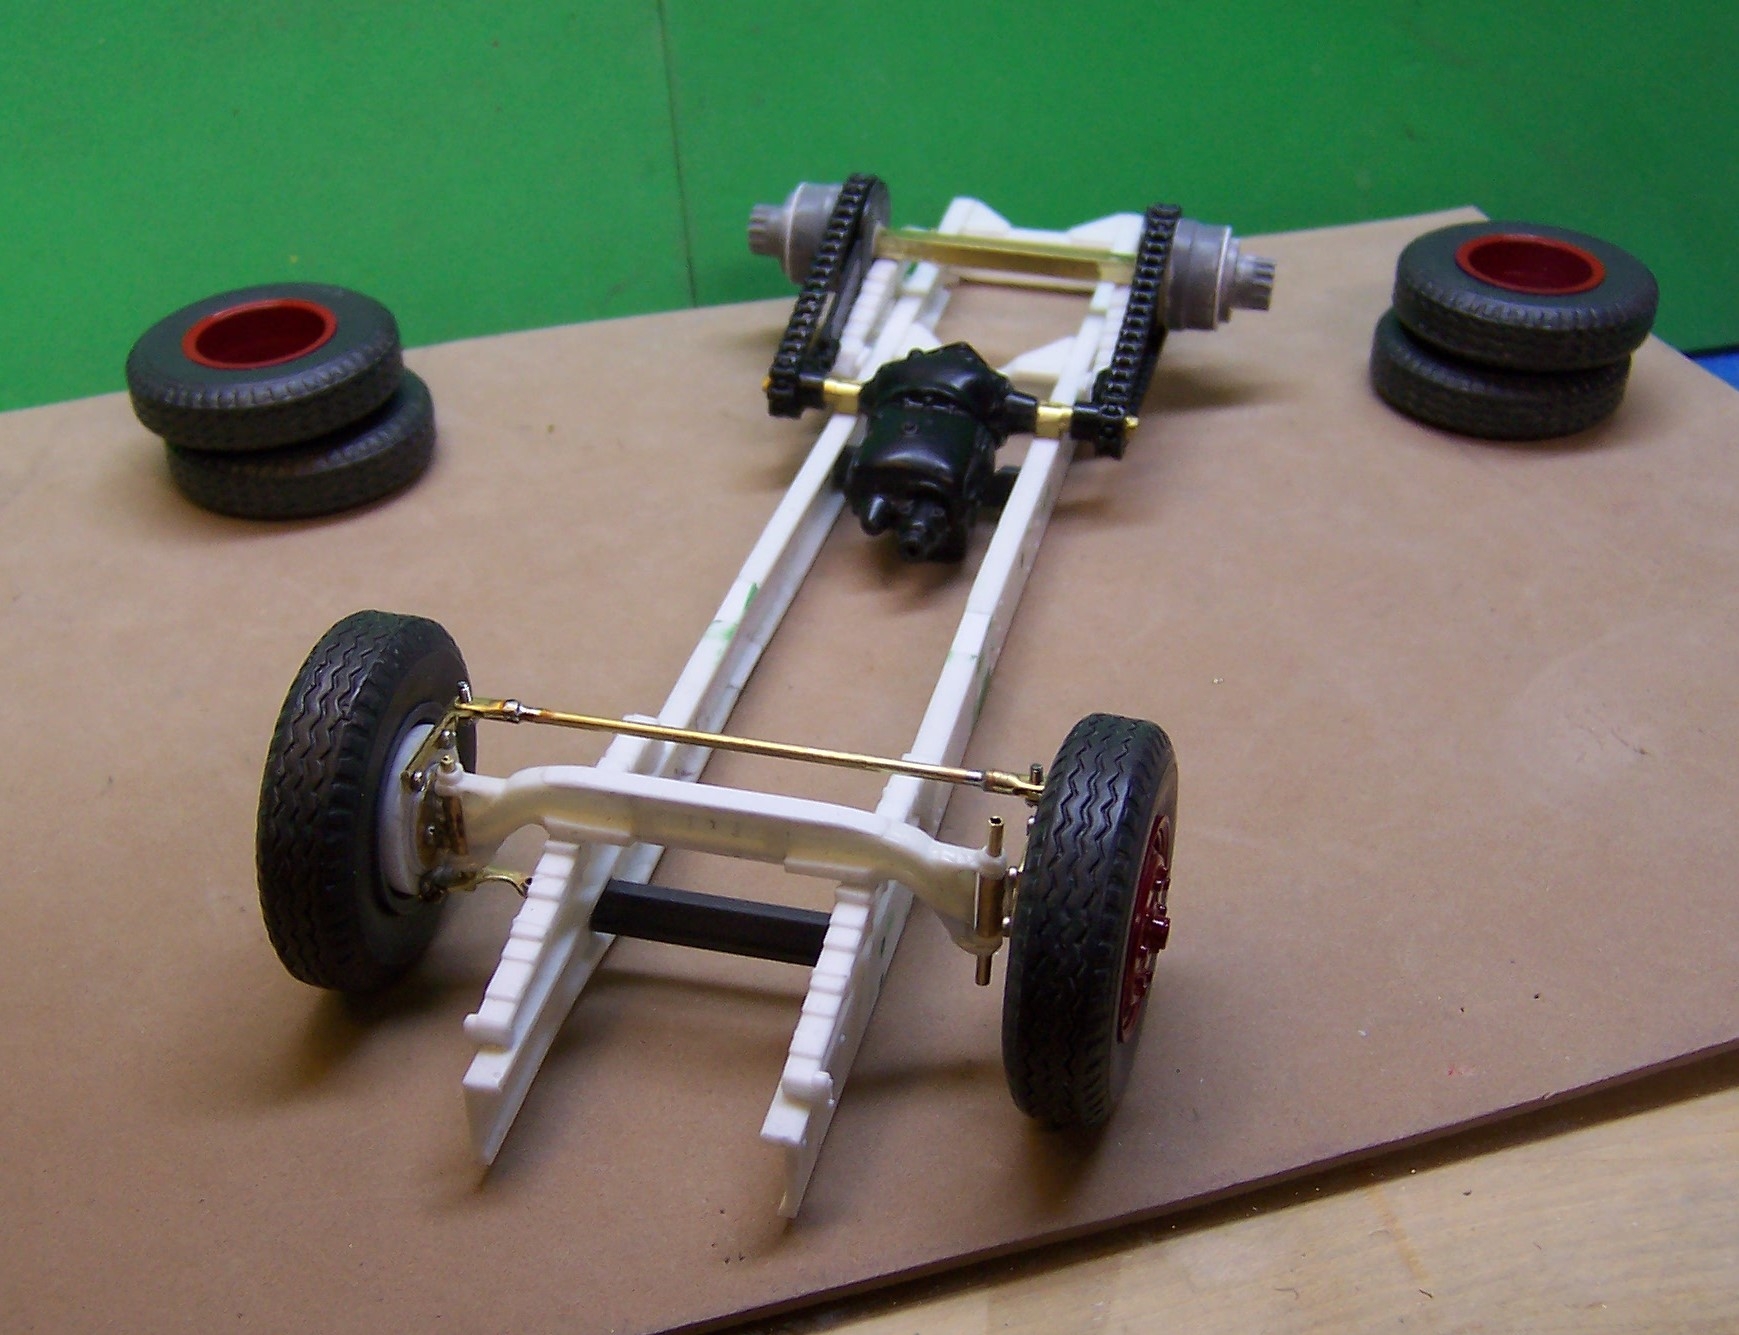
The original that was reworked was sent back to AITM and was cast again. This time with the shorter hood and 5 louvers. Since receiving it back the frame has been worked on and the drive train made up. I took the jackshaft from the Monogram Mack AC kit. The sprockets and chains are from Micro-Mark. Wheels came from the AMT ALF kit and the tires are resin castings. Lots of small stuff done to create the front axle so that the wheels can be posed. King pins are brass tubing. Tie rod the same. Next up will be do make the steering arm and connect it to a steering box. Also about 1/4" was cut off the bottom of the hood and cab. Many Sterlings were cut just below the door lines.

-
 2
2
-
-
Only other option I know of is to build your own. Use Evergreen strip stock to build the springs up by cutting varying lengths and glueing them together. Only thing is I'd round of the edges first or you will loose the individual leaf look of the finished spring cluster. Brackets would have to be similarly made out of strip stock and perhaps tube stock. Another choice is to make them from brass stock soldered together at each end.
-
Yes, they do push over trees with that top bar but the idea behind it is to just get the tree leaning. The bottom bar does all the work. Anyway the real rig is multi-fuel, I believe.
-
1
-
-
OOO! OOO! Big dent in the cab corner?? Assume that will be coming out.
-
Here's what it looks like built up. Just up on blocks for now. Time to start working up a frame.

-
That's nice work, Paul. Scaling up is not easy to do, especially if what you are working from is in any way questionable. I did this M-52 from photos and measurements taken from the actual piece and it was a fair amount of work. The hardest part was to get the hood right. Fortunately I did a mold and was able to cast it. The rest is just sheet stock. The builder of this real rig overdid the front bar work in my opinion. But that is the way the truck was made so that is what I did to reproduce it in 1/25 scale.

-
1
-
-
Yes, a big welcome from this side of the pond! No FB here either. I can stay out of trouble that way! Glad you are here. Hope to see some builds when you can do some posting.
-
What scale is that, Paul. That's pretty cool! Cab from the Renwall wrecker kit by any chance?
-
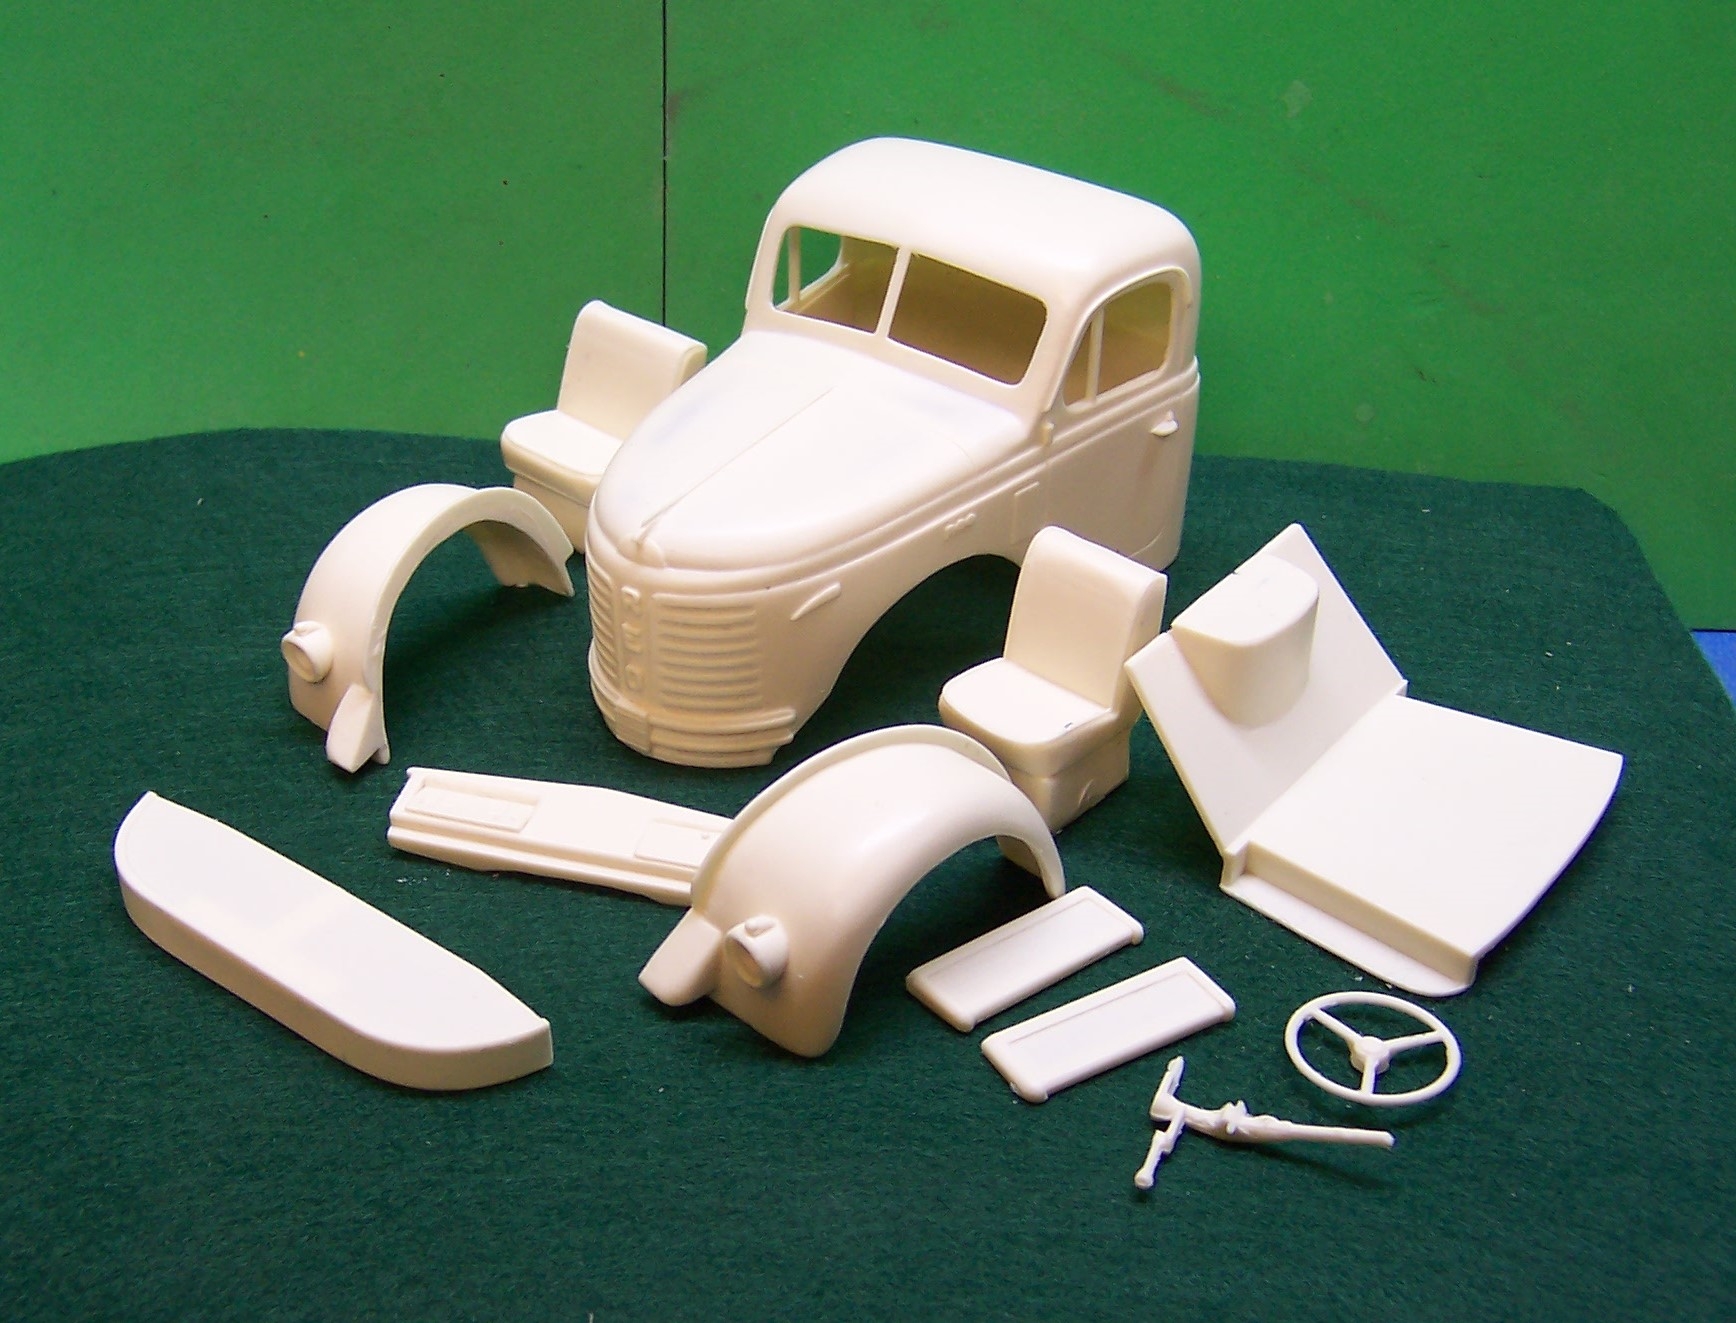
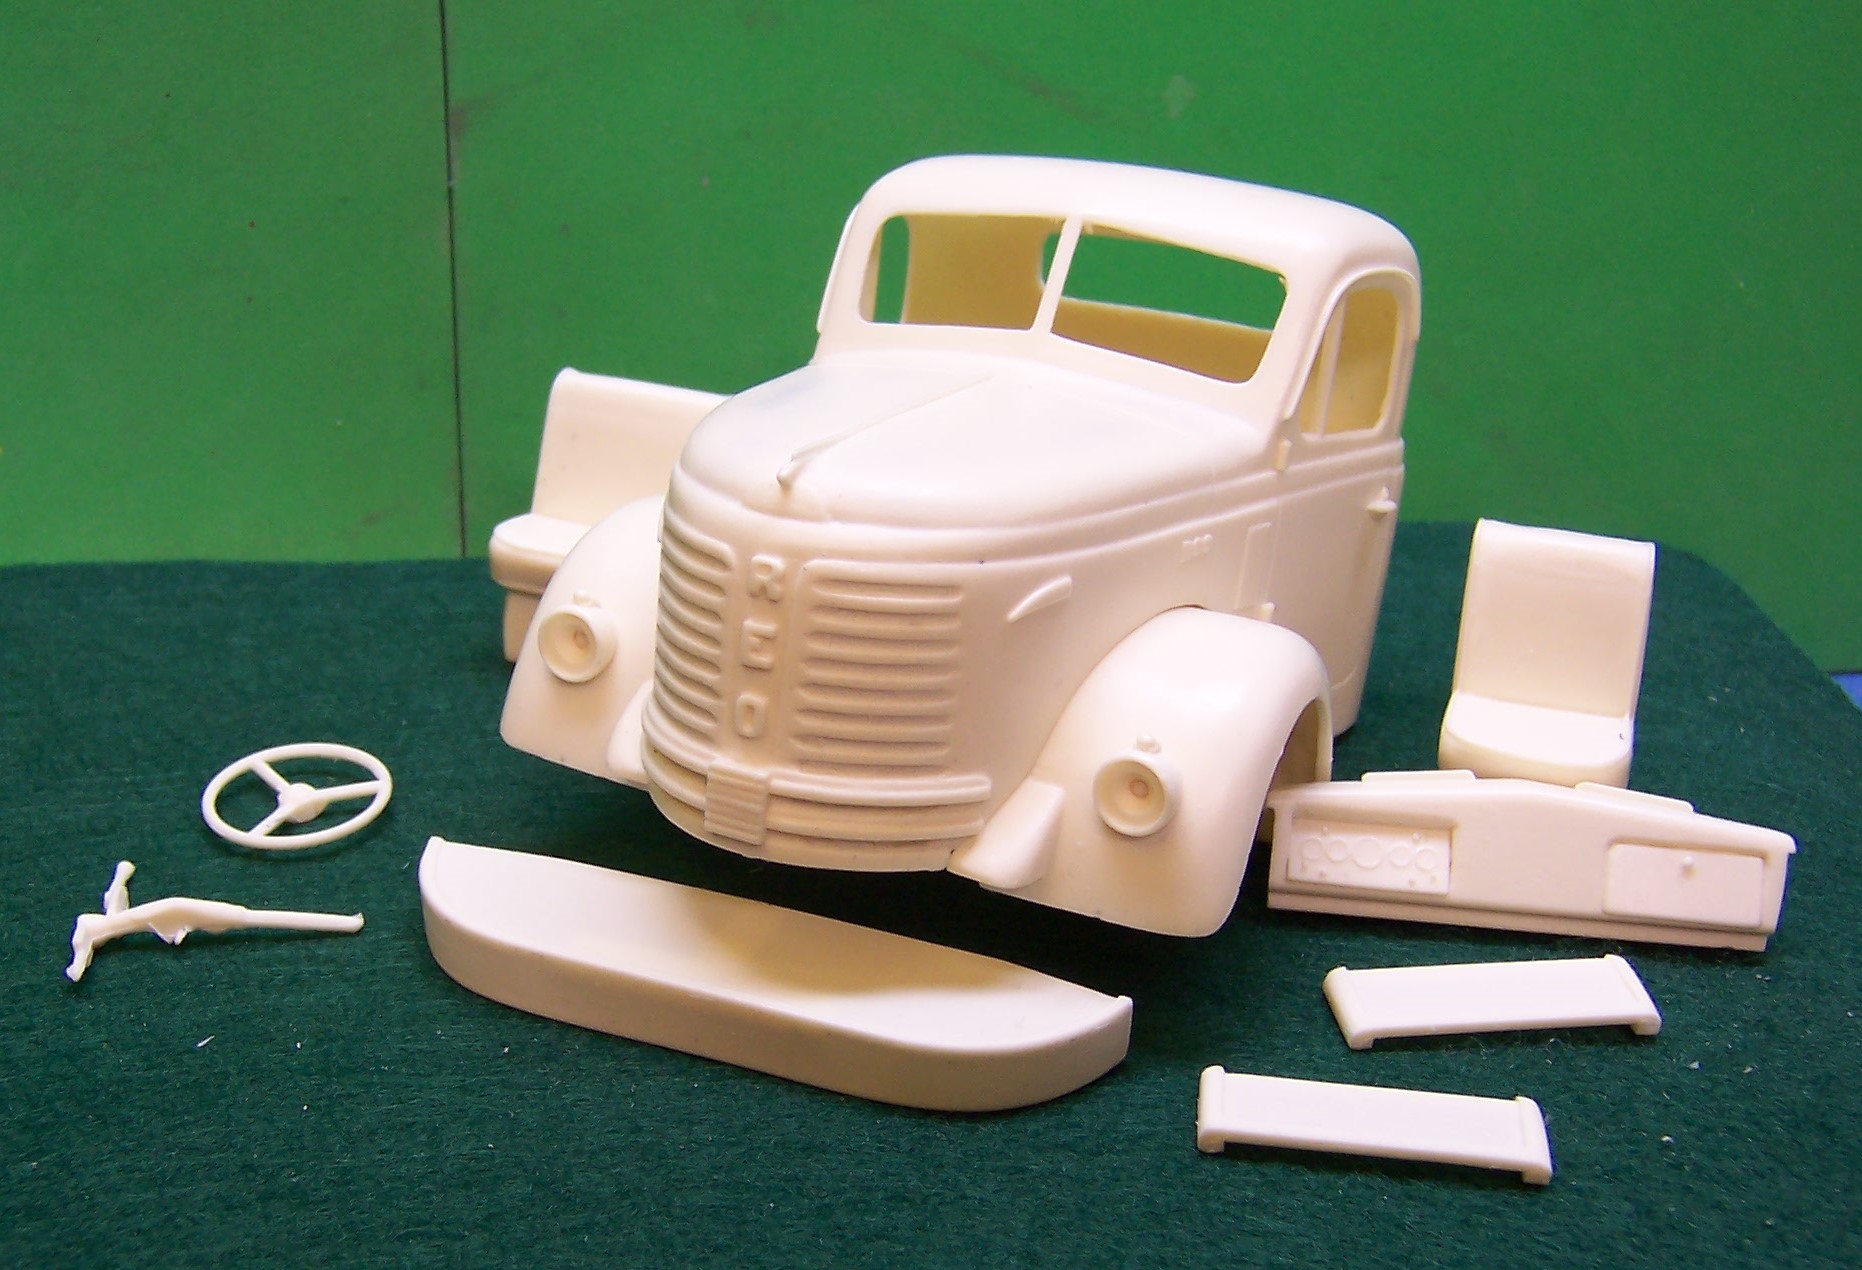
Got the first casting back today from AITM. It came out great, even if I do say so myself. Dave Natale did a fantastic job! So here are some pics of the casting pieces and what it looks when the fenders and cab are put together. The grill is easily opened up with an Xacto knife and some small files. There is just a skim coat over the openings. Same with the door handles. Just a file and Xacto will open them up.

 ks like
-
17 hours ago, goingsouth58 said:great lookin build like the mix match tires do not see that enuff on this kind of build looks great
What he said!! Made it look like it's been worked.
-
1
-
-
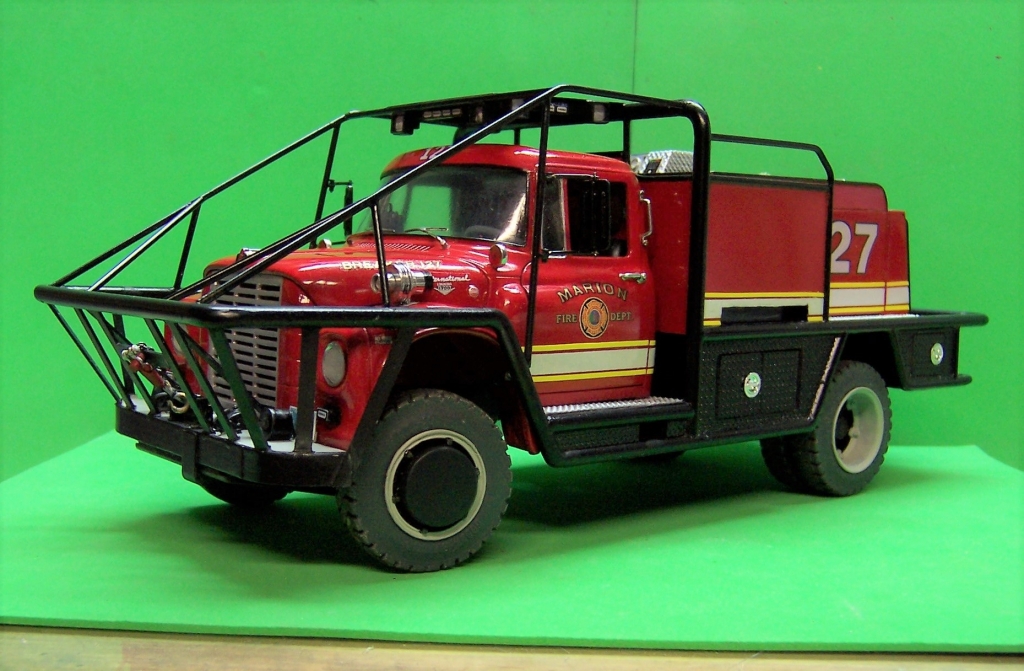
I've seen some pretty heavy units down your way as well, Paul! You tend to do a lot more protection over the top than we do. Here are a couple more examples of Cape Cod rigs.
In 1952 this was one of the ways in which they were done. Not much protection here!
This one is more up to date and in fact was upgraded about 7 years ago.
-
2
-
-
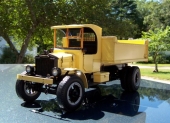
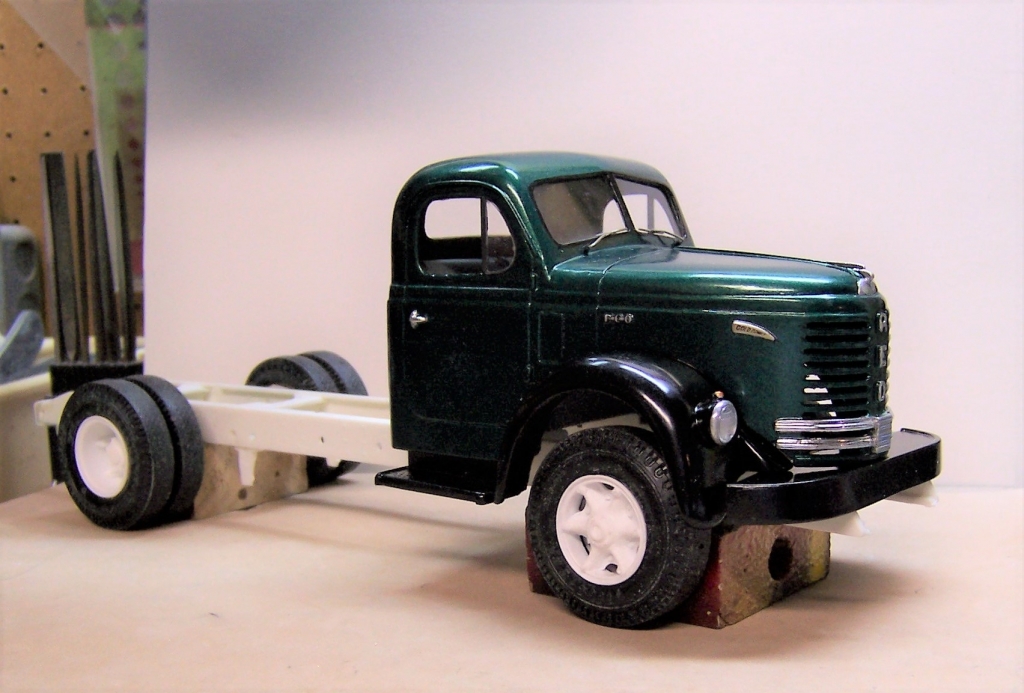
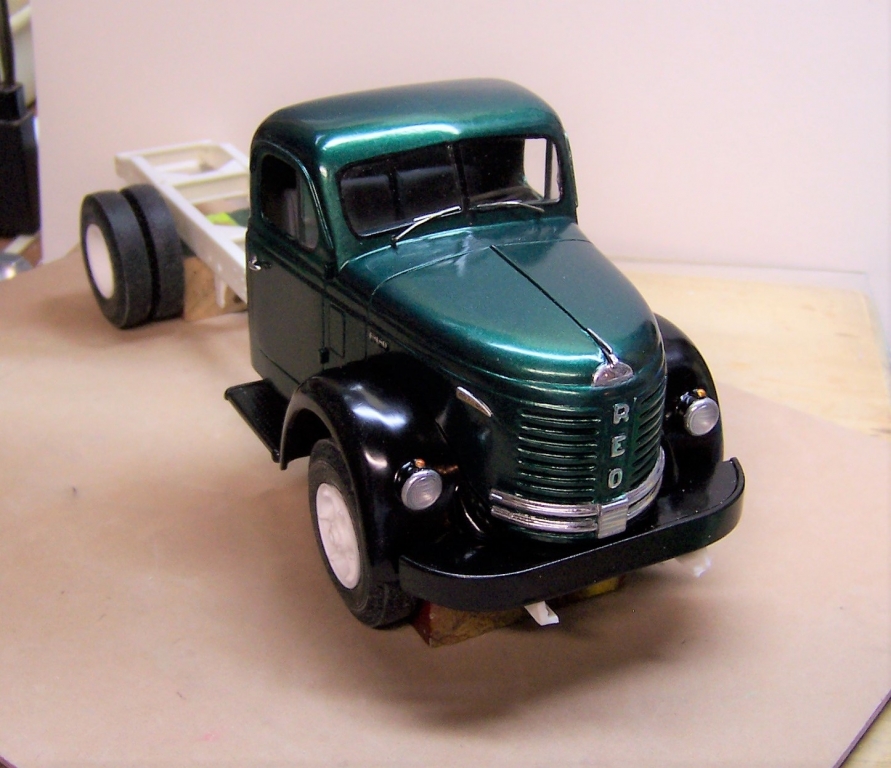
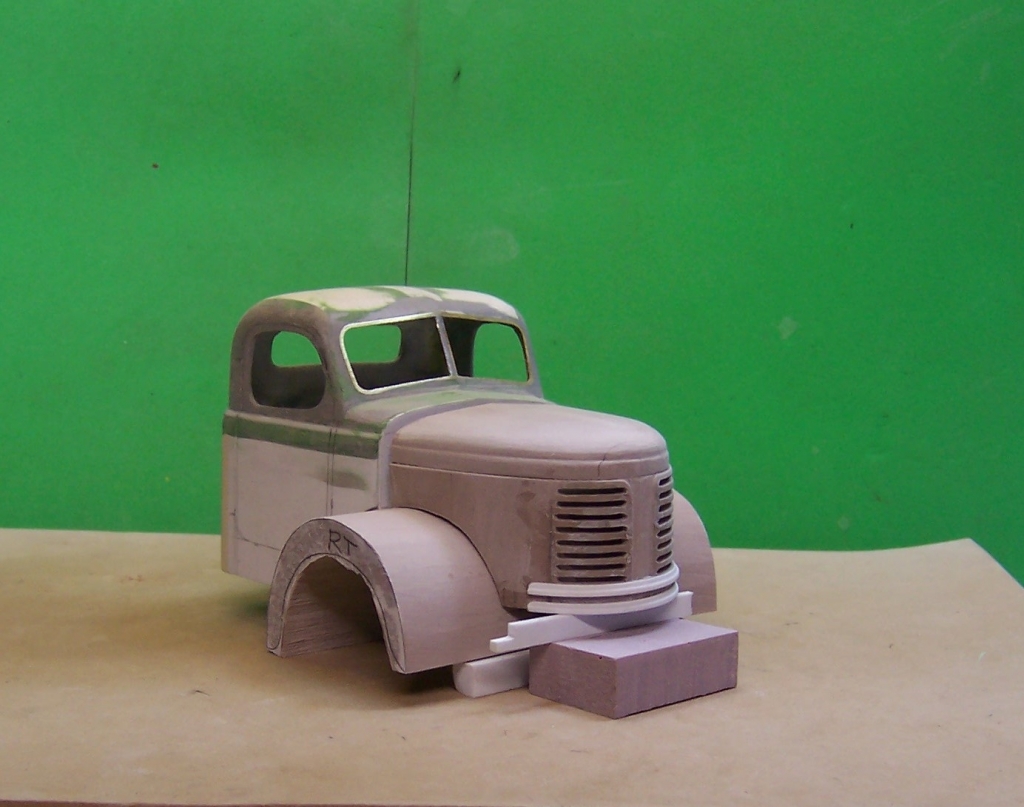
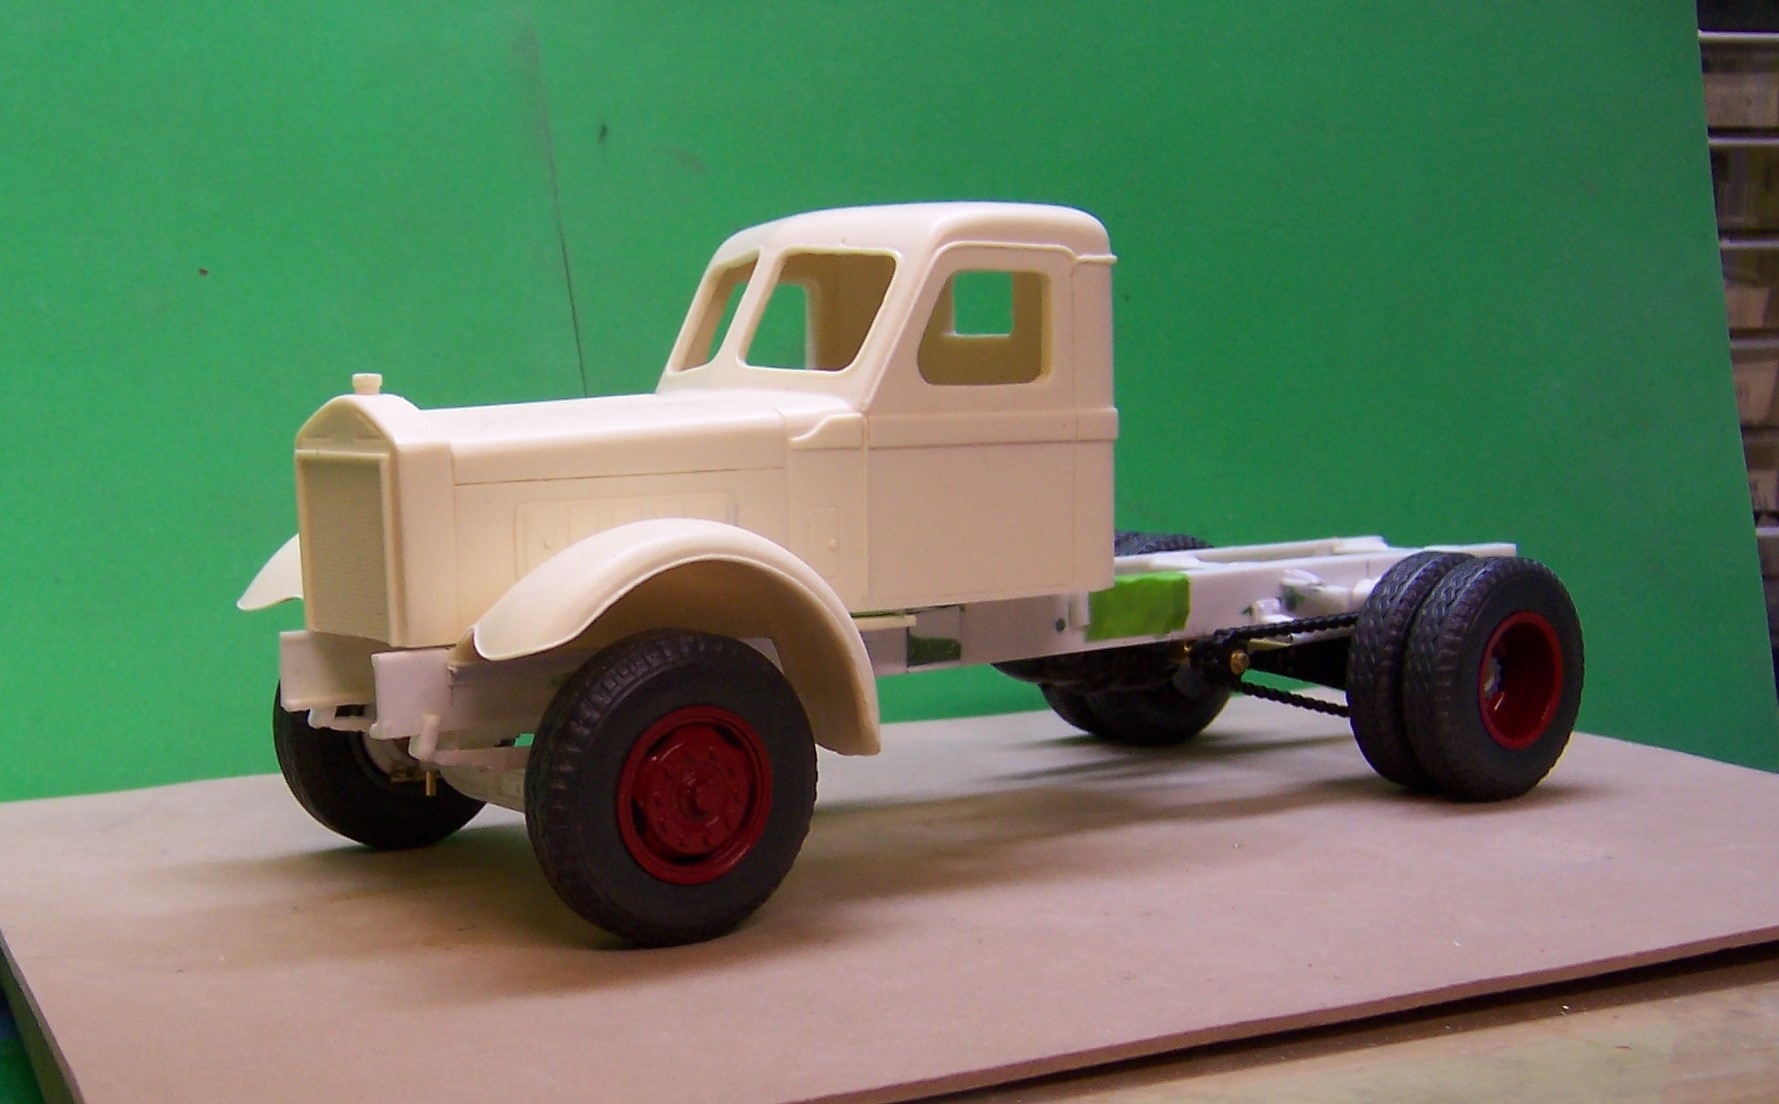
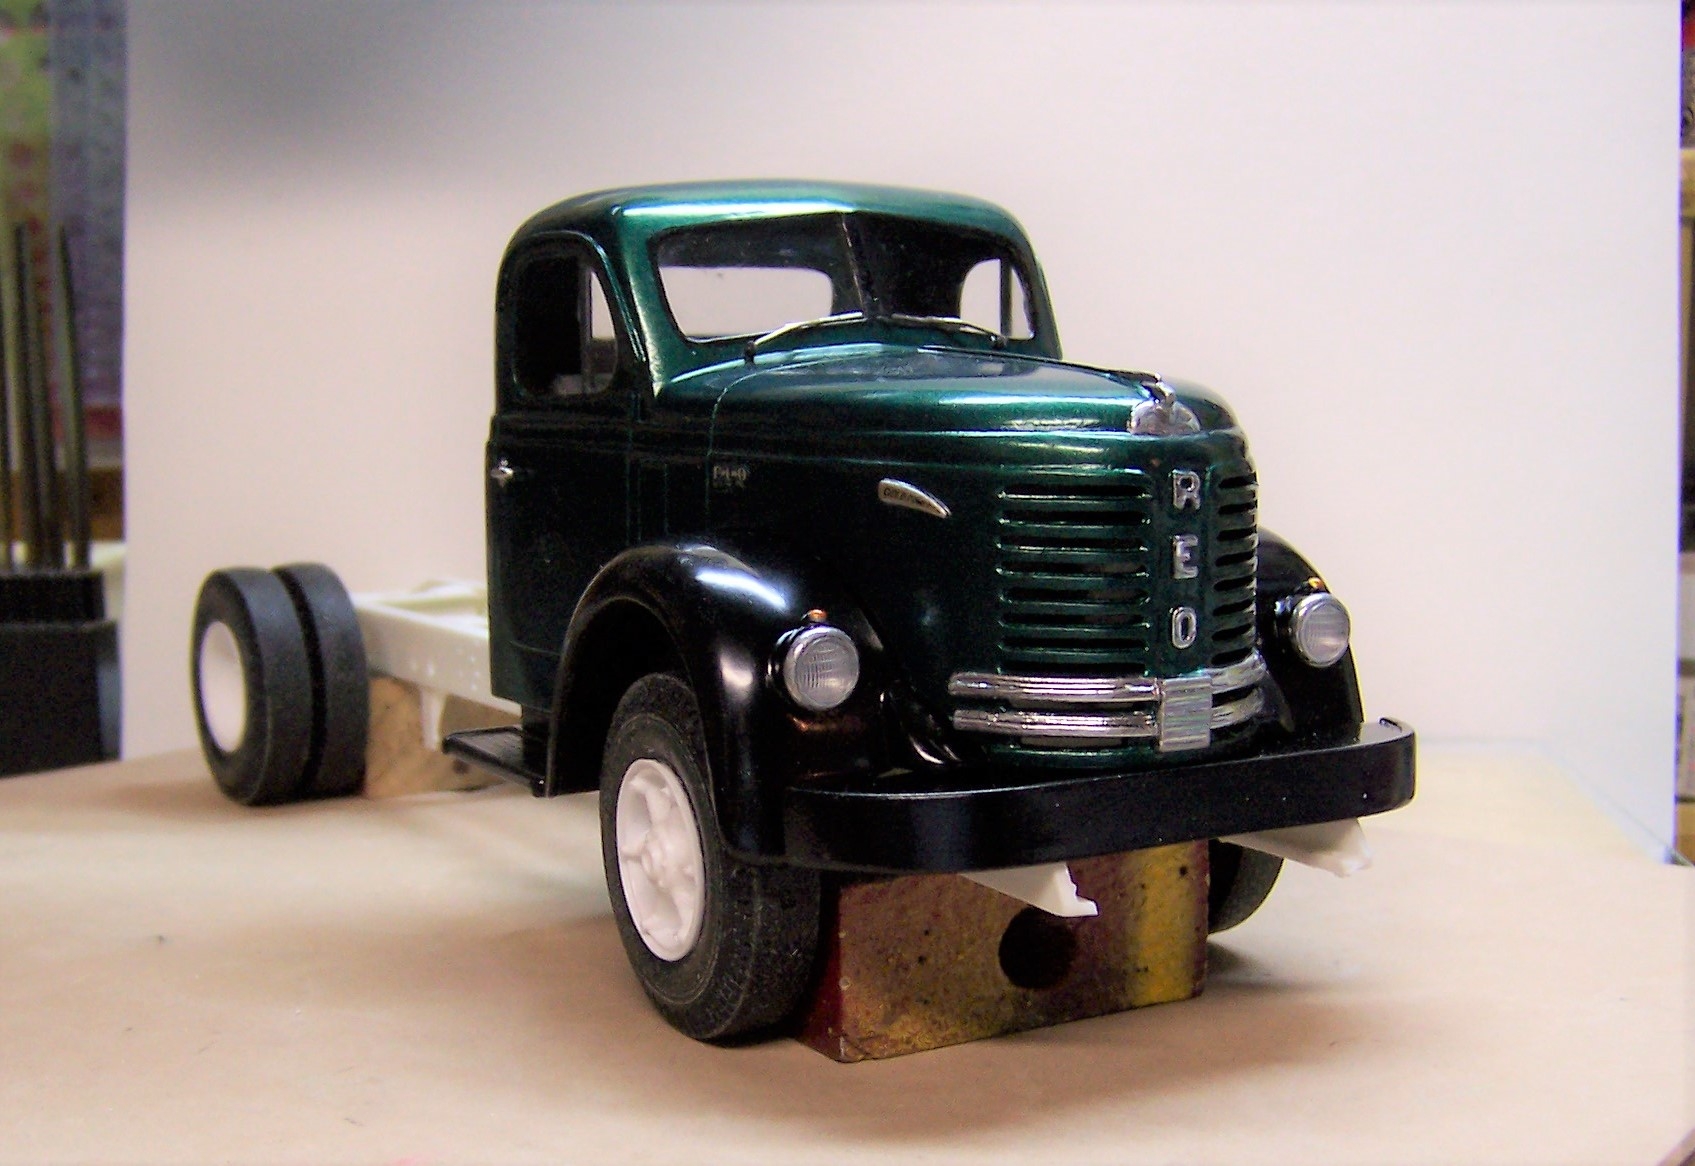
The Reo has gone to the caster. Here's what is next. A nice compact Sterling to build into a heavy duty dump. The West Coast version was modified by shortening the hood and changing the chrome trim to louvers. The radiator was also modifiedl


-
Here's where we are to date. Finally the belt line under the windows and along the hood is relatively uniform and straight. That was a bear to do for a while with the hood and cab having been built separately. Nothing really lined up when I first glued them into position. But things seem to be getting closer to the point where I can consider sending this out for examination and potential casting.
-
Thanks for sharing. Linking the tracks together is quite the thing! Nice work!
-
Glad you're here, Pablo. Welcome!
-
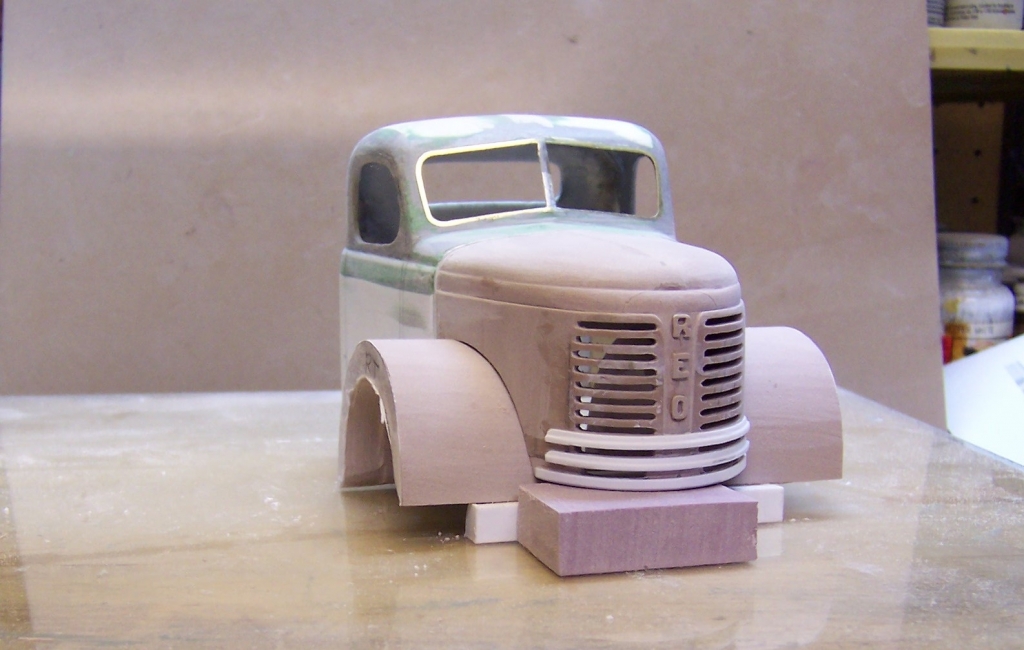
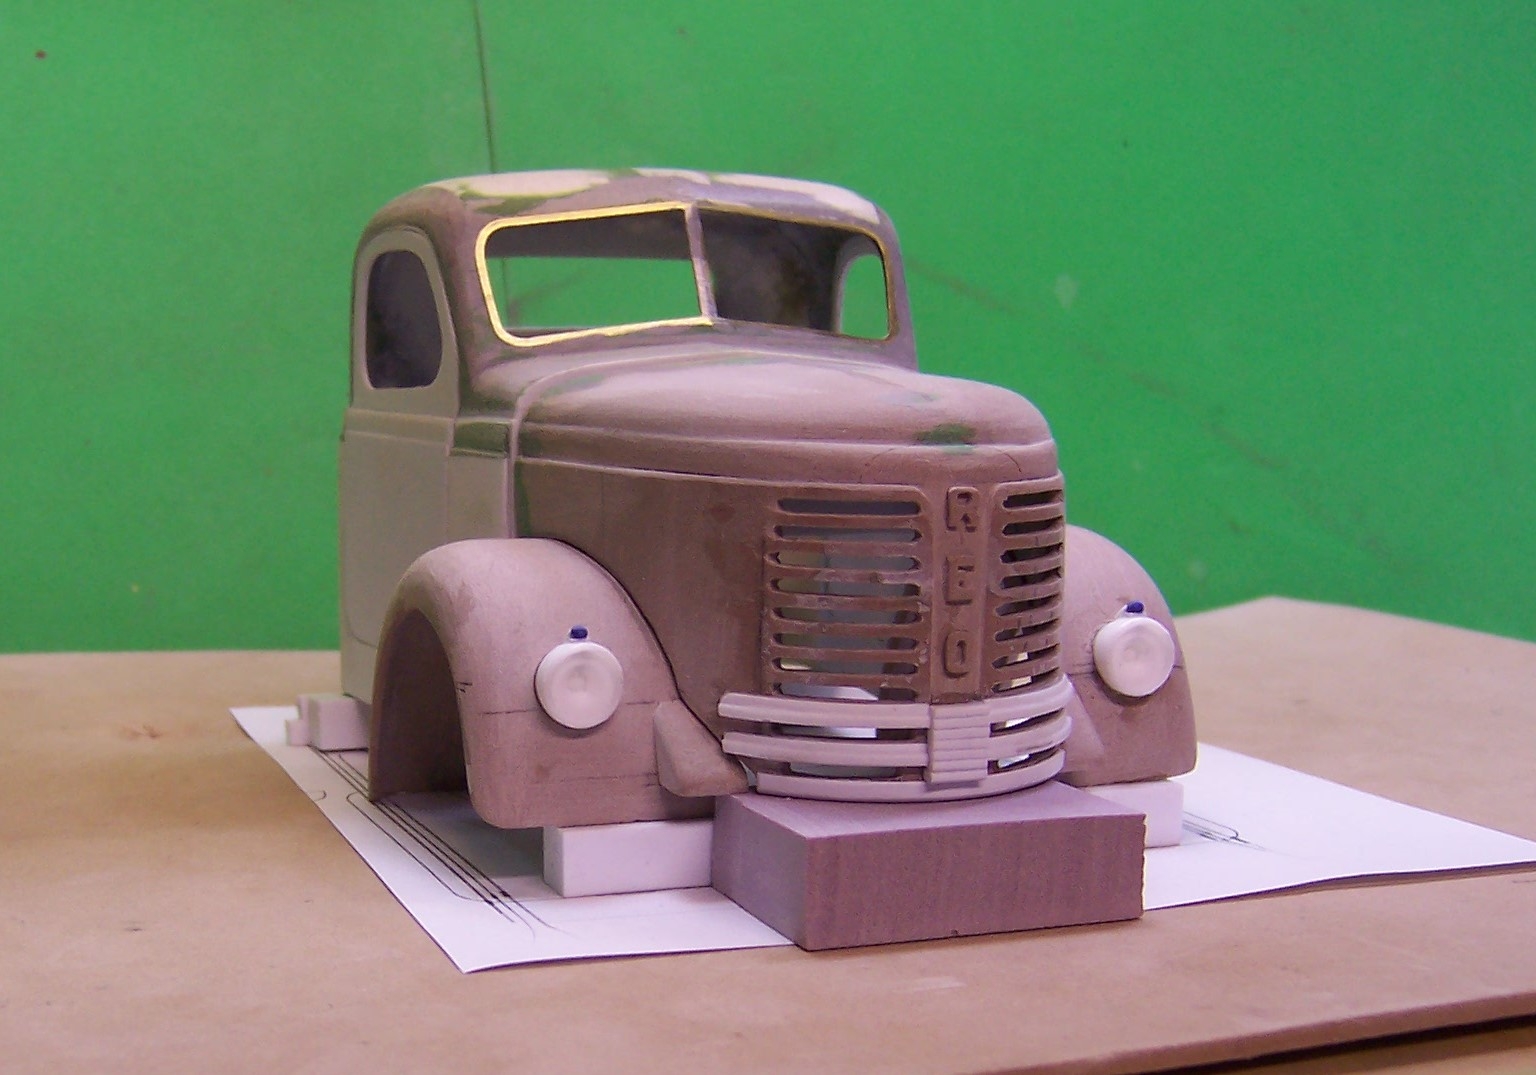
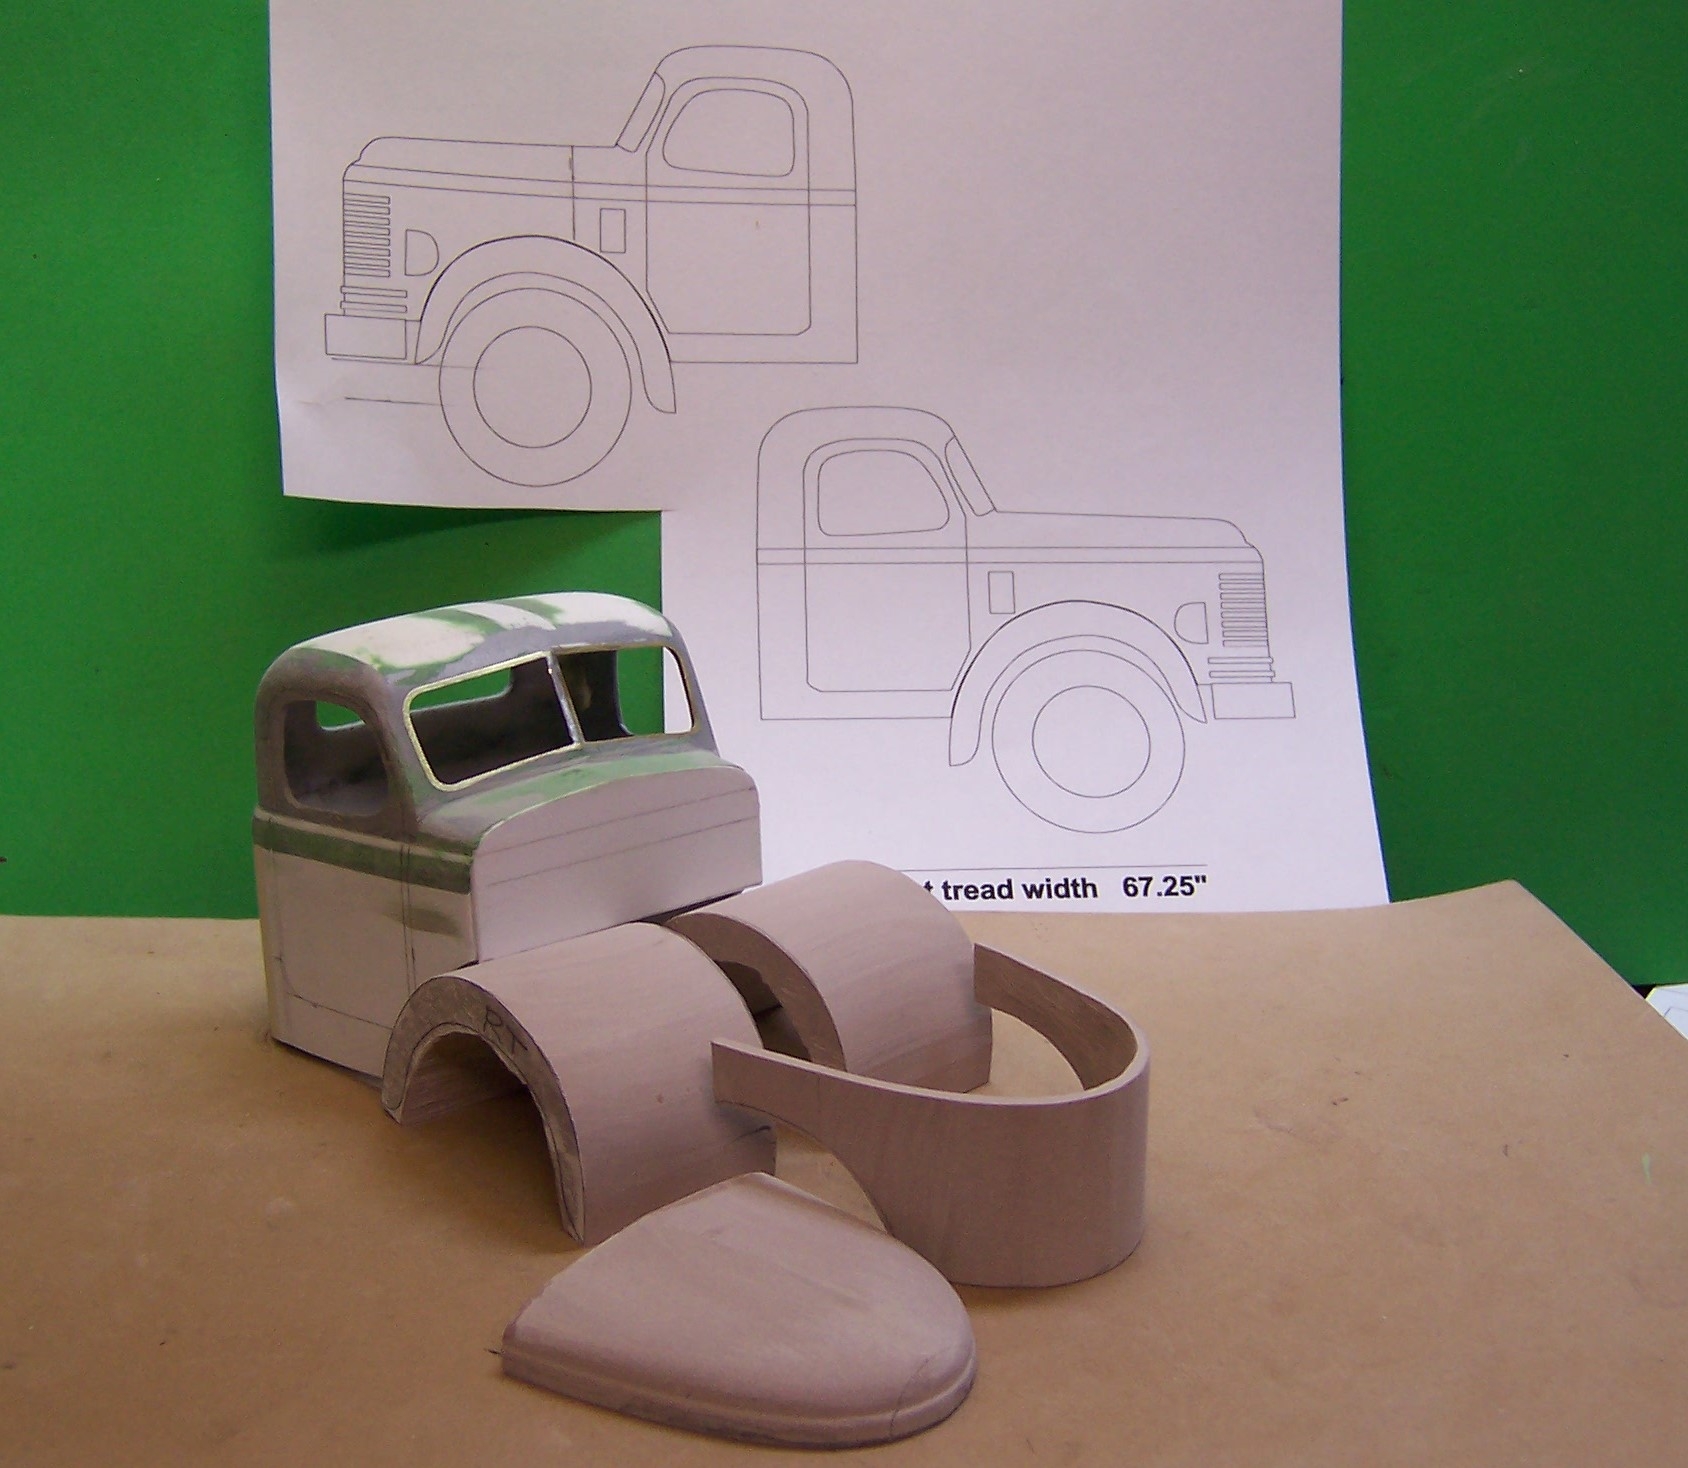
Here's one more. The headlights have small parking lights mounted on top. I used piece of plastic rod and a pin with a very small round head to make them. There is also a stack of small strips
 that separates the horizontal bars on the front. Next will be to add the Gold Comet medallion to the sides of the hood.
-
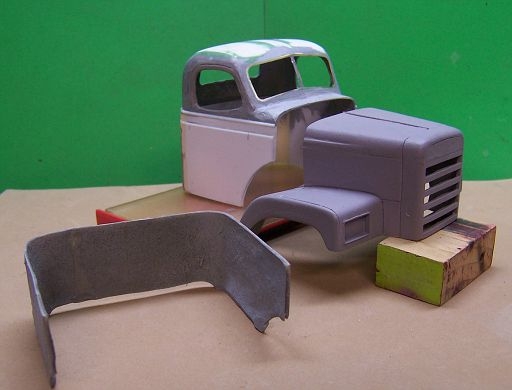
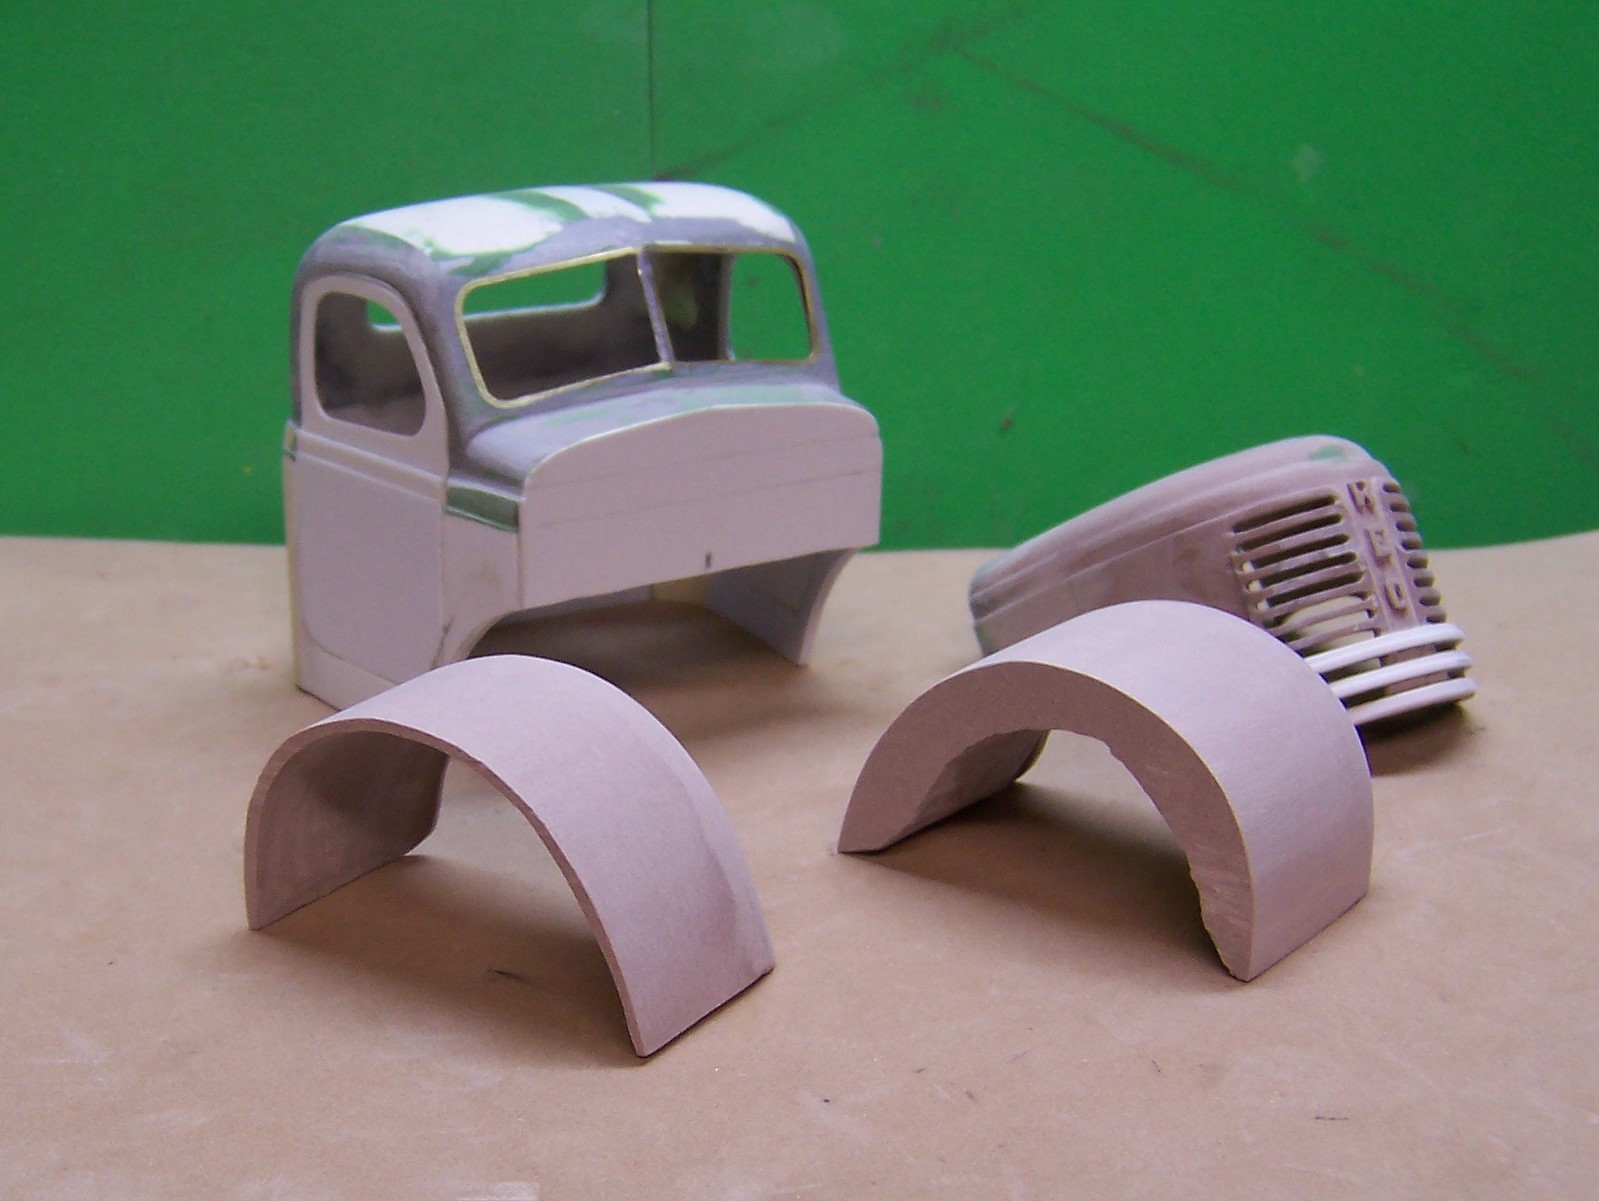
Got a bit more done on shaping the fenders, fitting the hood and the two small pieces that fit next to the hood at the lower end of the fenders. Lots of grinding excess materials away to hollow out the fenders to a thinner profile.


-
What are you gluing??? You don't even tell us what your project is!
-
When you chose files it allows you to then go to wherever your photo is and click on it. Open it in that file and it will automatically show up below your post. The photo will have a small + in the upper left. Just click on that and it will transfer it into your posting. (You have to start a post first before choosing files).
Hope this helps.
-
Here's a bit of an update. Next is to do some rounding of the fenders.
-
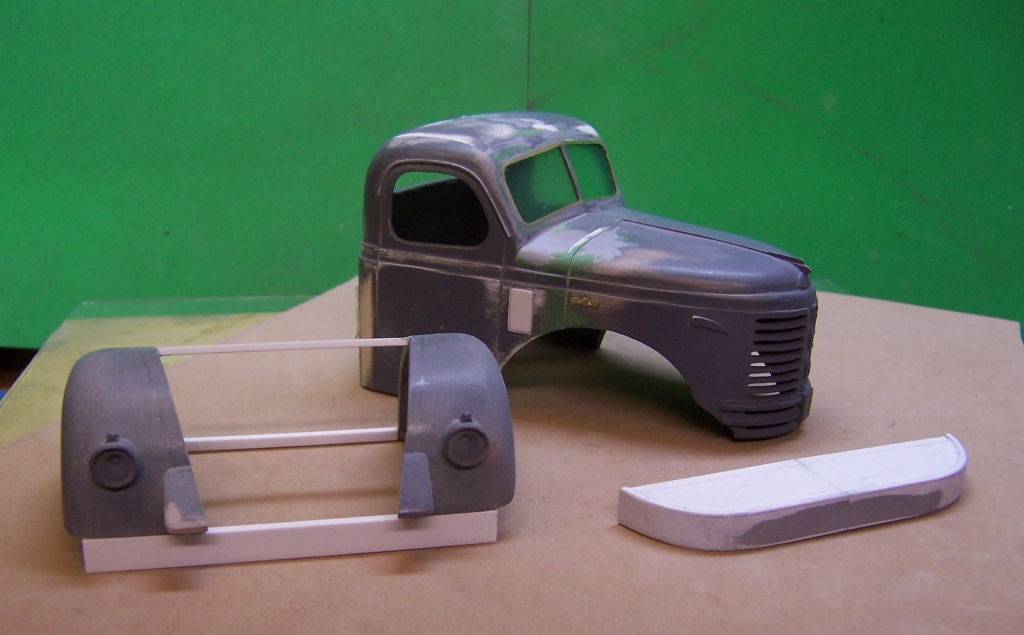
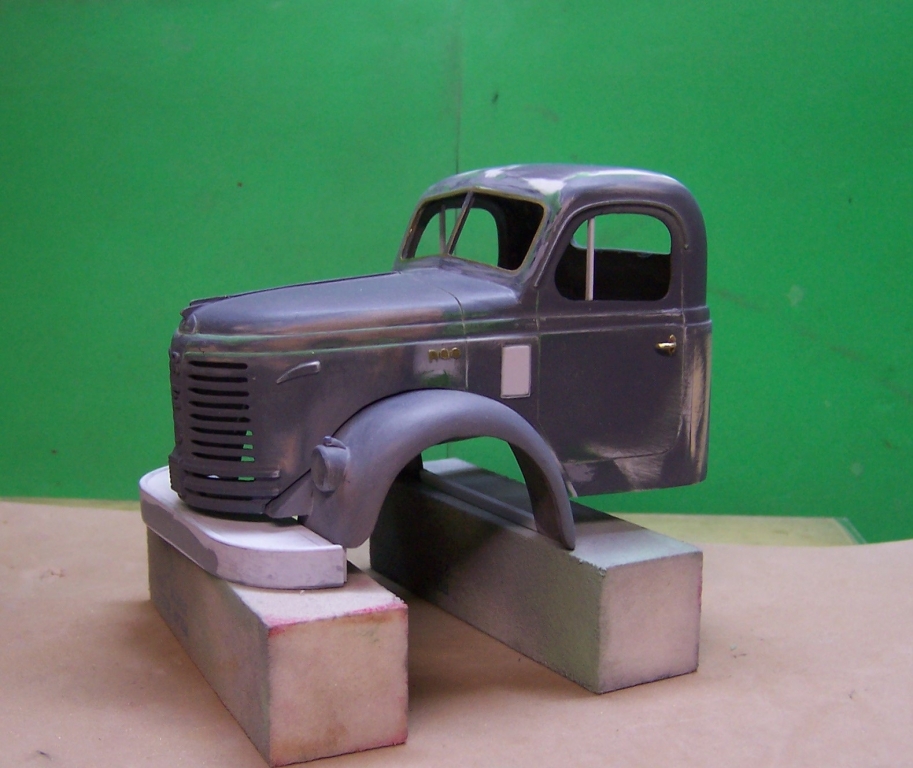
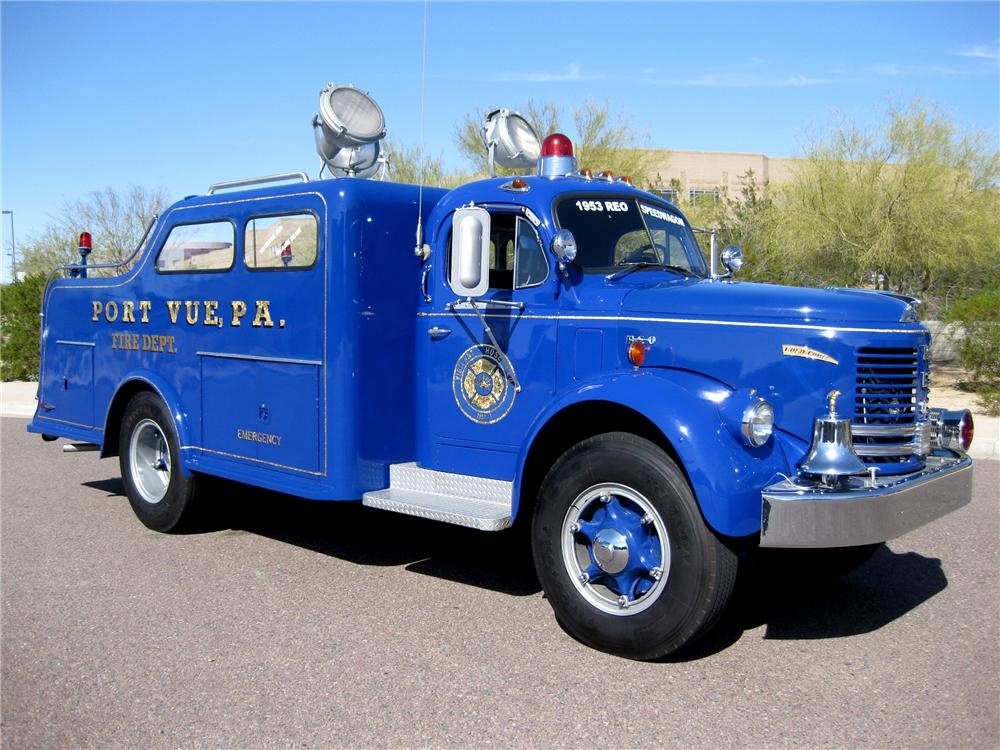
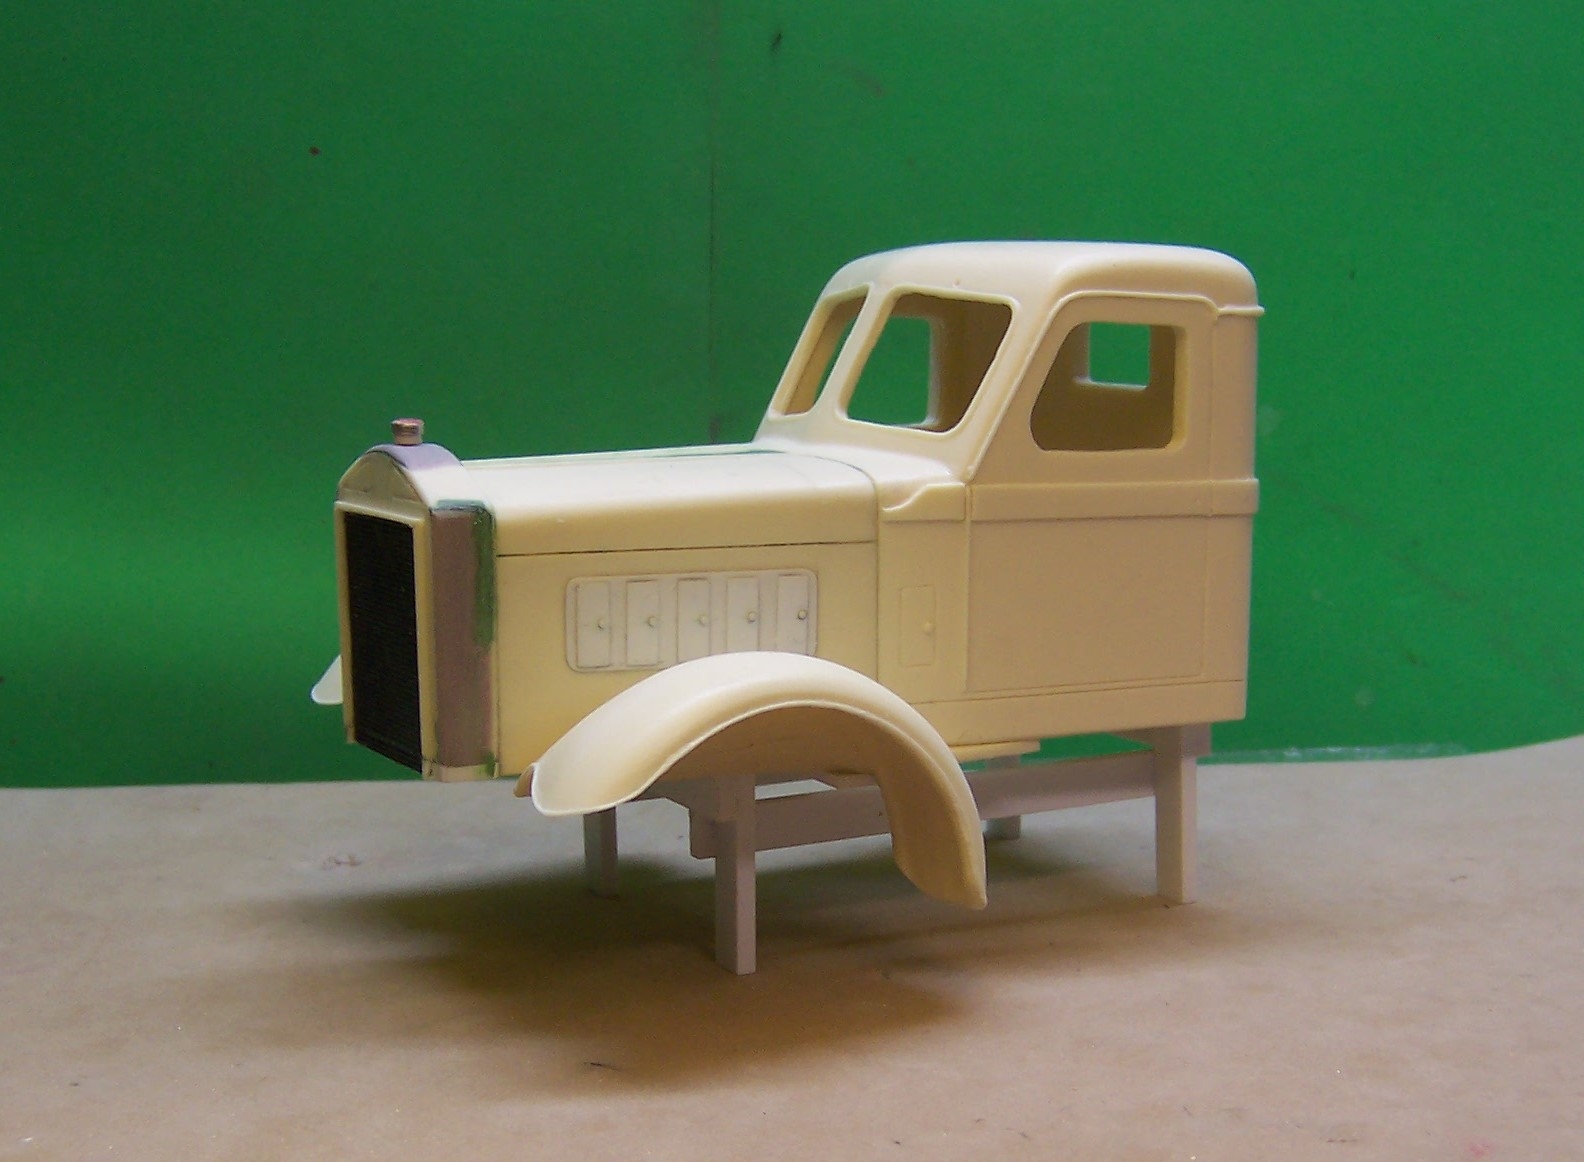
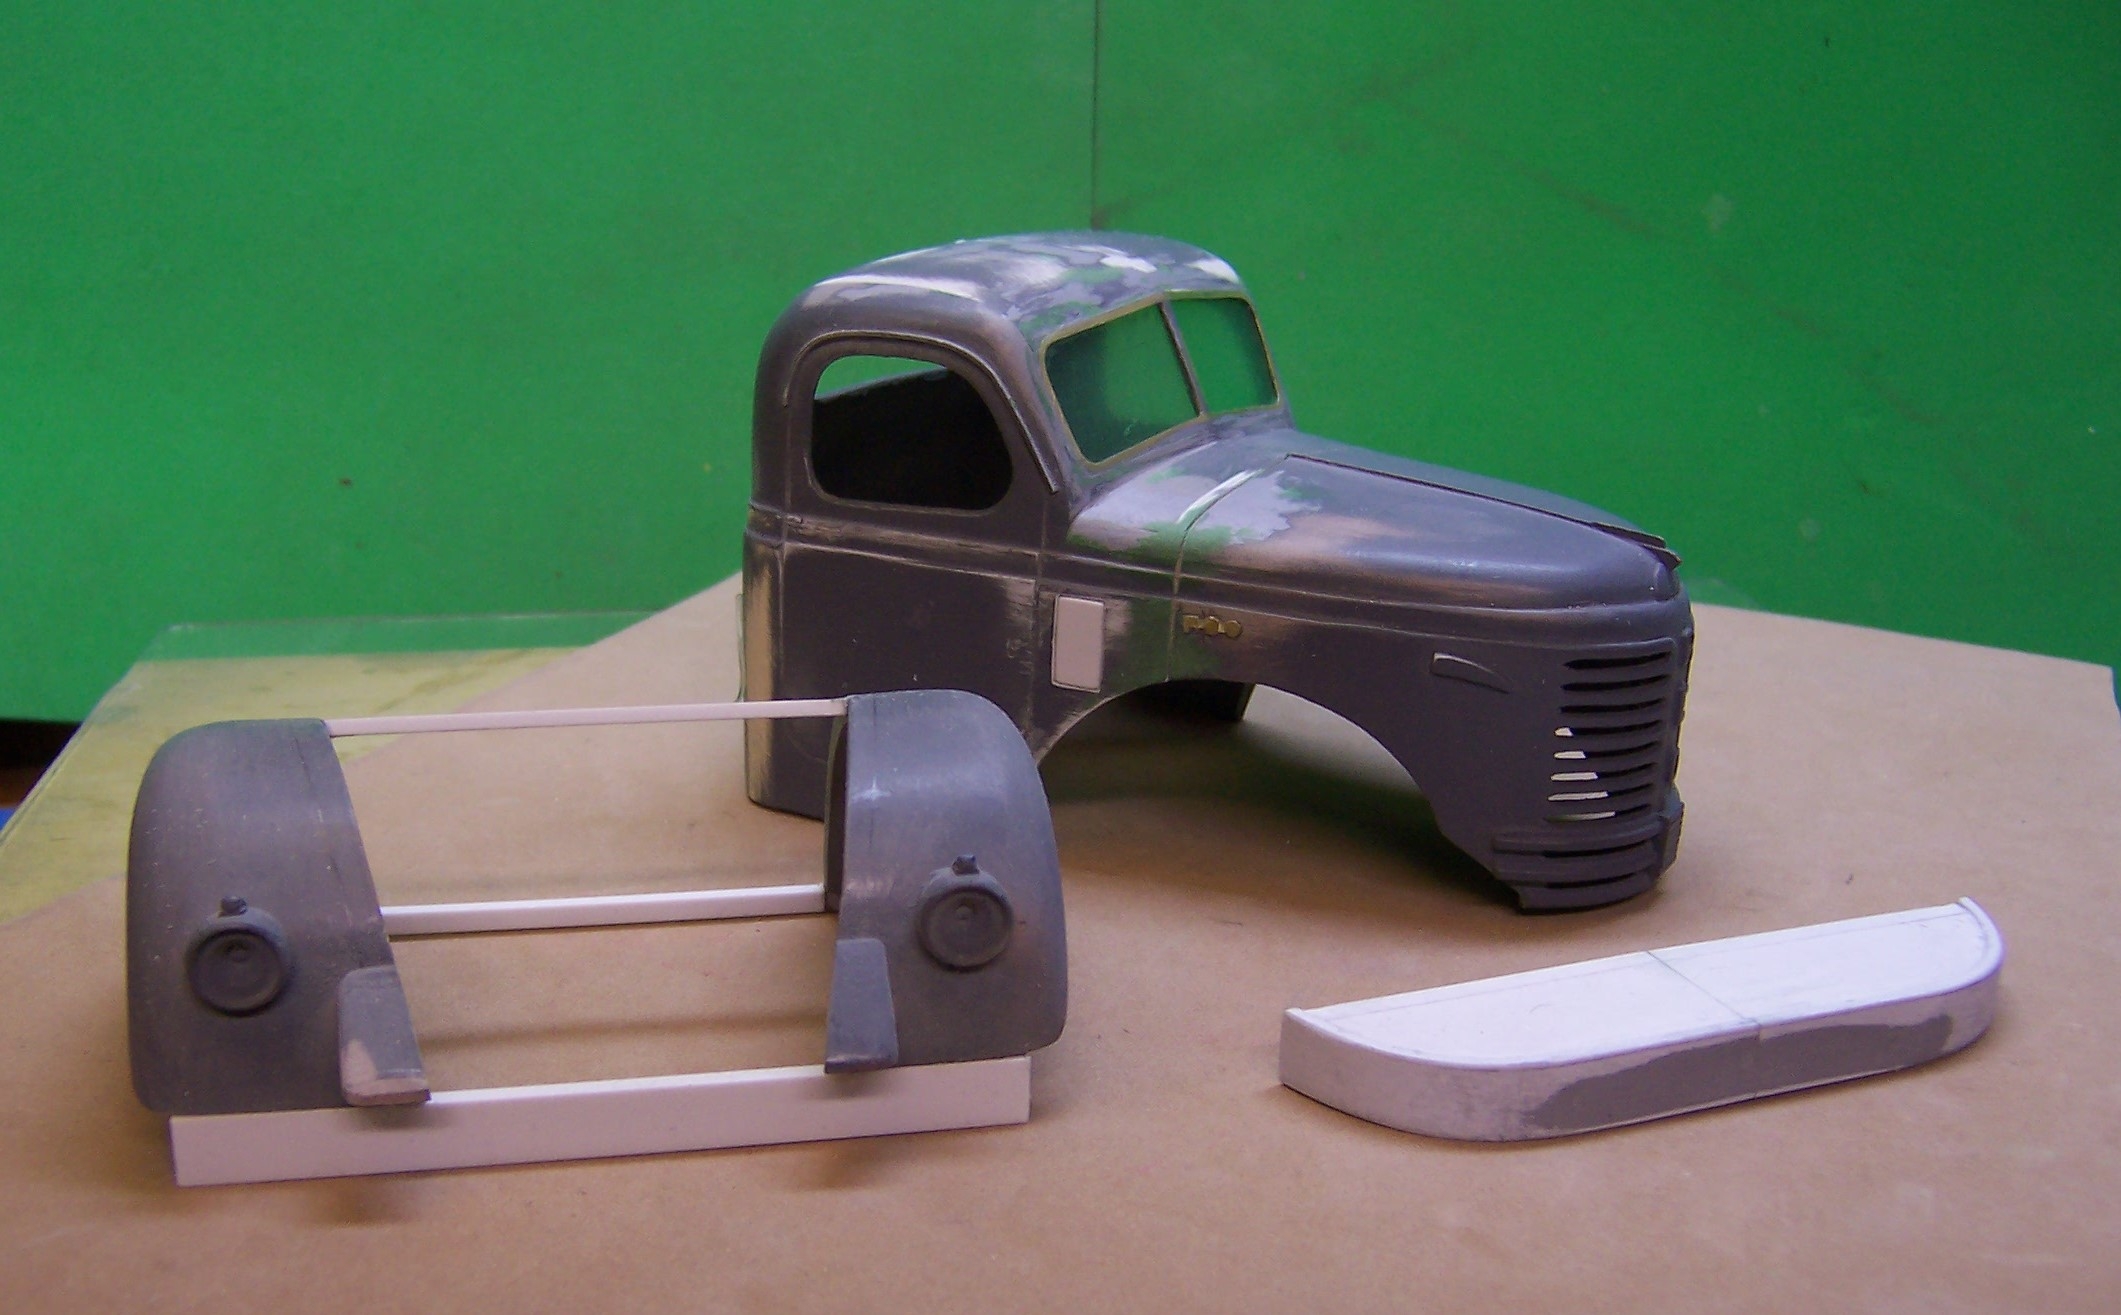
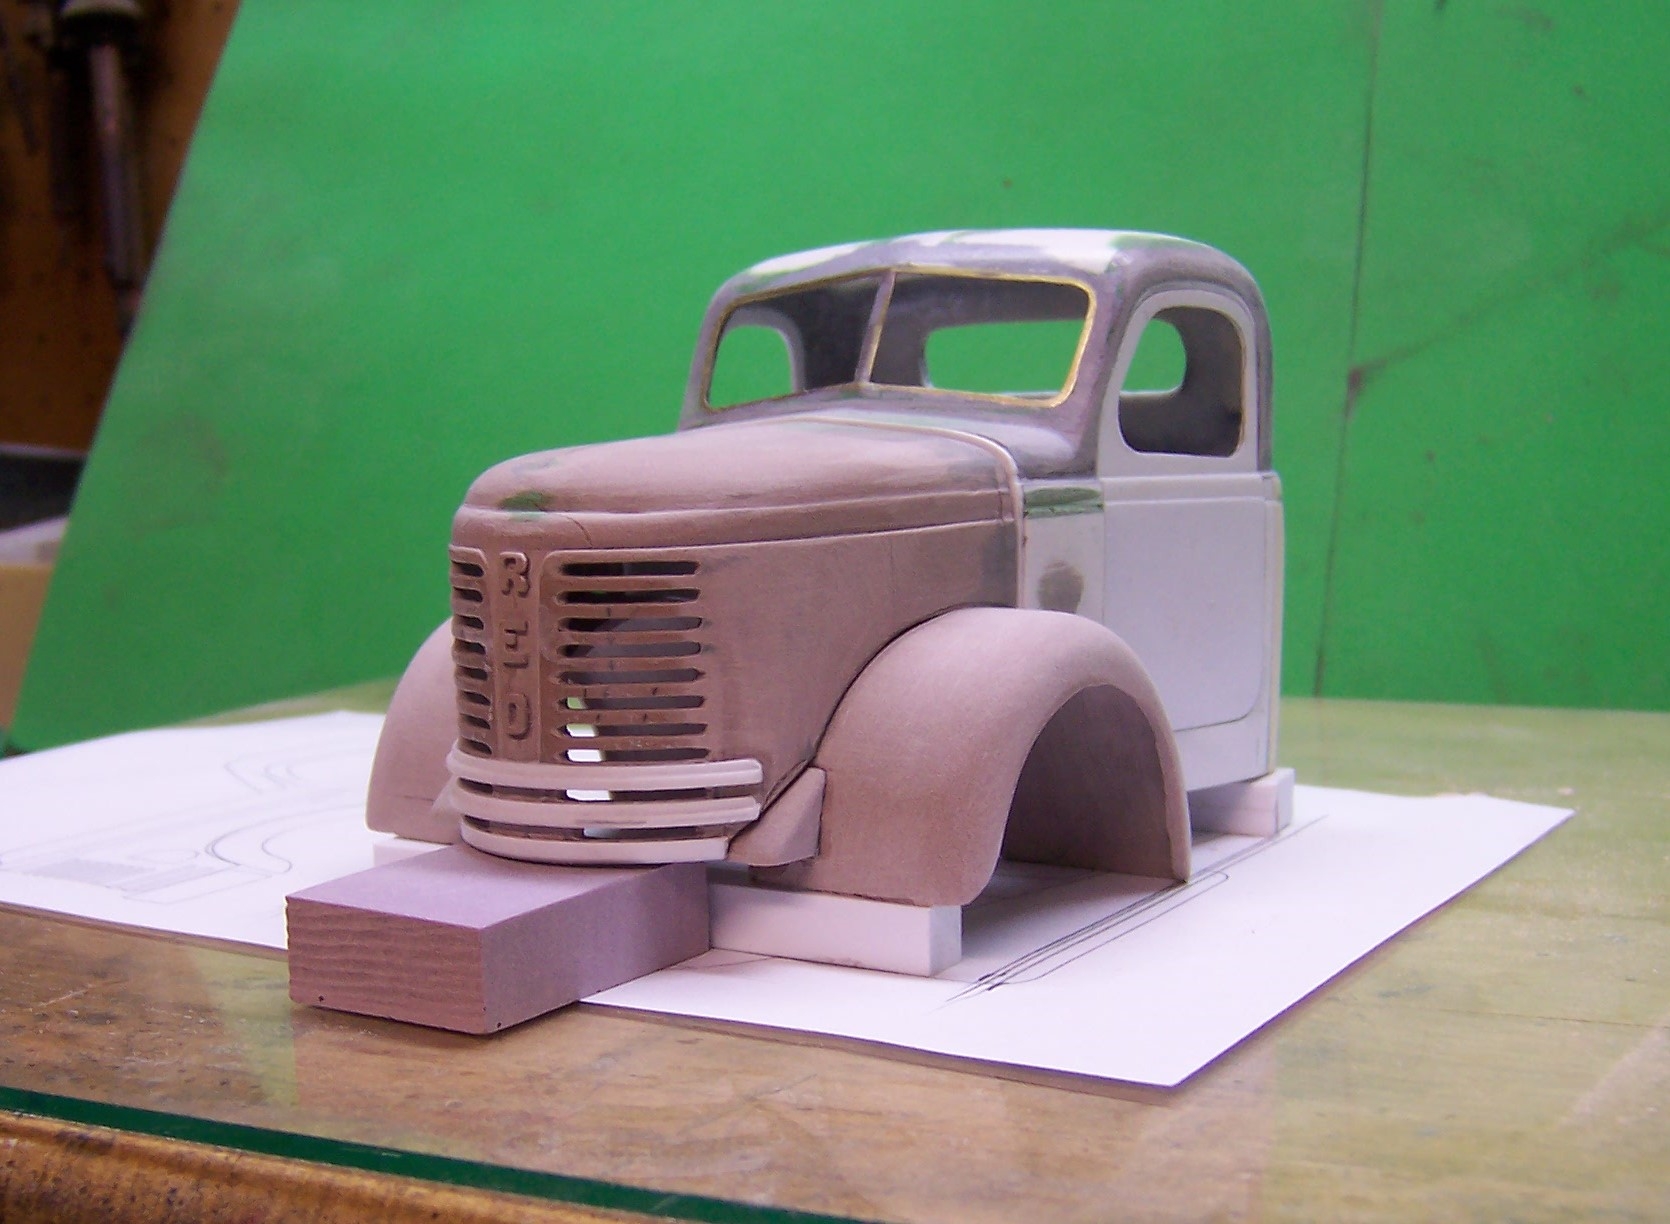
Been toying with the idea of building a Reo Gold Comet that was used for this Port Vue FD rig.
So I started with a more recent Reo cab but it was a real mess to work with. I ended up cutting off the bottom of the cab and building it new and installing a brass windshield surround. Then Renshape was used to carve some fenders and the hood.

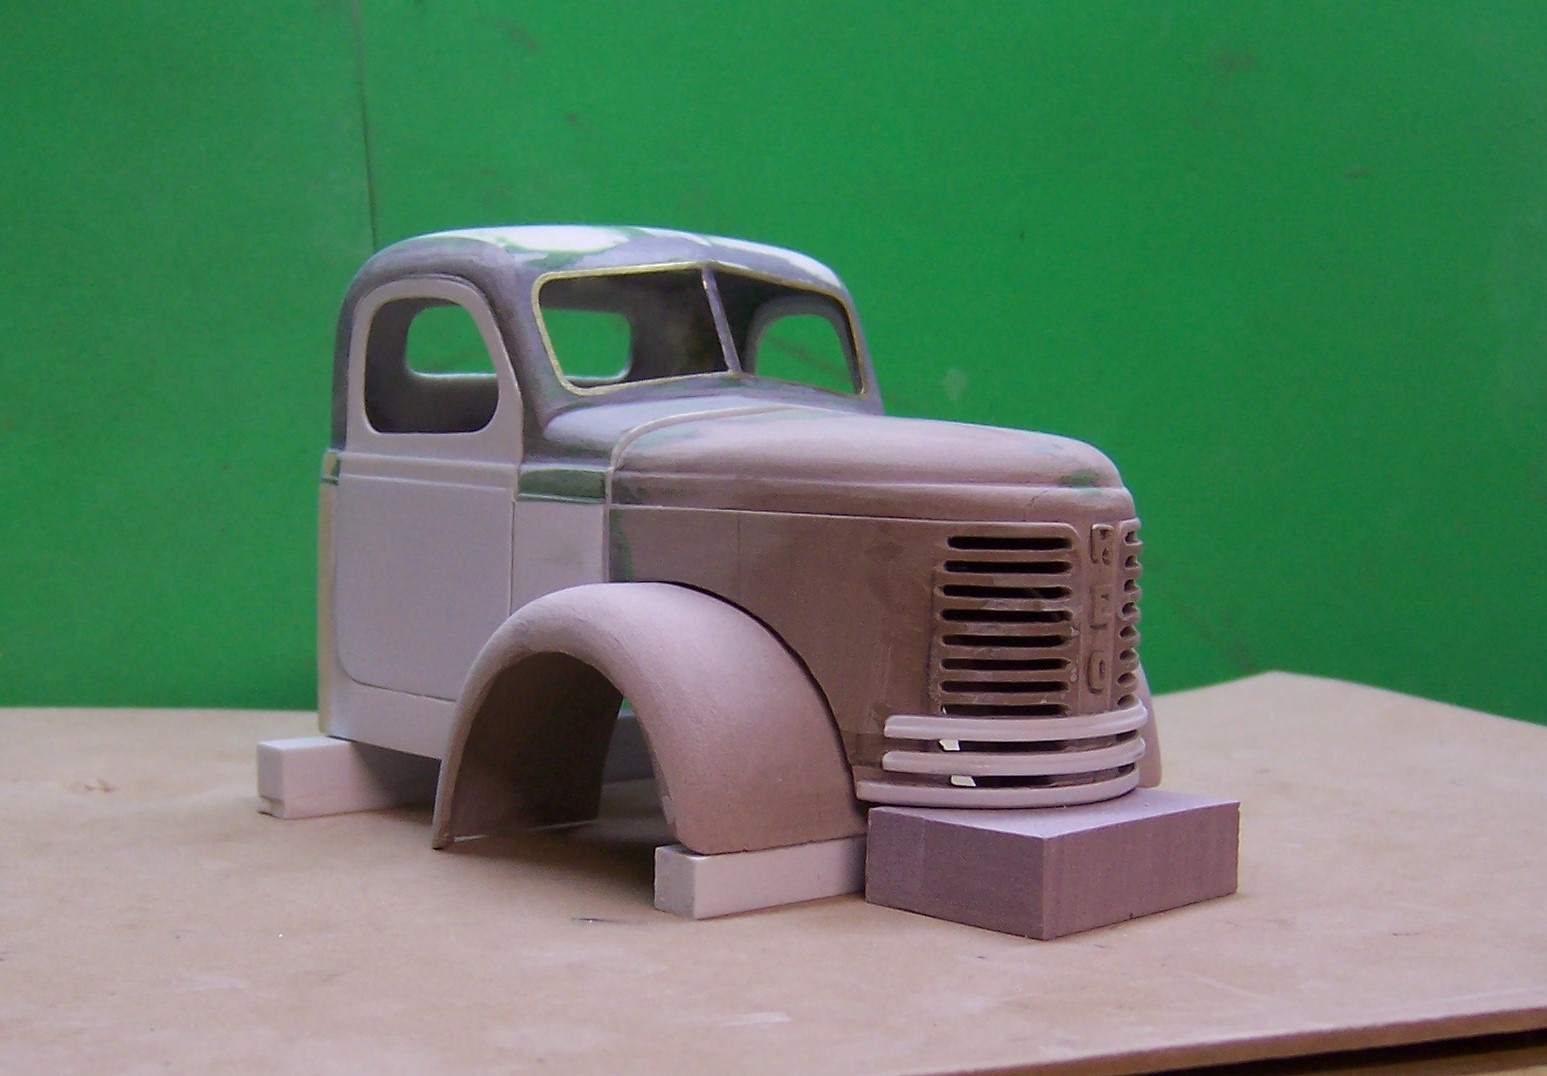
A section needs to be added to the nose below the two strips of plastic to finish off the front. This is were we are as of today.
-
You did good, Brian!! That looks just like it should having been around a bit. Great job! I see that Bricker kid posted here as well. You keeping safe there up the line??
-
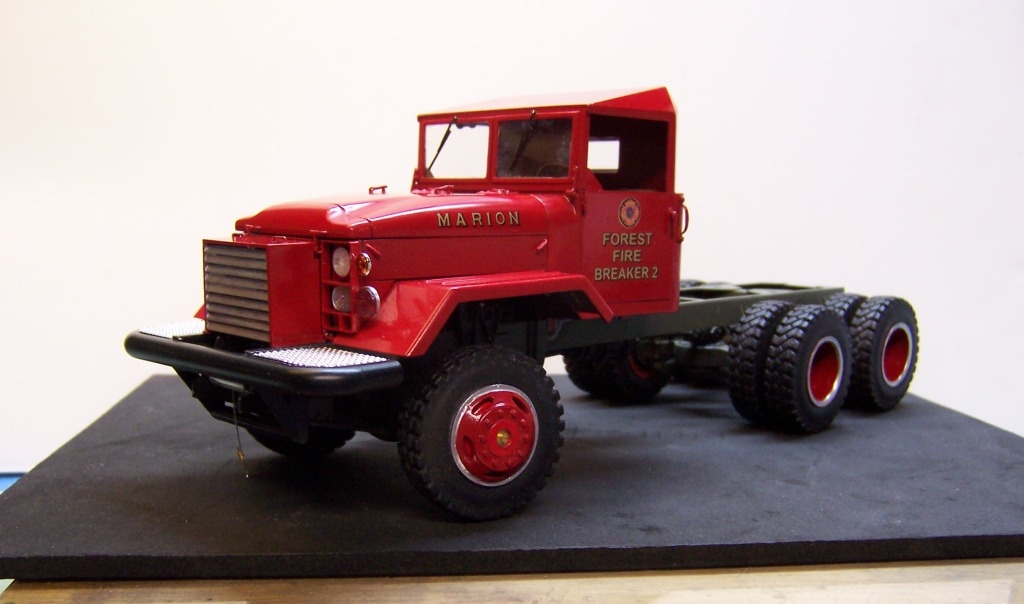
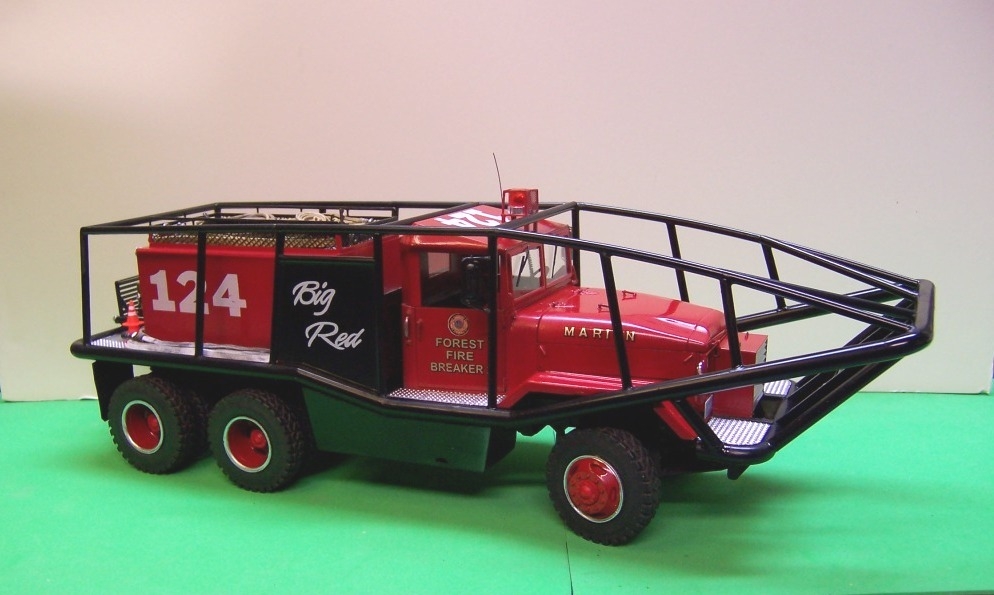
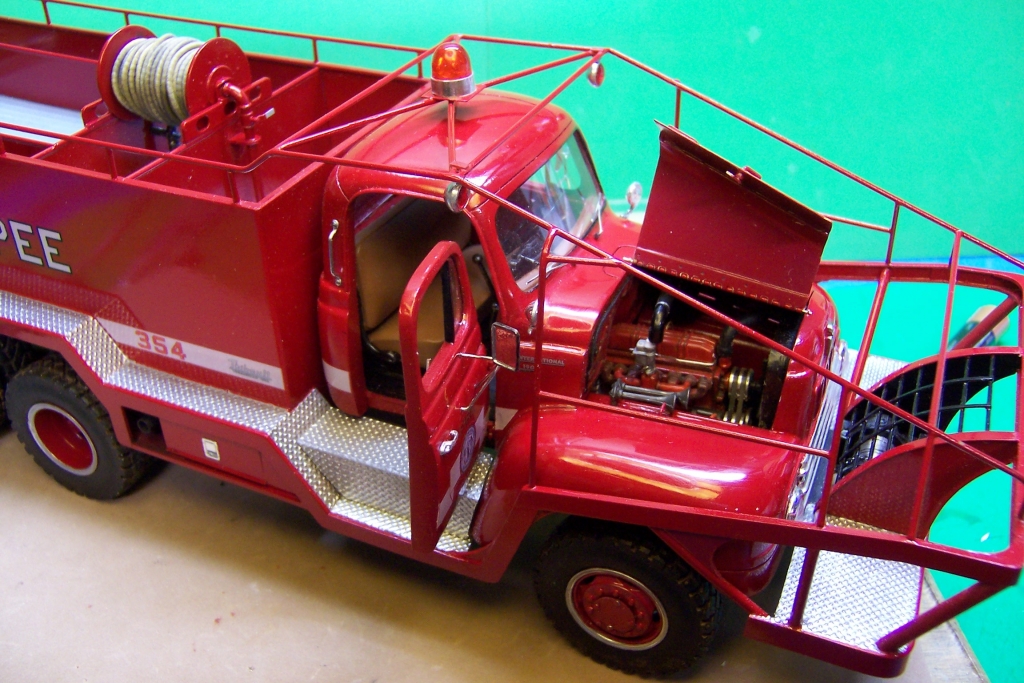
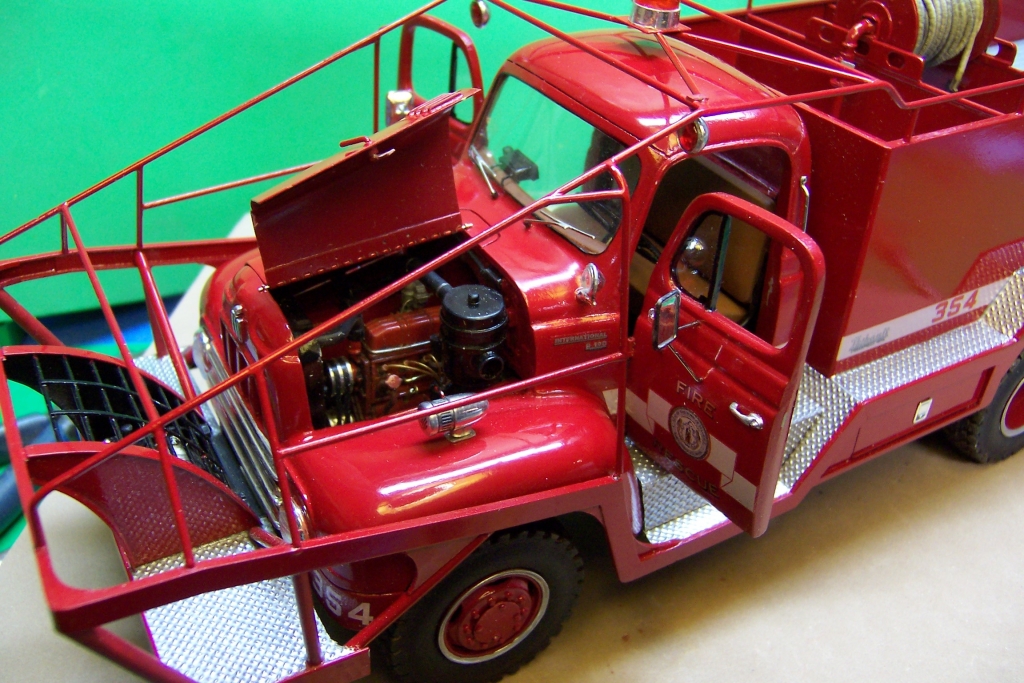
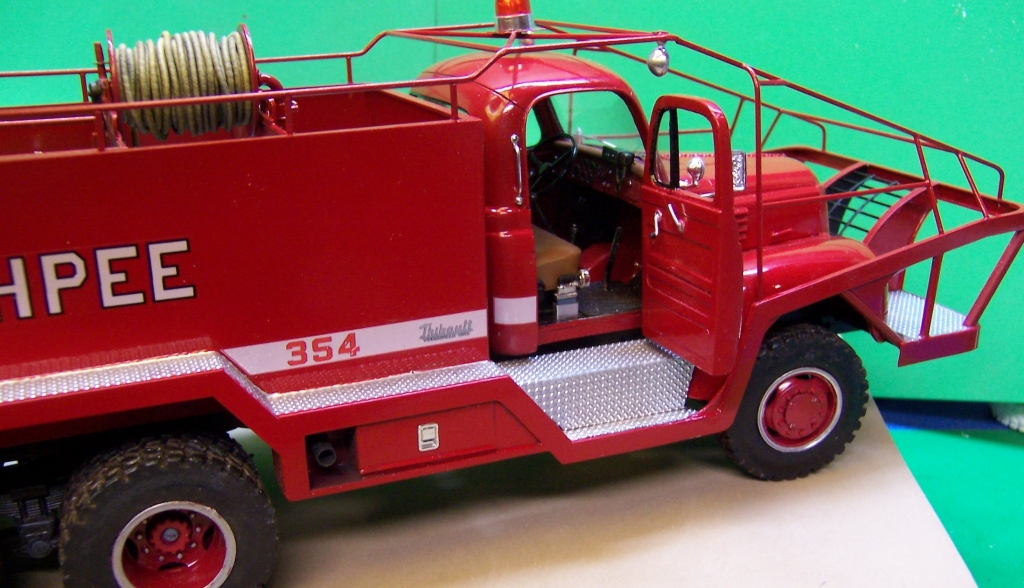
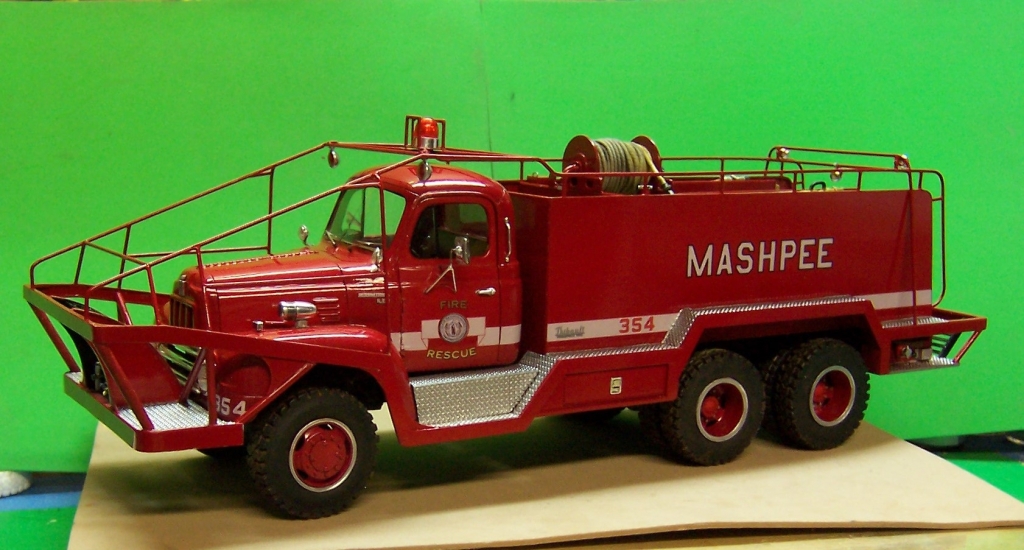
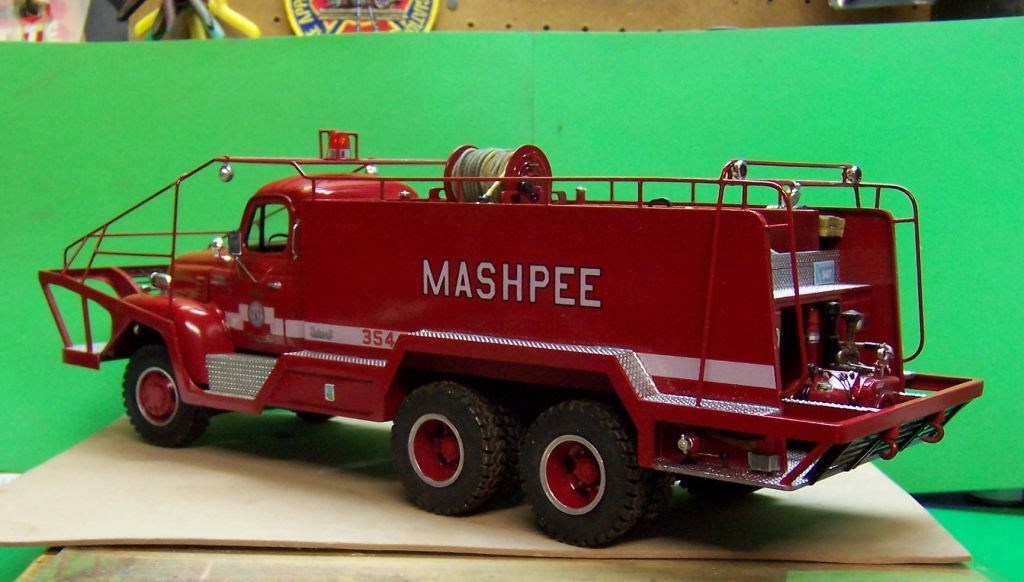
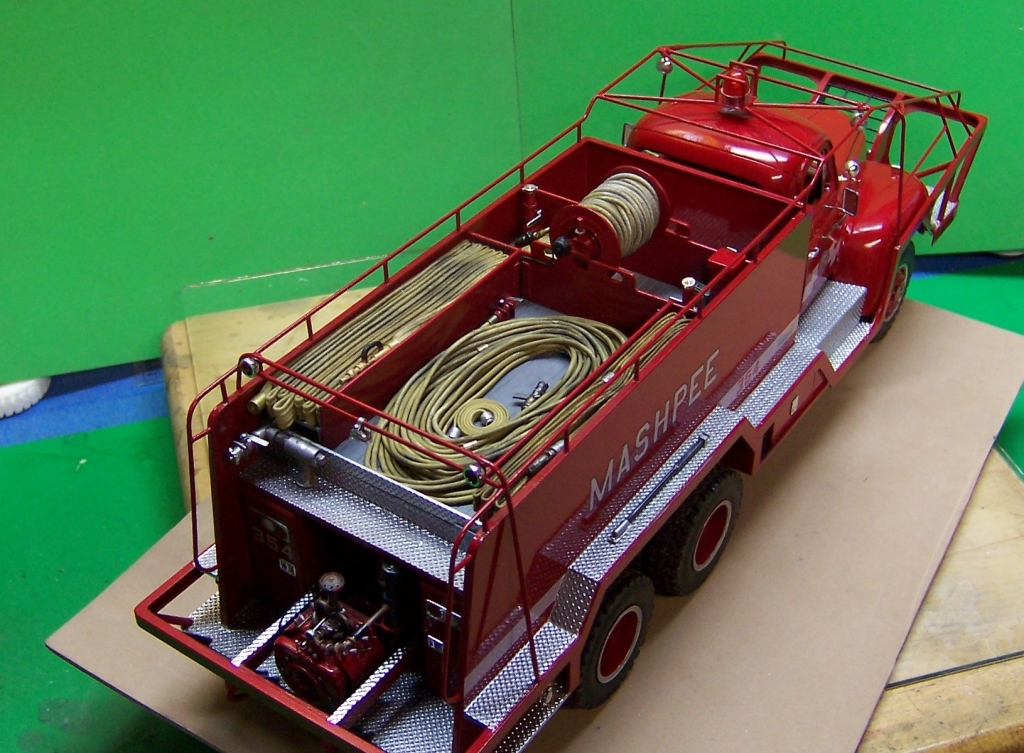
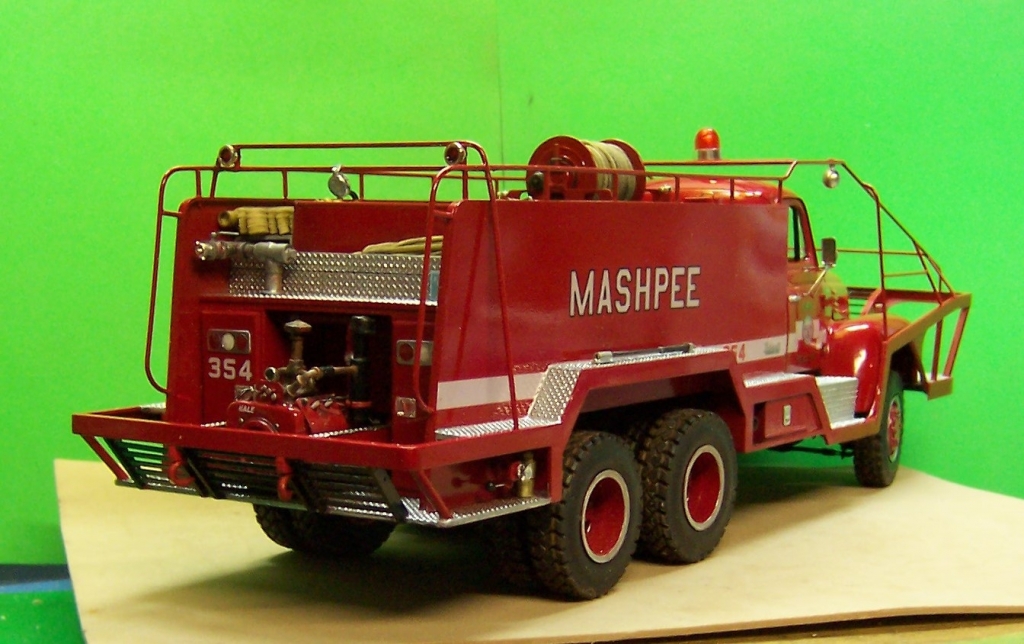
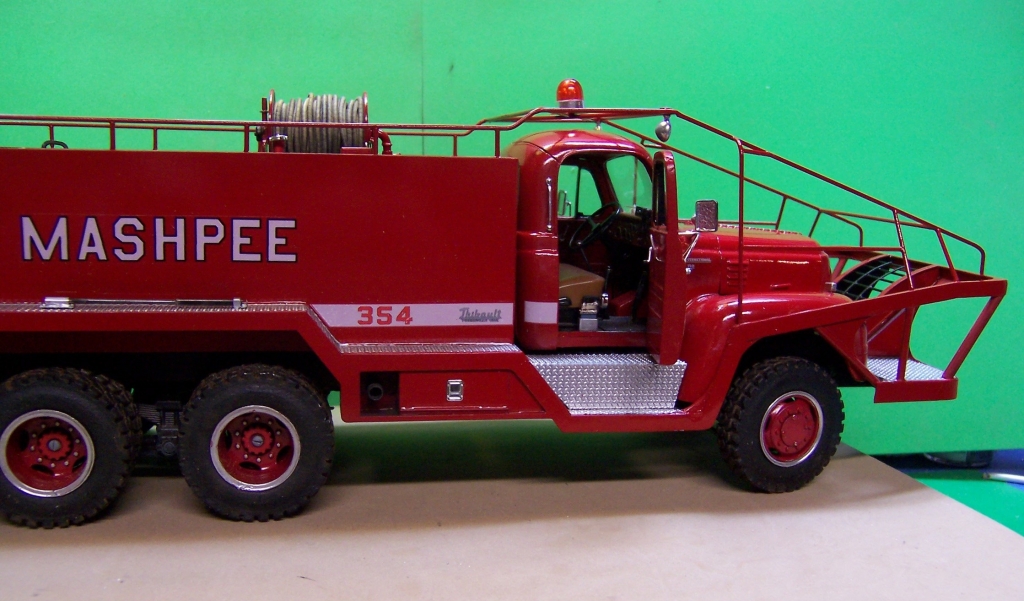
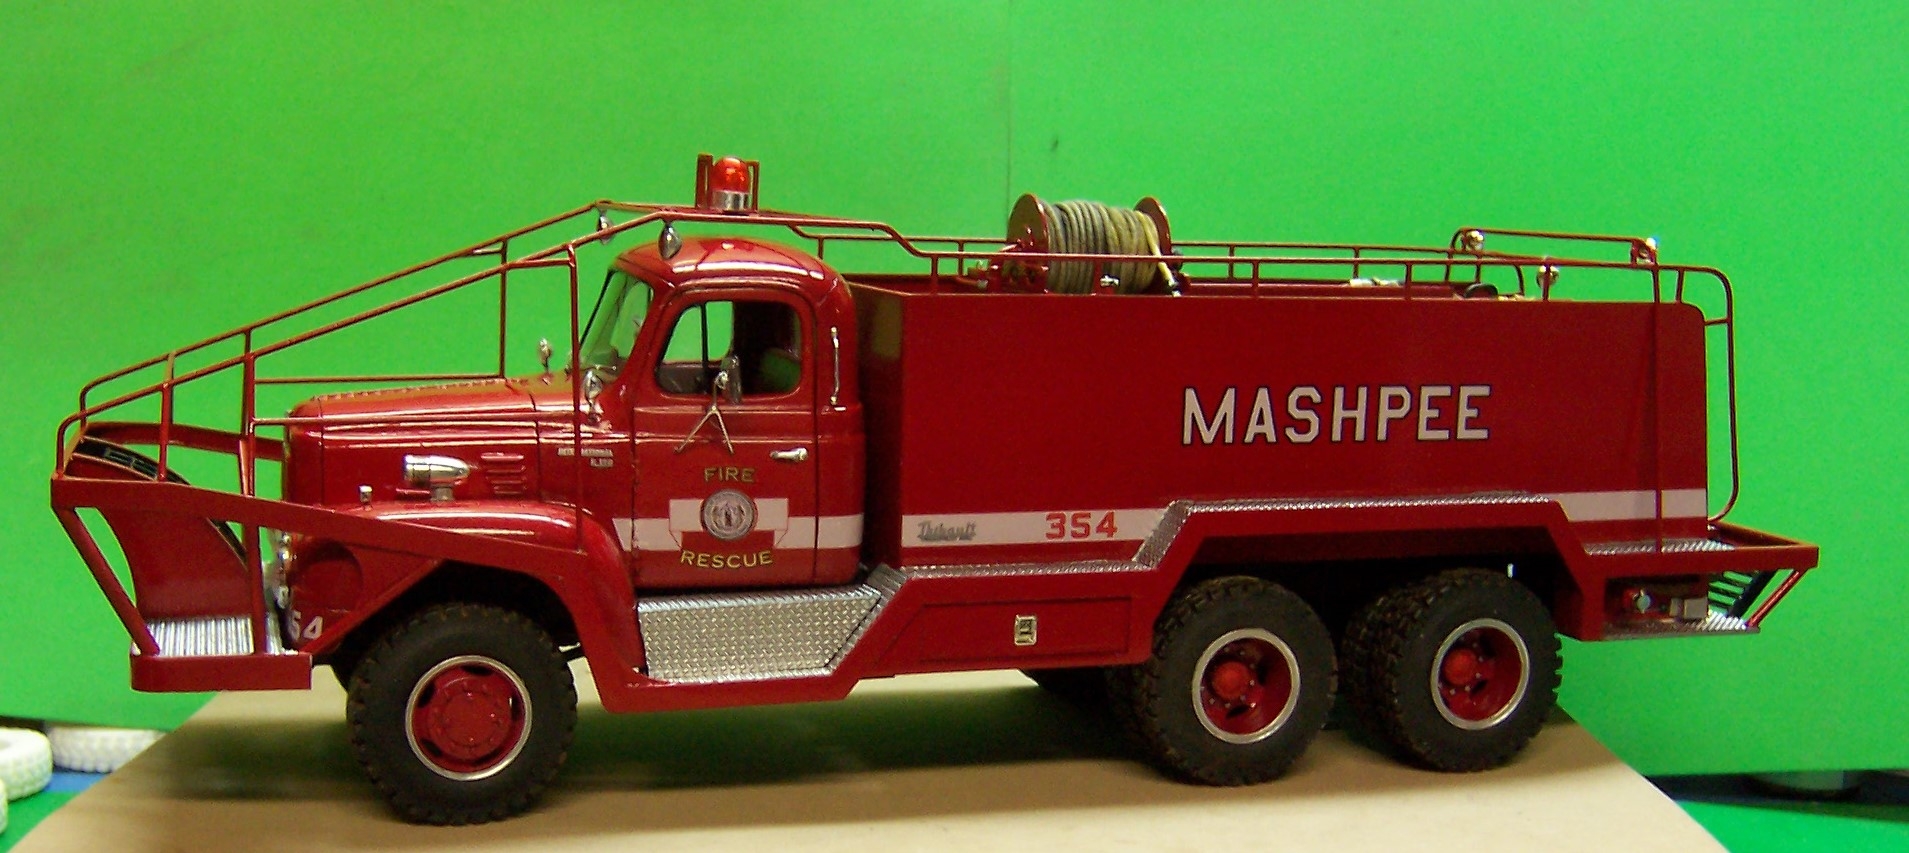
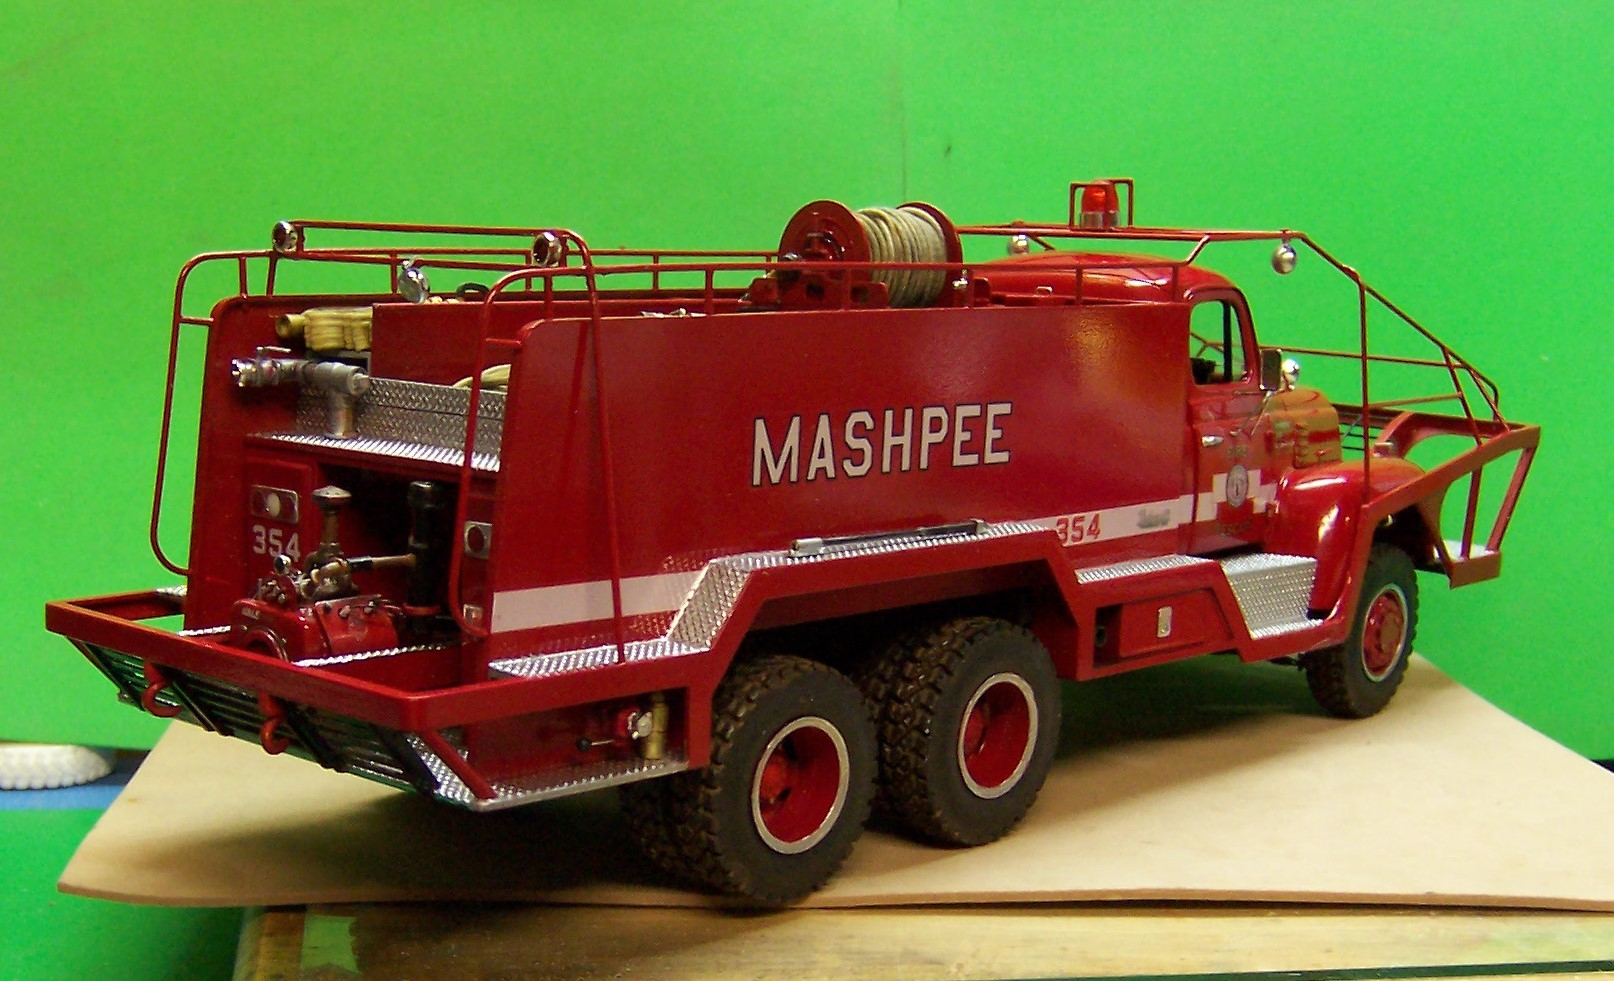
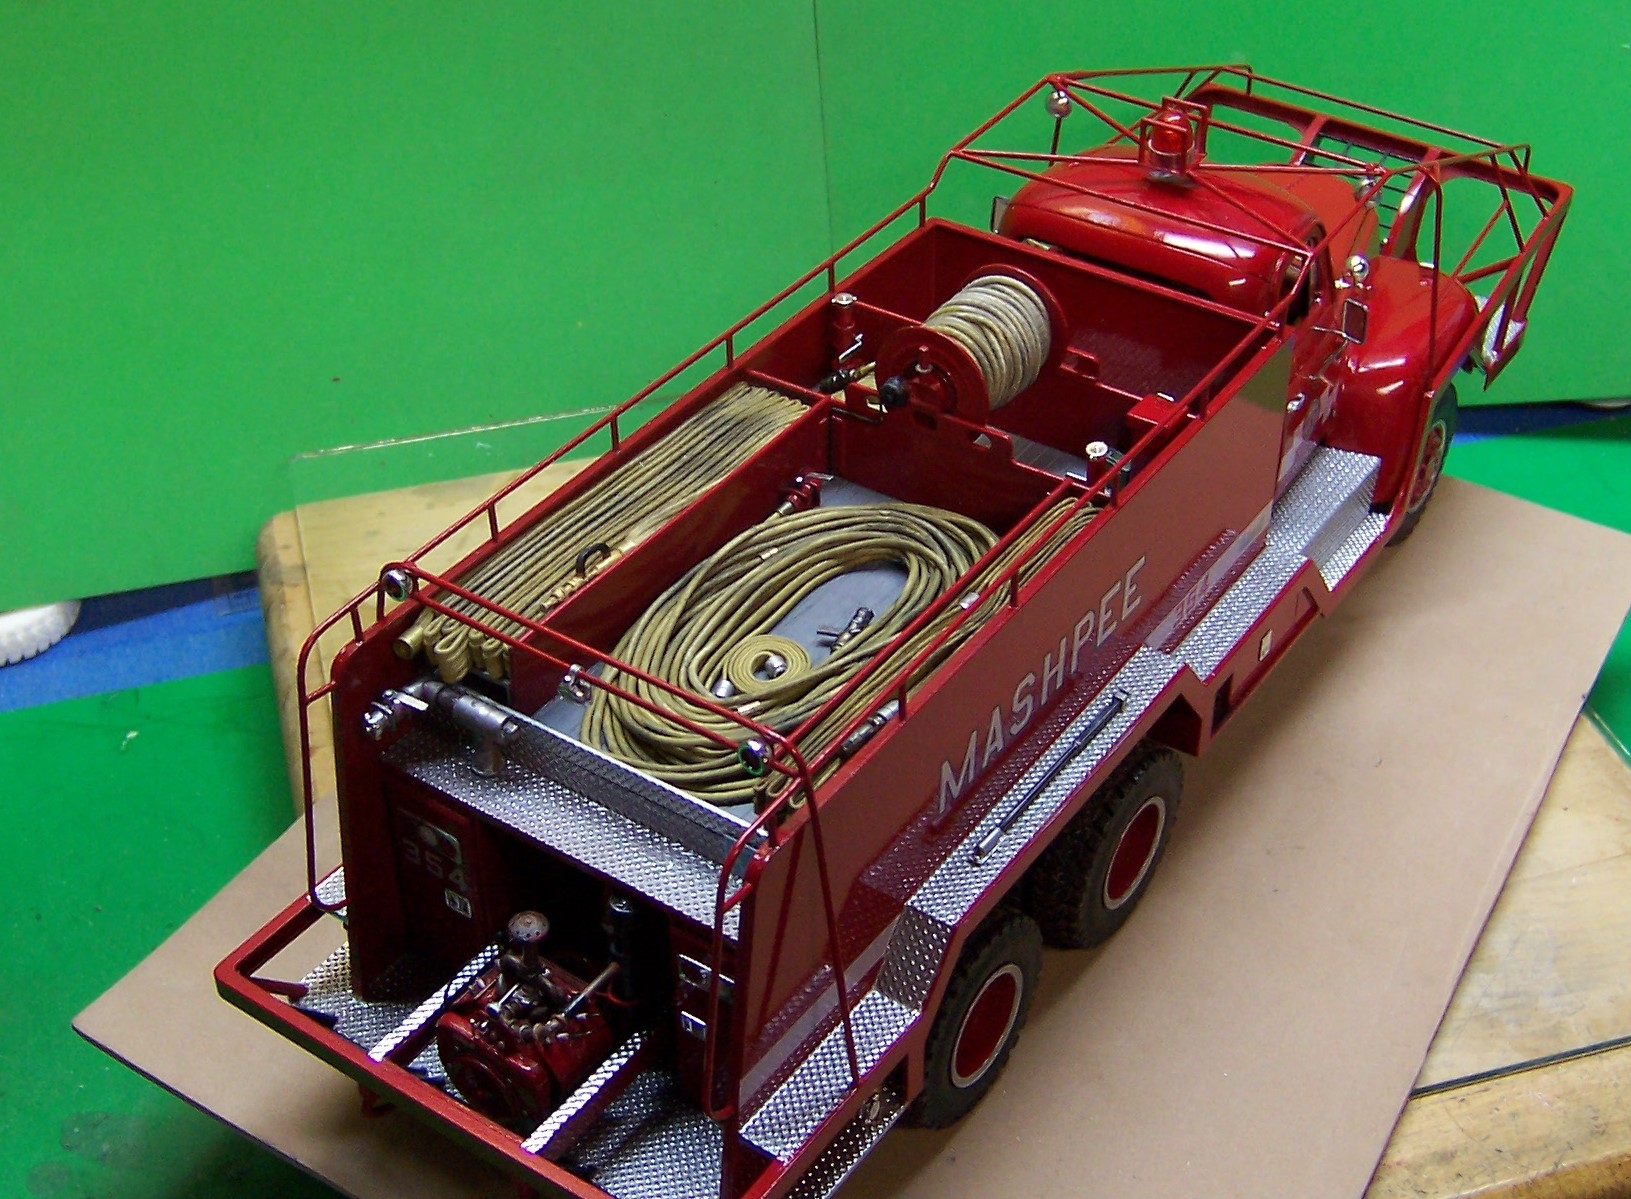
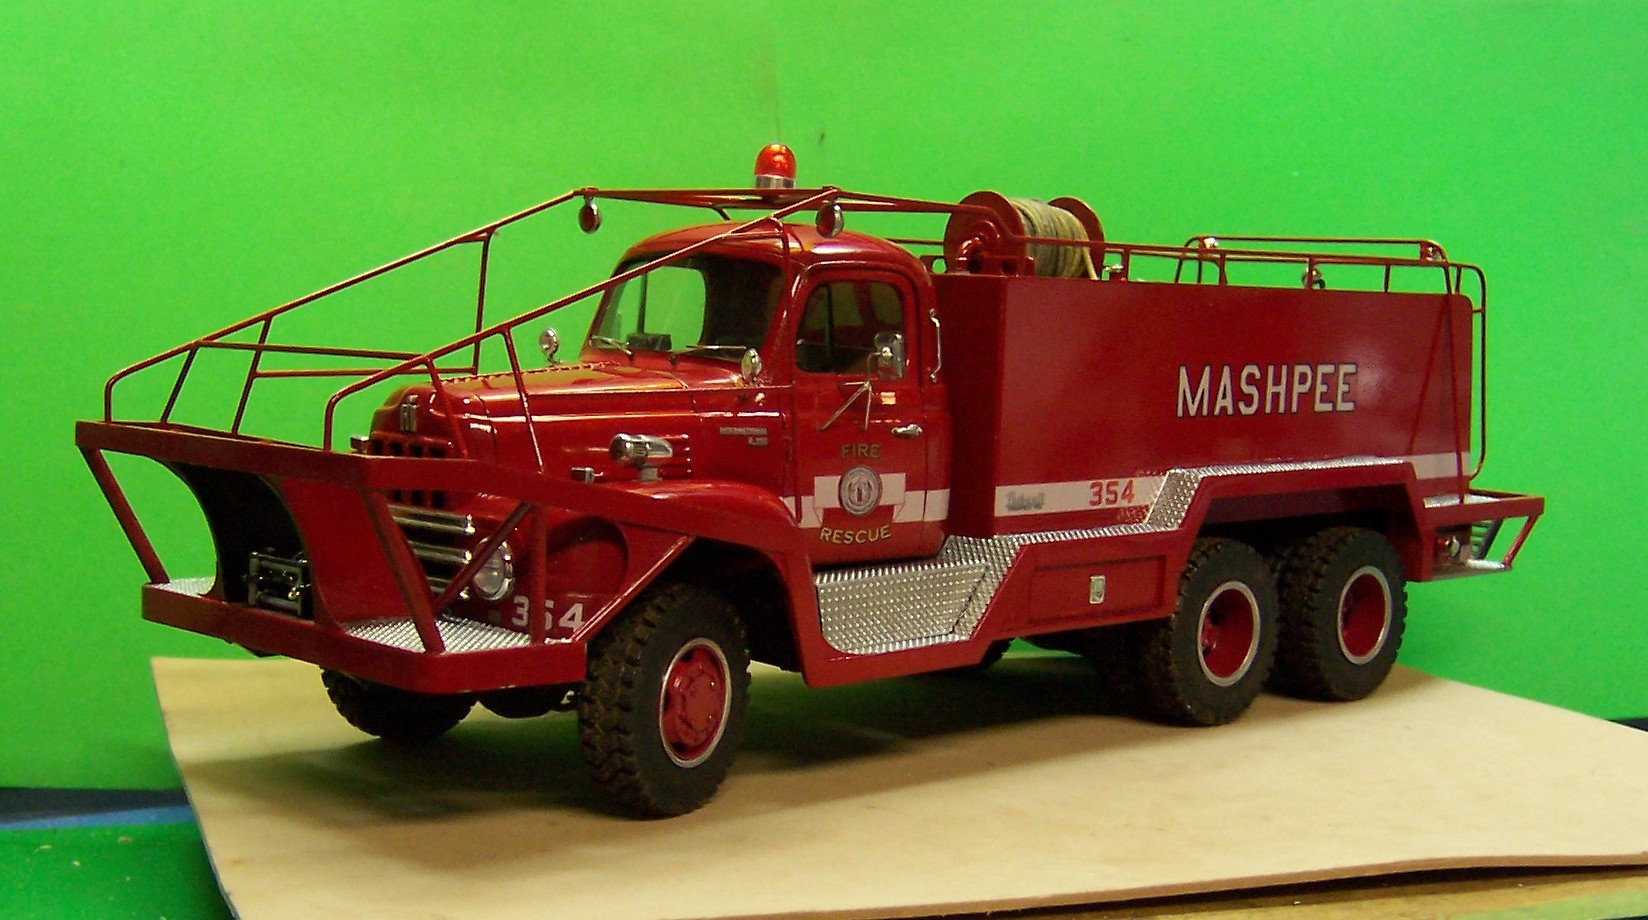
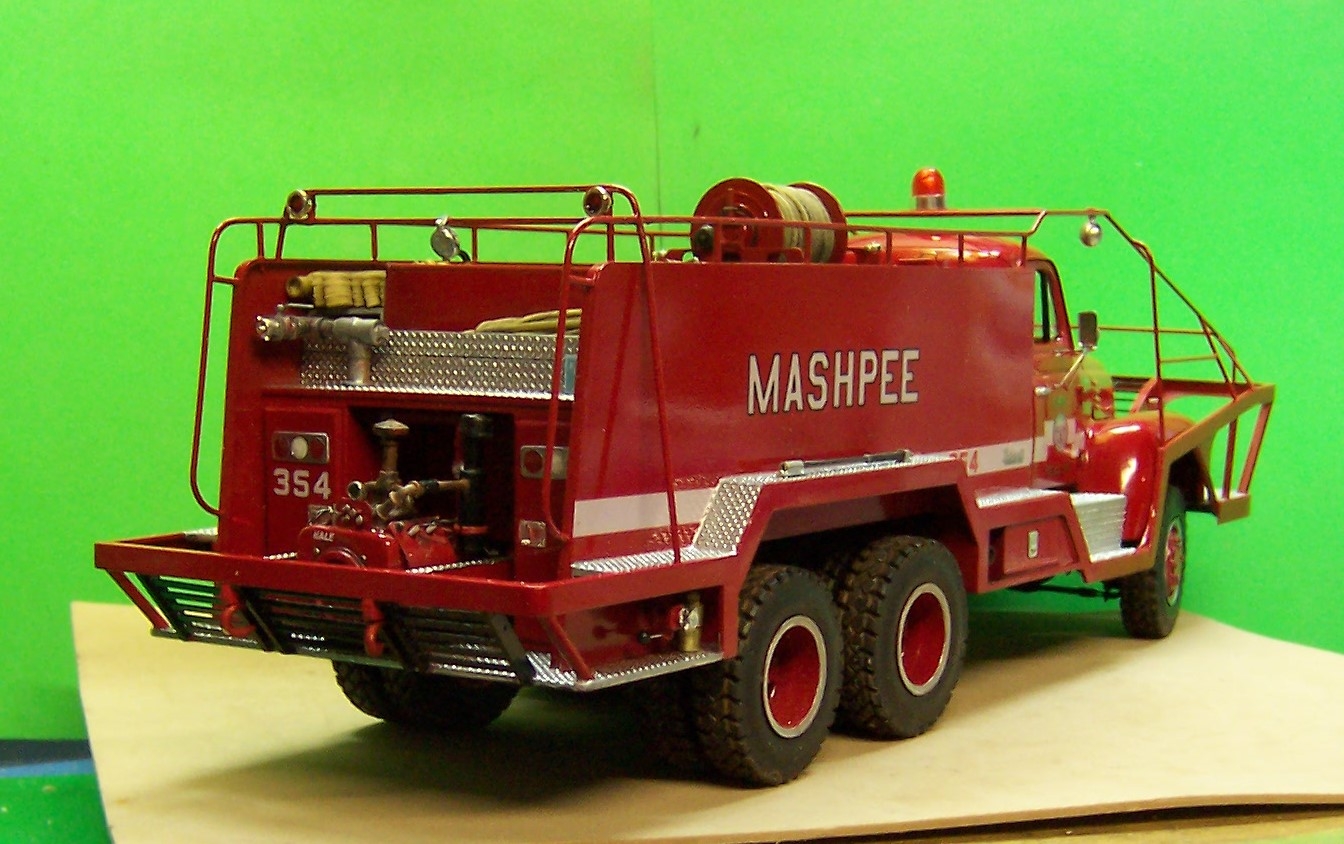
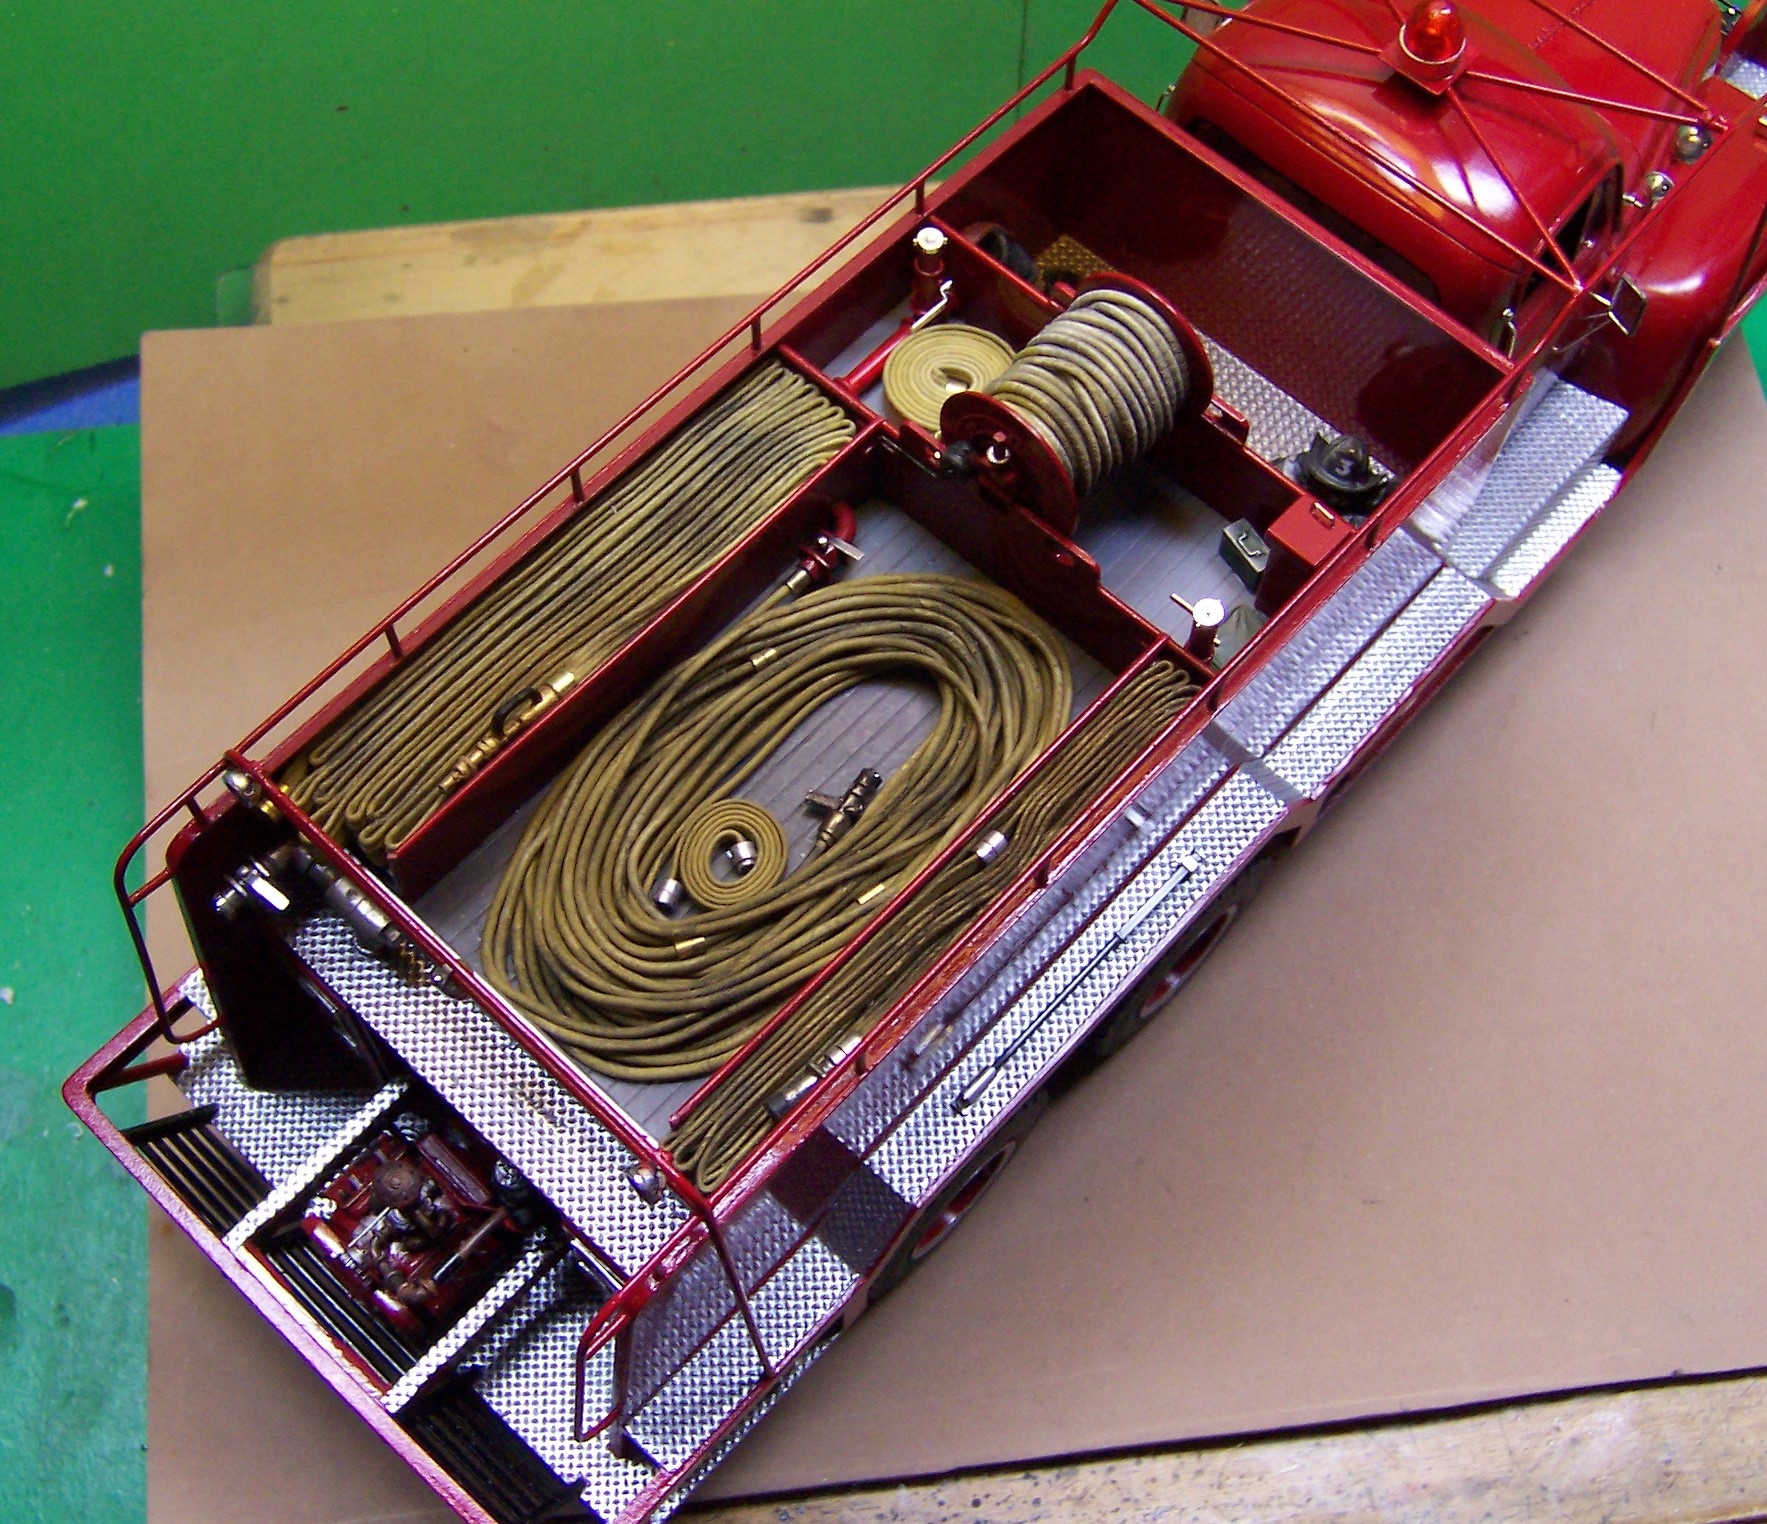
This rig is now ready for a trip through the woods. Once or twice doing that though and it won't look so bright and shiny. But that is what they are built for and are (or were) quite successful at it.
Here are photos of the last couple of sessions adding small details to the rig that finish the build.


-
2
-
-
Got a few additional details completed. Not far now to it being finished.


1948 Sterling HC 175
in Model Truck Workbench
Posted
Thank you, Brian. Plenty of work ahead on this one!