

Chariots of Fire
-
Content count
155 -
Joined
-
Last visited
-
Days Won
13
Posts posted by Chariots of Fire
-
-
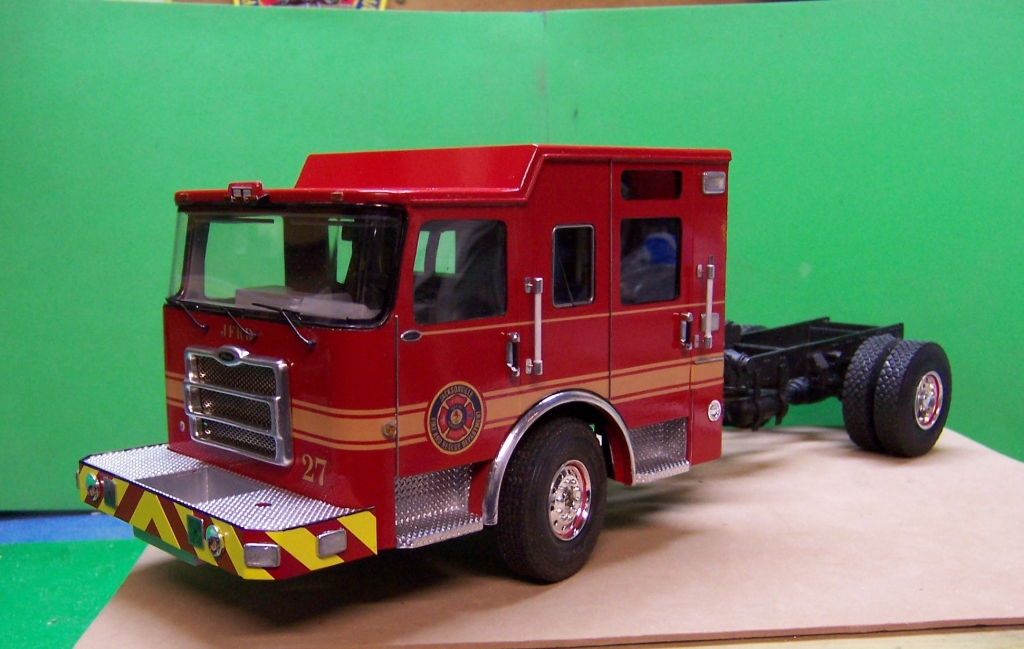
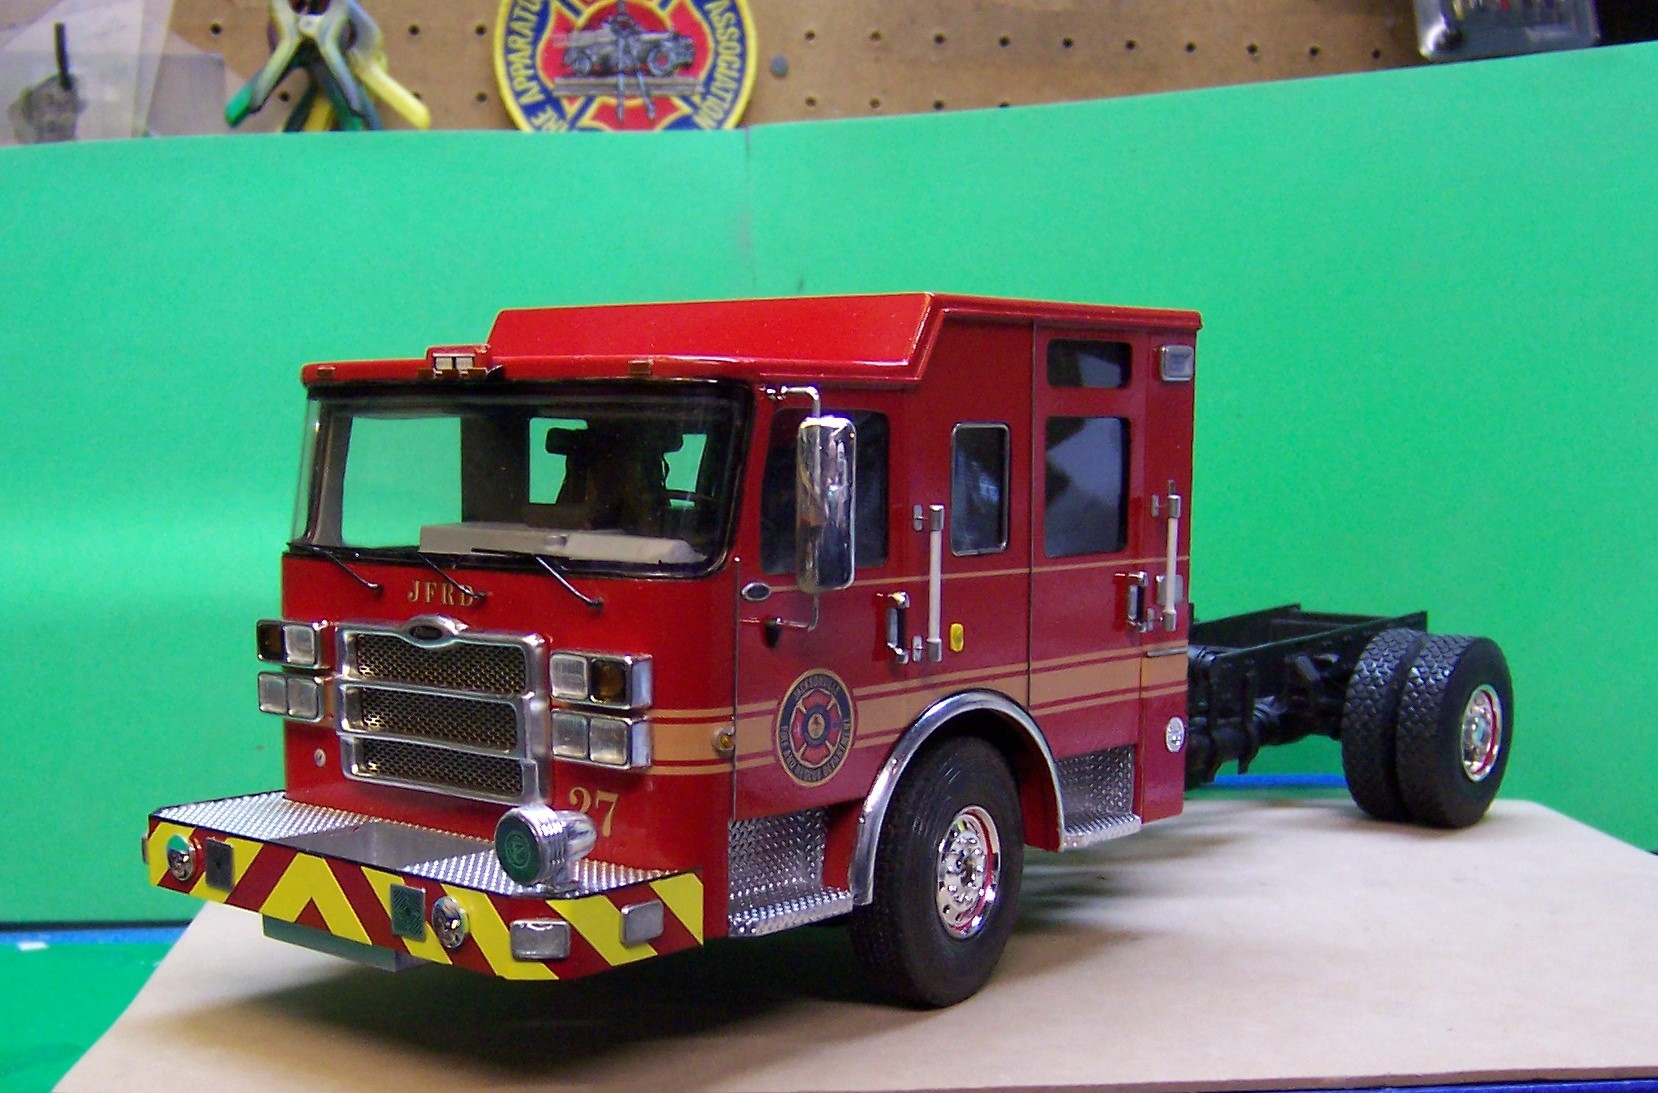
Got a bit more done on it. Headlights, mirrors and front discharge piping all are in place now. The piping is behind the siren.

-
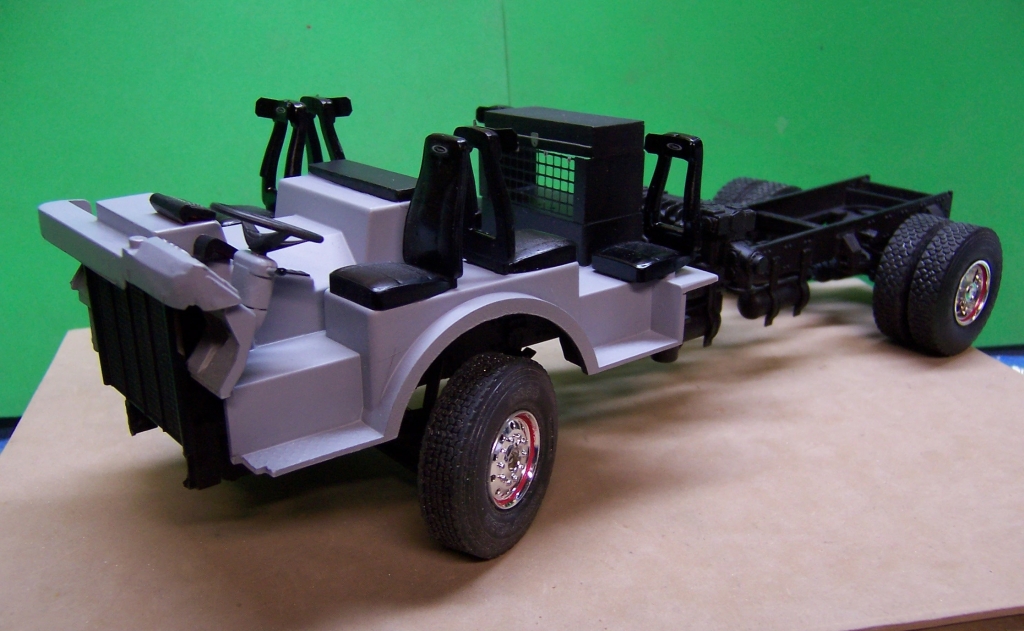
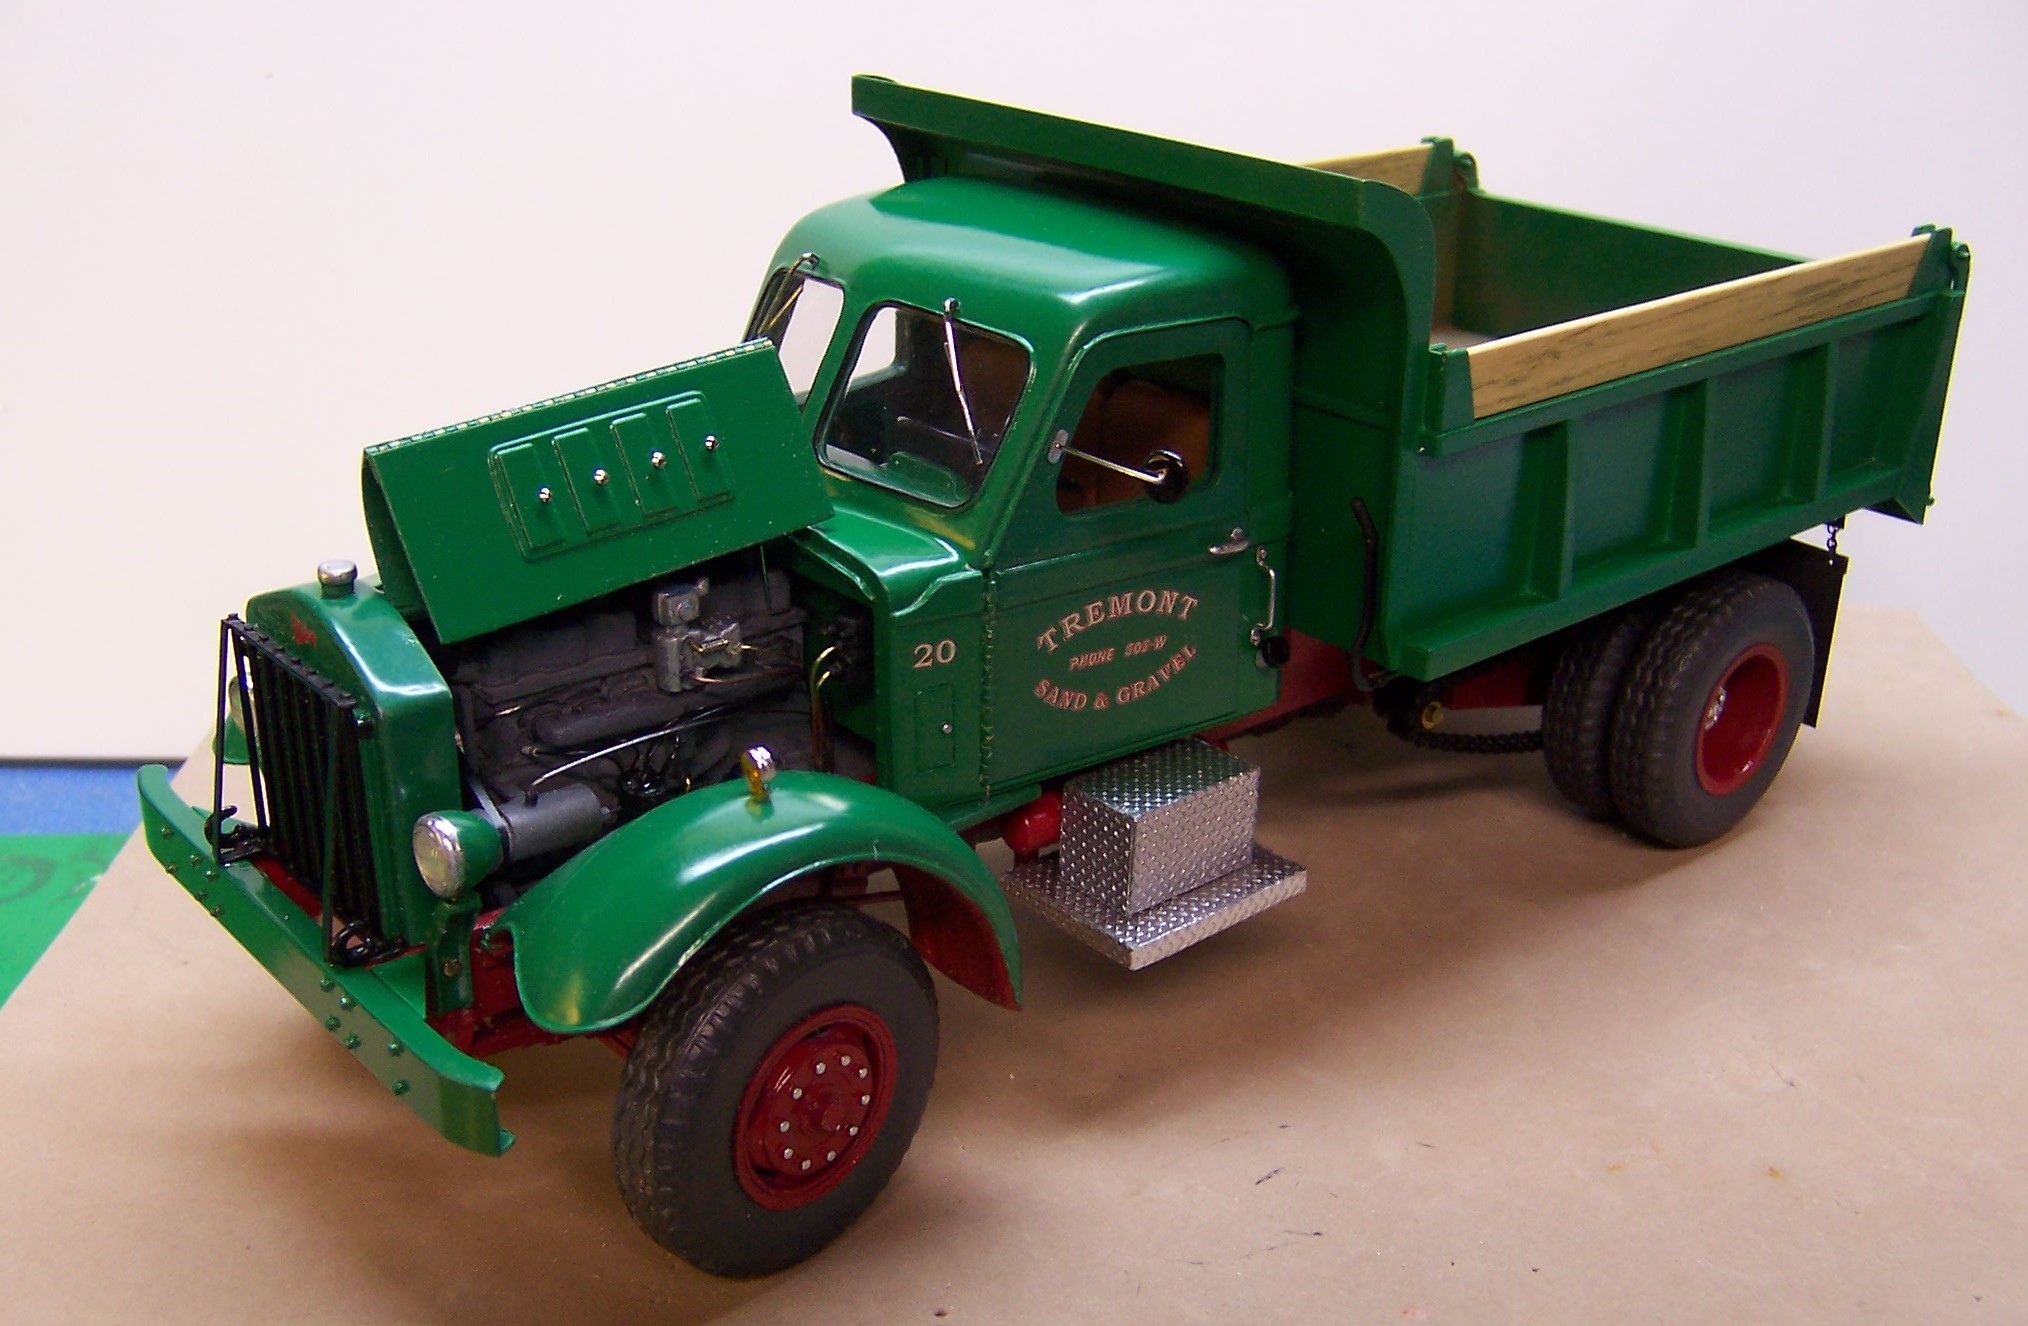
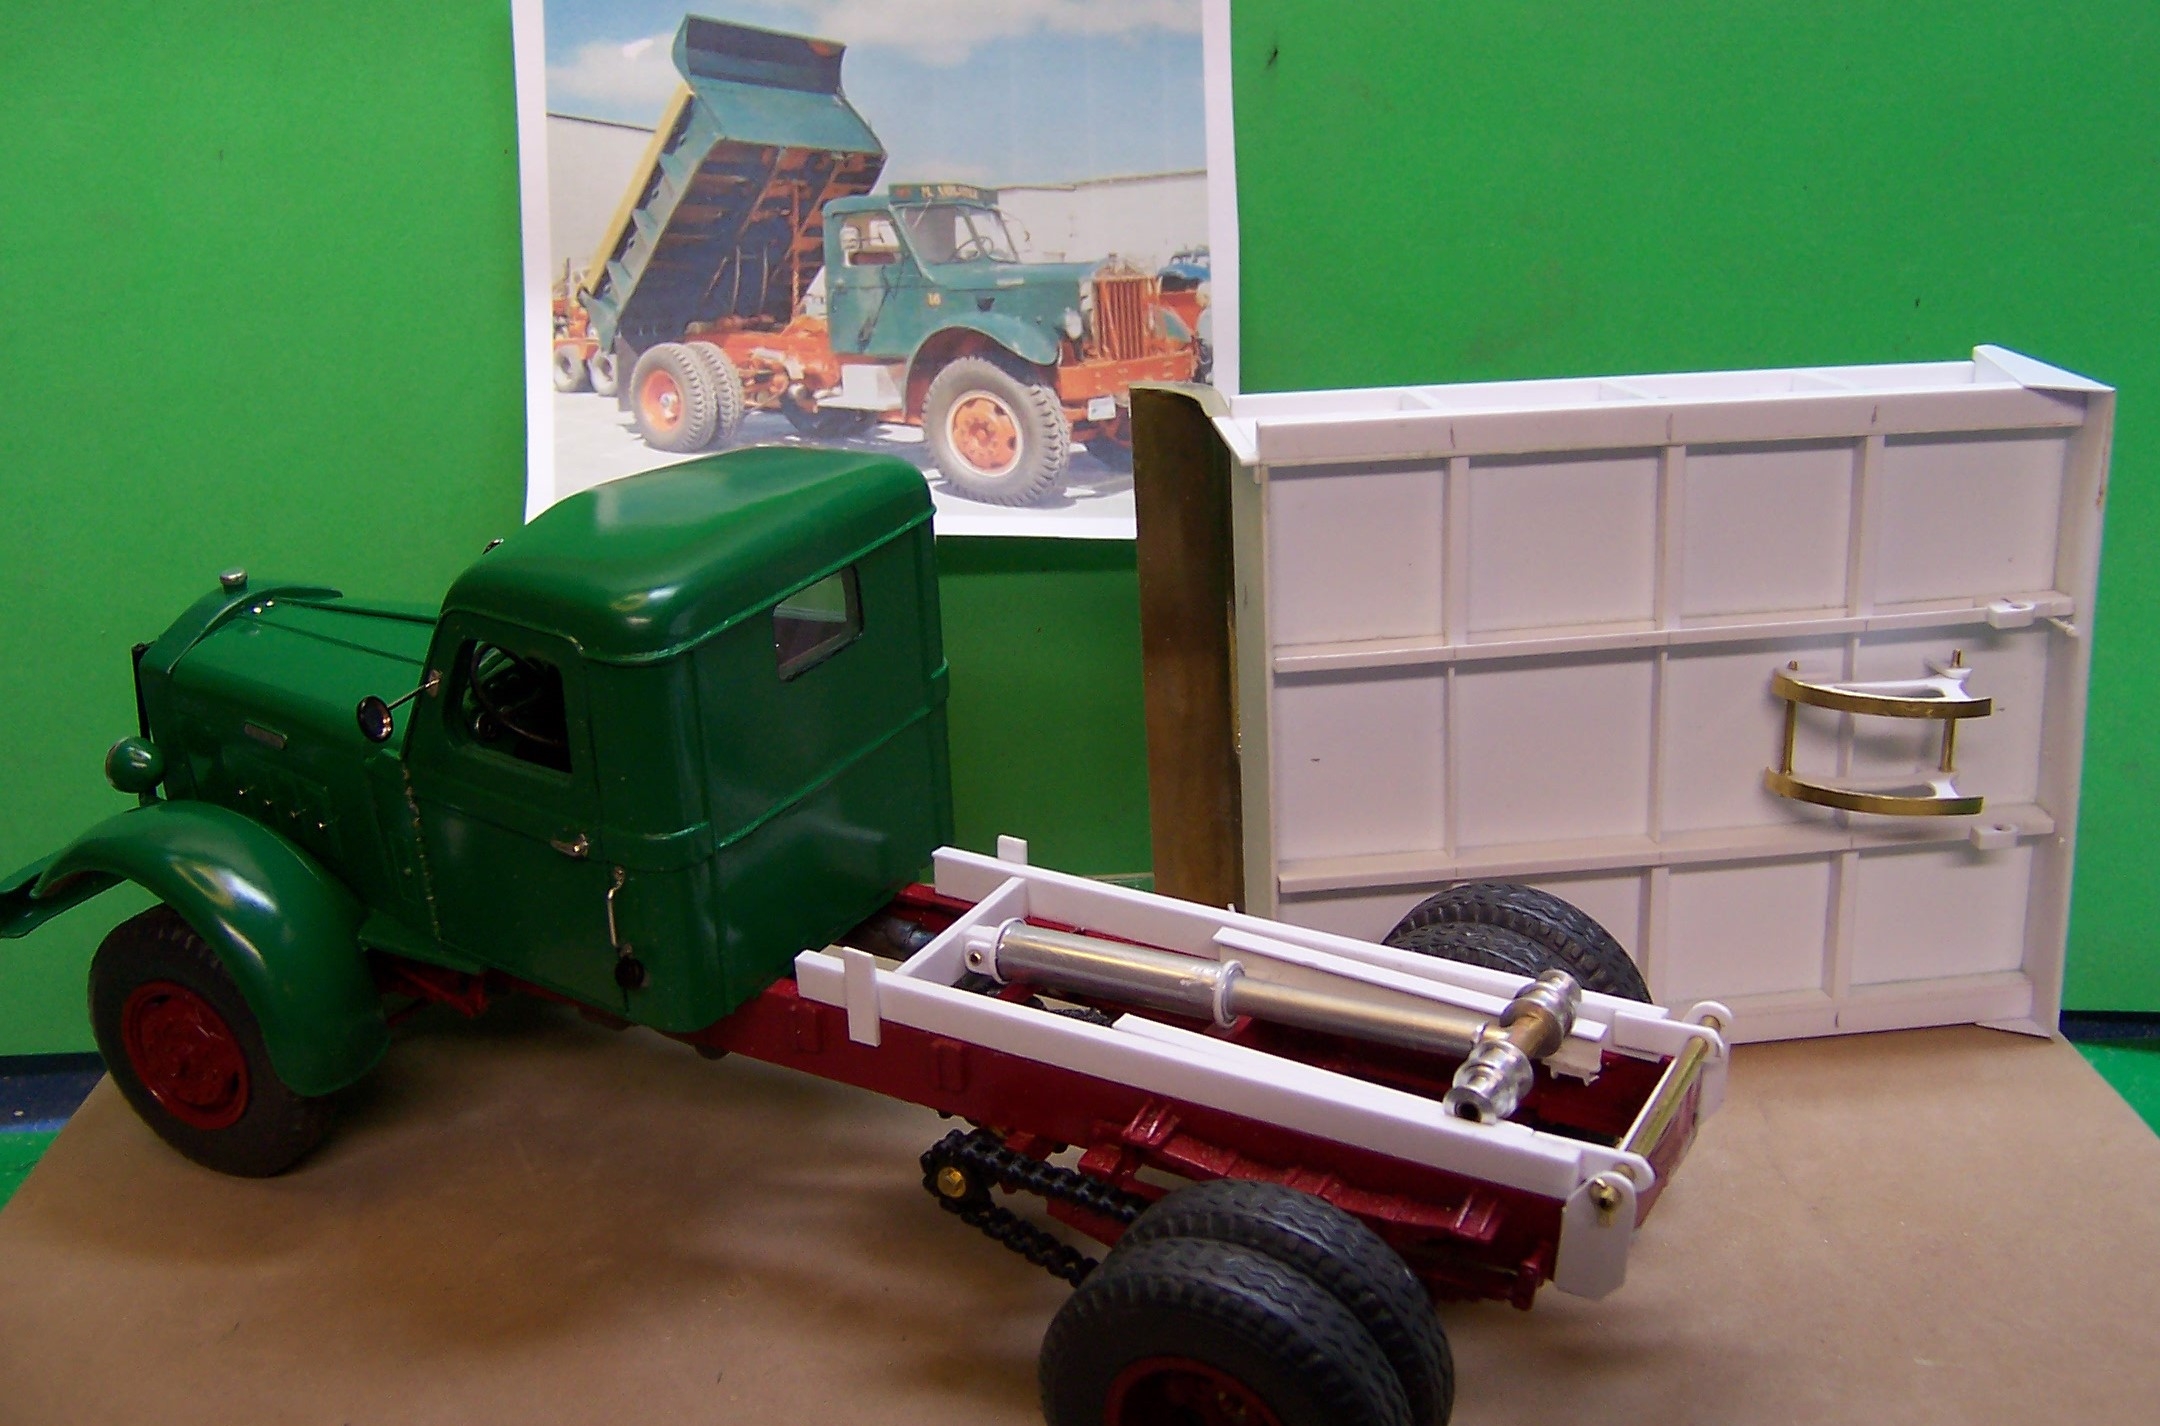
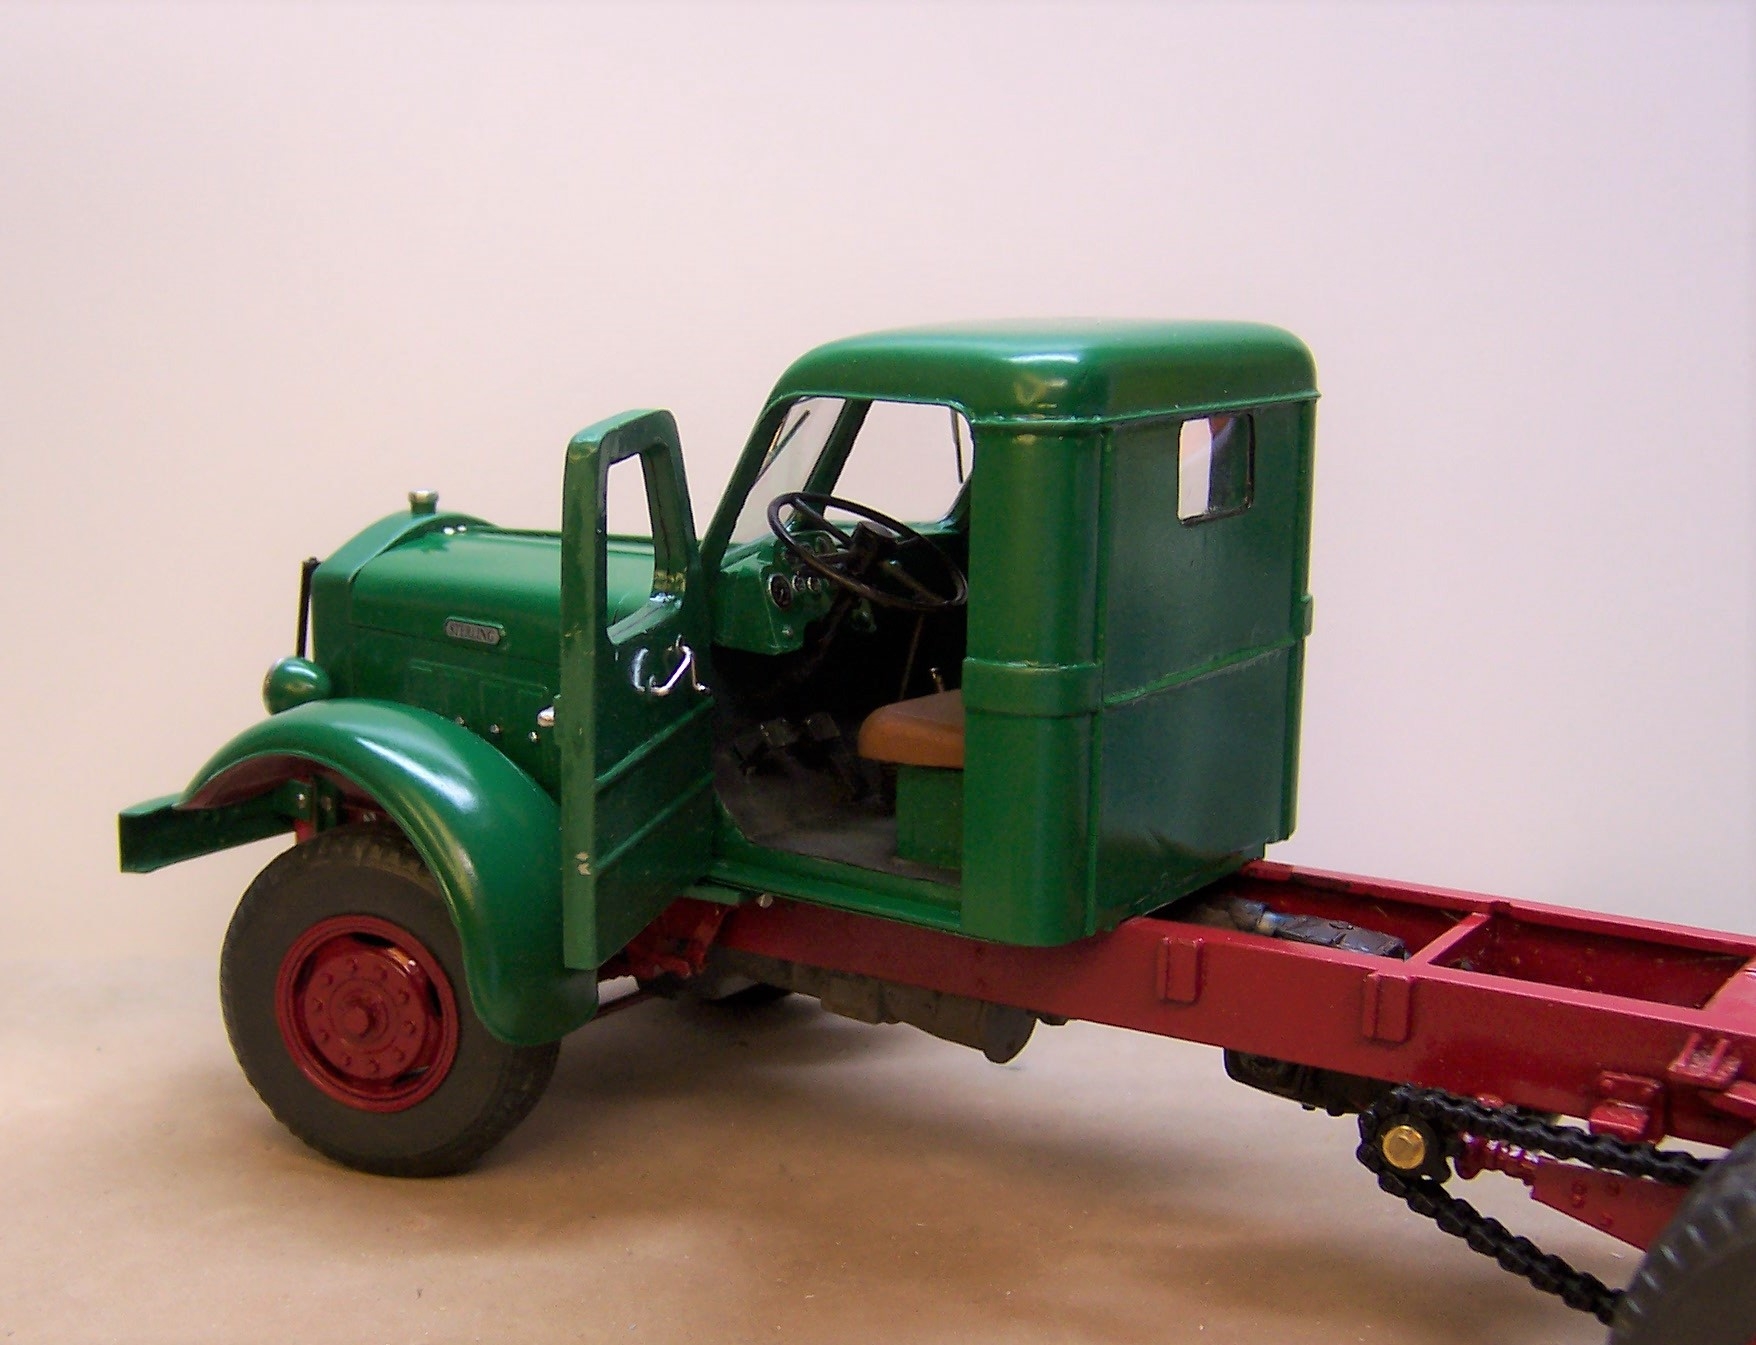
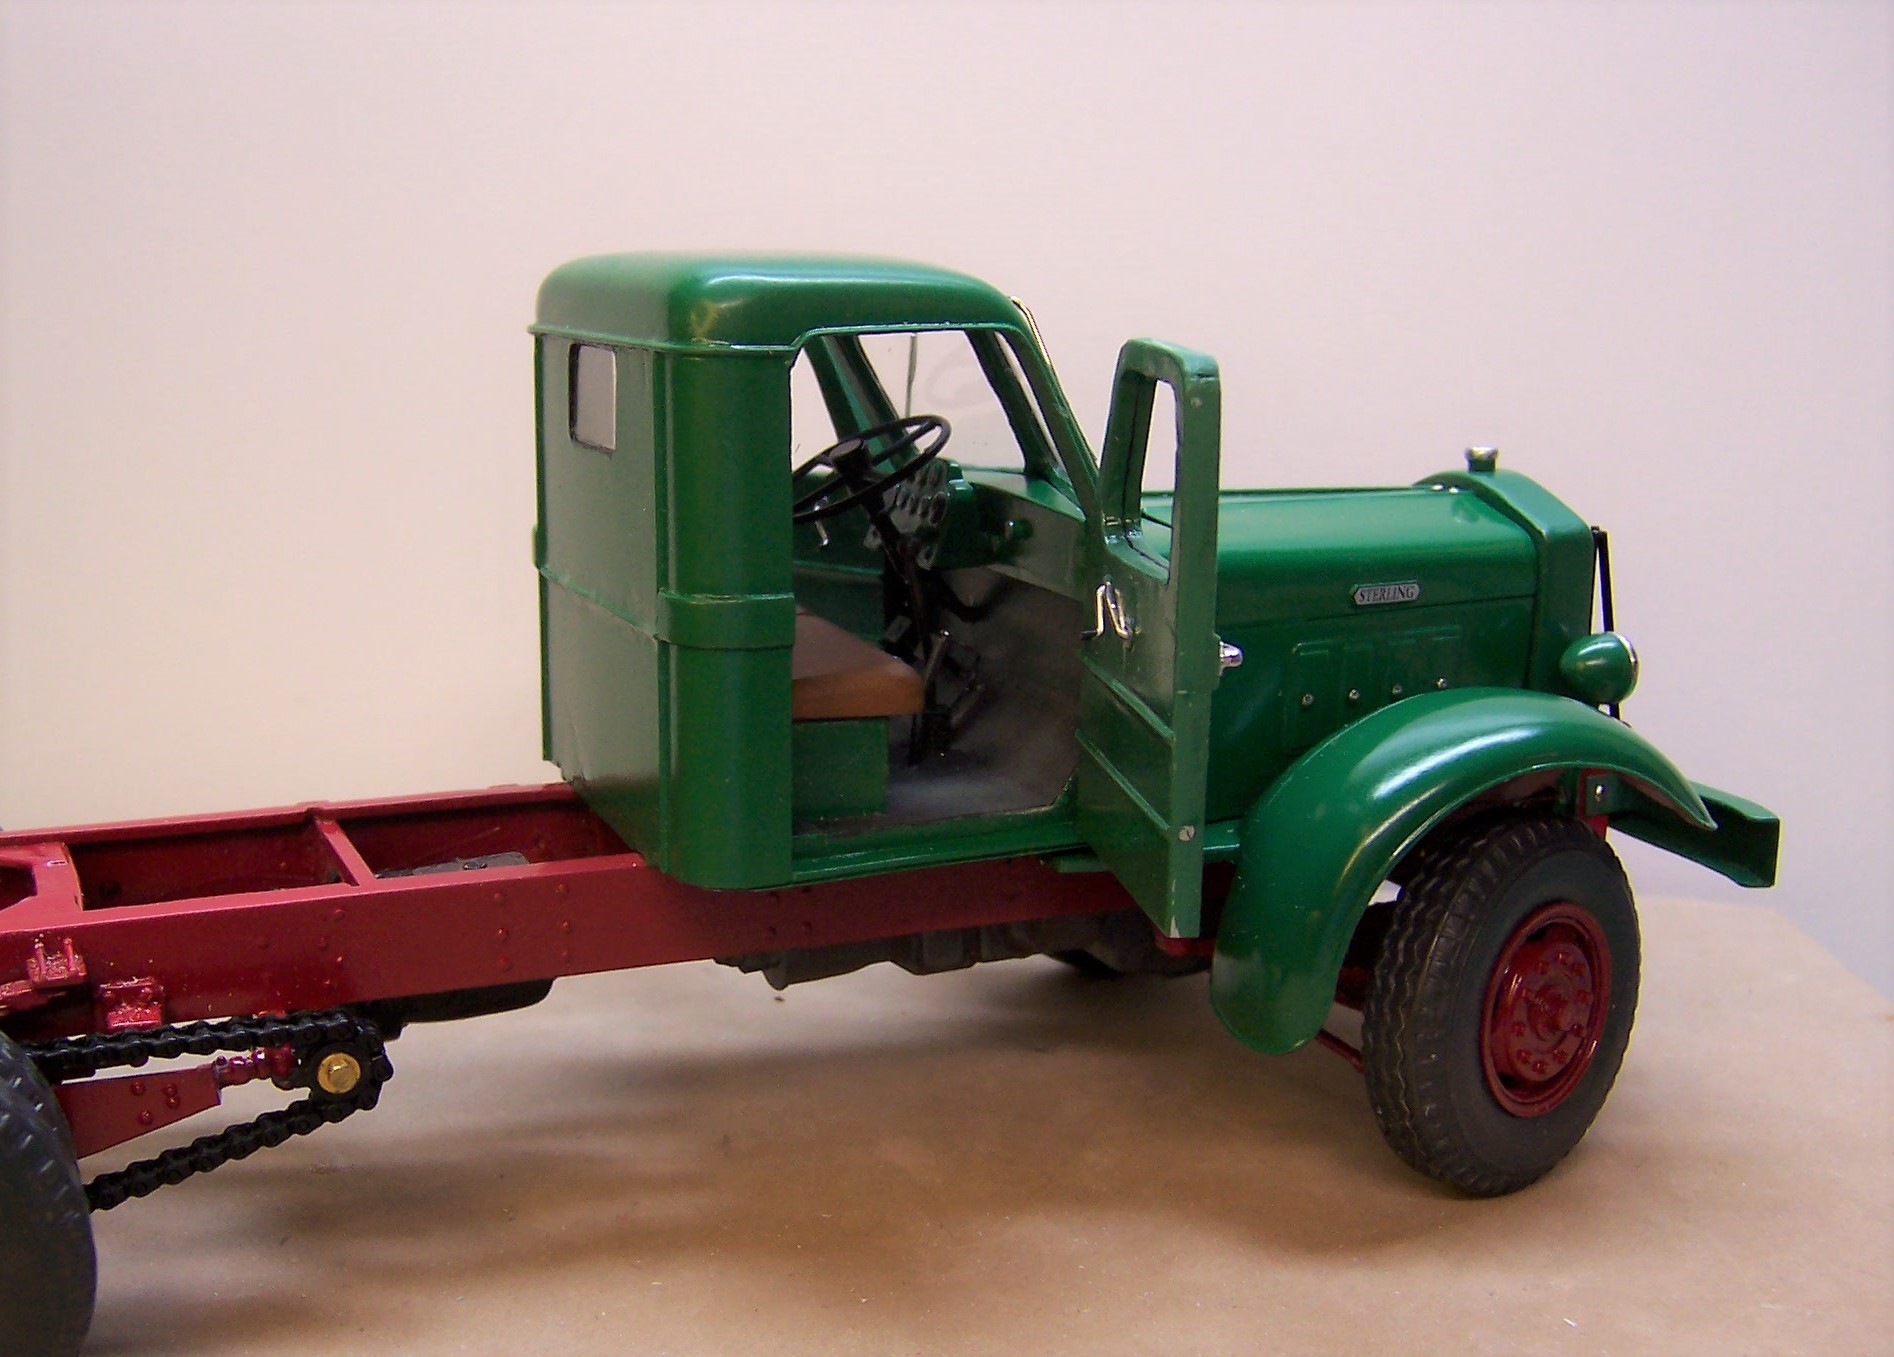
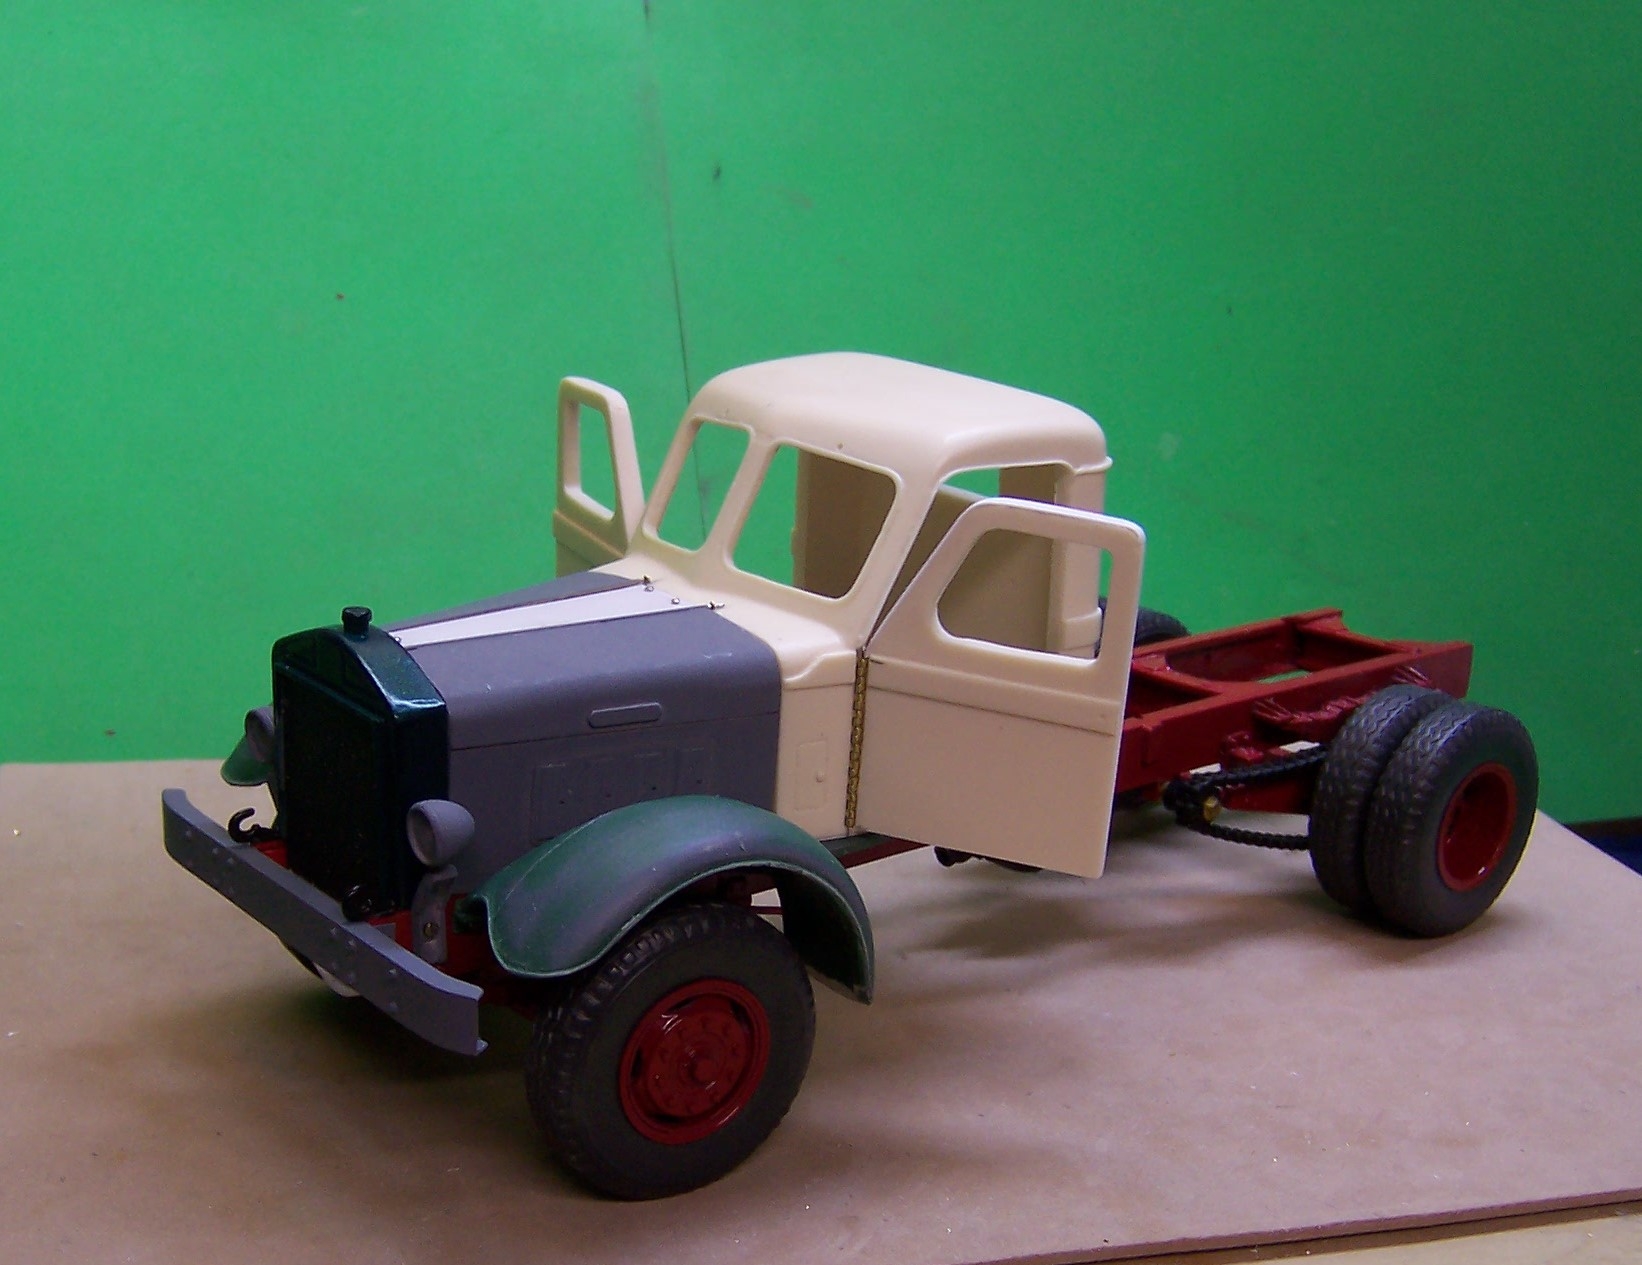
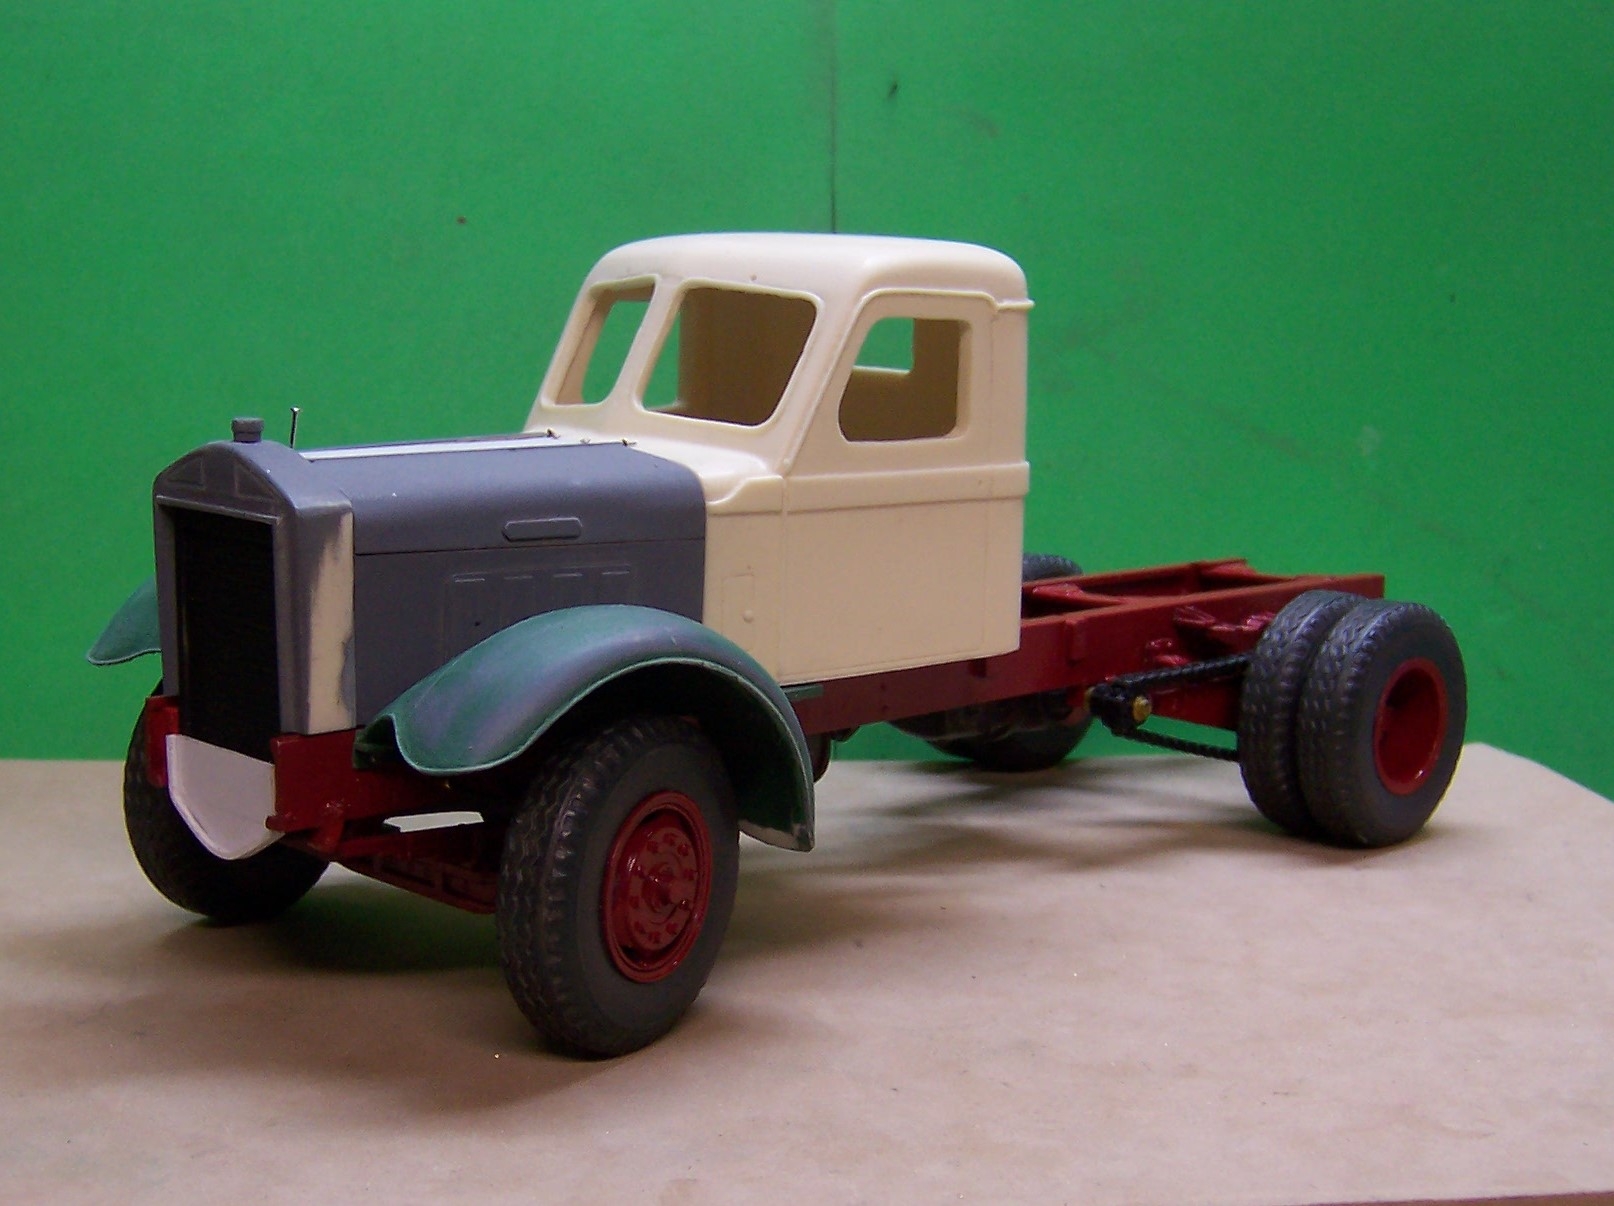
Been working on this rig for a while now. Lots of little stuff to make up and add. The Trumpeter ALF kit has been a good source of a lot of things including the chassis, cab interior and some detail things. Here is were we started and then where the cab work is now.
-
Thank you, Brian. AITM now has this shorter version of the Sterling cab. Doors on the hood sides, different radiator. There was also some of the casting removed from below the door line. The ones he had were all West Coast versions with a long hood and with grill opening and trim on the hood sides.
-
Here's a suggestion as a substitute if you don't have the Ford. Leave the bezels as is and paint the inside area with a Molotow pen or chrome paint. Also with a Molotow pen "paint" the bezels chrome. Then after it is completely dry mix up some two part epoxy and place it inside the lens area. Let it build up to where it actually is mounded some. Be careful that it does not get on the bezel. This will be the rounded face of the lens. Let that cure well. The surface will be smooth but the chrome background will make it look lens-like, I have often wondered if when the resin was almost cured if putting a thump print on it would make it resemble the reflecting surfaces of a real lens----but I always chicken out. Maybe a test shot some time!🤣
Hope this helps.
Charlie
-
Brian: Do you have one of the Ford snowplow kits that you've scrounged parts from? If the headlight bezels are still there sand these off and replace them with the Ford ones. That way you will have headlight lenses as well that will go with the bezels.
-
On 6/6/2020 at 12:13 PM, Brian Dutz said:Thanks Paul. Also, thanks for the glass tip. I didn’t even think of that but it makes perfect sense. That will definitely help in the future. I have several more resin builds coming up in the near future. Thanks again.
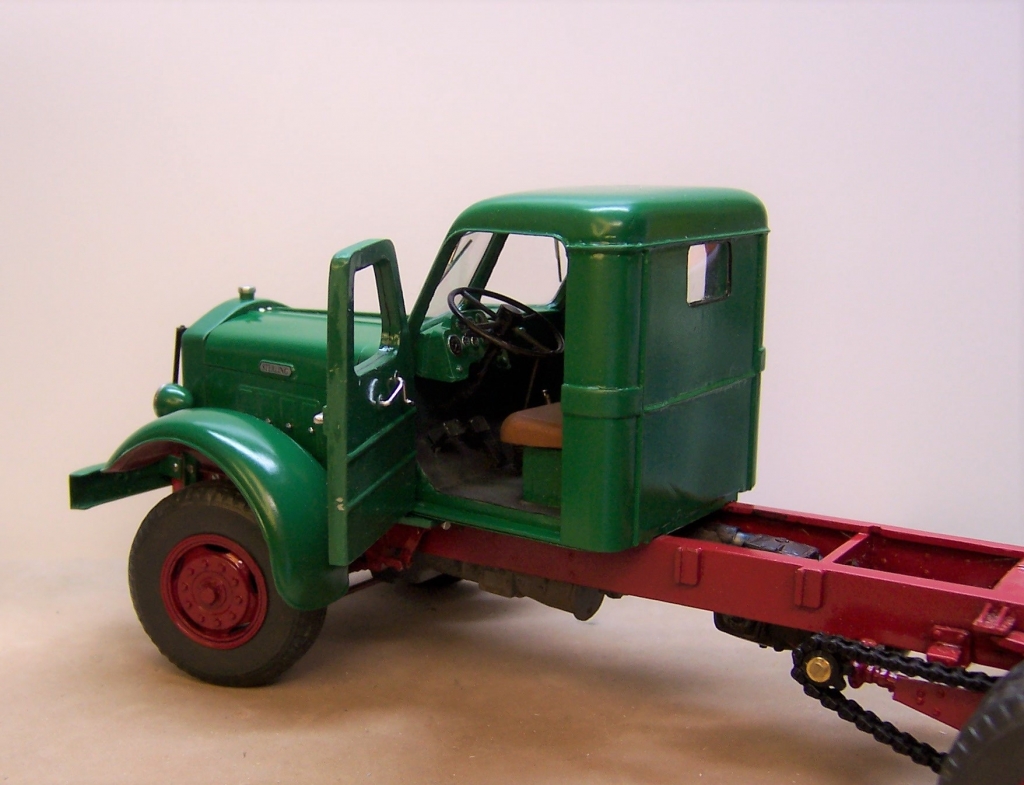
Another tip on glass is to make the glass fit as close to the gasket as possible by just trimming the glass so it fits just right. Then use some clear Tamiya gloss lacquer to hold it in place from the inside. It takes a bit to get the glass to fit nice all around the effect is worth it. Check out the Sterling build and you will see what I mean.
-
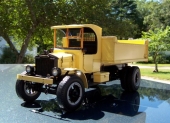
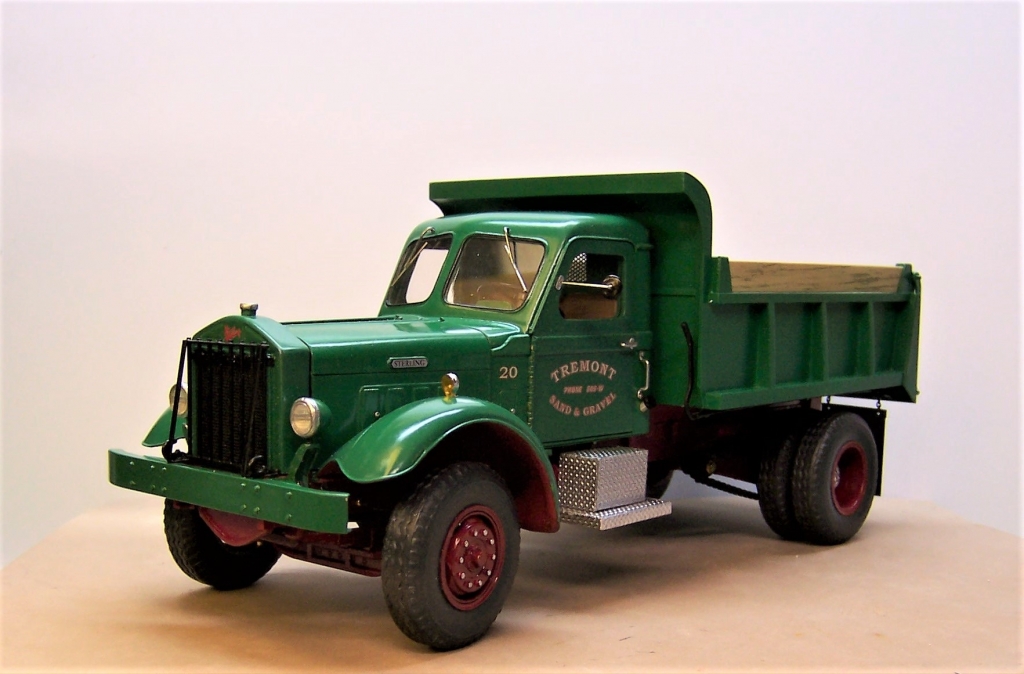
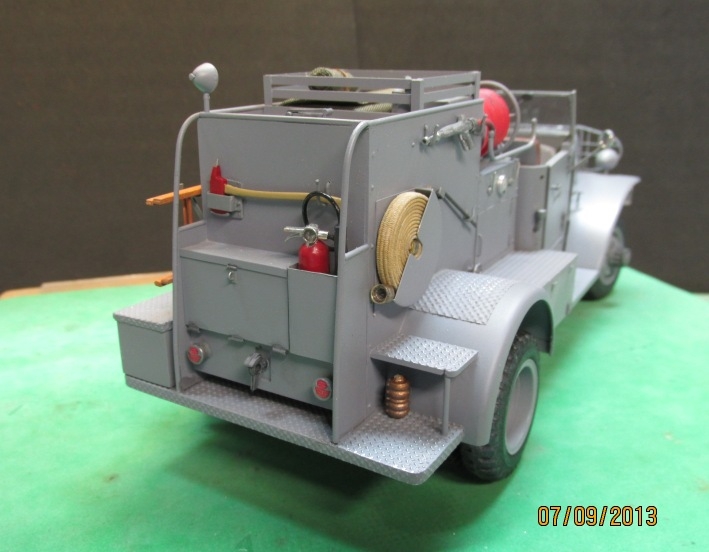
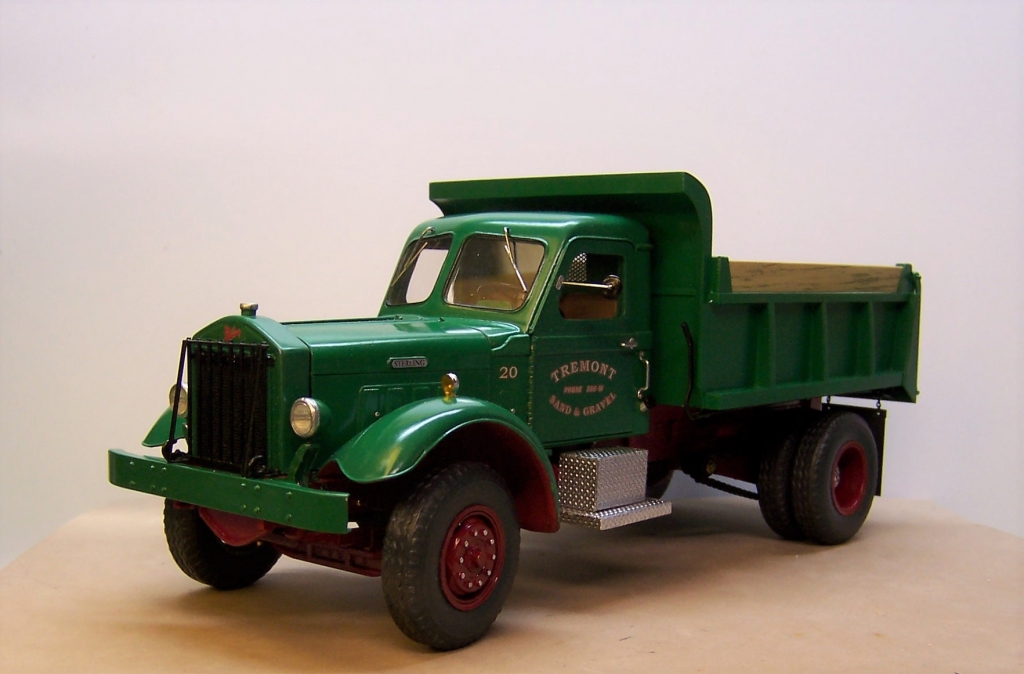
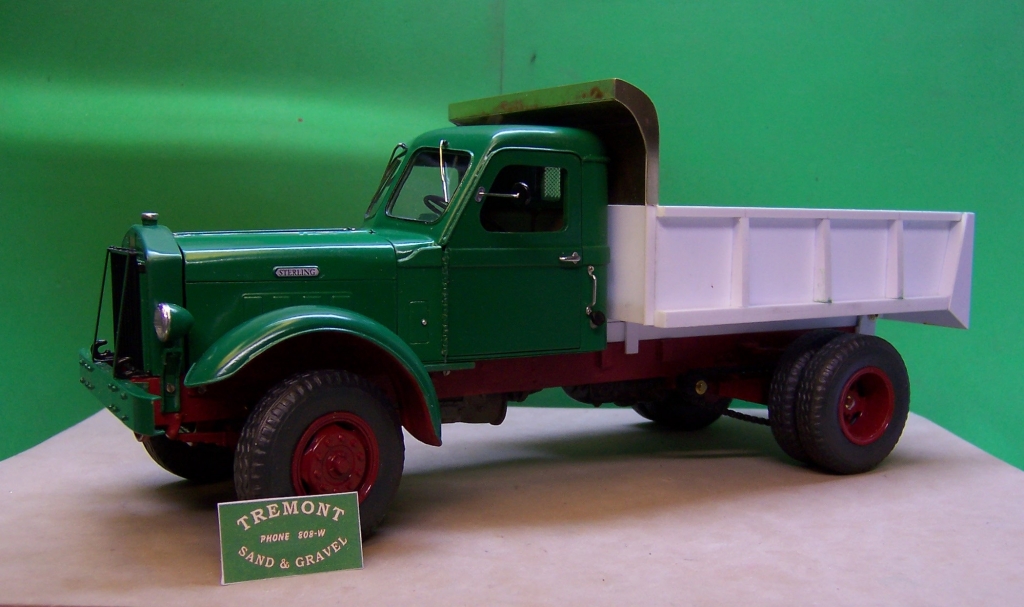
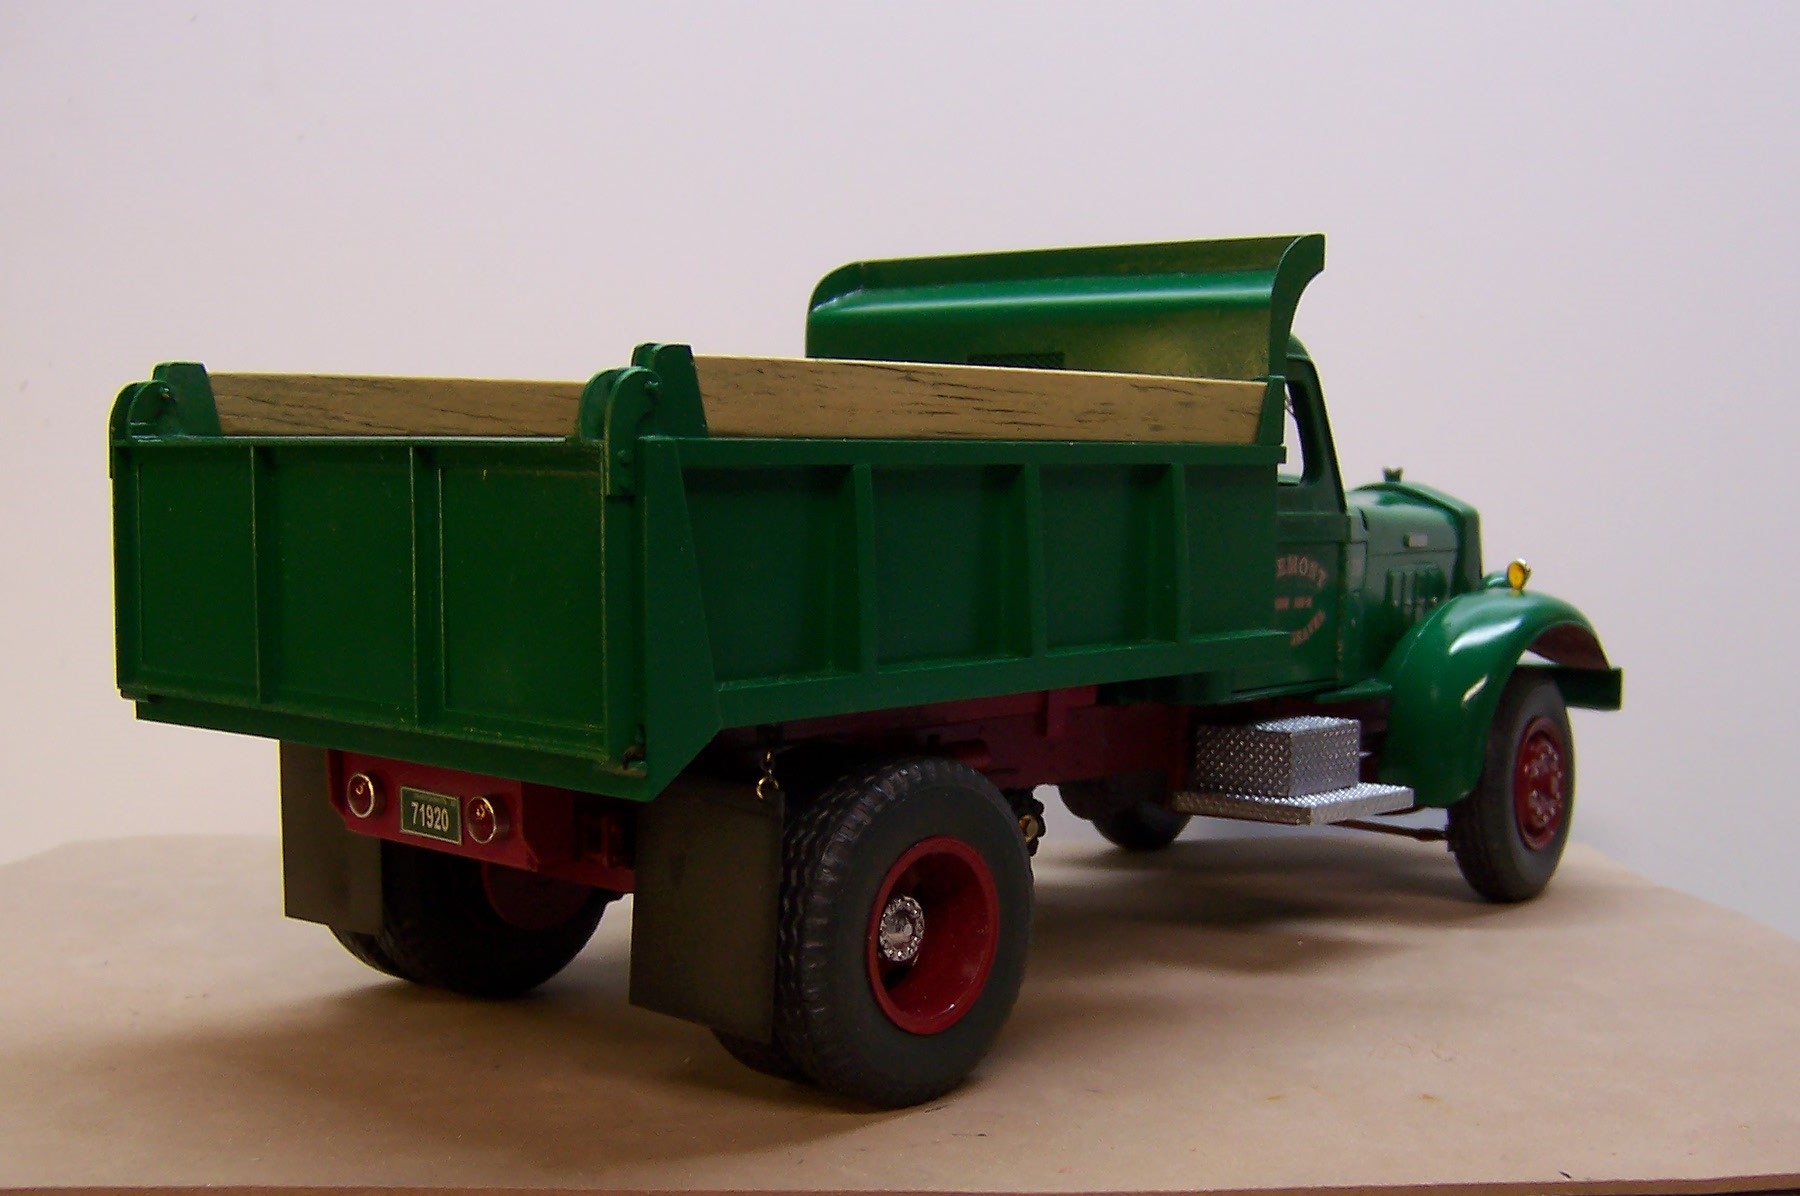
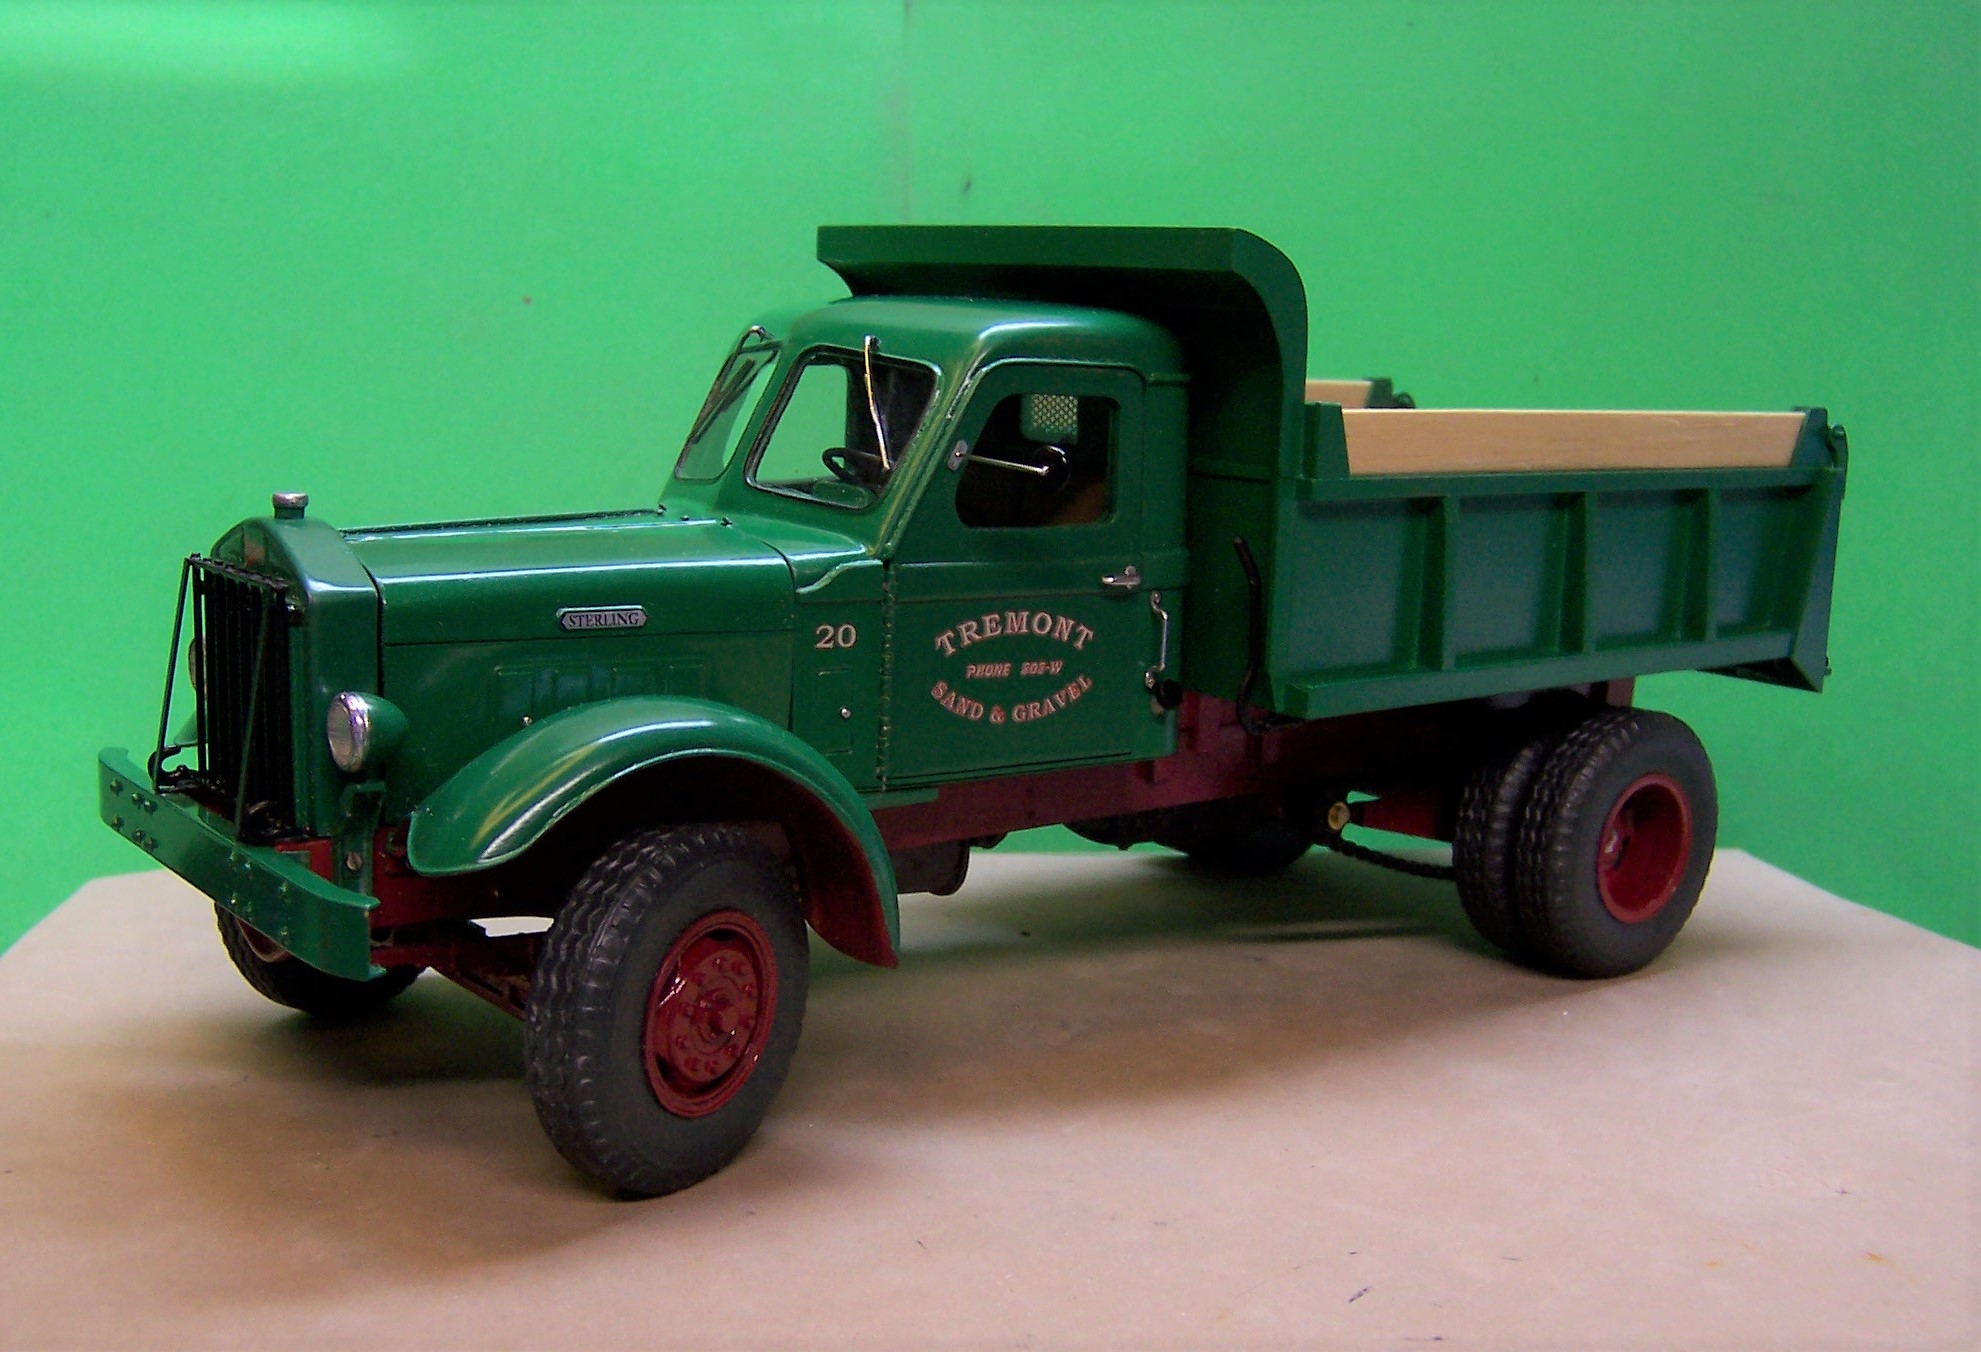
After several weeks and working on another project here are the photos of the finished rig. I've added the oil reservoirs, steps and battery boxes, air tanks, some mud flaps and tail lights. Calling it complete.


-
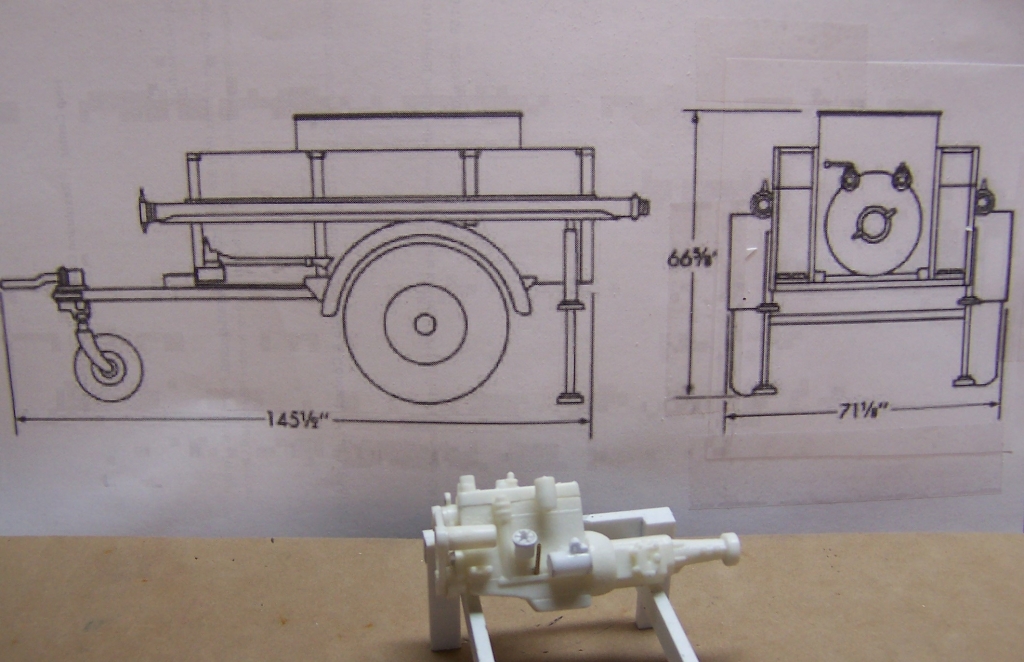
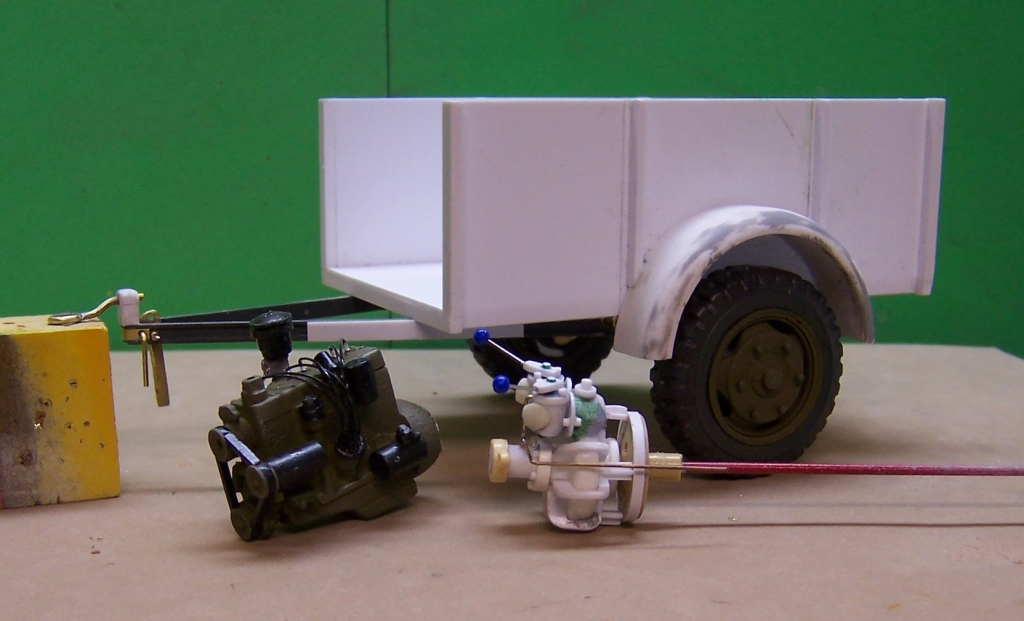
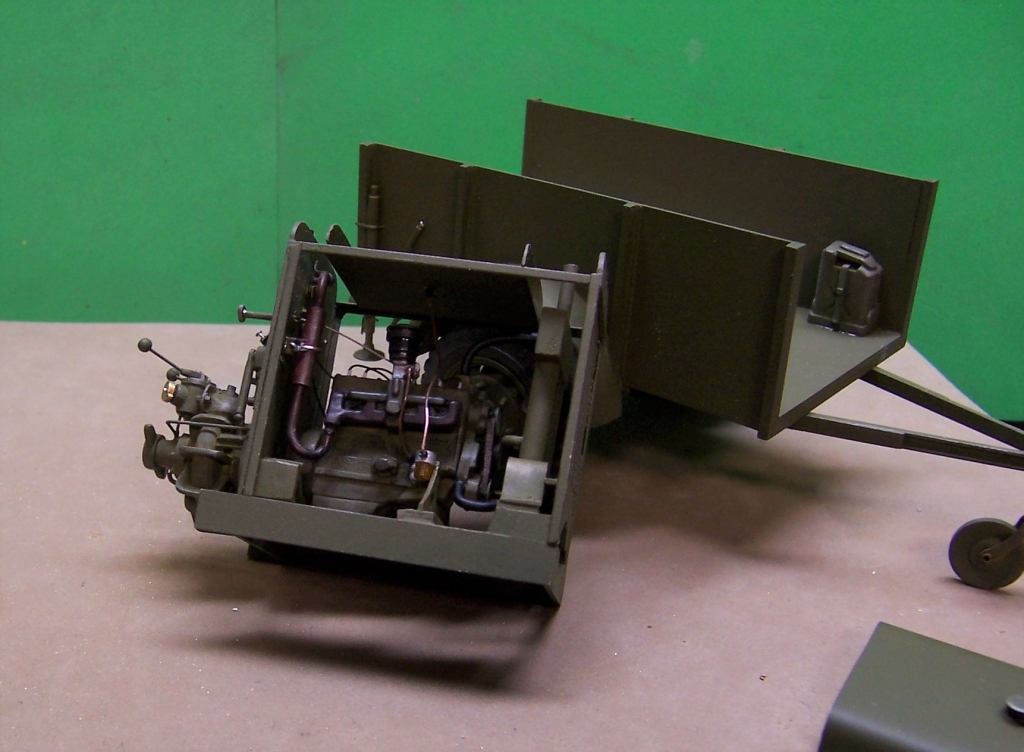
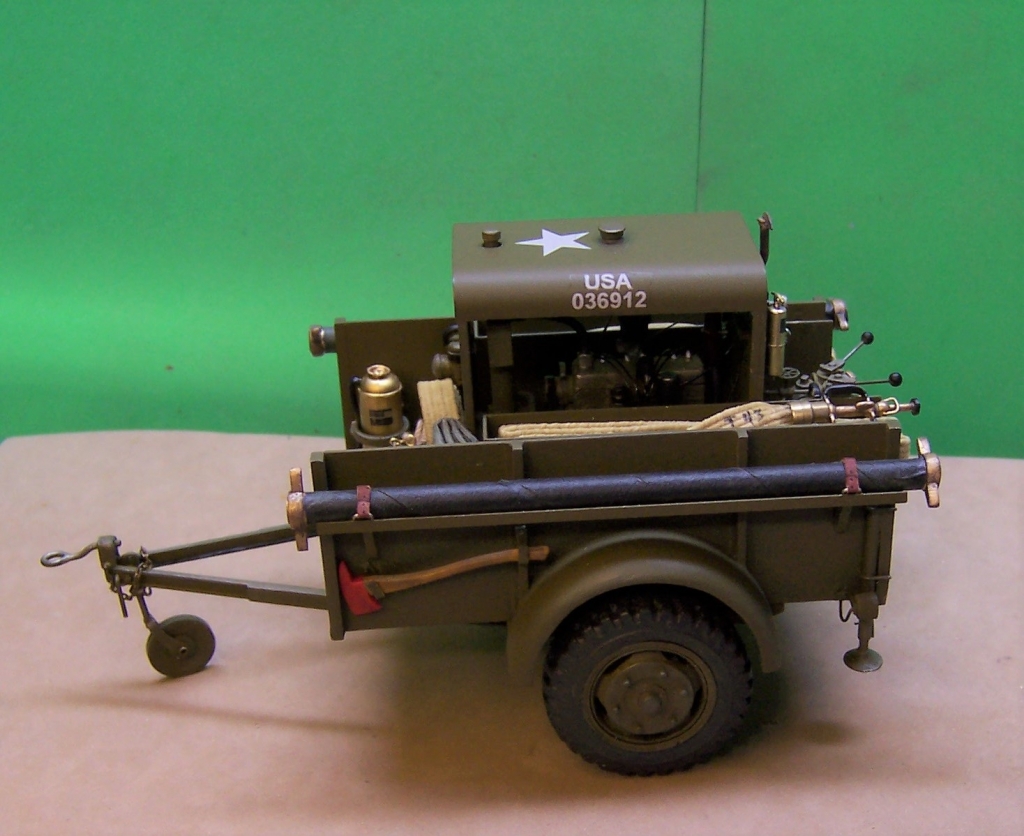
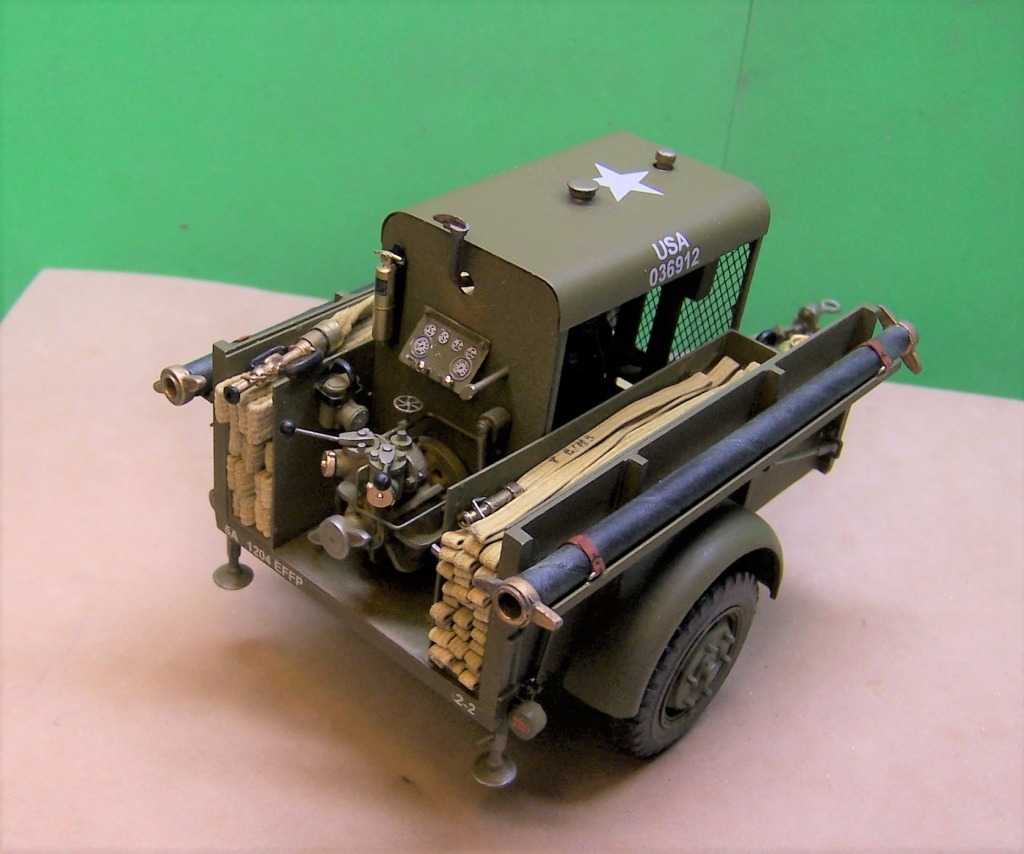
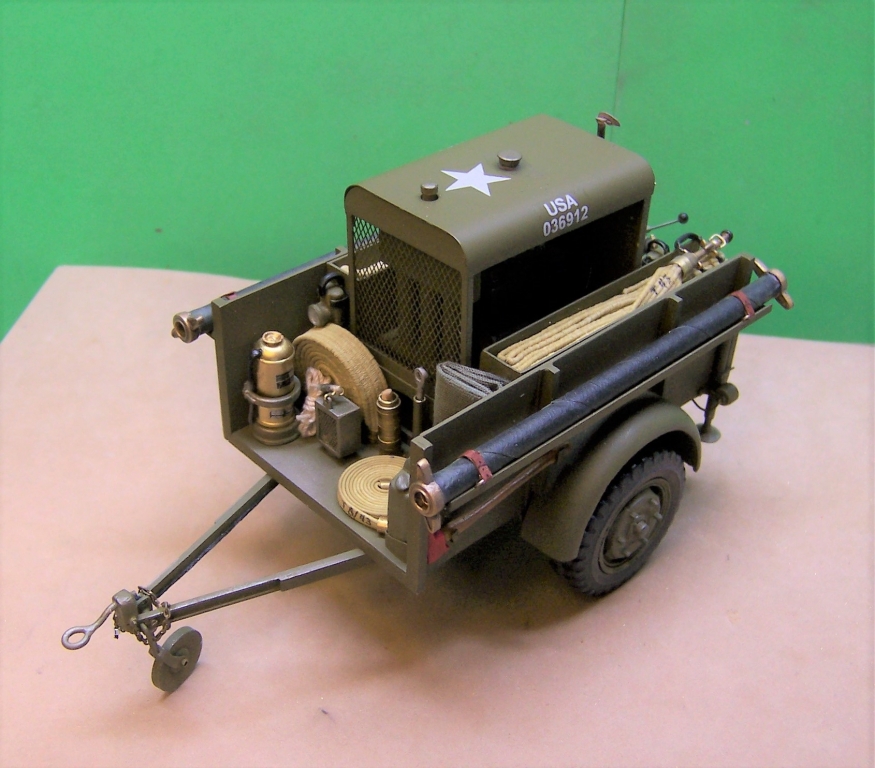
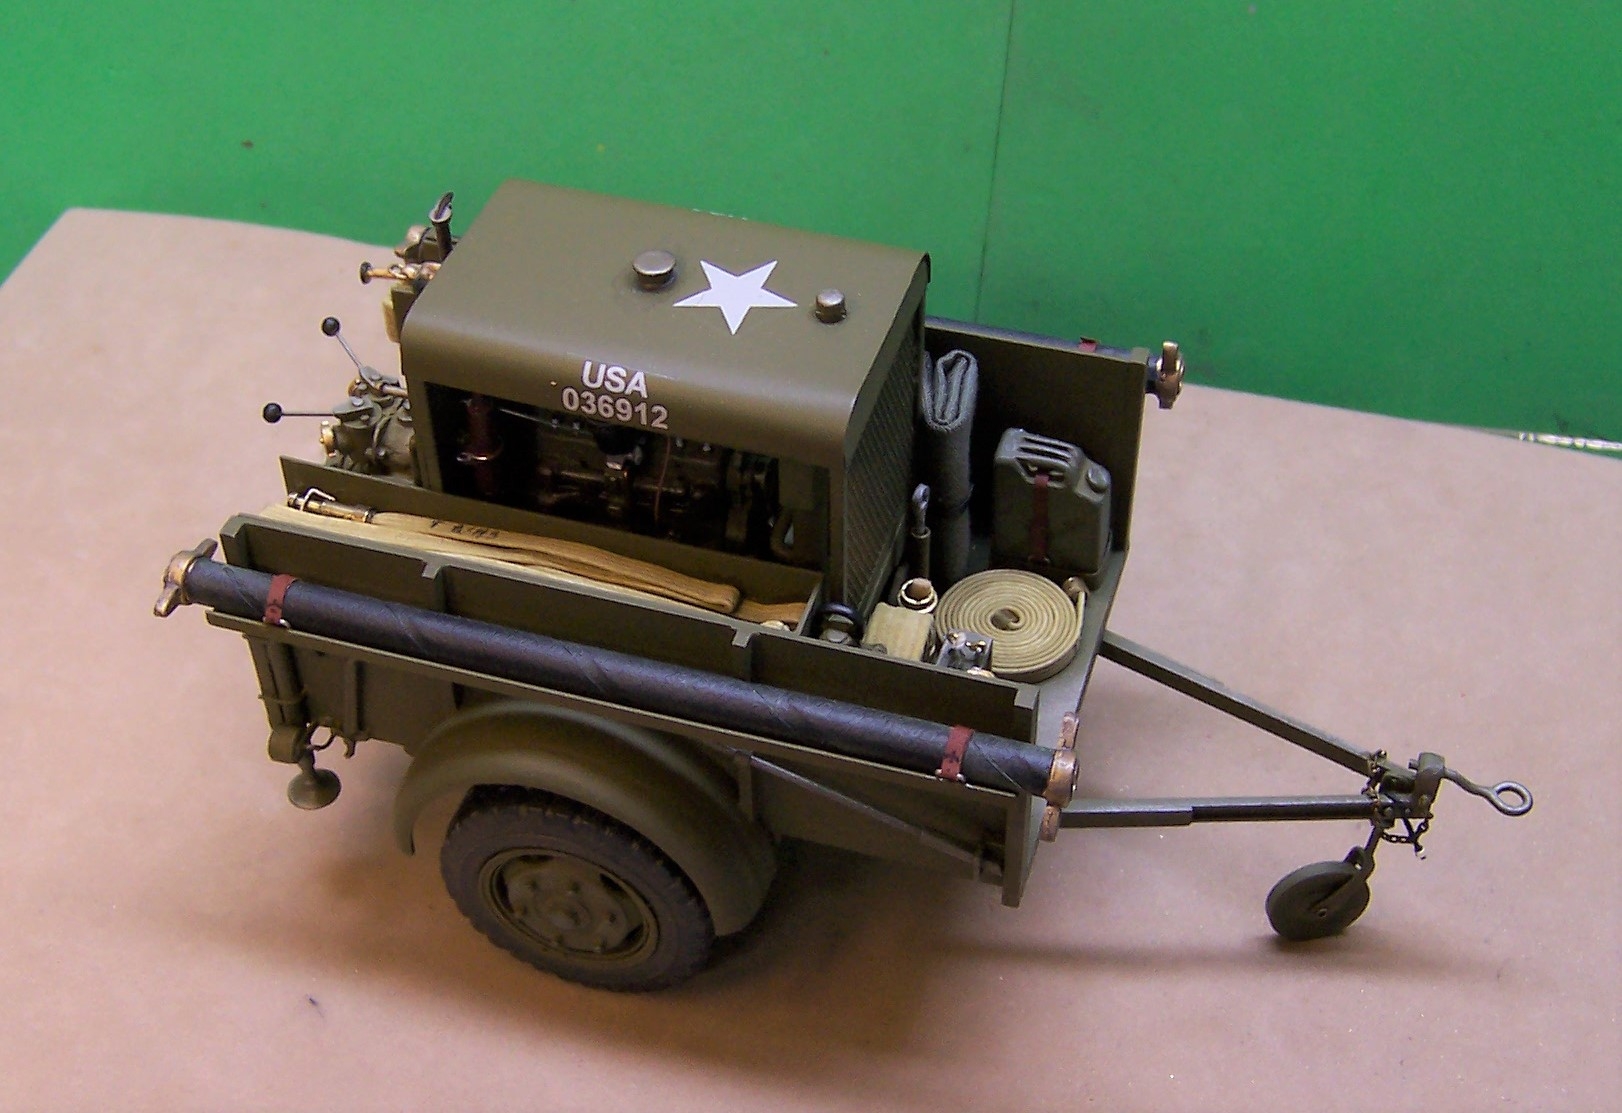
Not exactly a truck model but something that would be towed behind one. This US Army Class 1000 trailer pump was built over the past couple of months. The 500 GPM pump is driven by a Dodge 6 cylinder engine. The engine came from a Plymouth car kit. The pump, trailer and accessories are all scratch built. Tires are resin castings and the wheels came from an AMT ALF kit. Model is 1/25 scale.

-
Nice job, Paul! I like the black and white paint job.
-
 1
1
-
-
Thanks, Vince. Great work!
-
Extraordinary build! Wonderful work. Question: How did you do the tie down straps for the car in the trailer? Buckles are super!
-
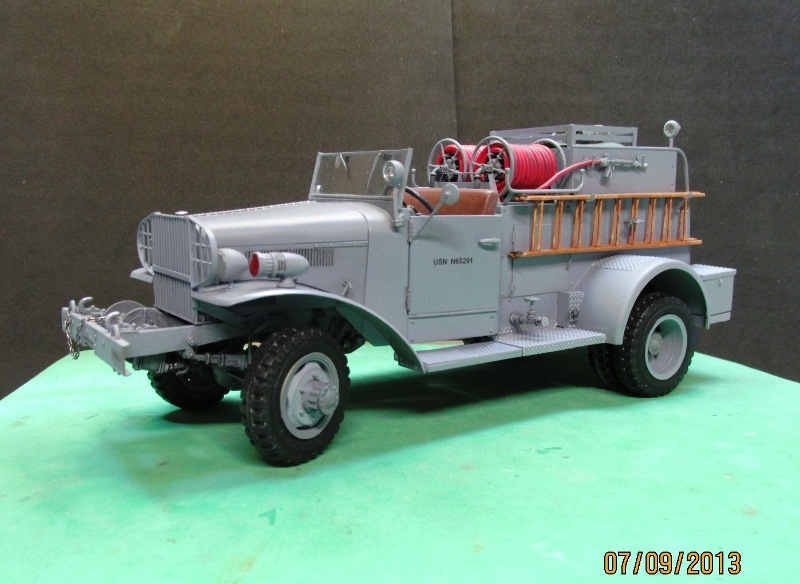
Here's one that may have accompanied the one above during the attack on HIckham Field. 1941 International FFN-3
-
2
-
-
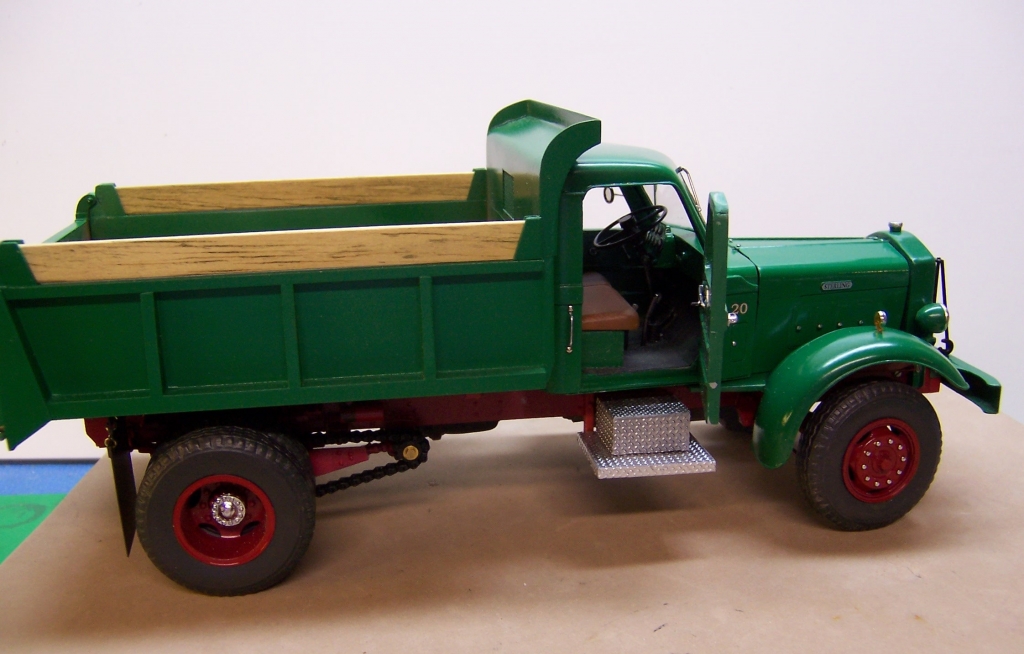
6 hours ago, 41CHEVY said:Sure looks the part!! I always liked all the Sterlings (even the newest ones) especially the heavier Sterlings with the Locust boards inserted in the frame rails
From what I understand they were all built that way, Paul.
-
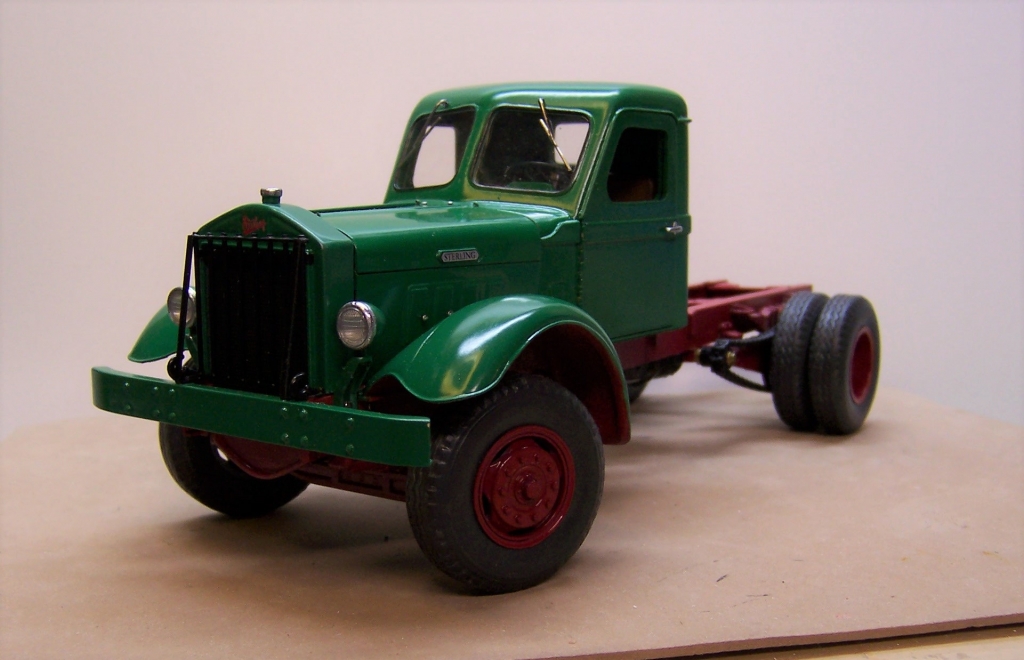
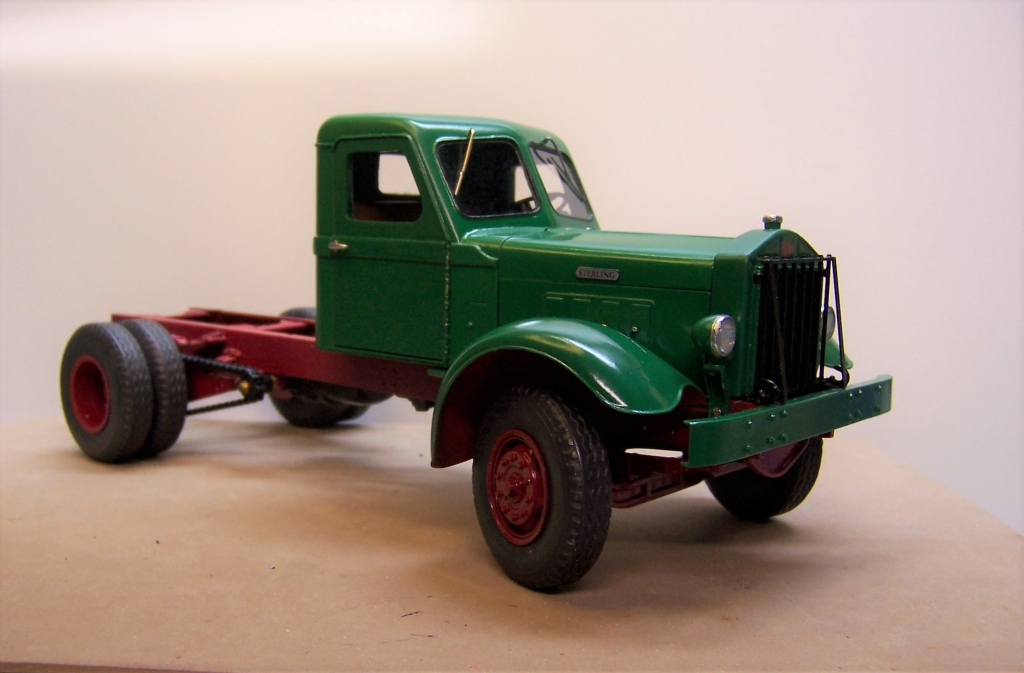
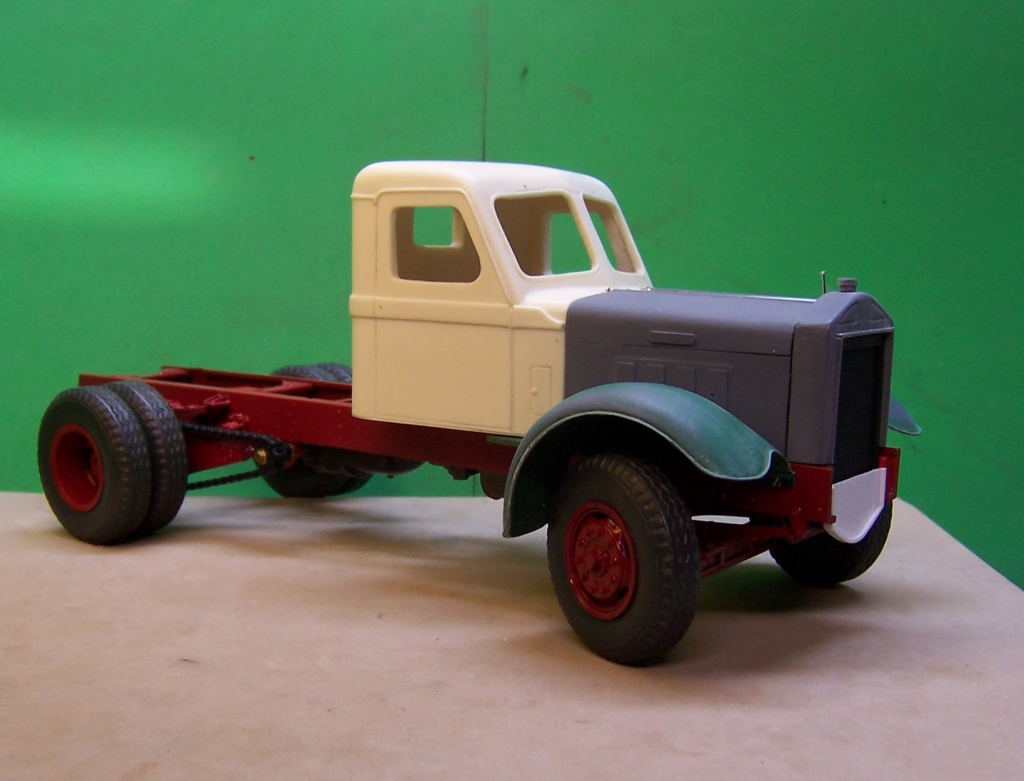
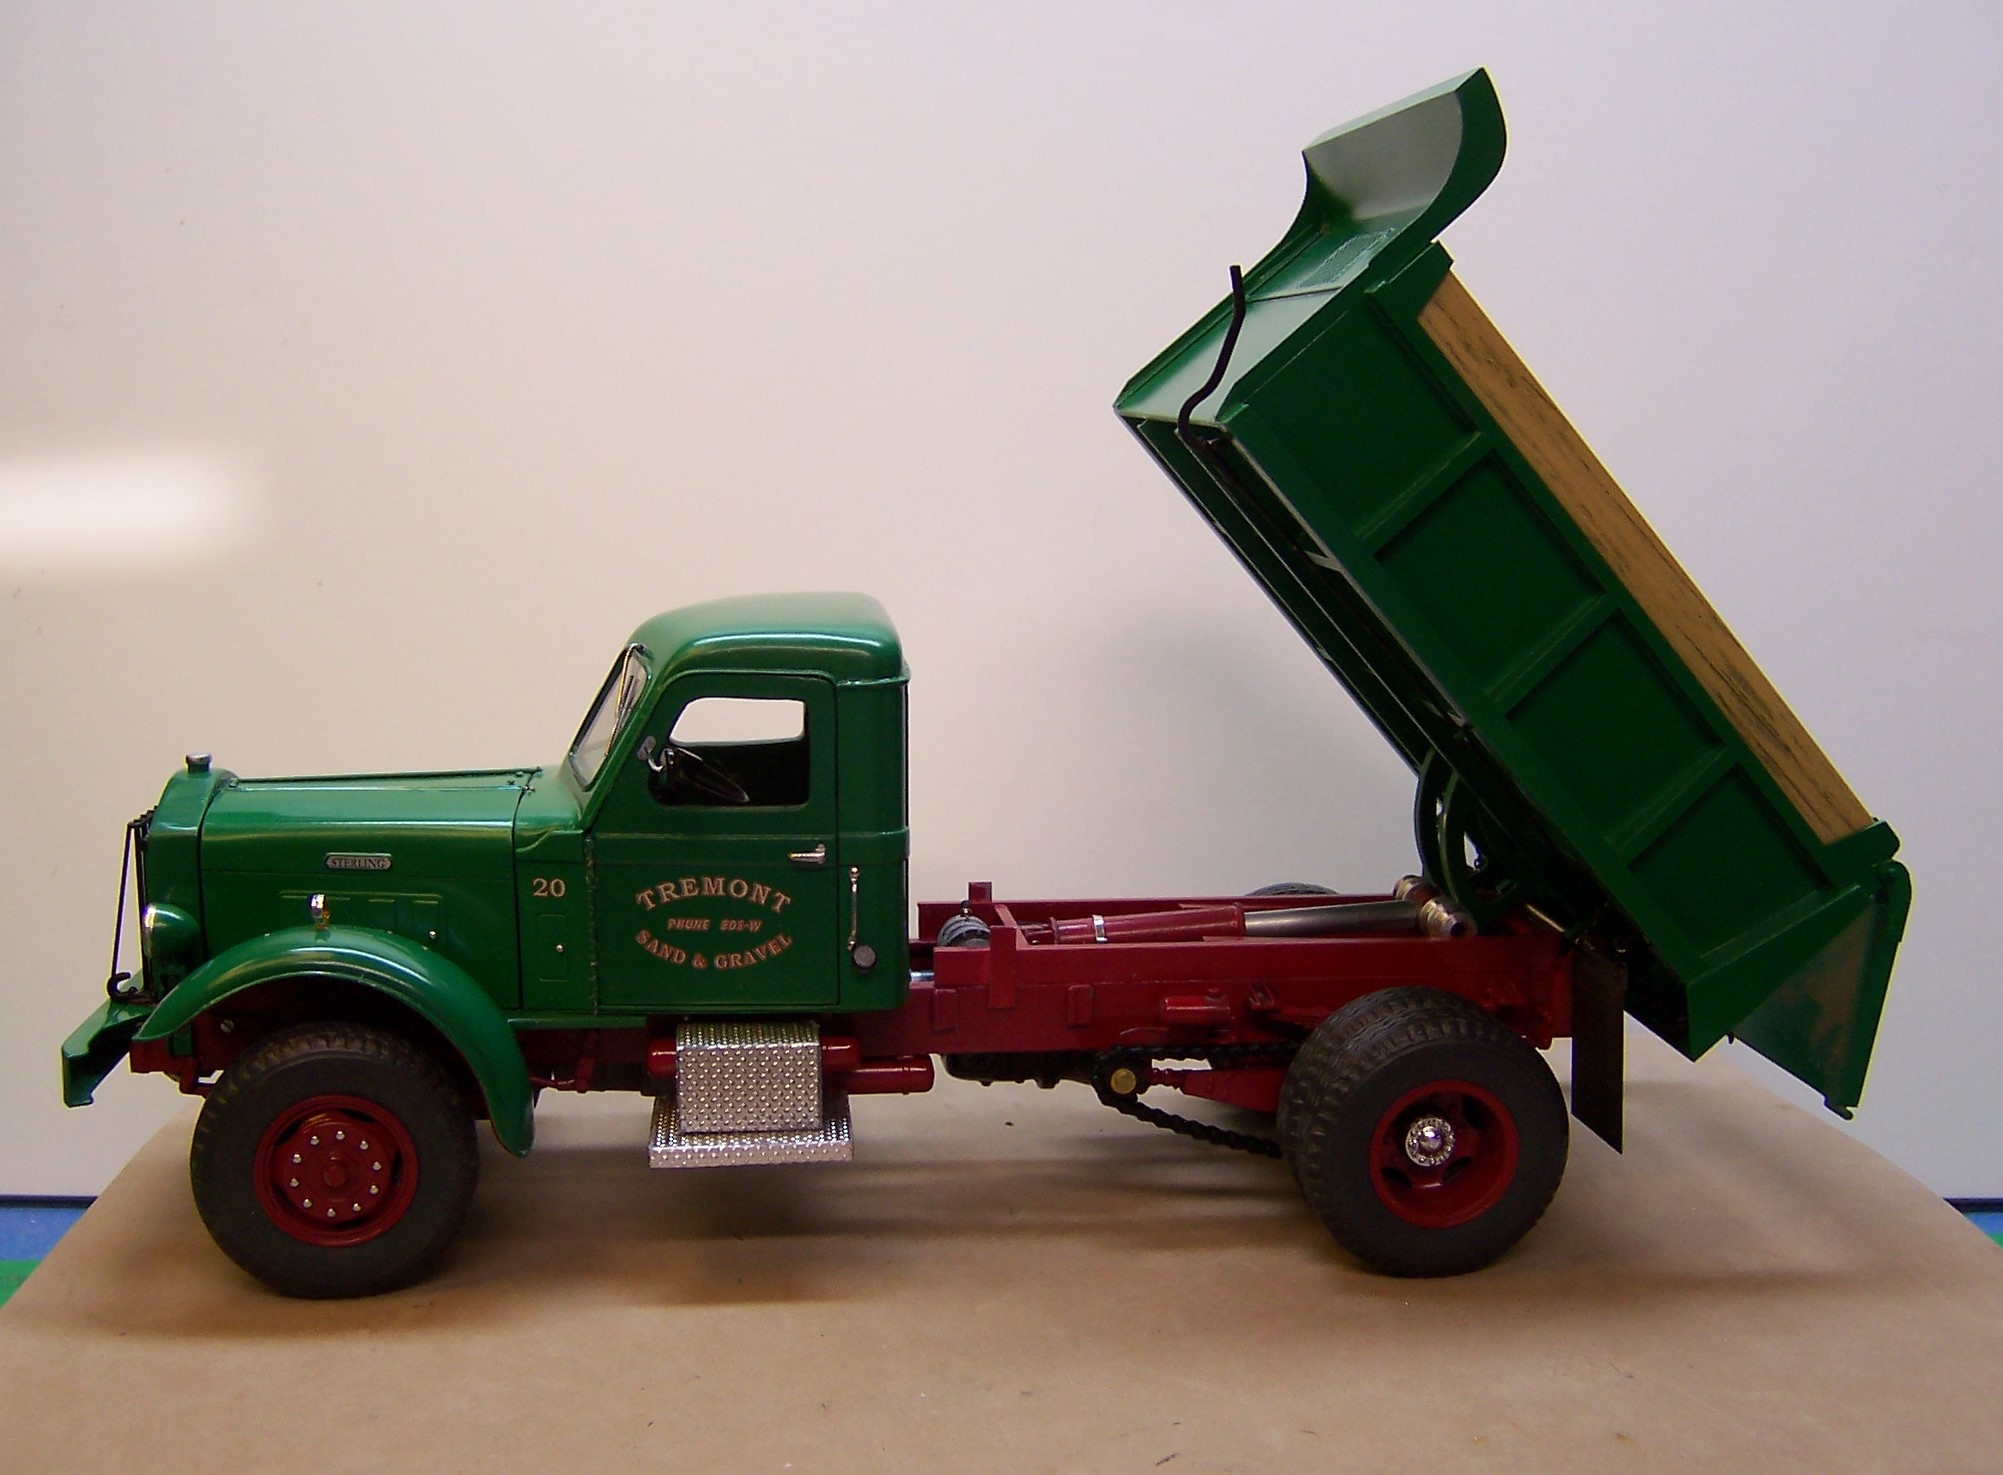
Finished up the Sterling tonite with some last minute details. Additional bracing between frame and bumper, mud flaps, the oil cans to lubricate the chains and some air tanks behind the step on the driver's side. Already now to go get a load of road gravel.


-
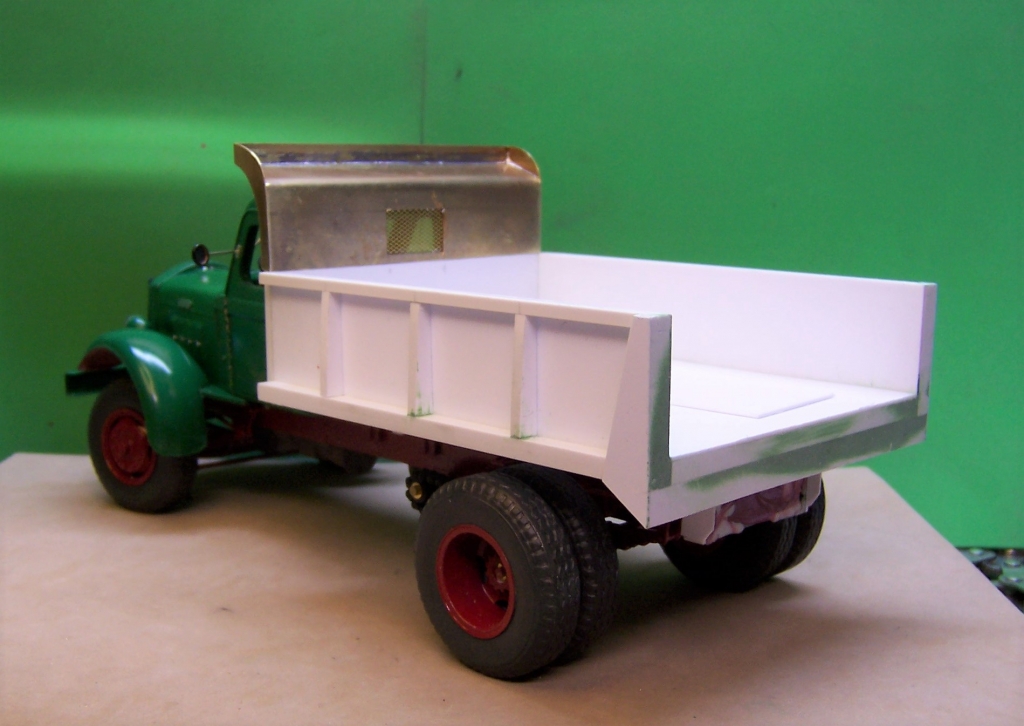
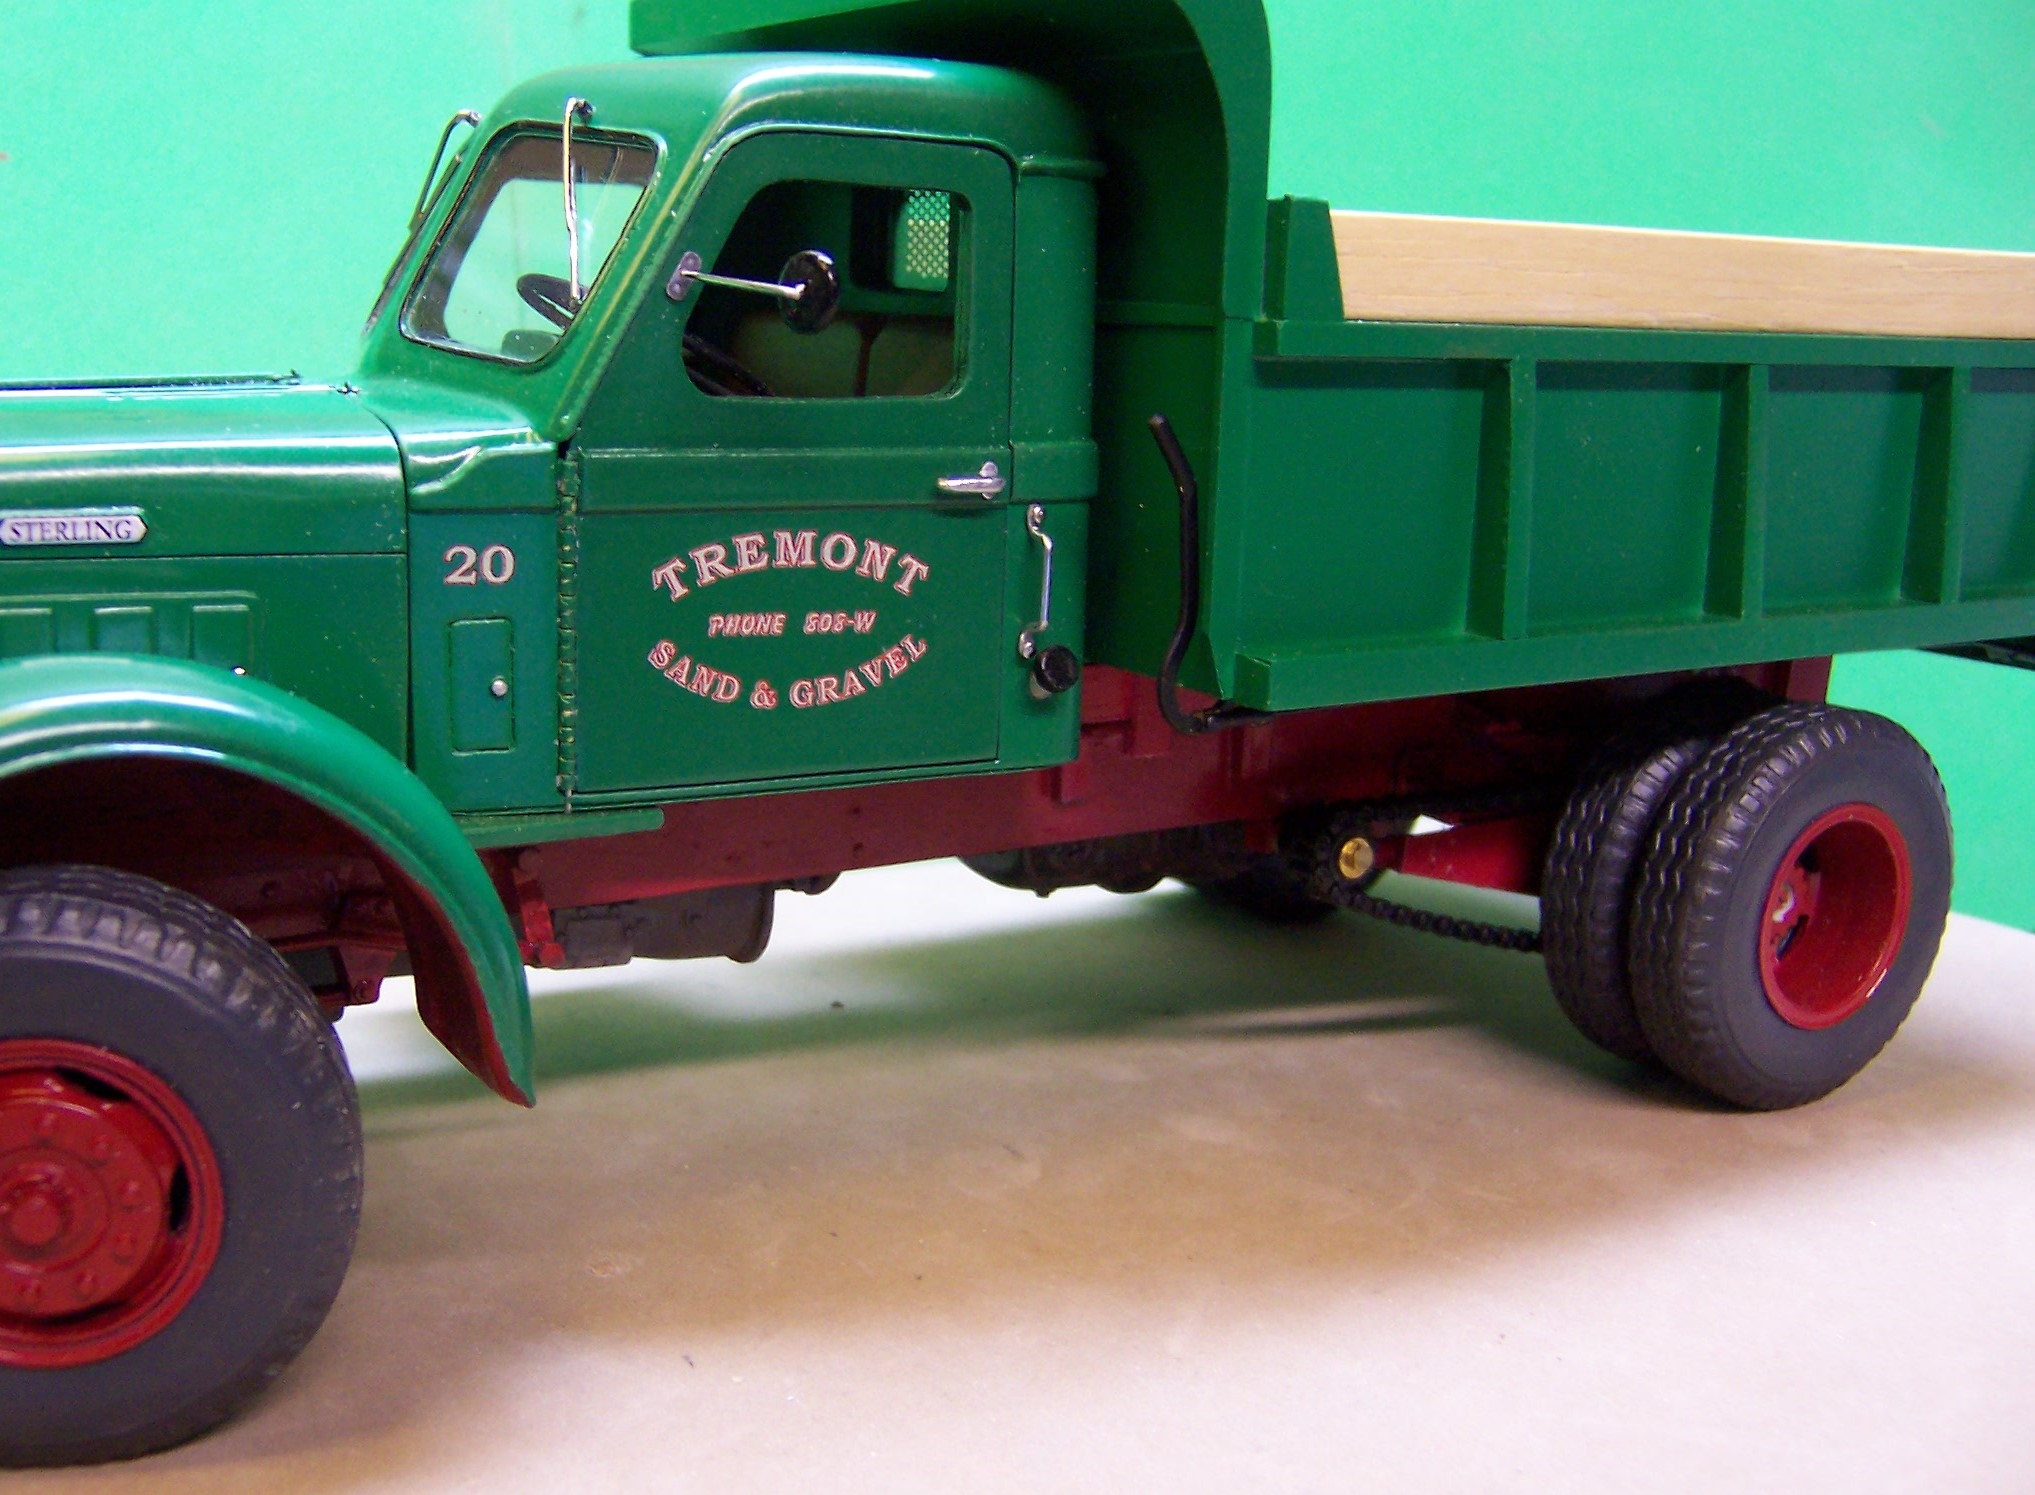
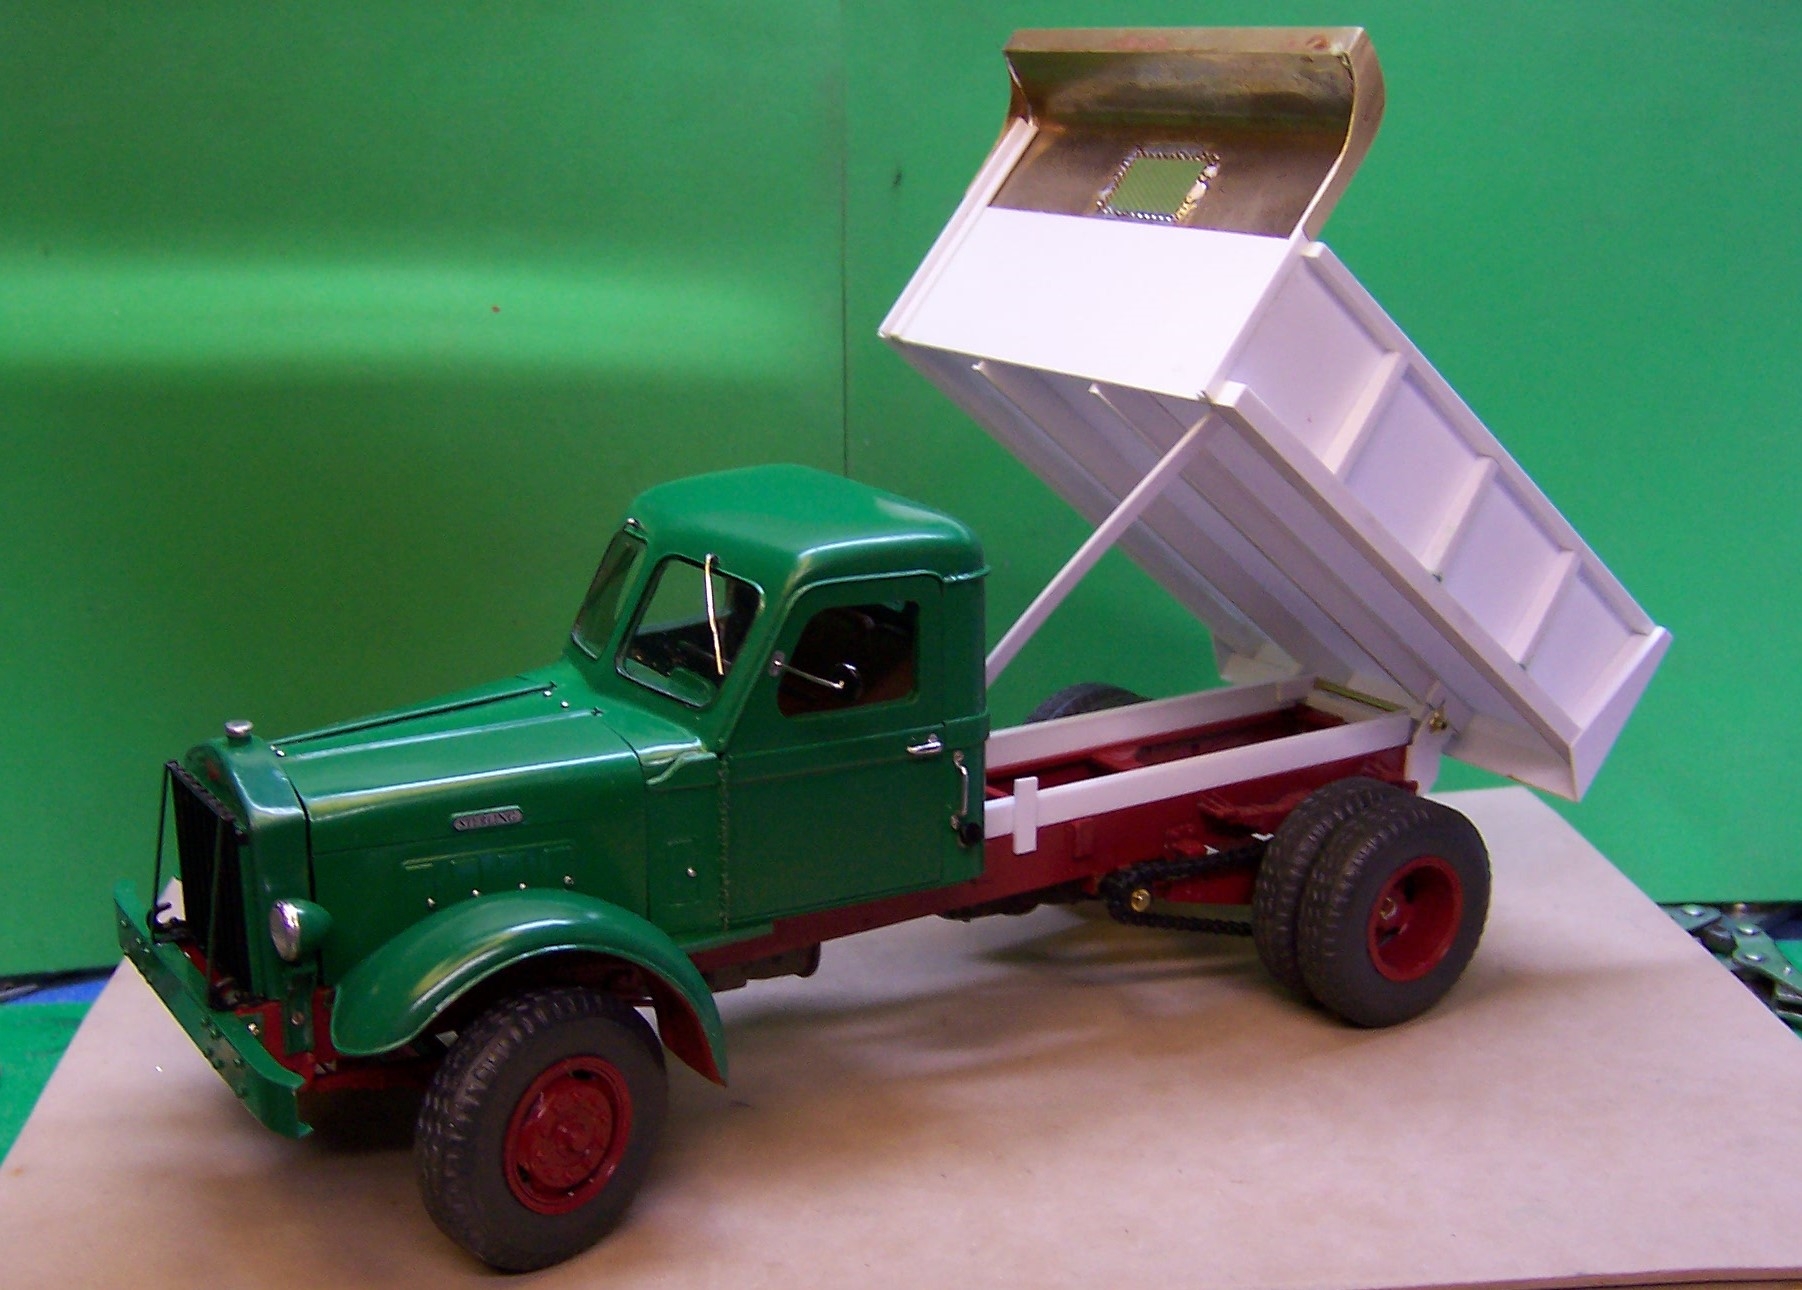
Work continues. With the body painted, the tailgate latches and handle were put in place. When the handle is pulled forward the latches raise and the tailgate opens.
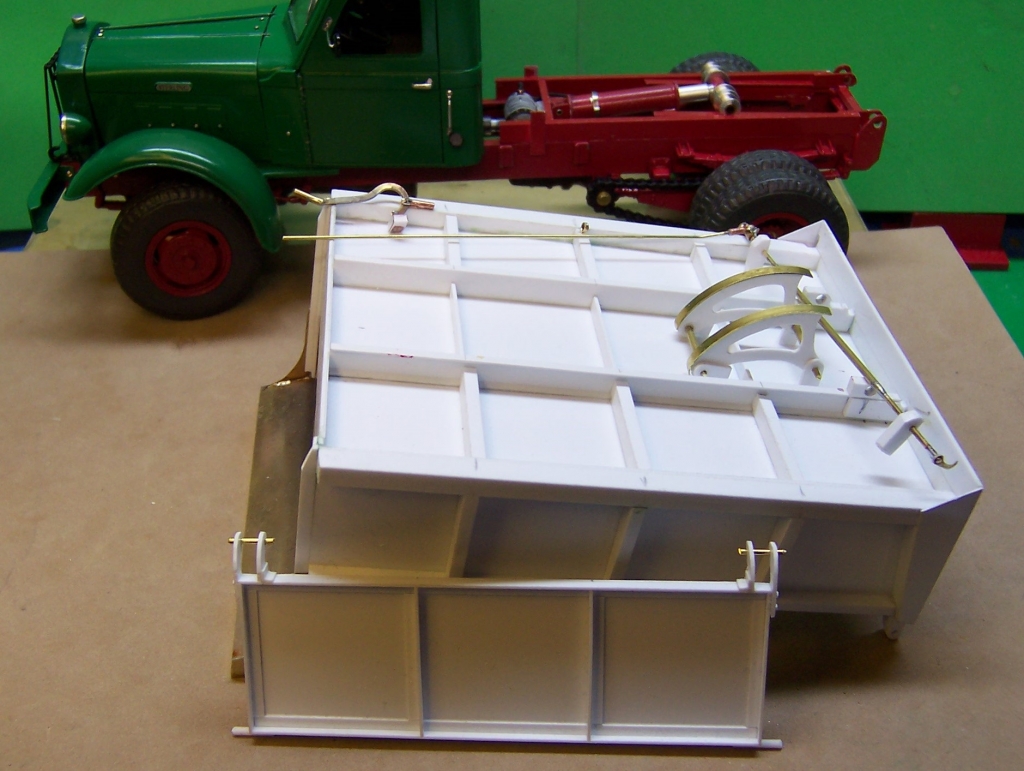

There are still steps to be made for the driver's side along with air brake cylinders and some oil canisters for the chains.


-
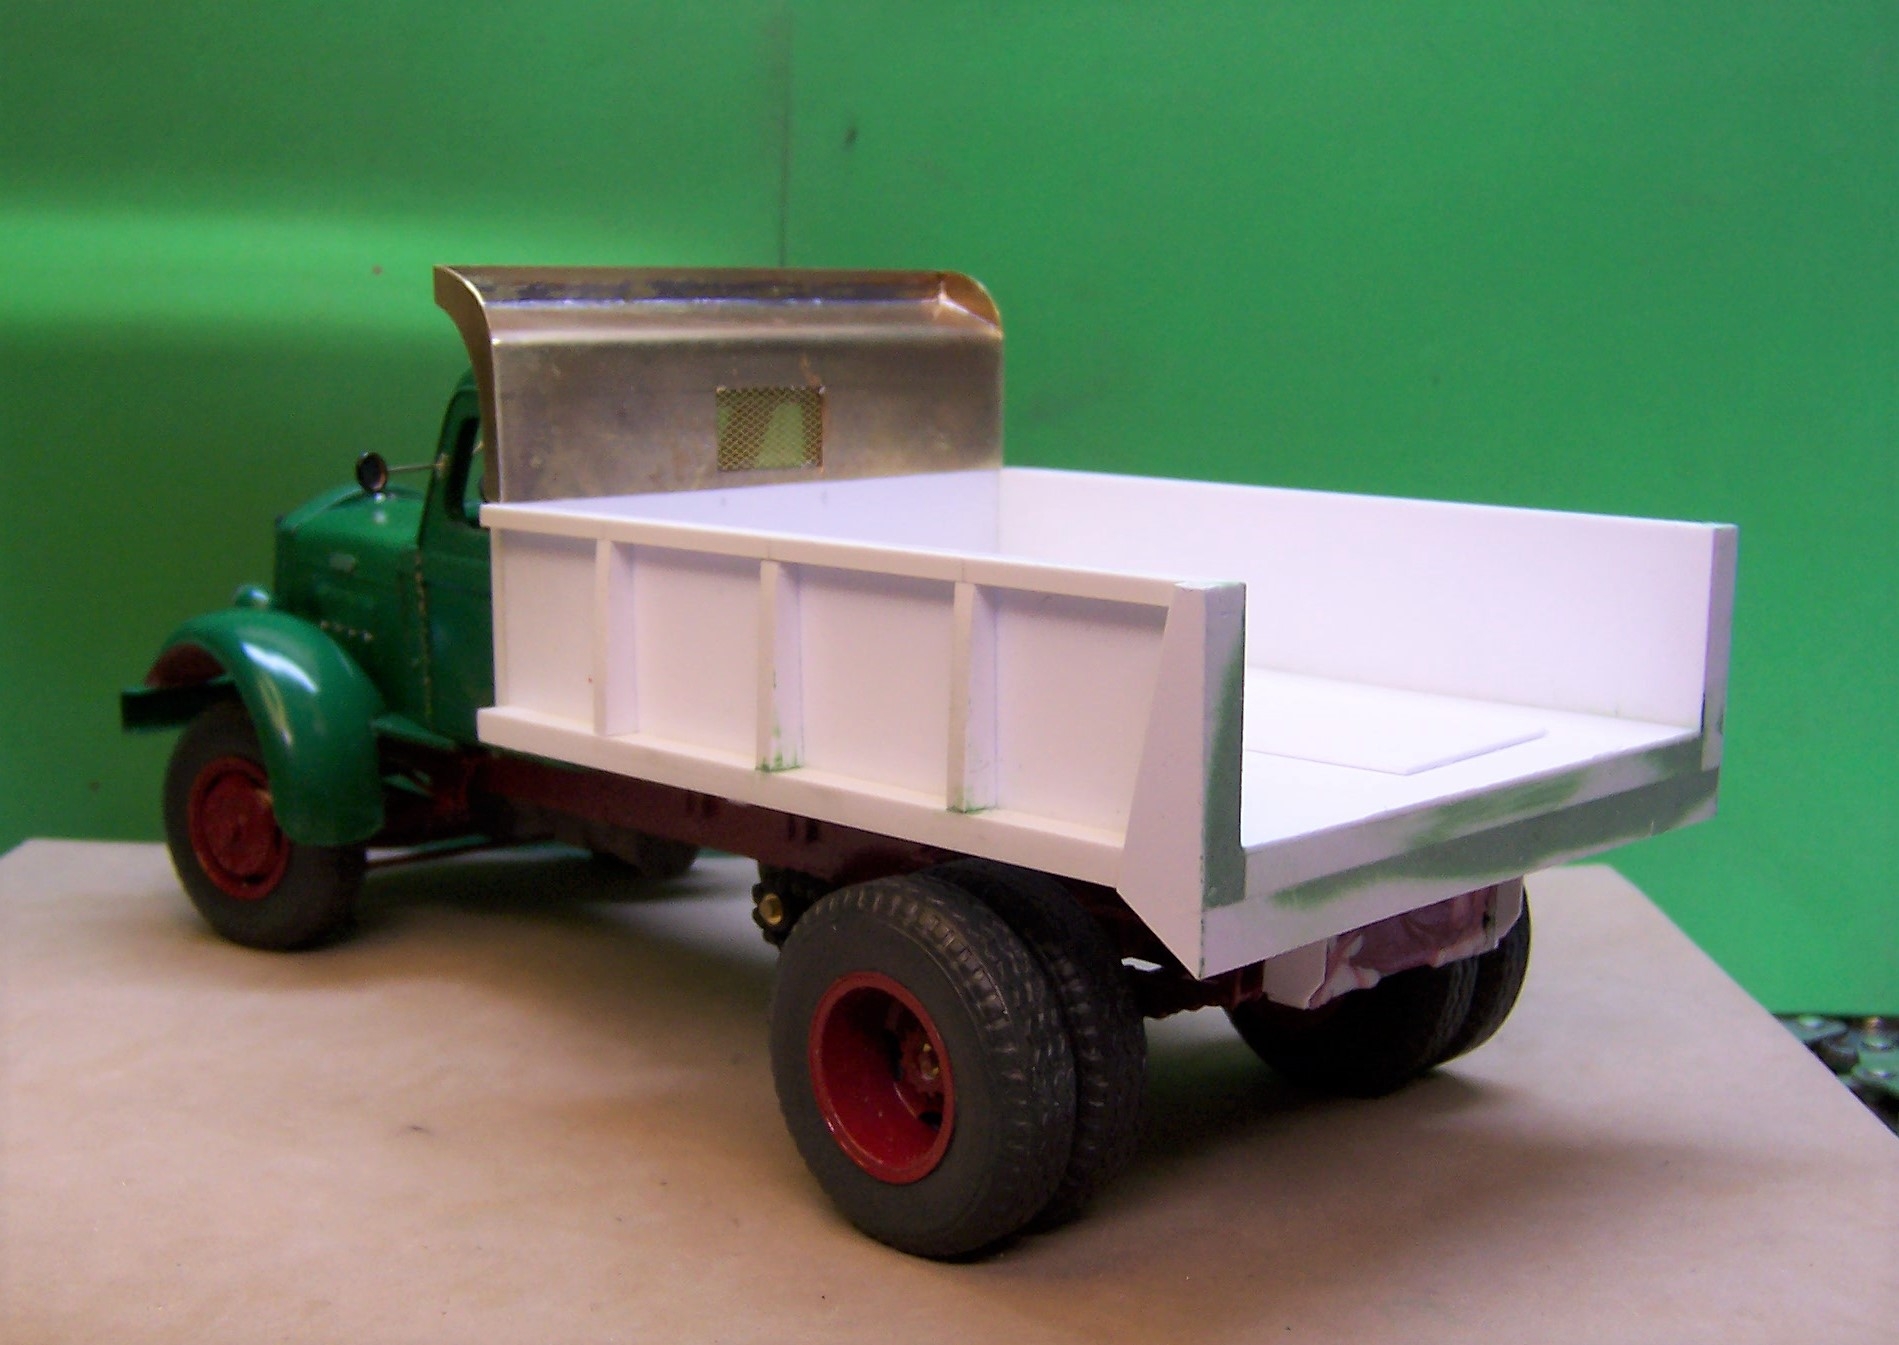
At first I thought the body was too big but then with the back of it in position and looking at it from the side it looks just right! Nice scratch work!!
-
1
-
-
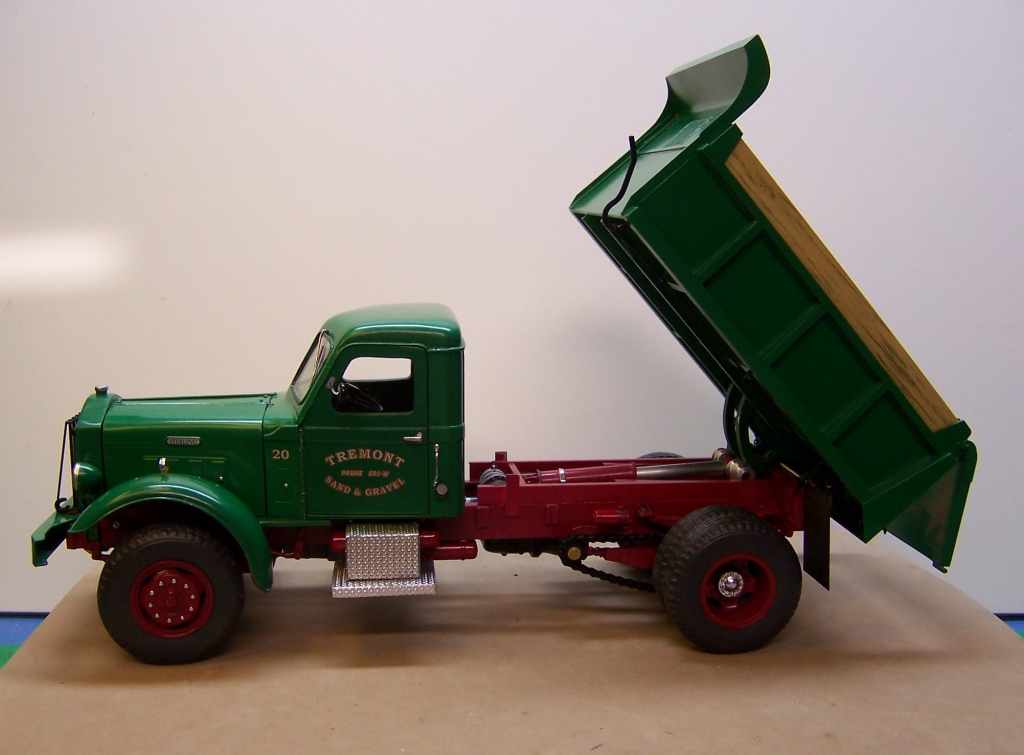
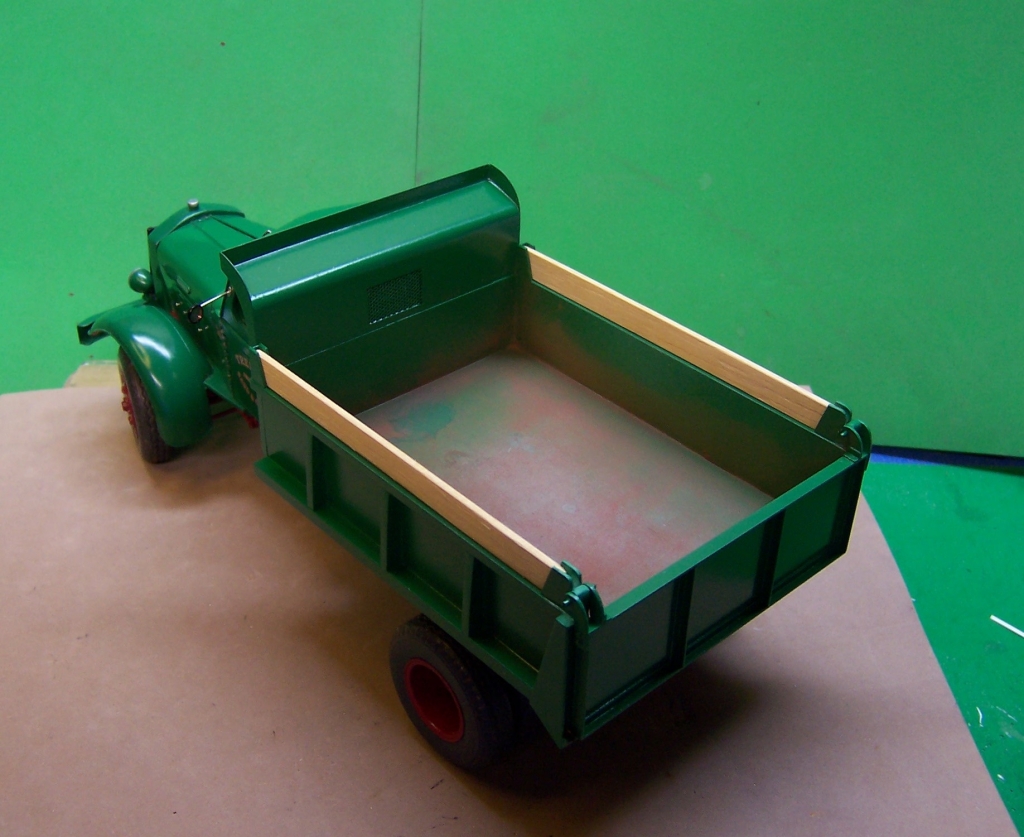
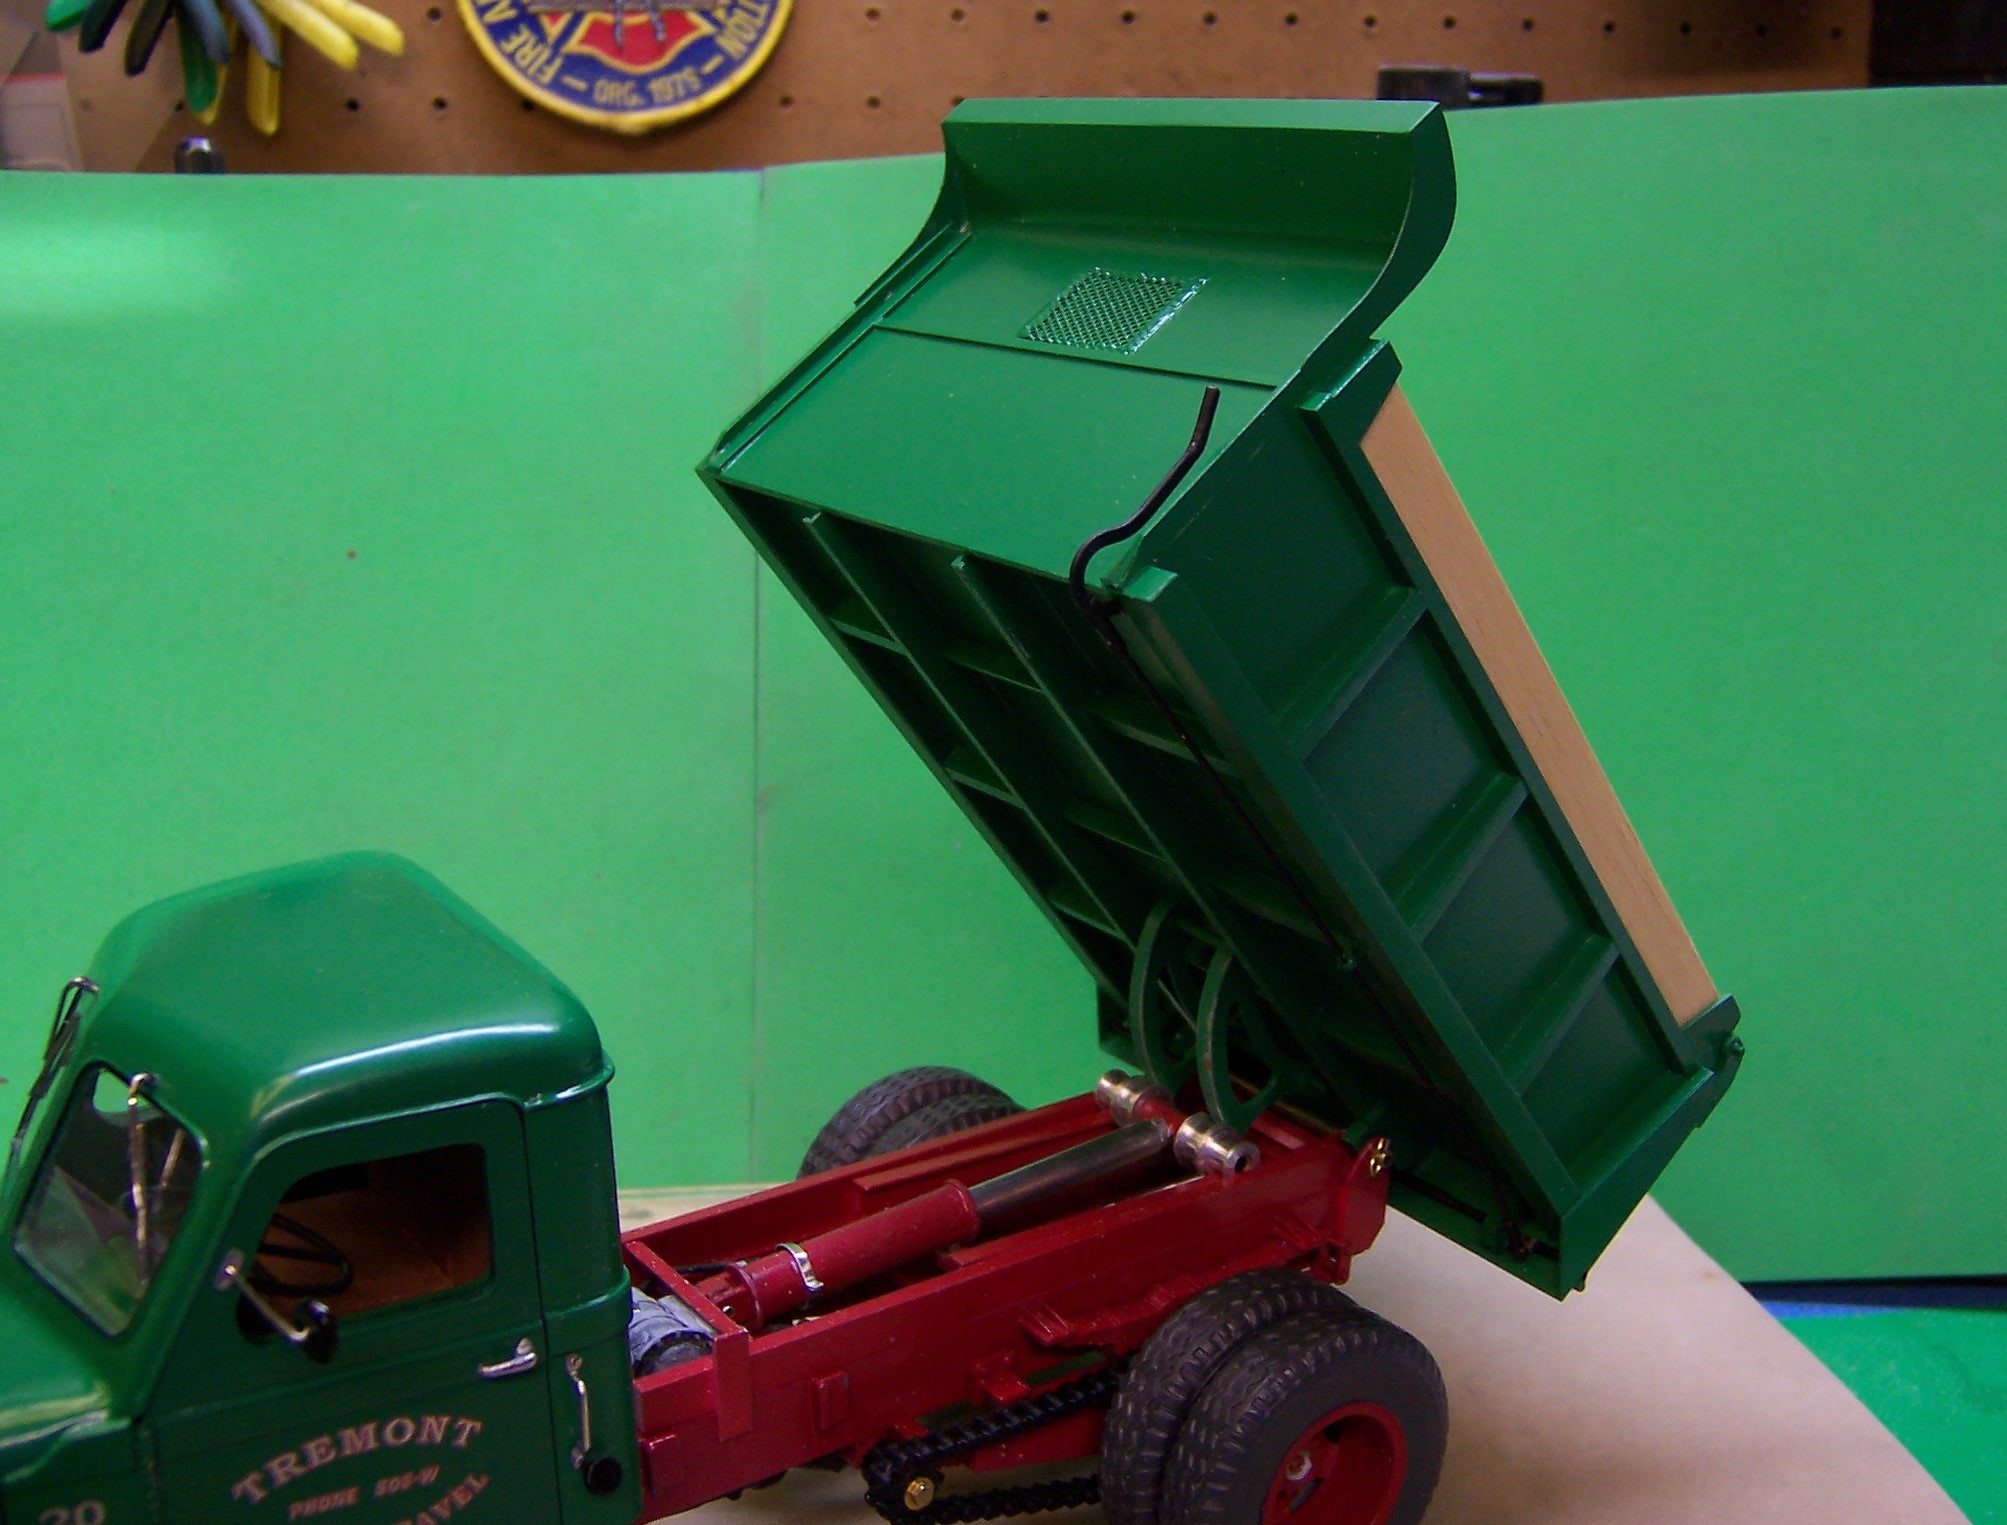
You are right, Paul. It is a GA Wood body. So is the lifting mechanism that I was able to complete today.
Here is the mechanism in the retracted position.

When fully extended the inner rollers push against the curved runners and the body is raised. It is a Wood design.
-
1
-
-
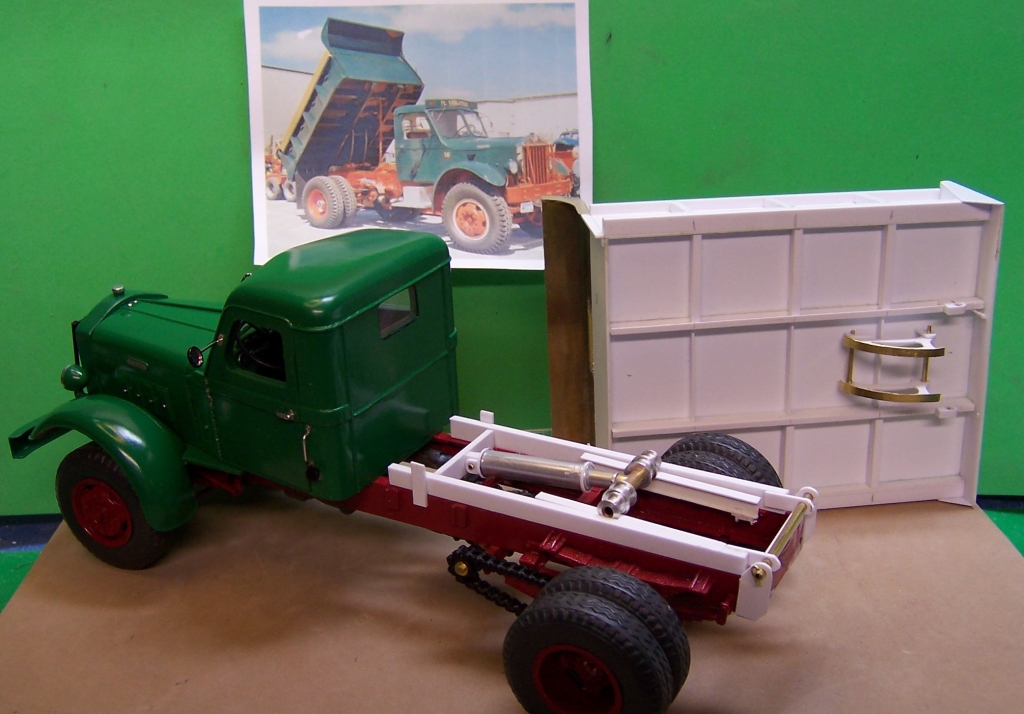
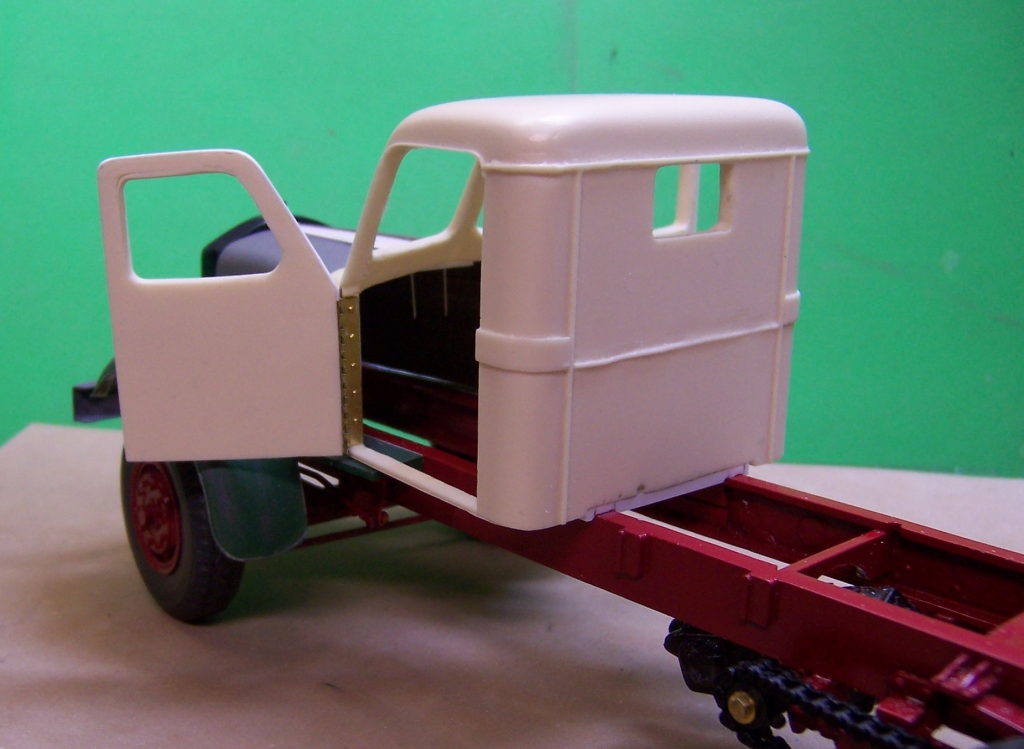
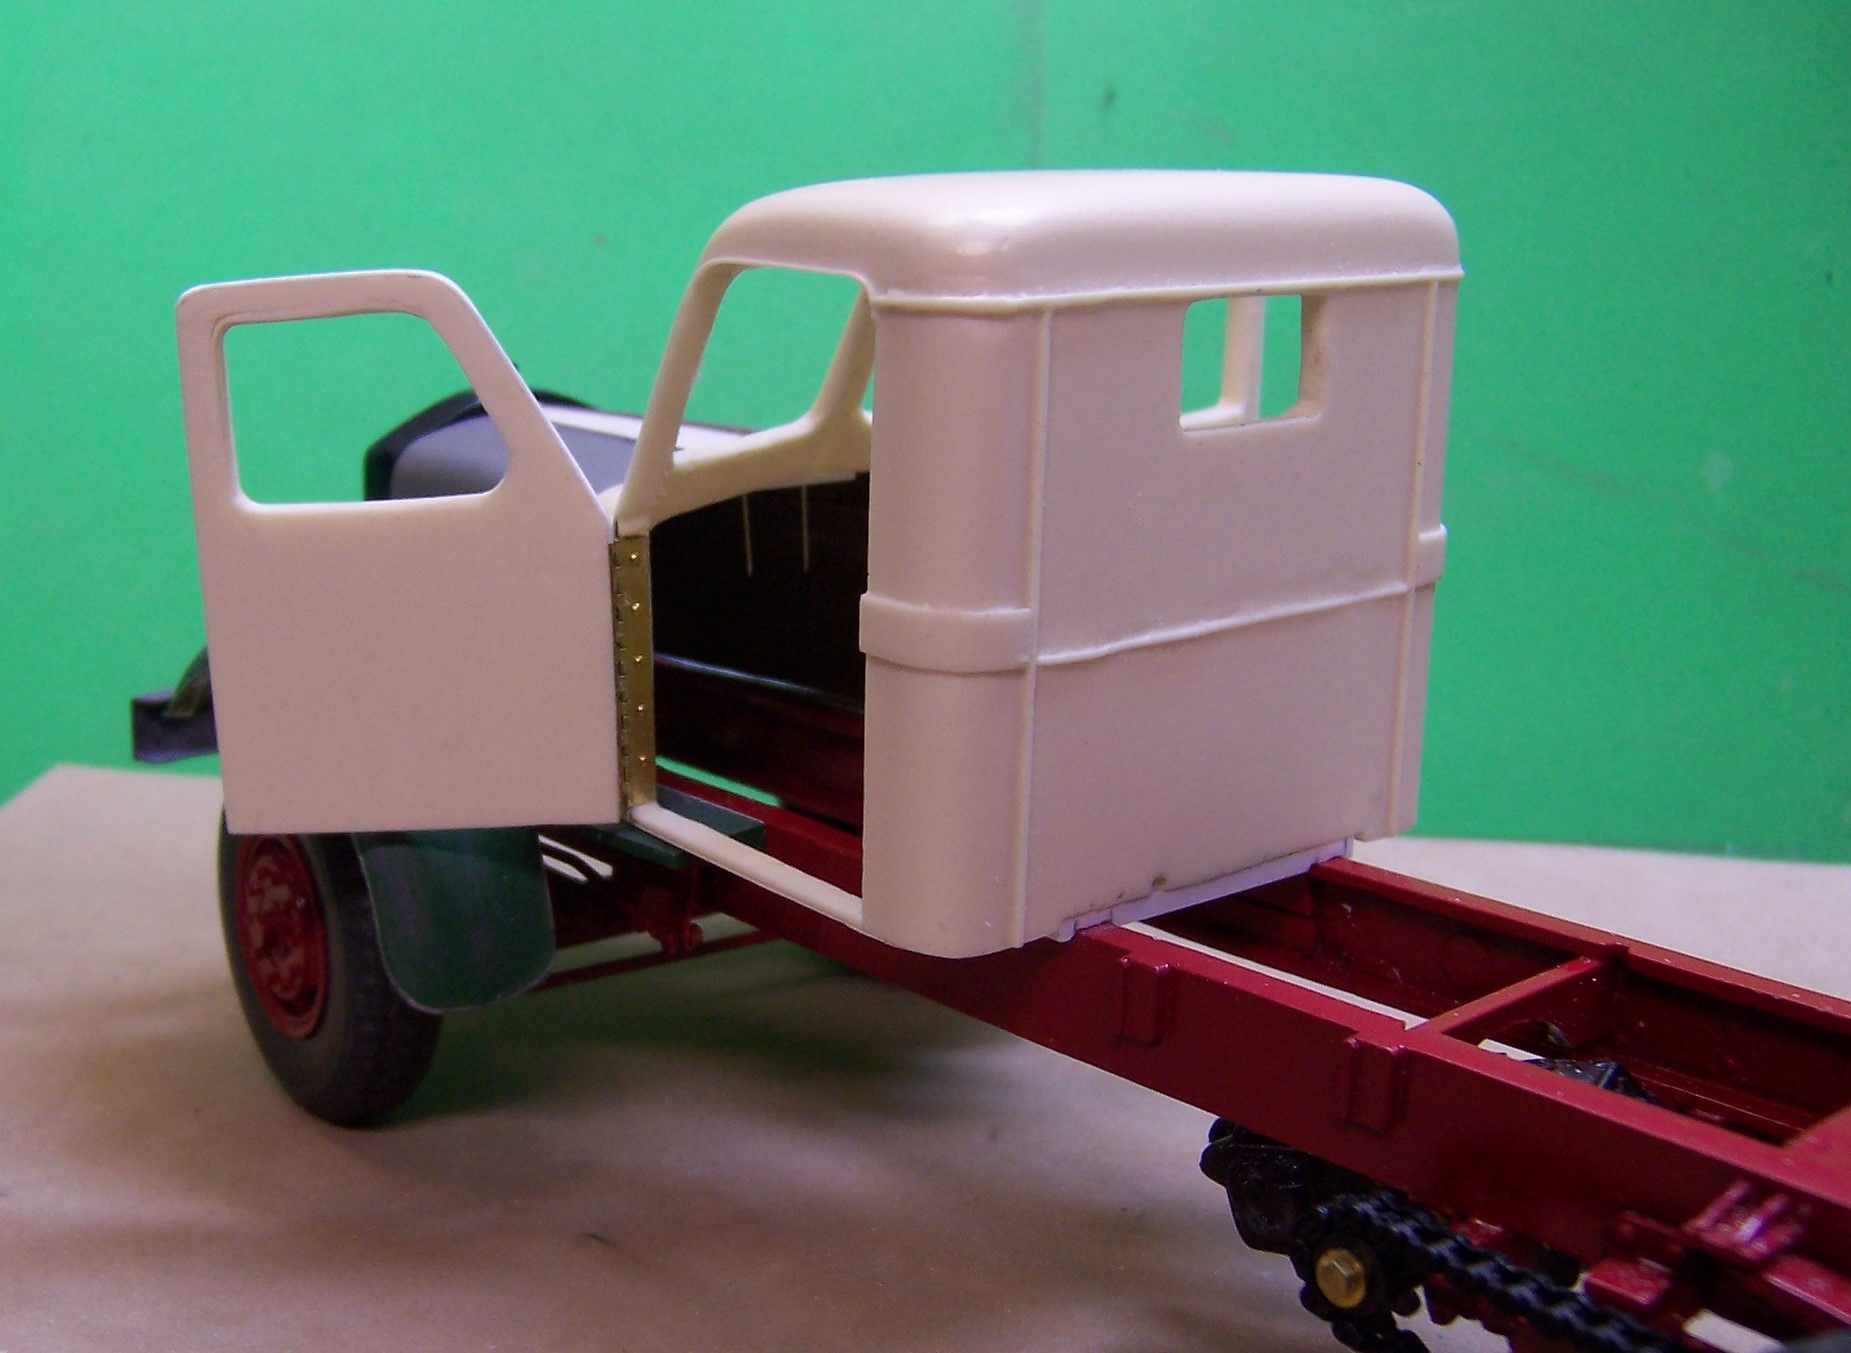
Here are some updated photos. Body work has started using some Evergreen sheet and strip stock. The upper portion that protects the cab is made of thin sheet brass. It needed to be bent in a curve and it is easy to do once the brass is annealed. Side pieces and the lip at the top were soldered on. It fits snugly against the two vertical plastic angles but will need to be braced further before mounting it permanently. Next up is the tailgate and lifting mechanism.

-
1
-
-
Got a lot more work done in the past few days including getting all of the major painting done. The Krylon Leaf green is a great color but like other non-automotive paints it is soft and requires a long drying time. Duplicolor is great fast drying stuff but the color selection is just not there for non-metallic colors. The battery boxes are being painted and certain other small details are to be added to the cab.


-
1
-
-
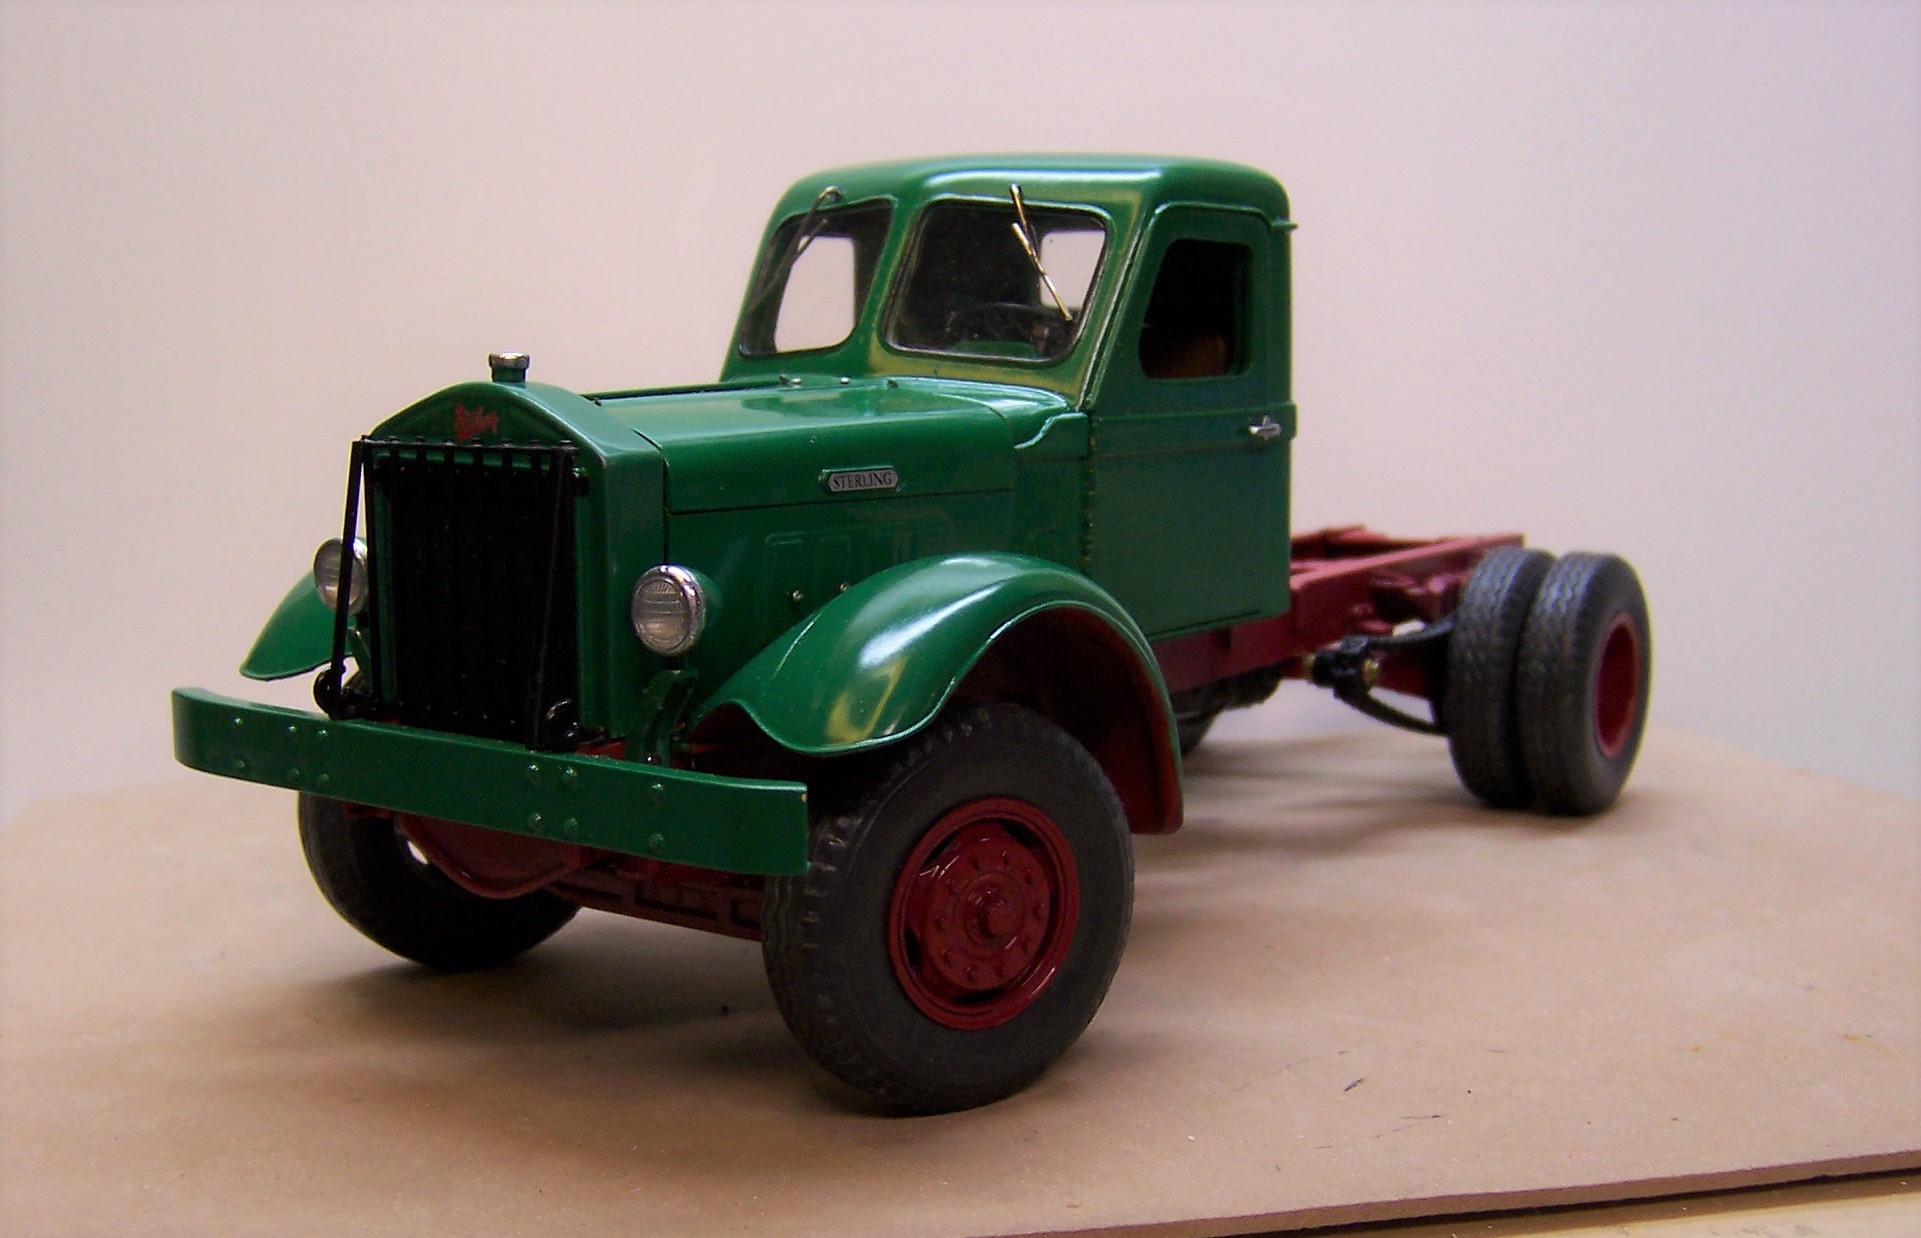
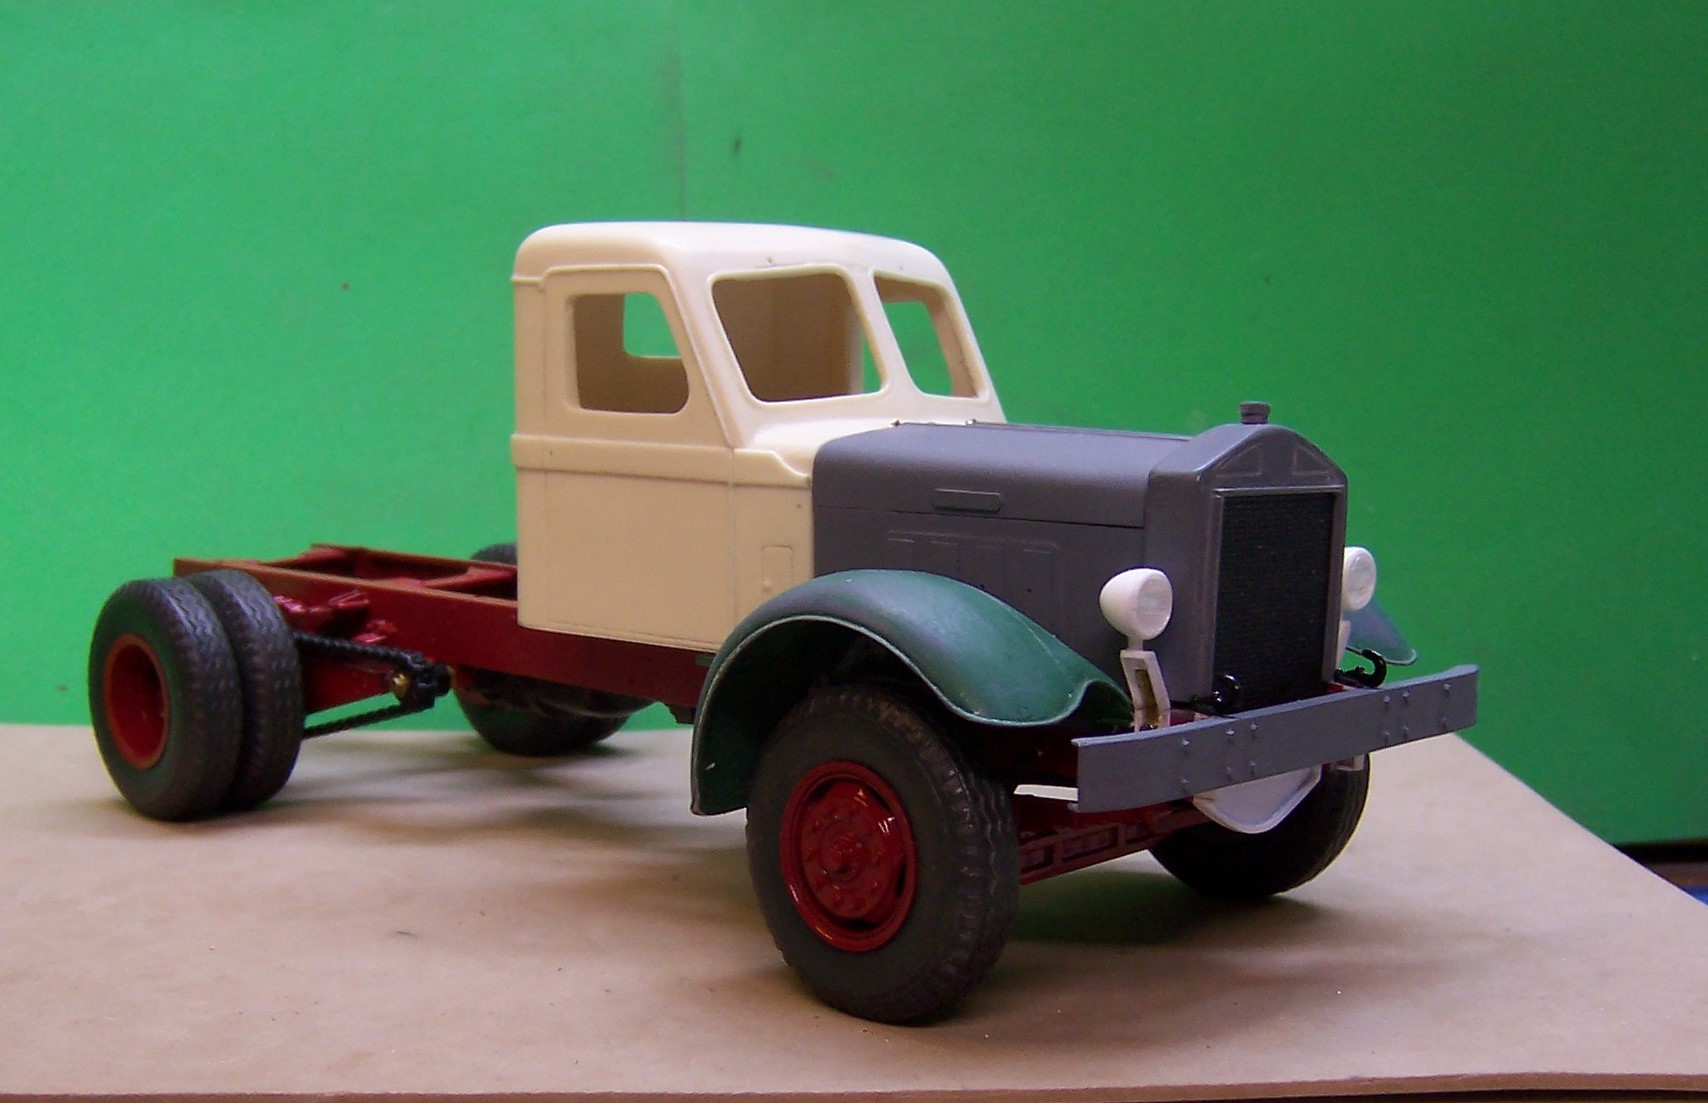
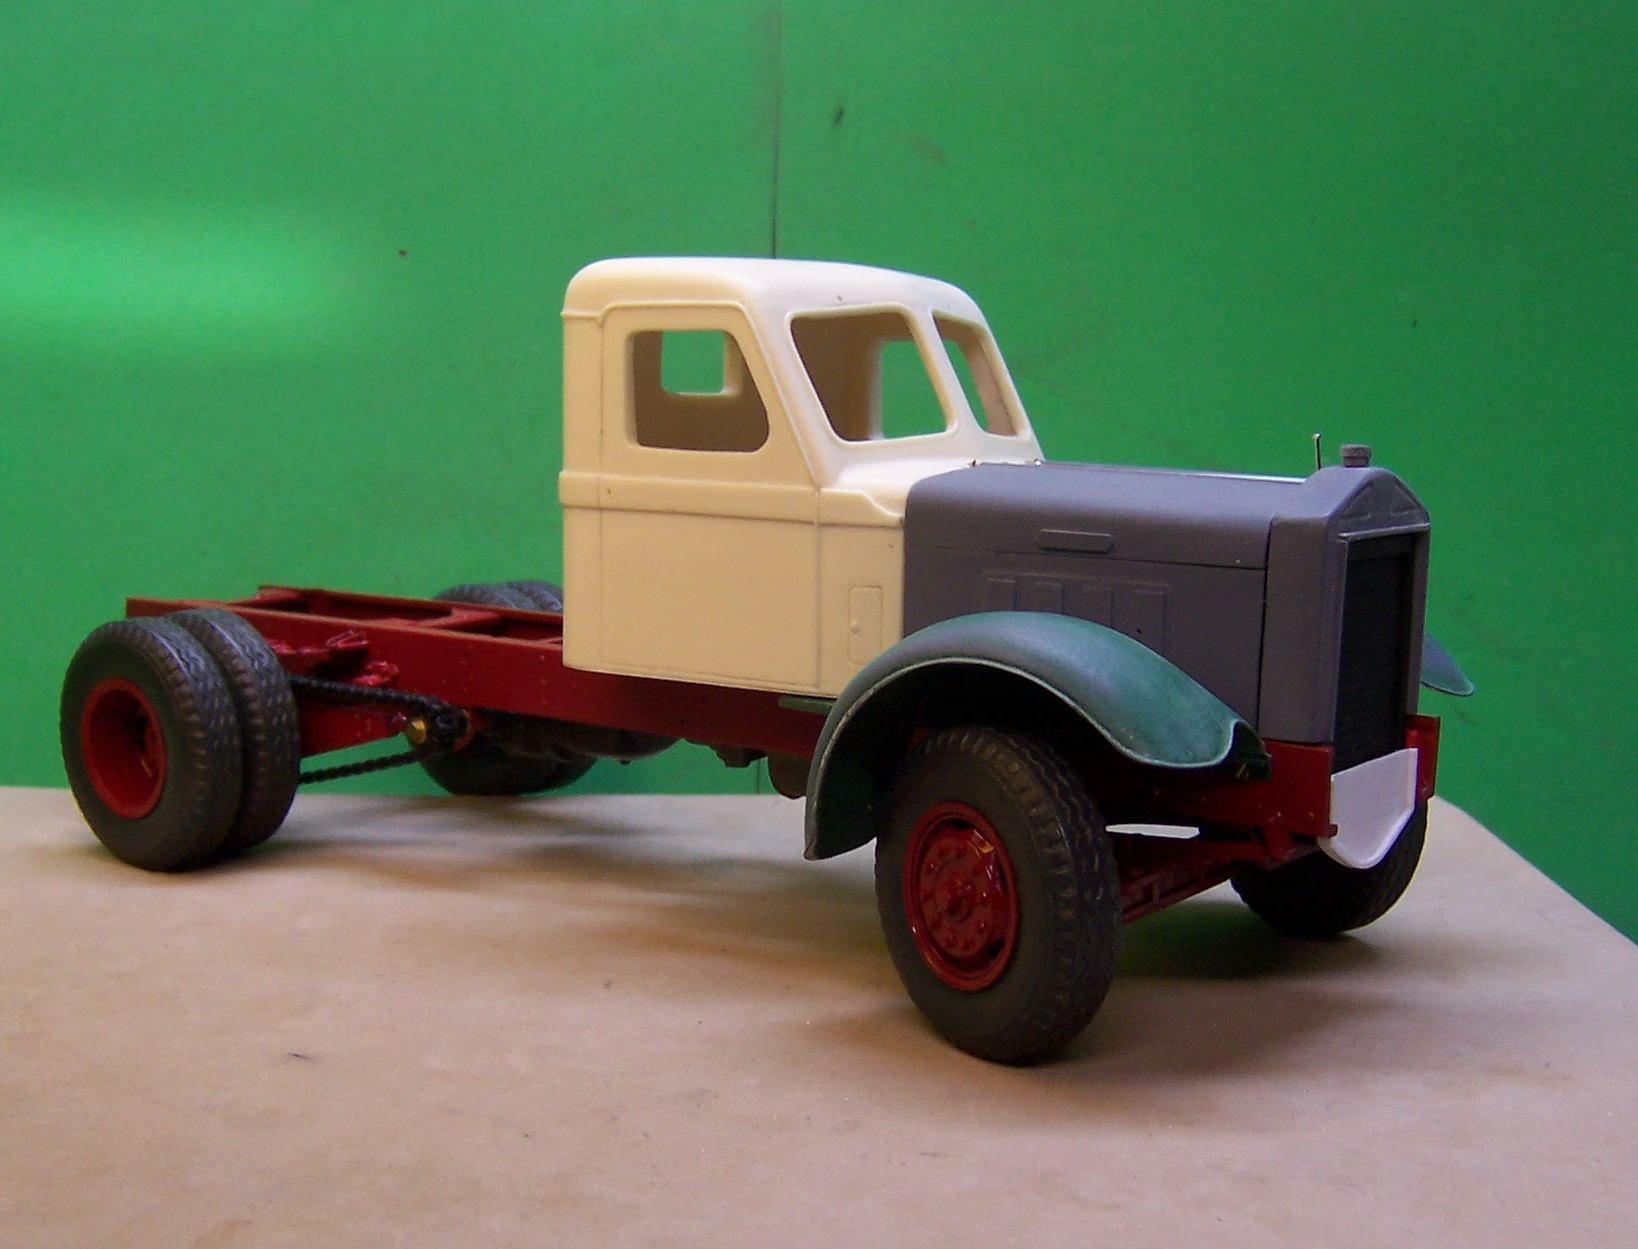
Kept working on the details today and last nite. The front bumper is now done along with the headlights and brackets. The doors have been opened after much scribing but they came out quite well. Getting closer to some paint on the cab!!


-
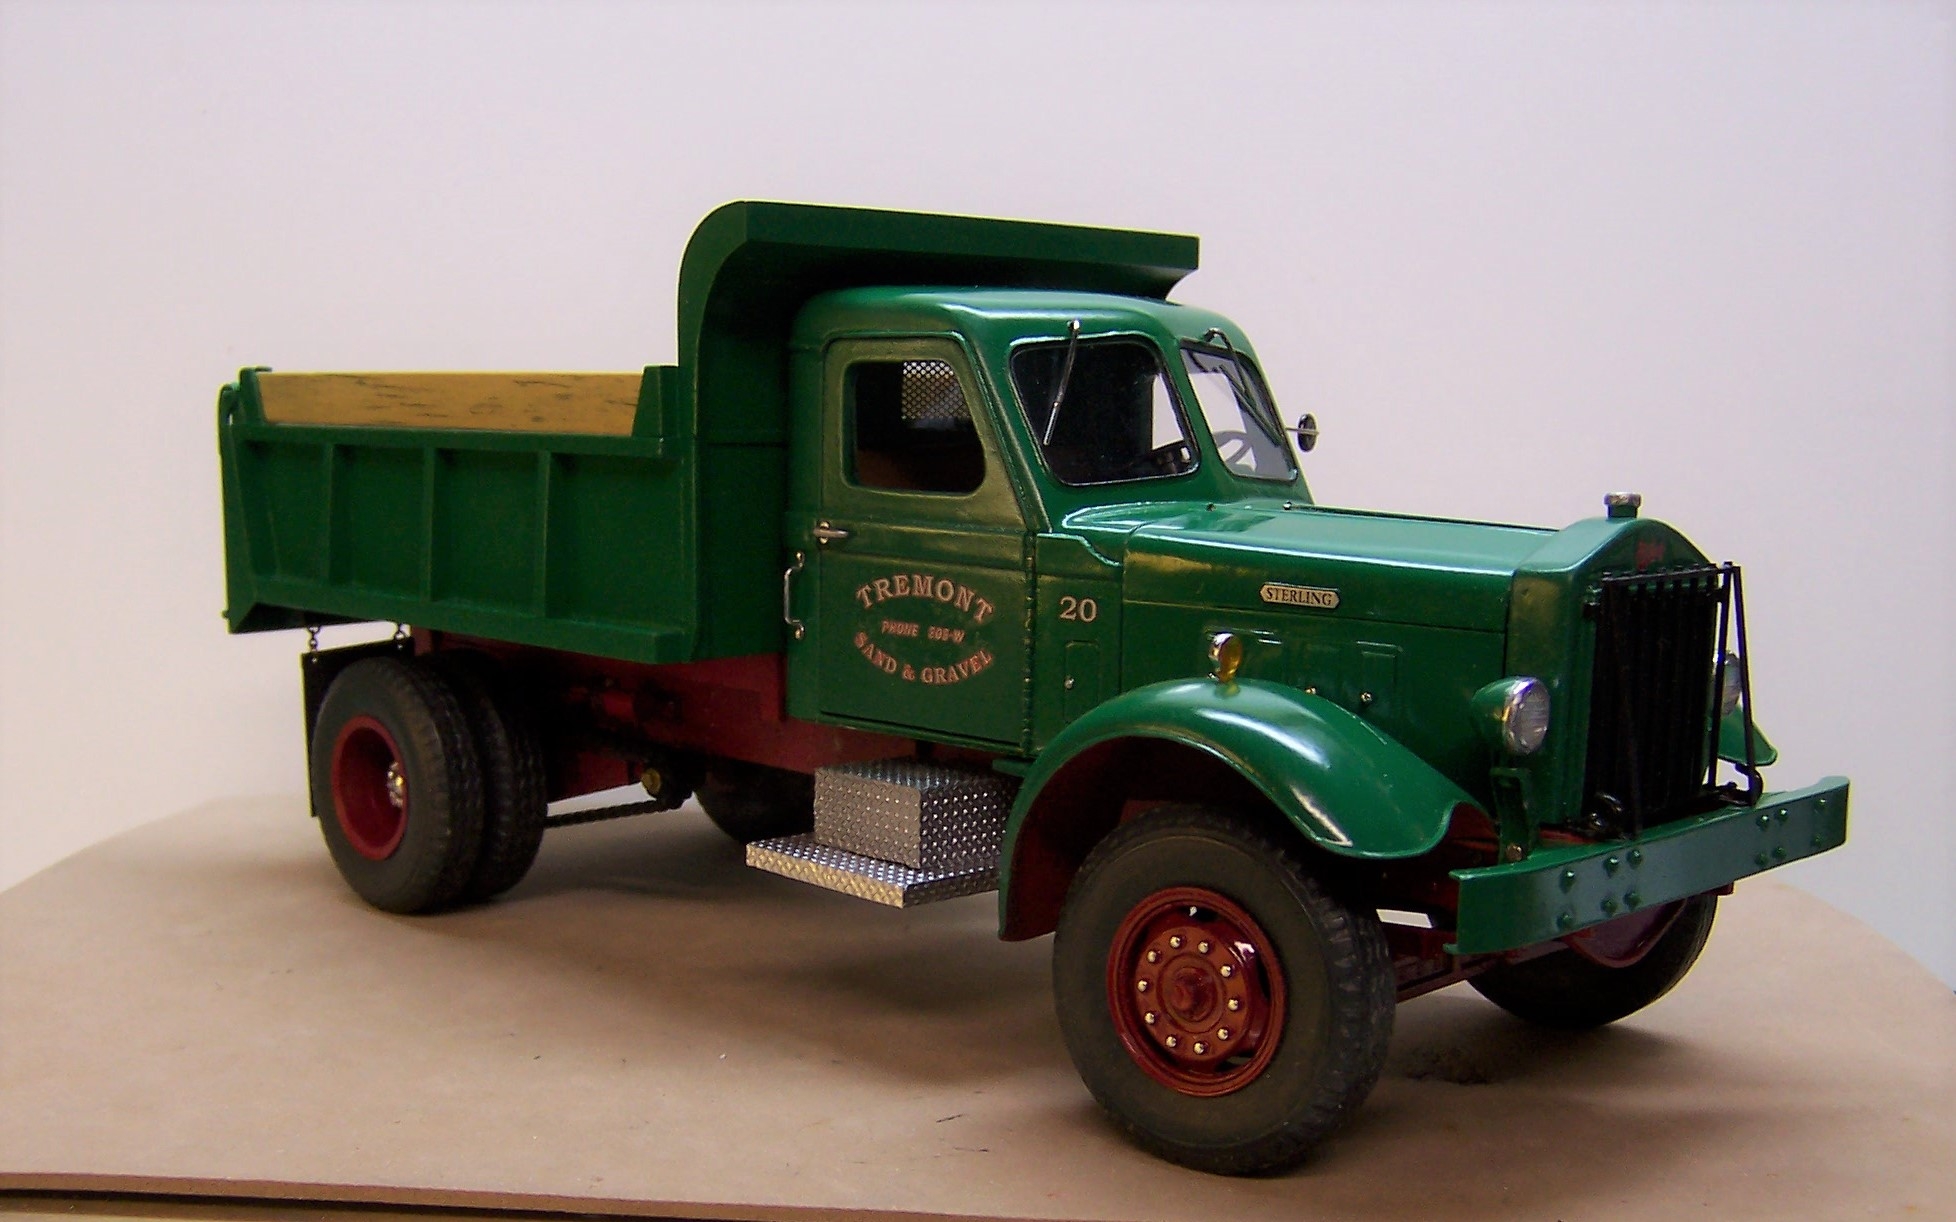
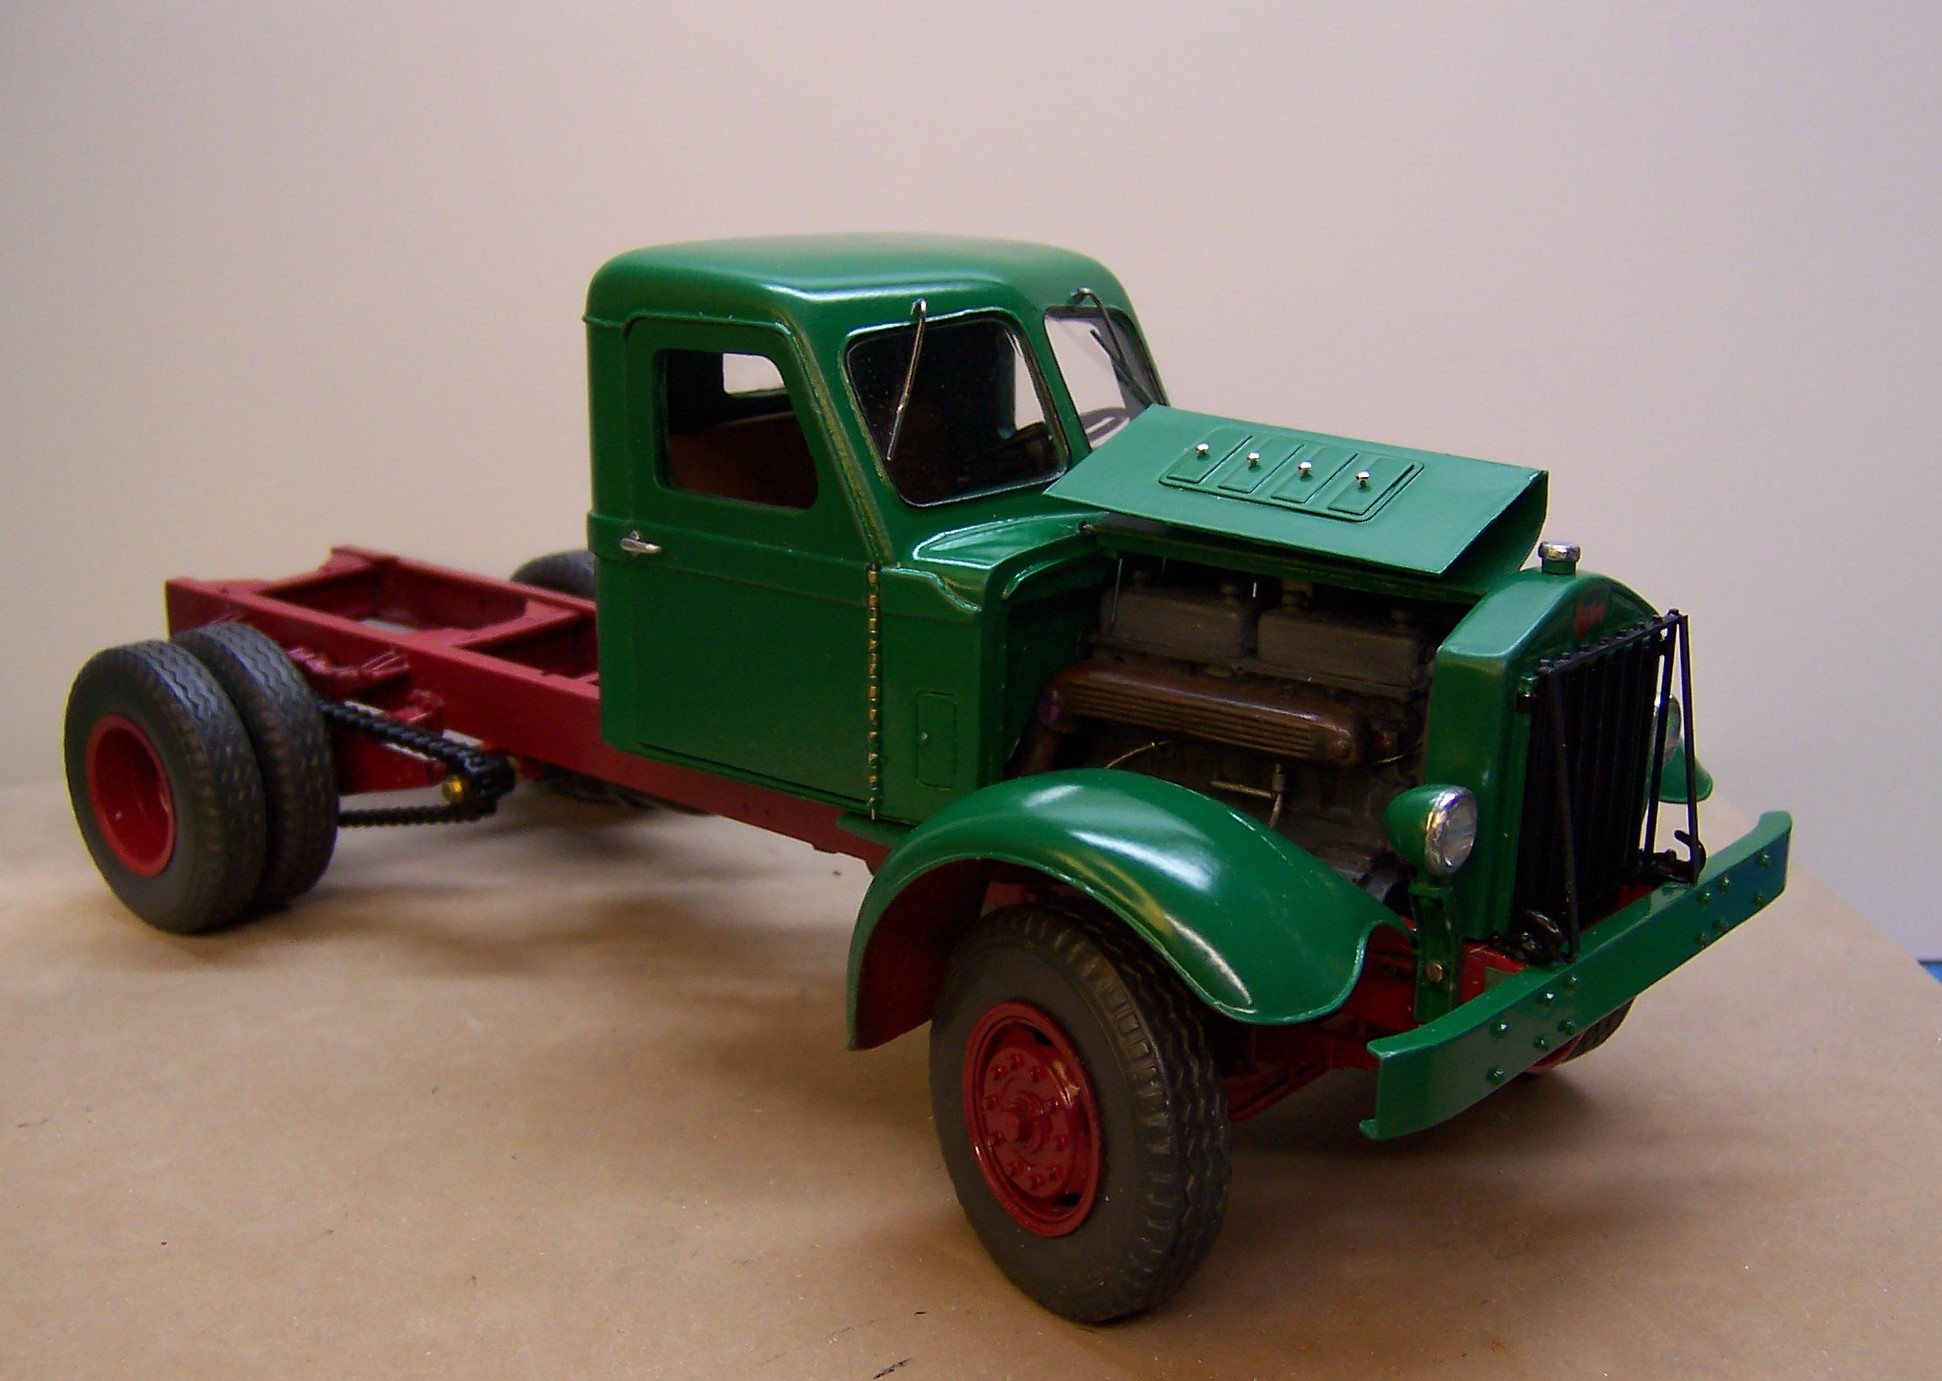
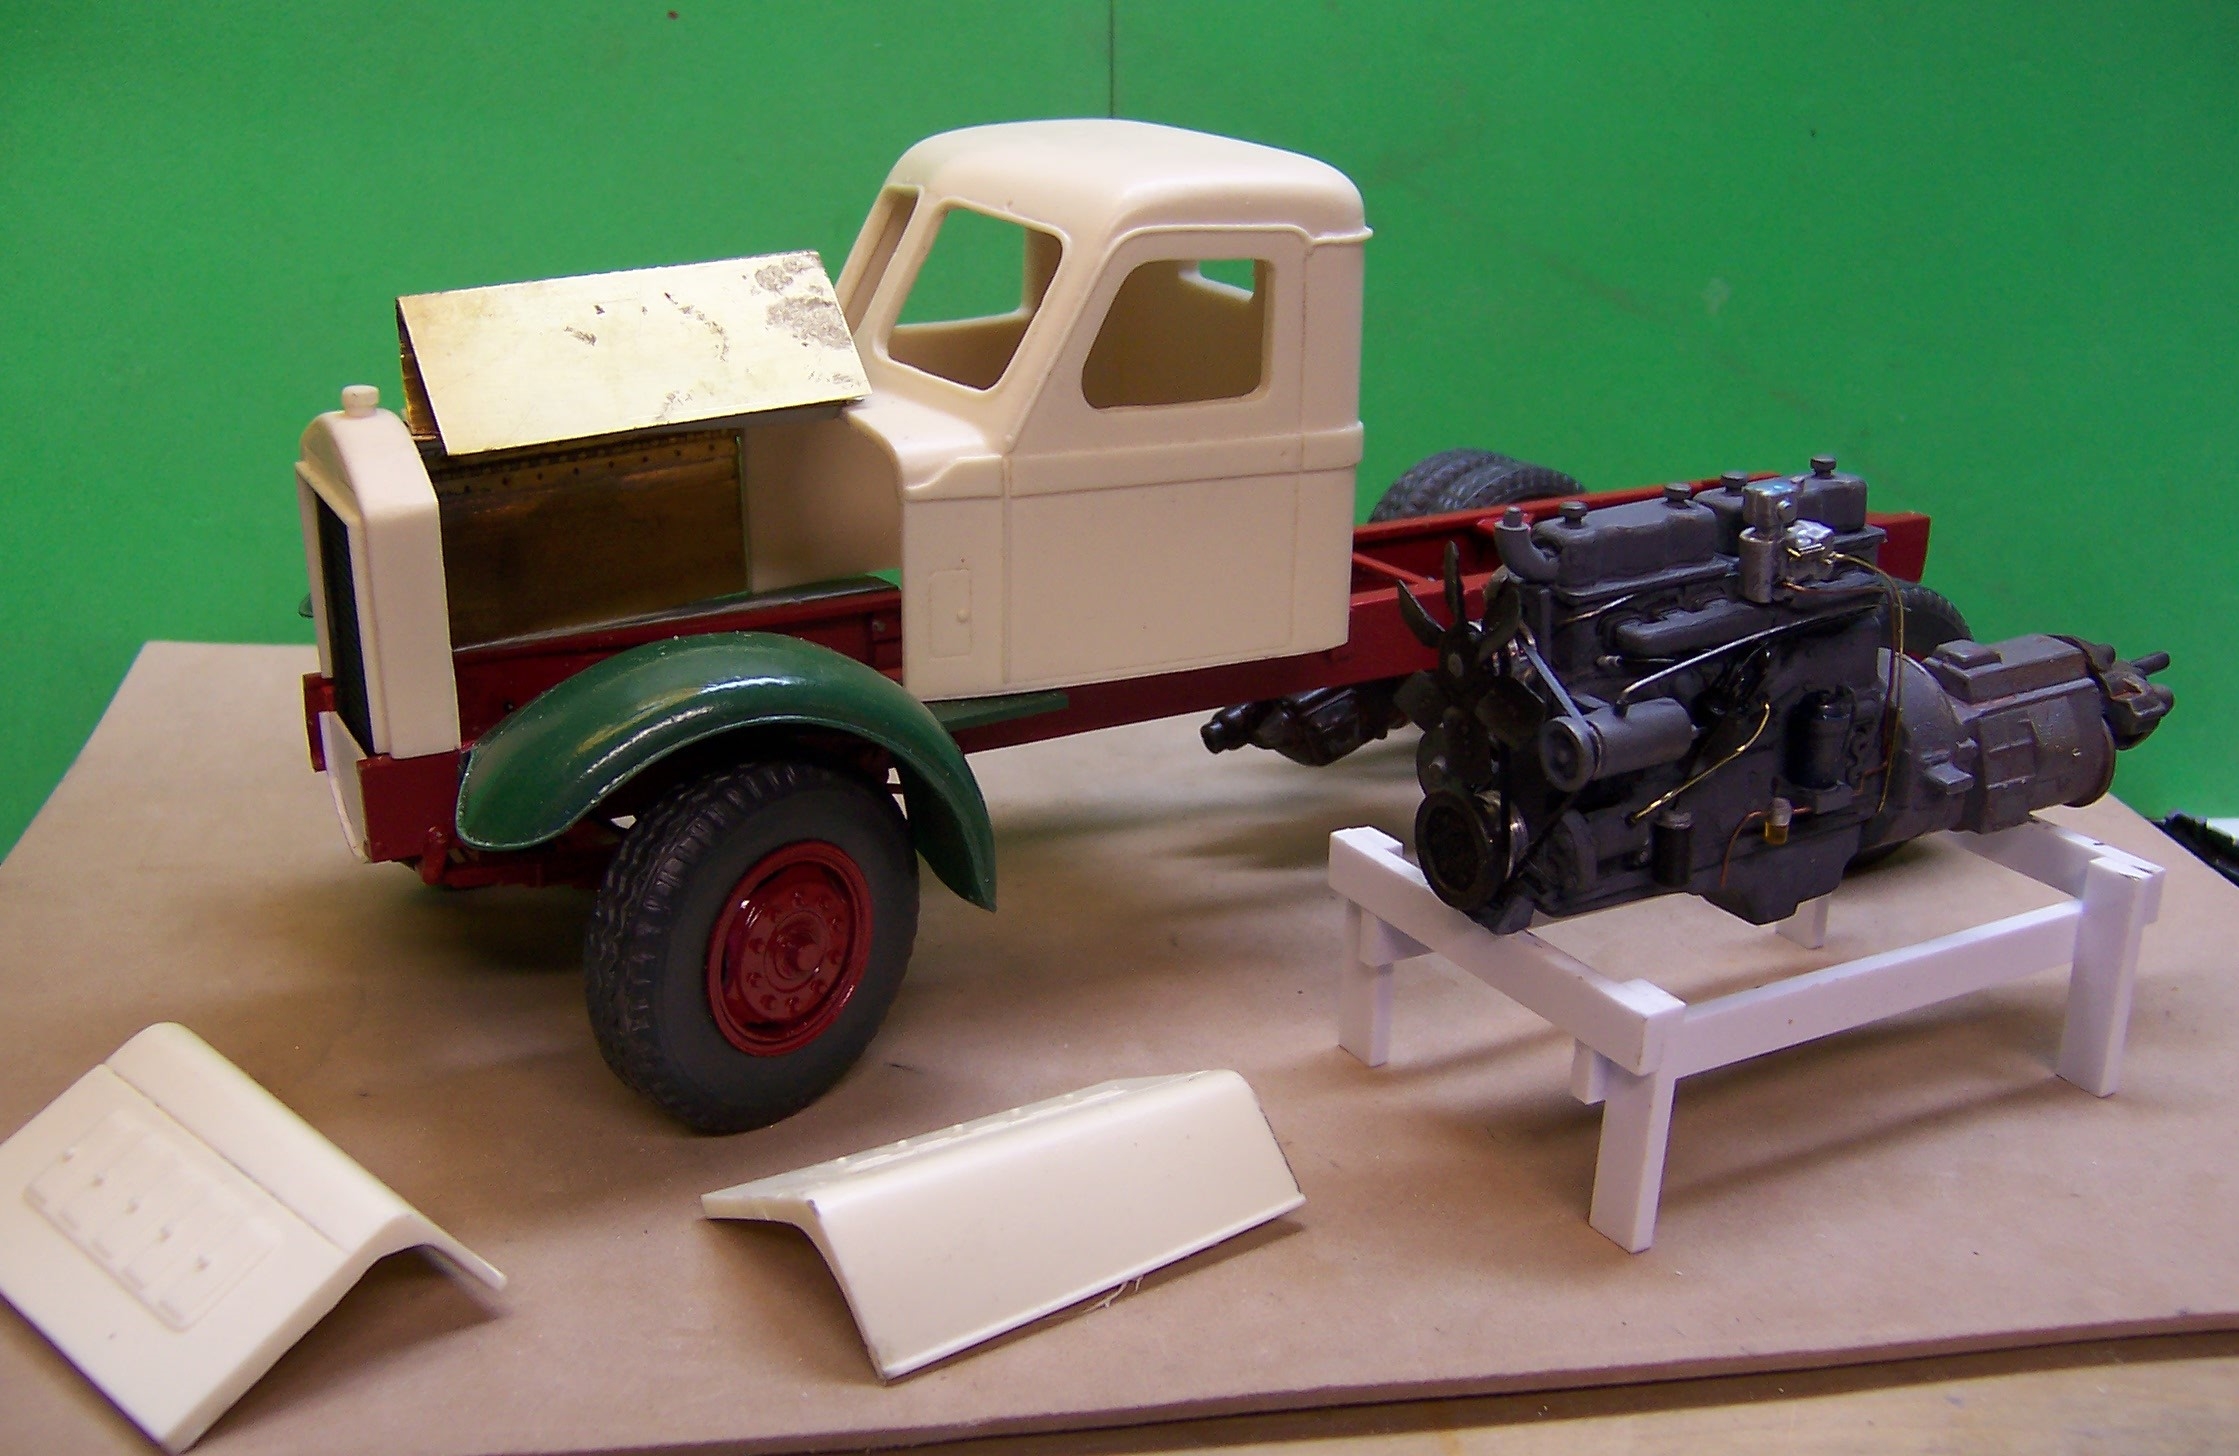
Here's where we are as of today with the Sterling. I'm modeling a 1948 Sterling, Dave. Brass sheet has been used to form the hood so it can open. The bumper is now brass as well since the kit bumper was straight and did not have the curved ends like most of the trucks that I am trying to construct. Next up will be to get the doors open. Bumper has been primed and I will post pix of it shortly.

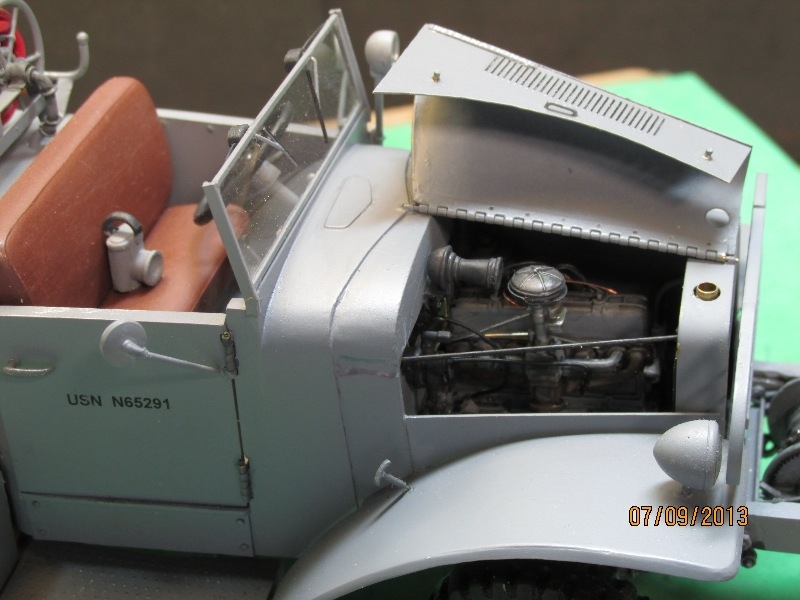
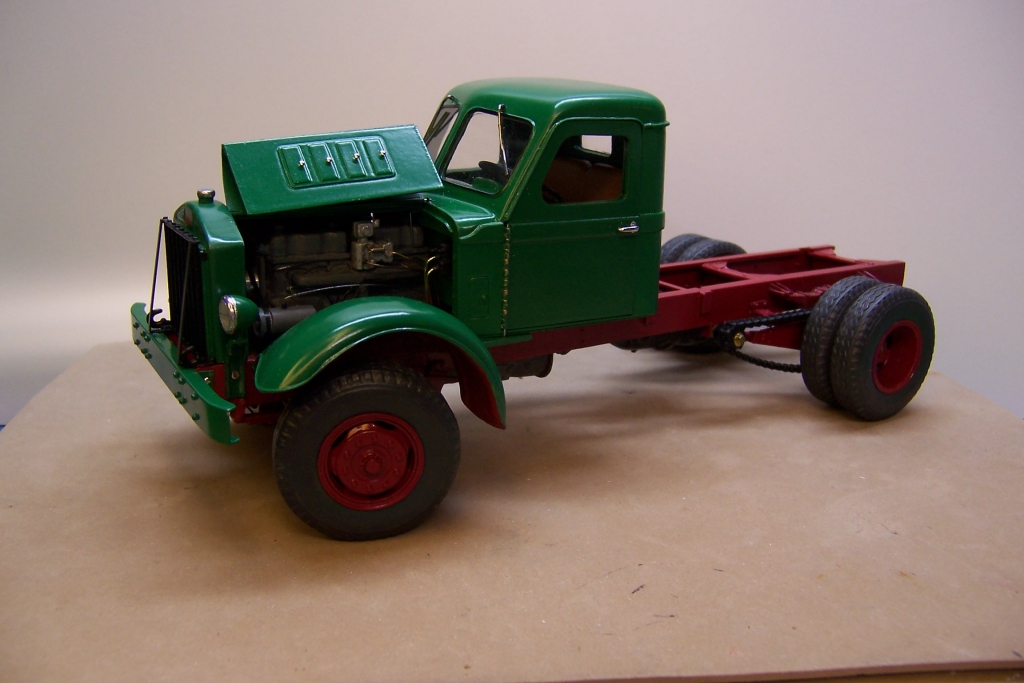
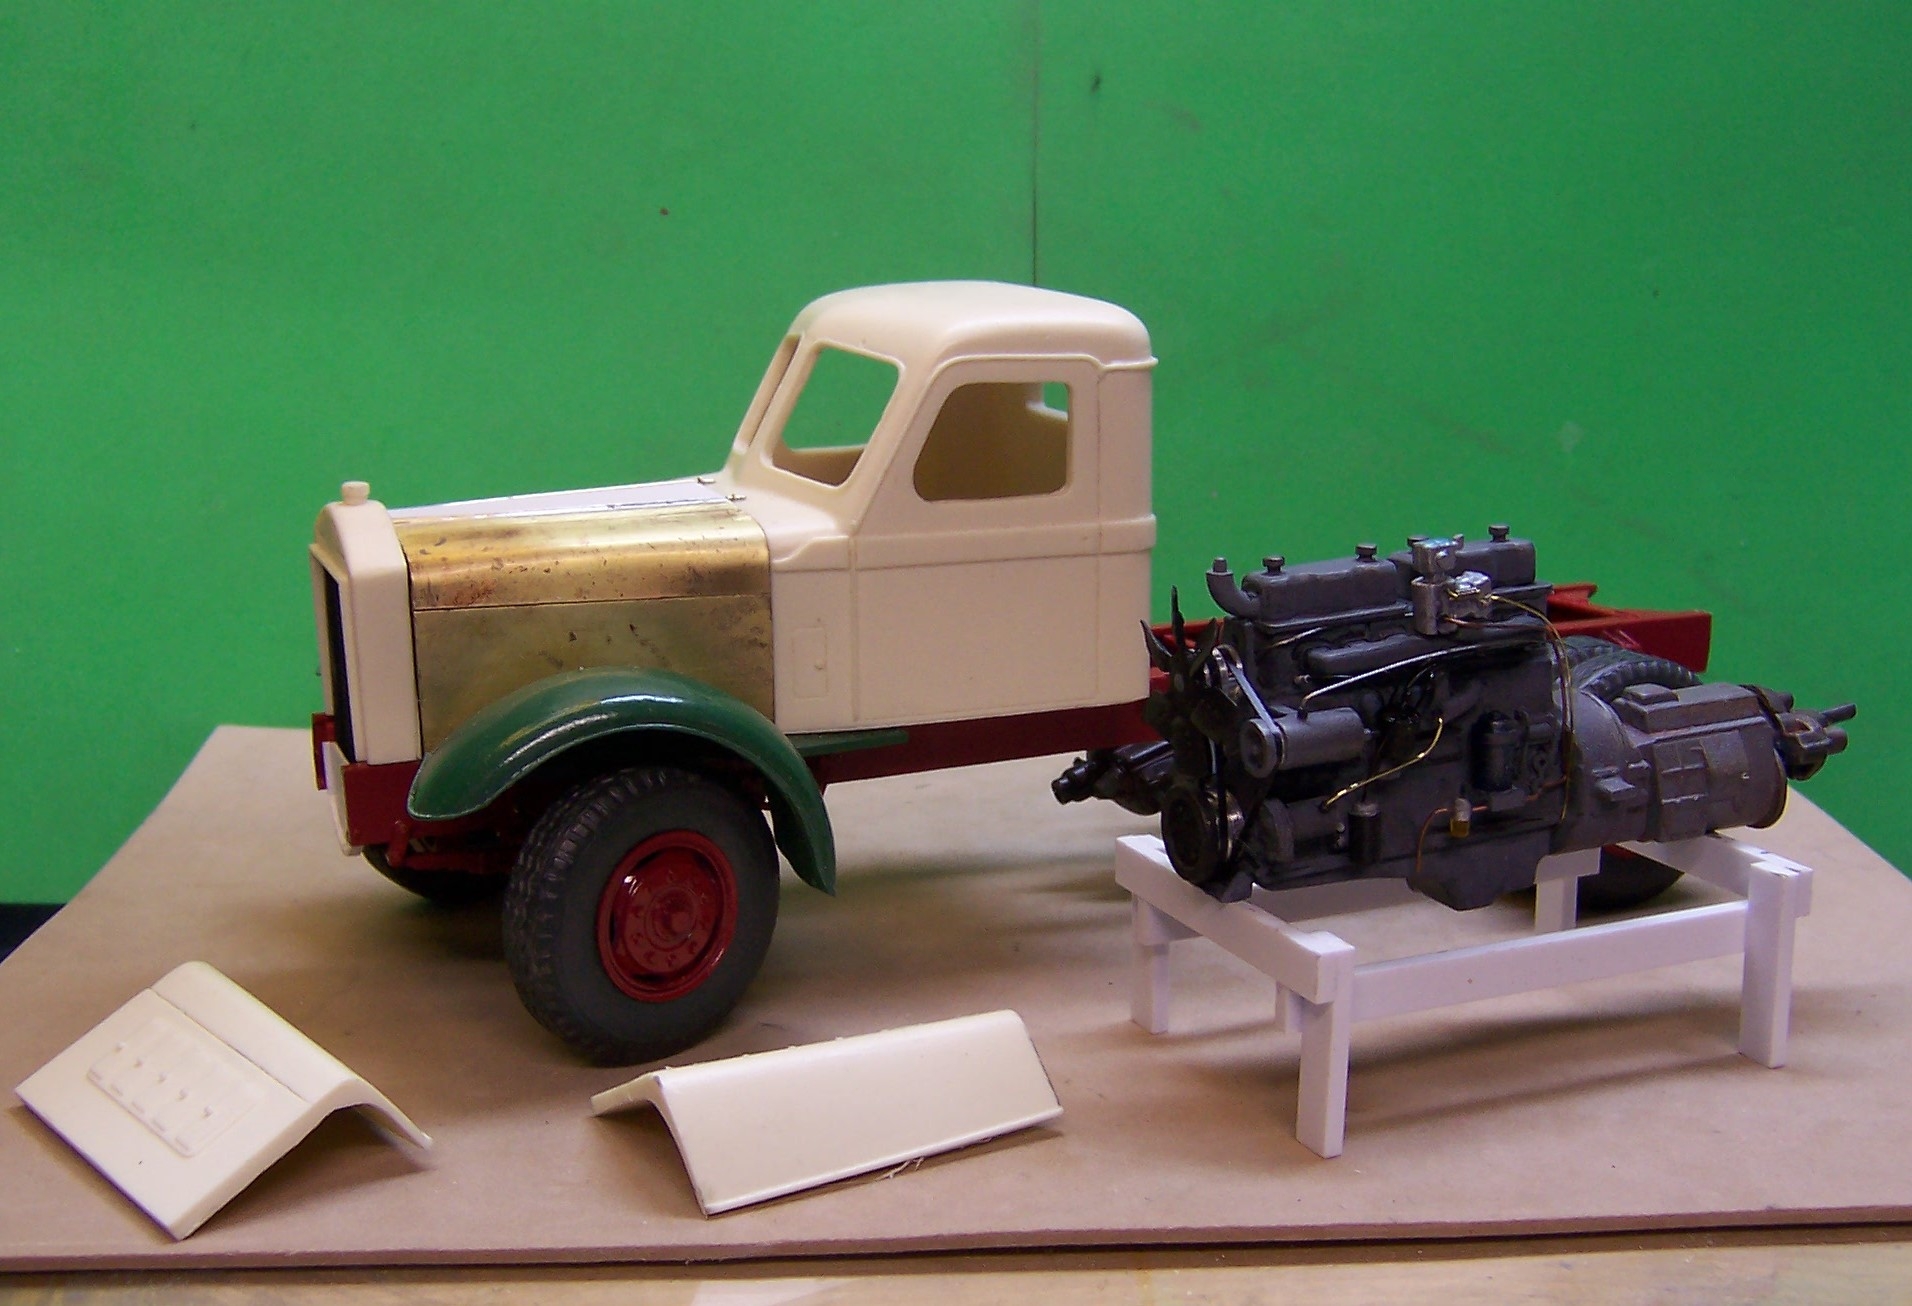
The engine is a compilation of various pieces from the parts box including a Pete block and oil plan and transmission. Much of the rest is simply plastic tubing, sheet stock and craft wire.
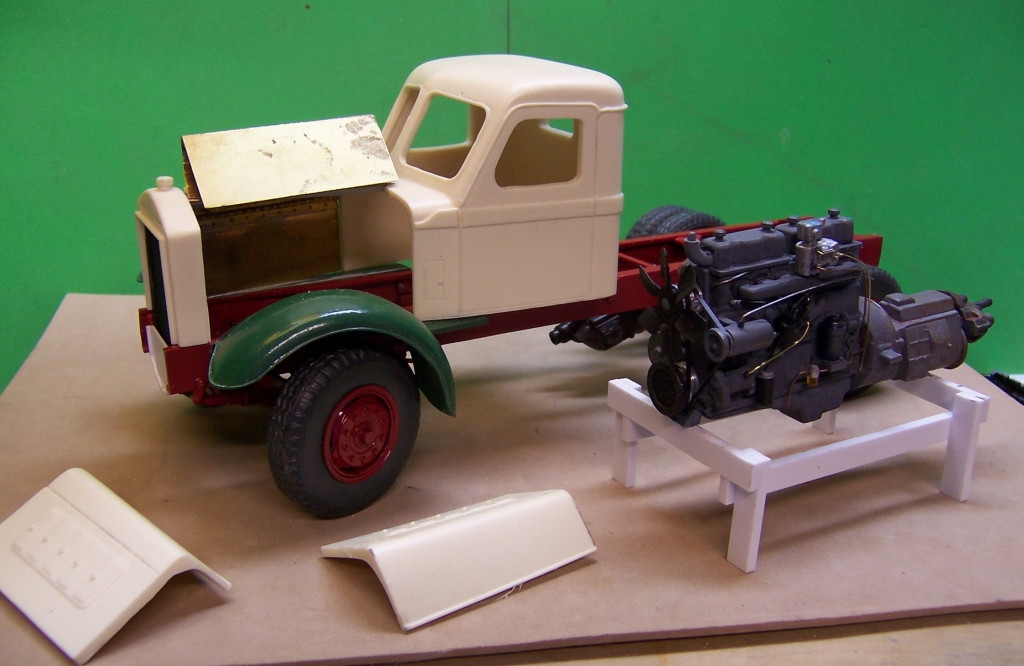
A shot of the engine bay with the hood side open. The louvers still have to be added along with a strip for the Sterling name plate.

-
1
-
-
I've heard some things about the Rubber Duck Mack that suggest that the model is not that close to the real thing. Comparisons to photos indicate some adjustments may be necessary. Not my personal observations; only what I have heard from others who have done the research.
-
1
-
-
That's been my experience with AITM castings as well. There is very little prep work that needs to be done with them before painting.
-
1
-
-
Good job, Brian. How was your experience working with the resin? Looks like it took the paint really well.
-
1
-


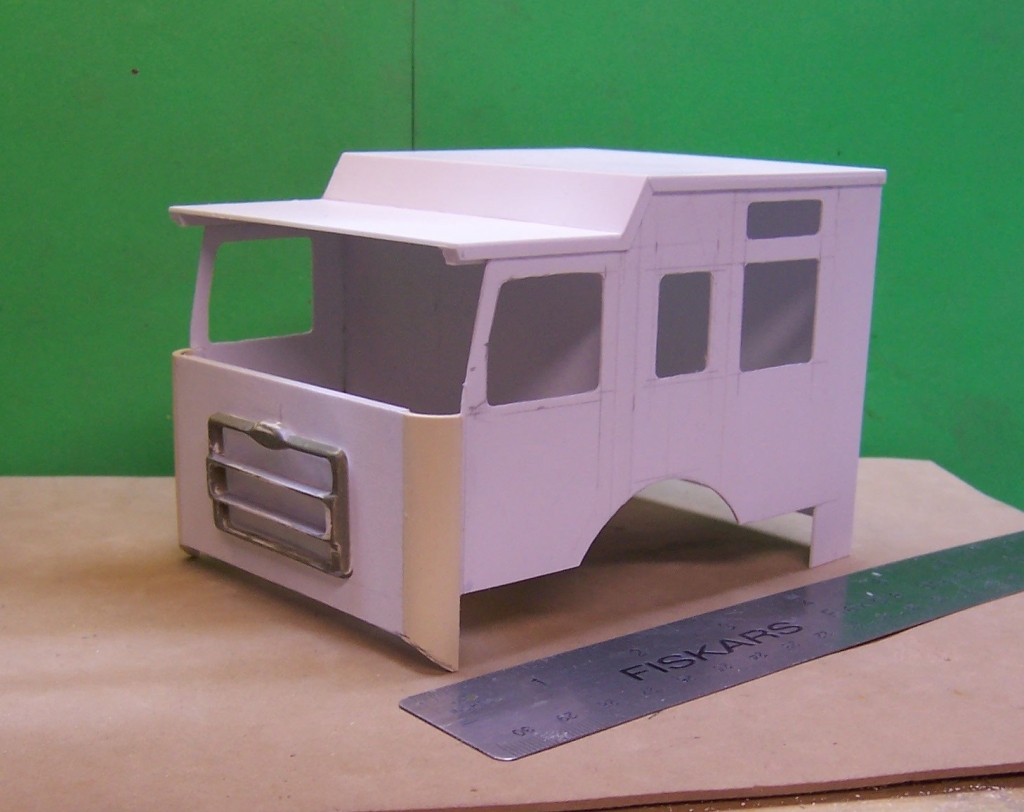
Pierce Enforcer
in Model Truck Workbench
Posted
I used the Trumpeter kit for the chassis. It was lengthened about 12 scale inches. The interior tub also came from the kit but has been heavily modified. The cab itself is scratch built. The only things that came from other sources are the rear view mirrors (Trumpeter again) and the headlight bezels (Daniel Gailloux castings). The castings were modified with a curved base to fit the curve of the cab corners. Then they were painted gloss black and then Alclad chrome. Decals are computer generated and ALPS printed.
Try and find some old AMT or Revell kits of police cars, ambulances or the ALF 900 series trucks. They have lights/beacons that you can use. Once model shows come back you may also find some in the parts boxes that many vendors bring with them.