

Chariots of Fire
-
Content count
155 -
Joined
-
Last visited
-
Days Won
13
Posts posted by Chariots of Fire
-
-
Some of it is decals that are in the kits. Other times it is a matter of masking to separate different colors. There are some specialty decal producers out there that can make up individual decal sets but they can be costly. Other options include colored tapes that can be used for straight line color separations. Very narrow tapes (1/64" width) can be used for pin striping. Depends on what you are looking for.
IF you are thinking of getting into painting big rigs start off with simple one color paint jobs and get the hang of it. Focus on getting the paint right so that there is no running, crazing or orange peeling. Use a good primer and lay on the color in thin coats to build it up.
There are plenty of builders out there who can coach you on doing the fancy paint jobs.
-
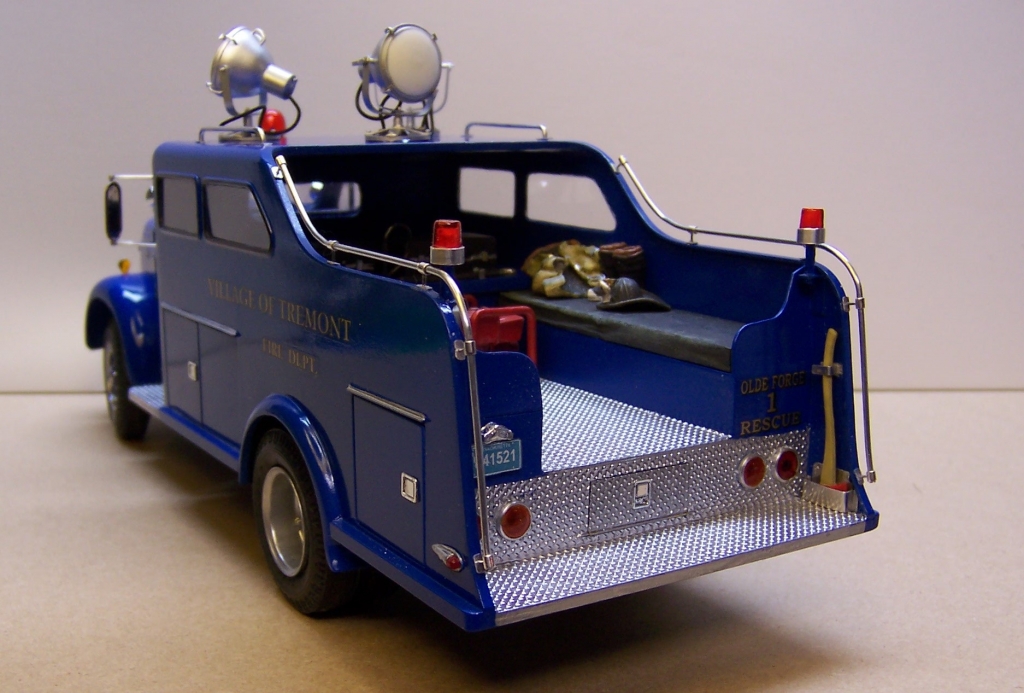
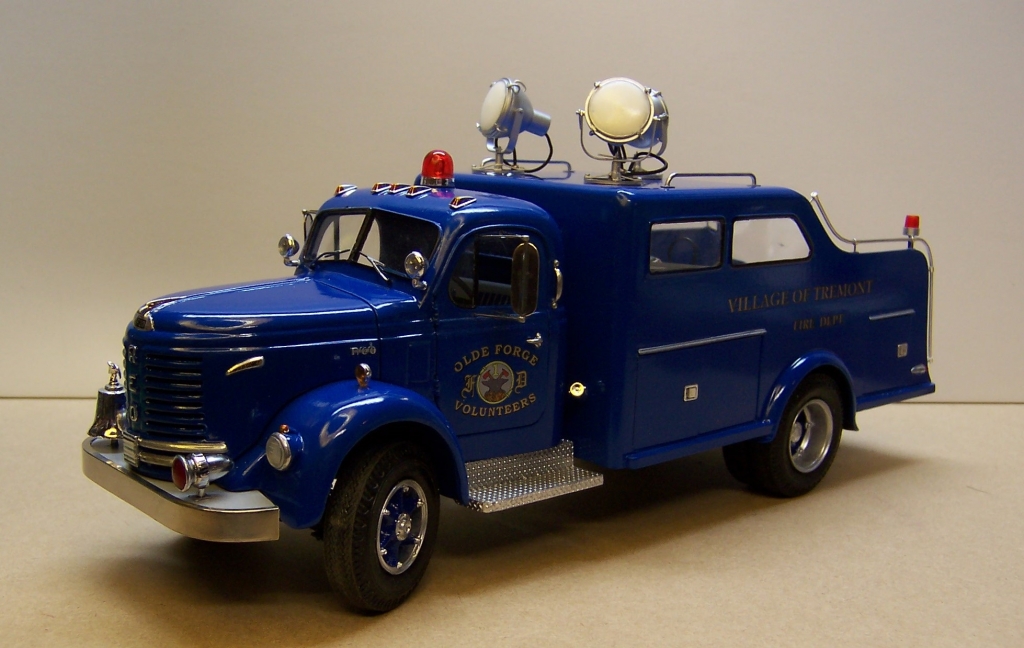
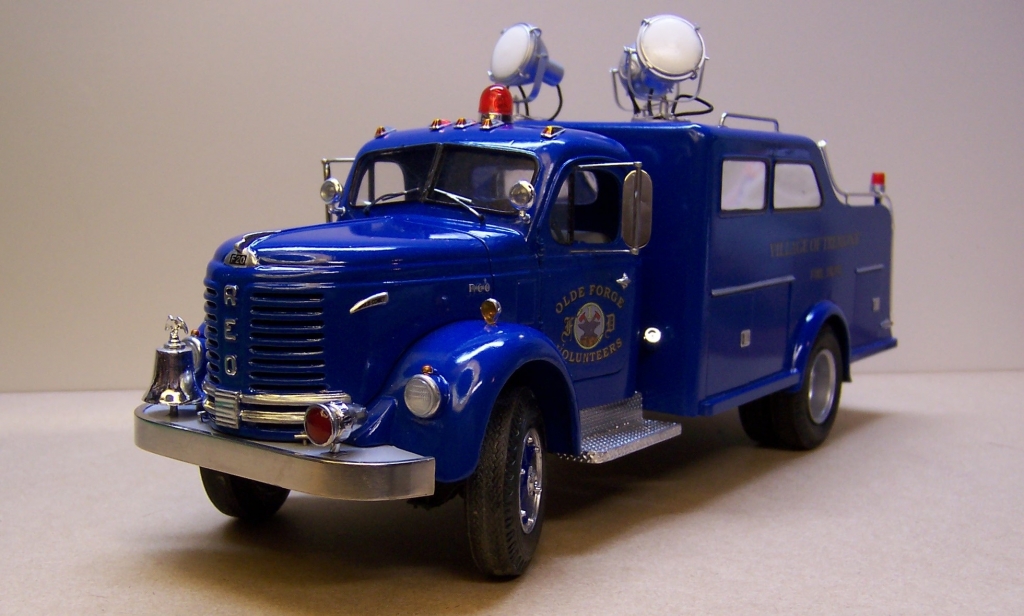
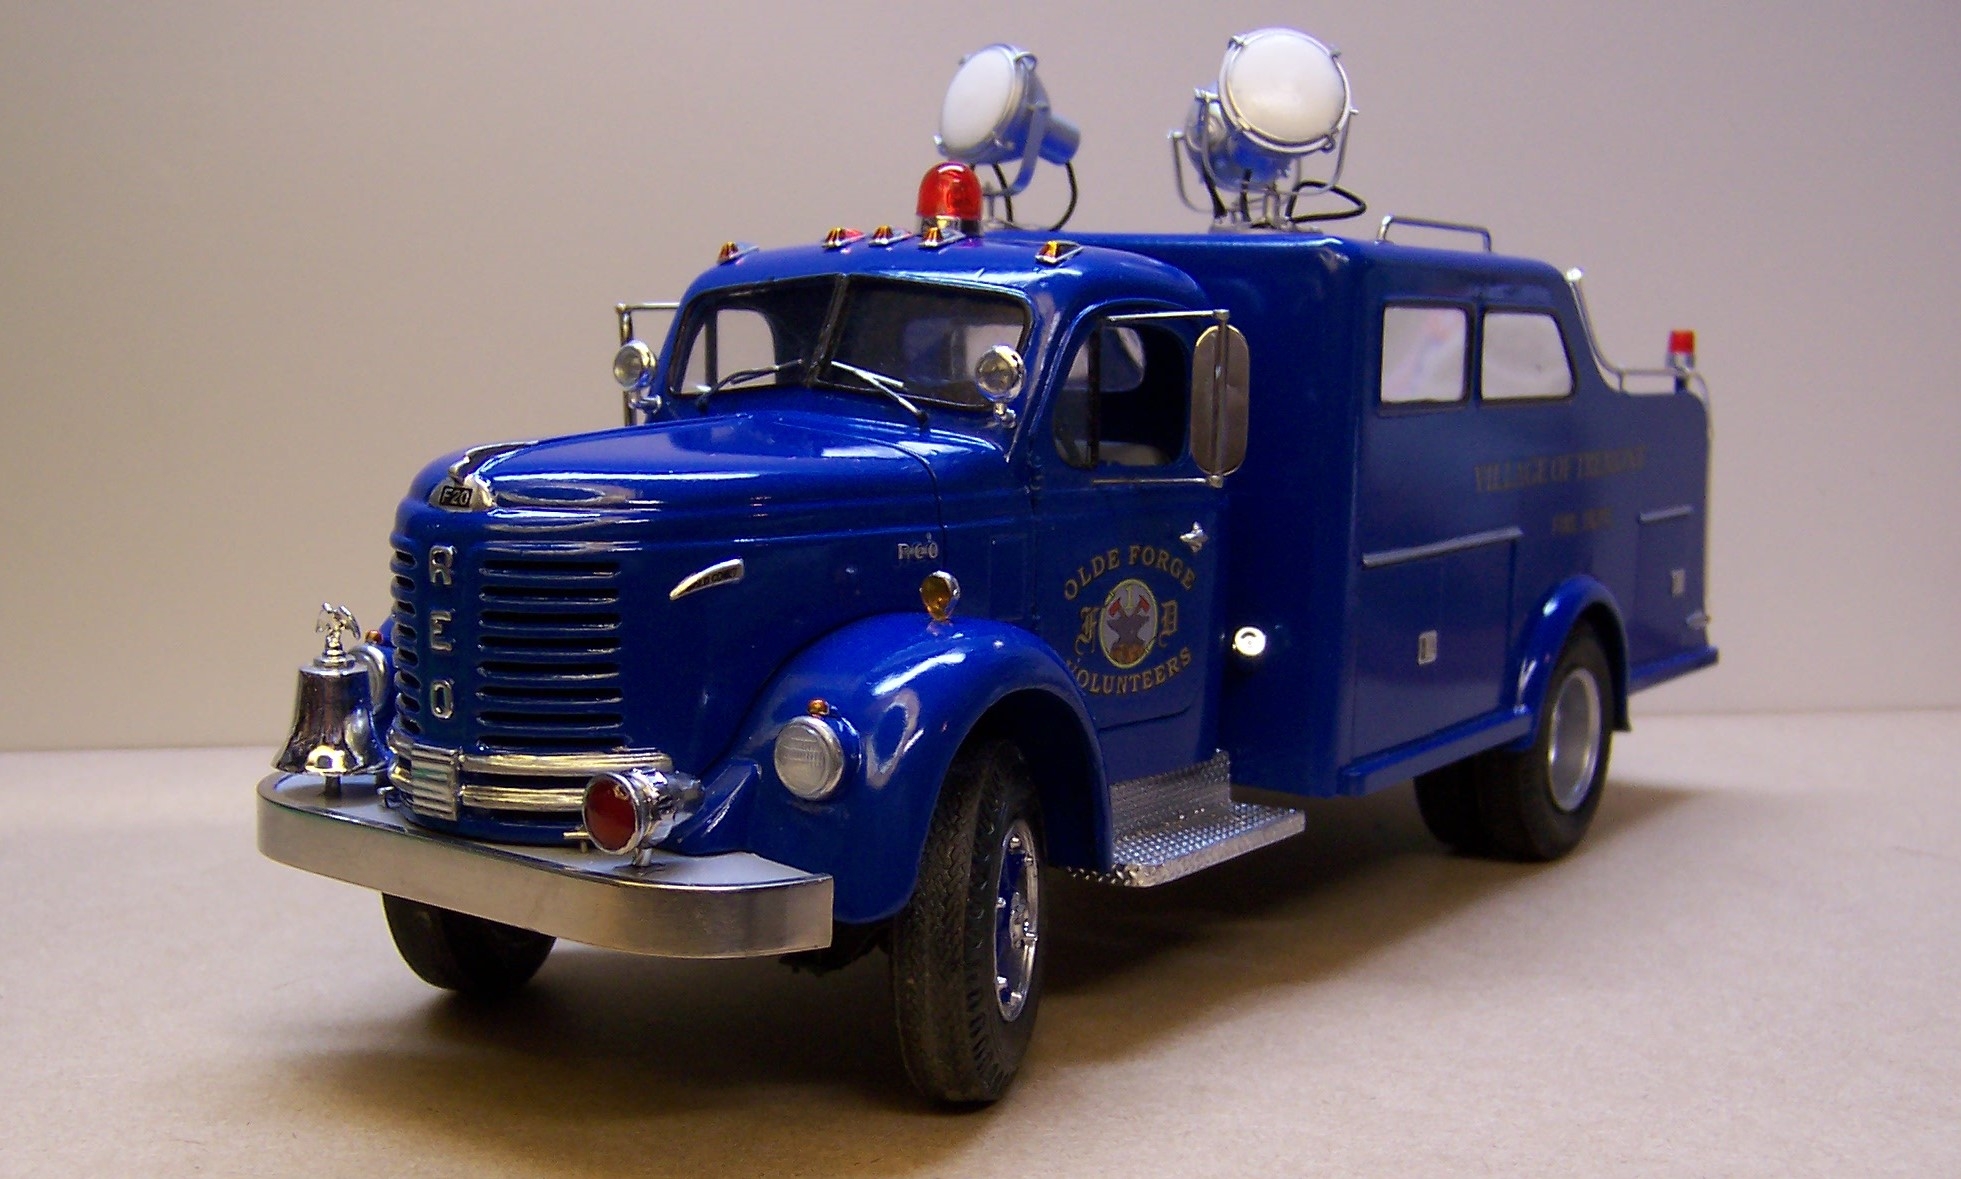
On 4/23/2021 at 11:11 PM, vincen47 said:A great looking rig. You’ve built yet another exquisite model of a fine piece of equipment. The finish on that paint is beautiful. It would gleam in an outdoor photo. Looks like the volunteers spend a lot of time washing and polishing the truck to a perfect shine.
I may just do that, Vince! Outside photos can be really nice.
-
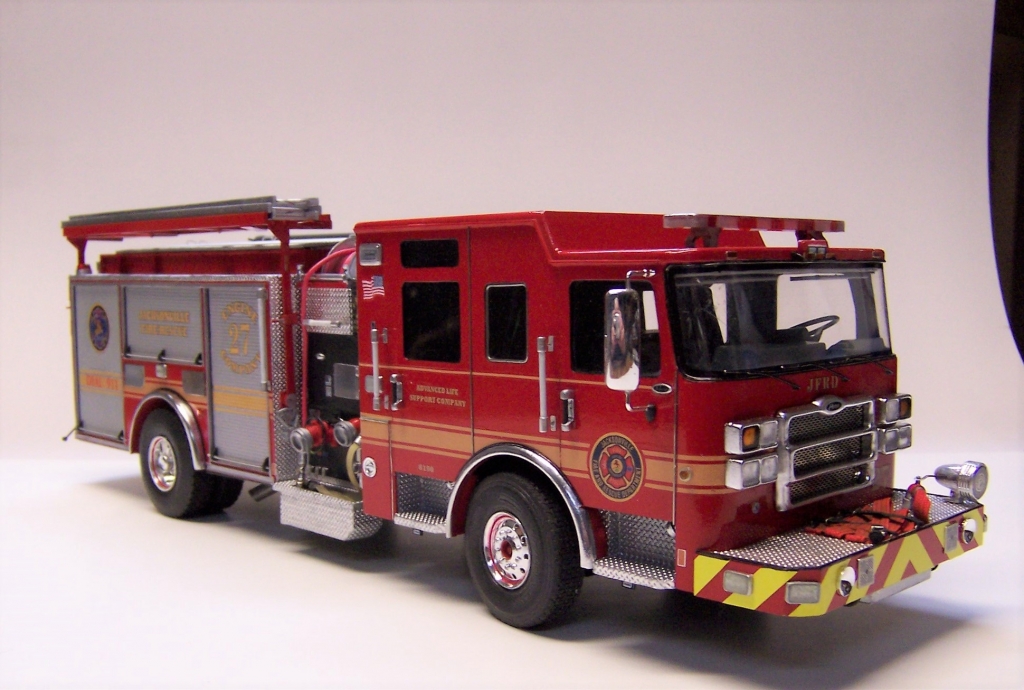
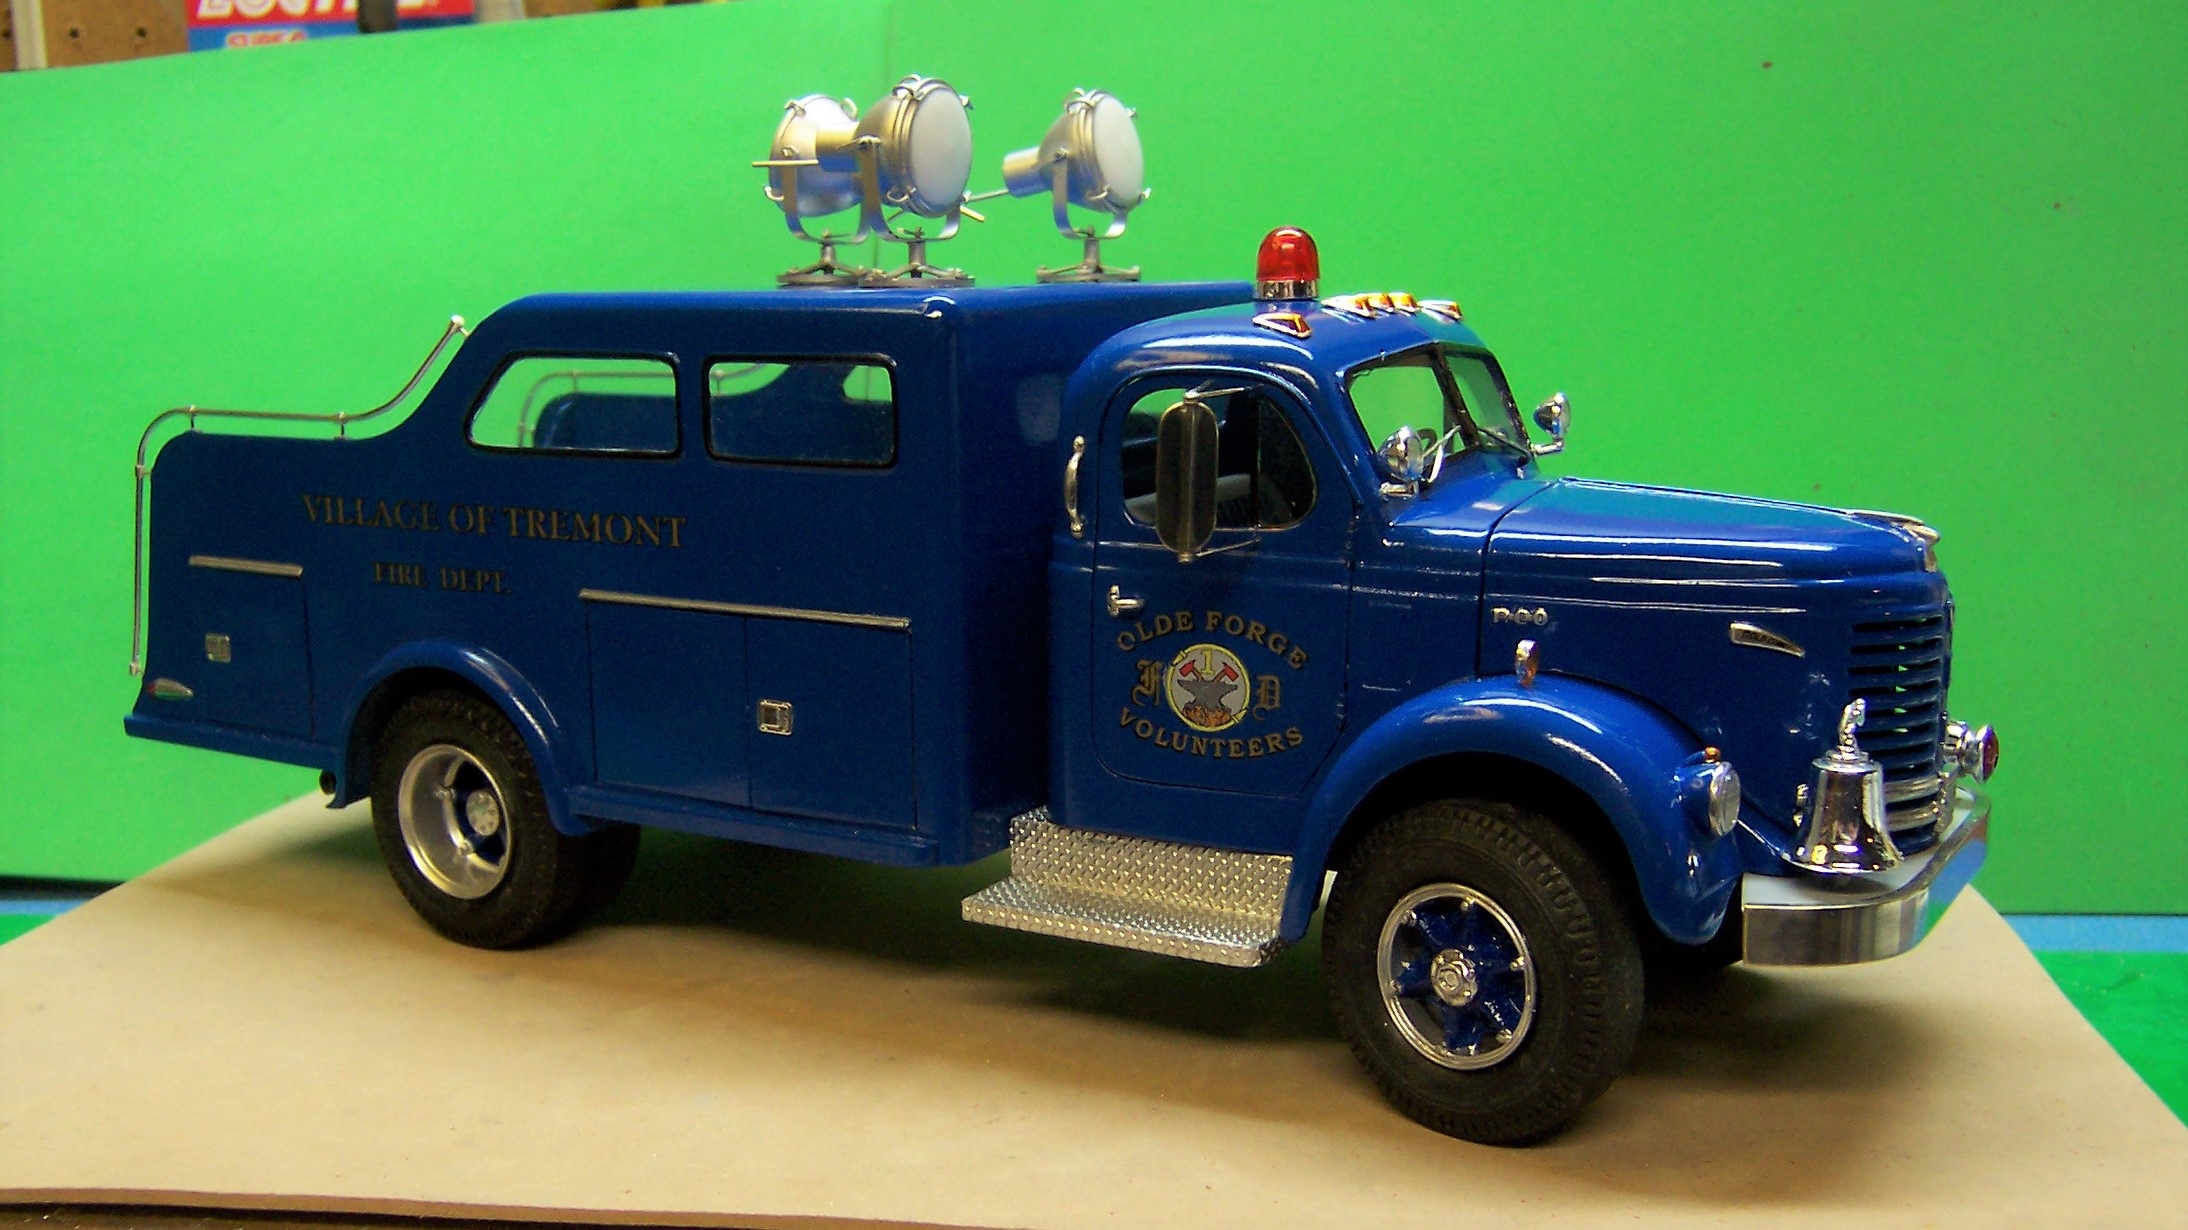
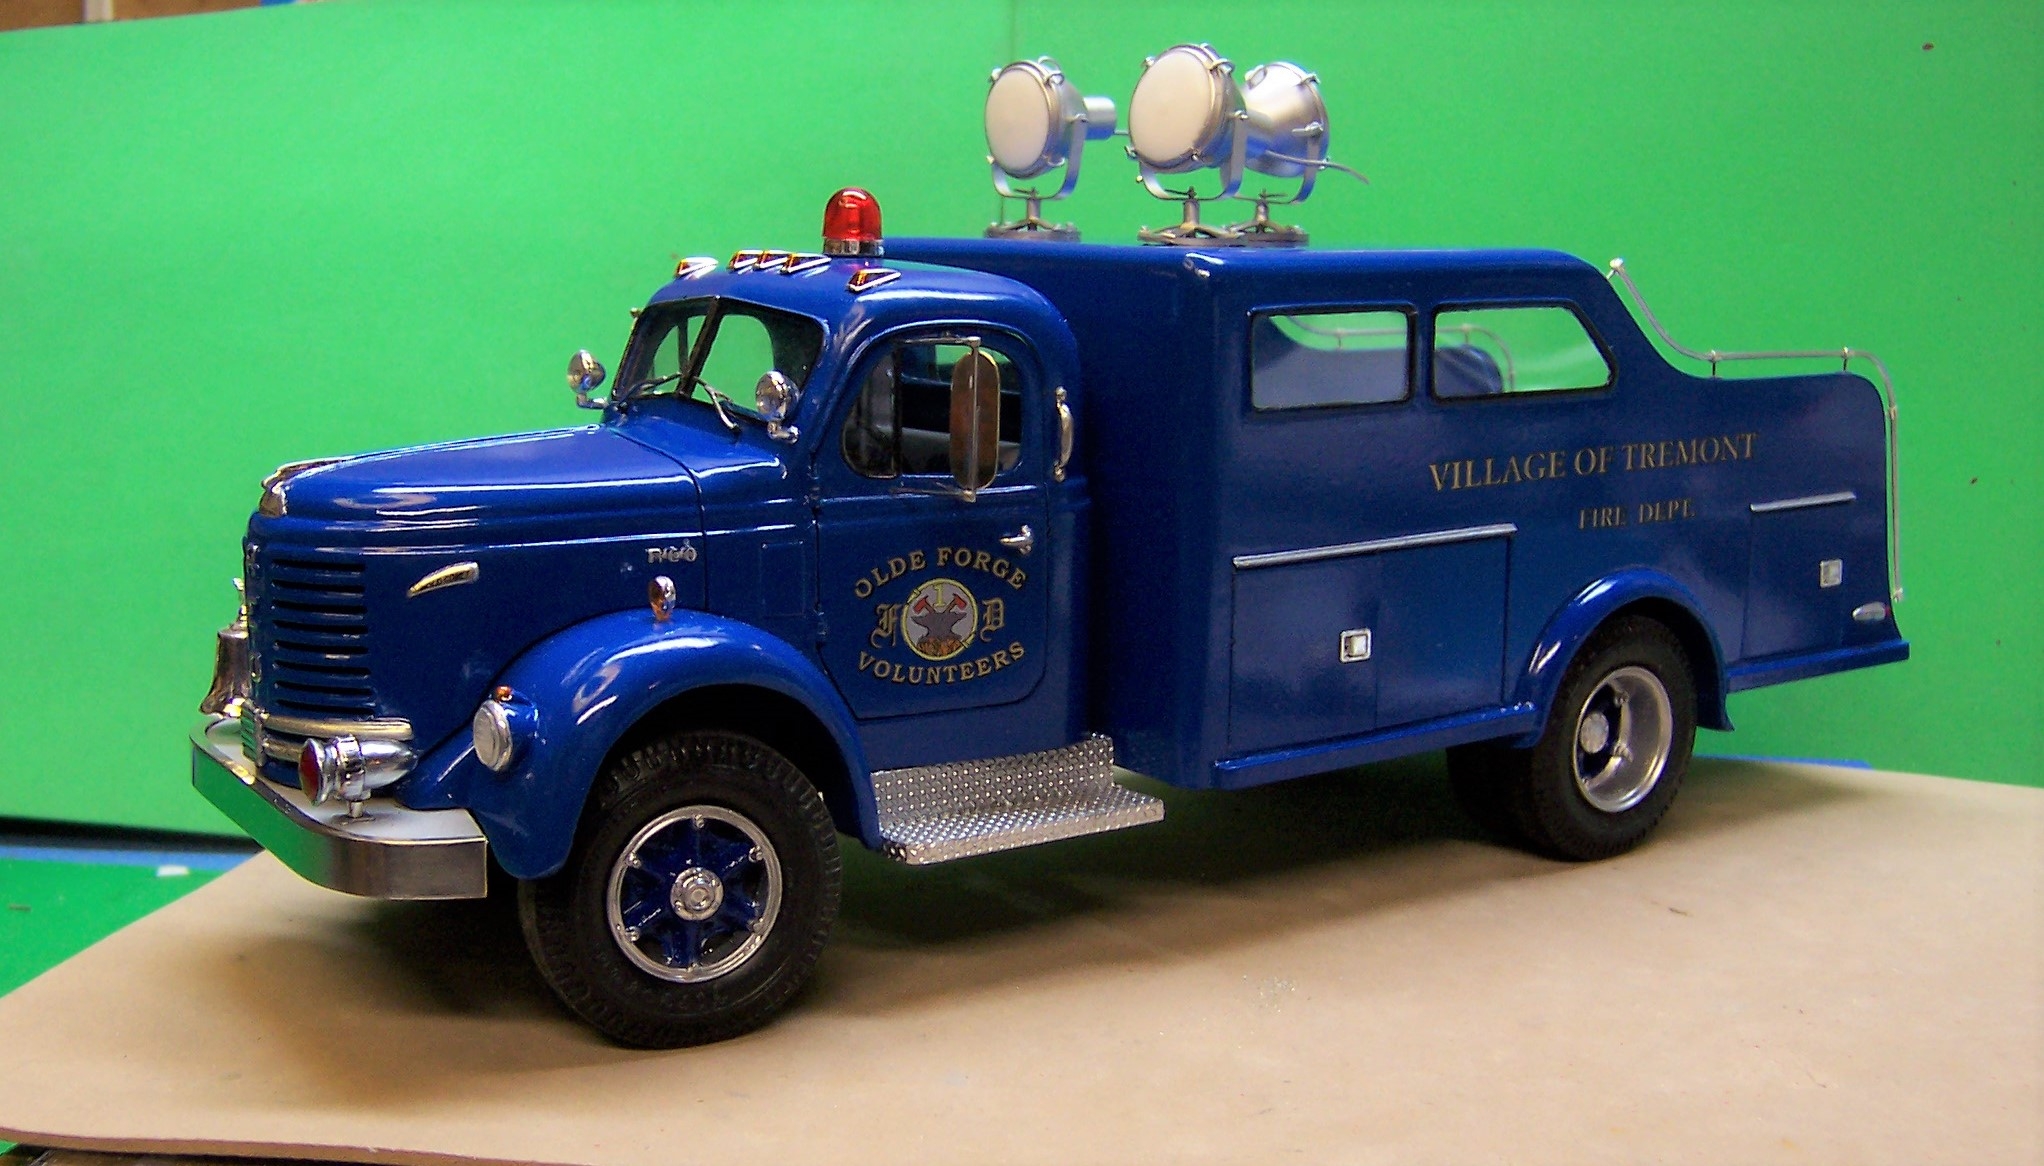
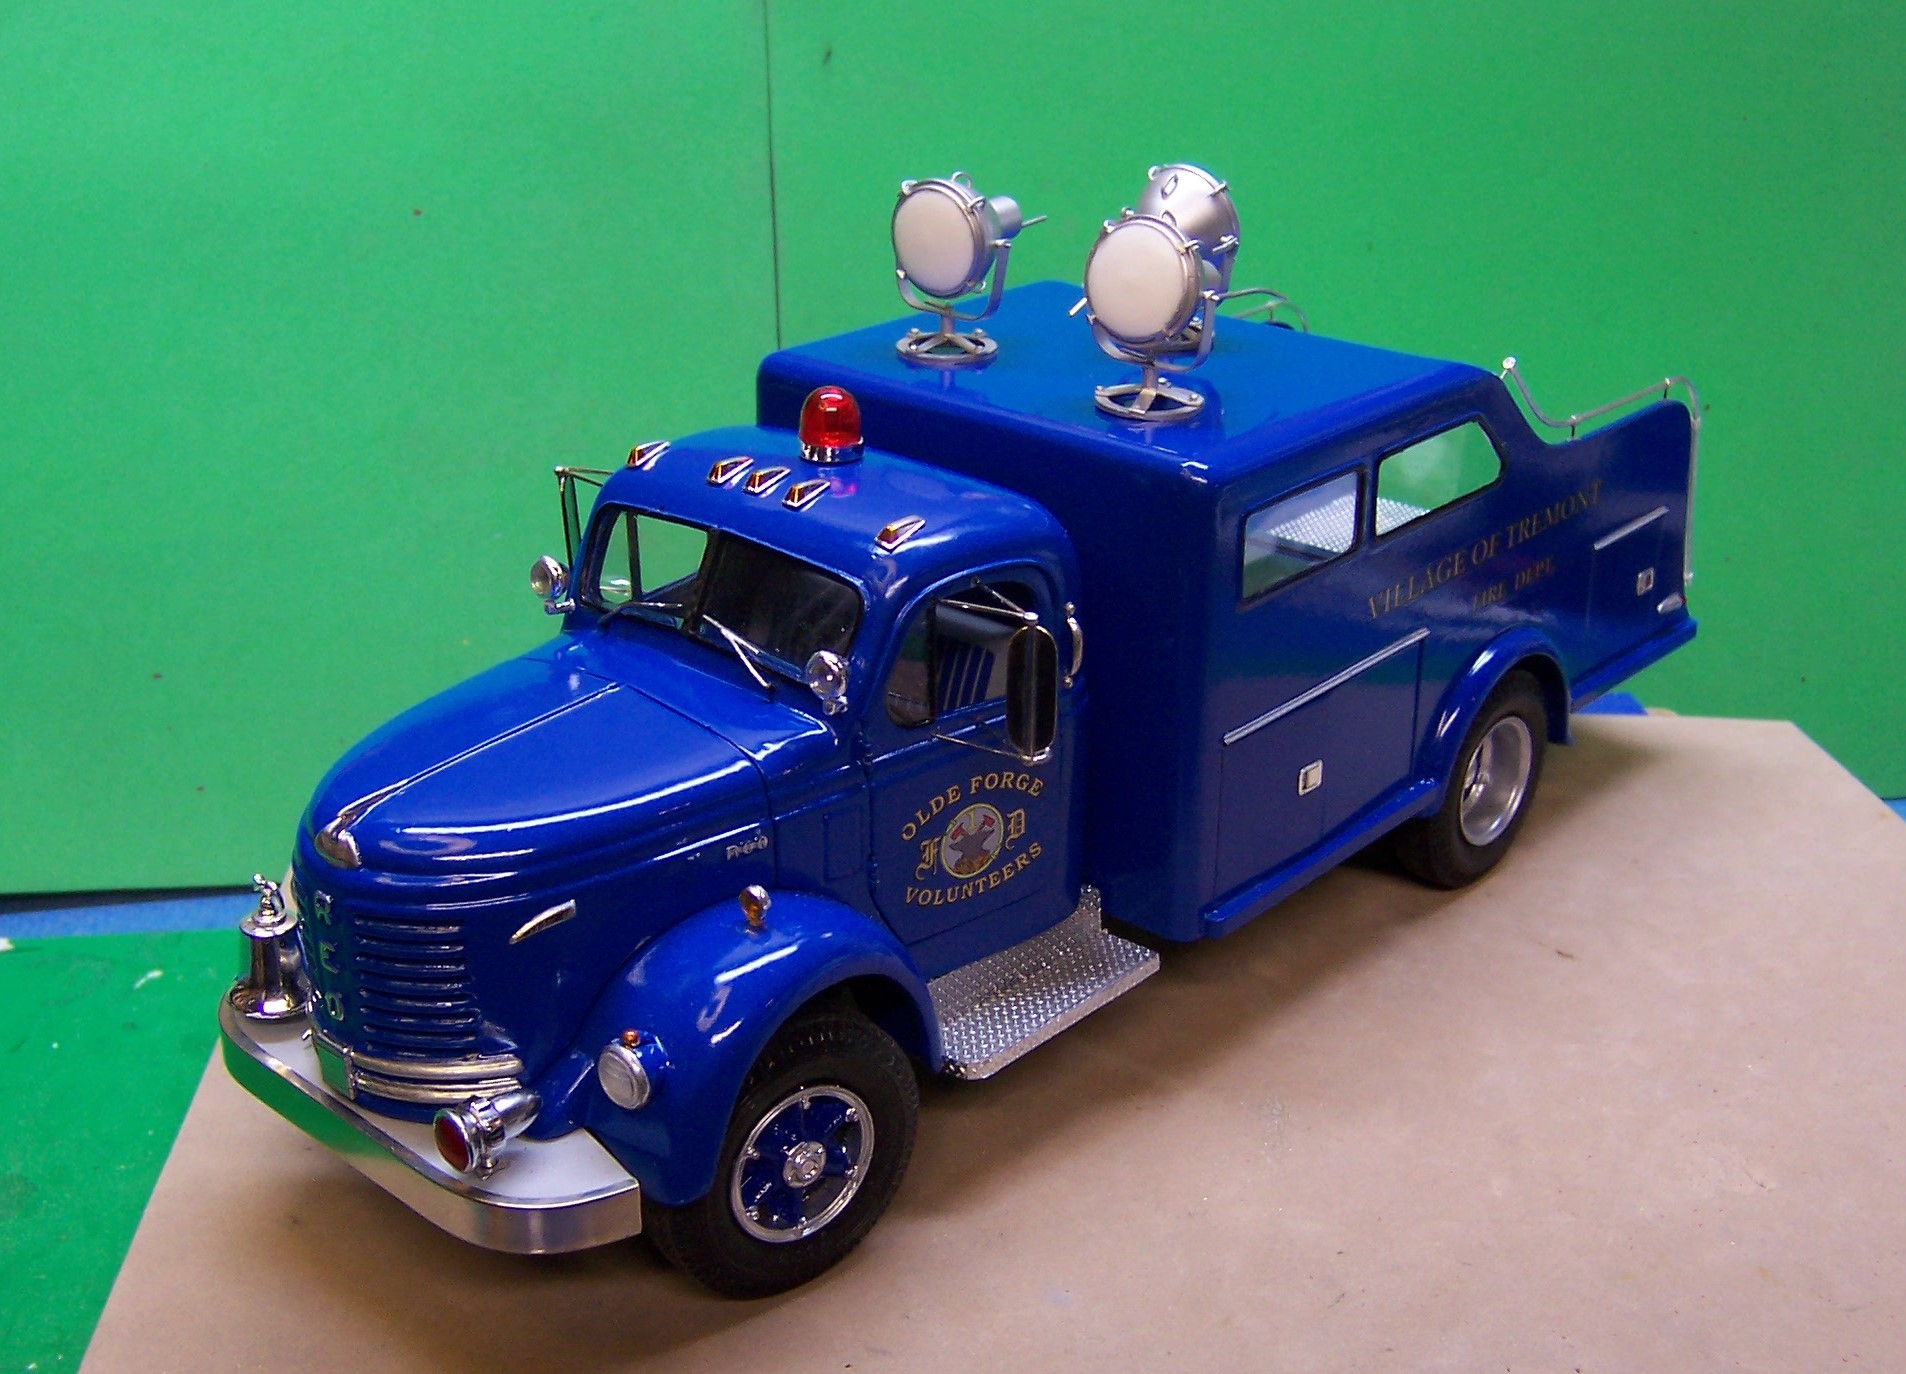
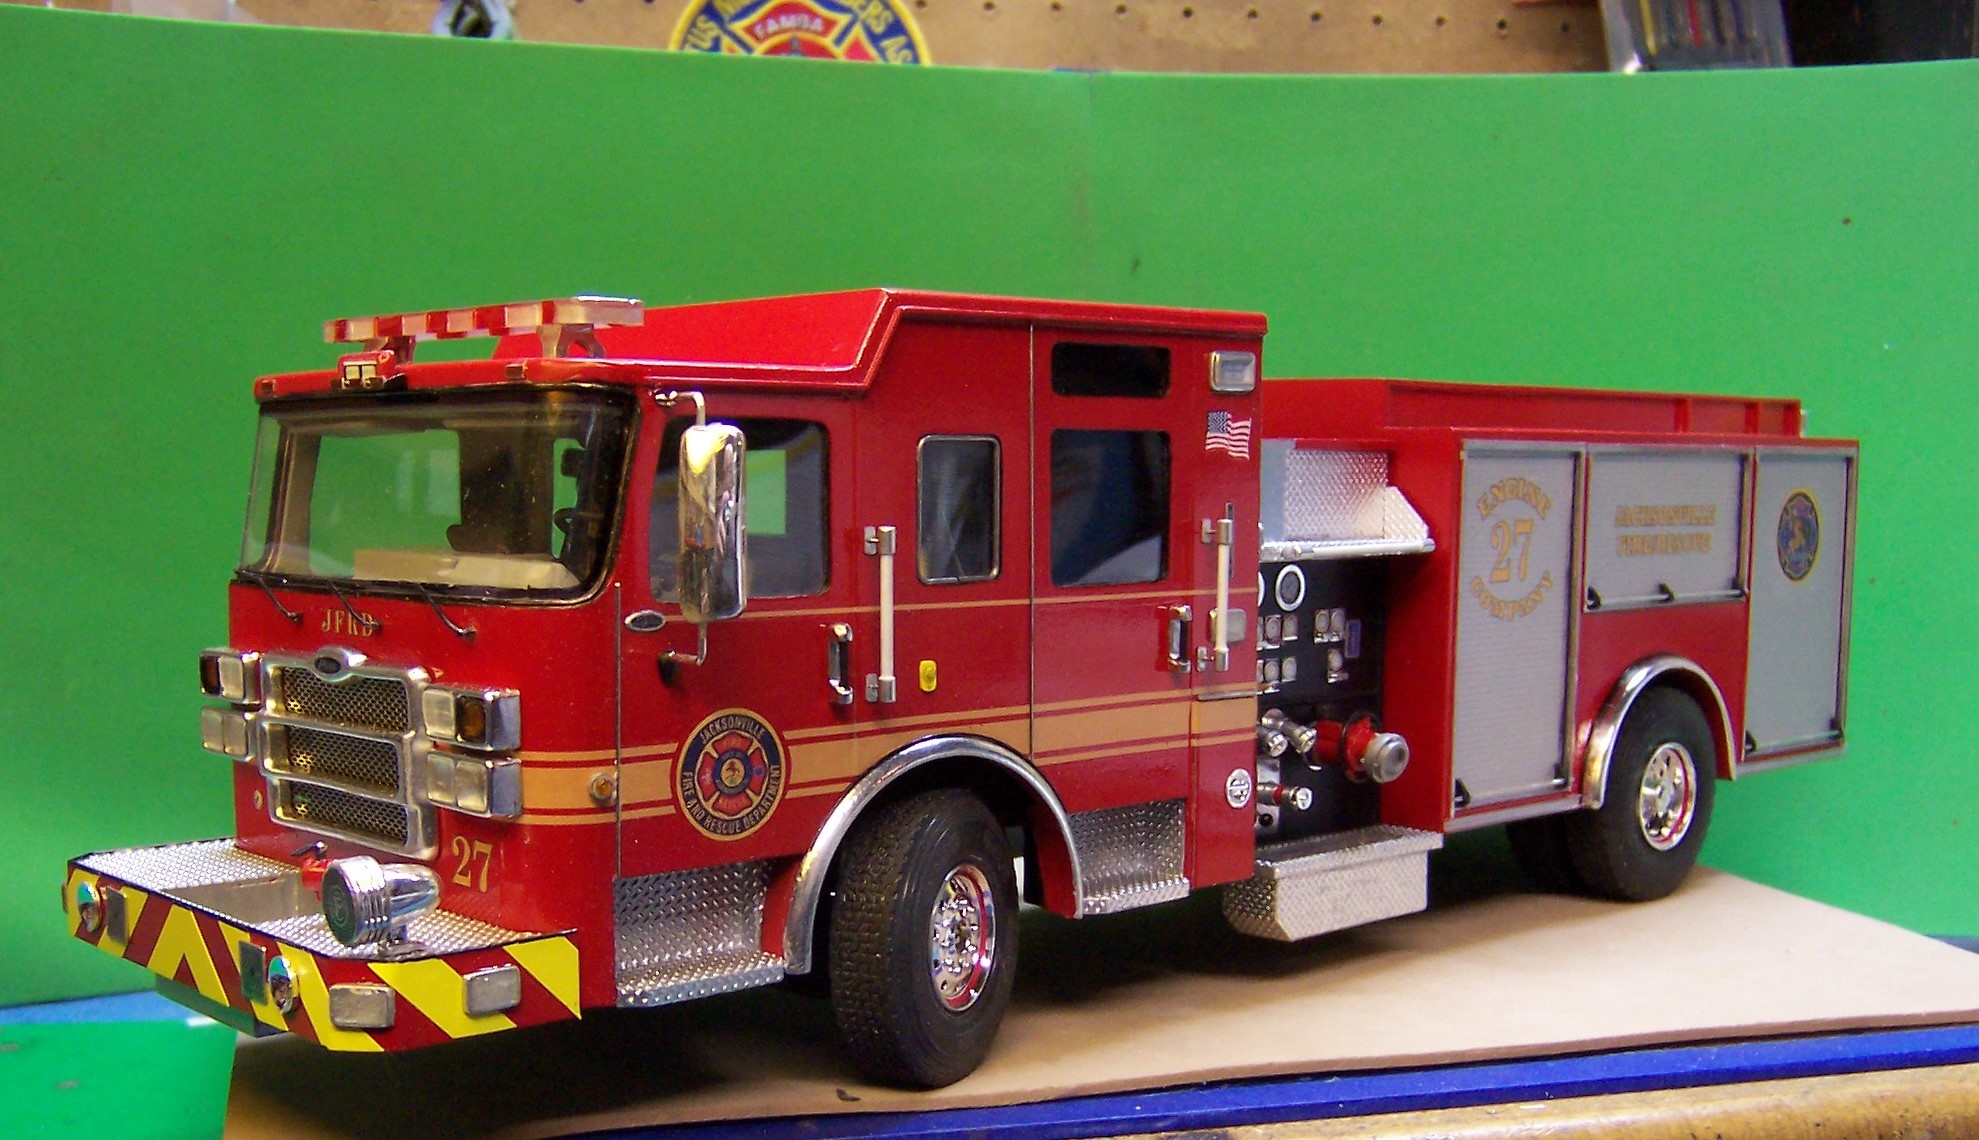
With the installation of some equipment and tools this build is now complete. On to the next one!


-
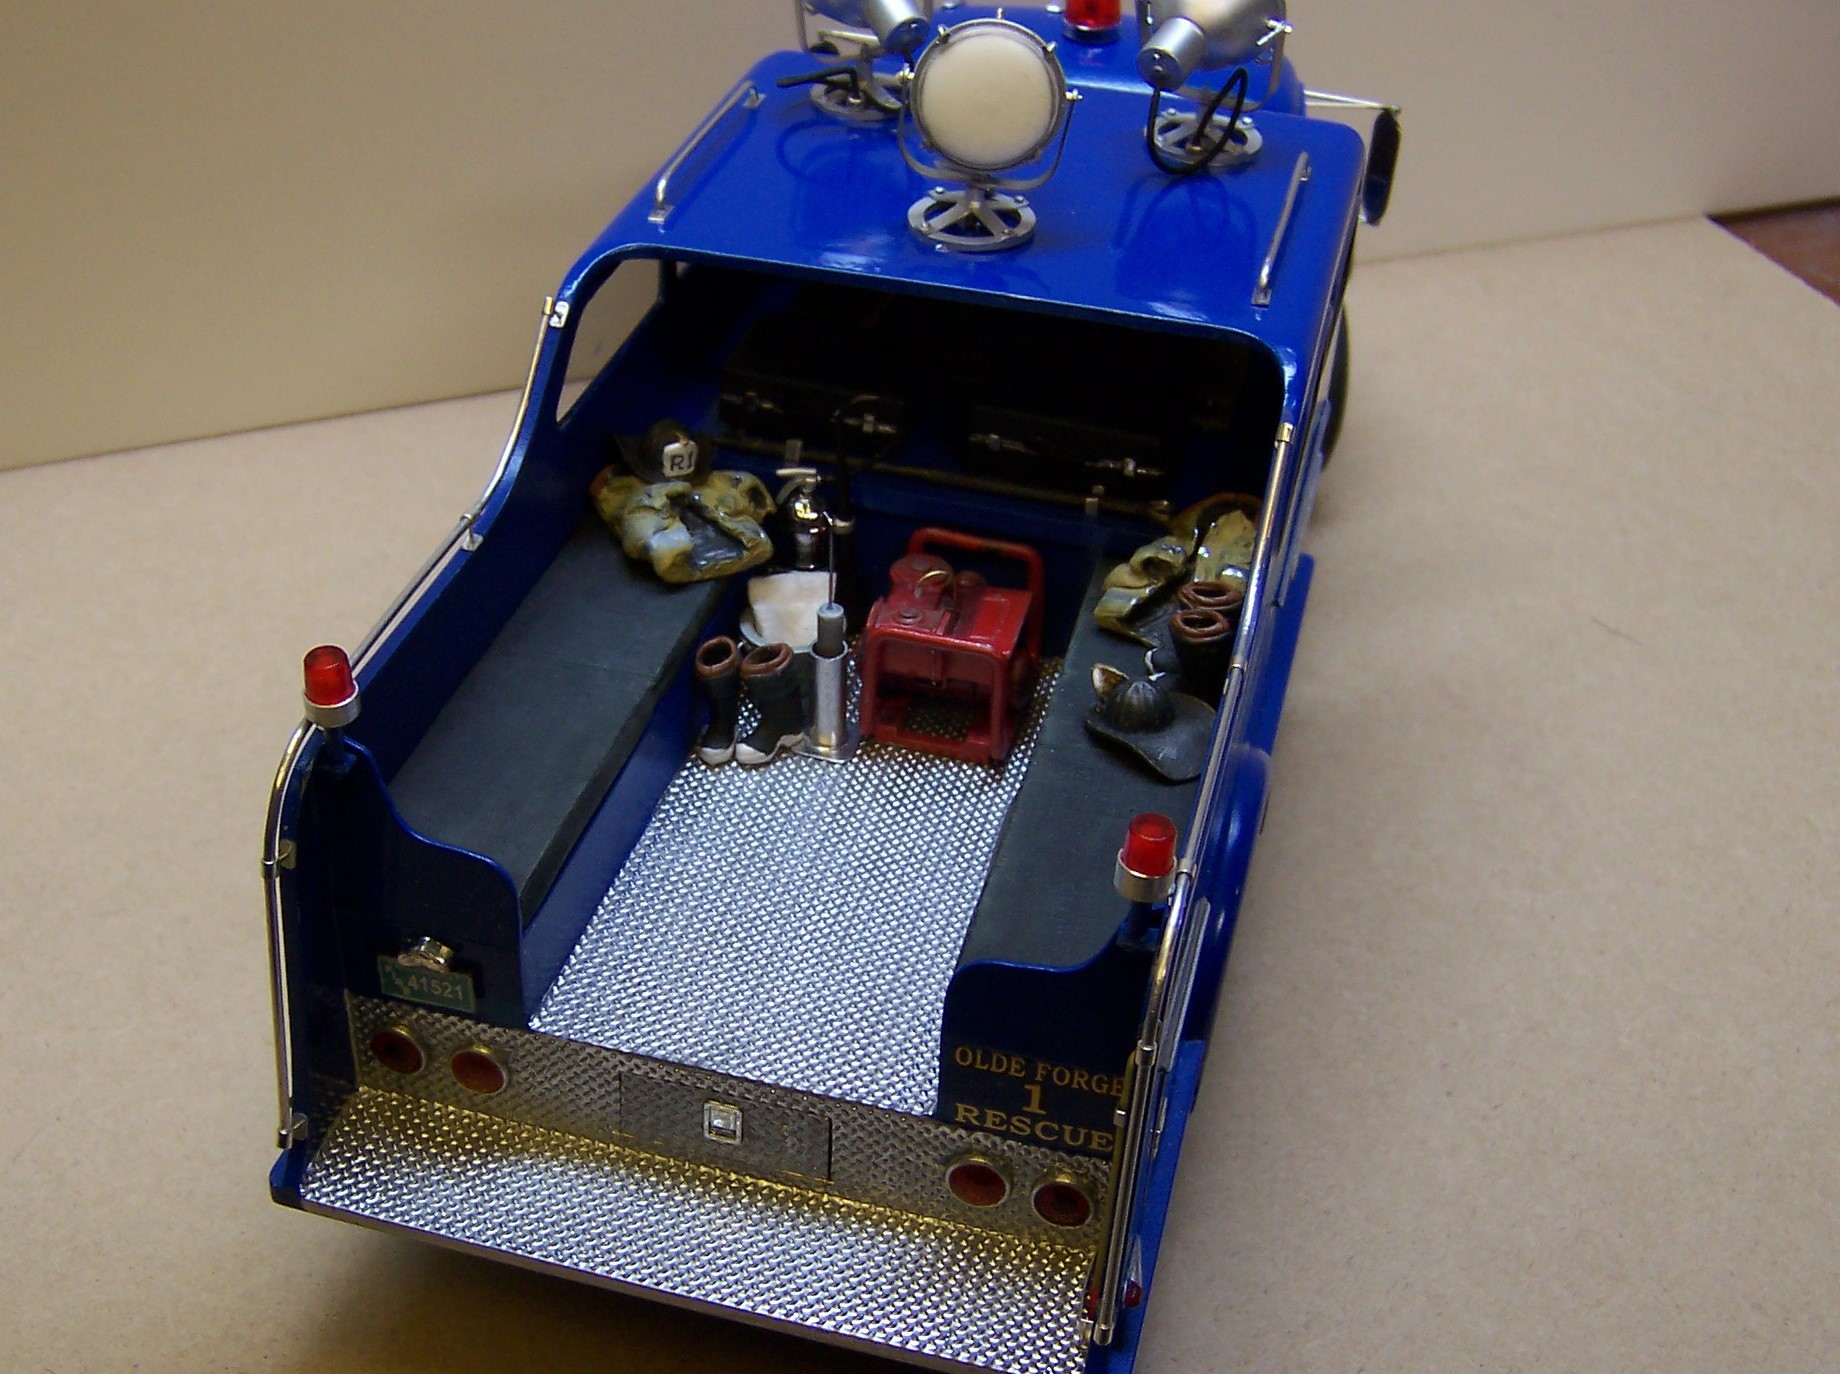
The cab, body and flood lights are now permanently mounted. Work continues on the compartment spaces and adding tools and equipment.
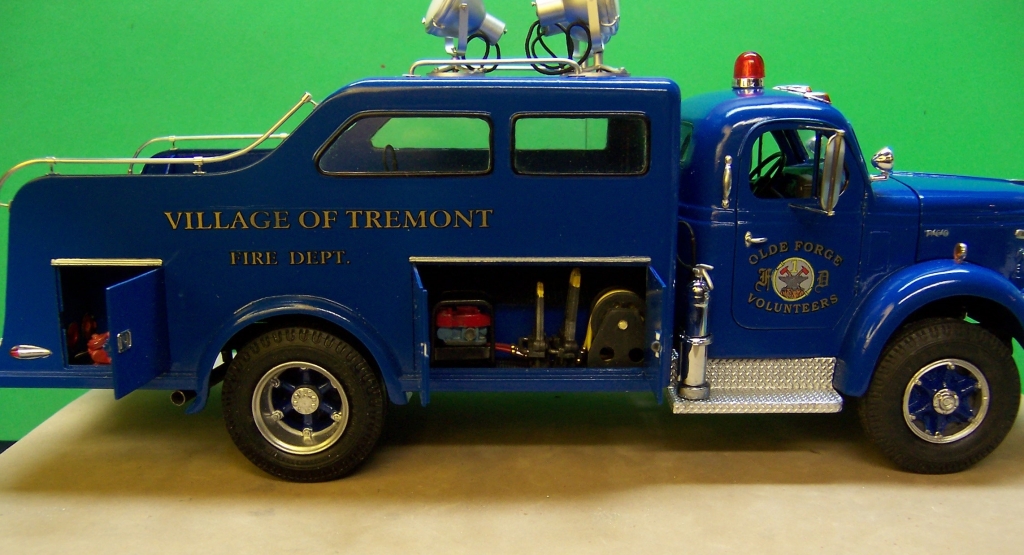
Two sets of jaws, hydraulic motor and hydraulic hose reel in the right front.

K-12 saw and gas can in the right rear.
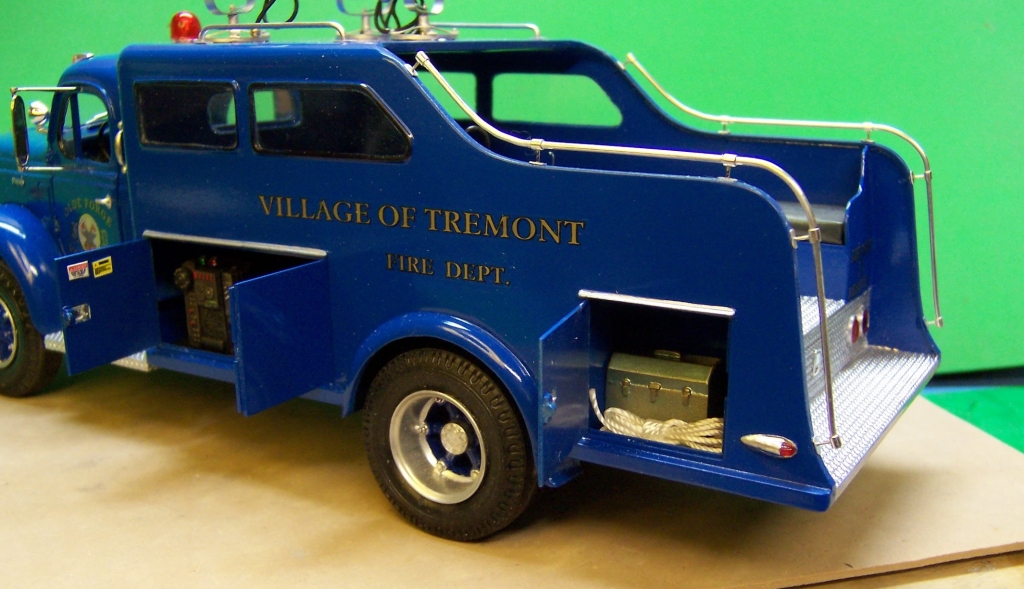
Tool box and ropes in the left rear.
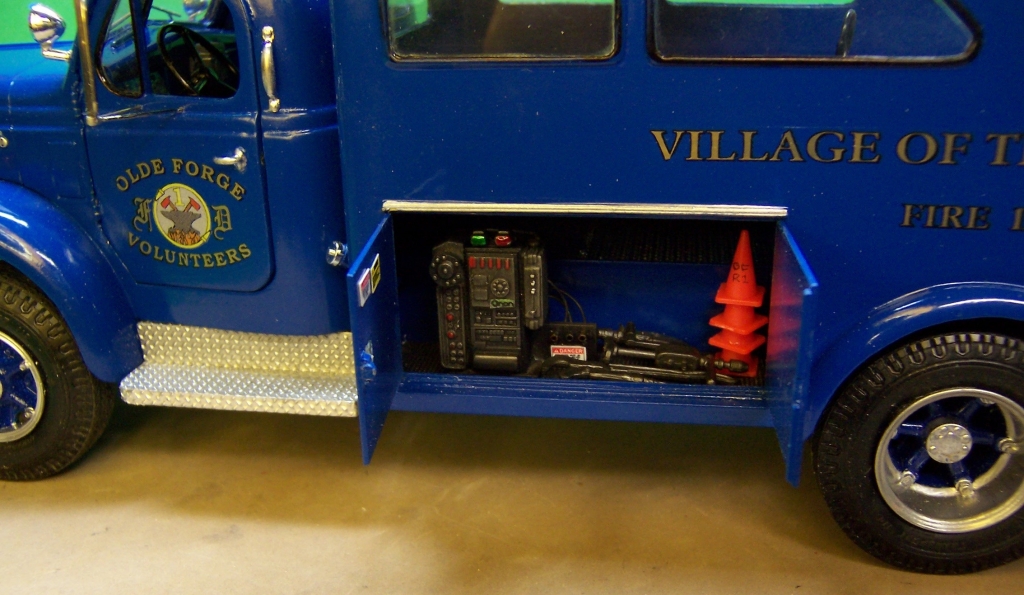
Floodlight controls and connections for other lighting, tools and traffic cones in the left front compartment.

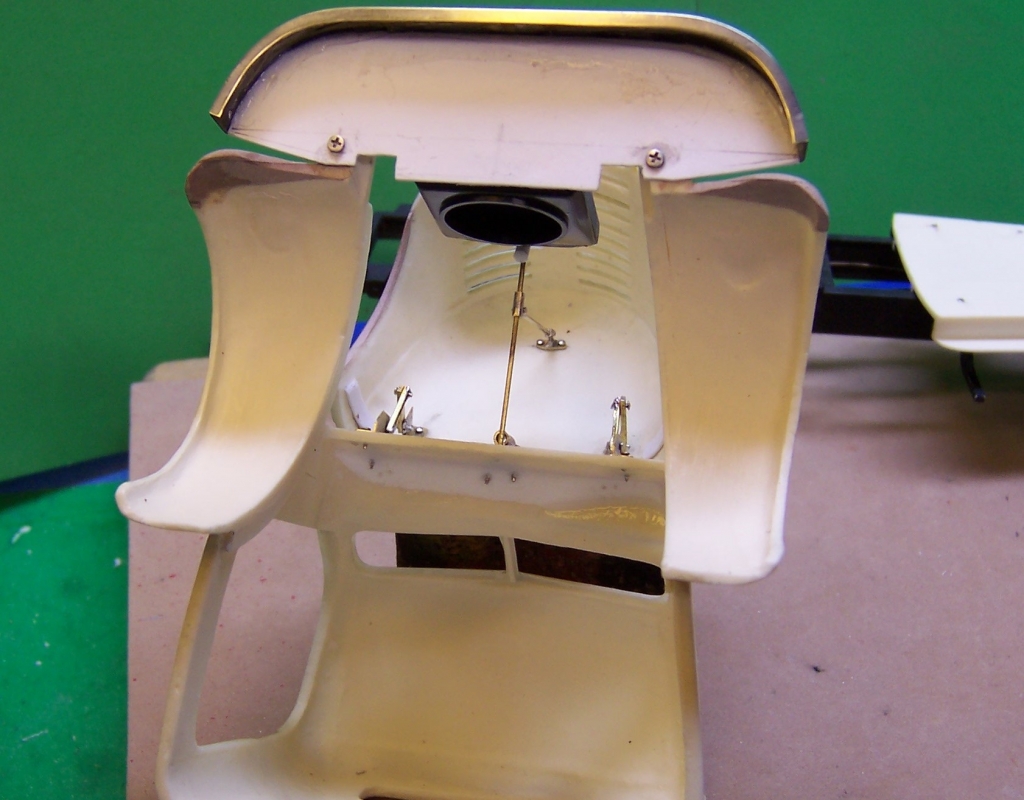
Period radio and speaker in the cab on the dash. Hood is raised with hinges at the firewall and is propped open with a sliding rod that connects hood to a rod between firewall and radiator.
-
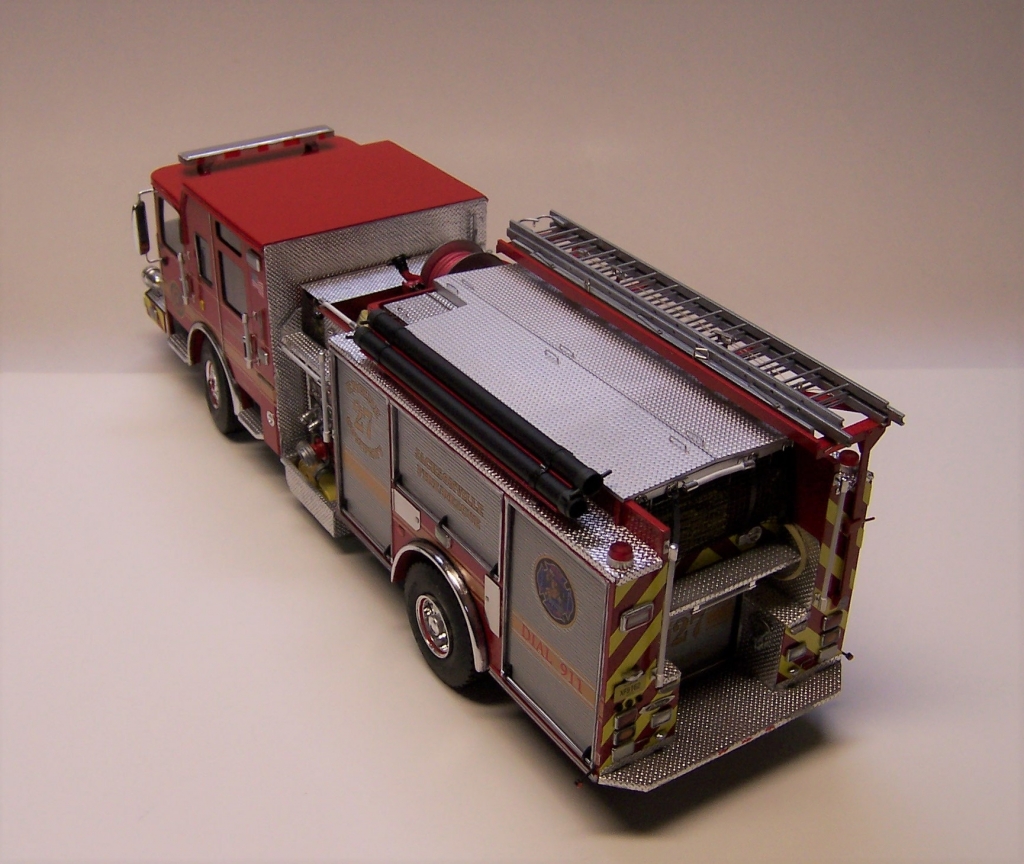
A lot finished since the last post. Not much more to do before it can go into "service". A fair amount of work to fill the compartments with equipment.


-
I'll be checking out your progress!😉
-
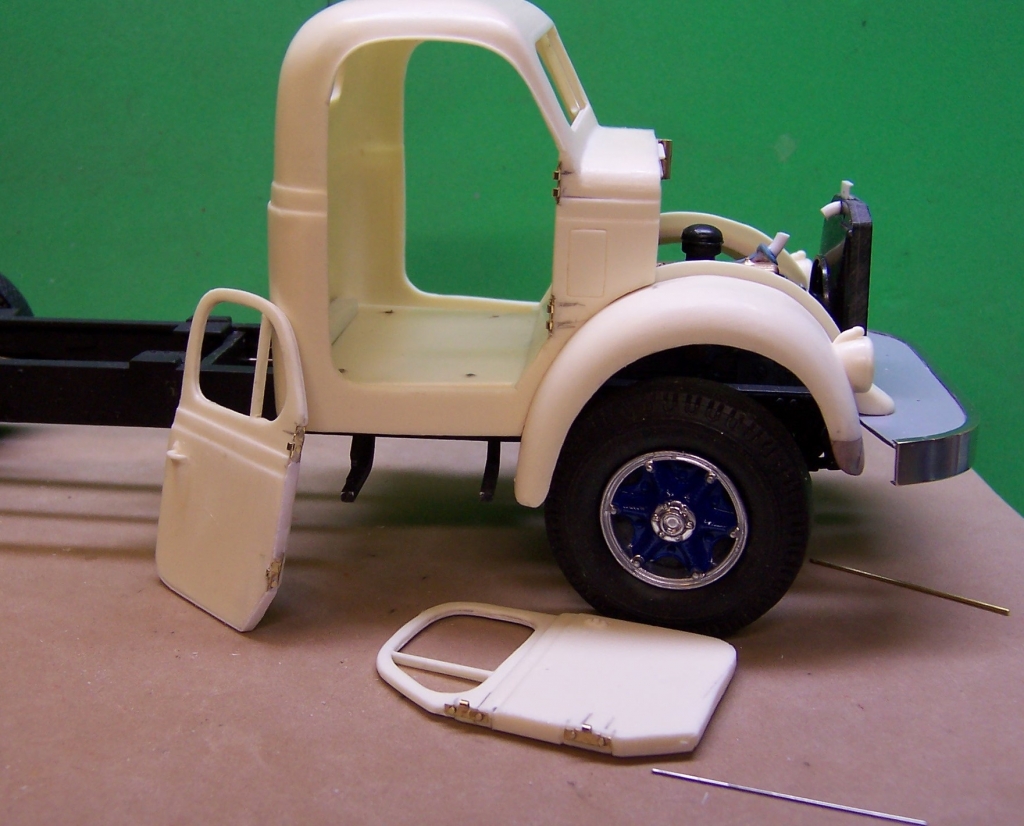
Got the door project finished. Now it's on to making some gaskets for the body windows.
That little odd shaped piece in the front is actually a stack of tiny magnets. Going to find a way to use them in keeping the doors closed!


-
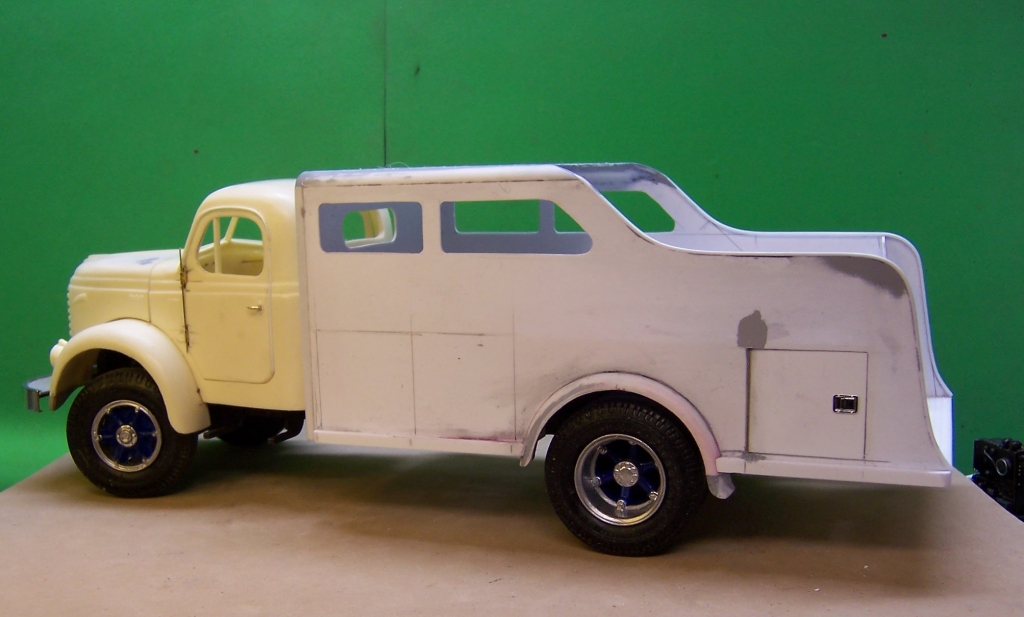
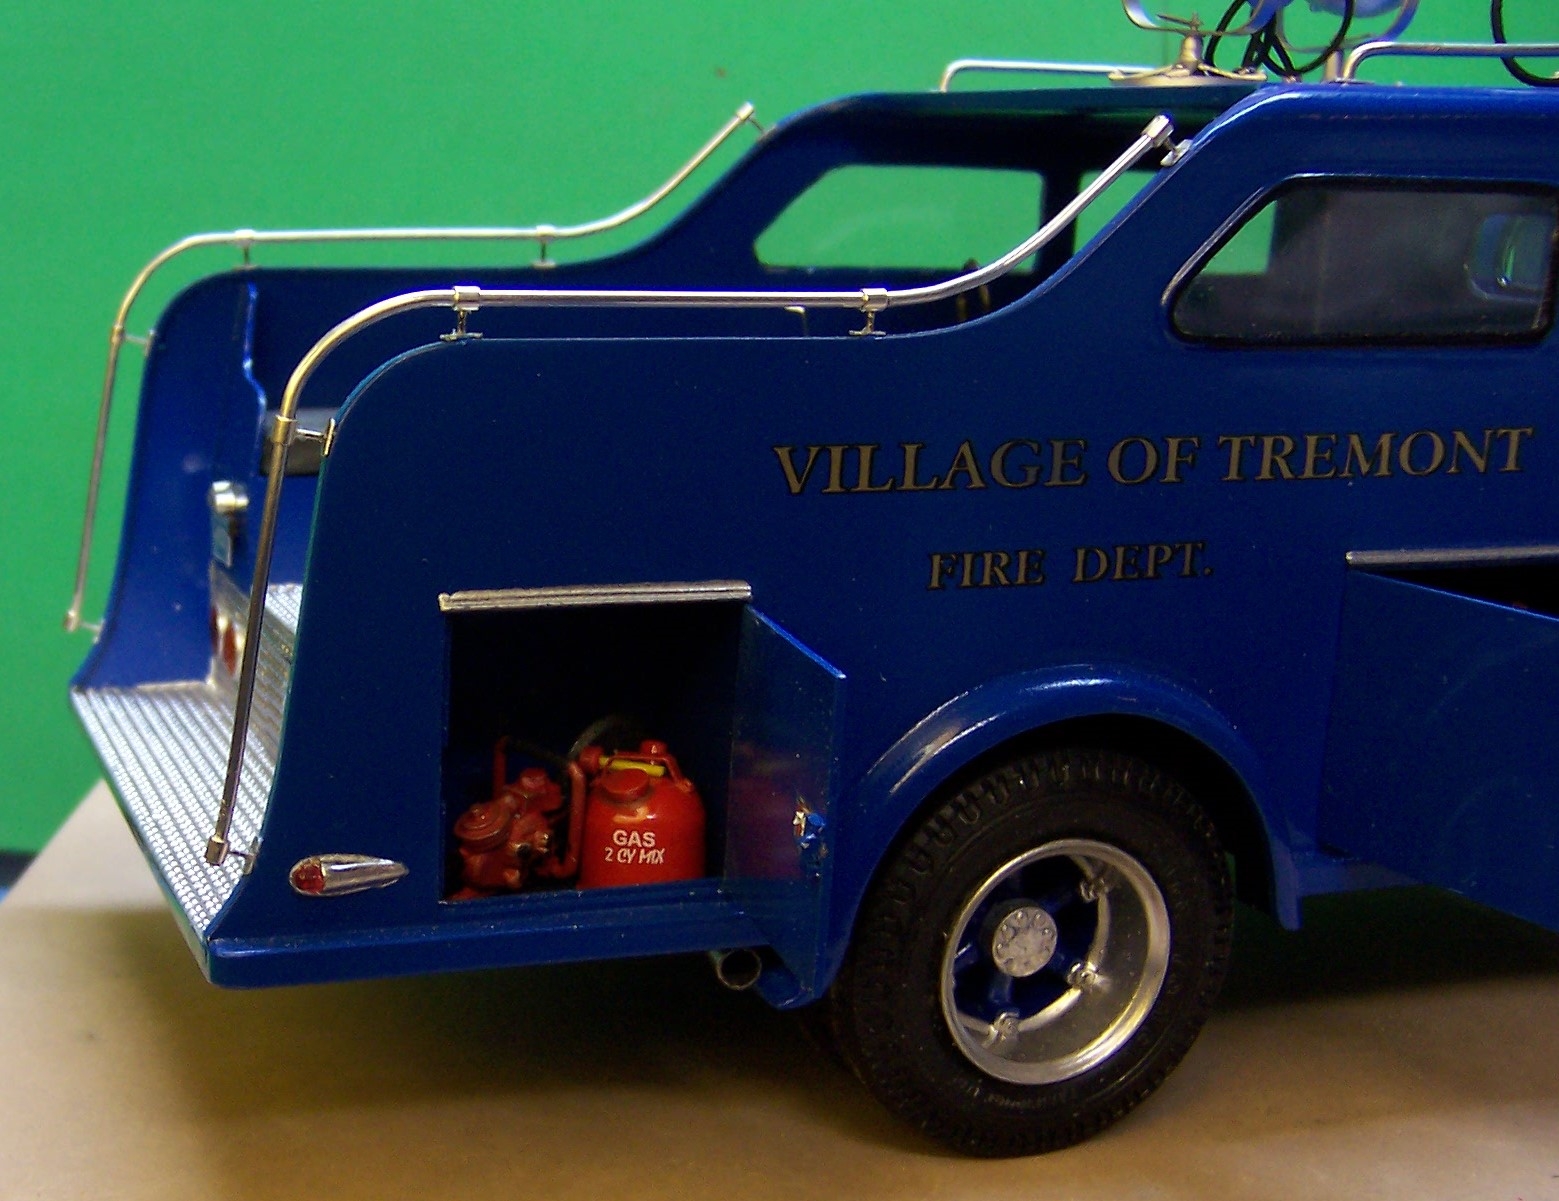
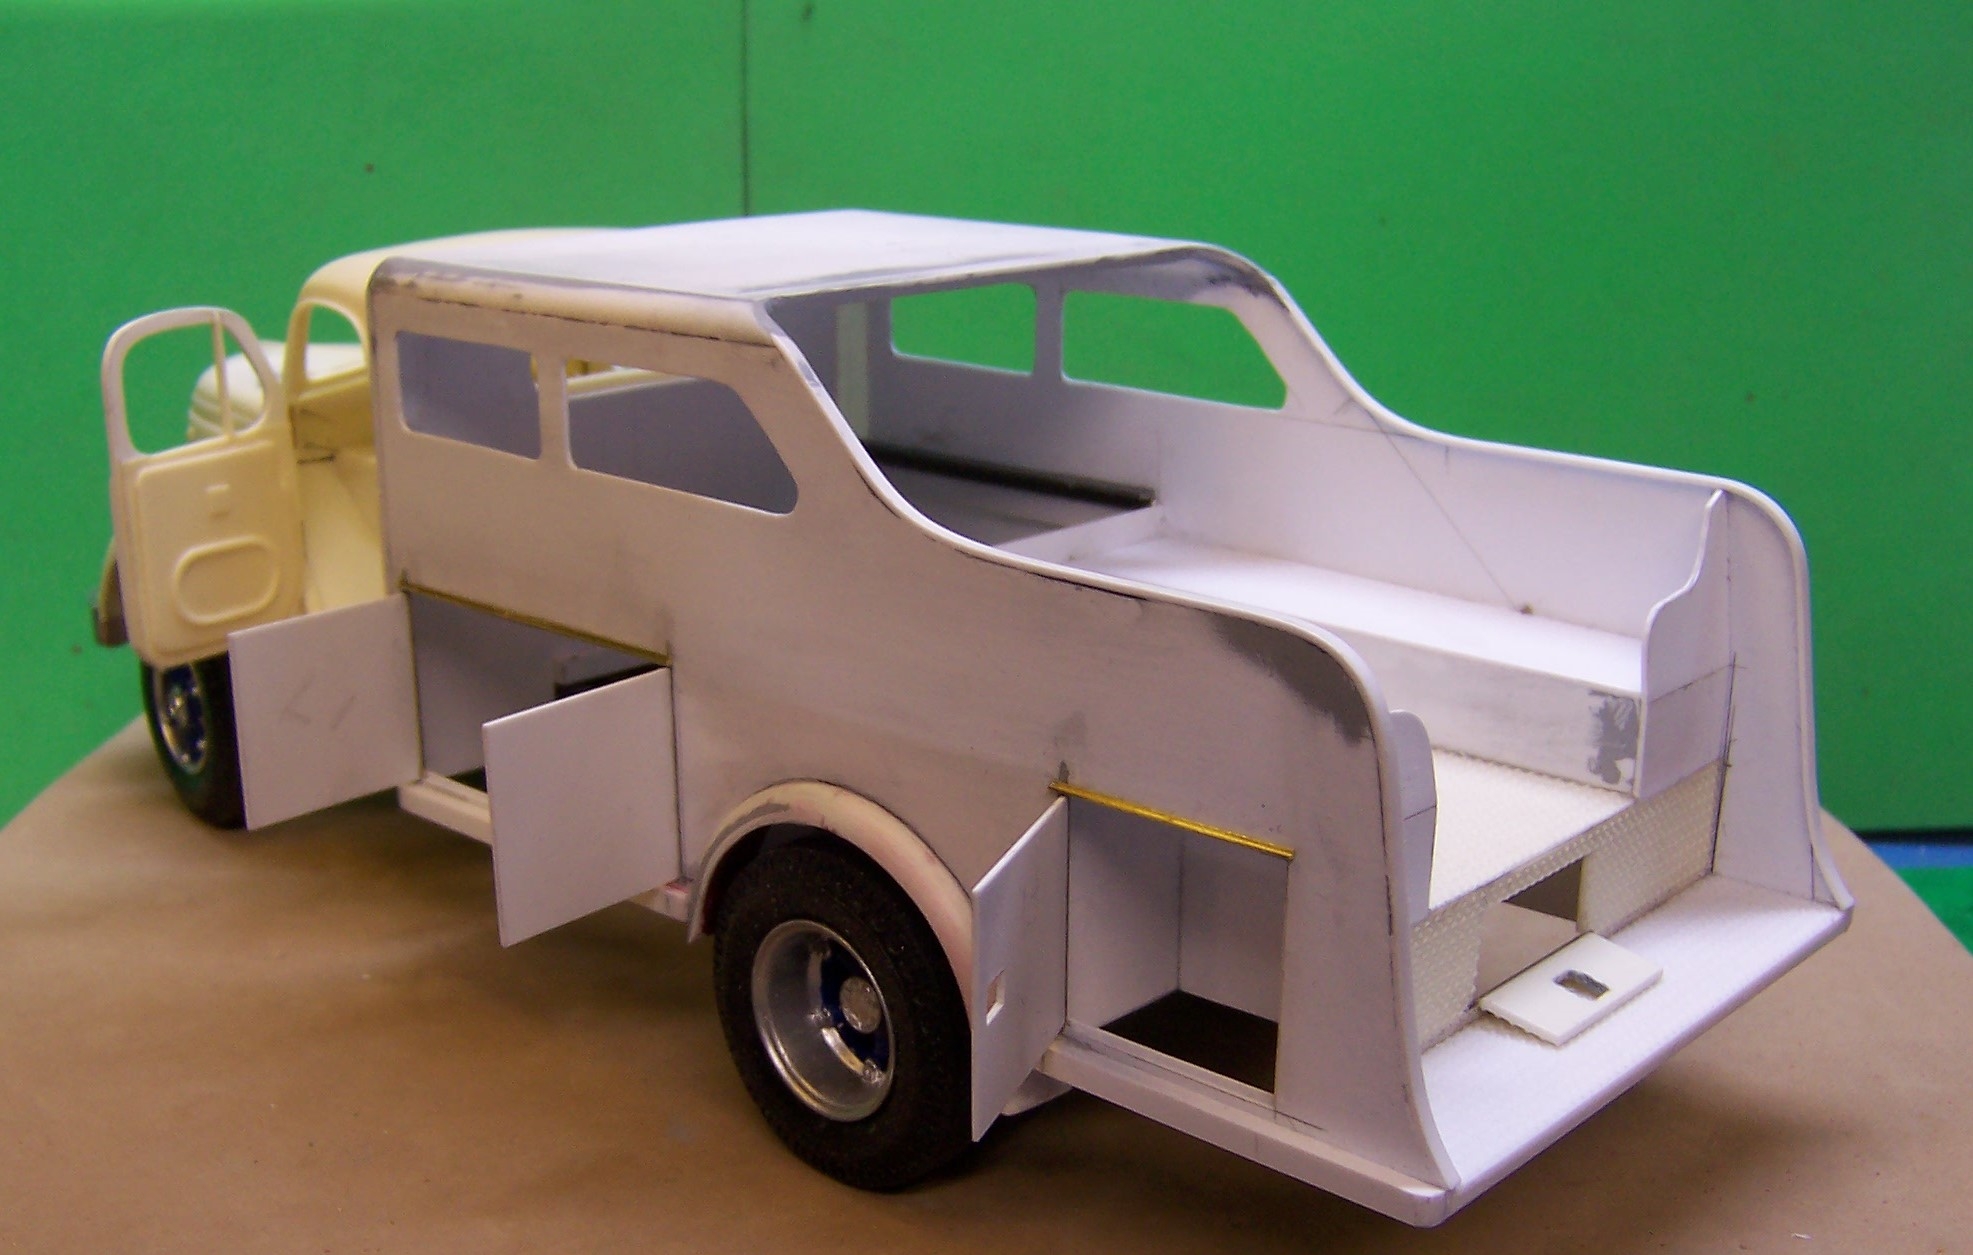
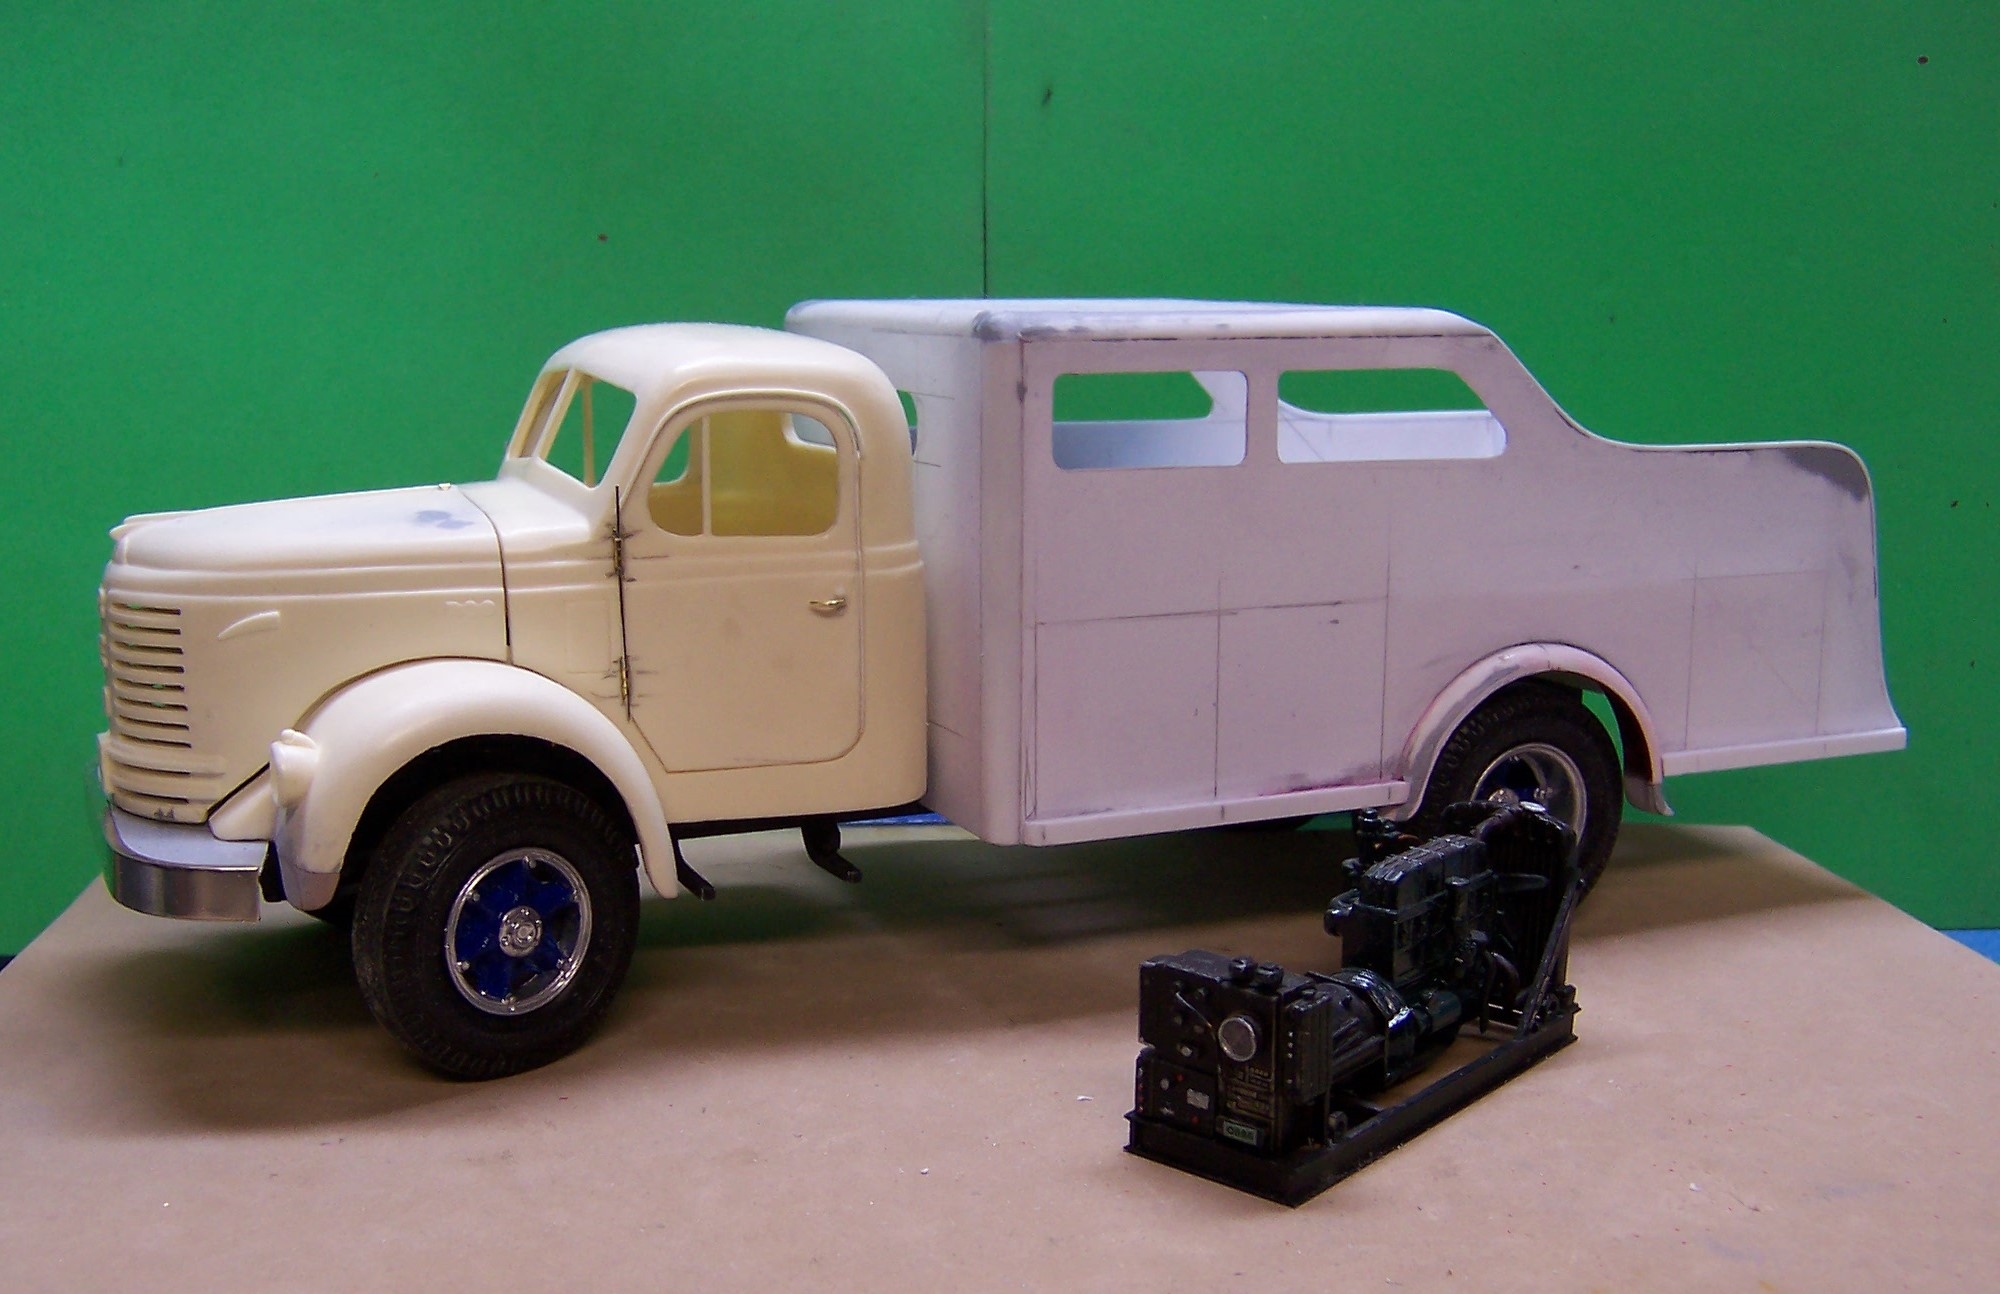
Here's what the body looks like now that some work has been done on it. In the process of cutting open the compartment door locations and hinging the doors so that they can open.


-
That must have been quite a rig if it was 6x6!
-
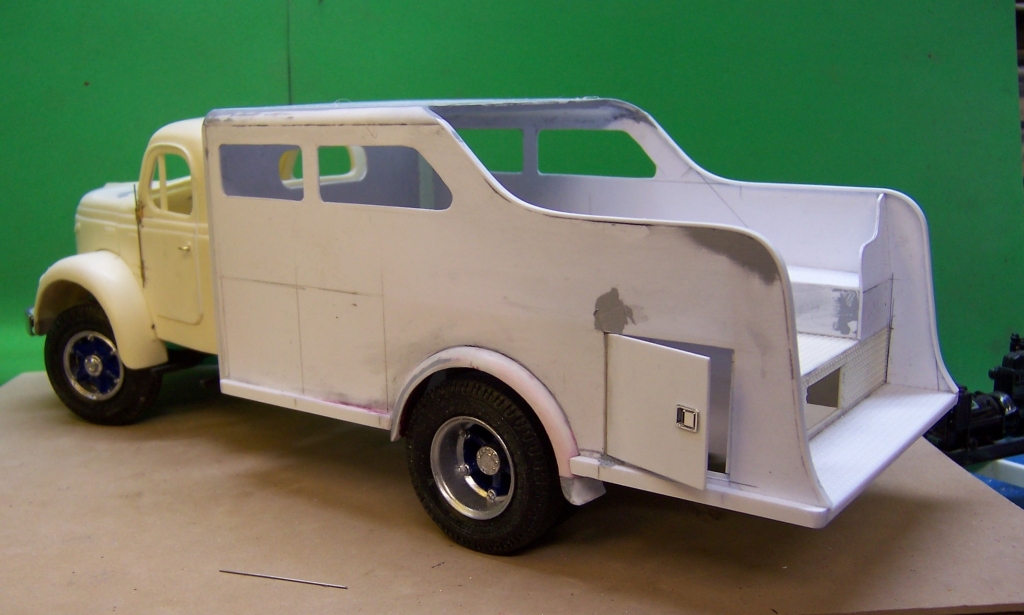
Here's an update on progress. Using some "H" hinges from Micro-Mark the doors have been mounted but instead of using the small brass pins that come with the hinges I have used a piece of stainless steel wire. That way I can keep the hinges in alignment and at the correct location so that the doors will open without tilting up or down. The doors themselves have been shimmed also with strips of plastic that bring the openings back even after the scribing process.
The doors as well as the door jamb is notched to accept the hinge halves. CA is used to set them in place and then small nails complete the process. Holes in the hinges are drilled into the resin and the nails set in CA. Then the nail heads are ground down so that the hinge can close without binding. It's a pretty secure process that has been used on multiple models with this type of door hinge assembly and it has worked well. The biggest challenge is to be sure that the CA does not get into the joint of the hinge when it's applied. Small doses are the best anecdote.


-
Hi, Vince. Lansing is a ways away although I did go to U-M in Ann Arbor back in the day. It's about a 15 hour ride from where I am. Another day and a bit younger I might be convinced to make the trip!🤓
-
Unfortunately, no. It would have taken some effort trying to do it in a 2 piece mold. Things like fan belt pulleys, the generator, distributor, manifolds would probably still have to be made separate.
-
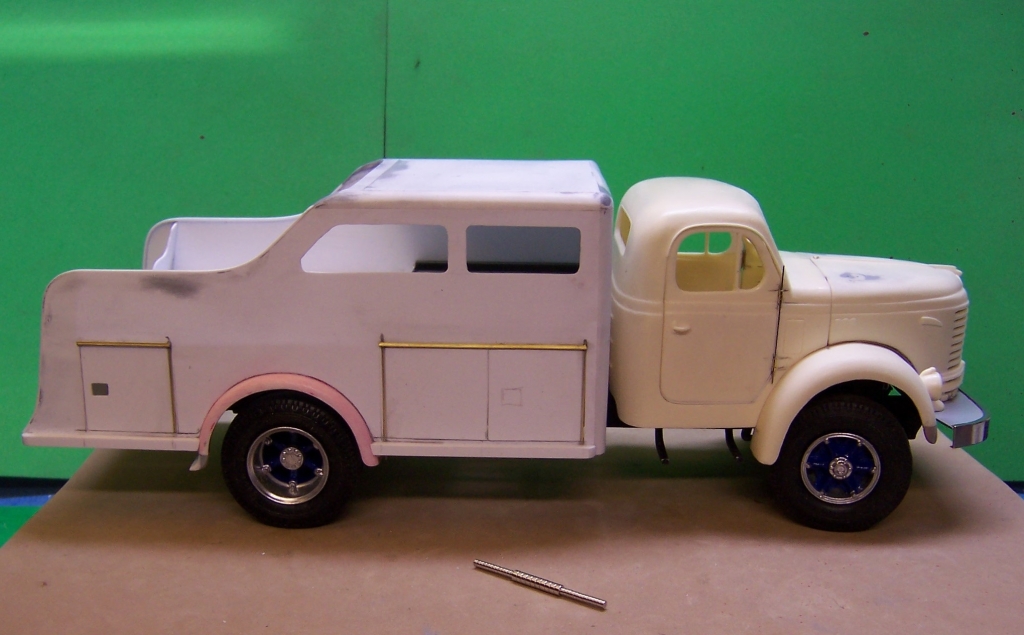
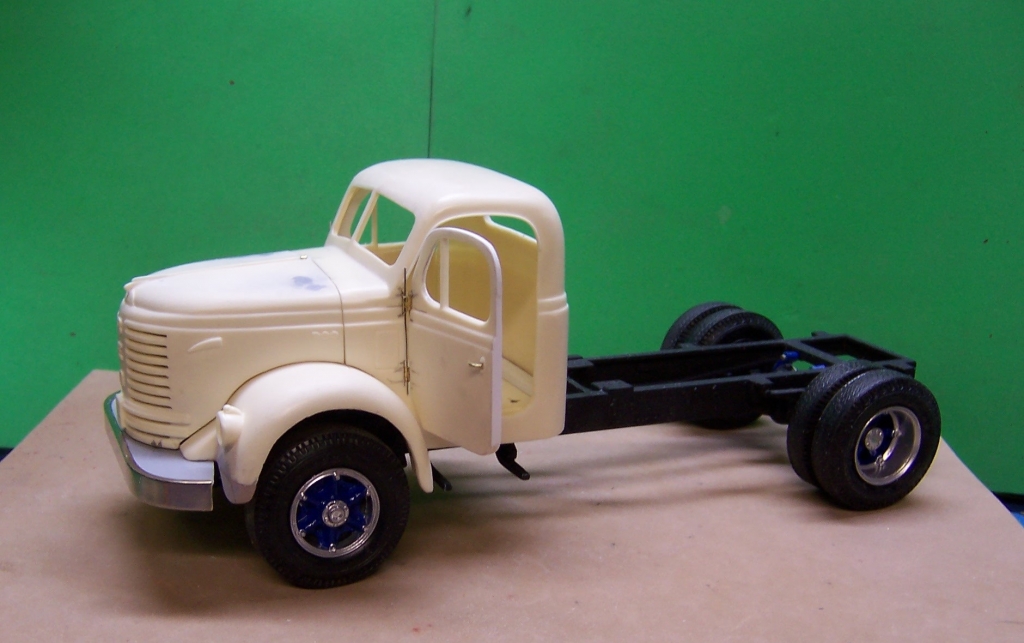
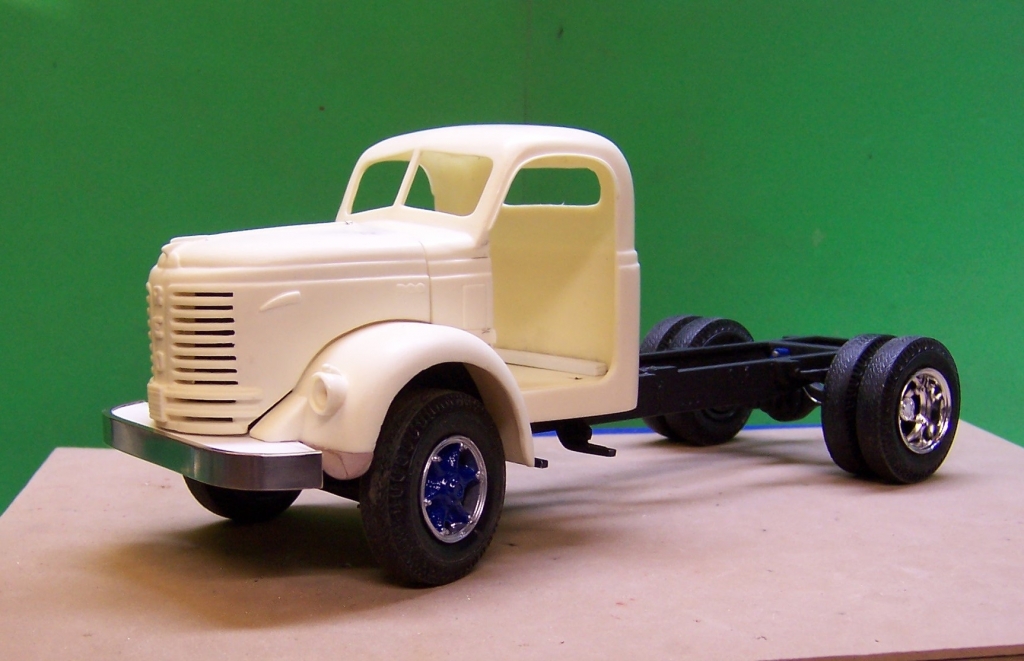
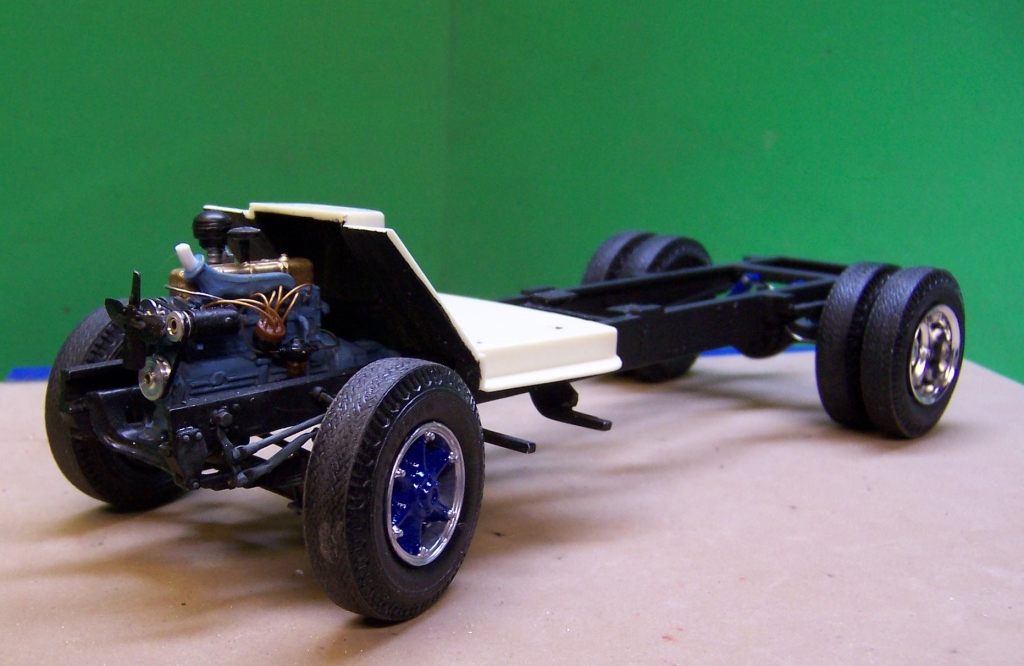
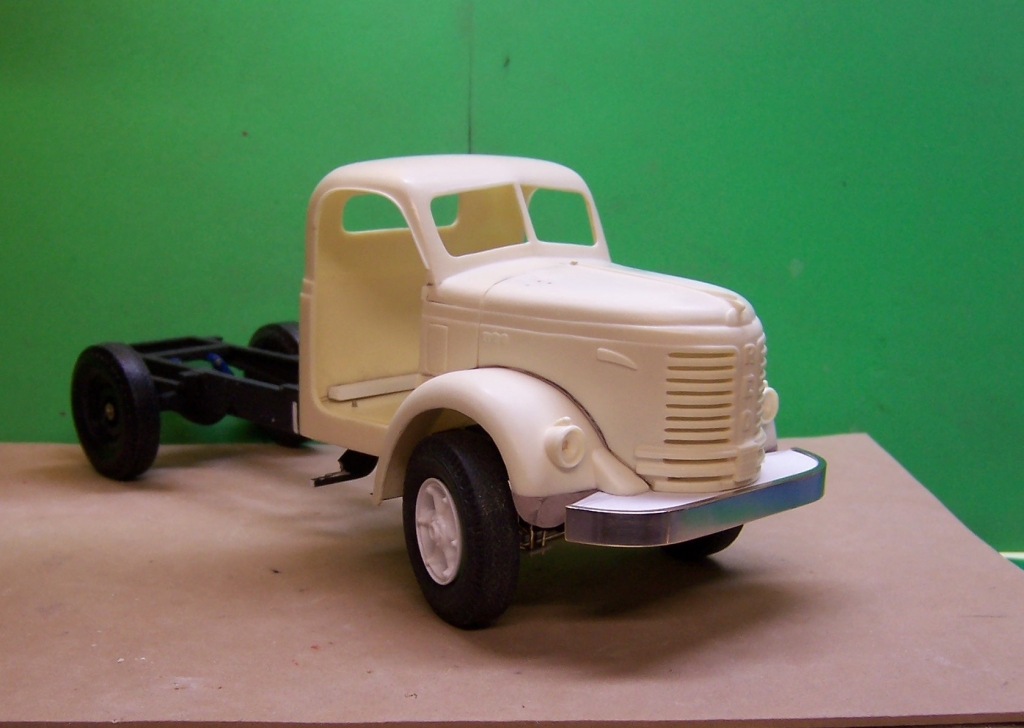
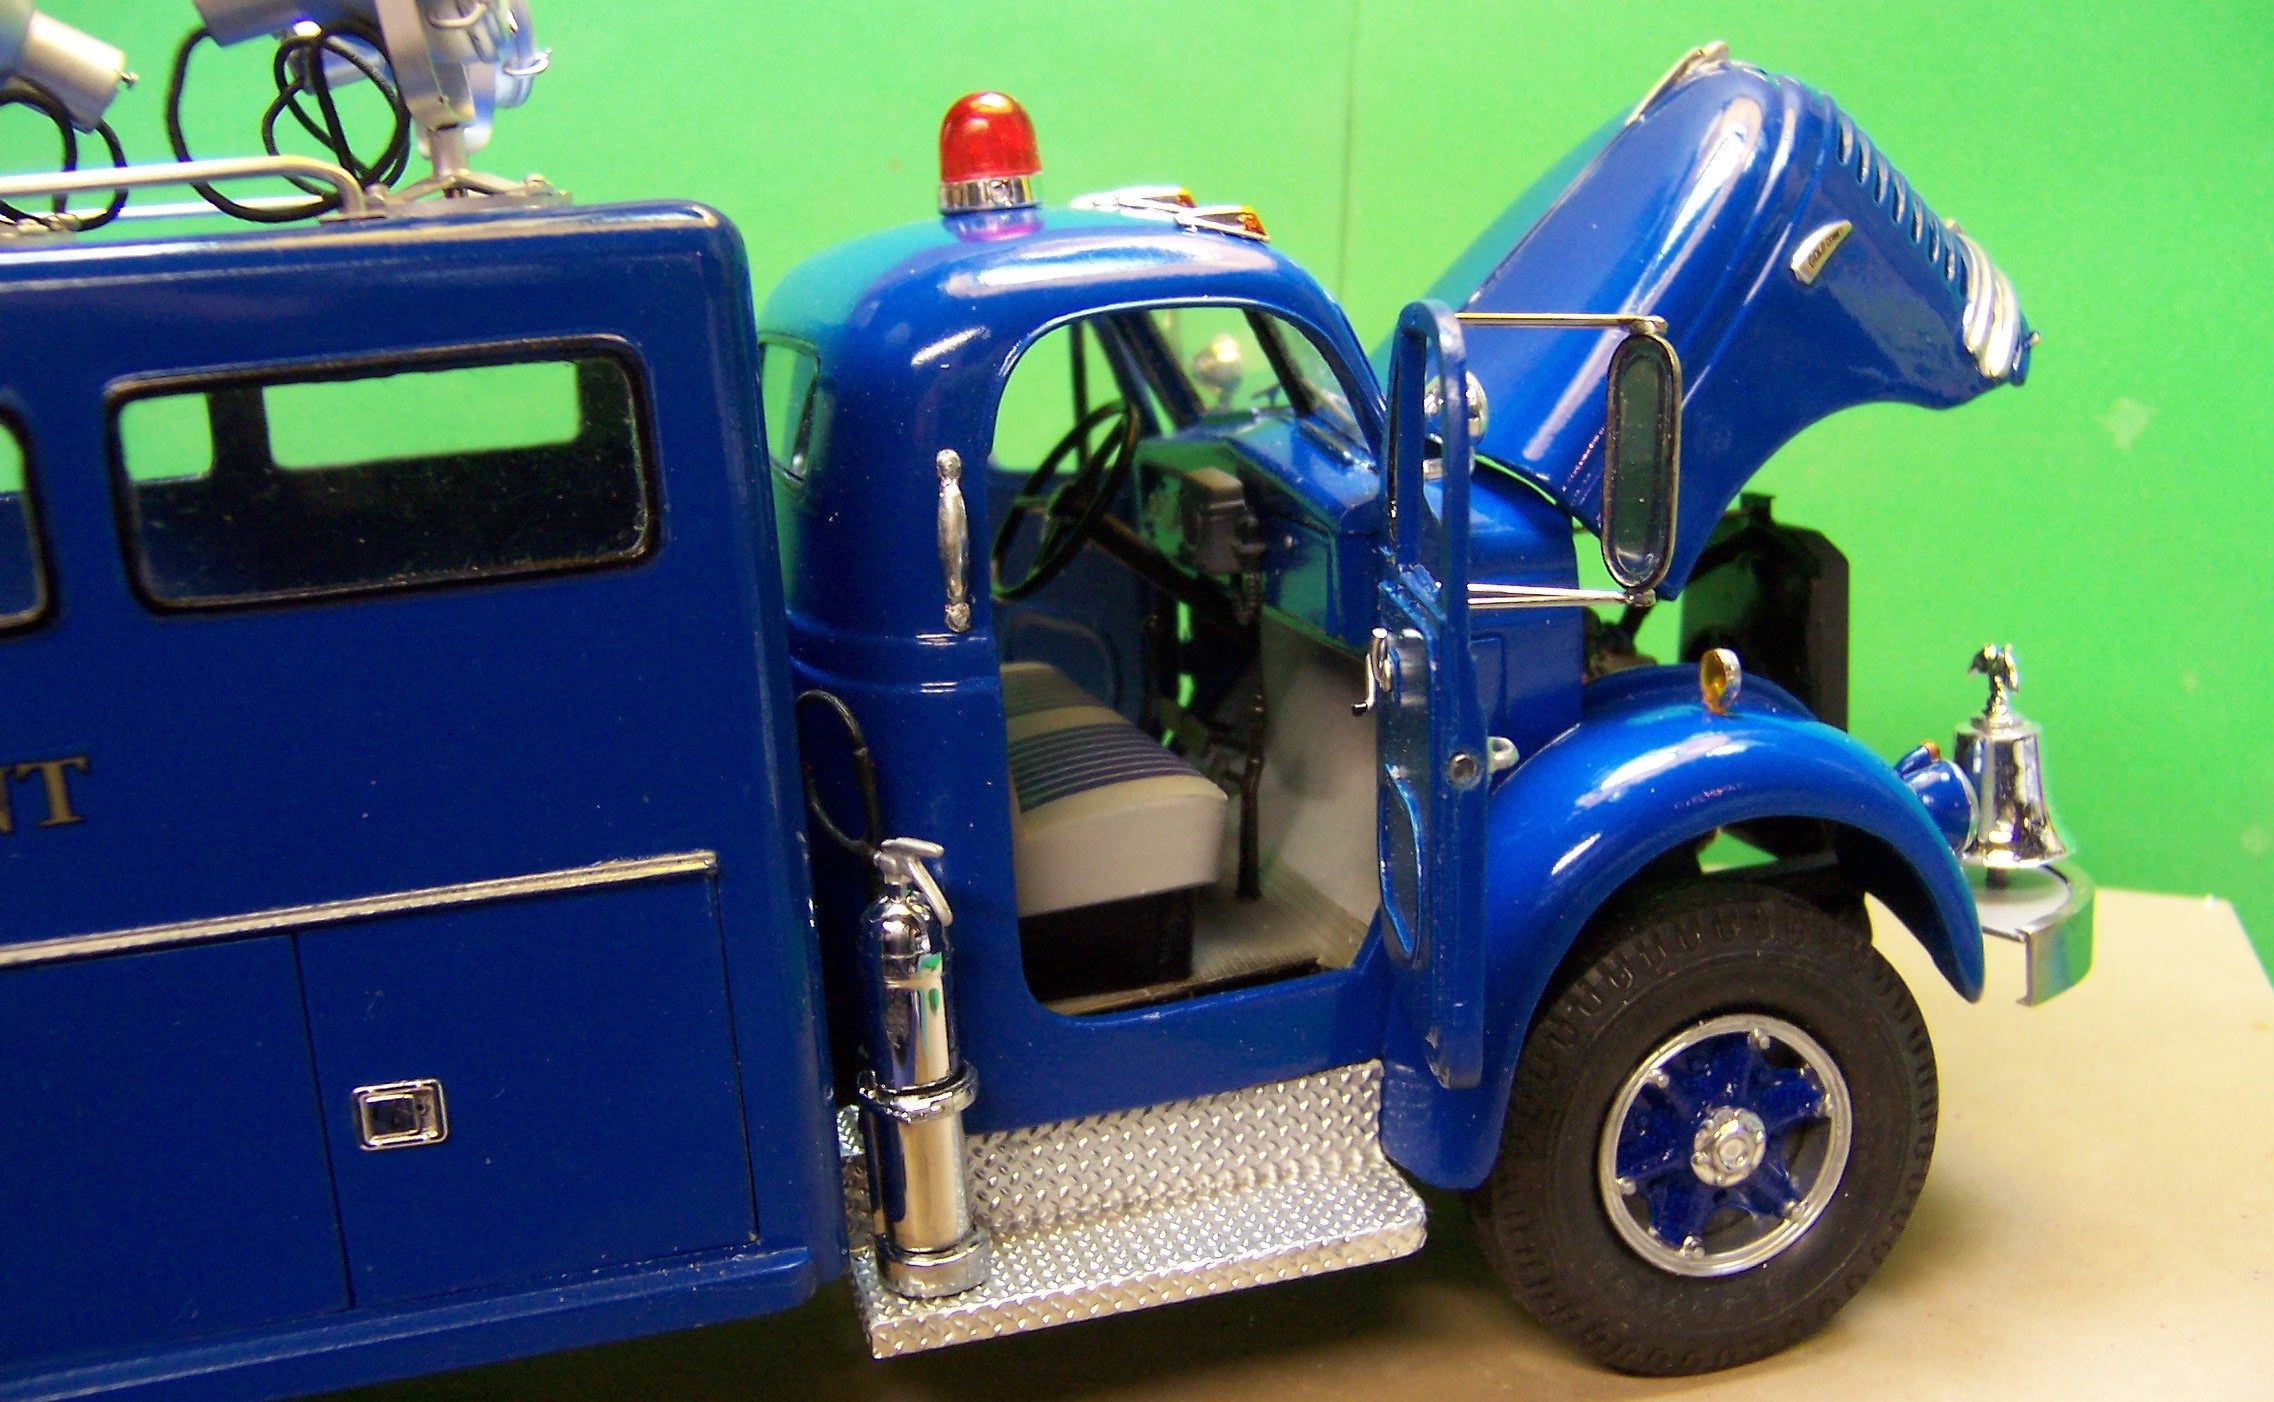
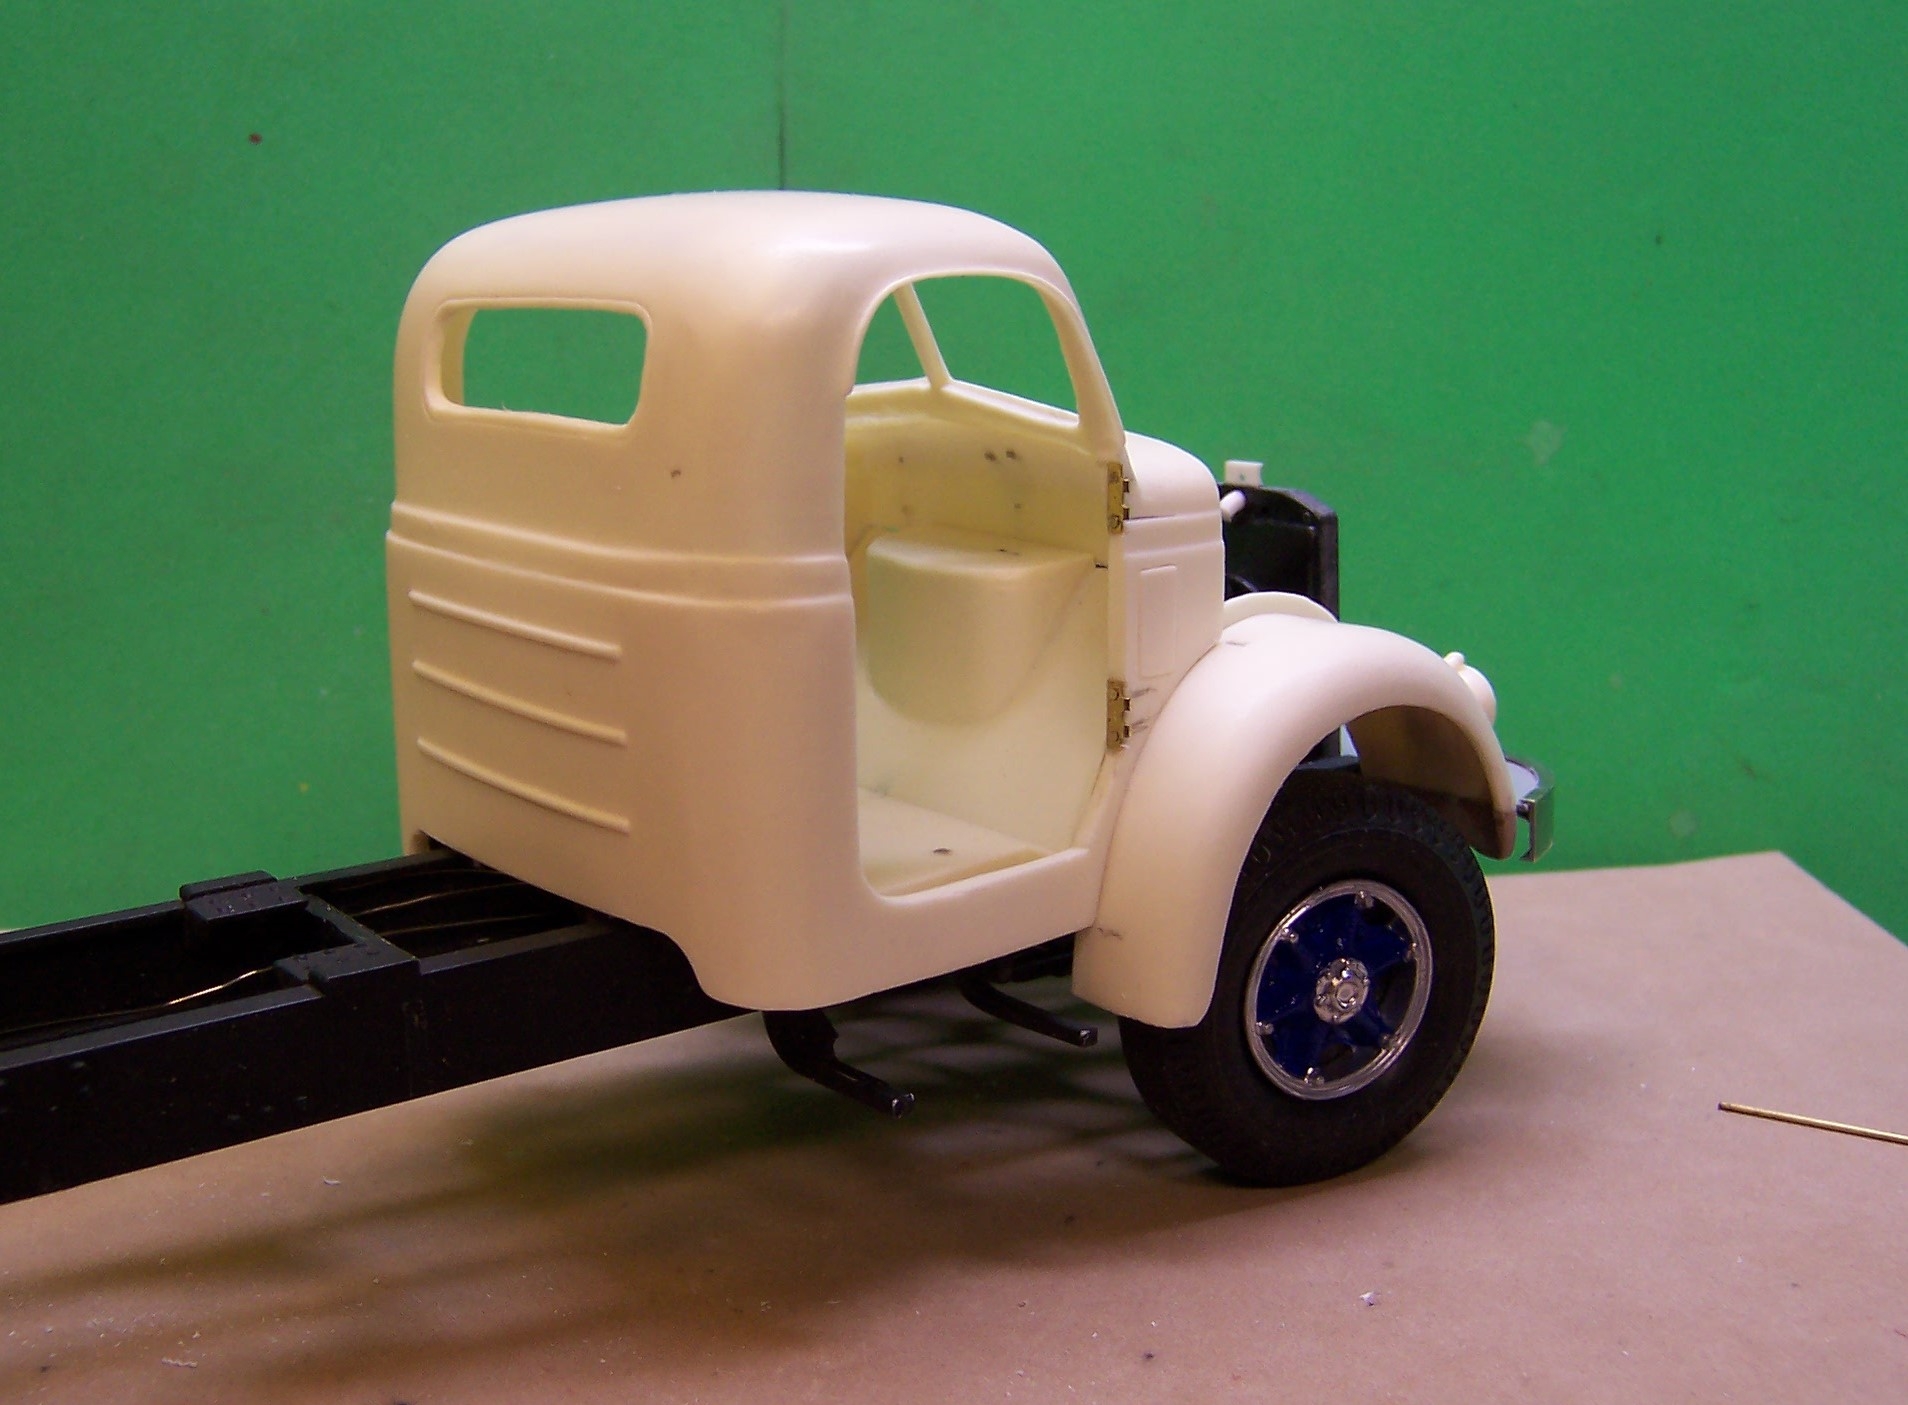
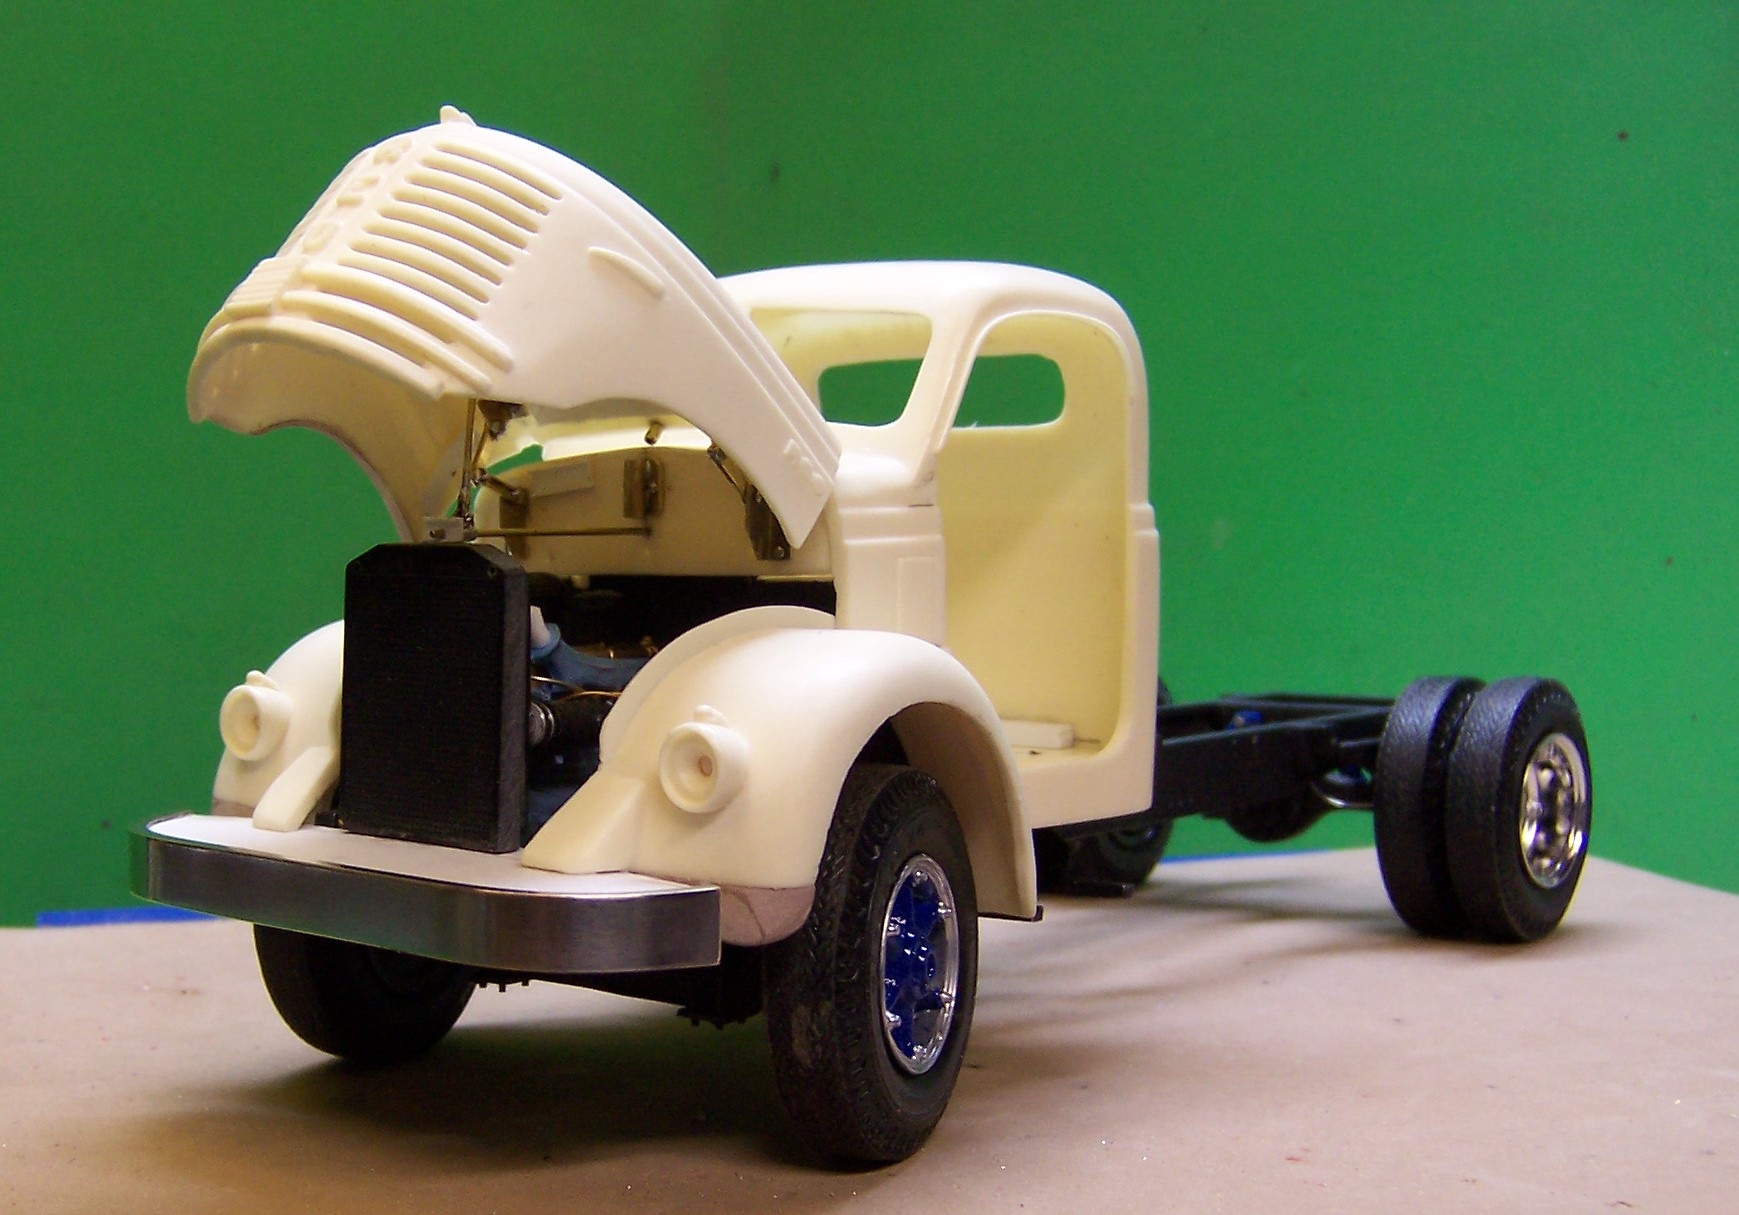
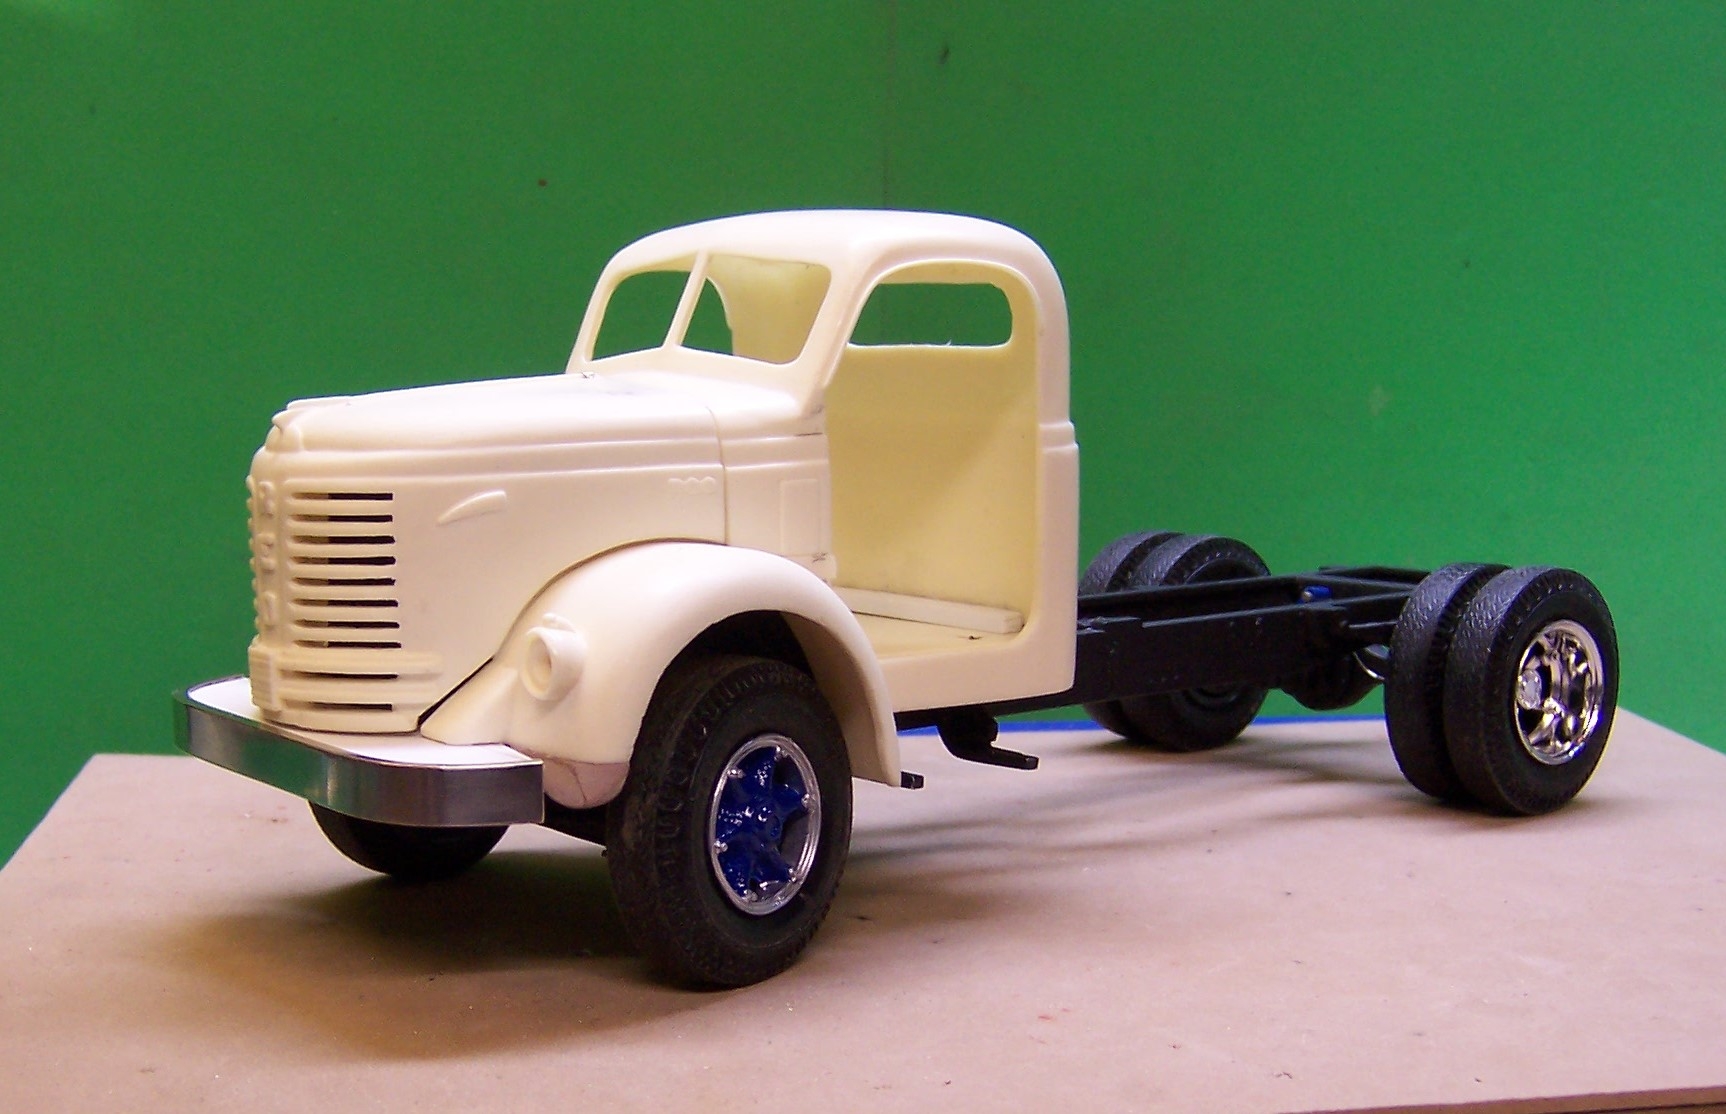
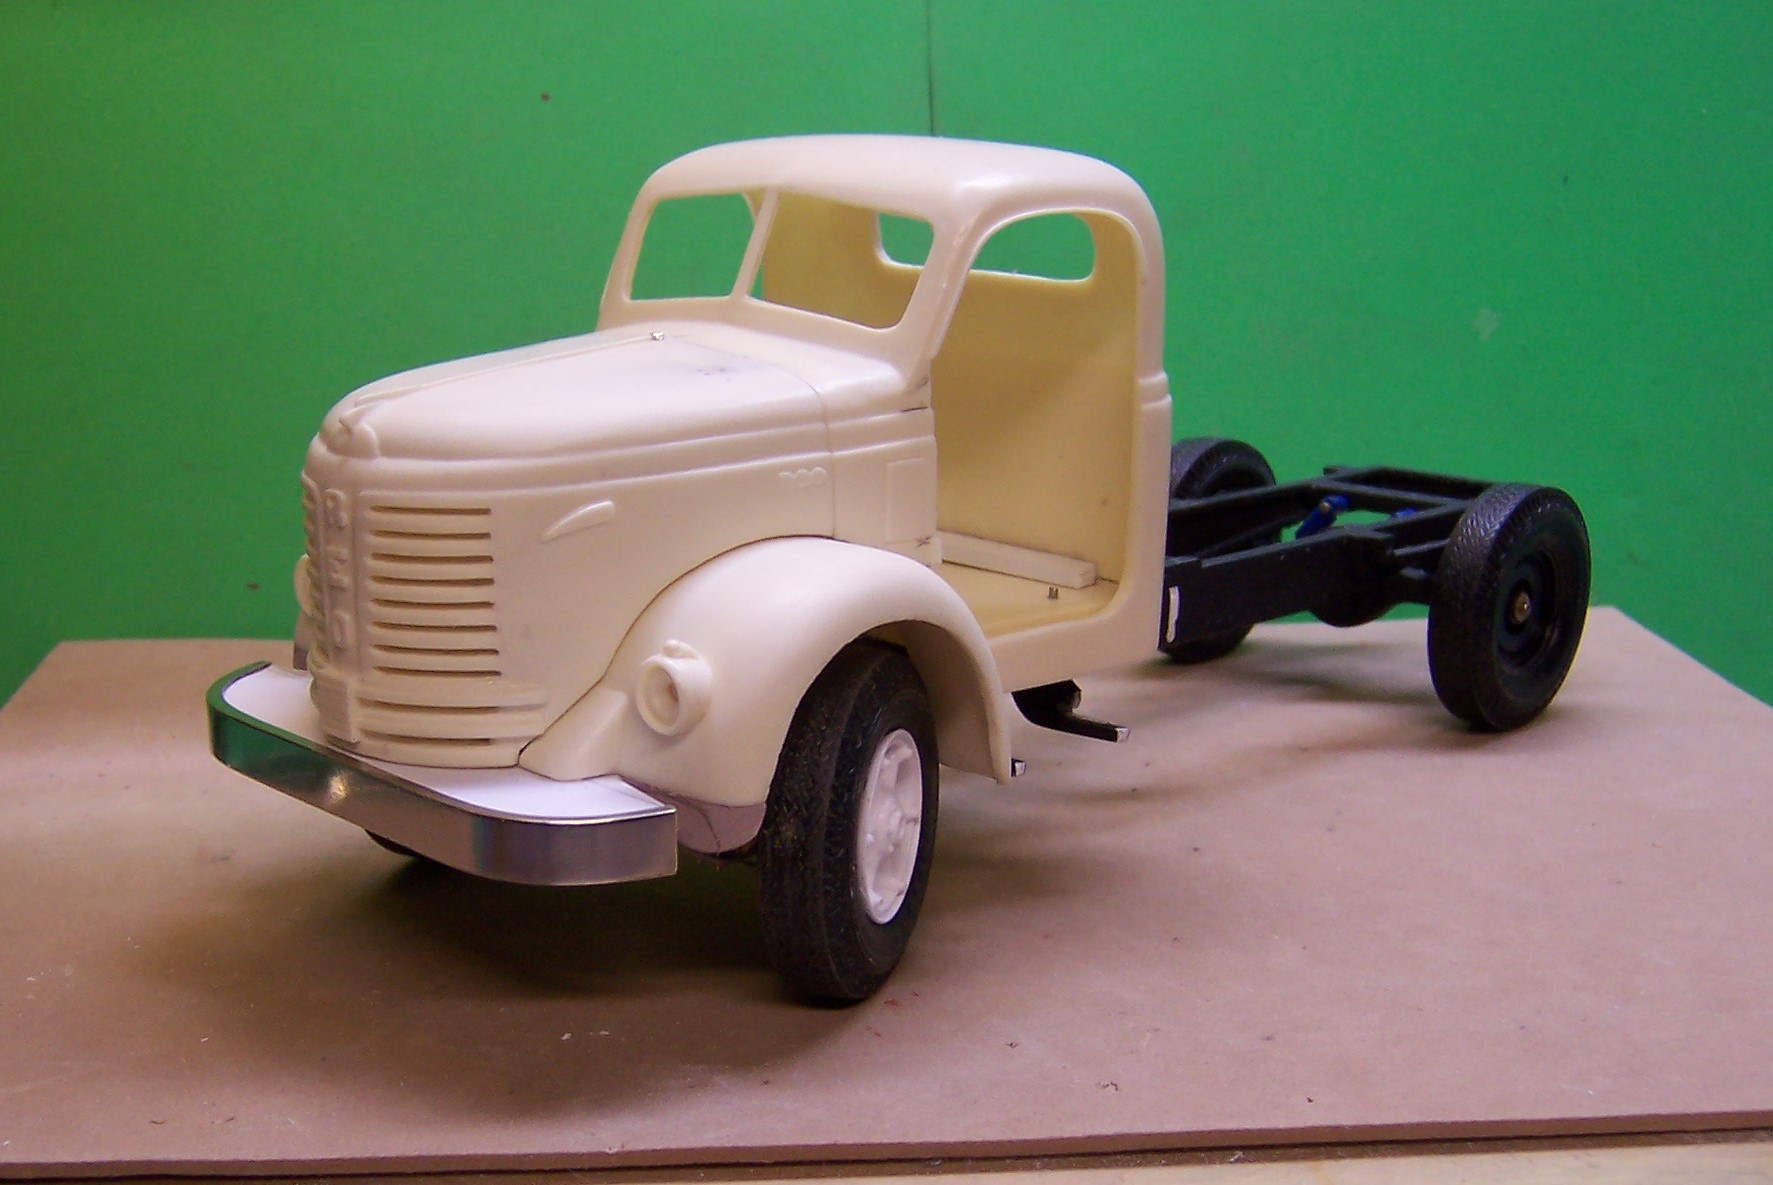
Here are a few updates on the build. The engine is complete and is now mounted on the frame. The floorboard position is set. The hood has some brass hinges and a rod that holds it open when raised. I painted the two front wheels with some blue spray paint I found in a Michaels craft store. The edges are silver and eventually the center hub will be painted Molotow chrome. I'll wait on that so it doesn't get messed up during the building process. In addition the front bumper was set aside and a new one was made of brass strip stock. Once it was cleaned up it was nickel plated. The piece holding it to the fenders is plastic sheet stock that was epoxied to the back of the bumper.


-
Yesterday I got the bumper done and did a bit of tweaking on the fenders to correct the shape. I think the bumper could have used a little more polishing as there are some spots that look a little dull. Overall it's not bad. Now it's on to the engine and getting something close to a Gold Comet.

-
The green and black Reo has gone to another builder. Now it's back to the Port Vue Reo. Lots of re-working things. The cab doors have been cut free and the hood is open. I recently made a new front bumper from brass using the resin casting as a template. After soldering the face of the bumper to two pieces of brass sheet top and bottom, It was trimmed to shape, smoothed out and then given a nickel plating bath. It came out nicely. Will provide a pic soon.
-
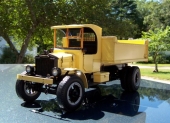
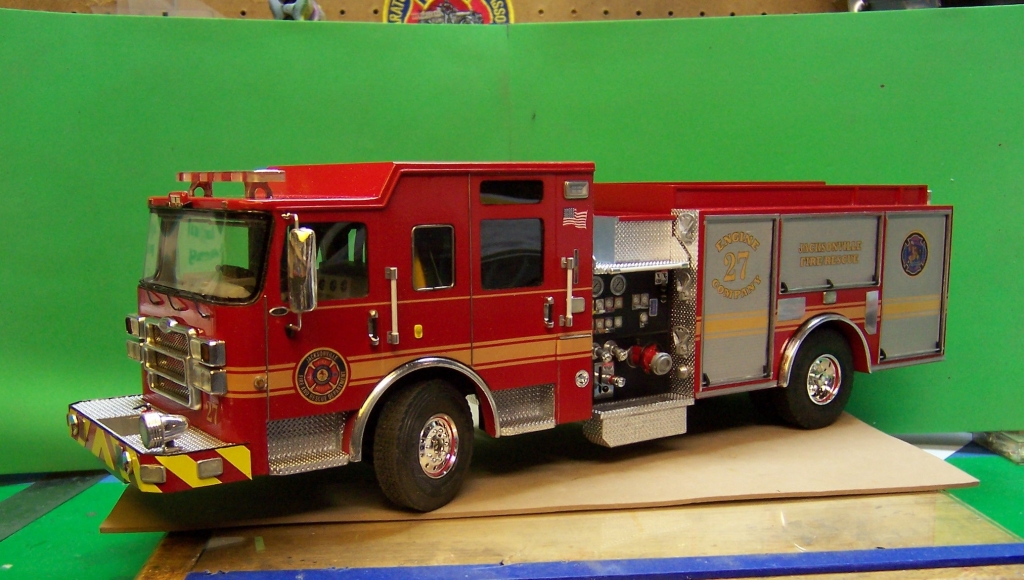
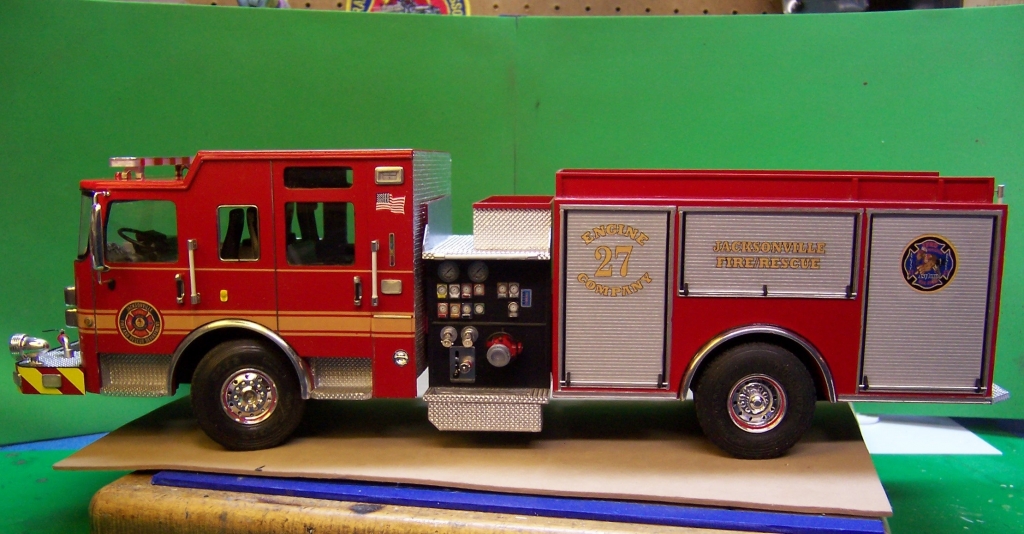
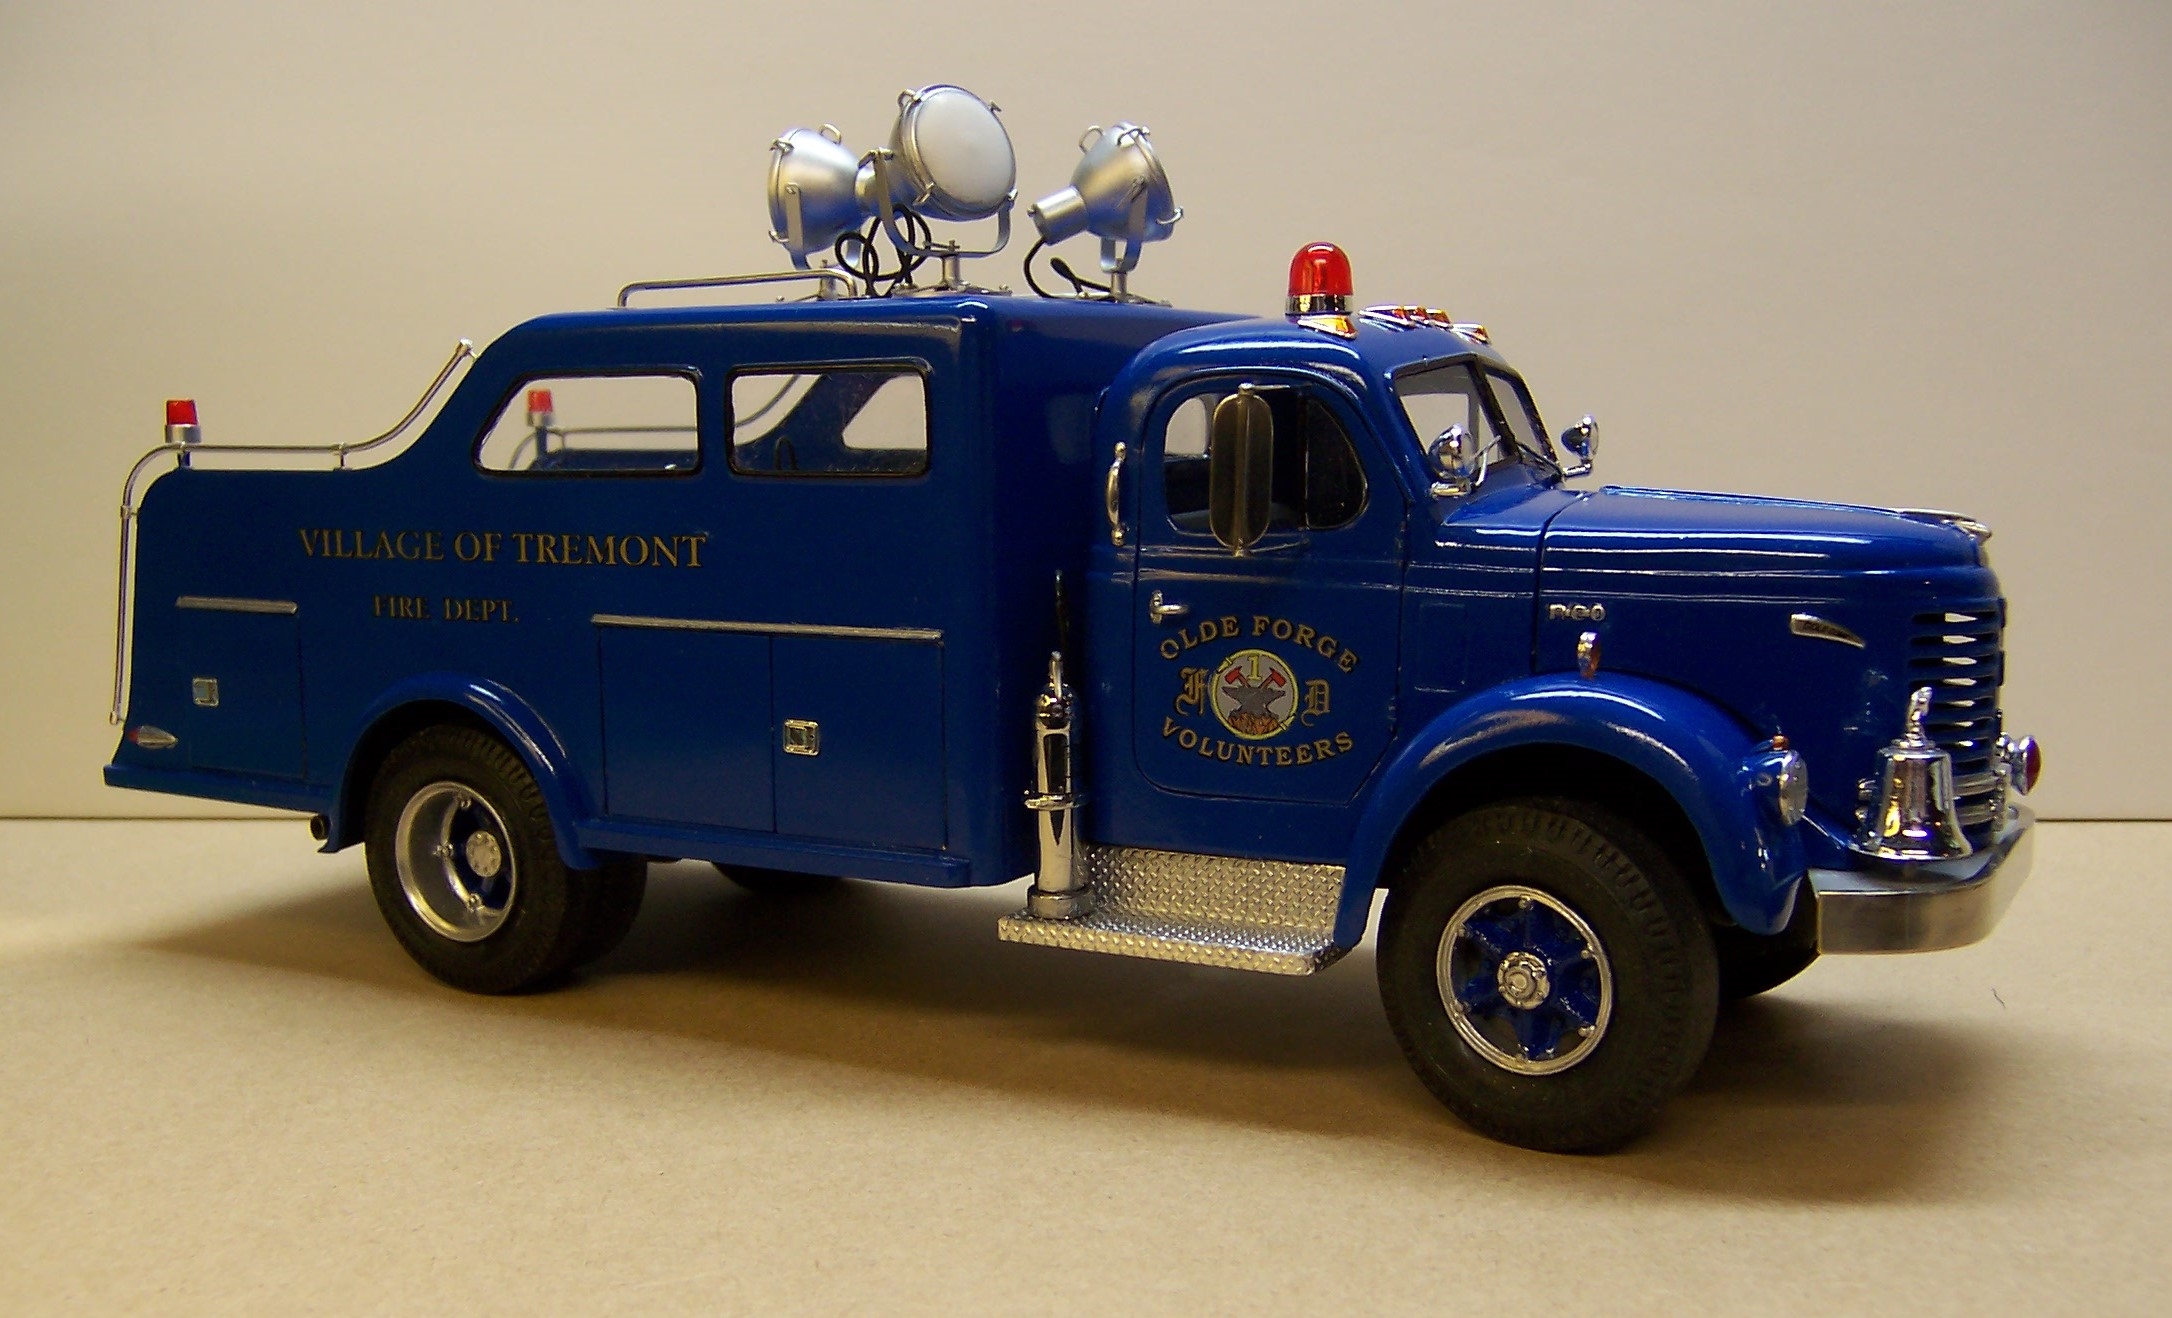
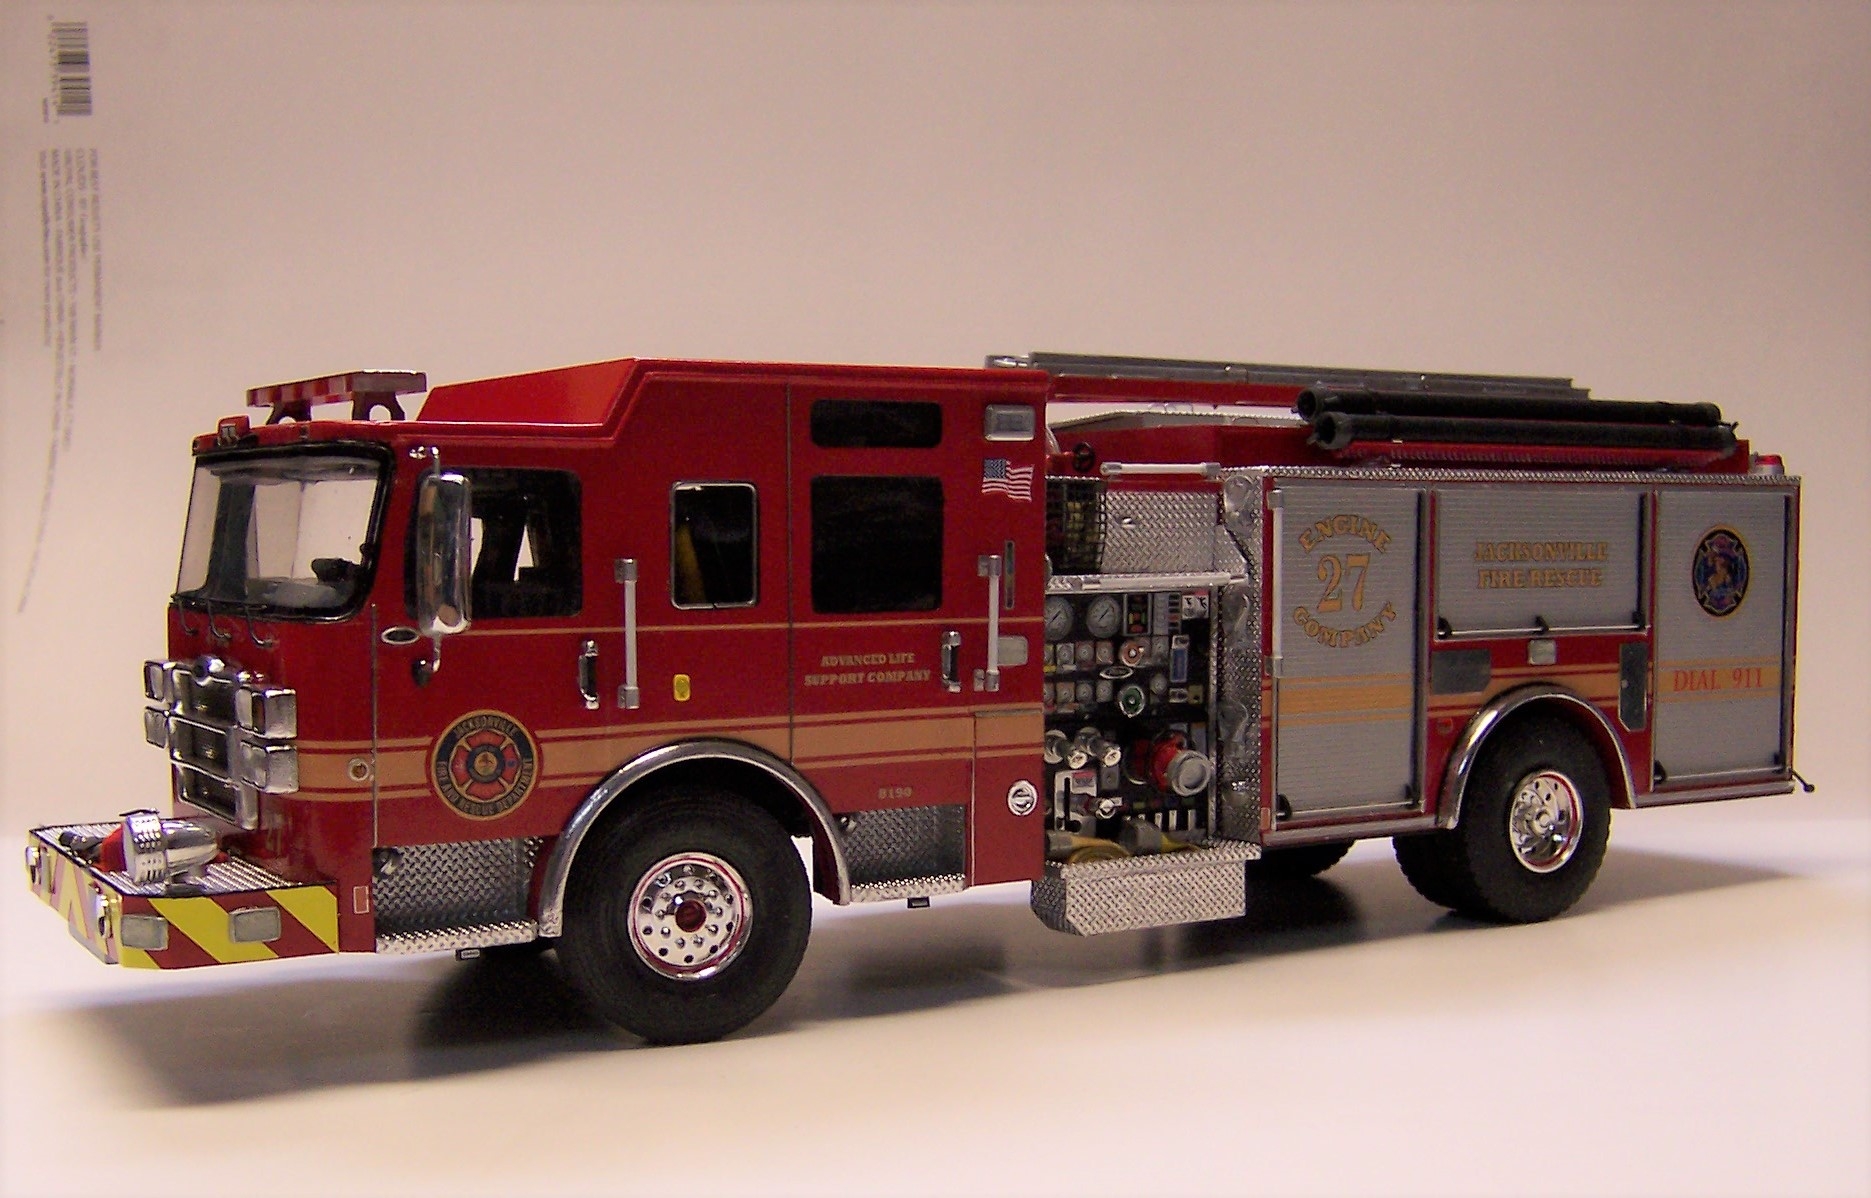
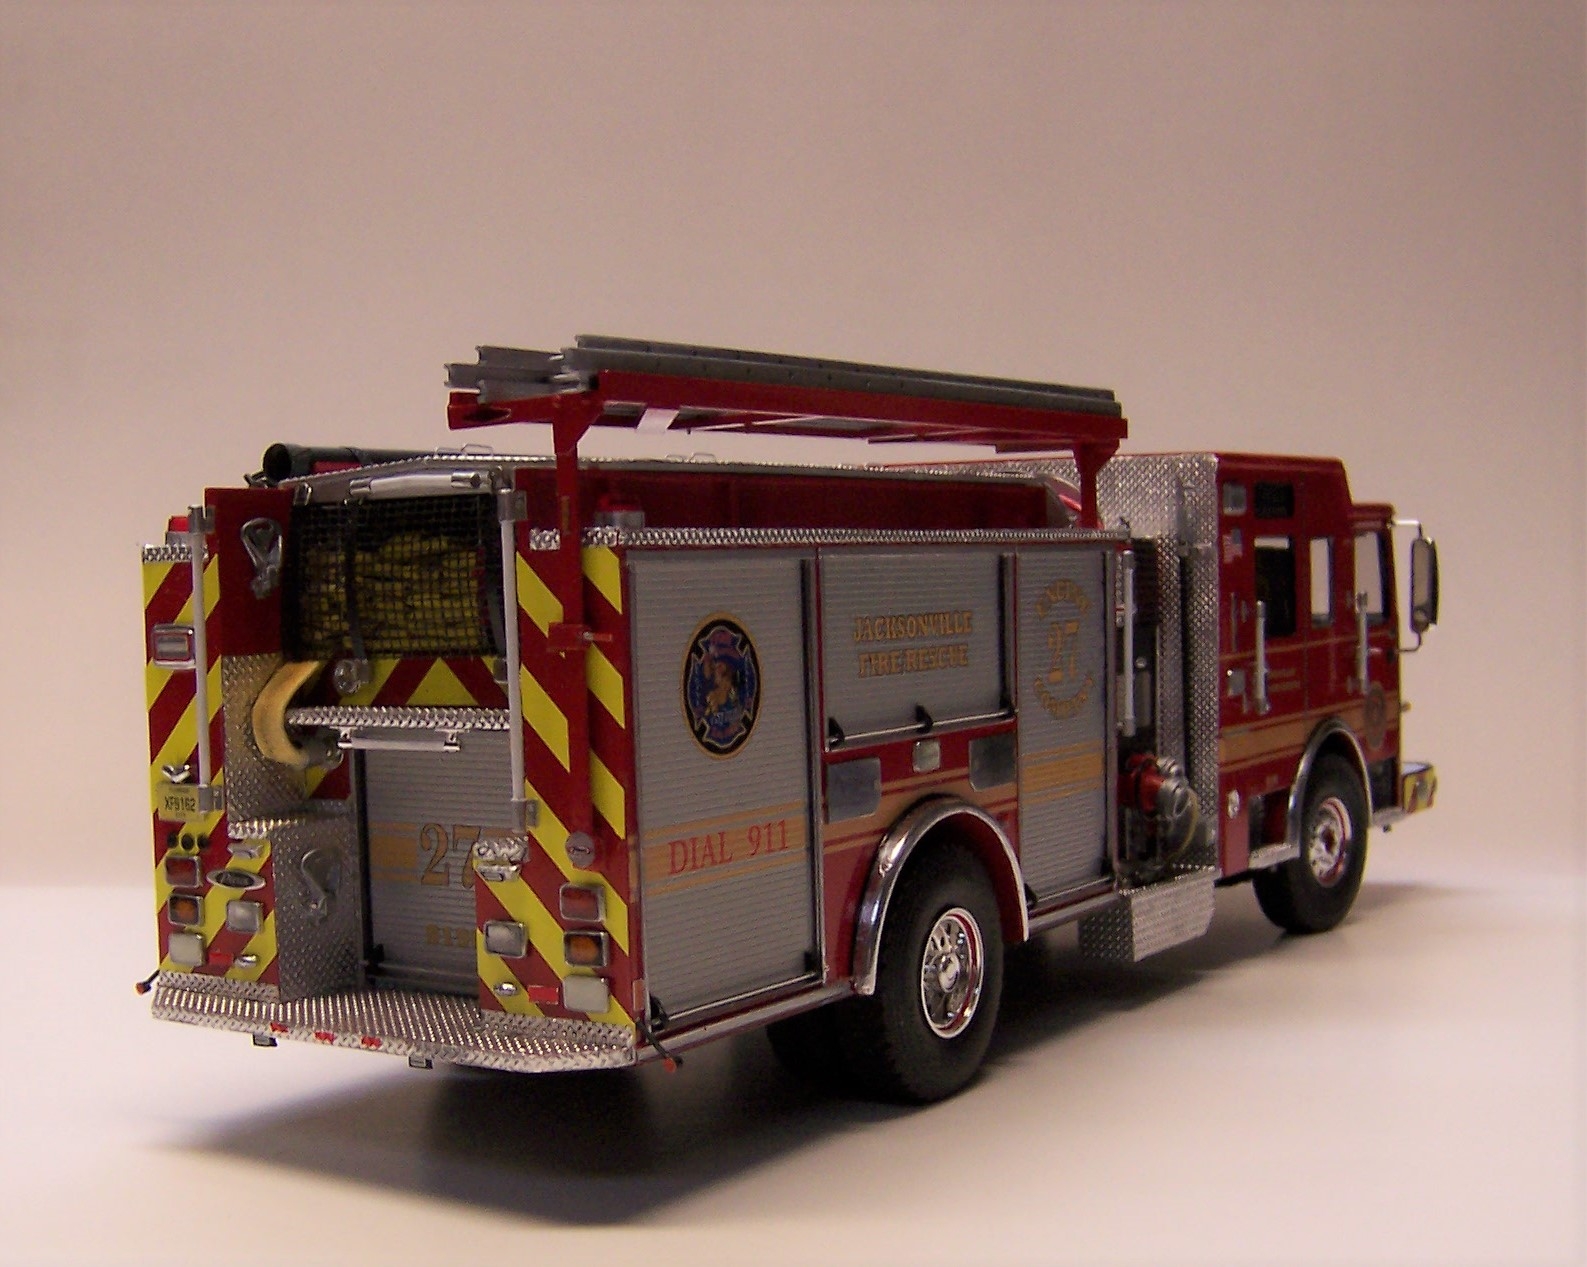
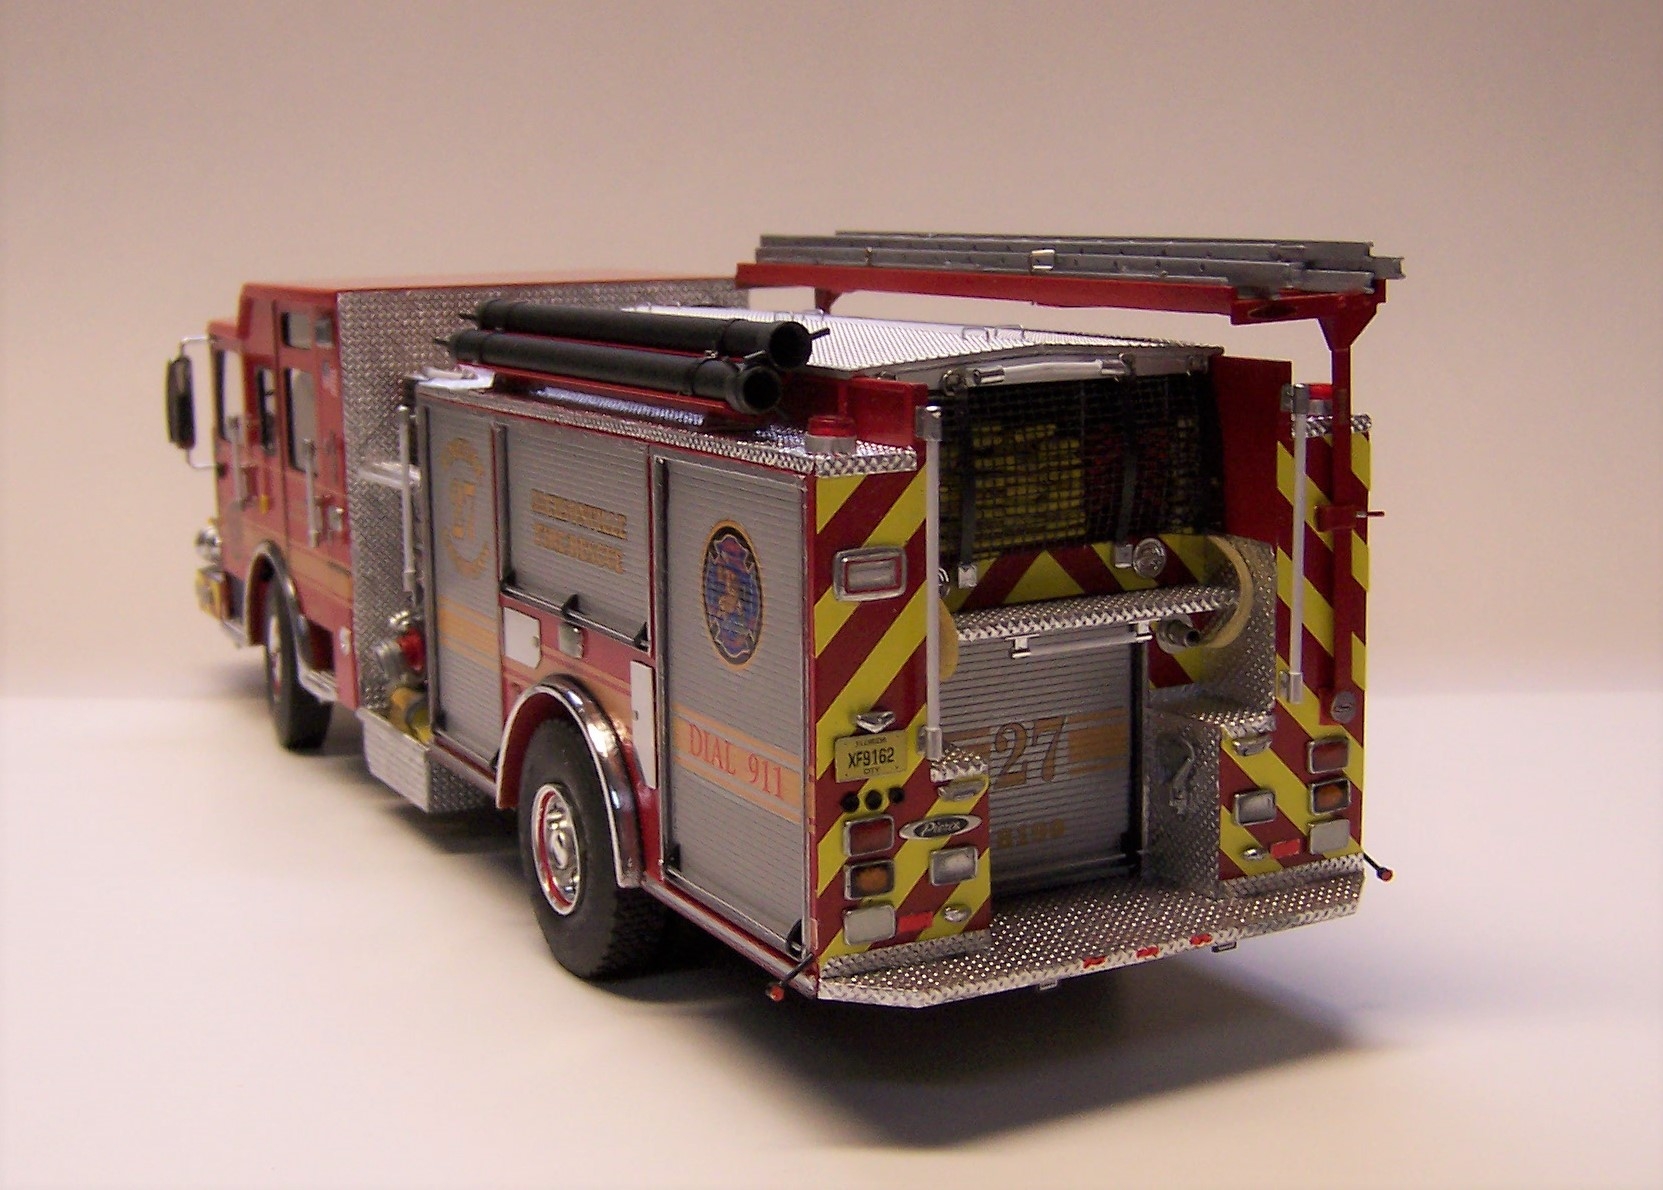
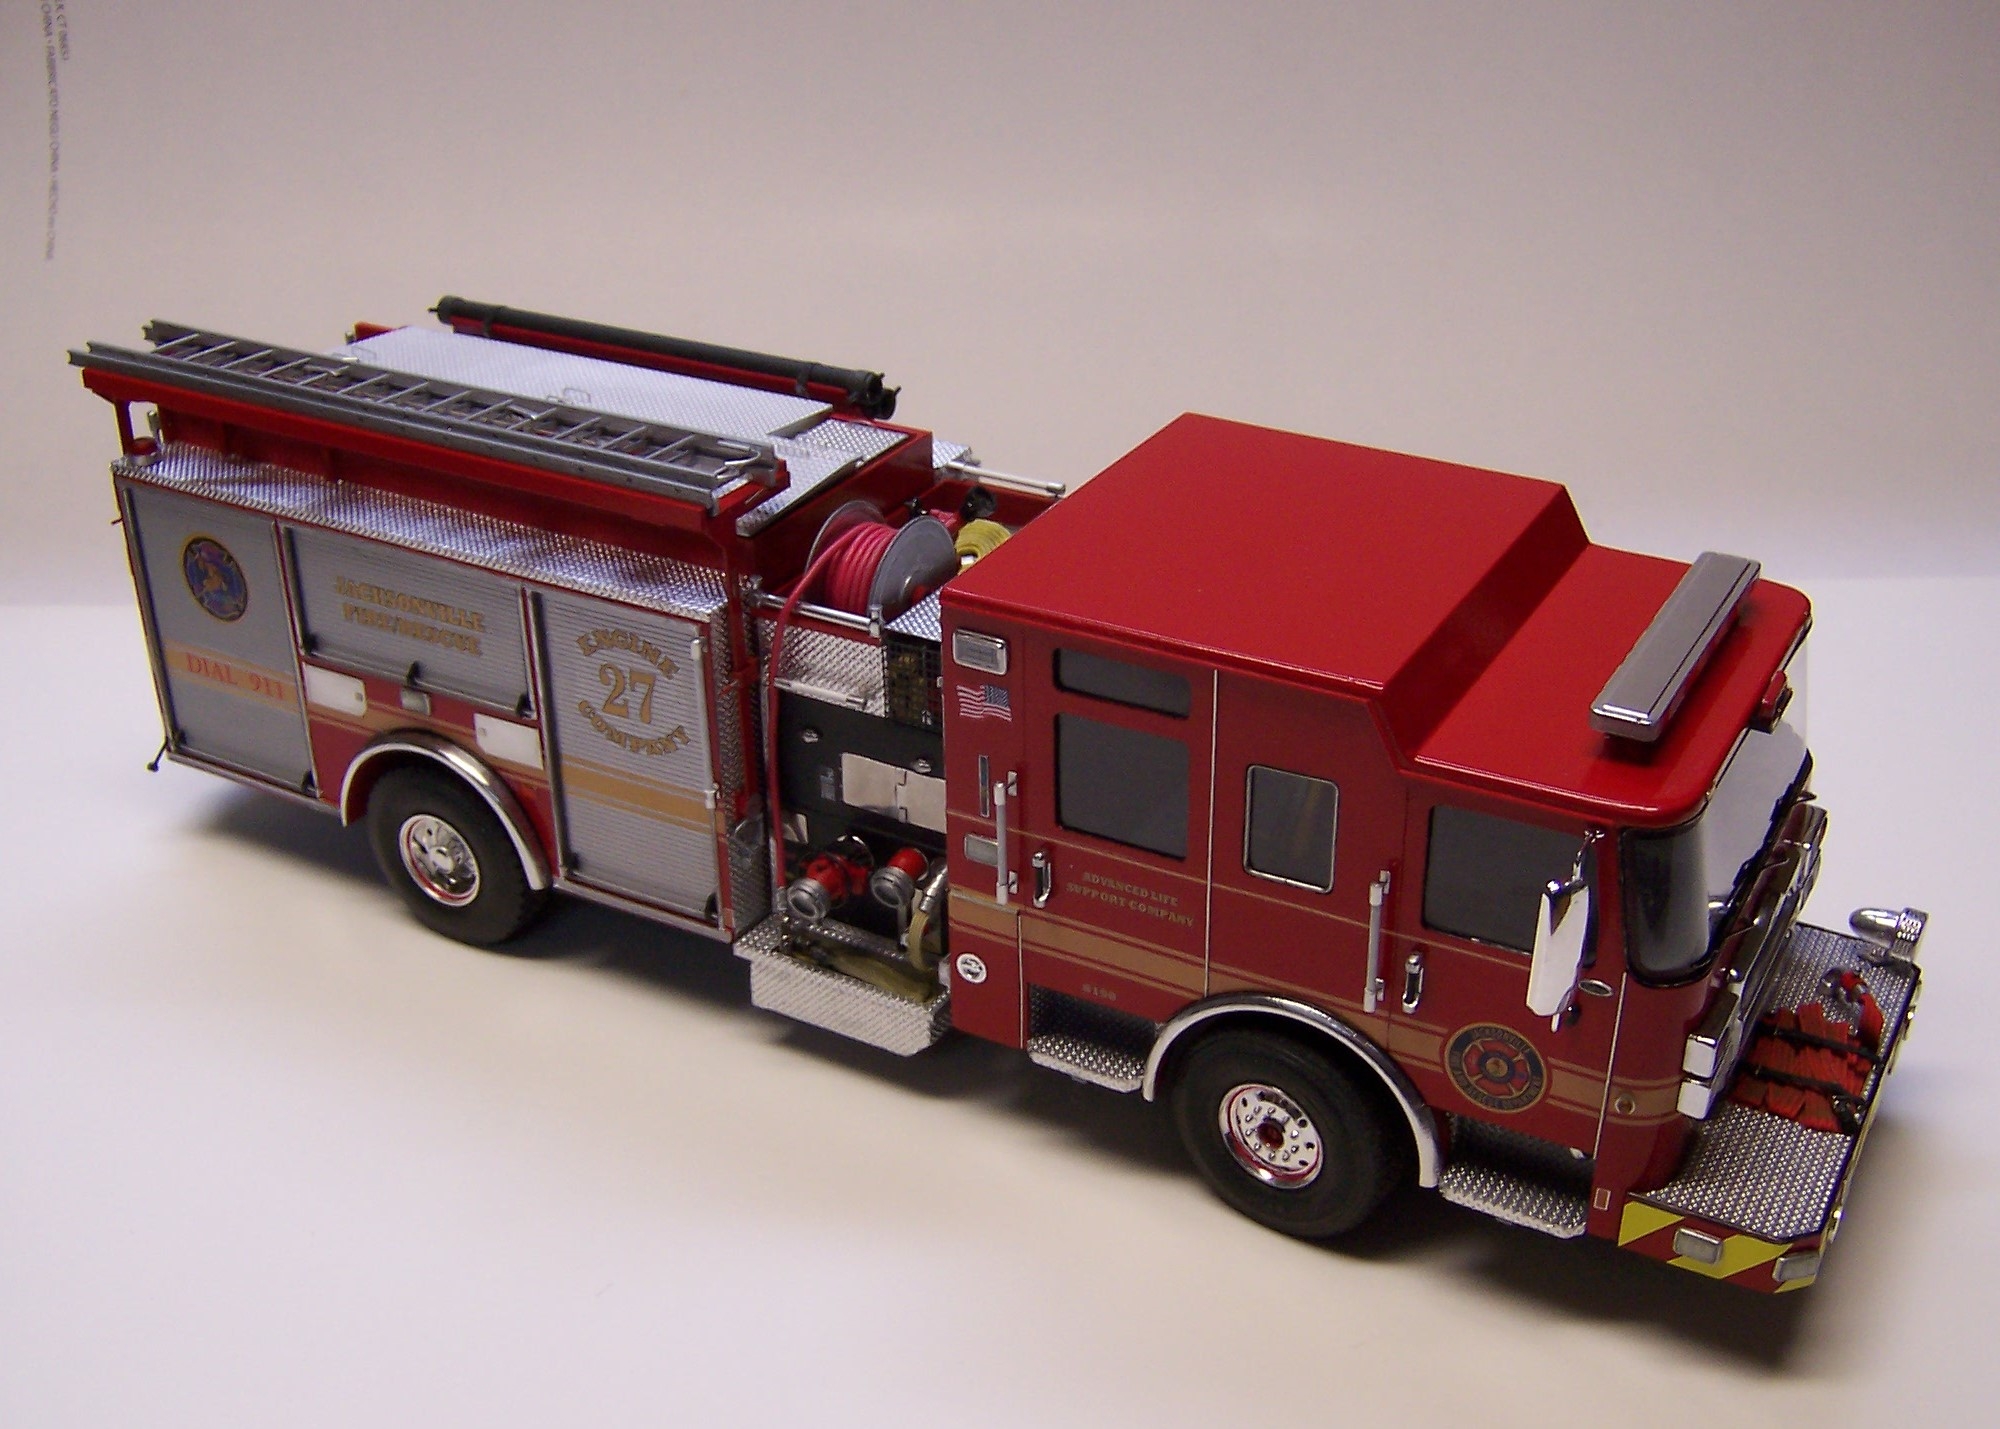
This rig was recently finished. Started back in September with basic drawings and photos. Model is 15" long and is 1/25 scale.


-
Here's an update. Lots of little things added that might not be obvious at first sight but there is more to go!
-
 1
1
-
-
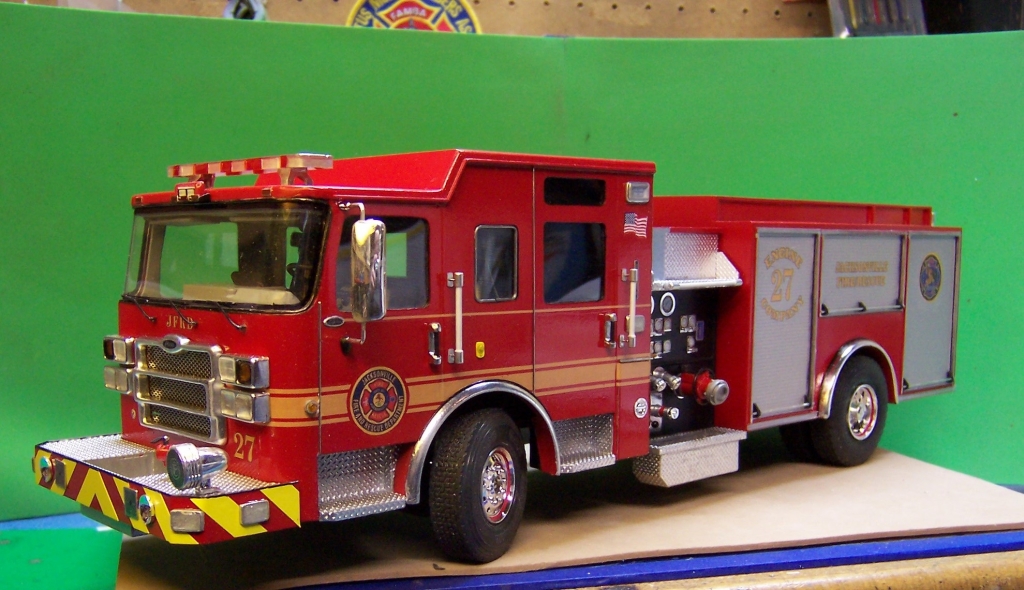
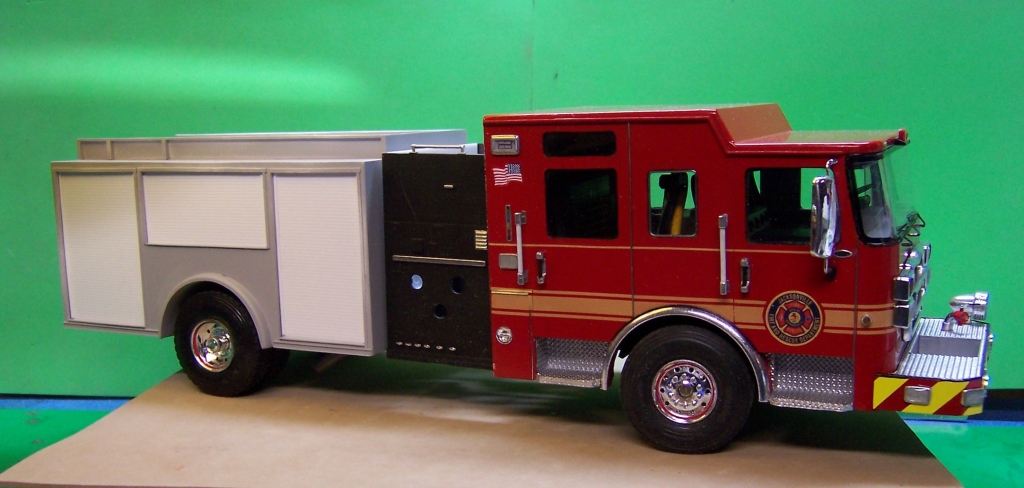
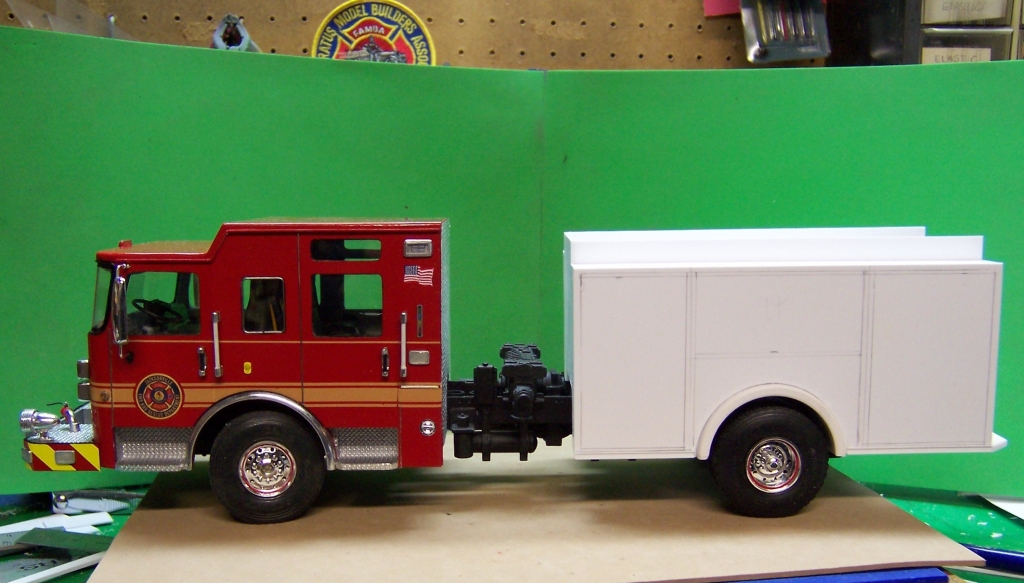
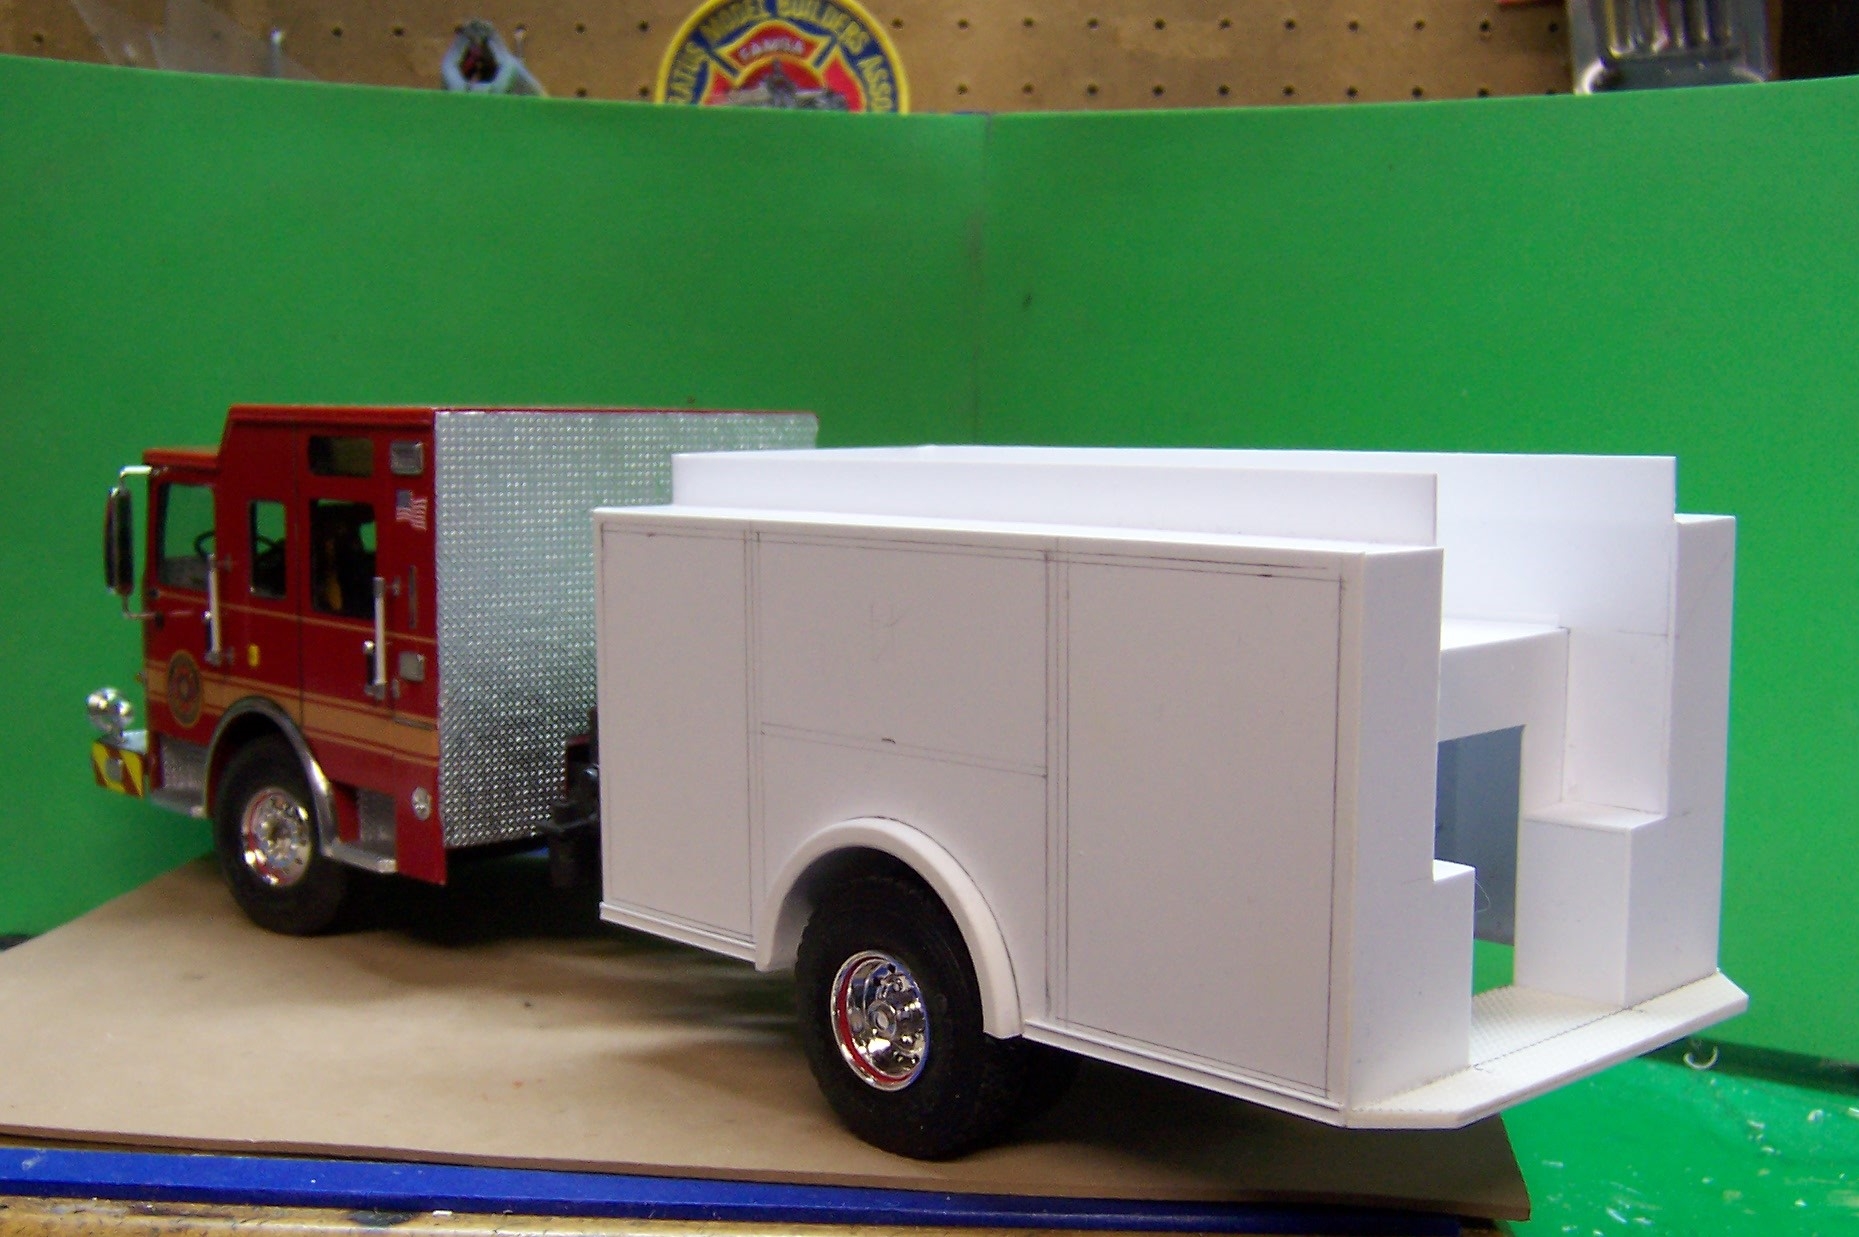
Been working on the actual pump panel. The Trumpeter panel is nice but not Pierce. So here is where it is as of tonite.
-
5 minute epoxy is mixed 1:1 parts A and B. Best thing about it is that it does not set up immediately but allows for location adjustment. Secures to just about any surface including resin. Can be found in small packages at hardware stores and big box stores. It will move so parts to be secured should be set flat or otherwise held in position until the epoxy is fully cured.
-
HI, Vince. Saw your post on MCM forum. Sorry to say the number of modern pieces I have is quite small. And most of them go back to the 80's and 90's. This is the first real modern rig I have done in some time.
-
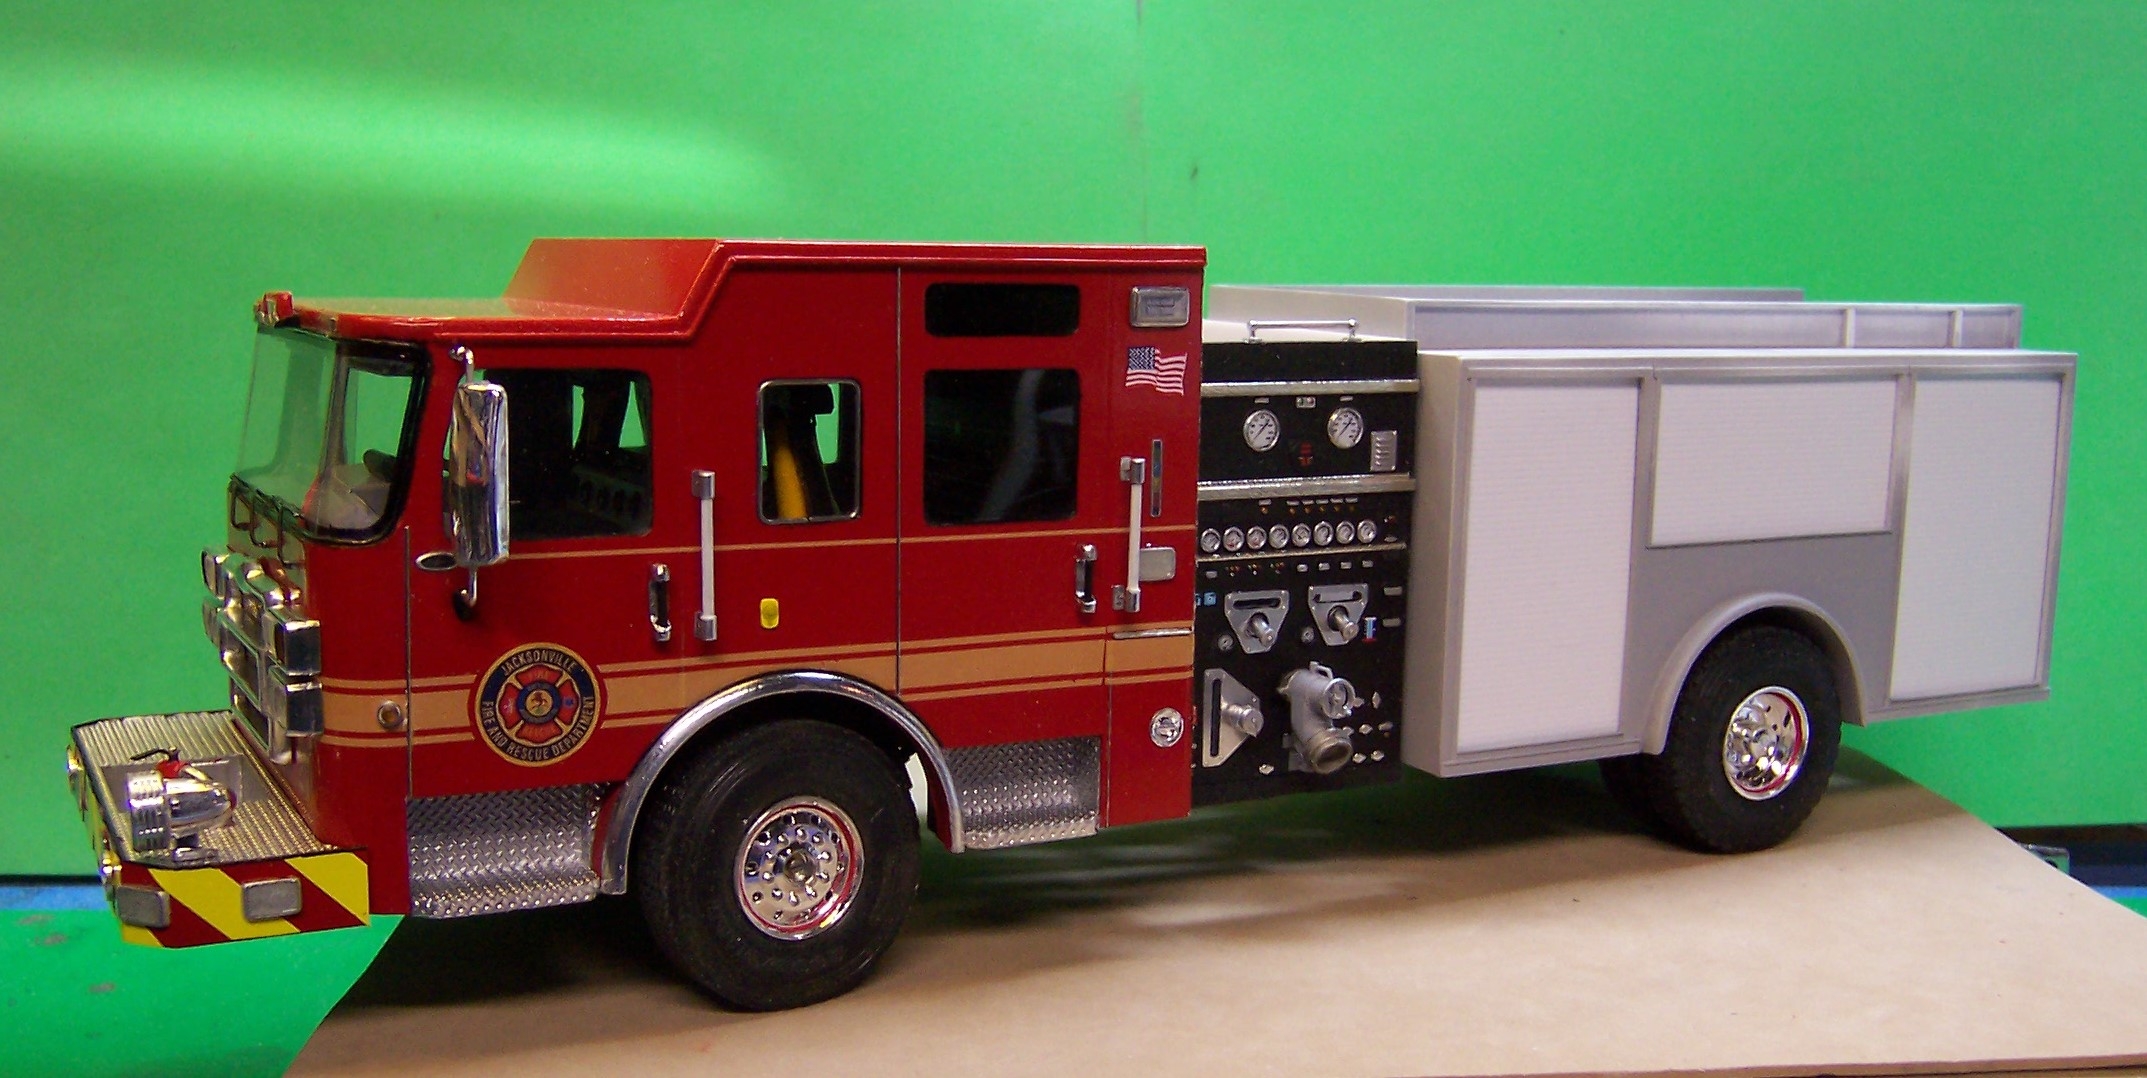
The body is now in primer and a pump panel is set in place just to see how it looks. The actual panel has a much different layout. This one came direct from the Trumpeter ALF kit. The kit panel has the large diameter gate valve like what is shown; a nice detail that I will keep for further projects. All I did to the panel was paint it flat black, add the three polished aluminum face plates around the discharges and to the rest up with Bare Metal Foil and a Molotow pen. I'll prime the body one more time and sand lightly before going to final paint. The body will be red with silver roll up doors. The orange/yellow striping on the sides will be extended full length. The rear will get the red/yellow treatment the same as the front bumper.

-
Nice piece of work! Lots and lots of details. I like it!
-
 1
1
-
-
Dennis: Are you using the AITM casting for the cab and hood? Give a shout it I can help in any way.
-
Here's where we are as of now. Got some of the basic body work done in the last couple of days.


Hi from Vt.!
in Introductions
Posted
One 'o them Green Mtn boys, eh? Welcome to the forum! Flatlander, myself.😊