

Chariots of Fire
-
Content count
155 -
Joined
-
Last visited
-
Days Won
13
Posts posted by Chariots of Fire
-
-
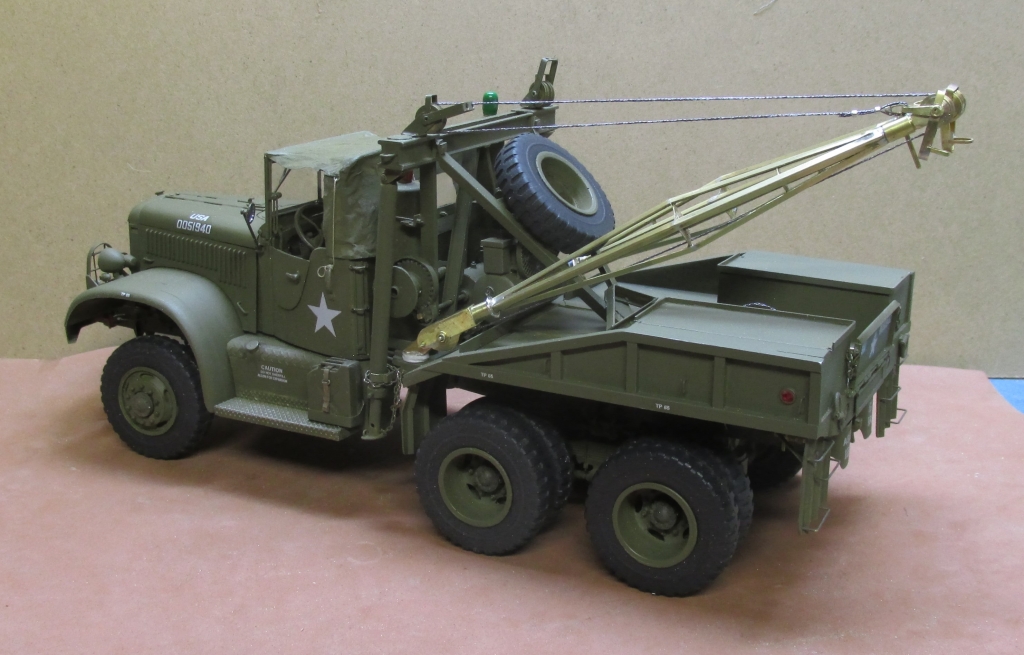
This 1/25 scale Diamond T Wrecker was built using information from a Squadron Walk Around Photo book and TM-811 which is the US Army technical manual for the 4 Ton Trucks. It carried the designation of 969A with the army.
It was built from a combination of brass, plastic, Renshape, resin castings, brass wire, aluminum foil, two ply facial tissue for the top and assundry pins and wire. Metallic embroidery thread was used for the winch cables. Decals are computer generated and ALPS printed.


-
A good source of tubing that size is a hardware store that carries plumbing supplies. Brian is right. Cut it to length and then glue on some sheet plastic to the ends. Stack up 2-3 pieces so that you can bevel the ends by sanding.
-
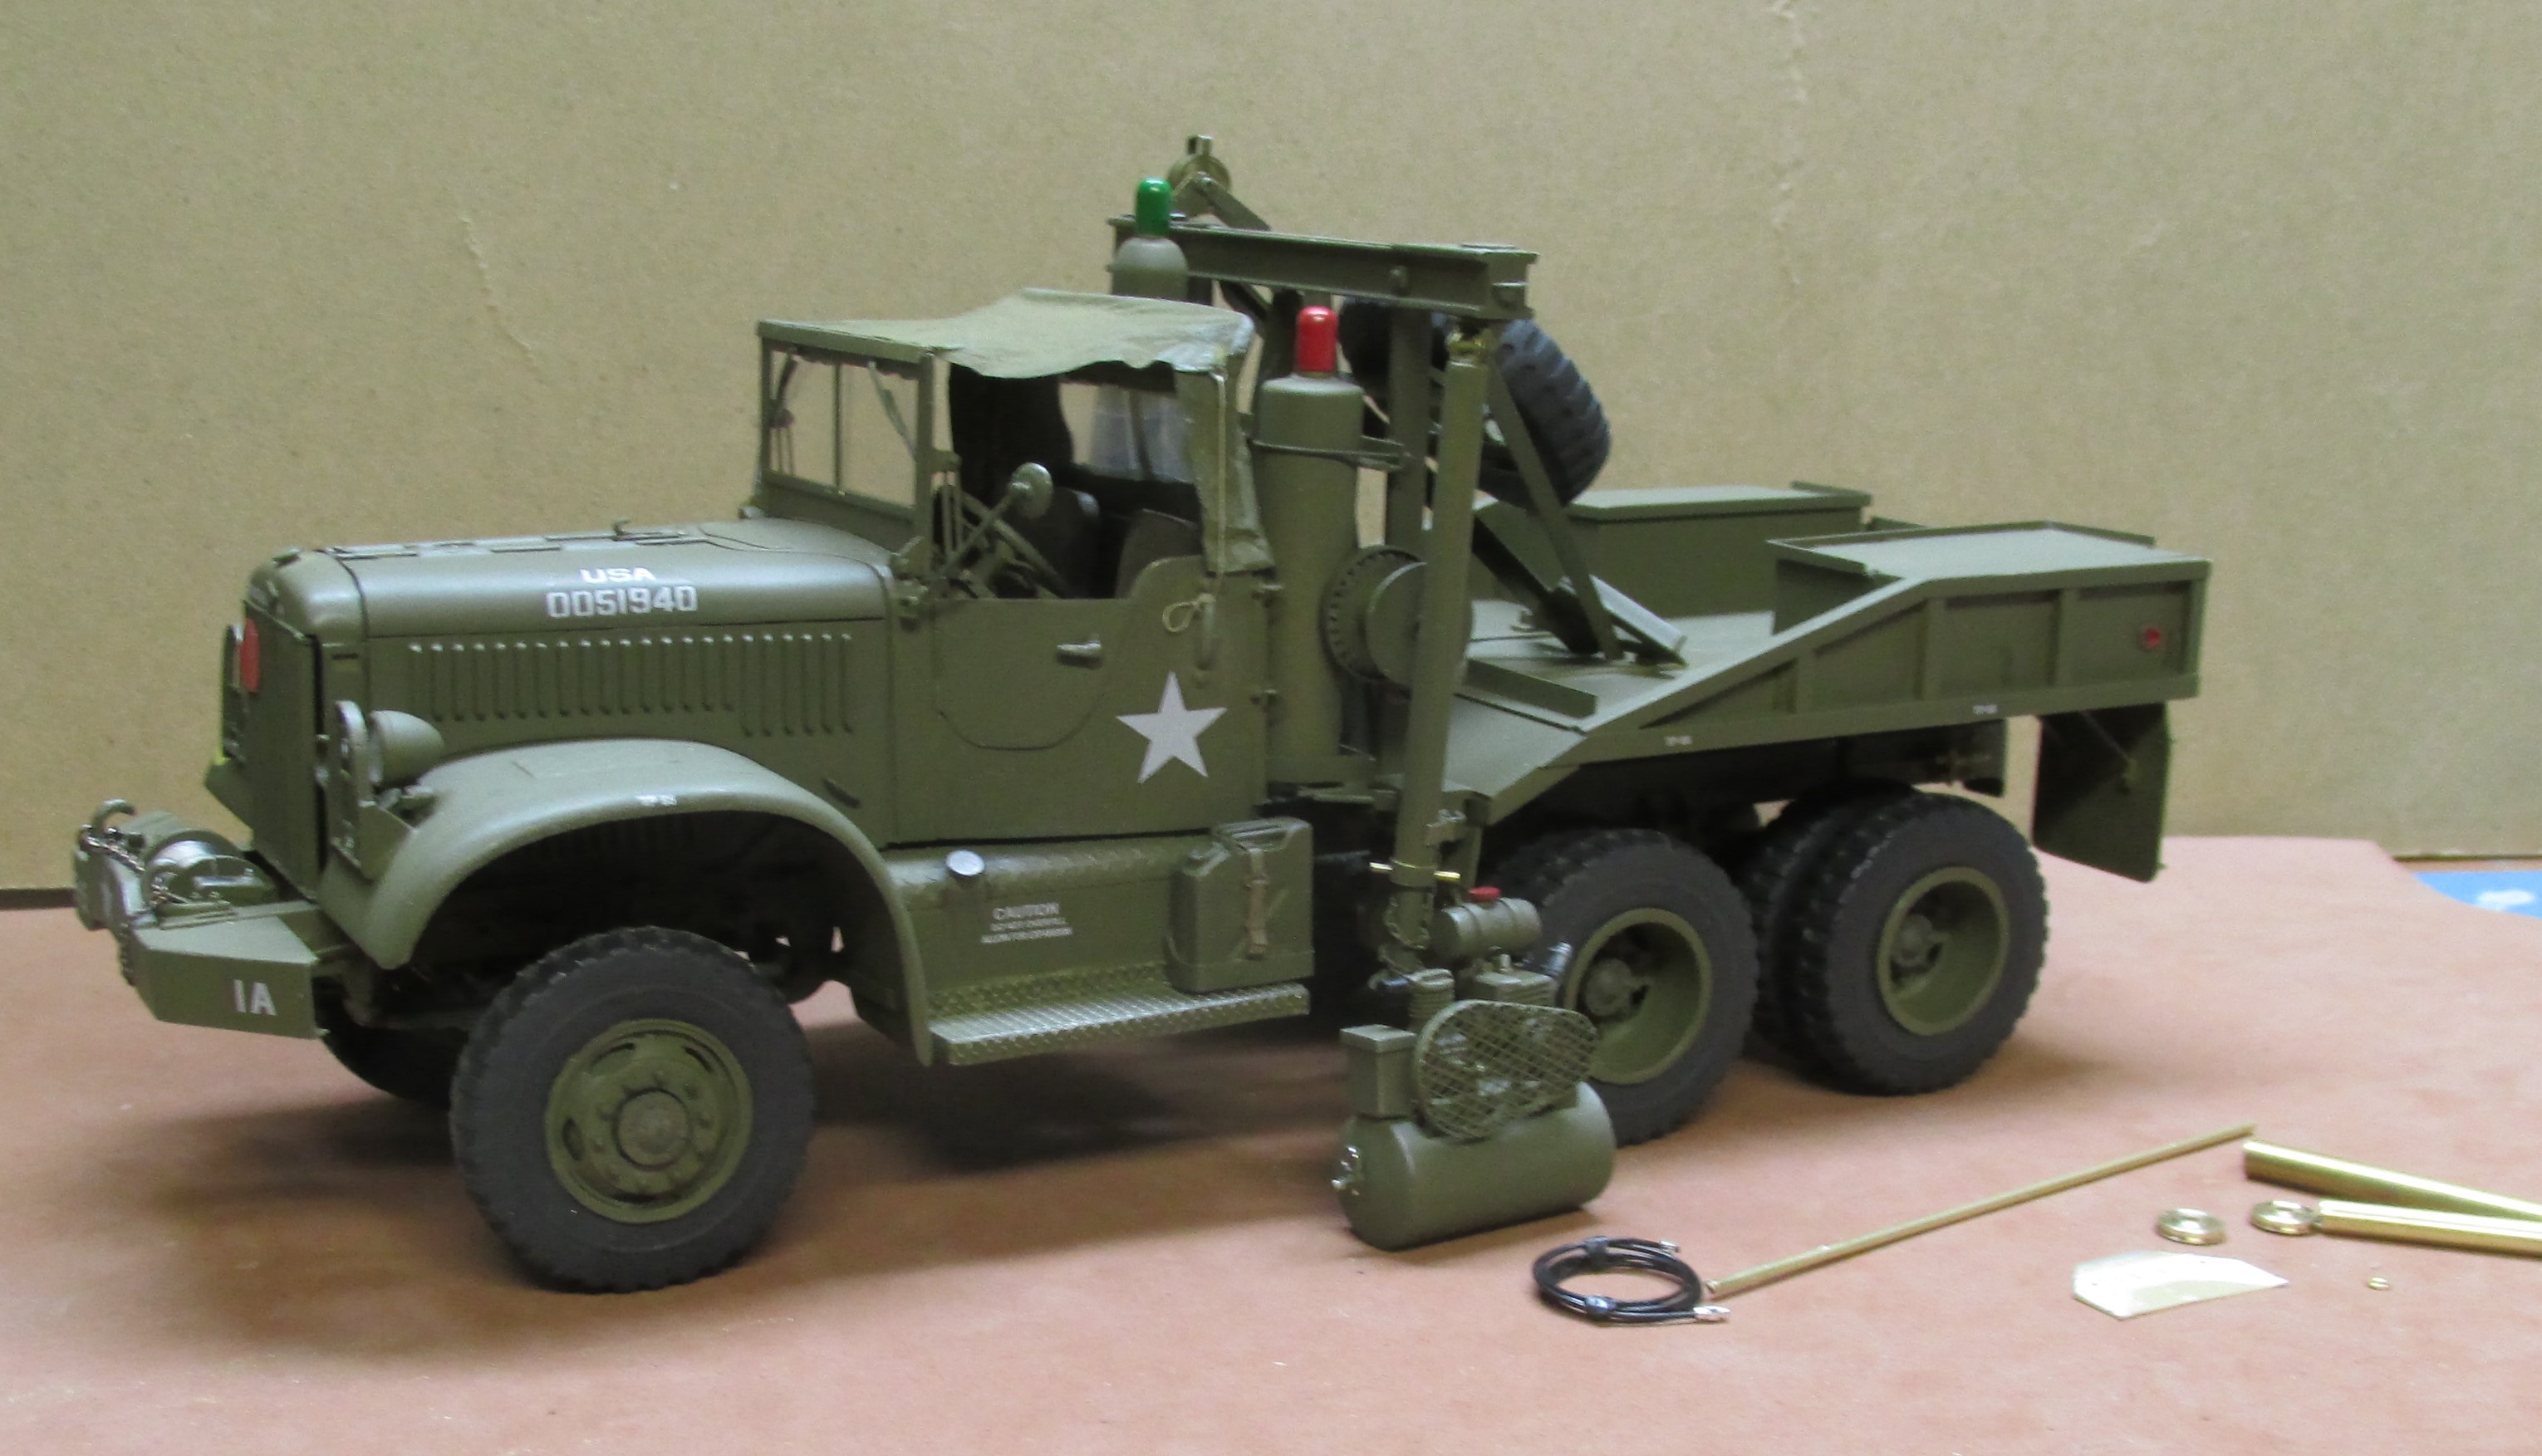
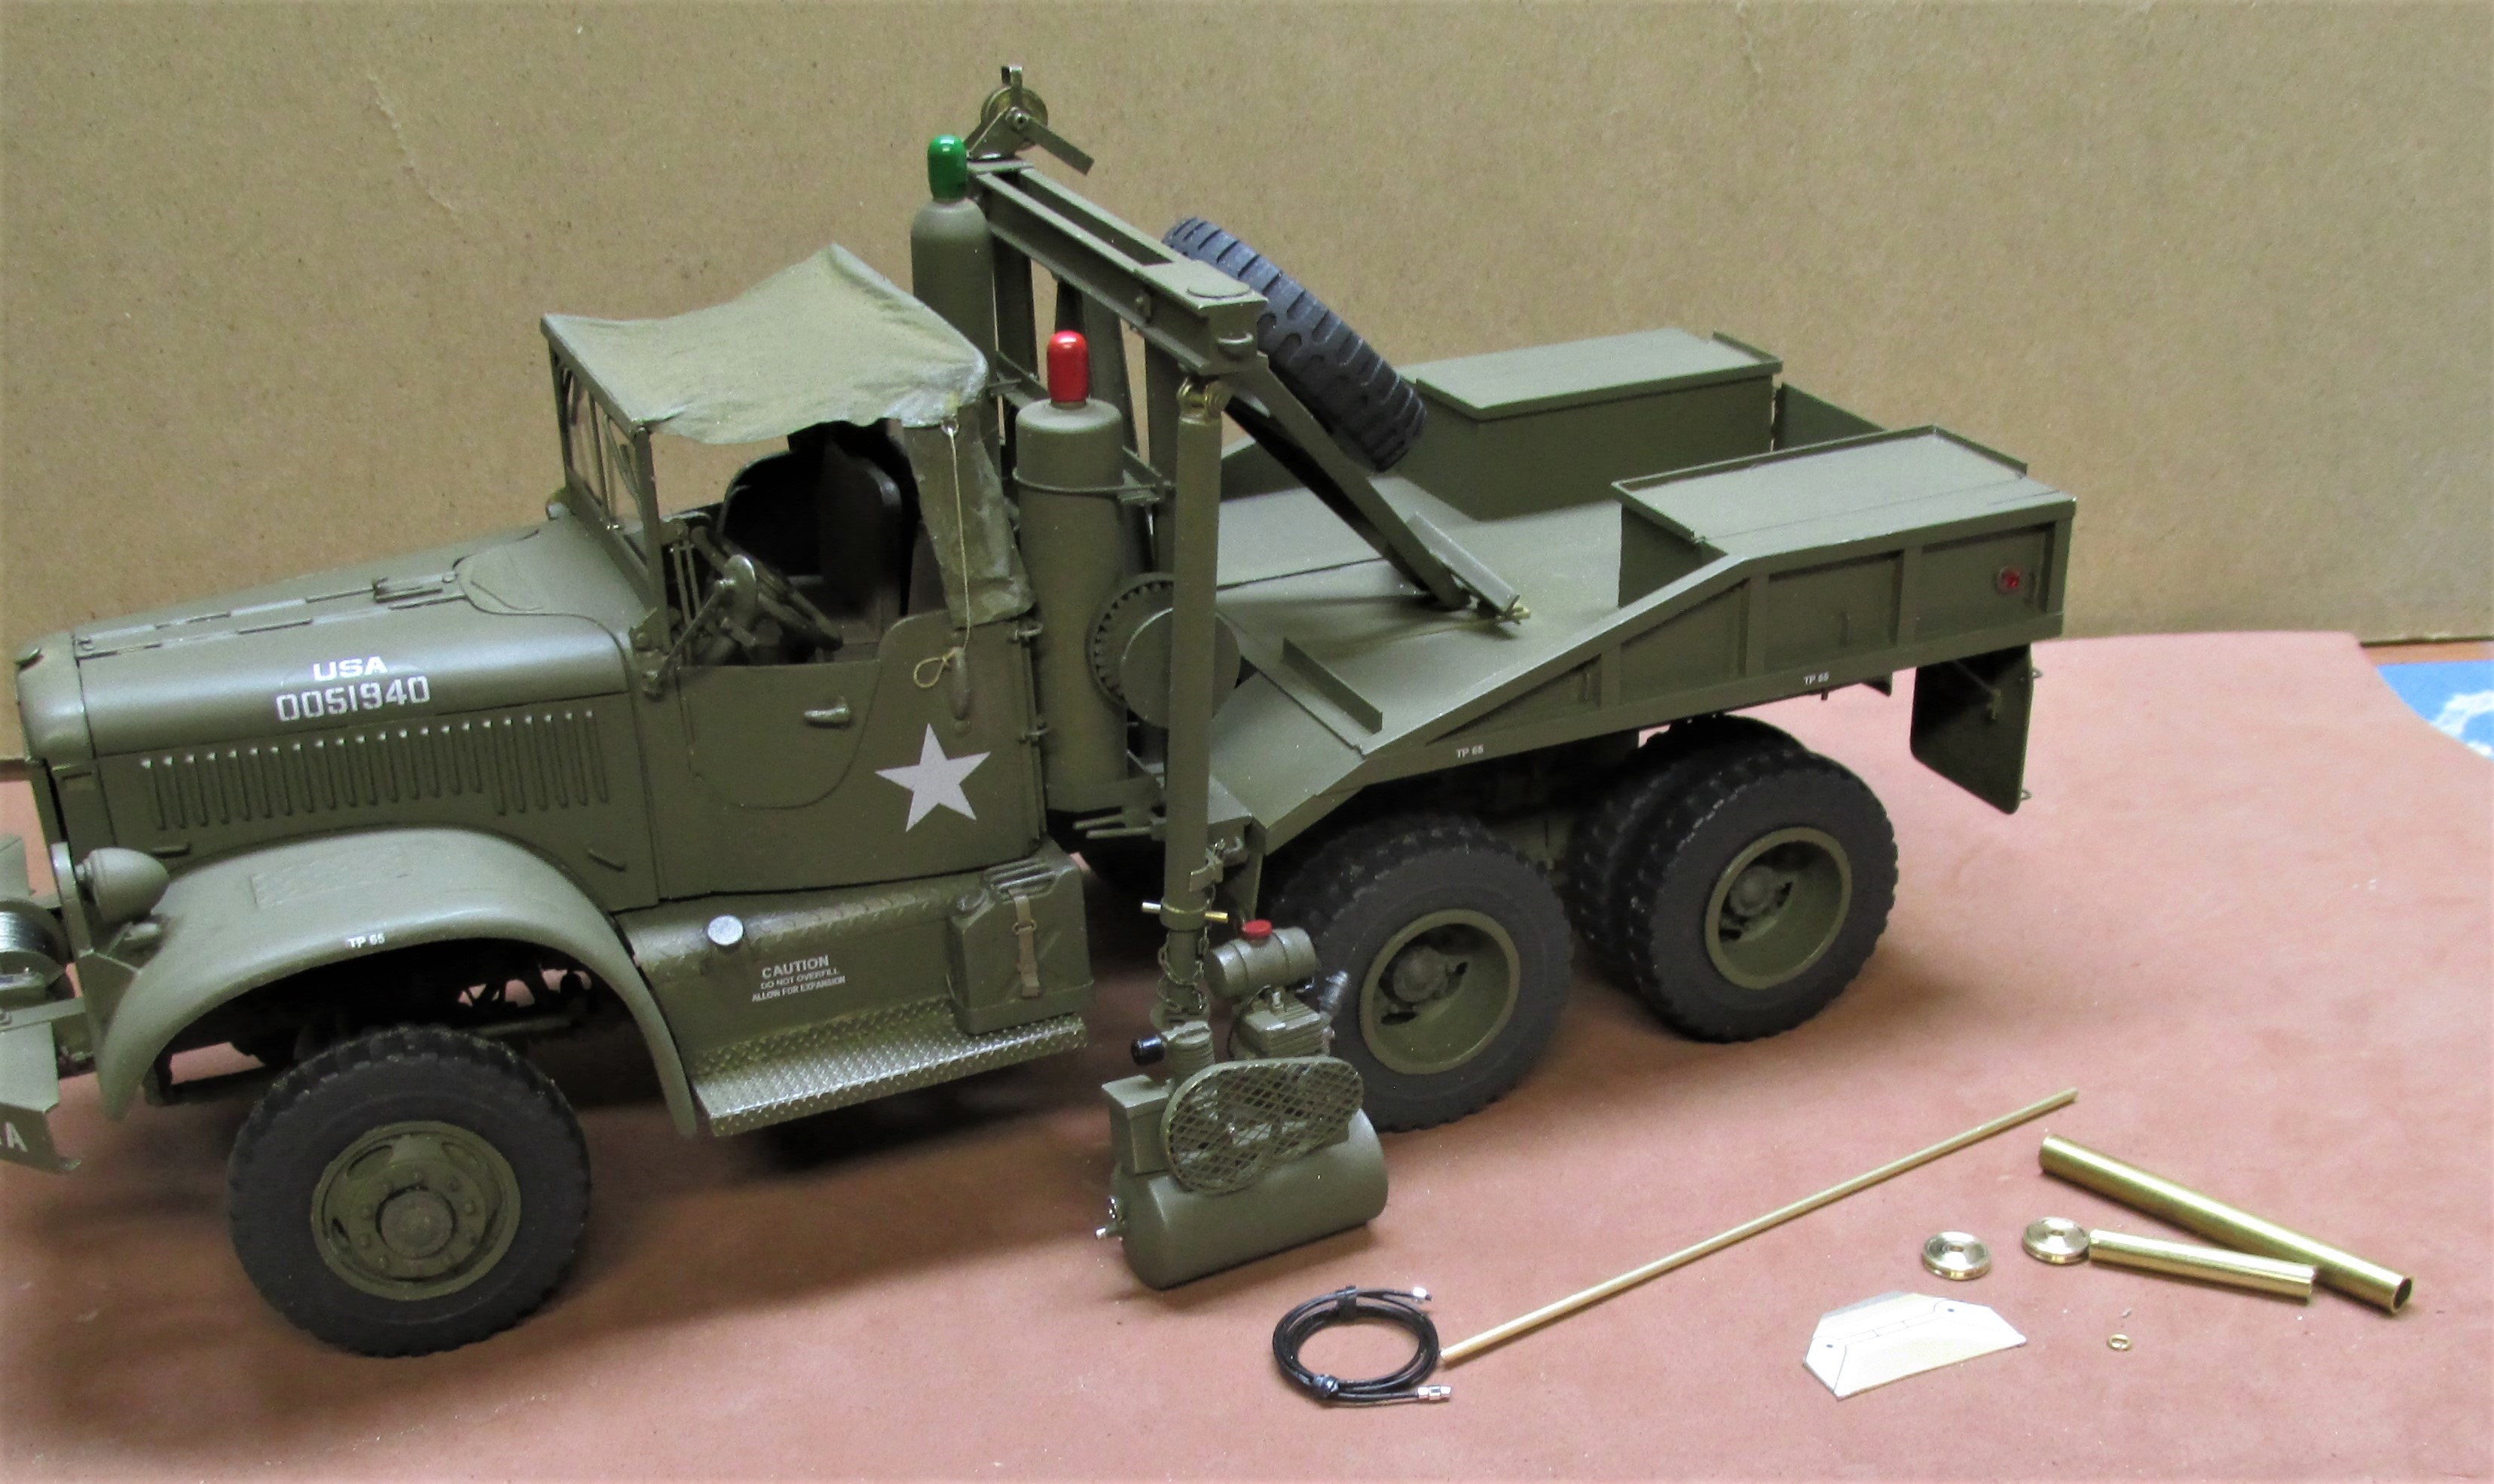
A lot more has been completed. The booms are done and mounted but not permanently. Still a lot of little things to do on them before setting them in place for good. Winches need to be supplied with cable. The lifting cable on one side has been done to see how it works. It raises and lowers easily. The first photo shows the booms in place with a temporary cable for fitting purposes.

In the bottom photo the boom on the left is now self supported. Similar cables will be added to the right side.
-
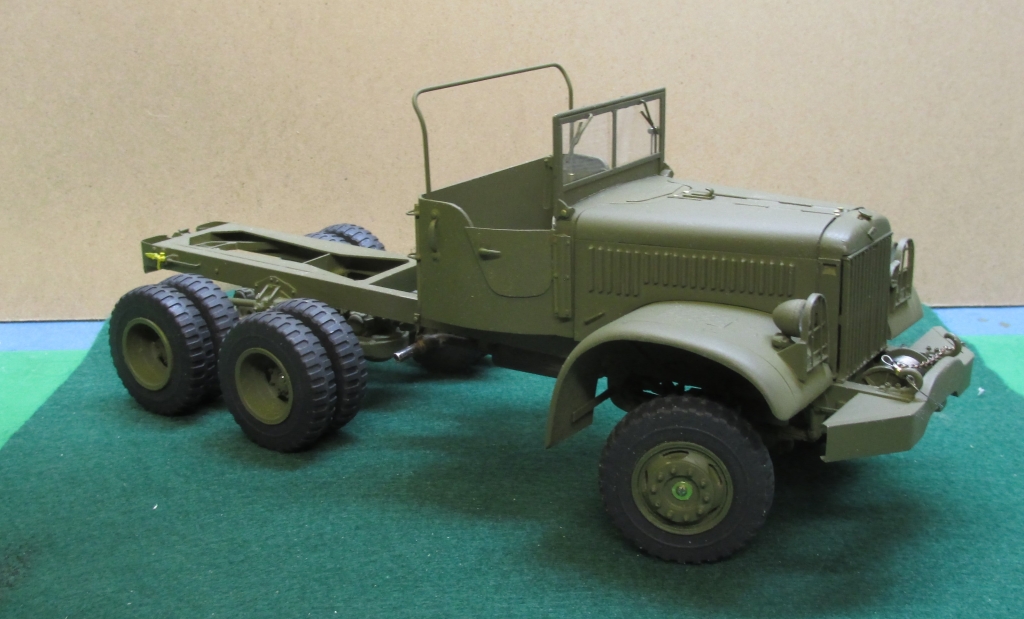
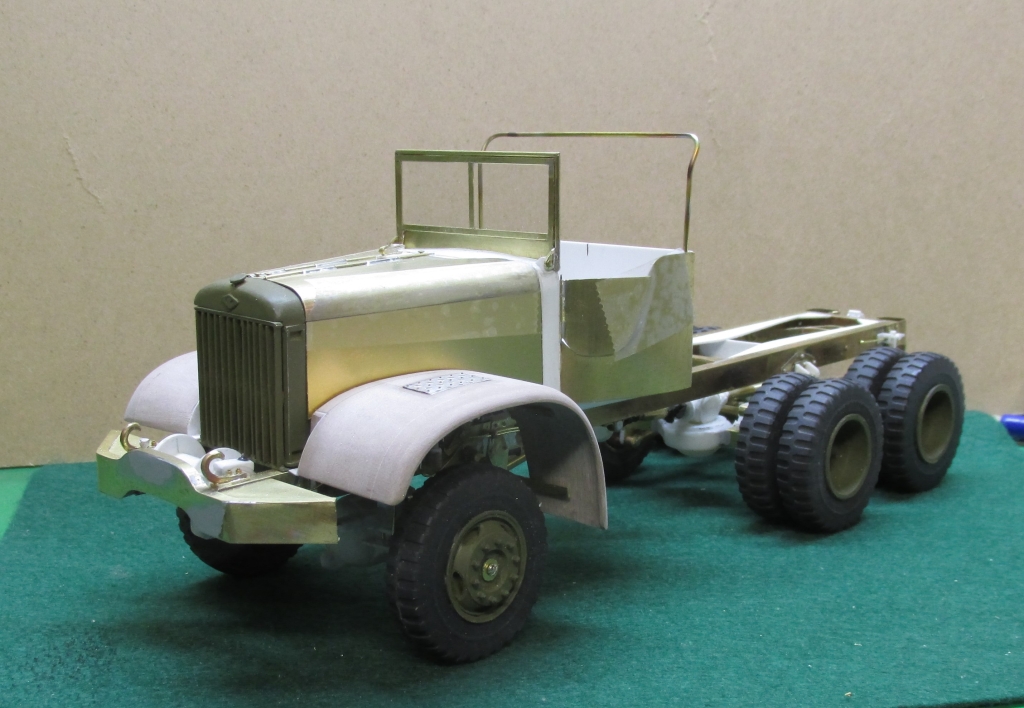
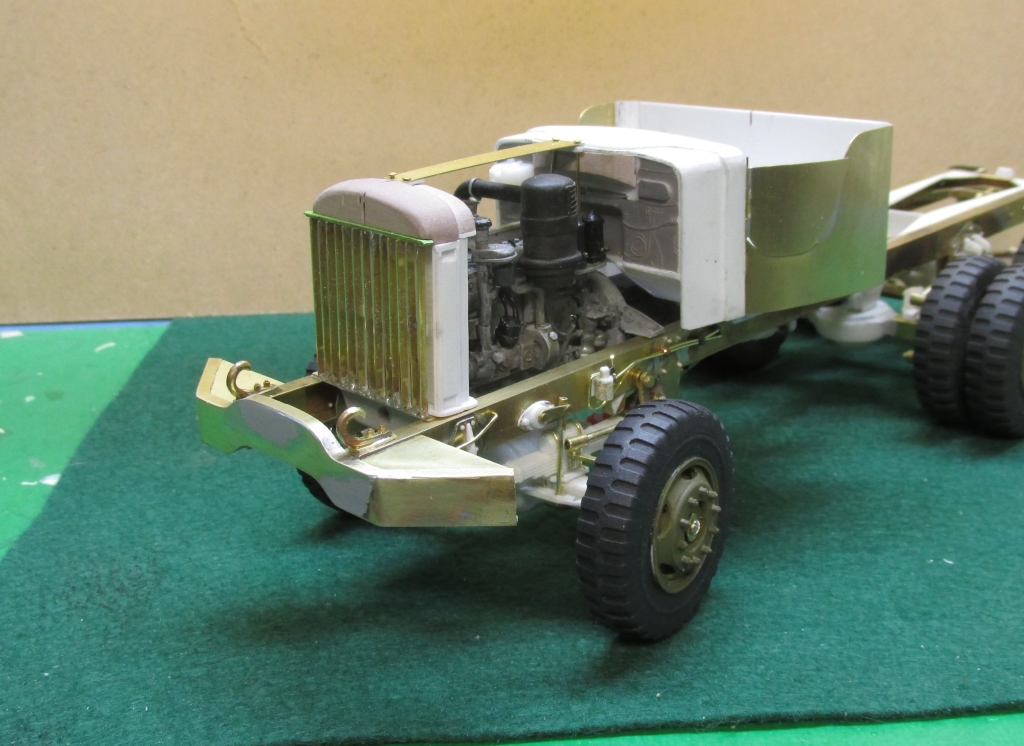
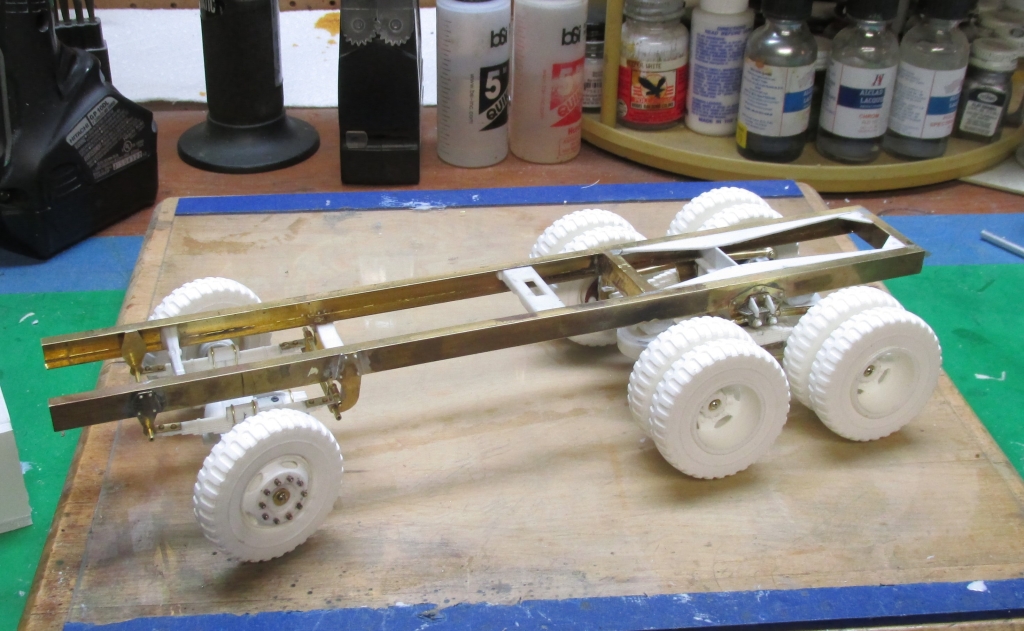
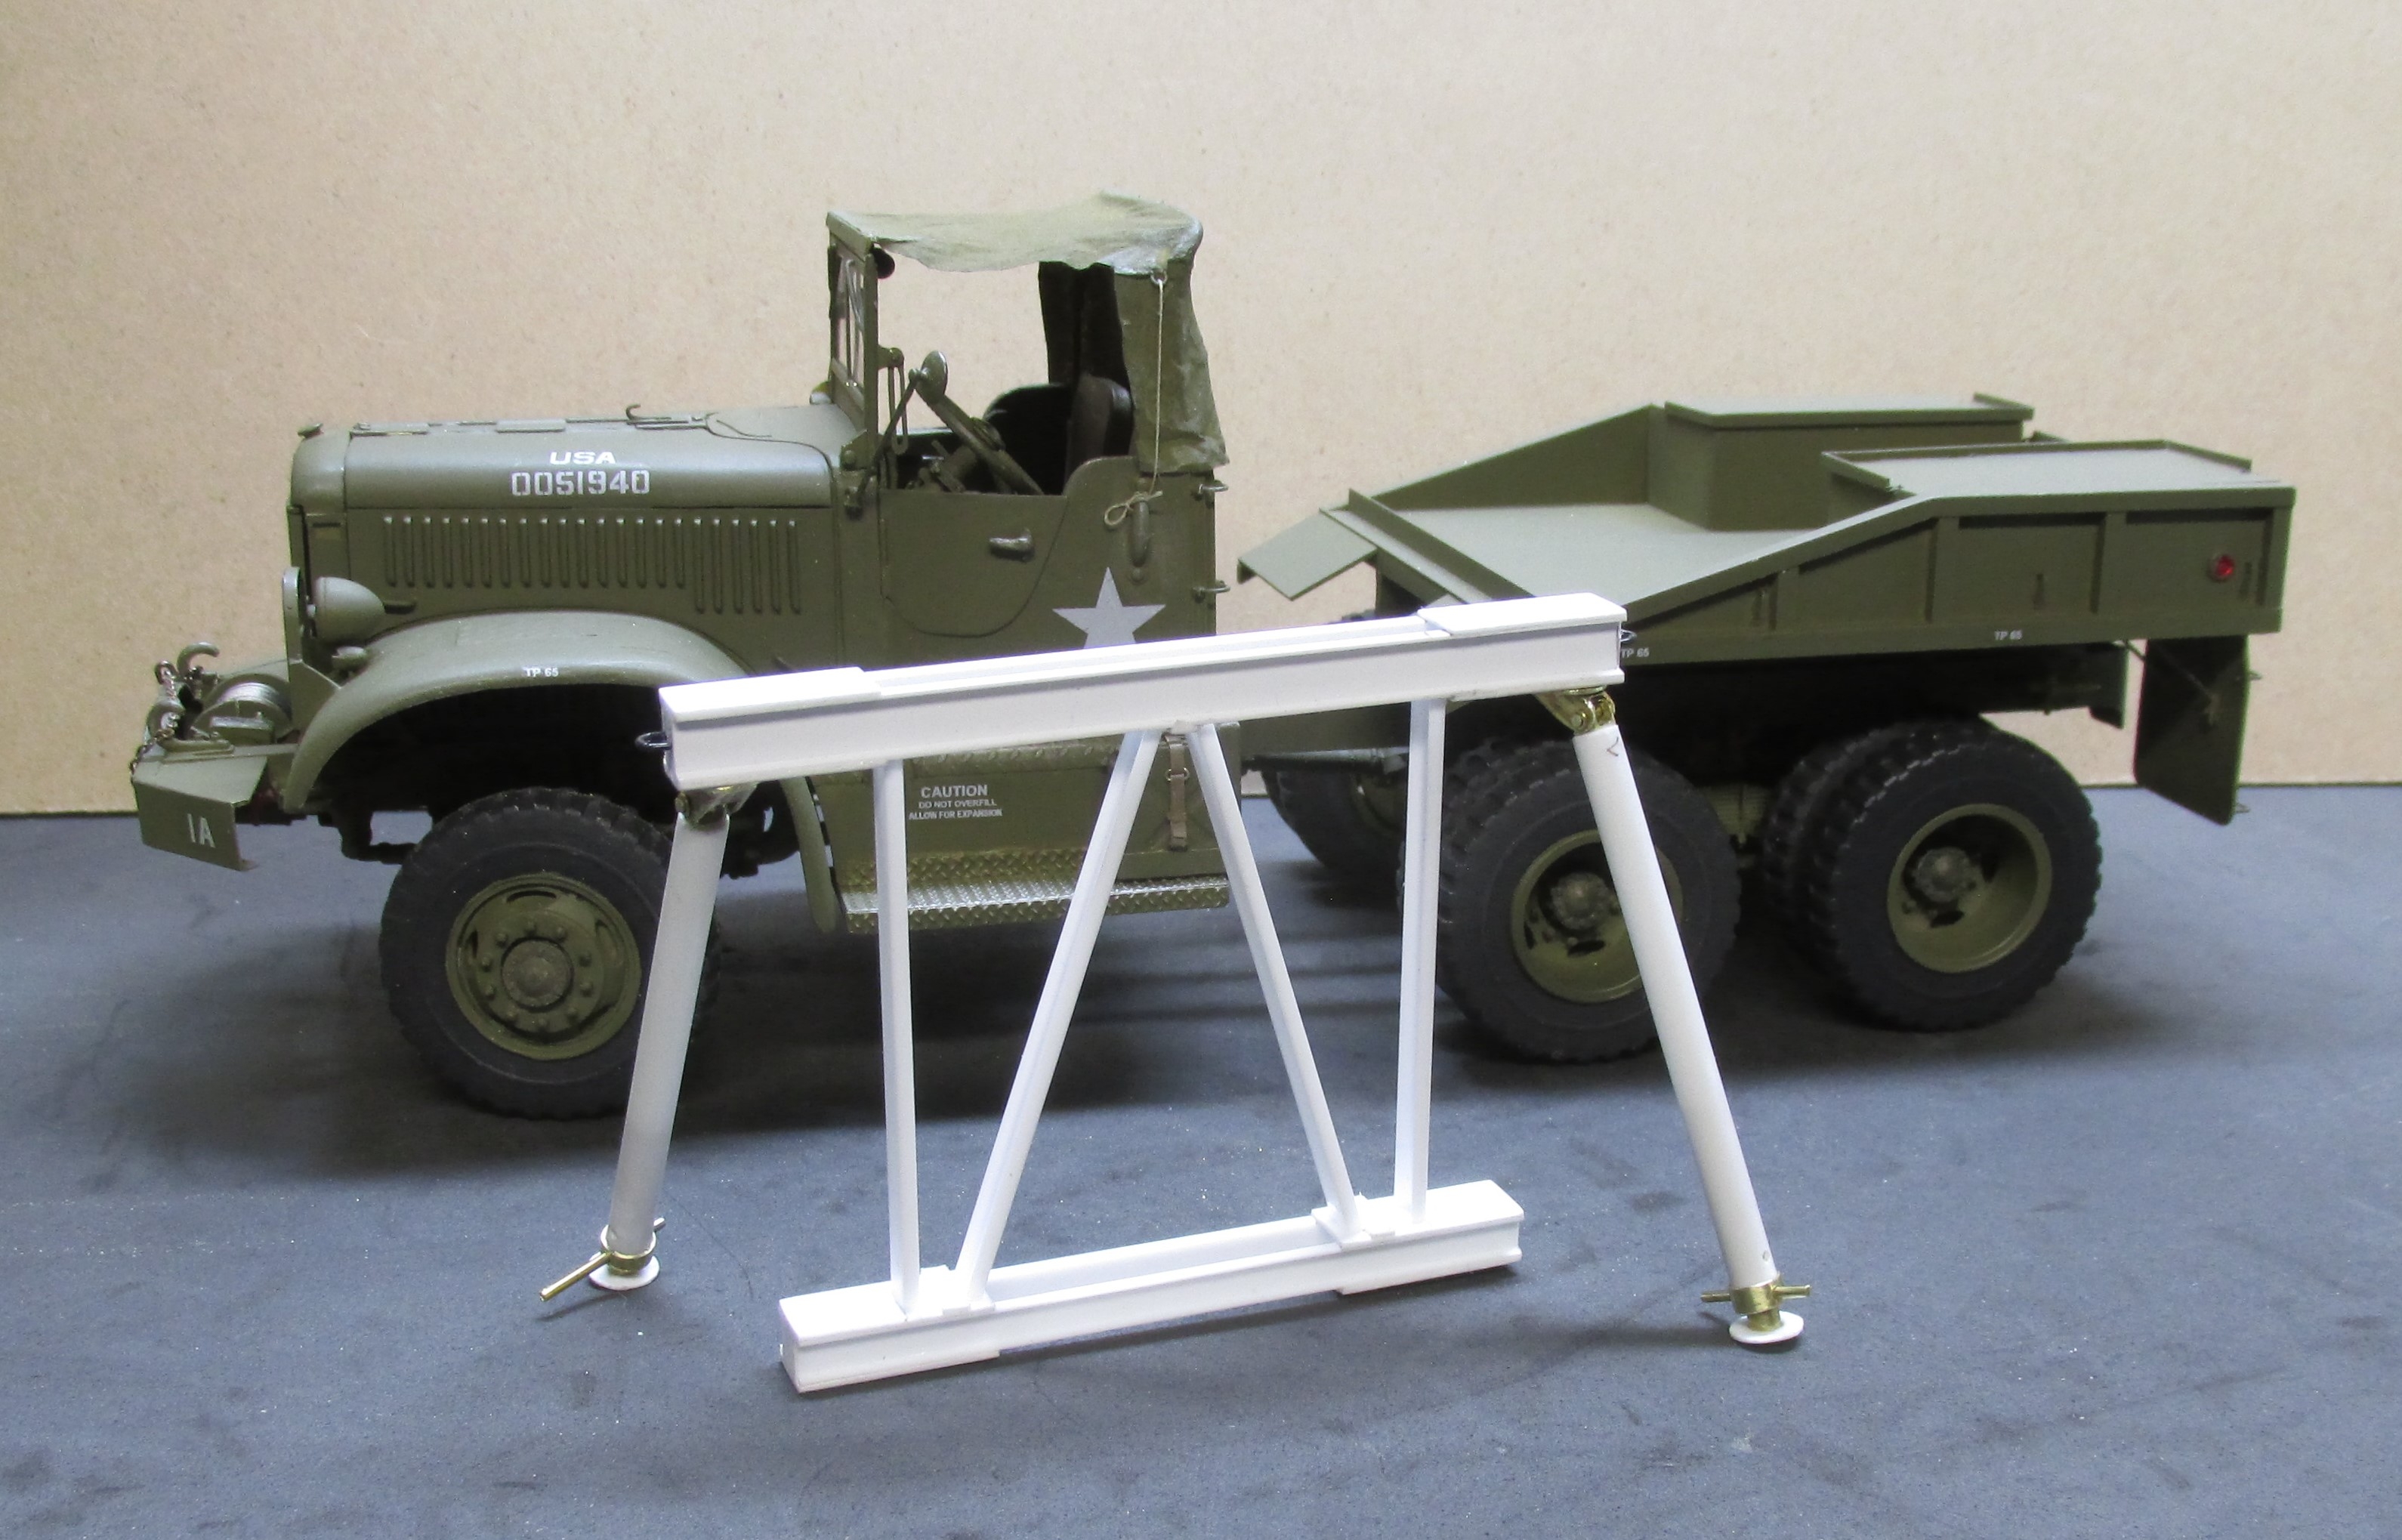
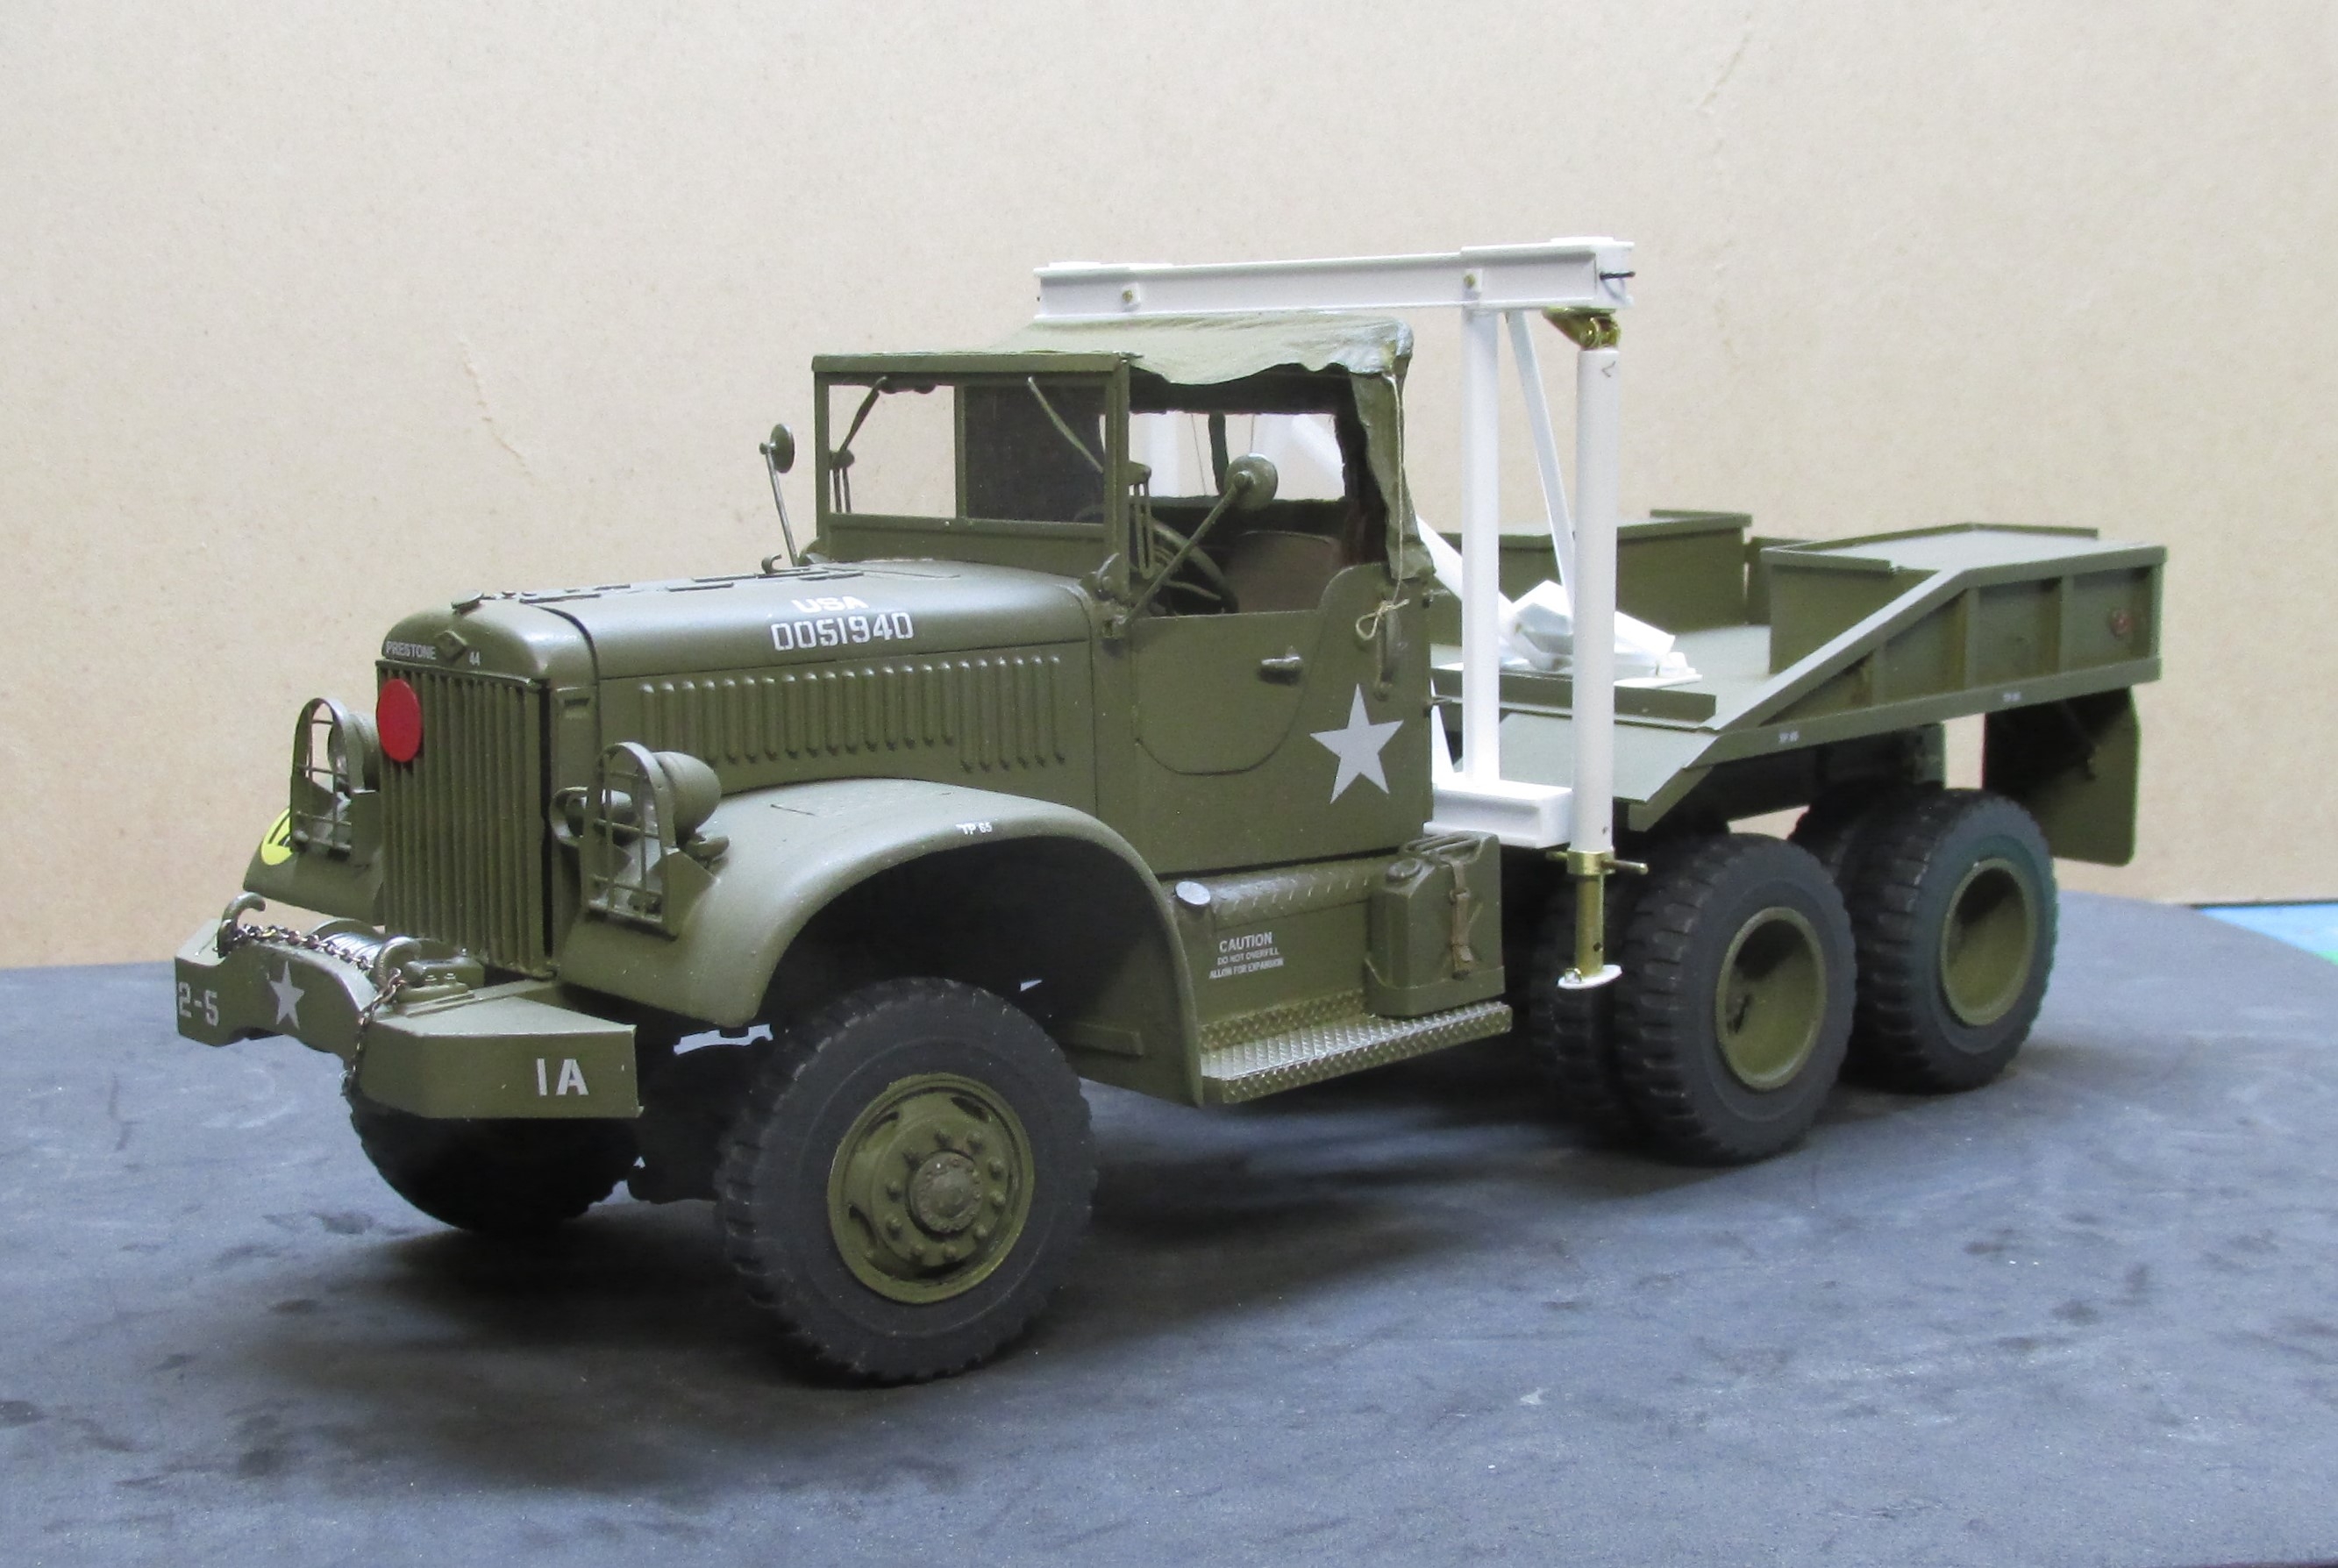
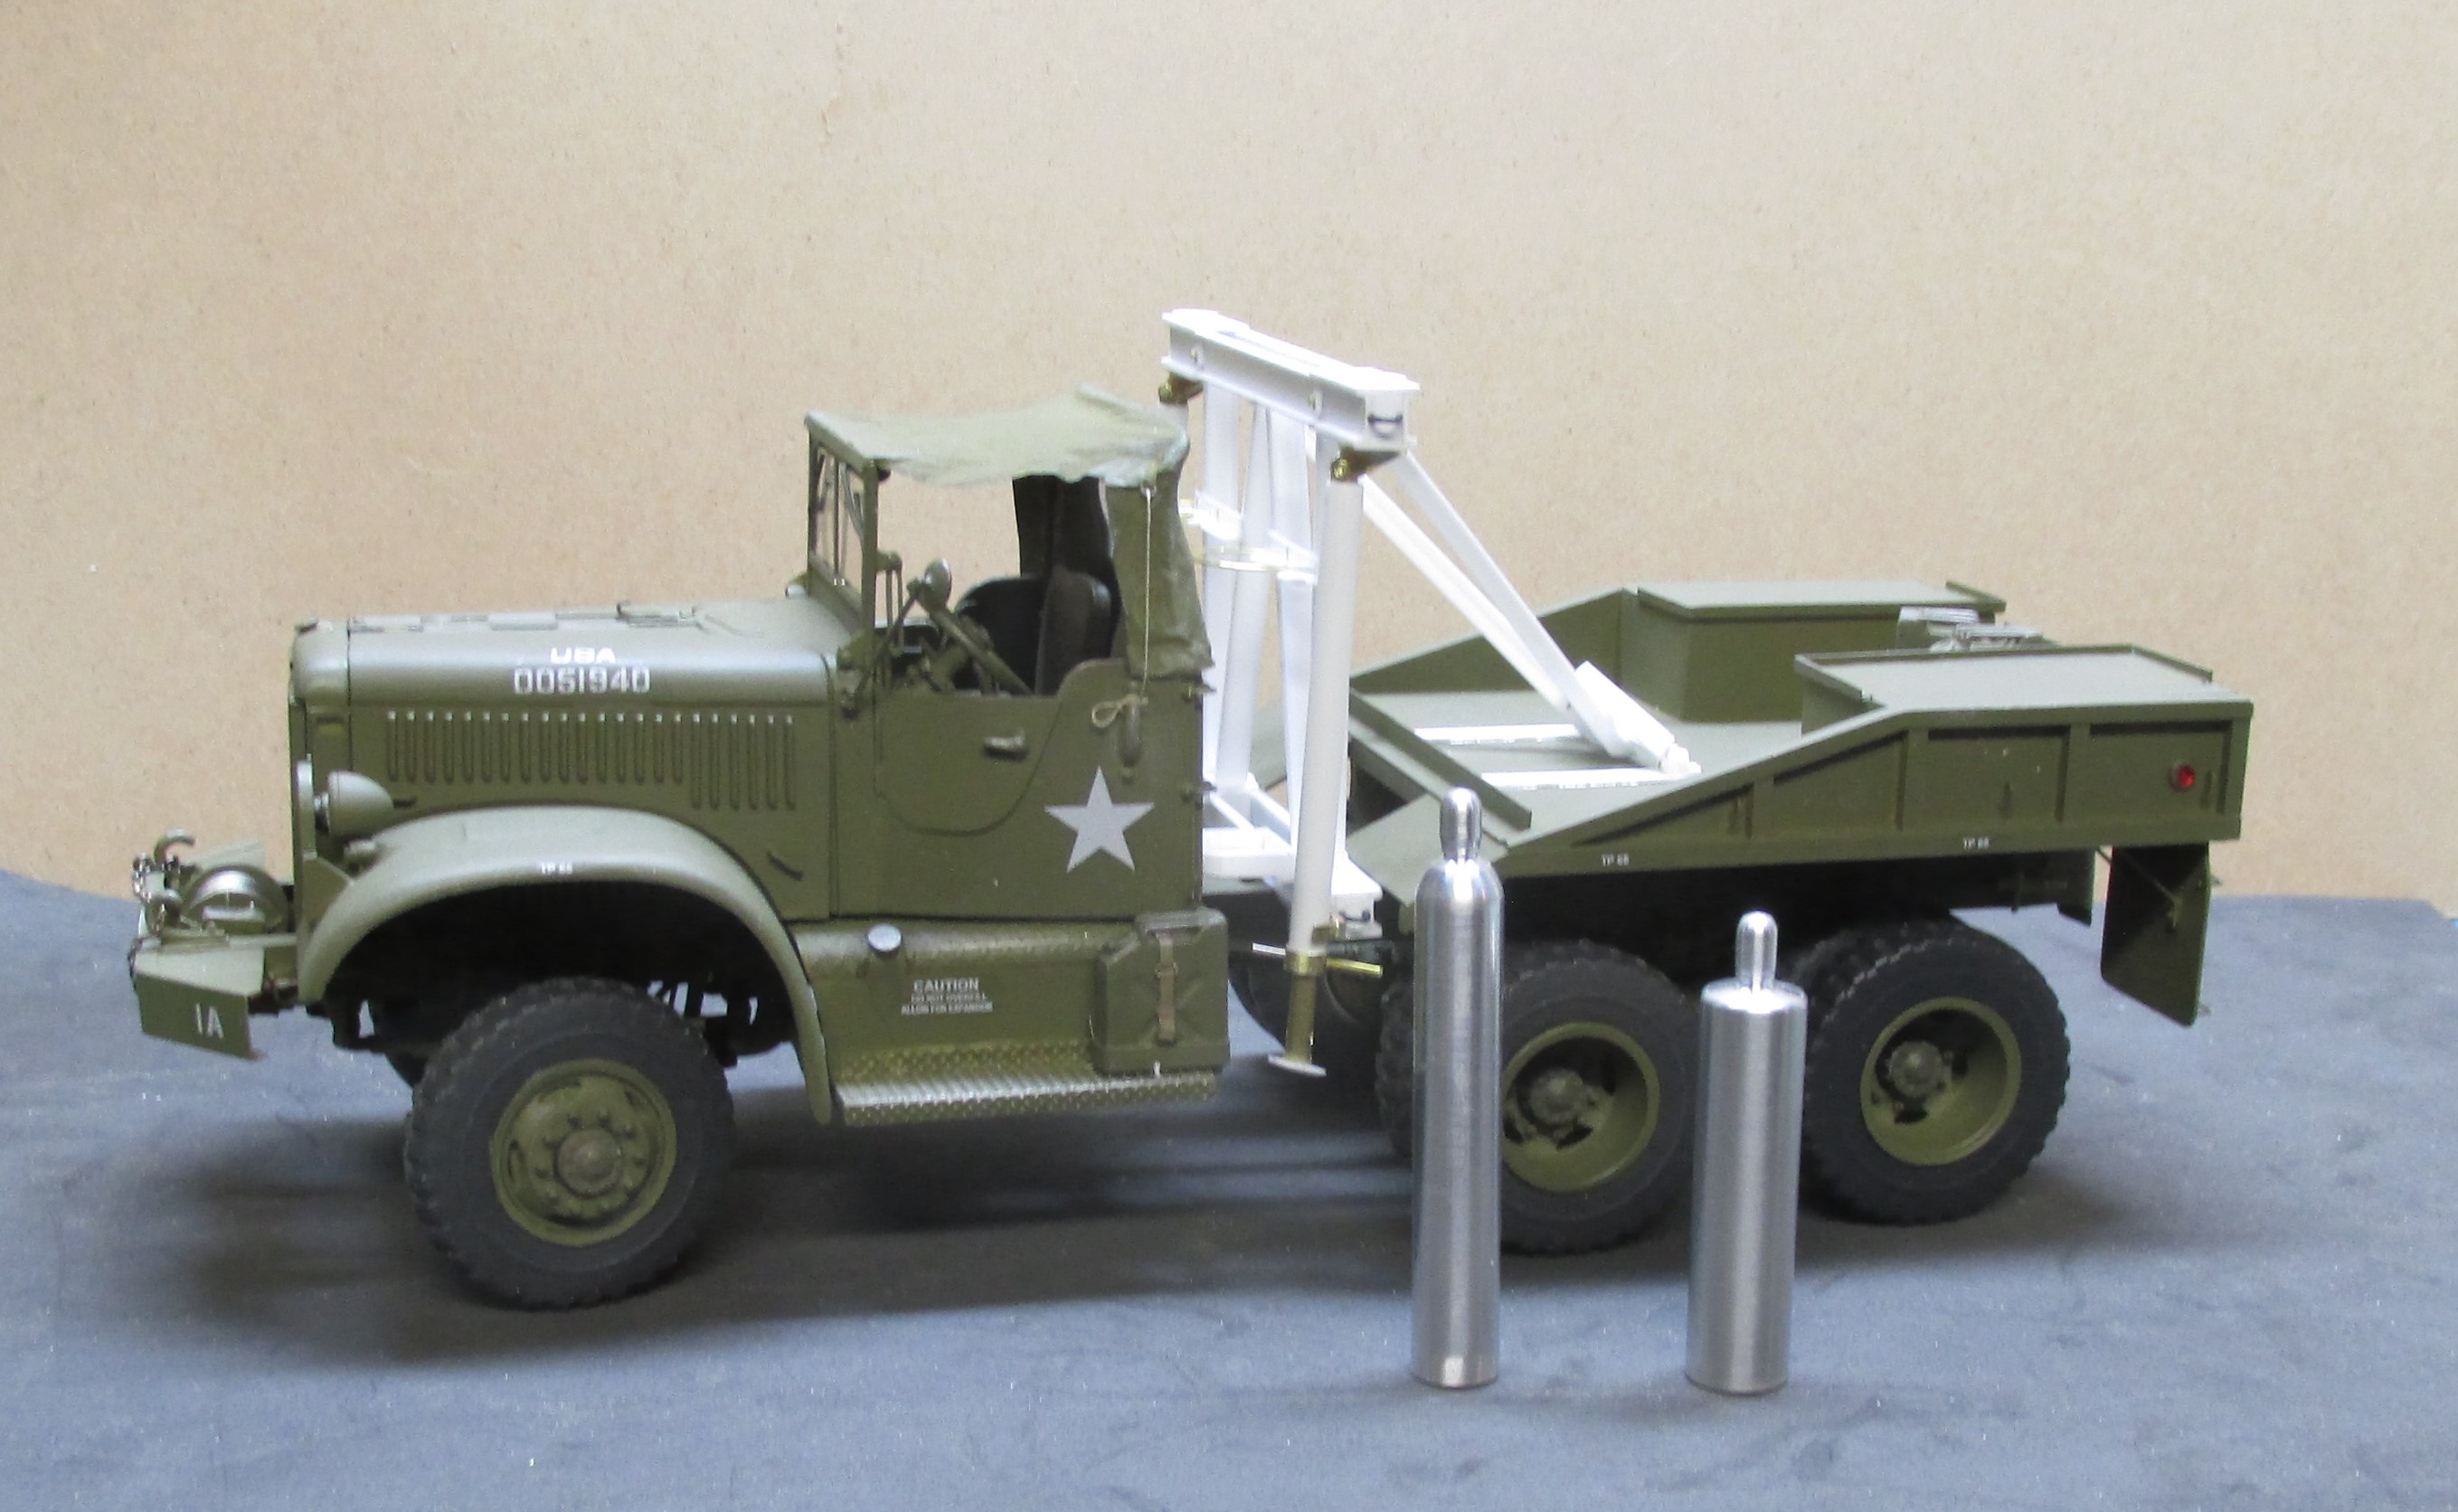
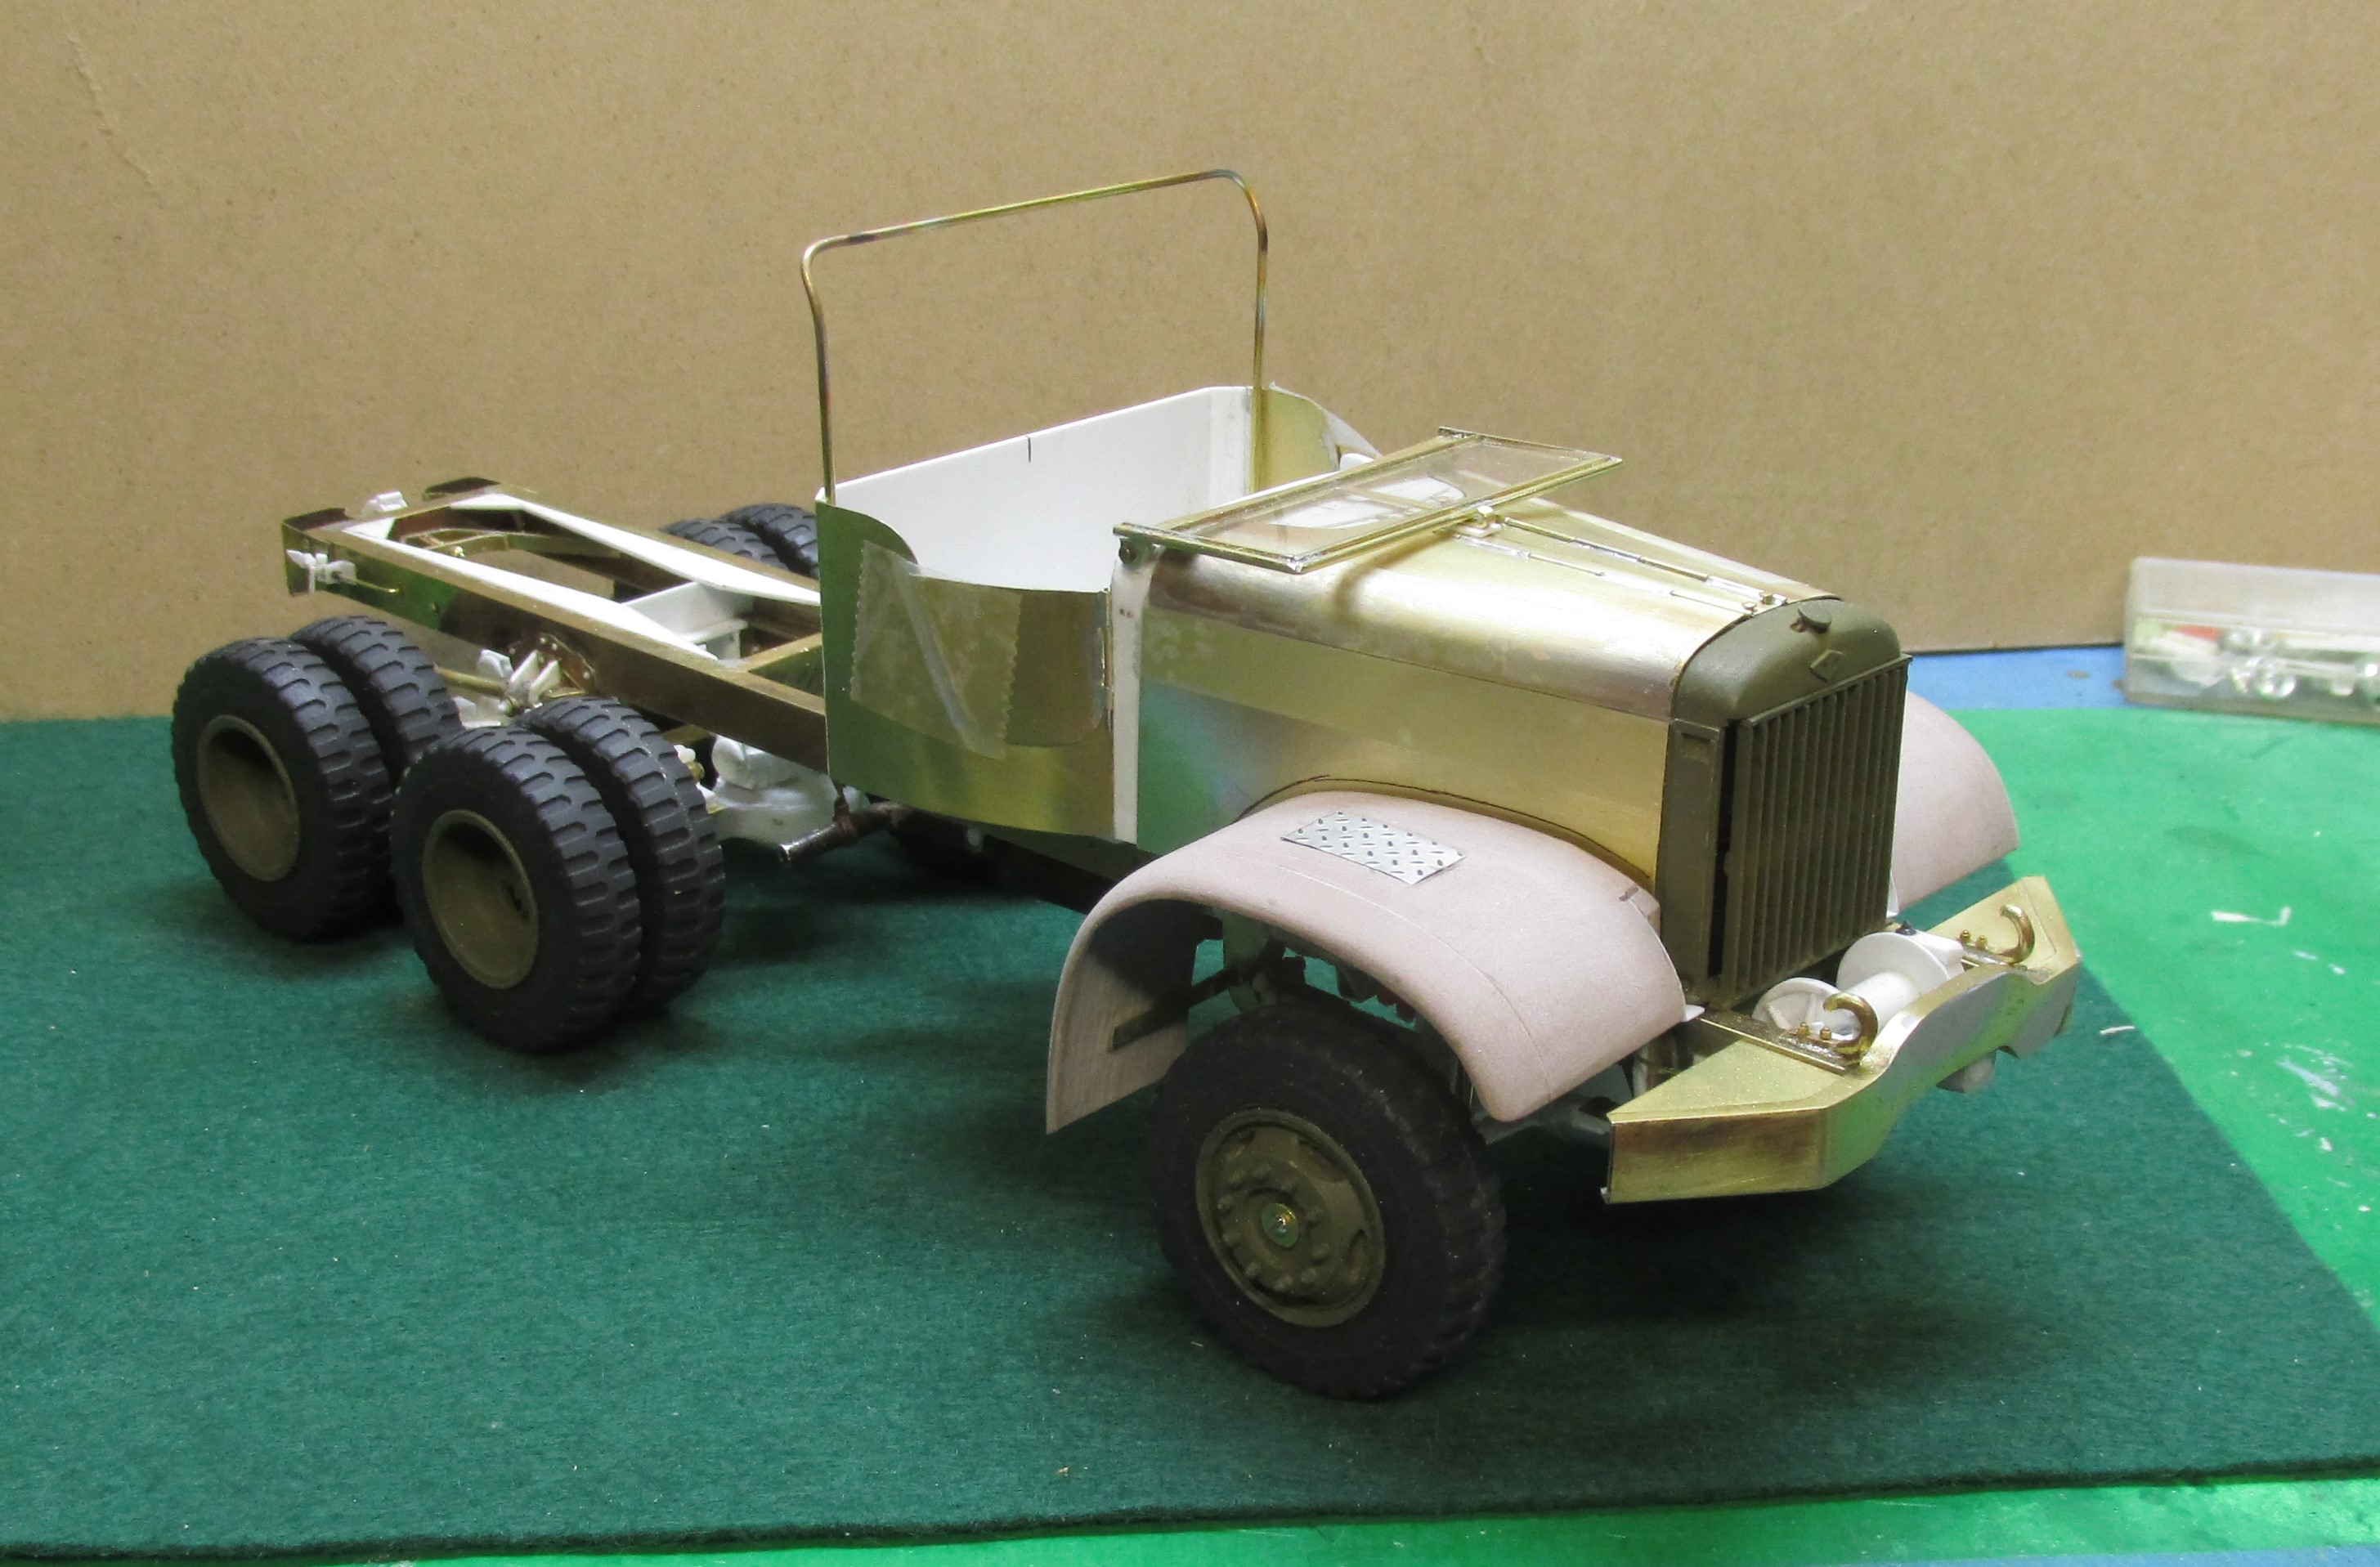
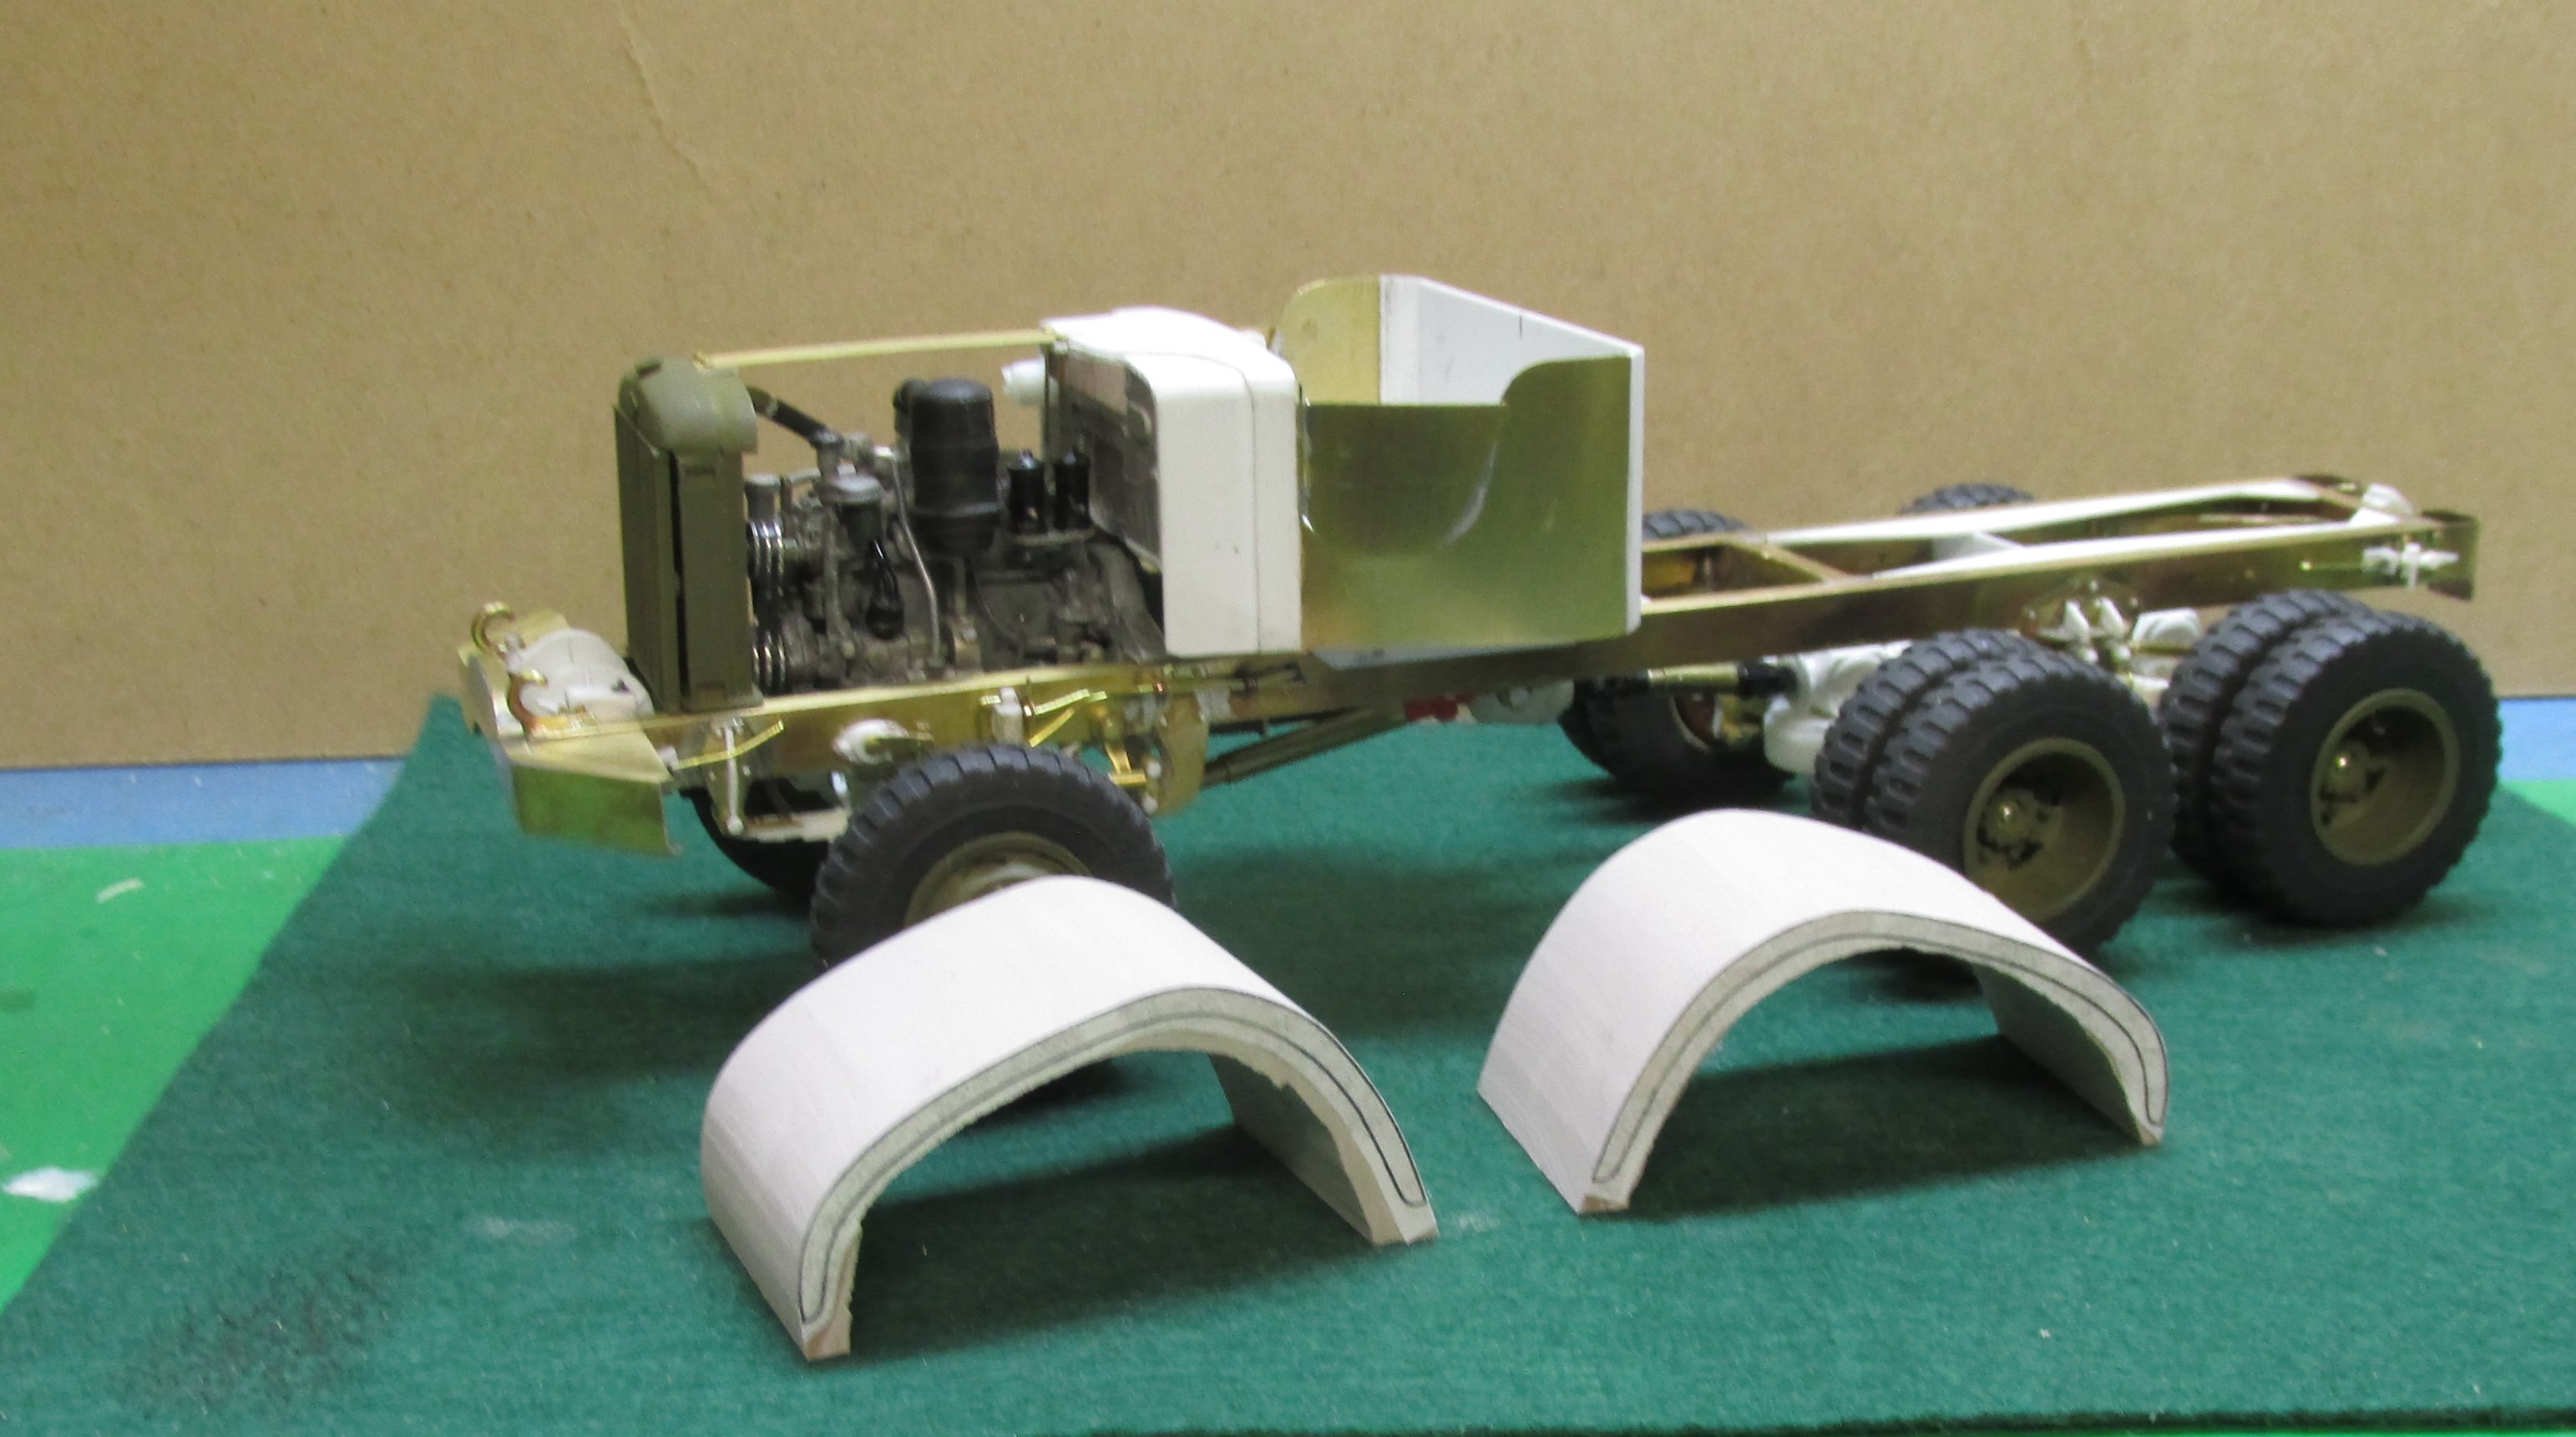
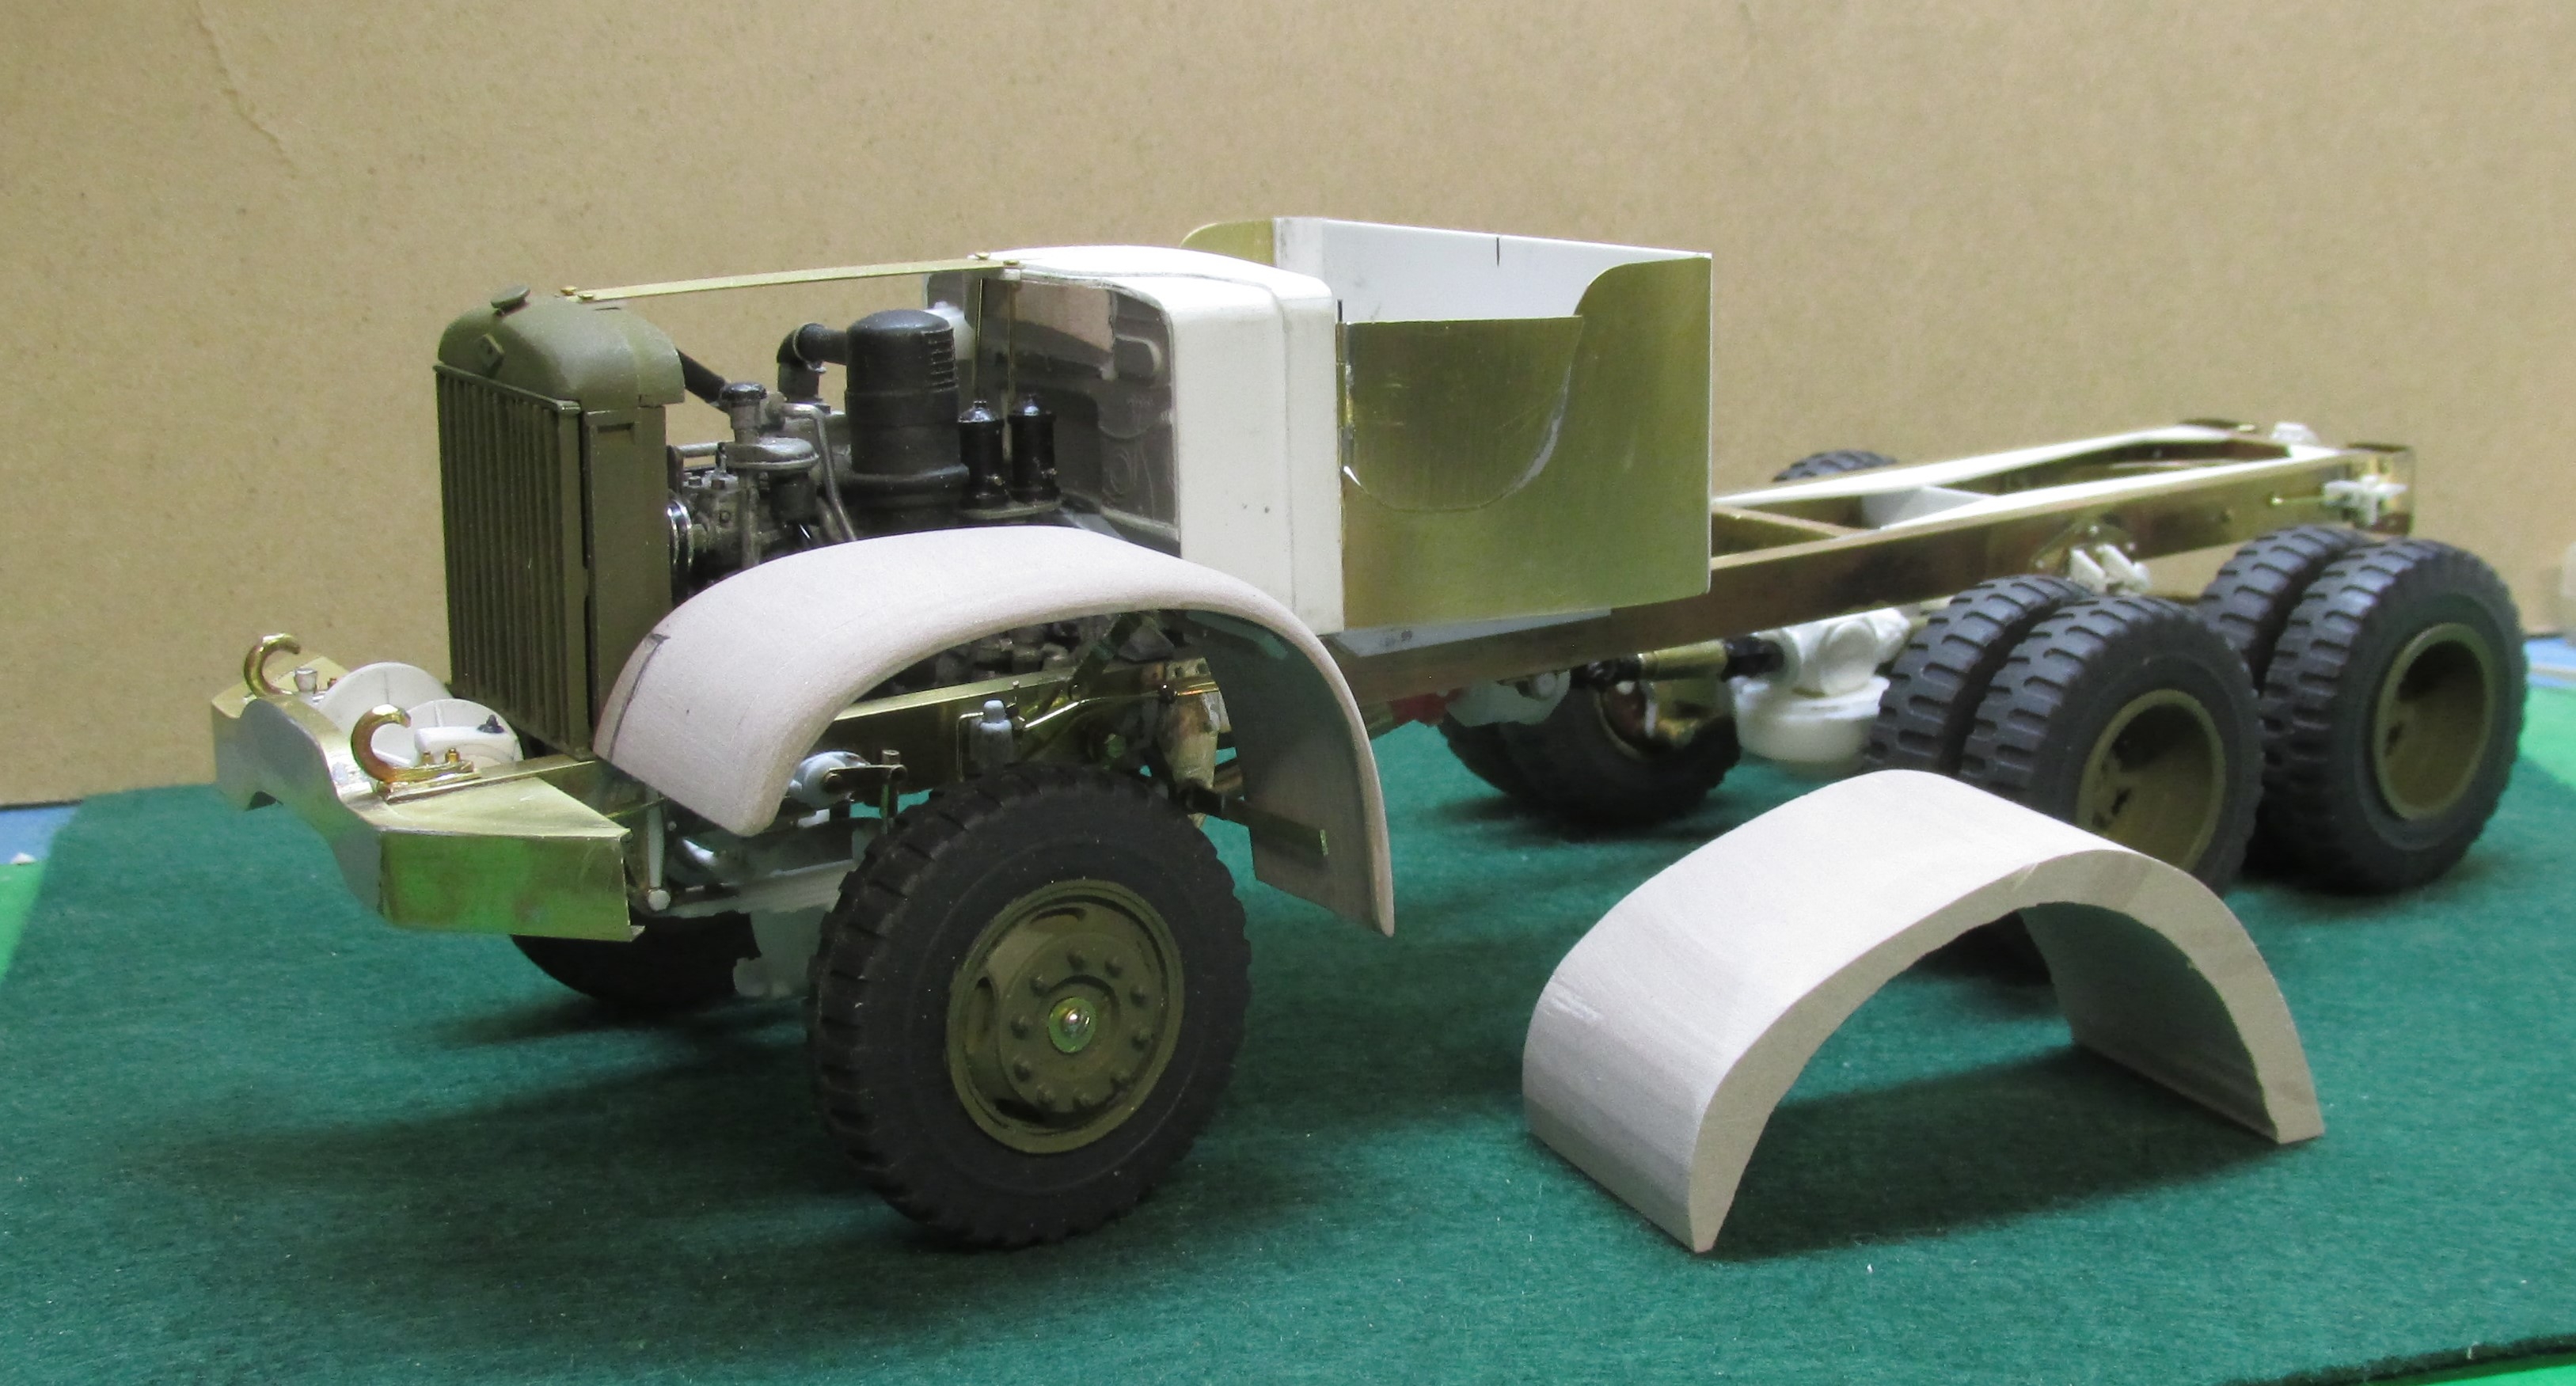
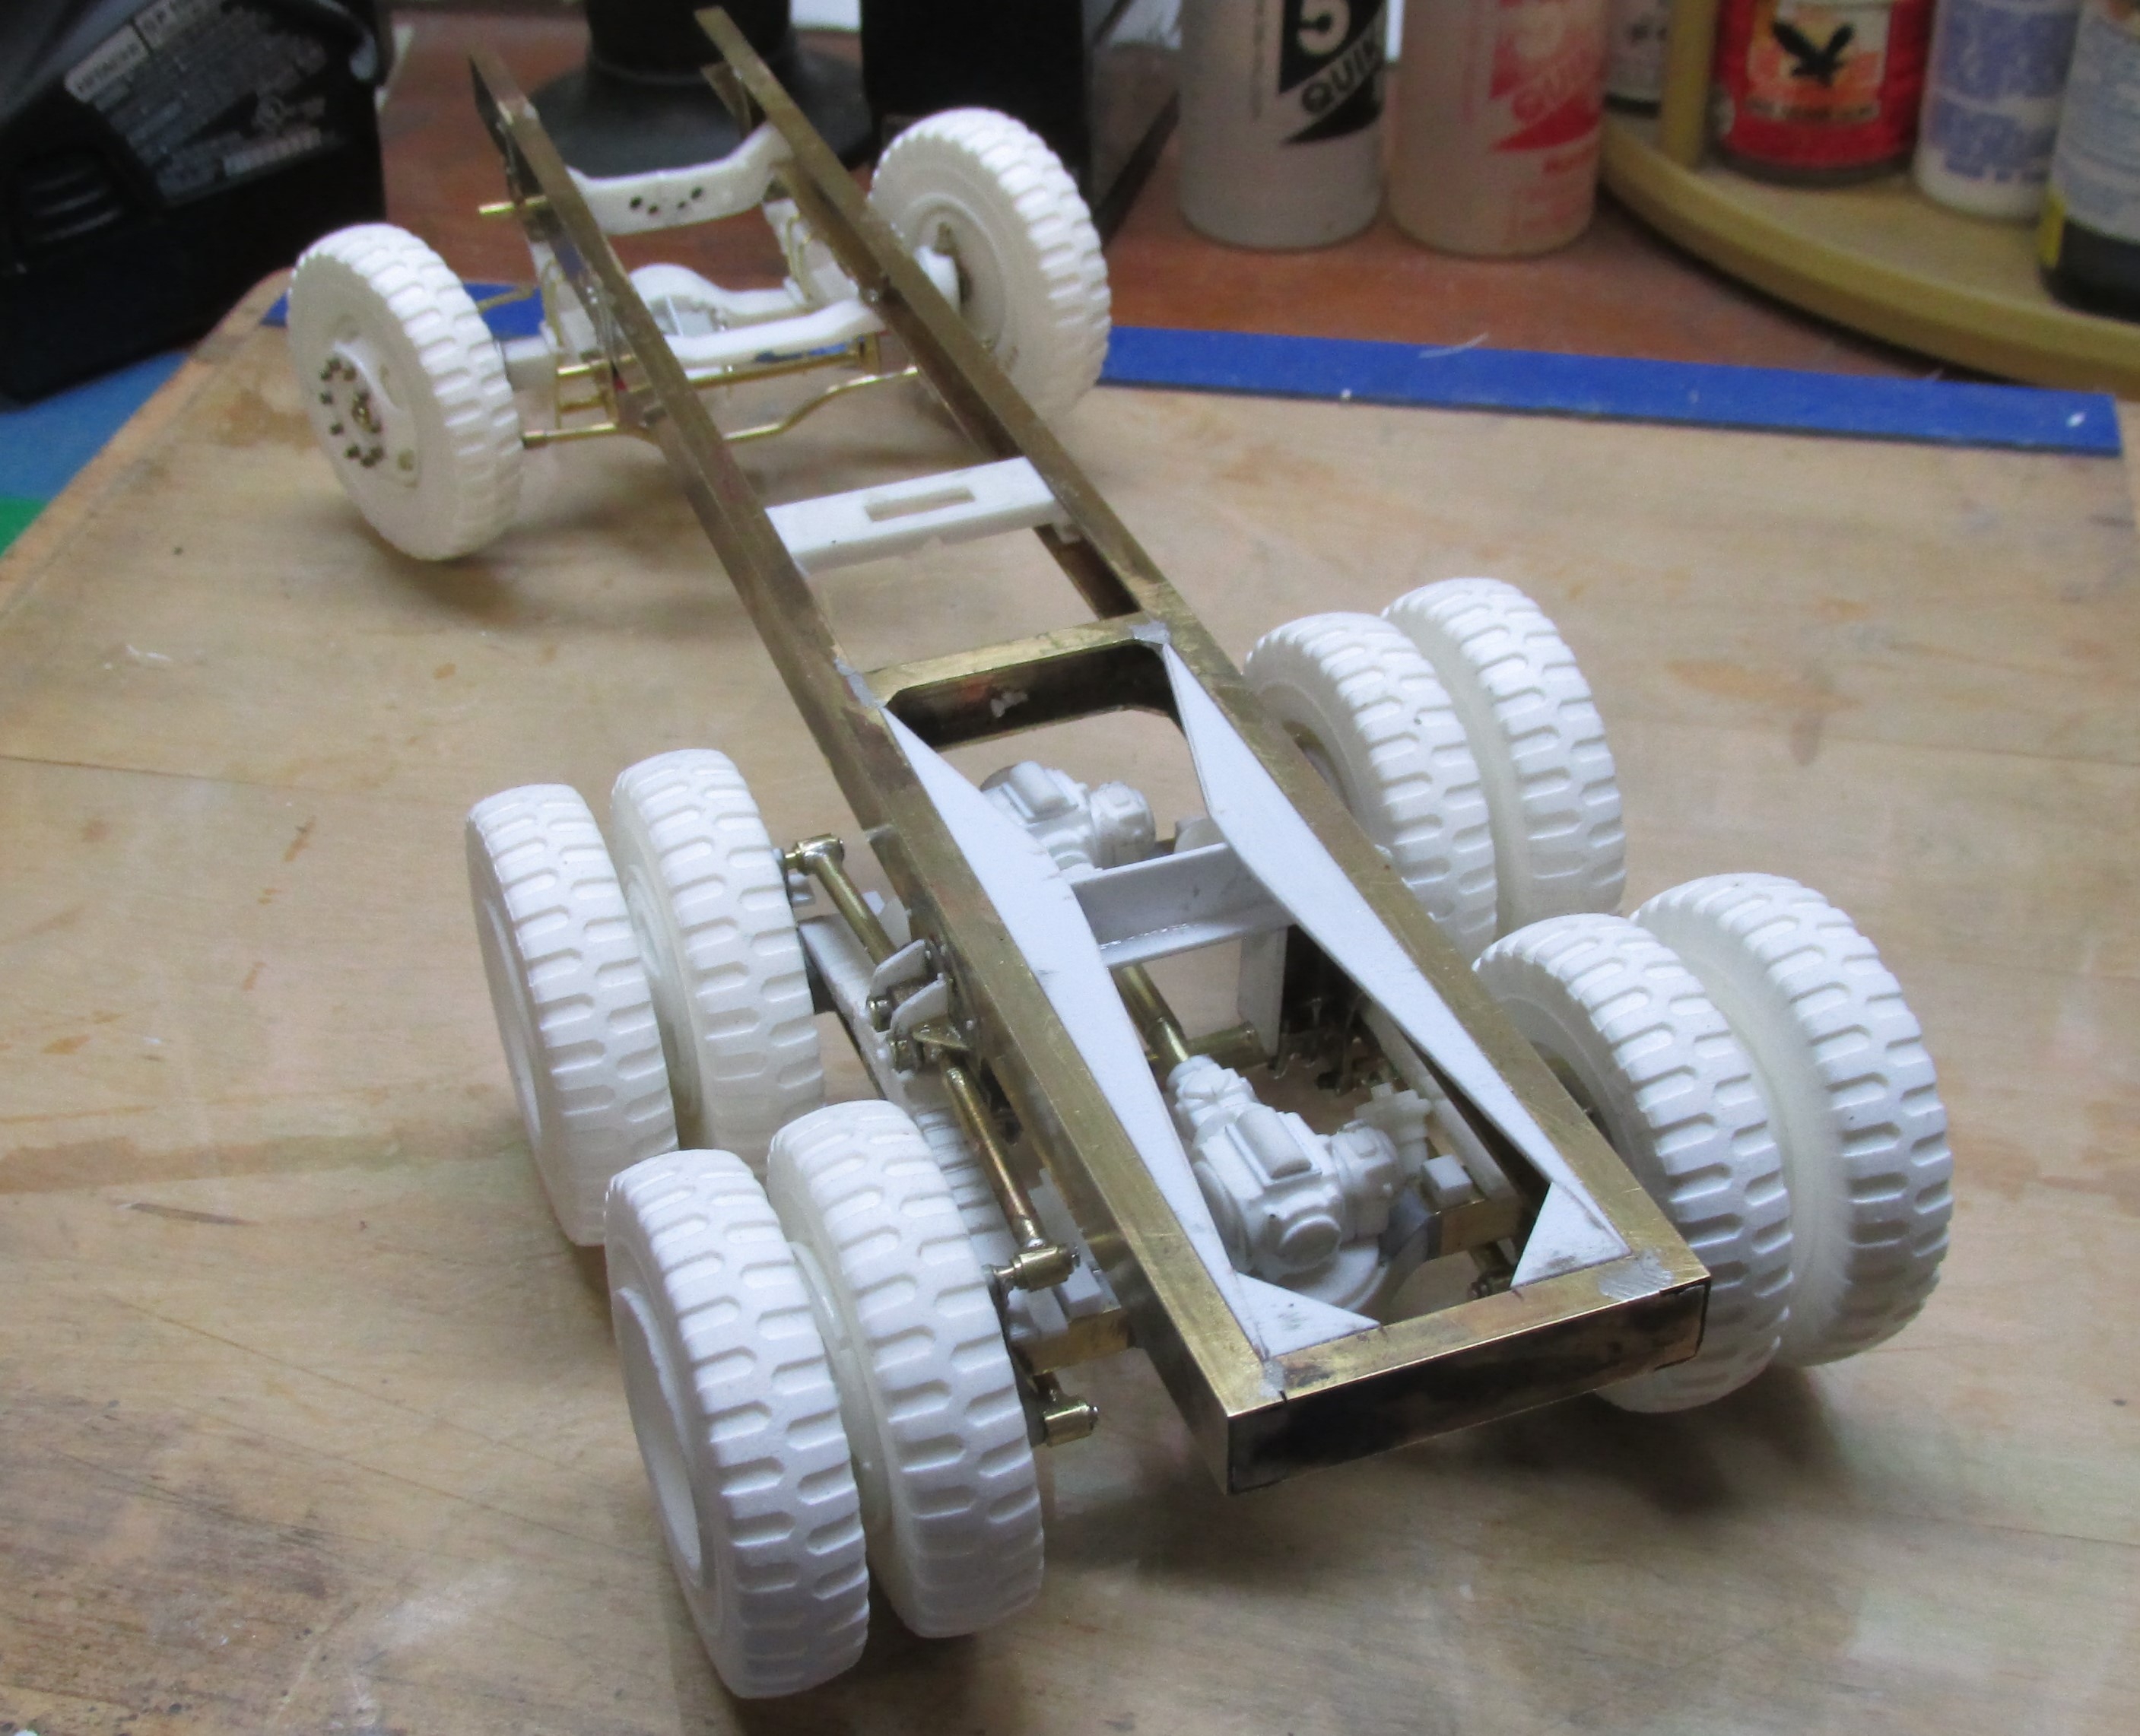
Here's a look at where we are today. The wrecker frame is done except for the pulleys on the upper left. Got them still to make. Then it's on to the boom construction. The air compressor will go under the spare tire.


-
Much progress has been made with the body being painted and detailed. Work has commenced on the wrecker part of the build. The frame is complete along with some details. Two tanks, one for acetylene and the other for oxygen were turned from aluminum rod. The gear box for the winches may be next.


-
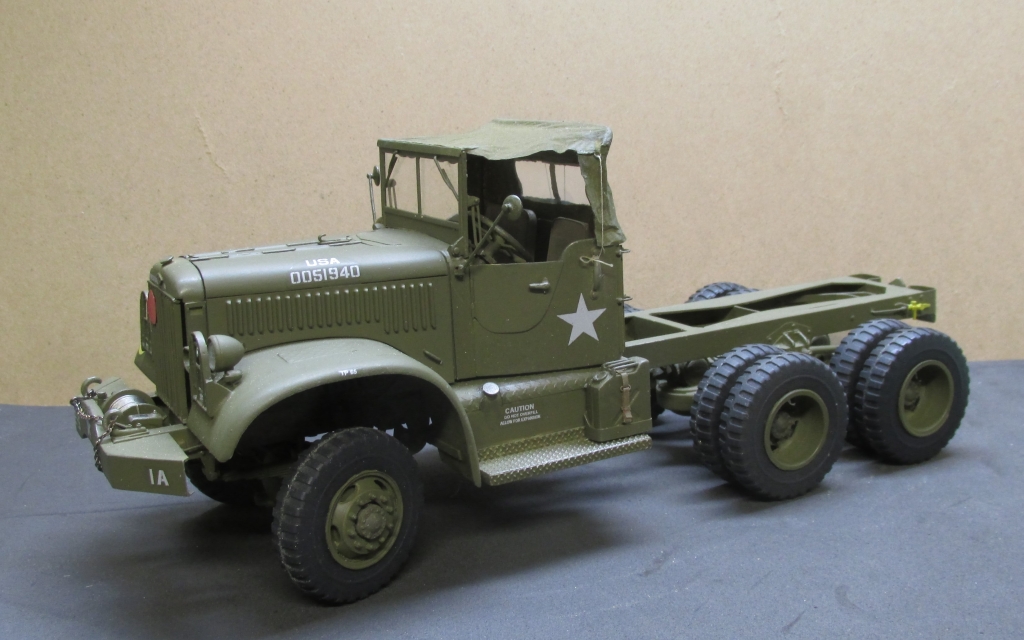
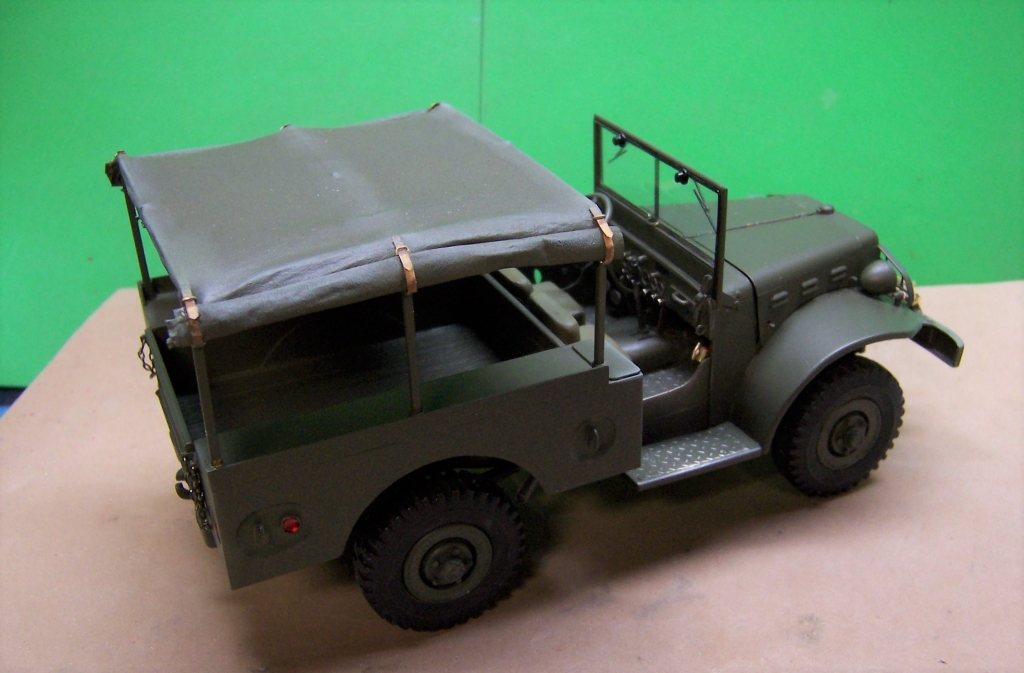
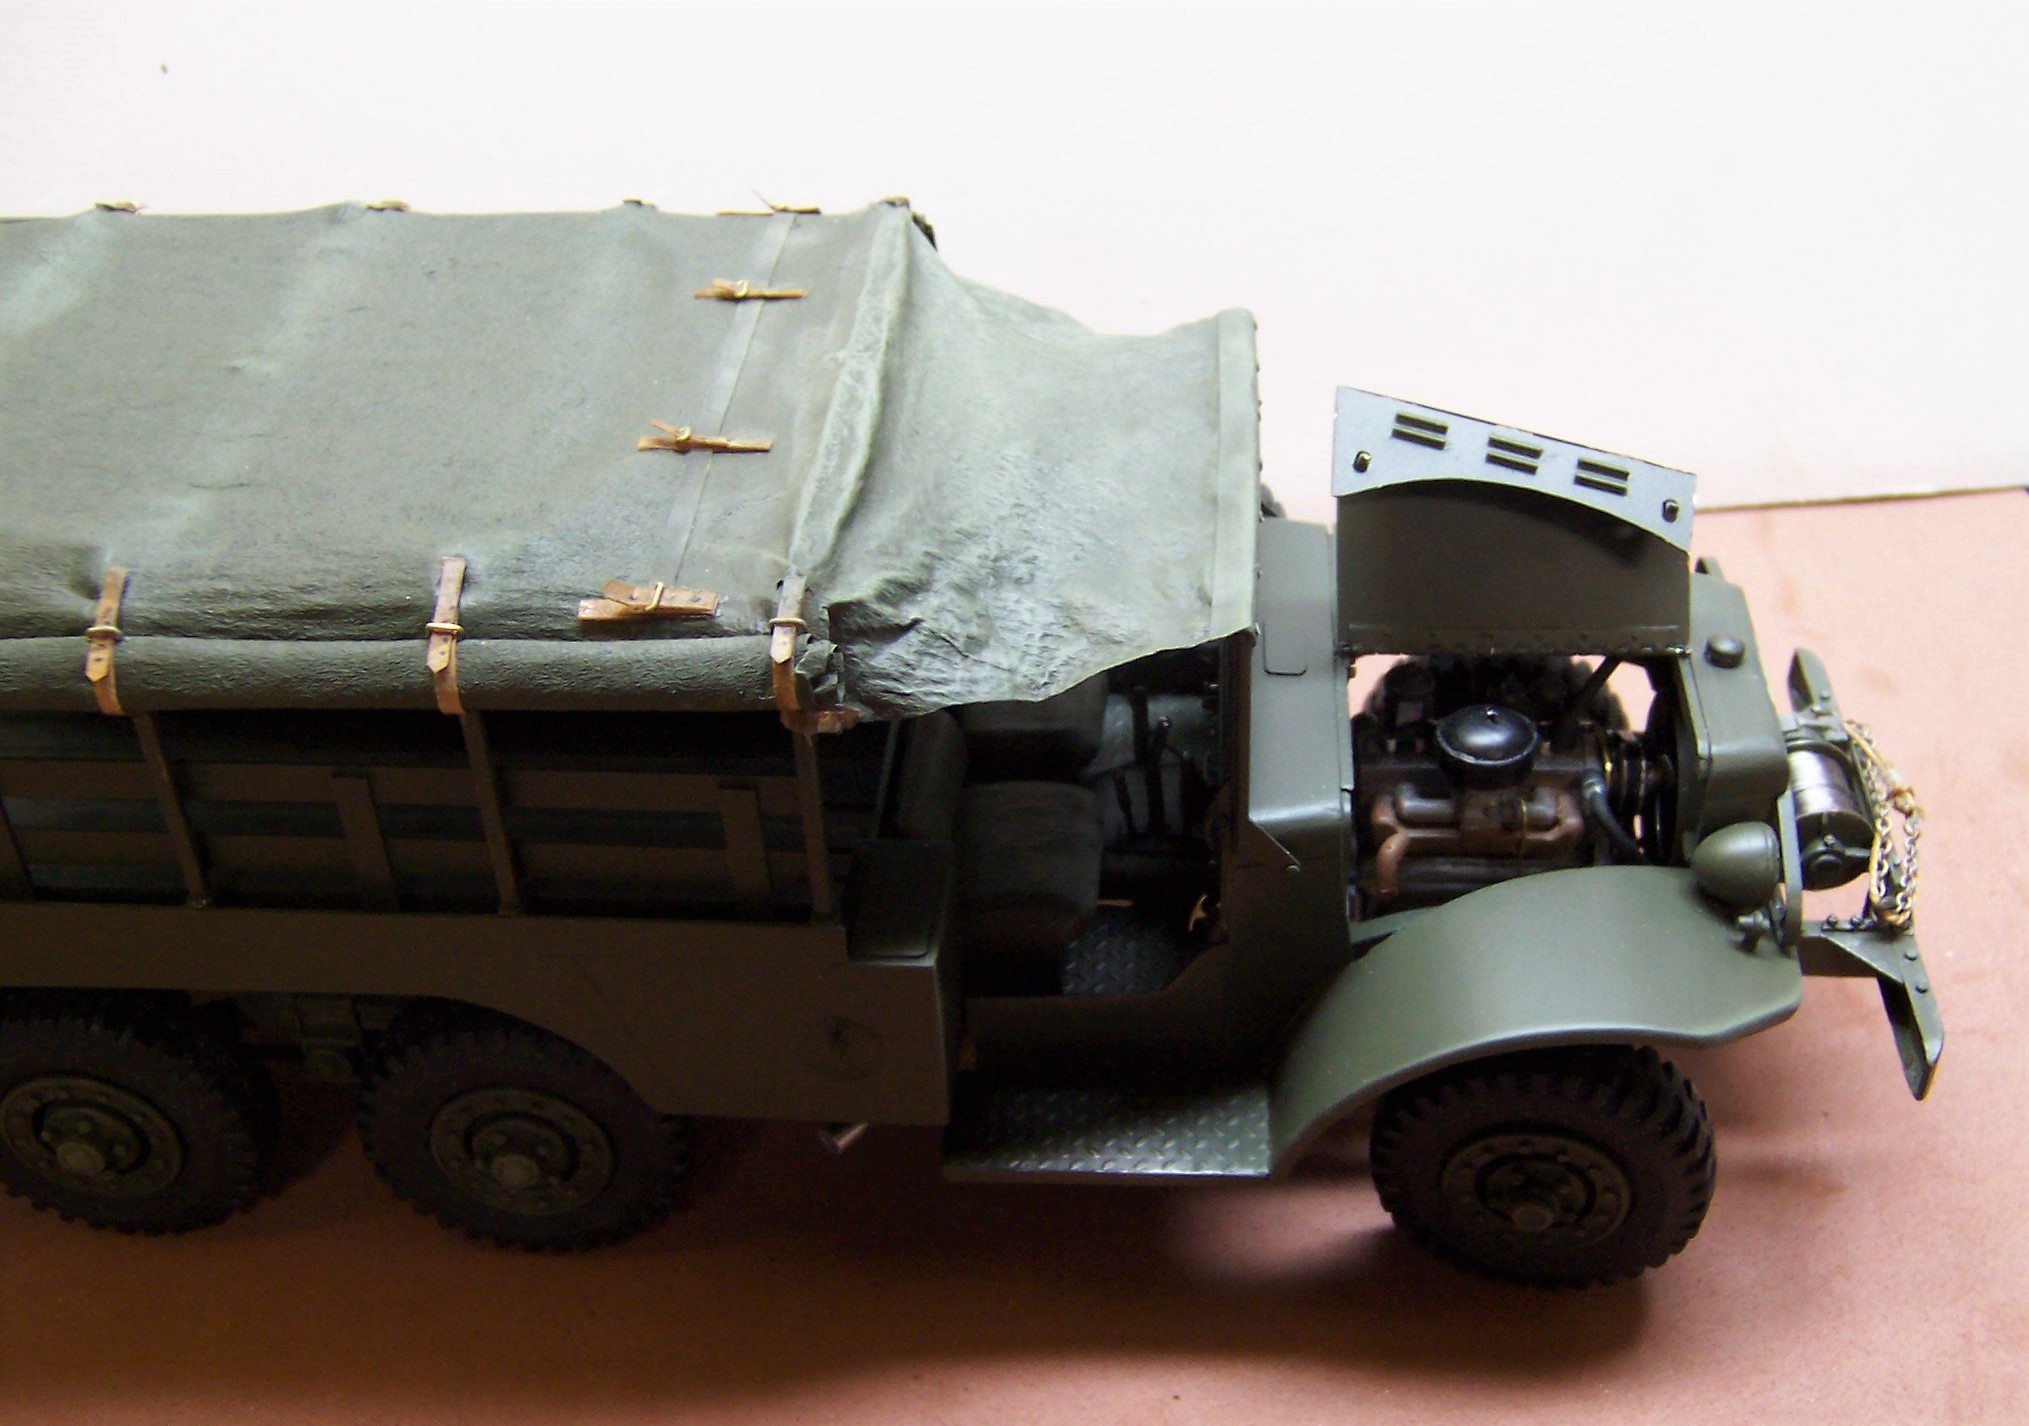
The soft top above was a dry run to see how it would come out. Not satisfied with the texture of the material. A second top was finally fabricated using two ply facial tissue that has no patterns to it. A little richer mixture of white glue and water also helped. The rear view mirrors are done as well. The mirrors themselves were turned from aluminum rod with the polished faces left bare. The brackets and arms are brass. The top also has some grommets to thread the tie down ropes through. Some off white thread from my wife's sewing stash worked well.

Now it's on to some body work. Details are coming along for this part of the build as well.


-
That's just some decals to indicate the various instruction plates that are on the dash. They are too small to make legible when I print them out. There are two more over on the left side as well behind the steering wheel.
-
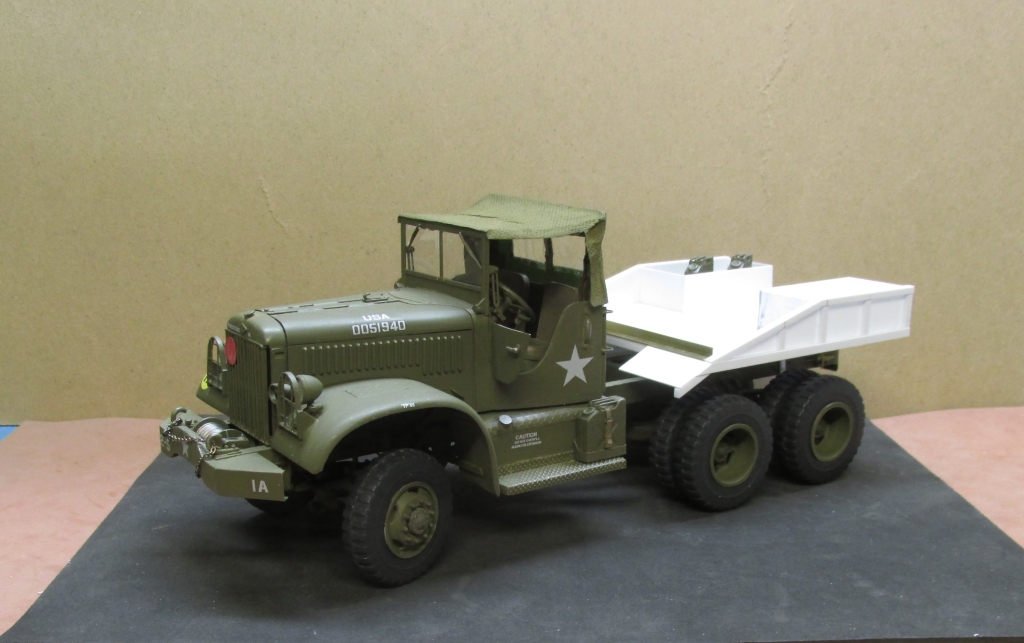
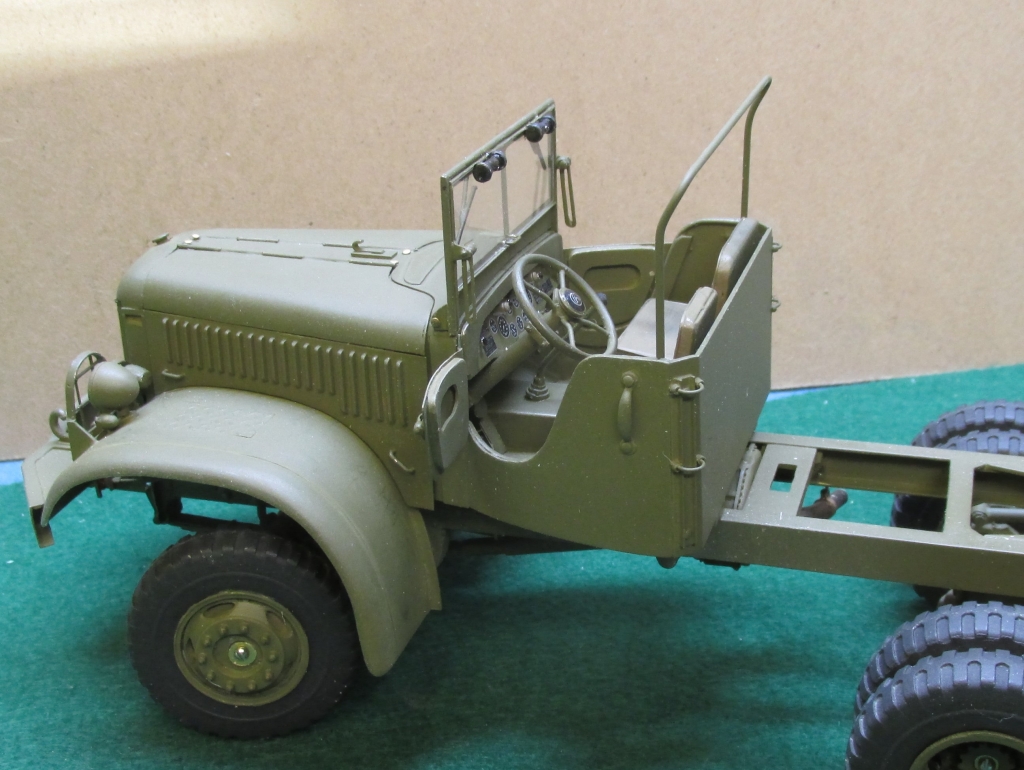
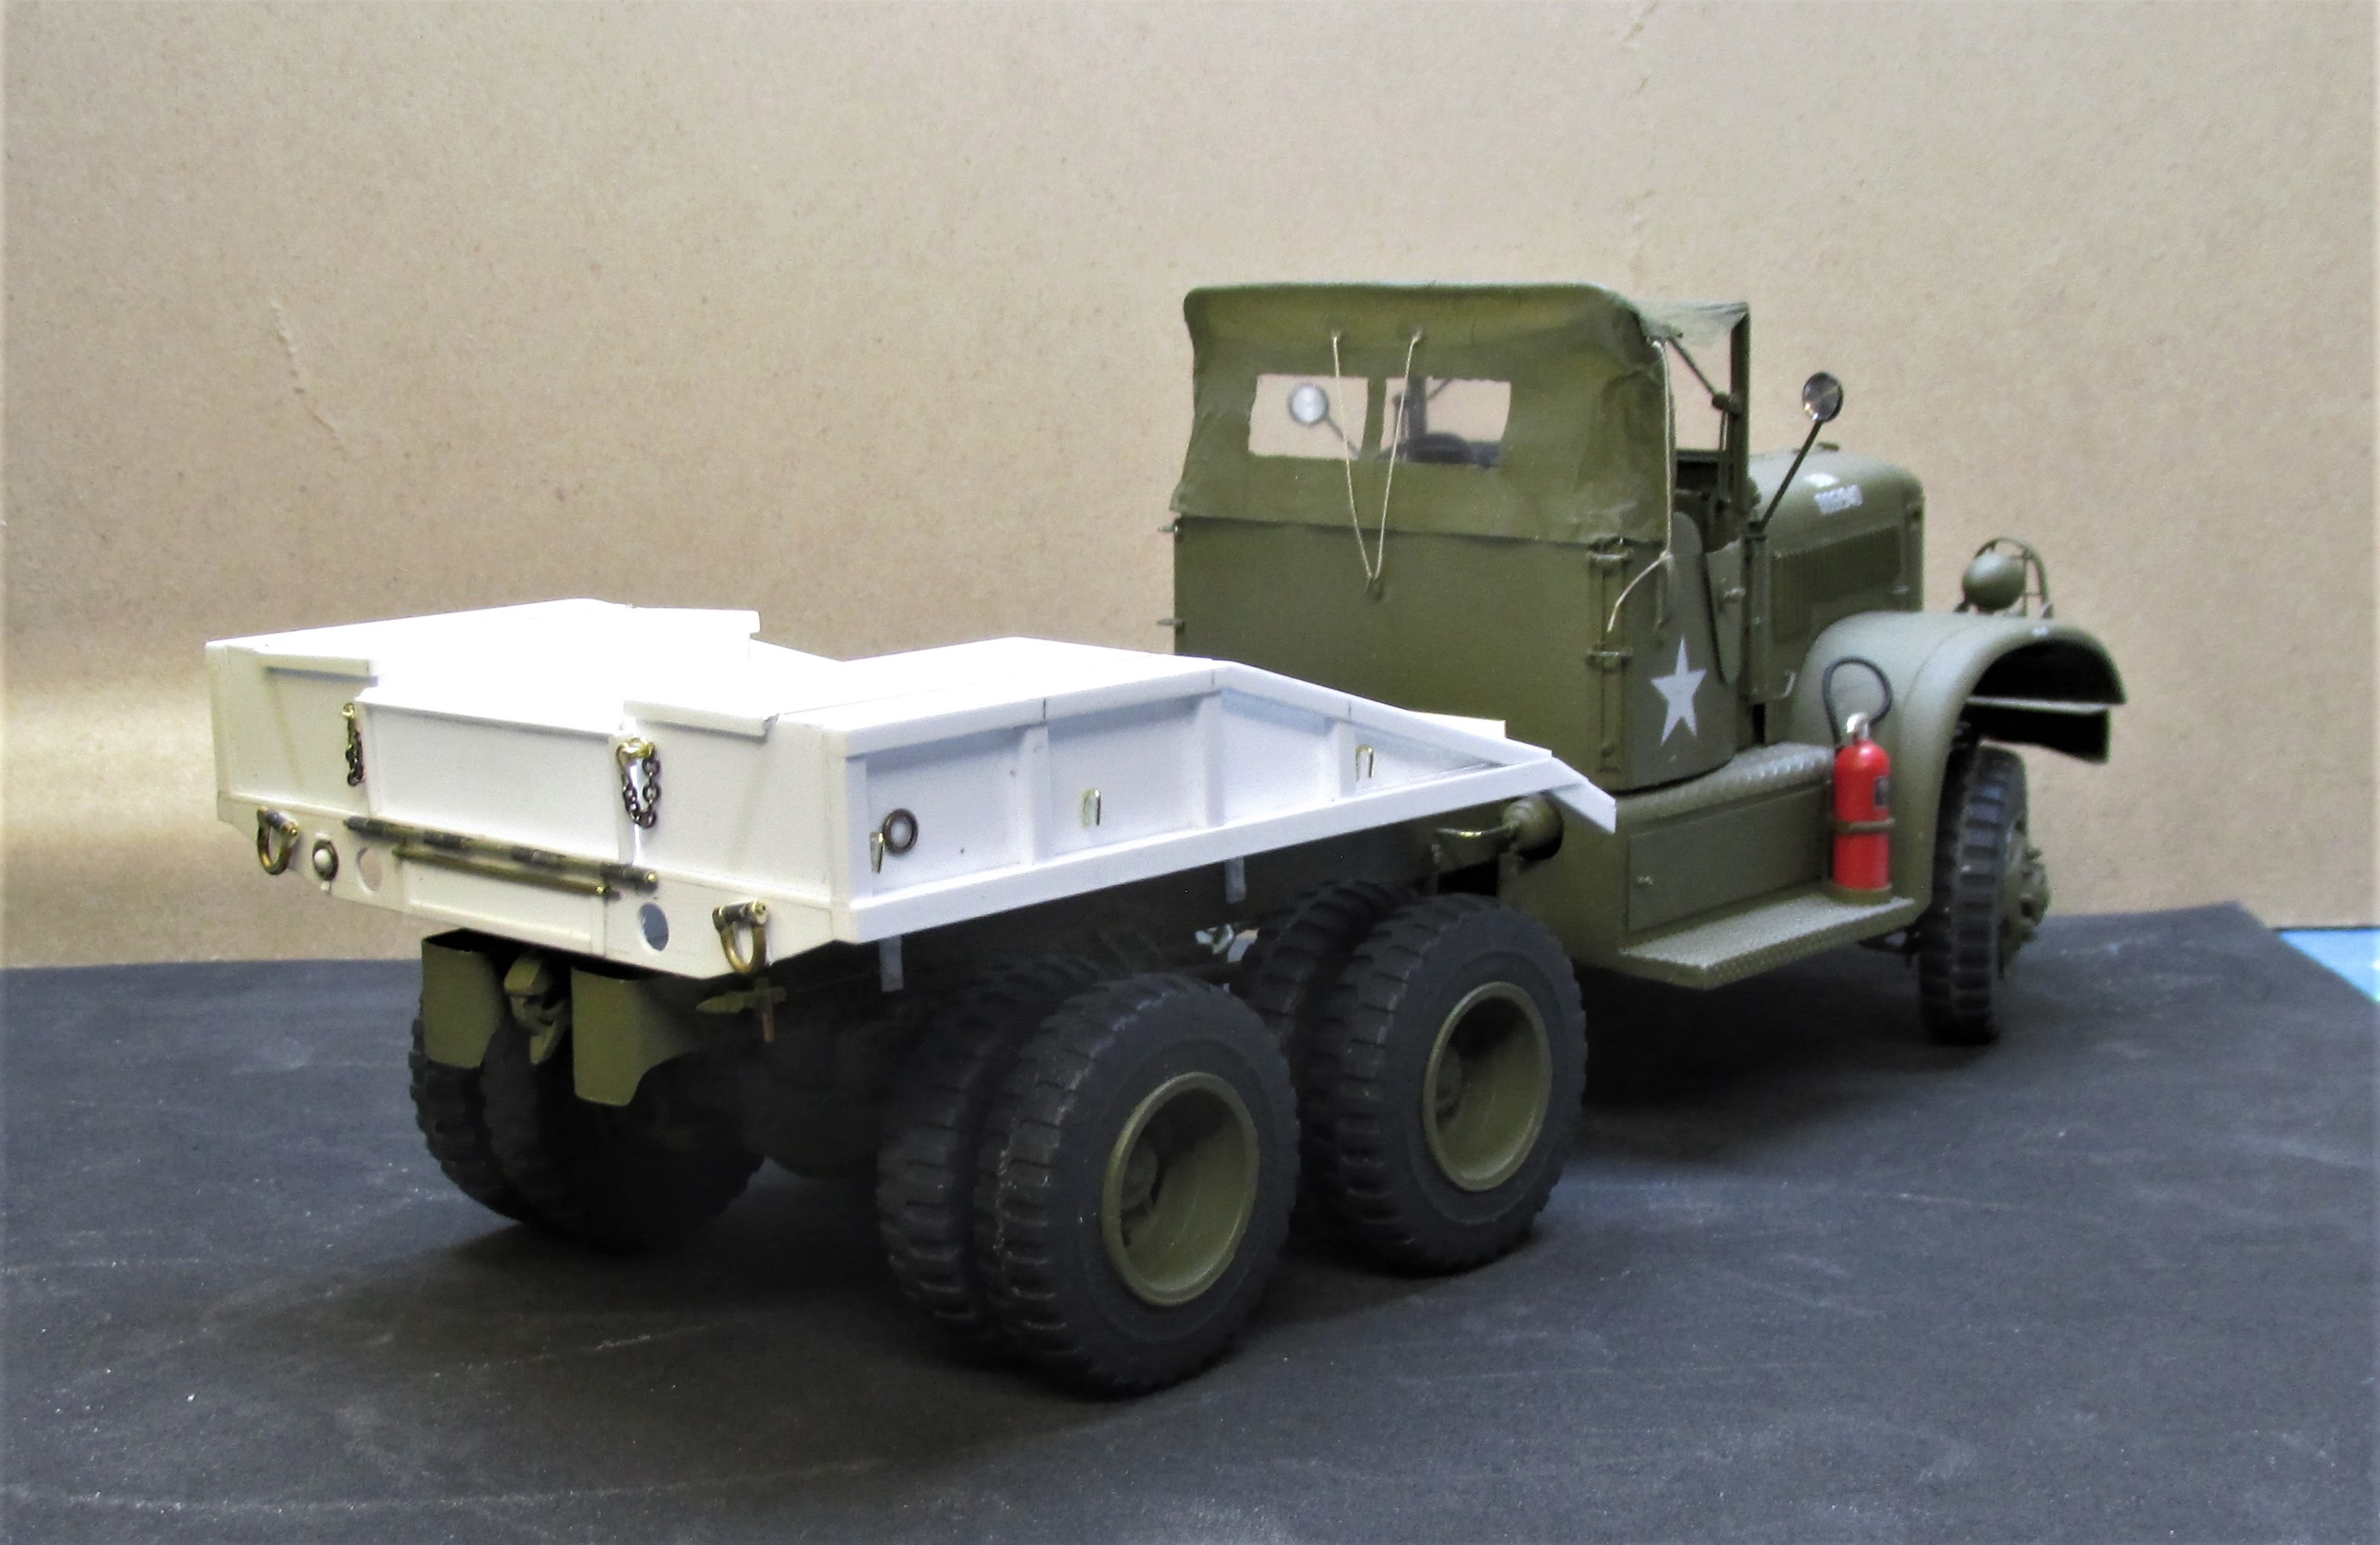
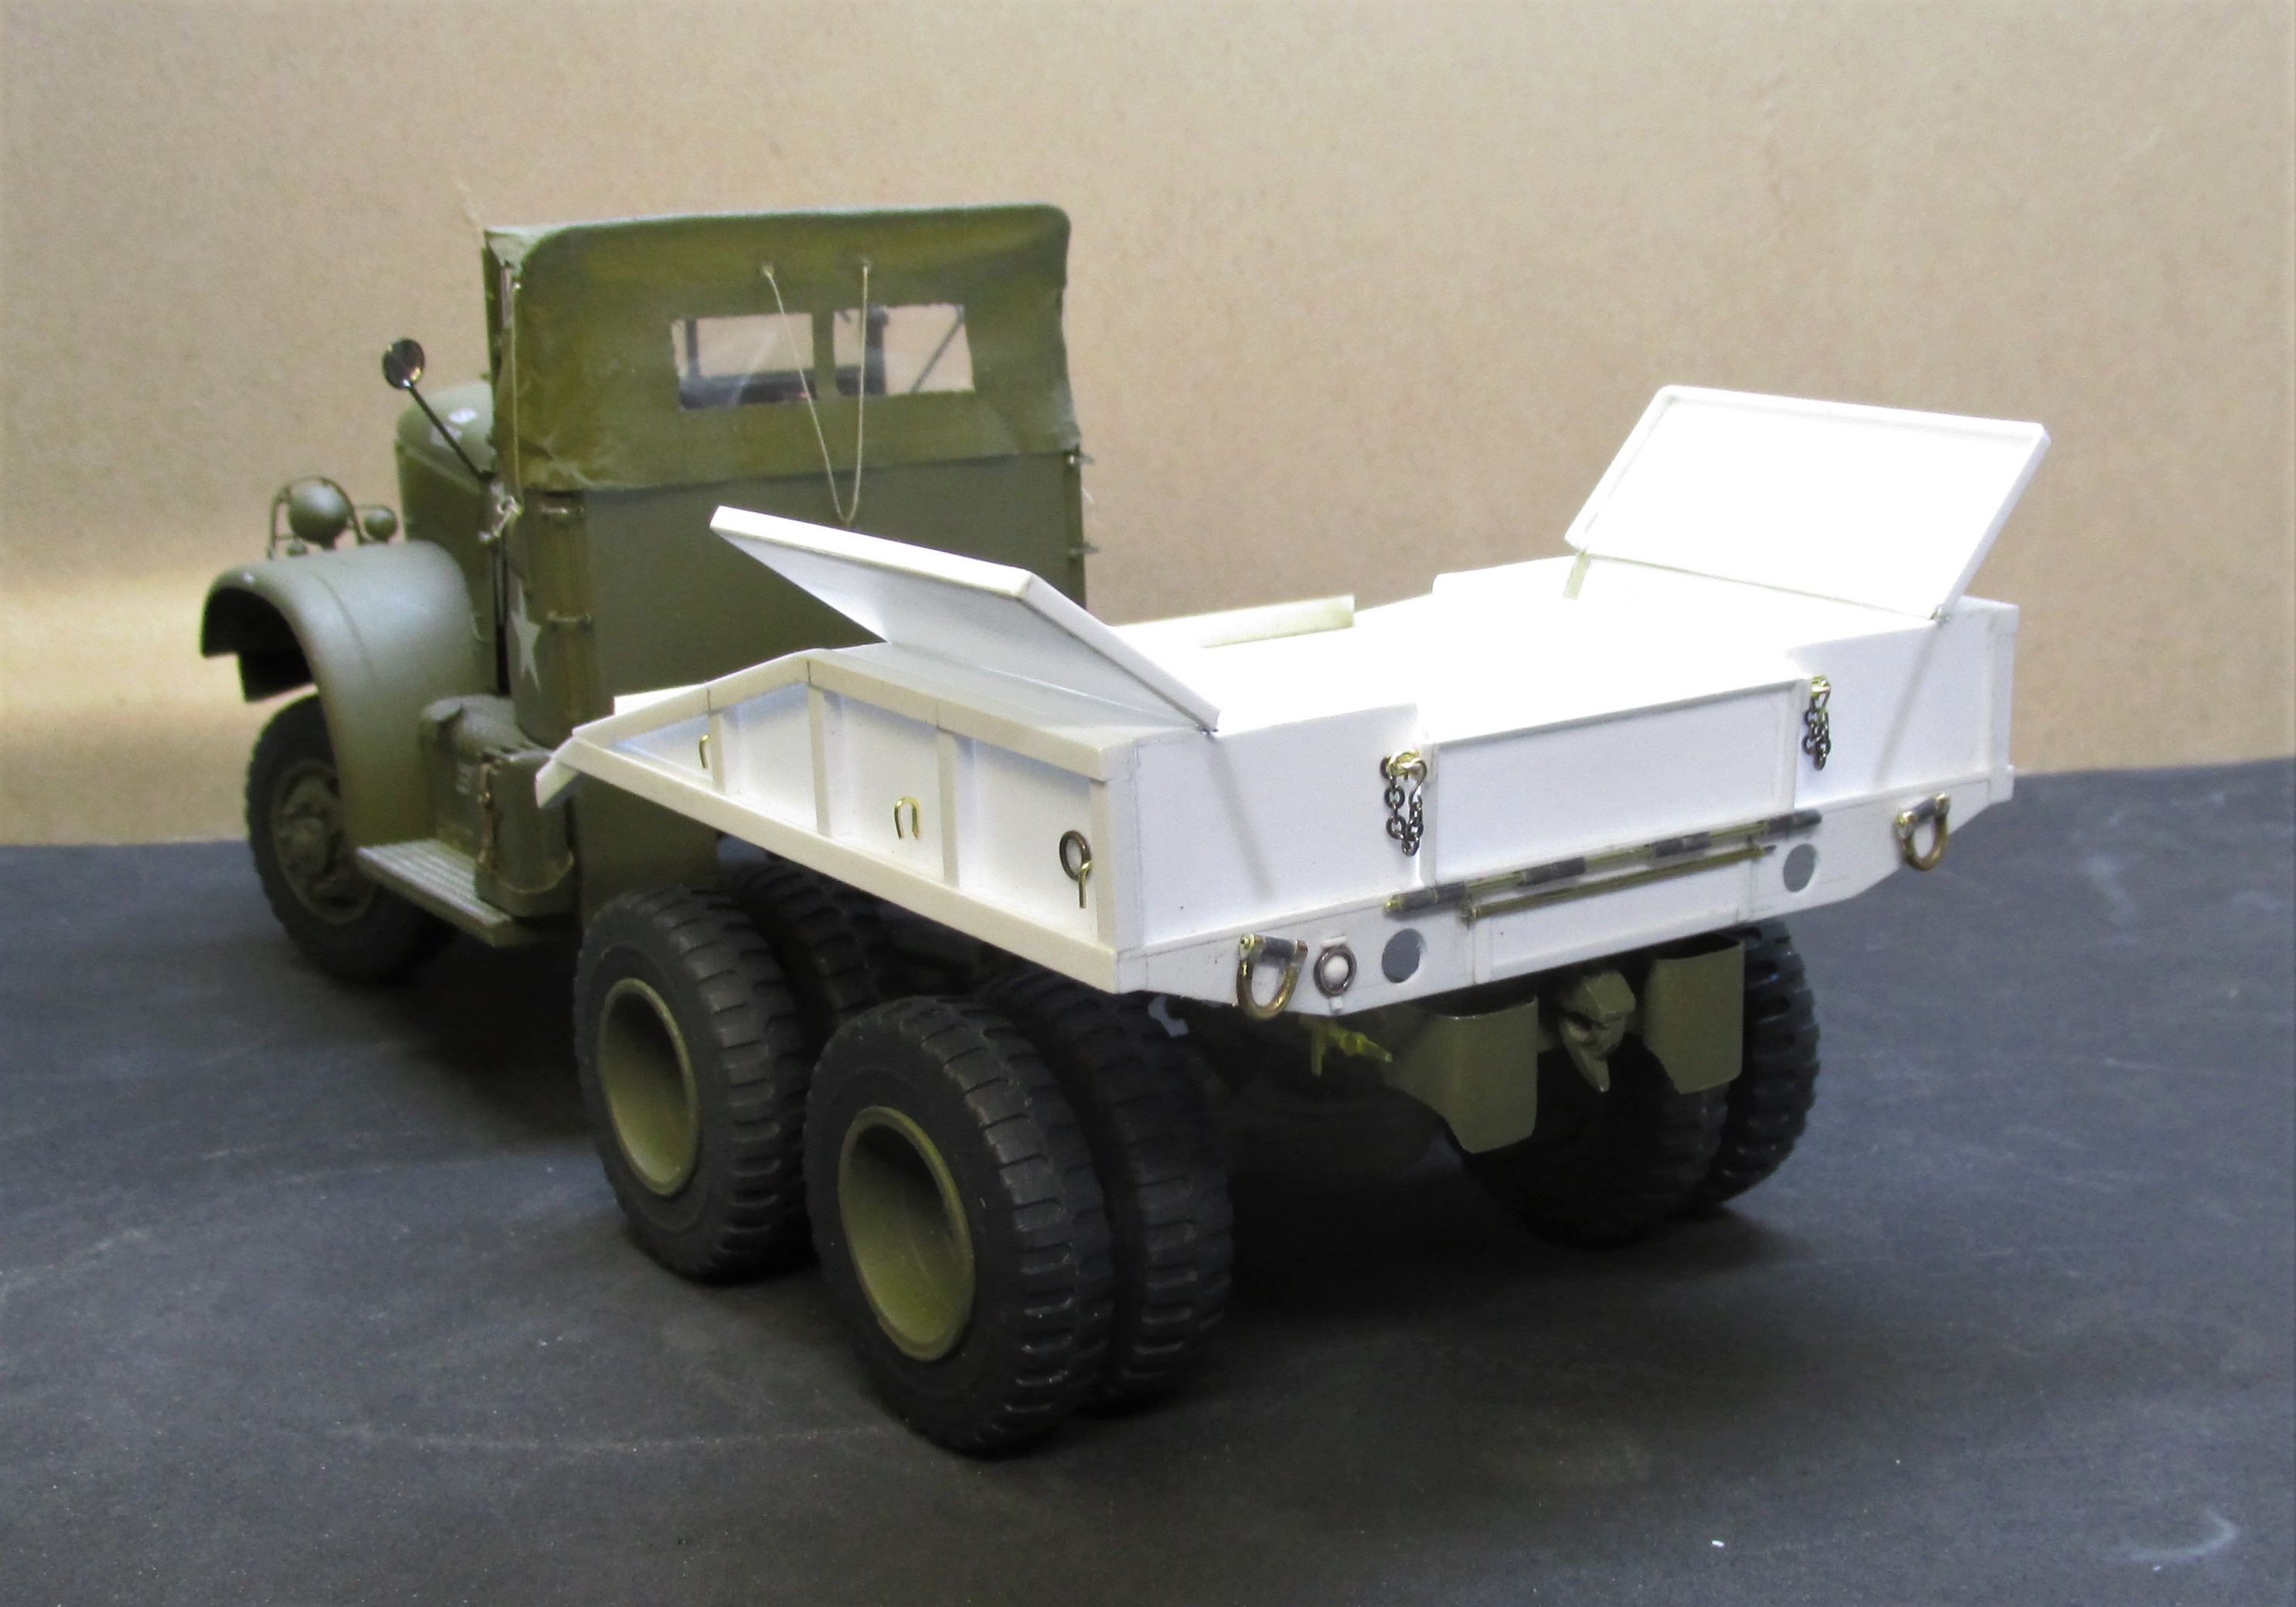
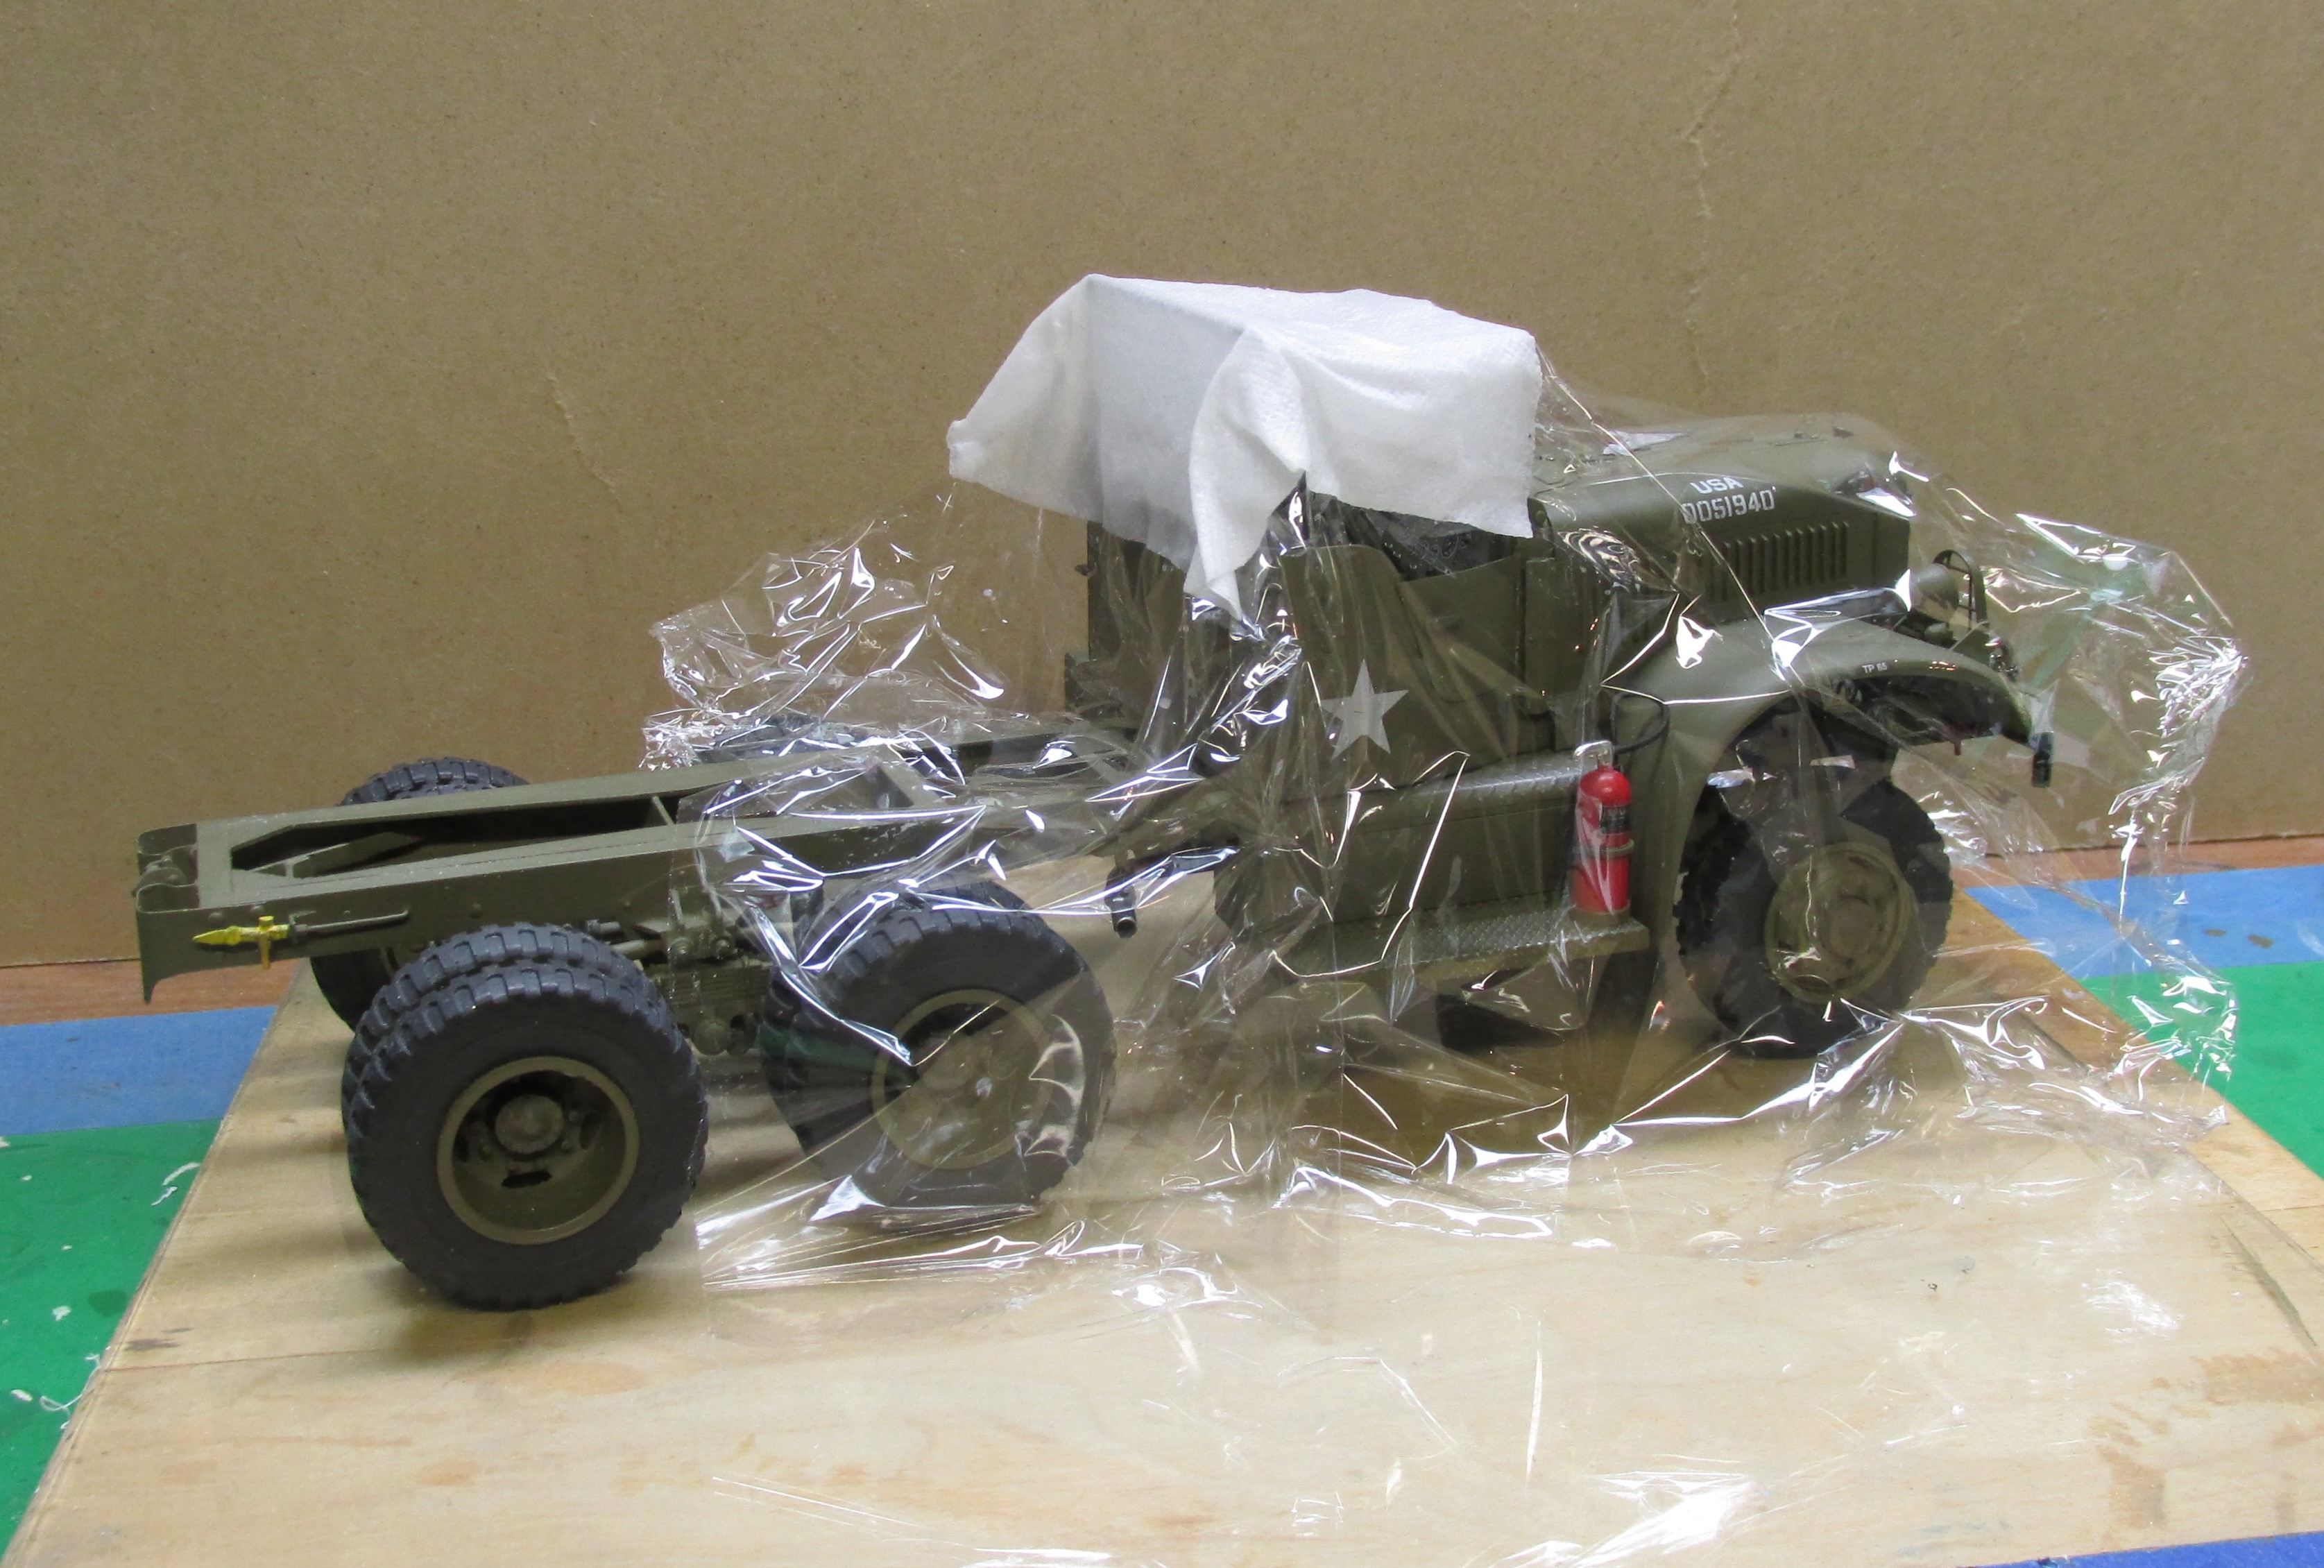
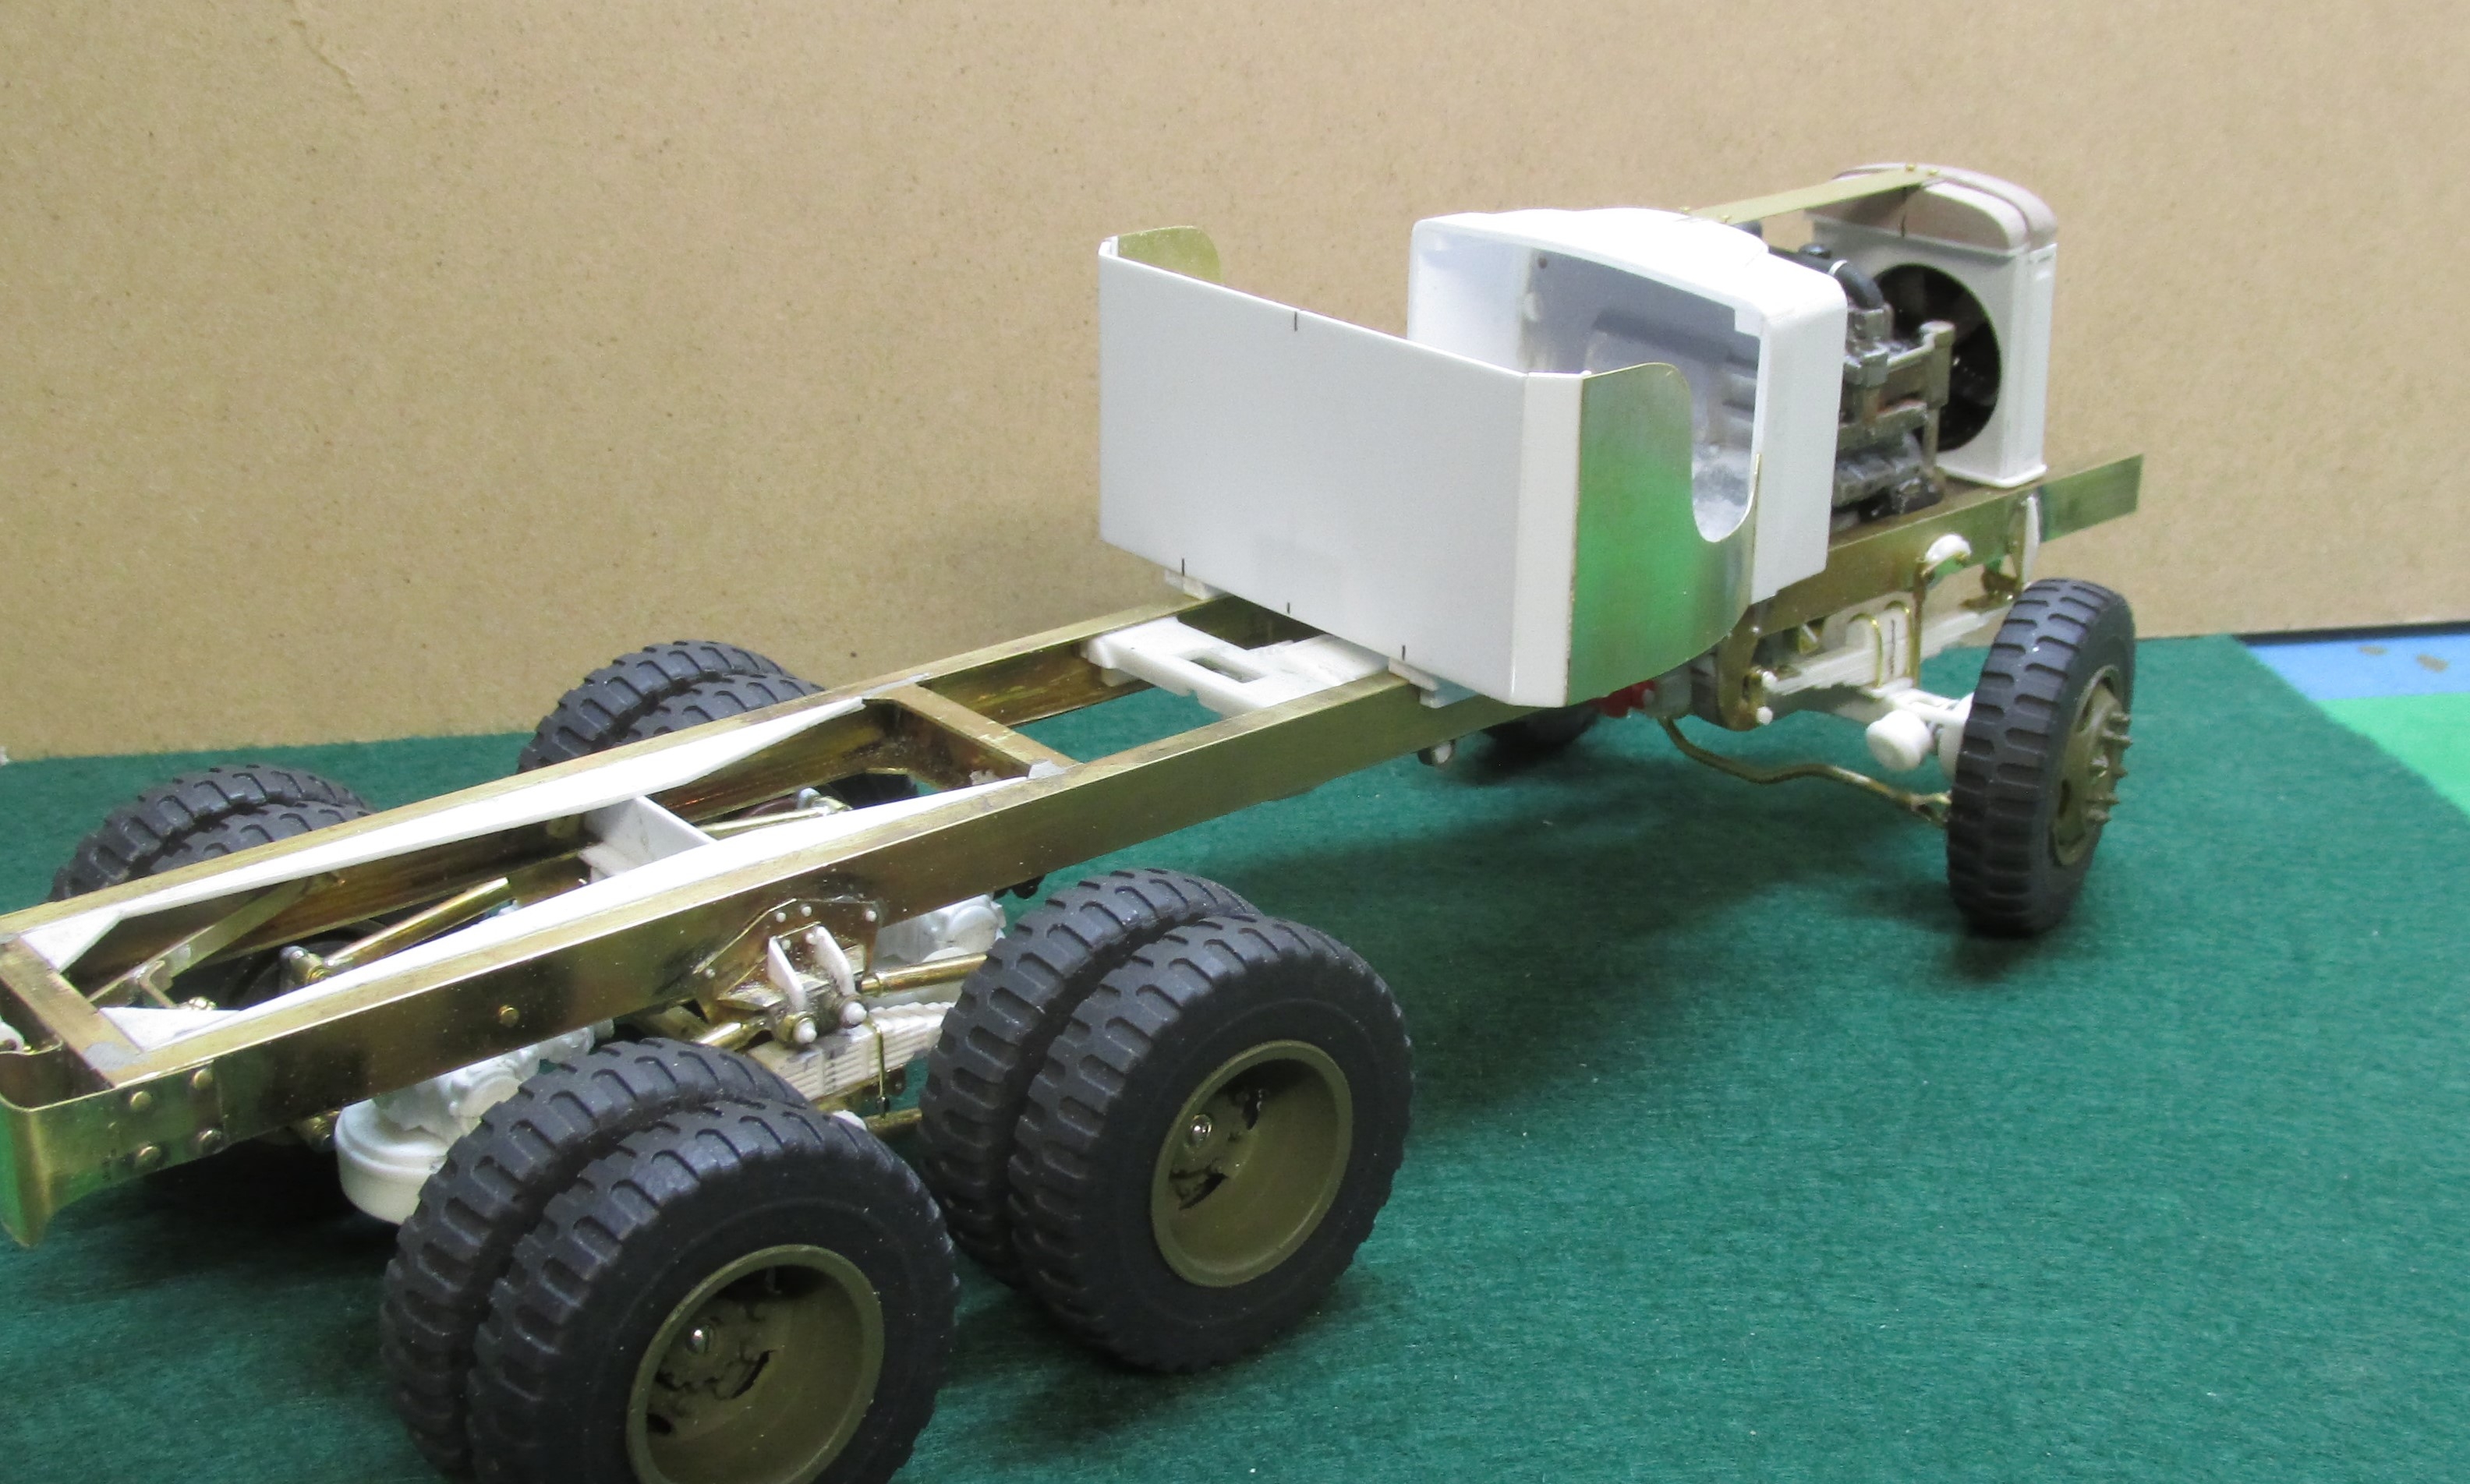
Cab interior is now finished. On to the next part of the build; the fuel tank and battery compartment.
Since originally posting these two pix, the fuel tank, battery compartment and steps have been done. I found a good jerry can also in the stash and with a little work got it to look pretty good. Now I'm working on the top. I tried some tissue but it was too coarse. Subsequently I found some finer material and will do it over. The clear window at the rear of the top is some Press 'n Seal. Looks a little wavy just like the real one would. Sometimes the simplest things work out the best!


-
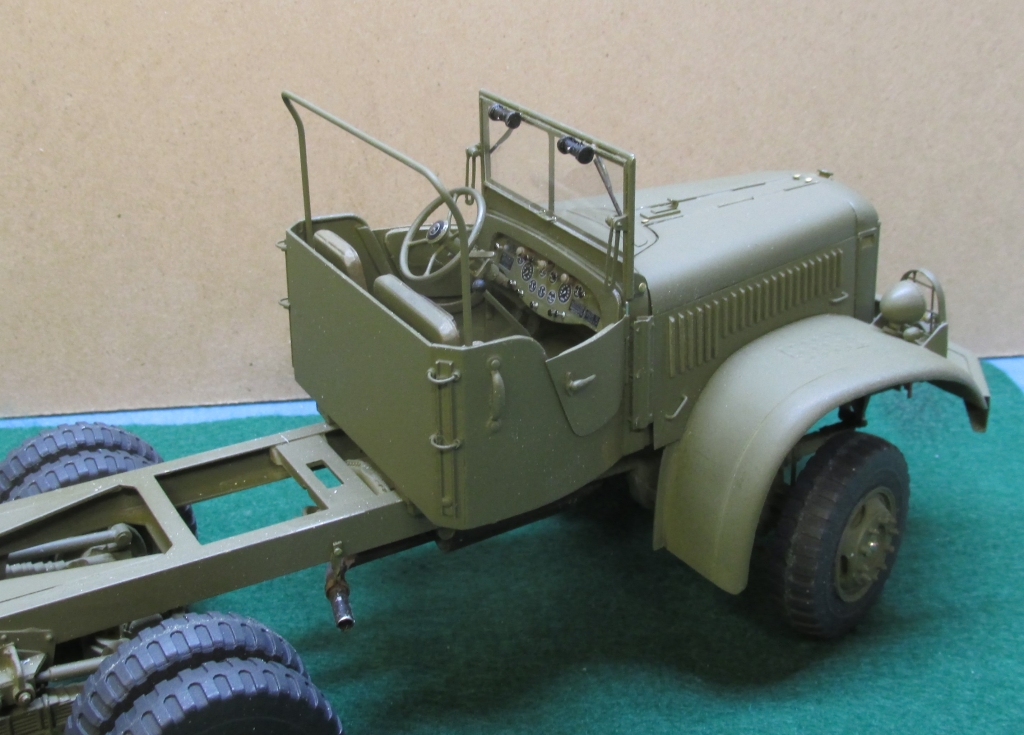
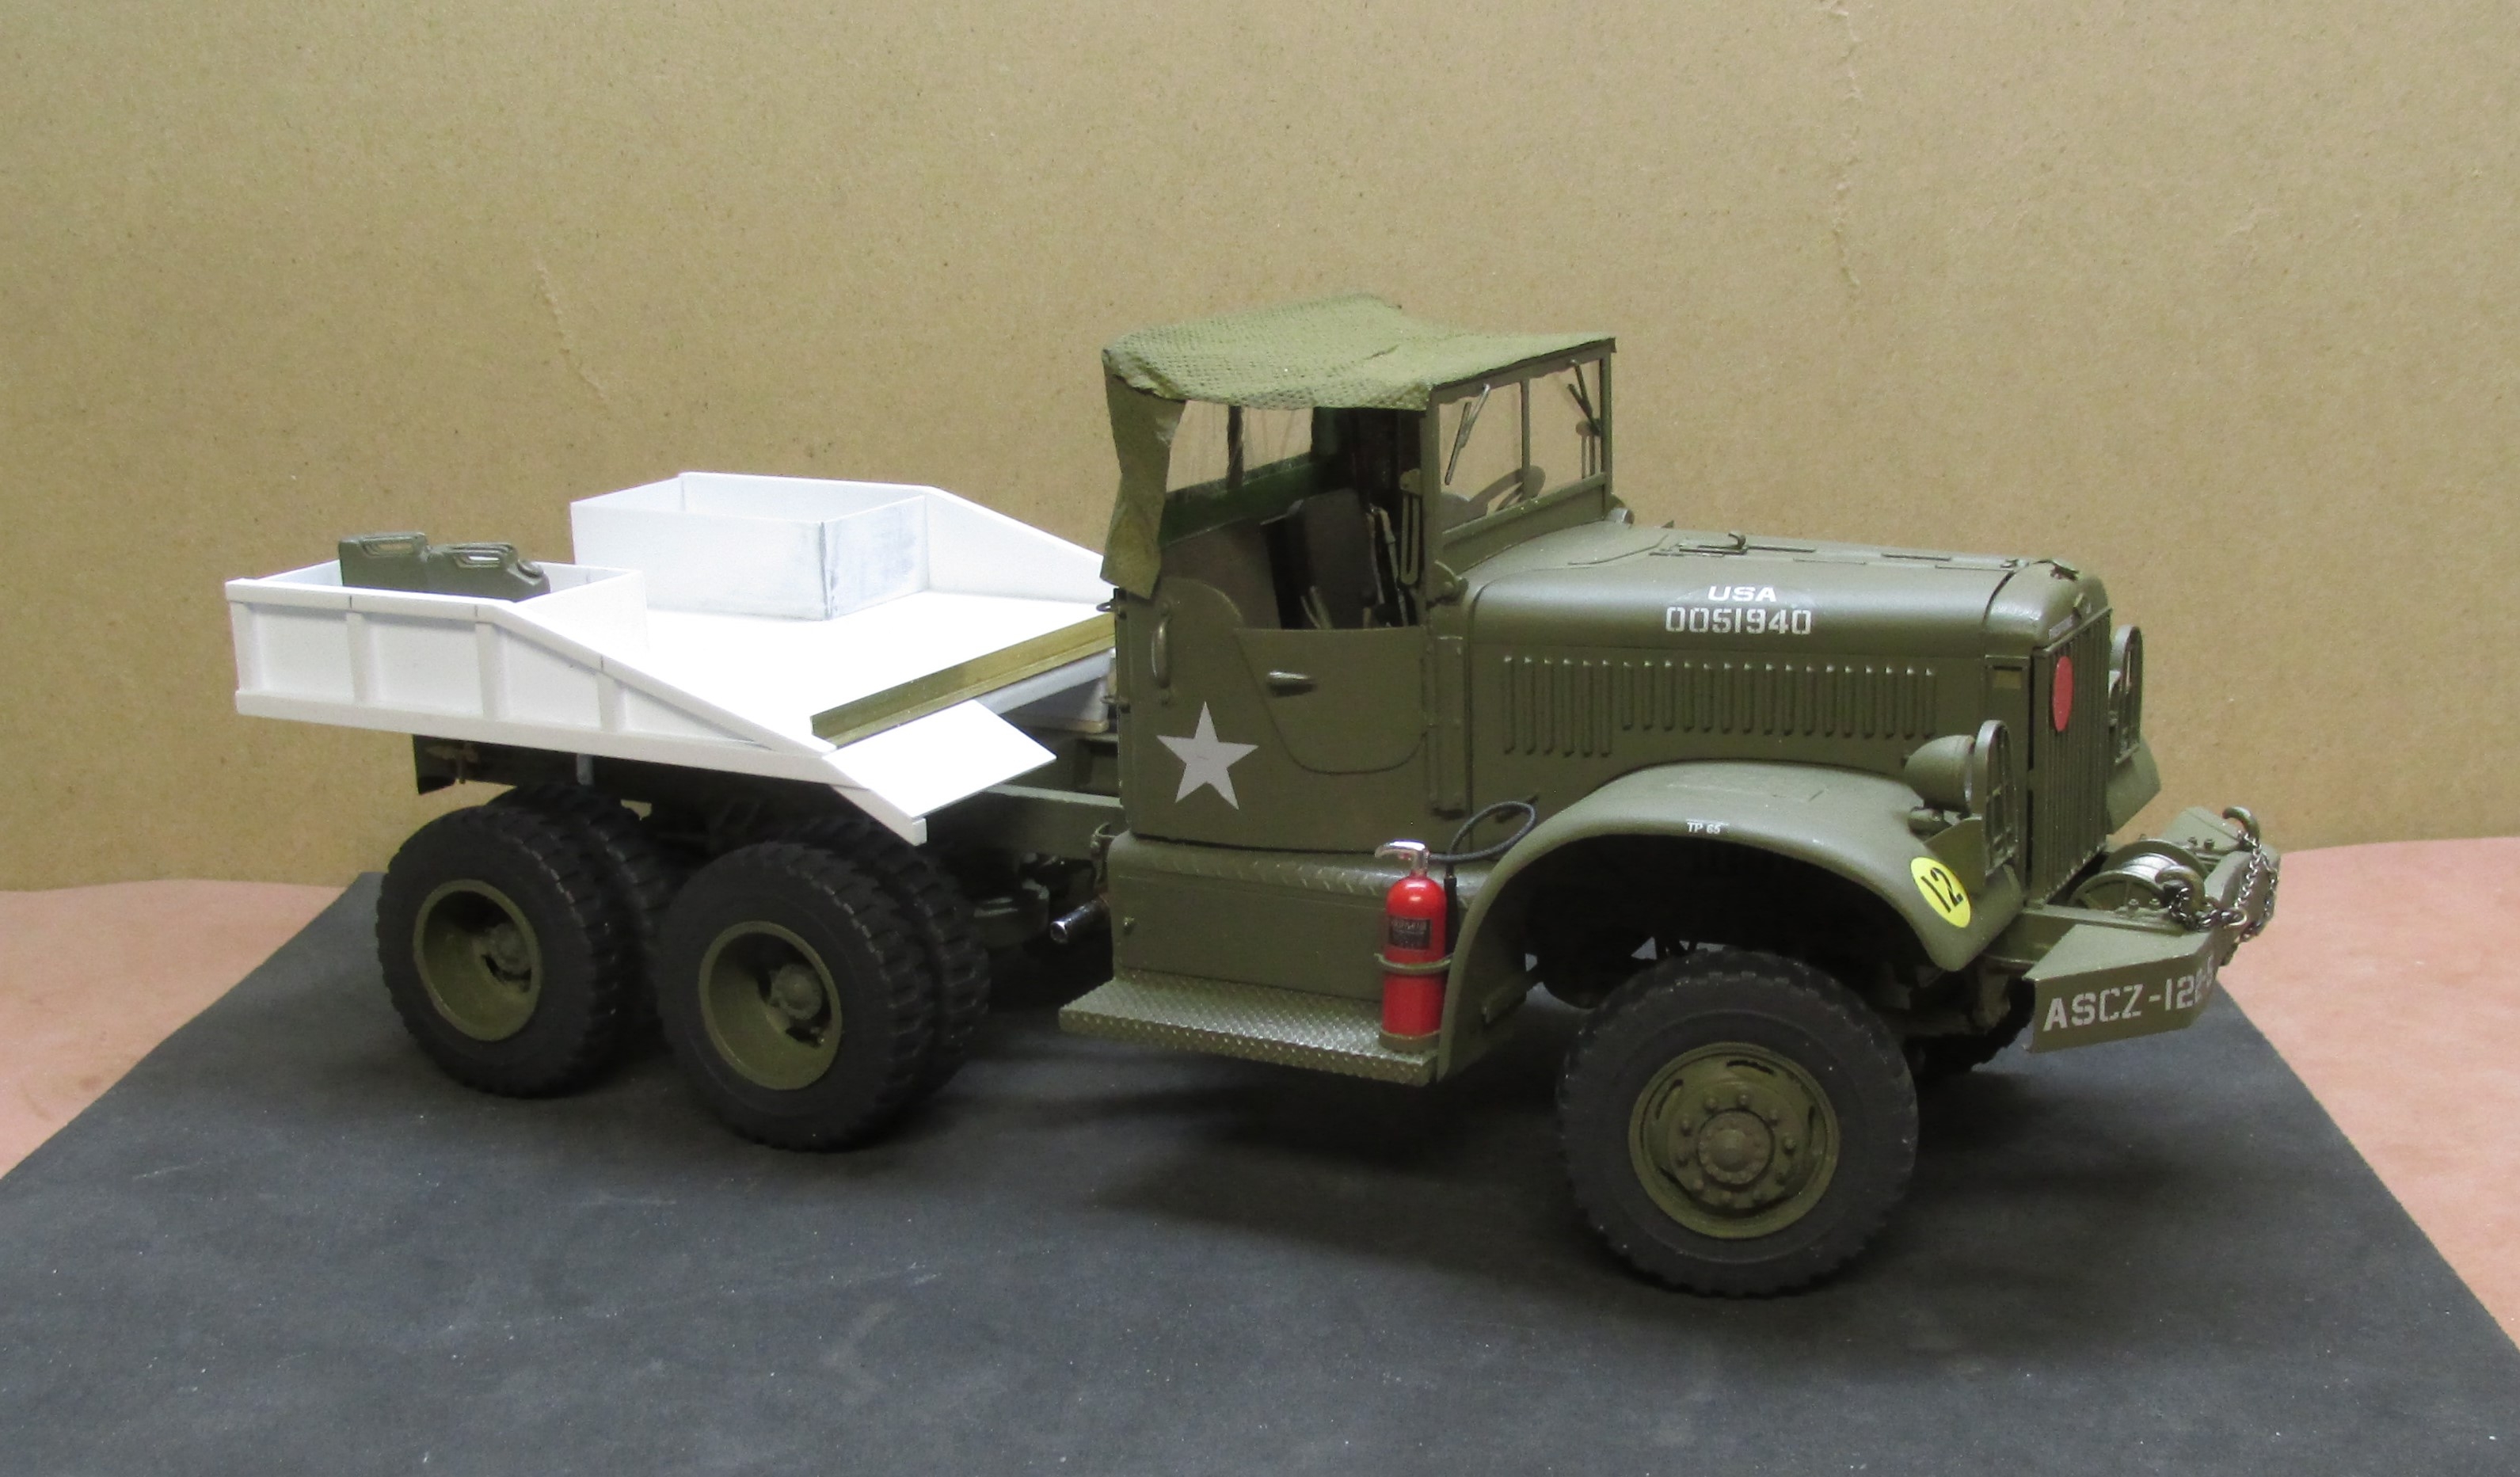
Lots to show since the last posting. Painting completed for the most part, cab interior nearly finished. Winch is done except for a hook on the end of the chain.
-
Aluminum foil dents! Always something to learn that you never thought of before! Thanks!!!!!
-
Got a bit more done since the last post. Here's where we are as of today.

-
Been doing some fender work. The material is Renshape. No grain because its extruded plastic sort of like plastic decking. The rough profile was cut on a bandsaw and sanded smooth using a disk sander. The underside of the fender is carved out using my Dremel and a sanding drum.

-
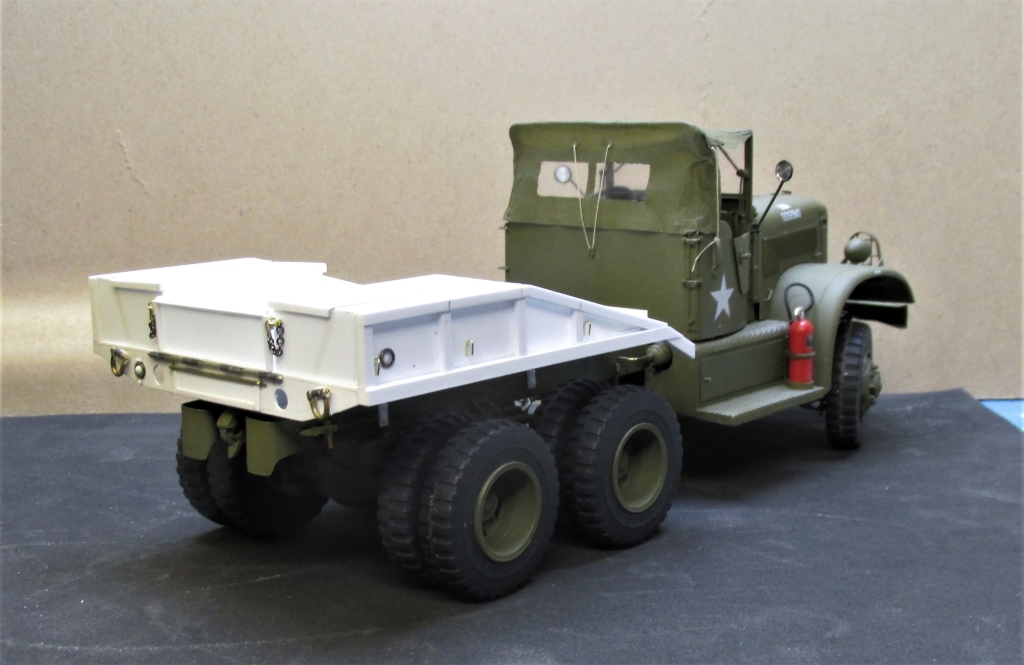
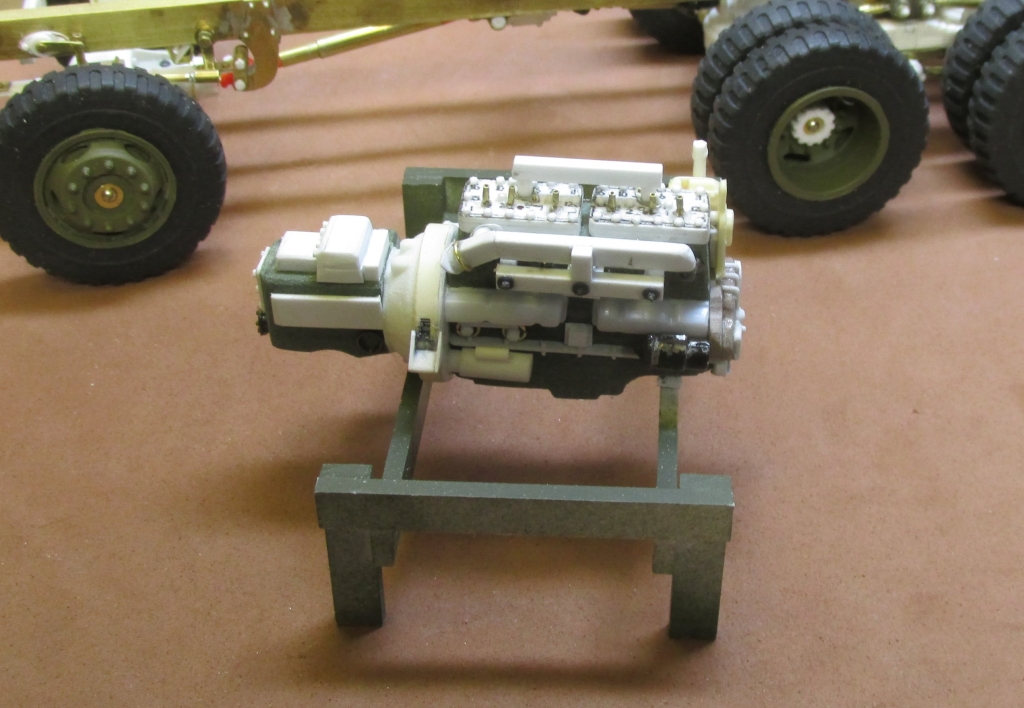
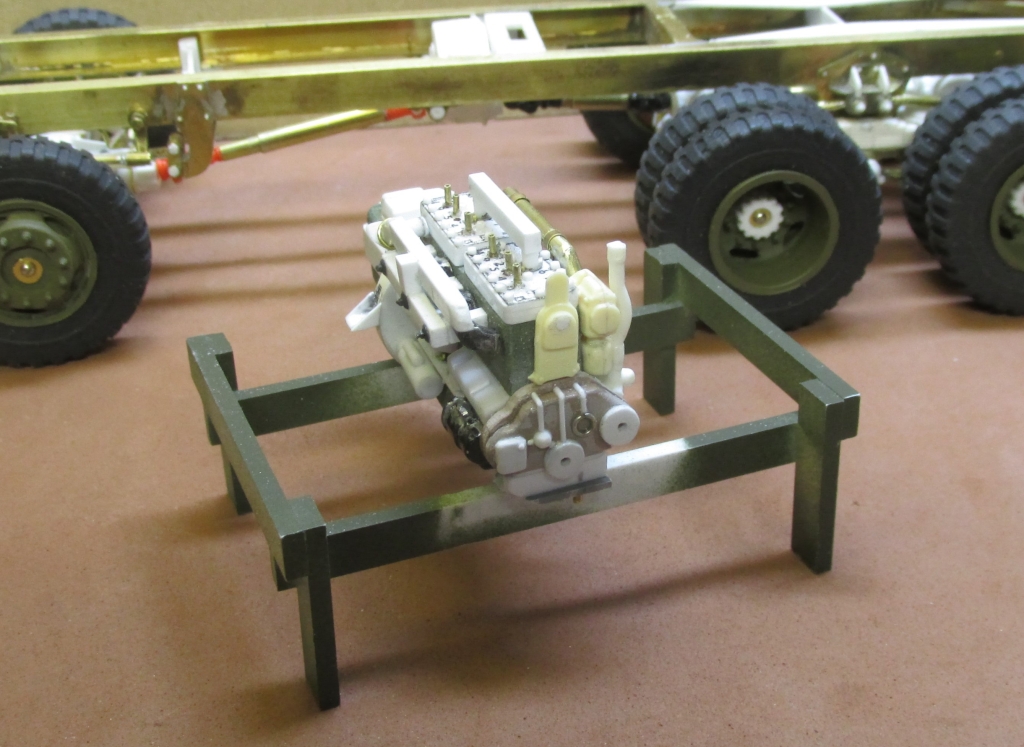
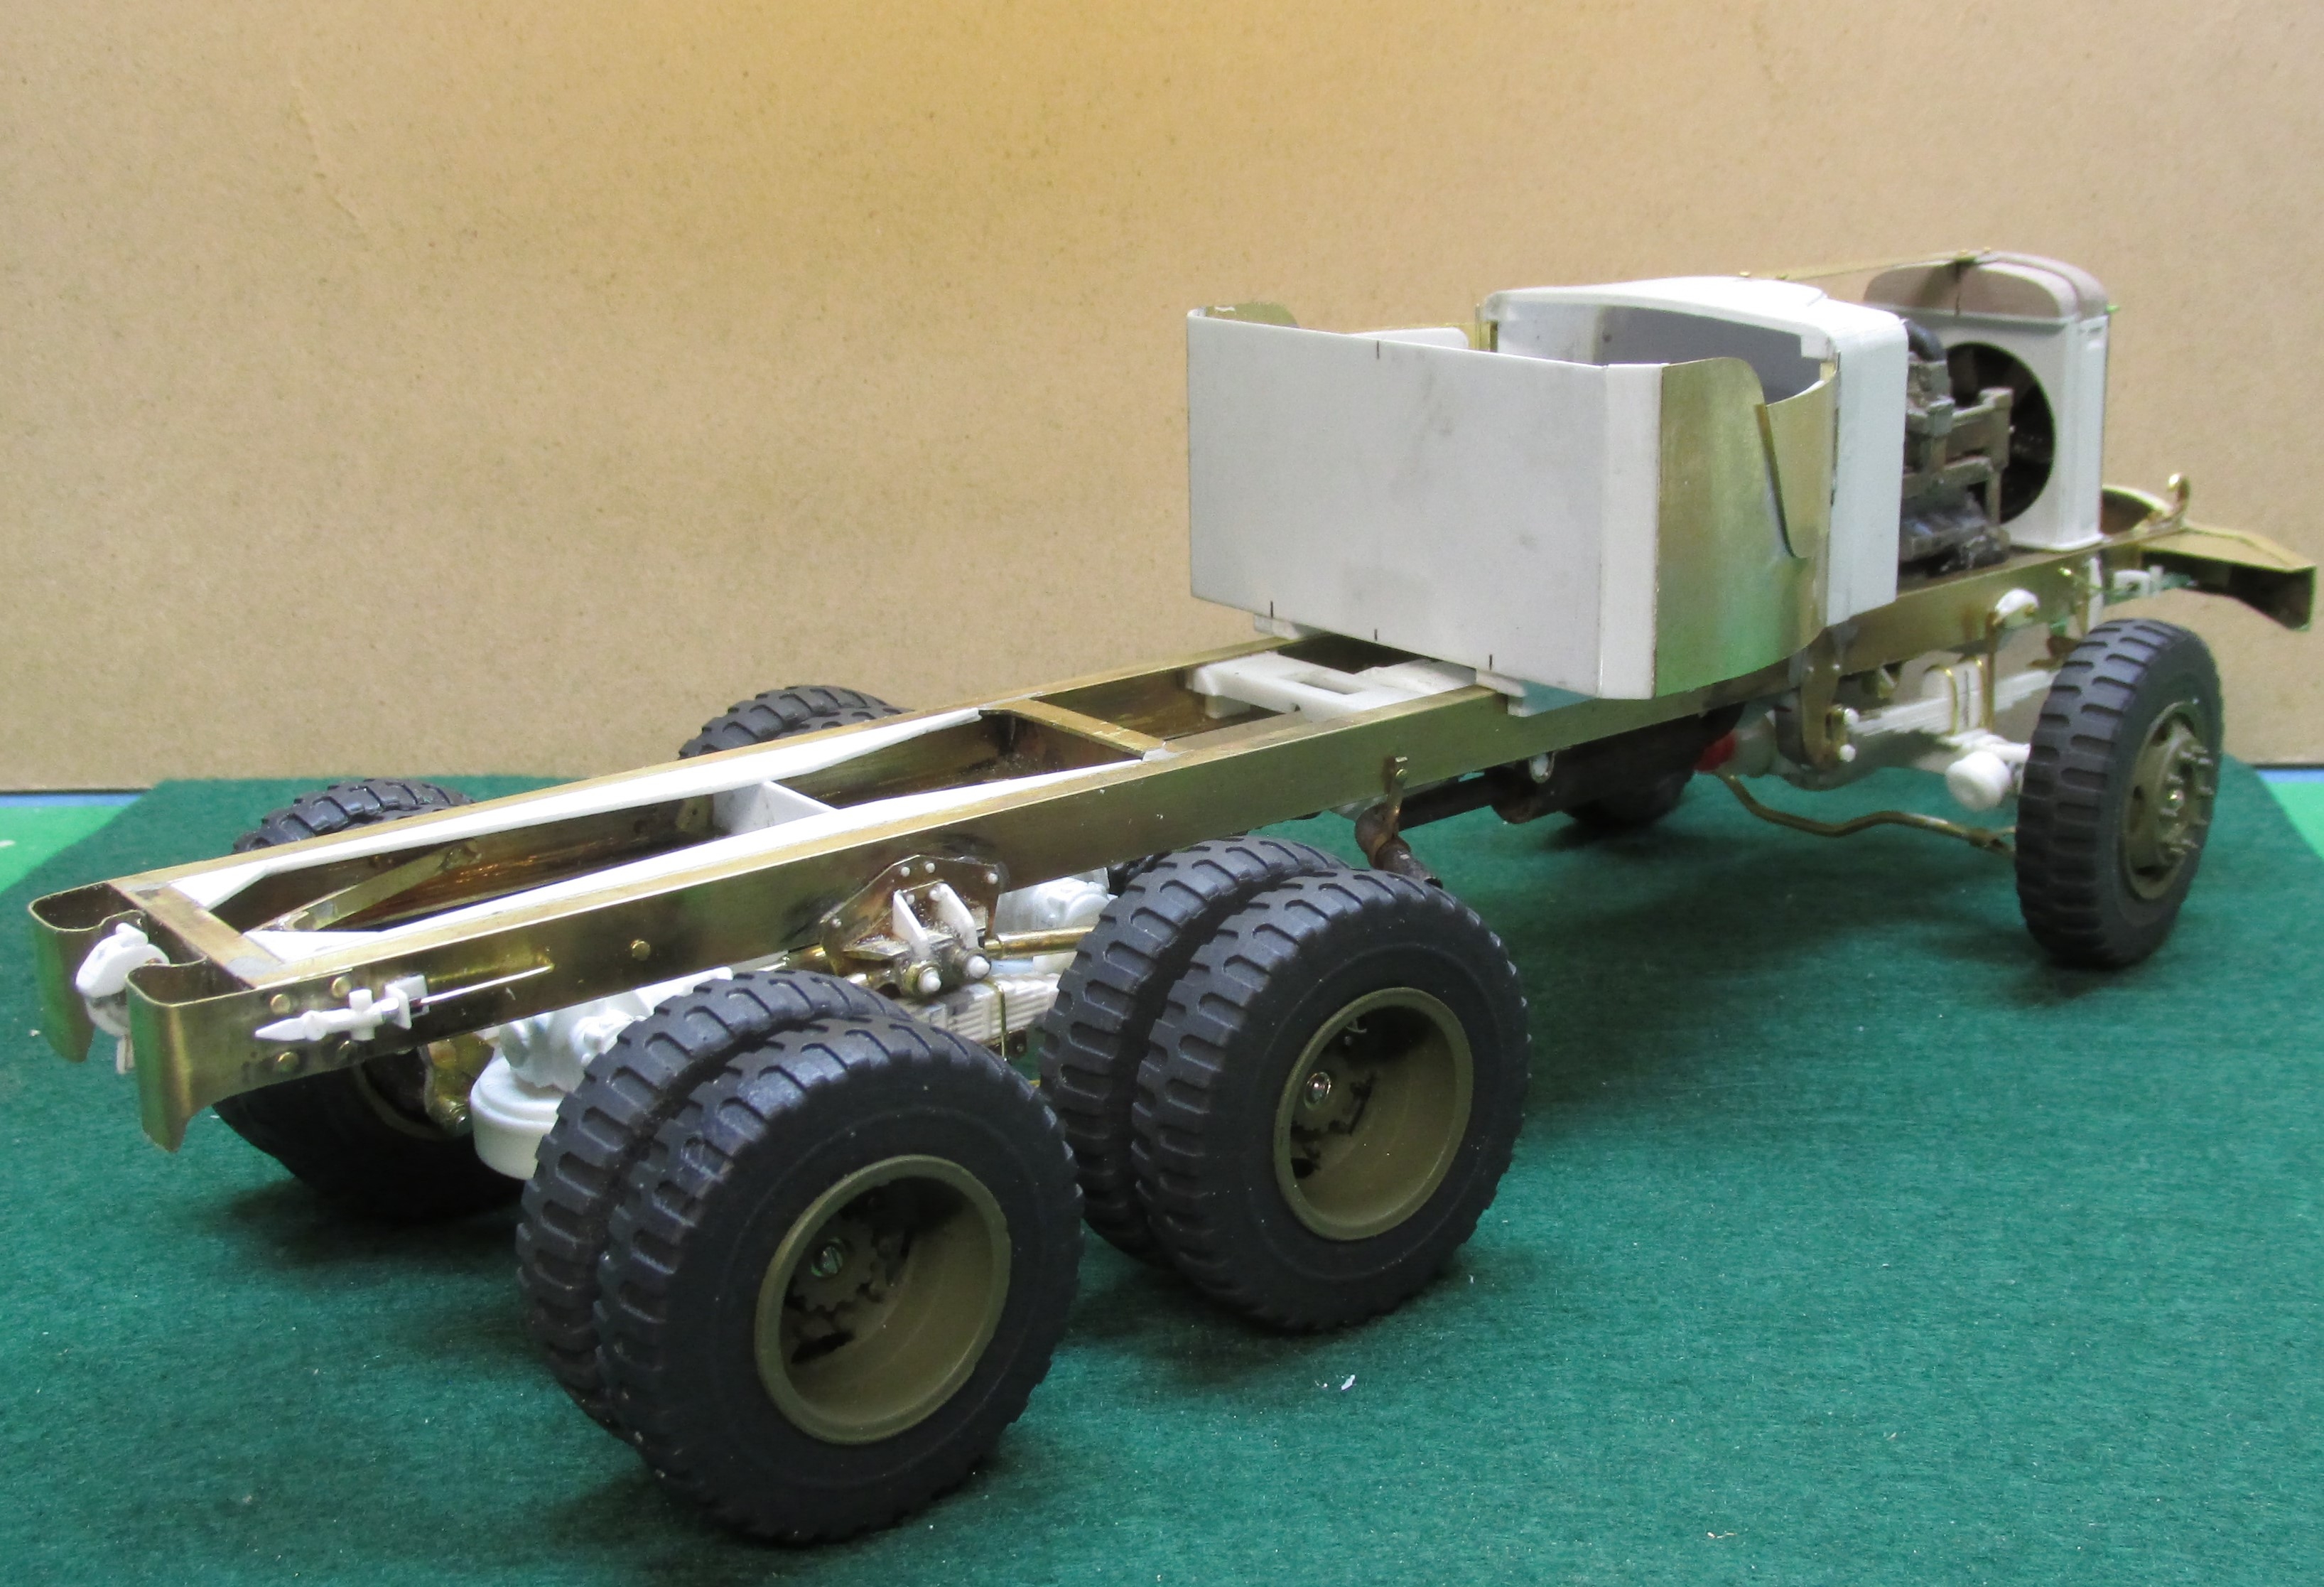
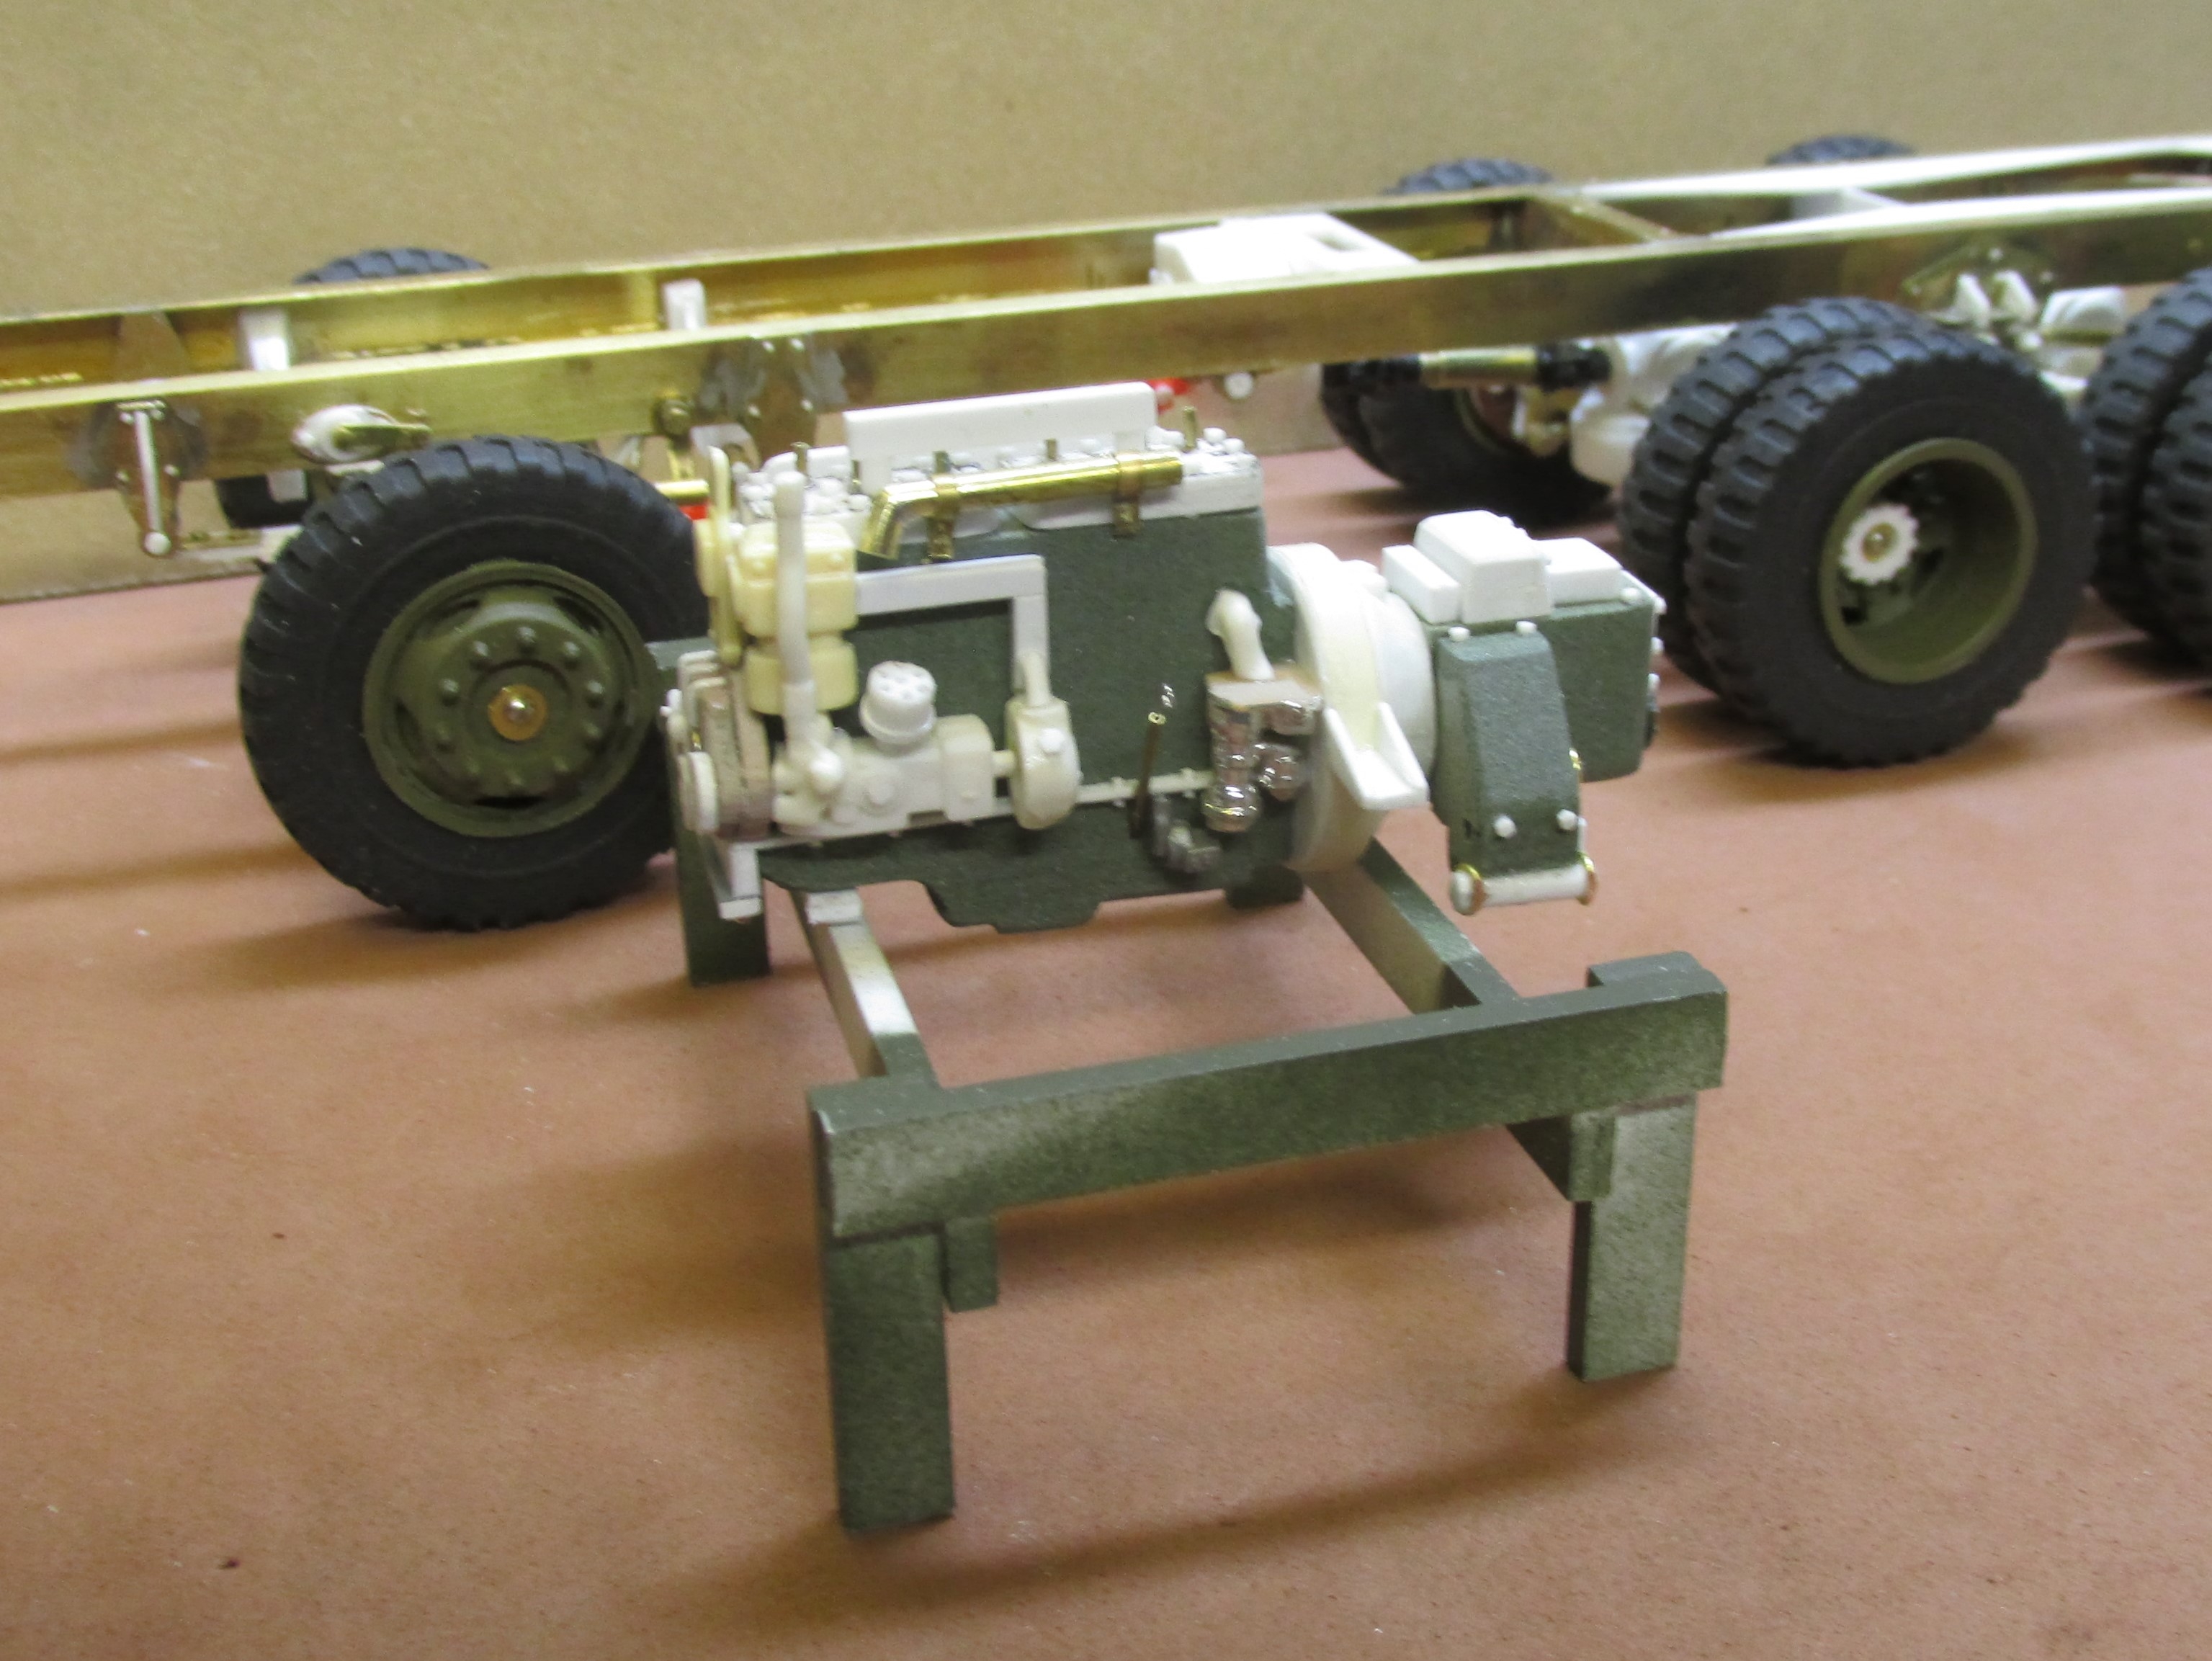
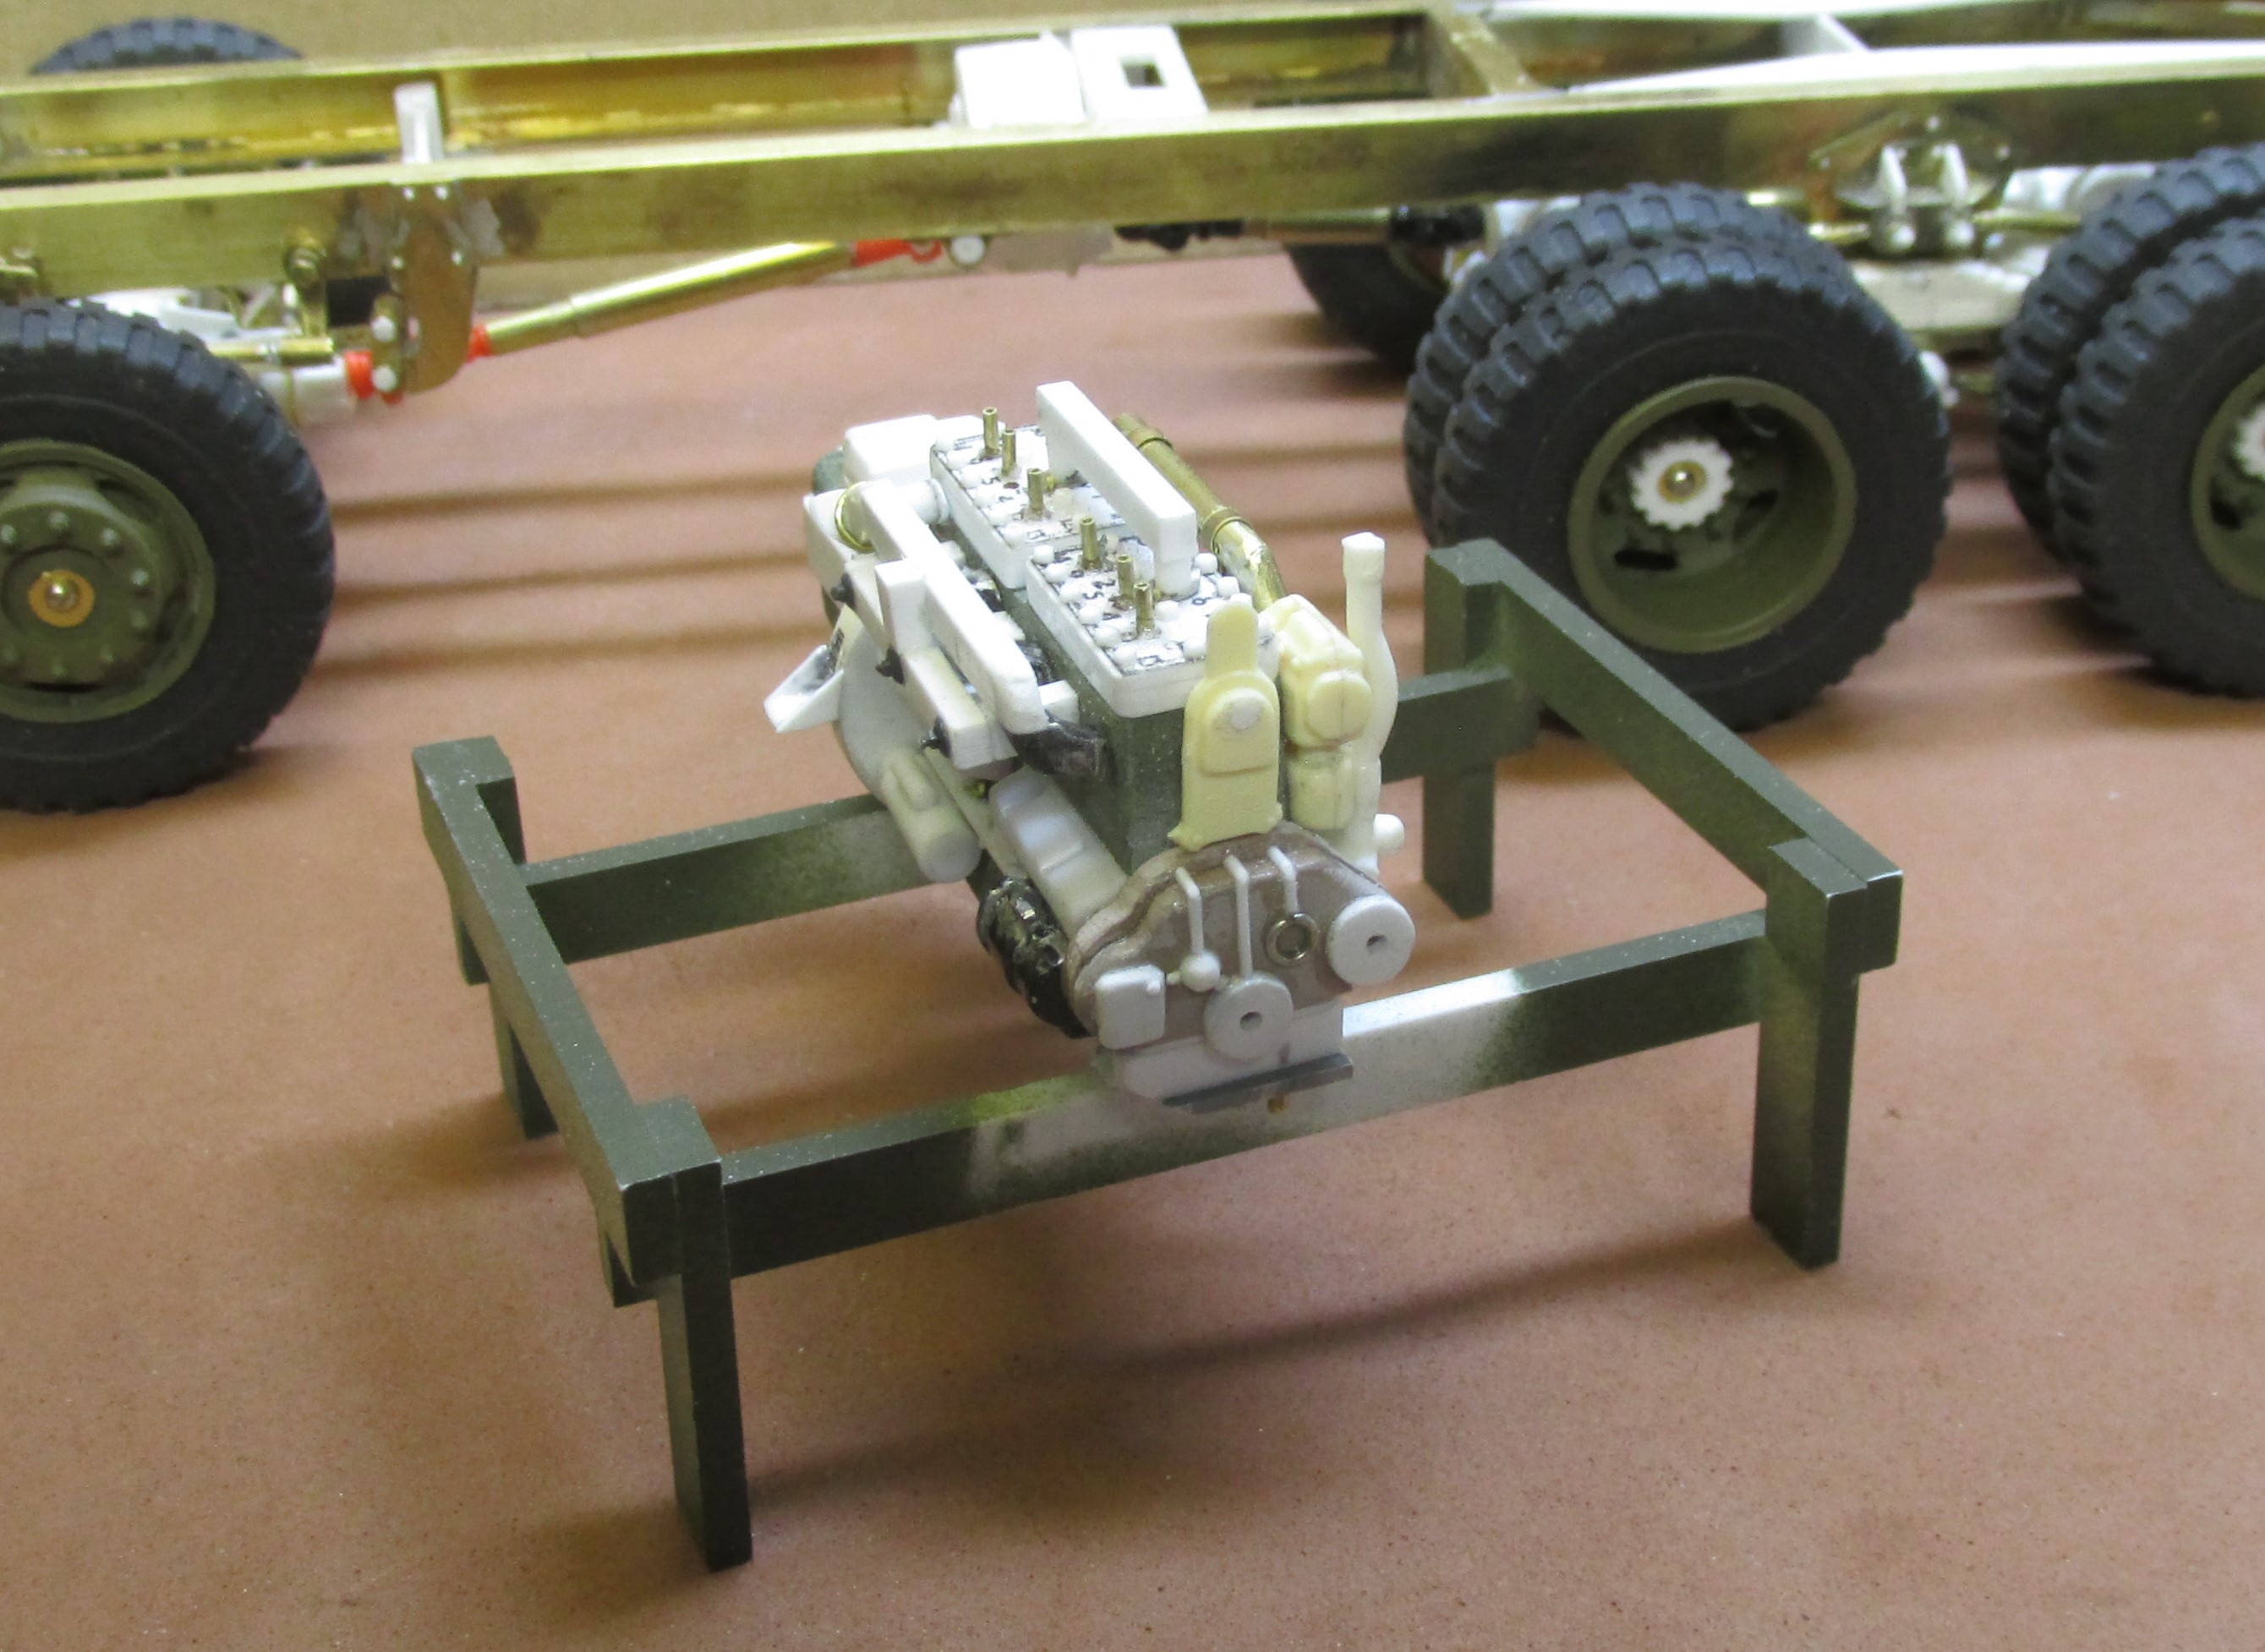
With very few exceptions all of what is in white is what I have either made from plastic stock or have cast in white resin. The only things that are kit pieces are the air brake components on each axle, a couple of frame cross members, and the voltage regulator on the firewall. Sorry, I forgot; the fan also.😊
Yes, the engine is scratch built as well. Renshape for the block and oil pan. Other parts are plastic tubing, strip stock, brass wire, brass tubing and some craft wire for spark plug wires. Fan belts are electical black tape. Pulleys are lathe turnings.
-
Progress made since the last post. Here's where we are as of today.

-
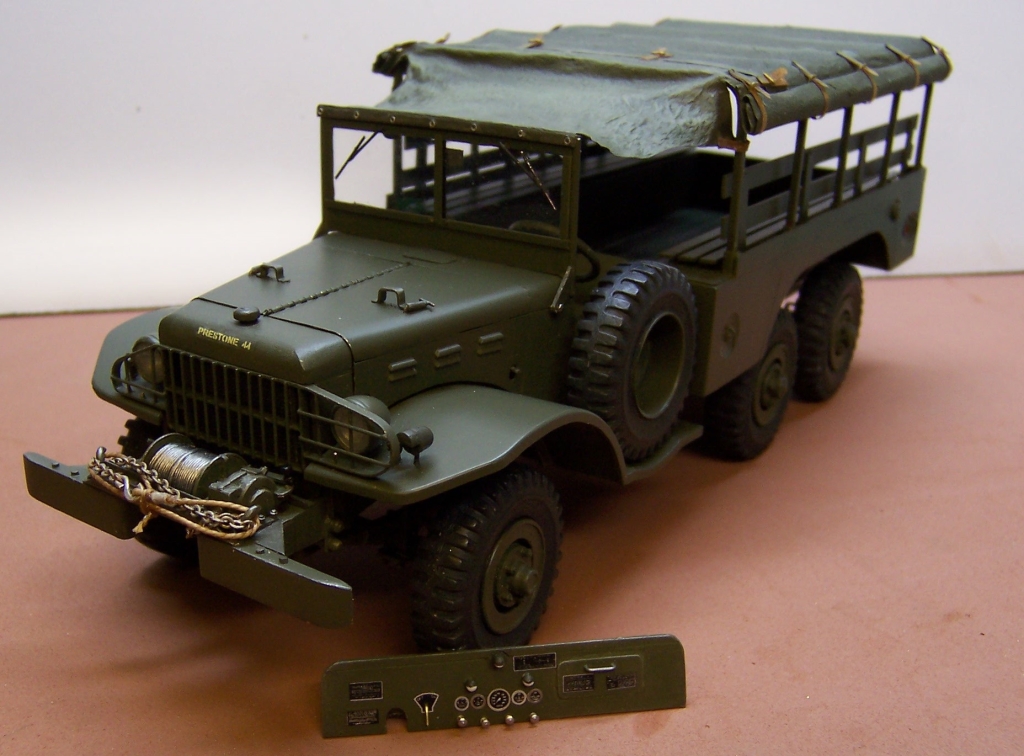
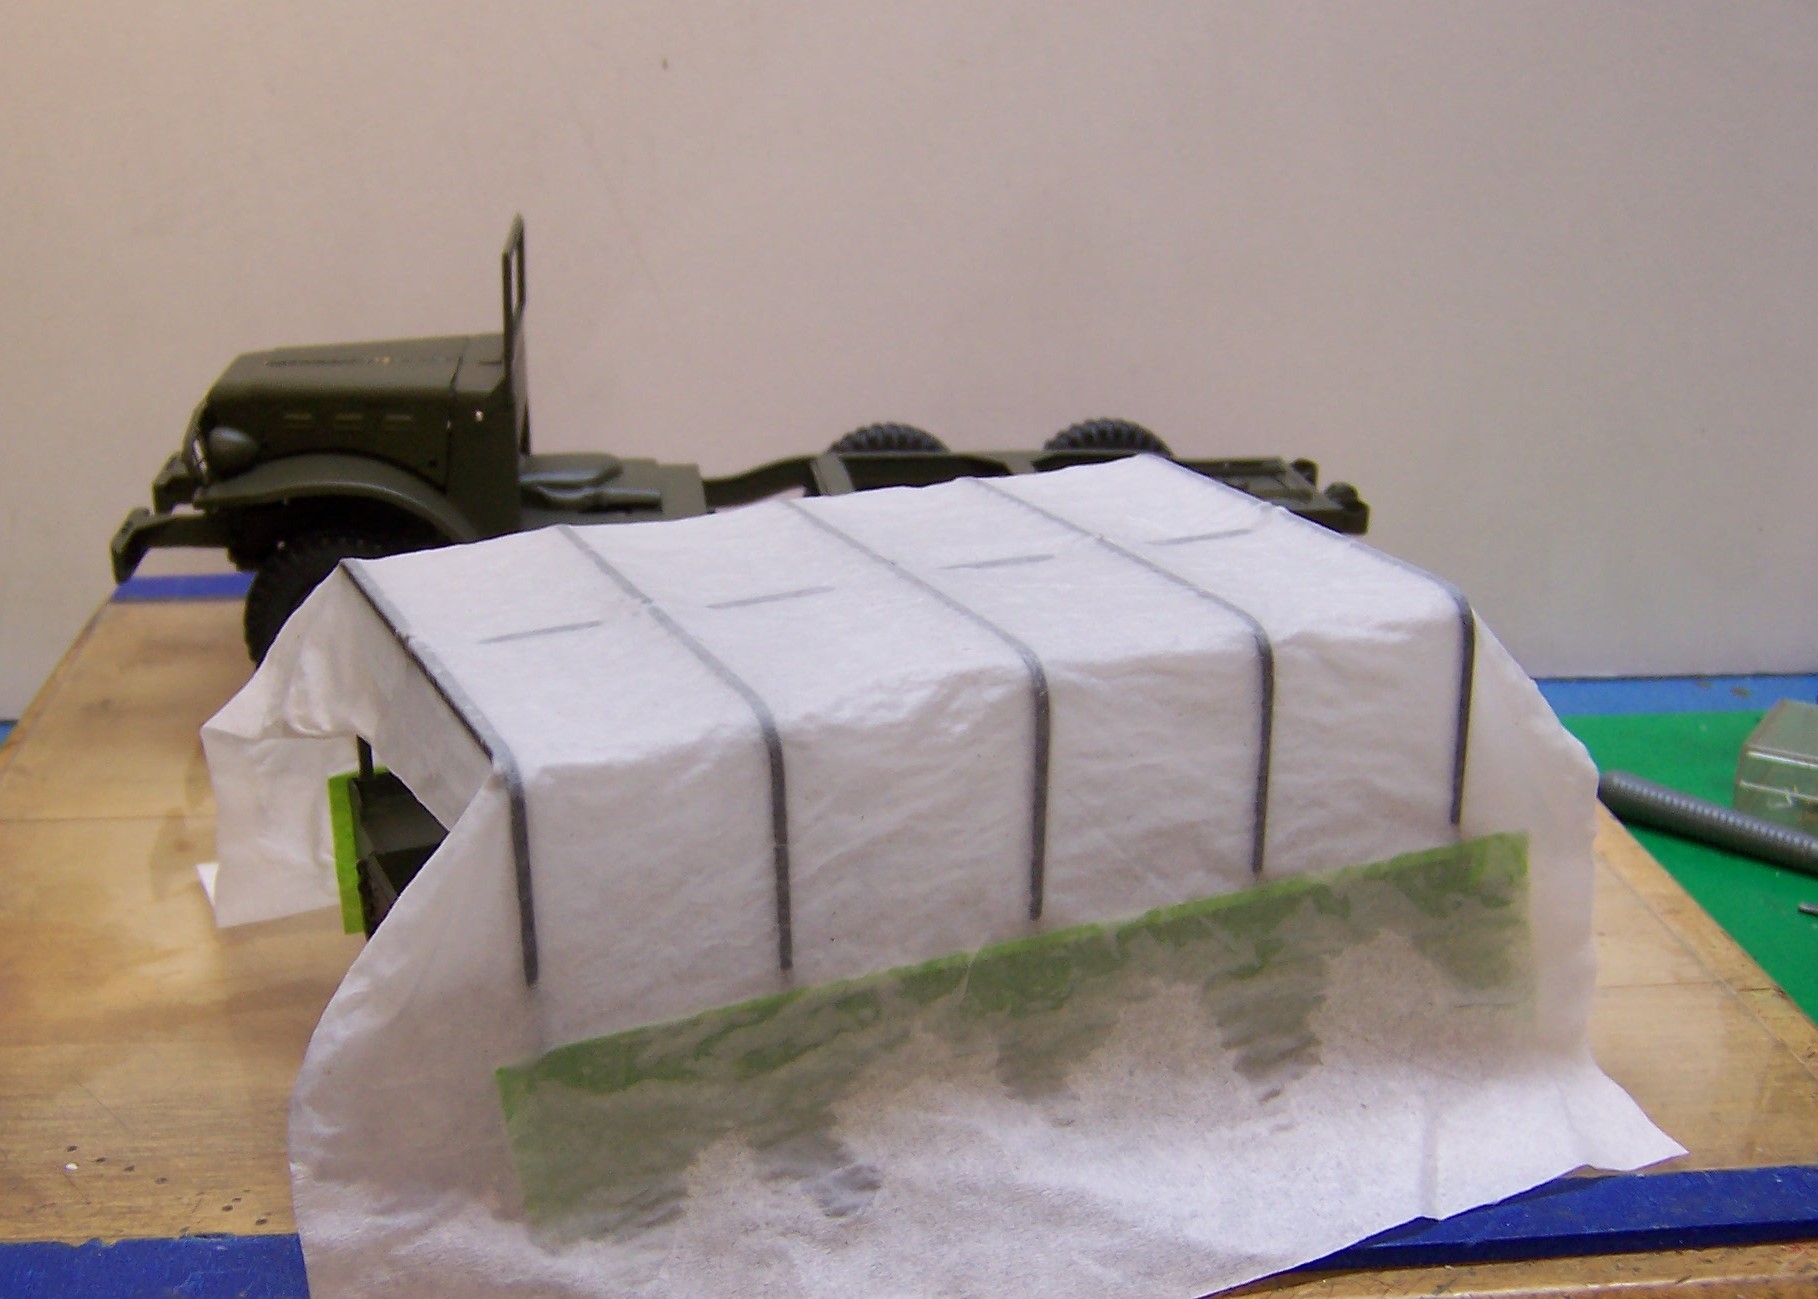
Tarps can be easy to make using some 2 ply facial tissue with no imprint and some 50/50 white glue and water. Here are examples of what I did for two WC trucks of WW II.

Tissue laid in place and "painted with white glue/water mix.
Tissue rolled up and glued in place. Spray painted with Testors Olive Drab and then weathered.

Similar rig but with a larger tarp to make.

In place with an added piece over the drivers compartment. The straps are made of brown paper bag strips and brass wire. Again weathering was done using Tamiya chalks.
The trick is to simply lay the tissue over what you want to cover and let gravity and the glue/water mix do its thing. After it dries you can shape it to fit the coils you are thinking about.
-
 1
1
-
-
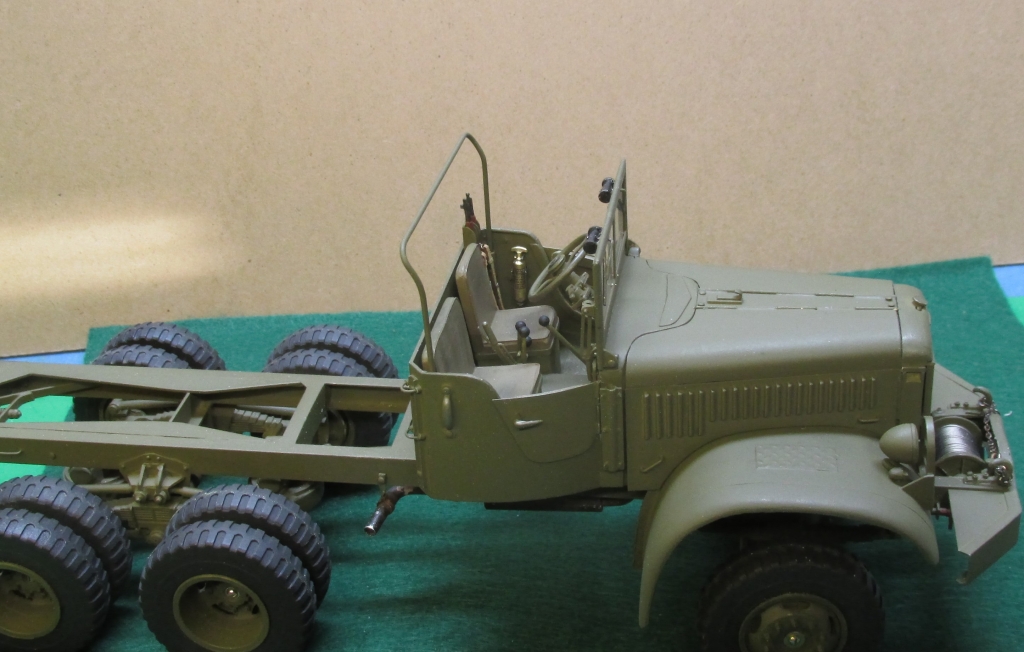
Picking up speed a bit. The cab and radiator are taking shape. It's beginning to look something like a truck now. This is going to be the soft top version of the military Diamond T so it has small half doors on each side.

-
Got some engine work done. The truck is powered by a Hercules RXC 6 cylinder engine. No kit has this engine so it is off to the scrap yard, parts bin and the materials bay to get enough to work with. The block and oil pan are Renshape-like materials. Other stuff is mainly plastic and brass. The TM for the '44 Diamond T has been a good source of info as has the maintenance manual.


-
Welcome to the forum, Mark. Lots of good ideas here.
-
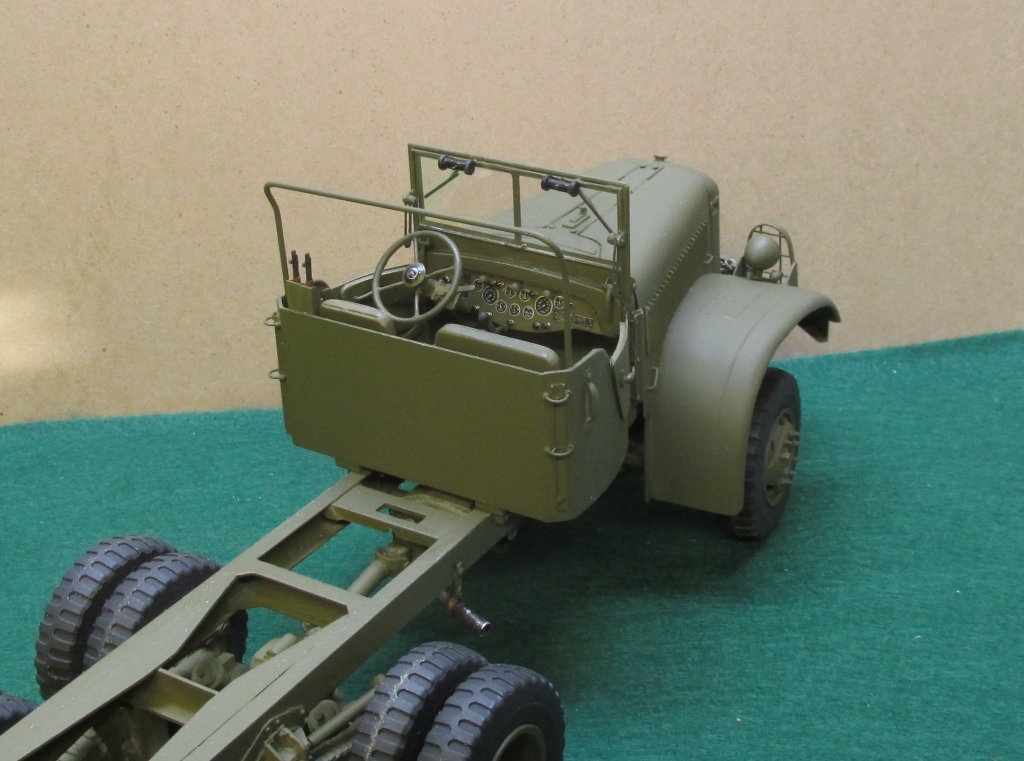
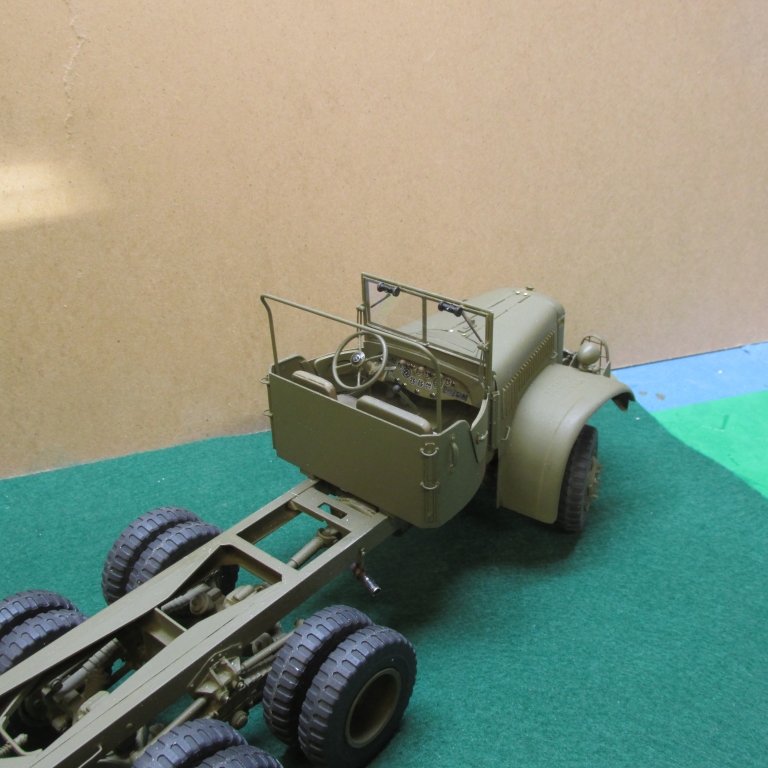
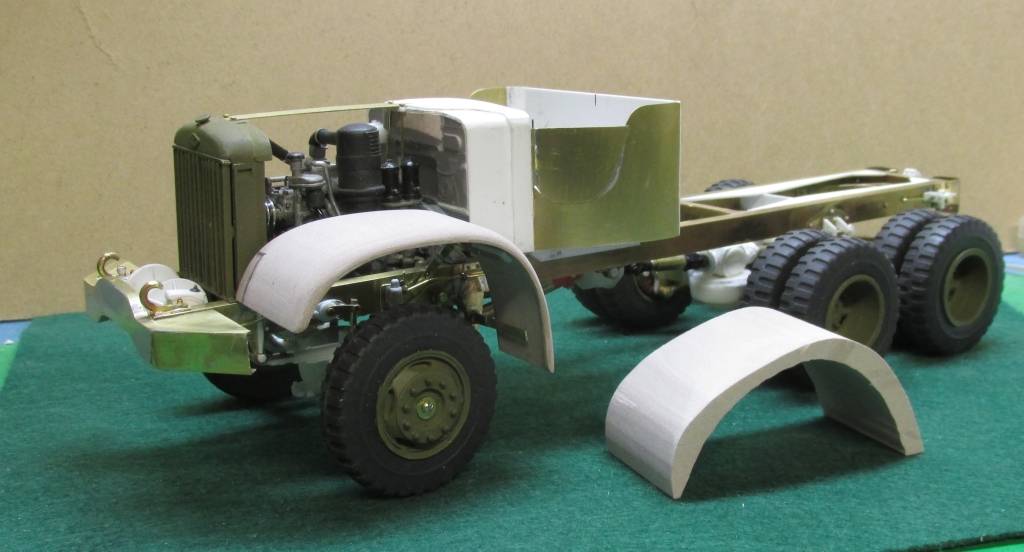
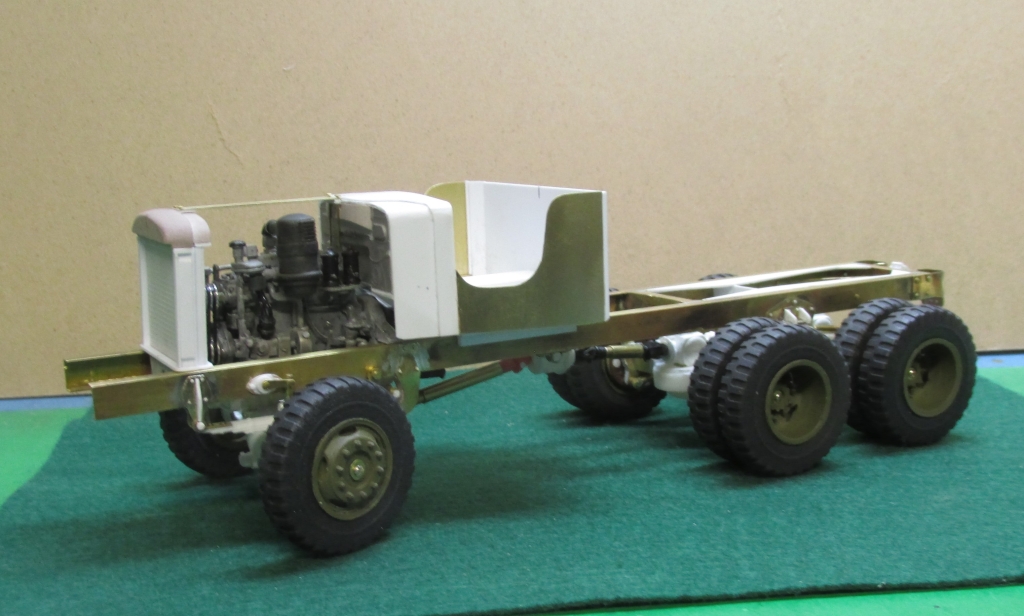
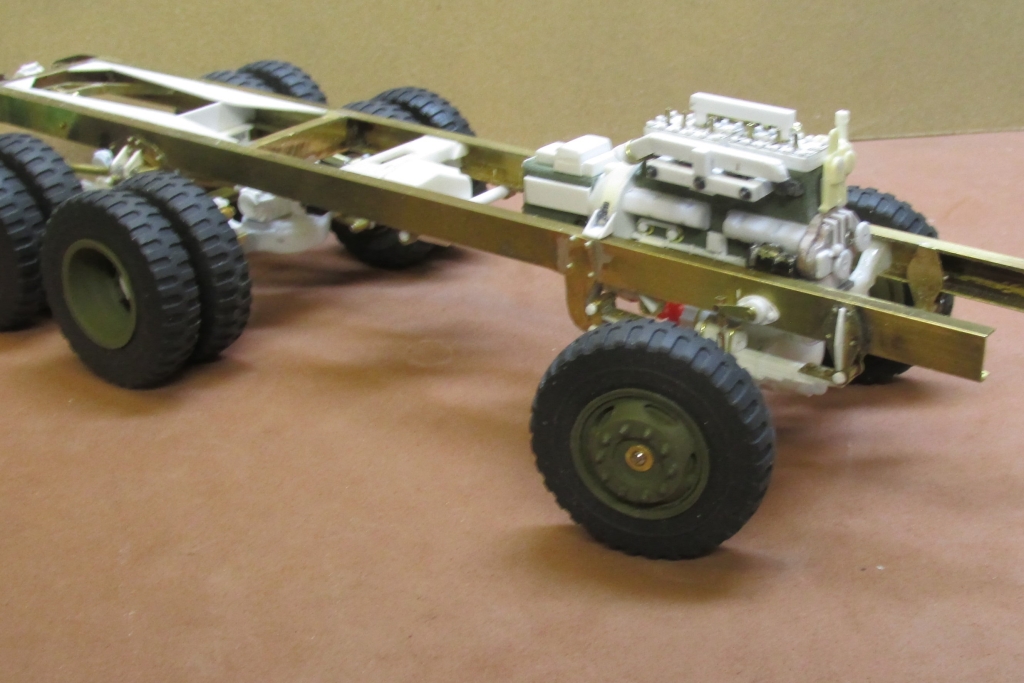
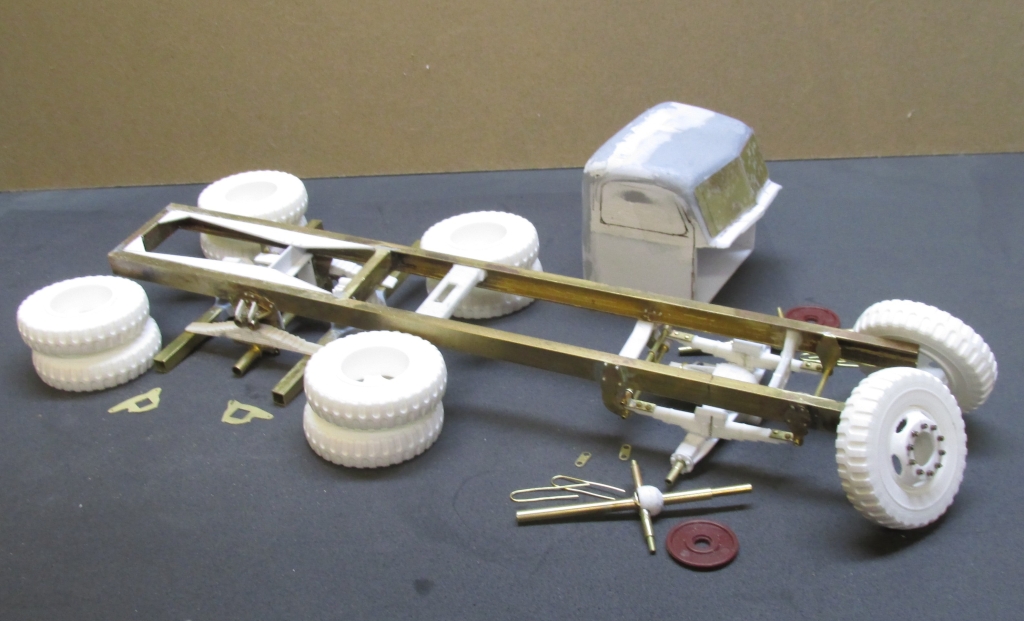
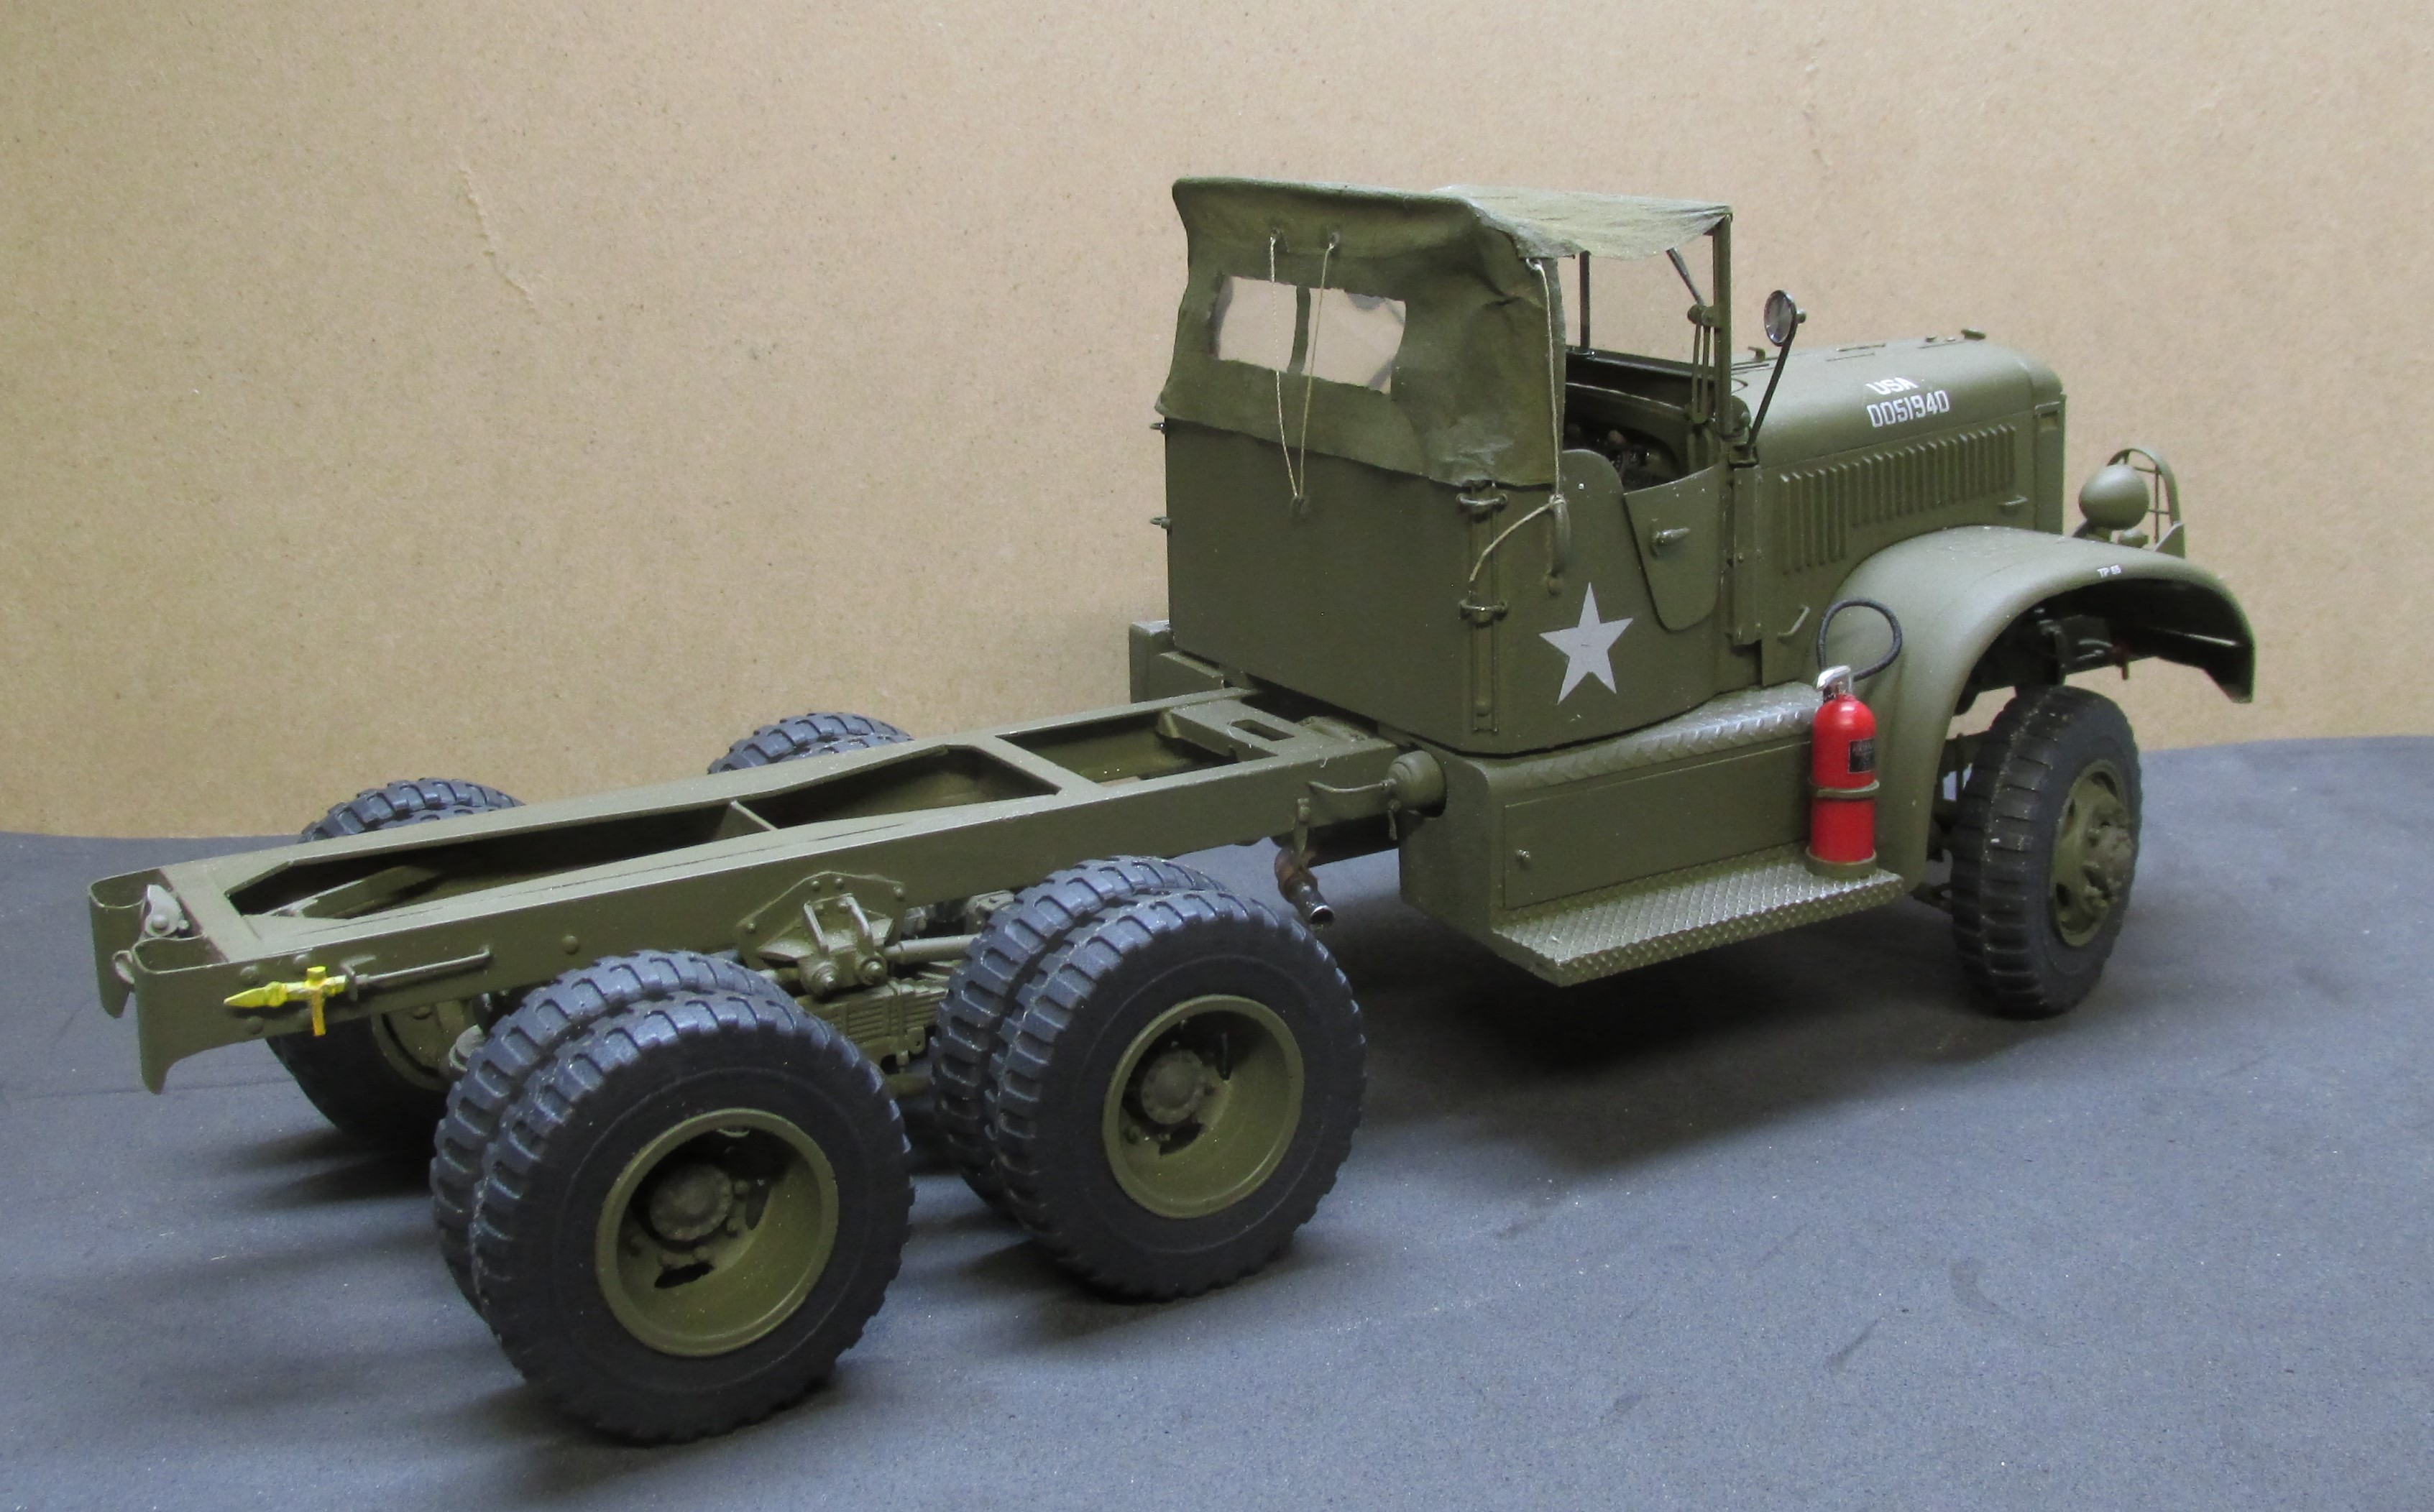
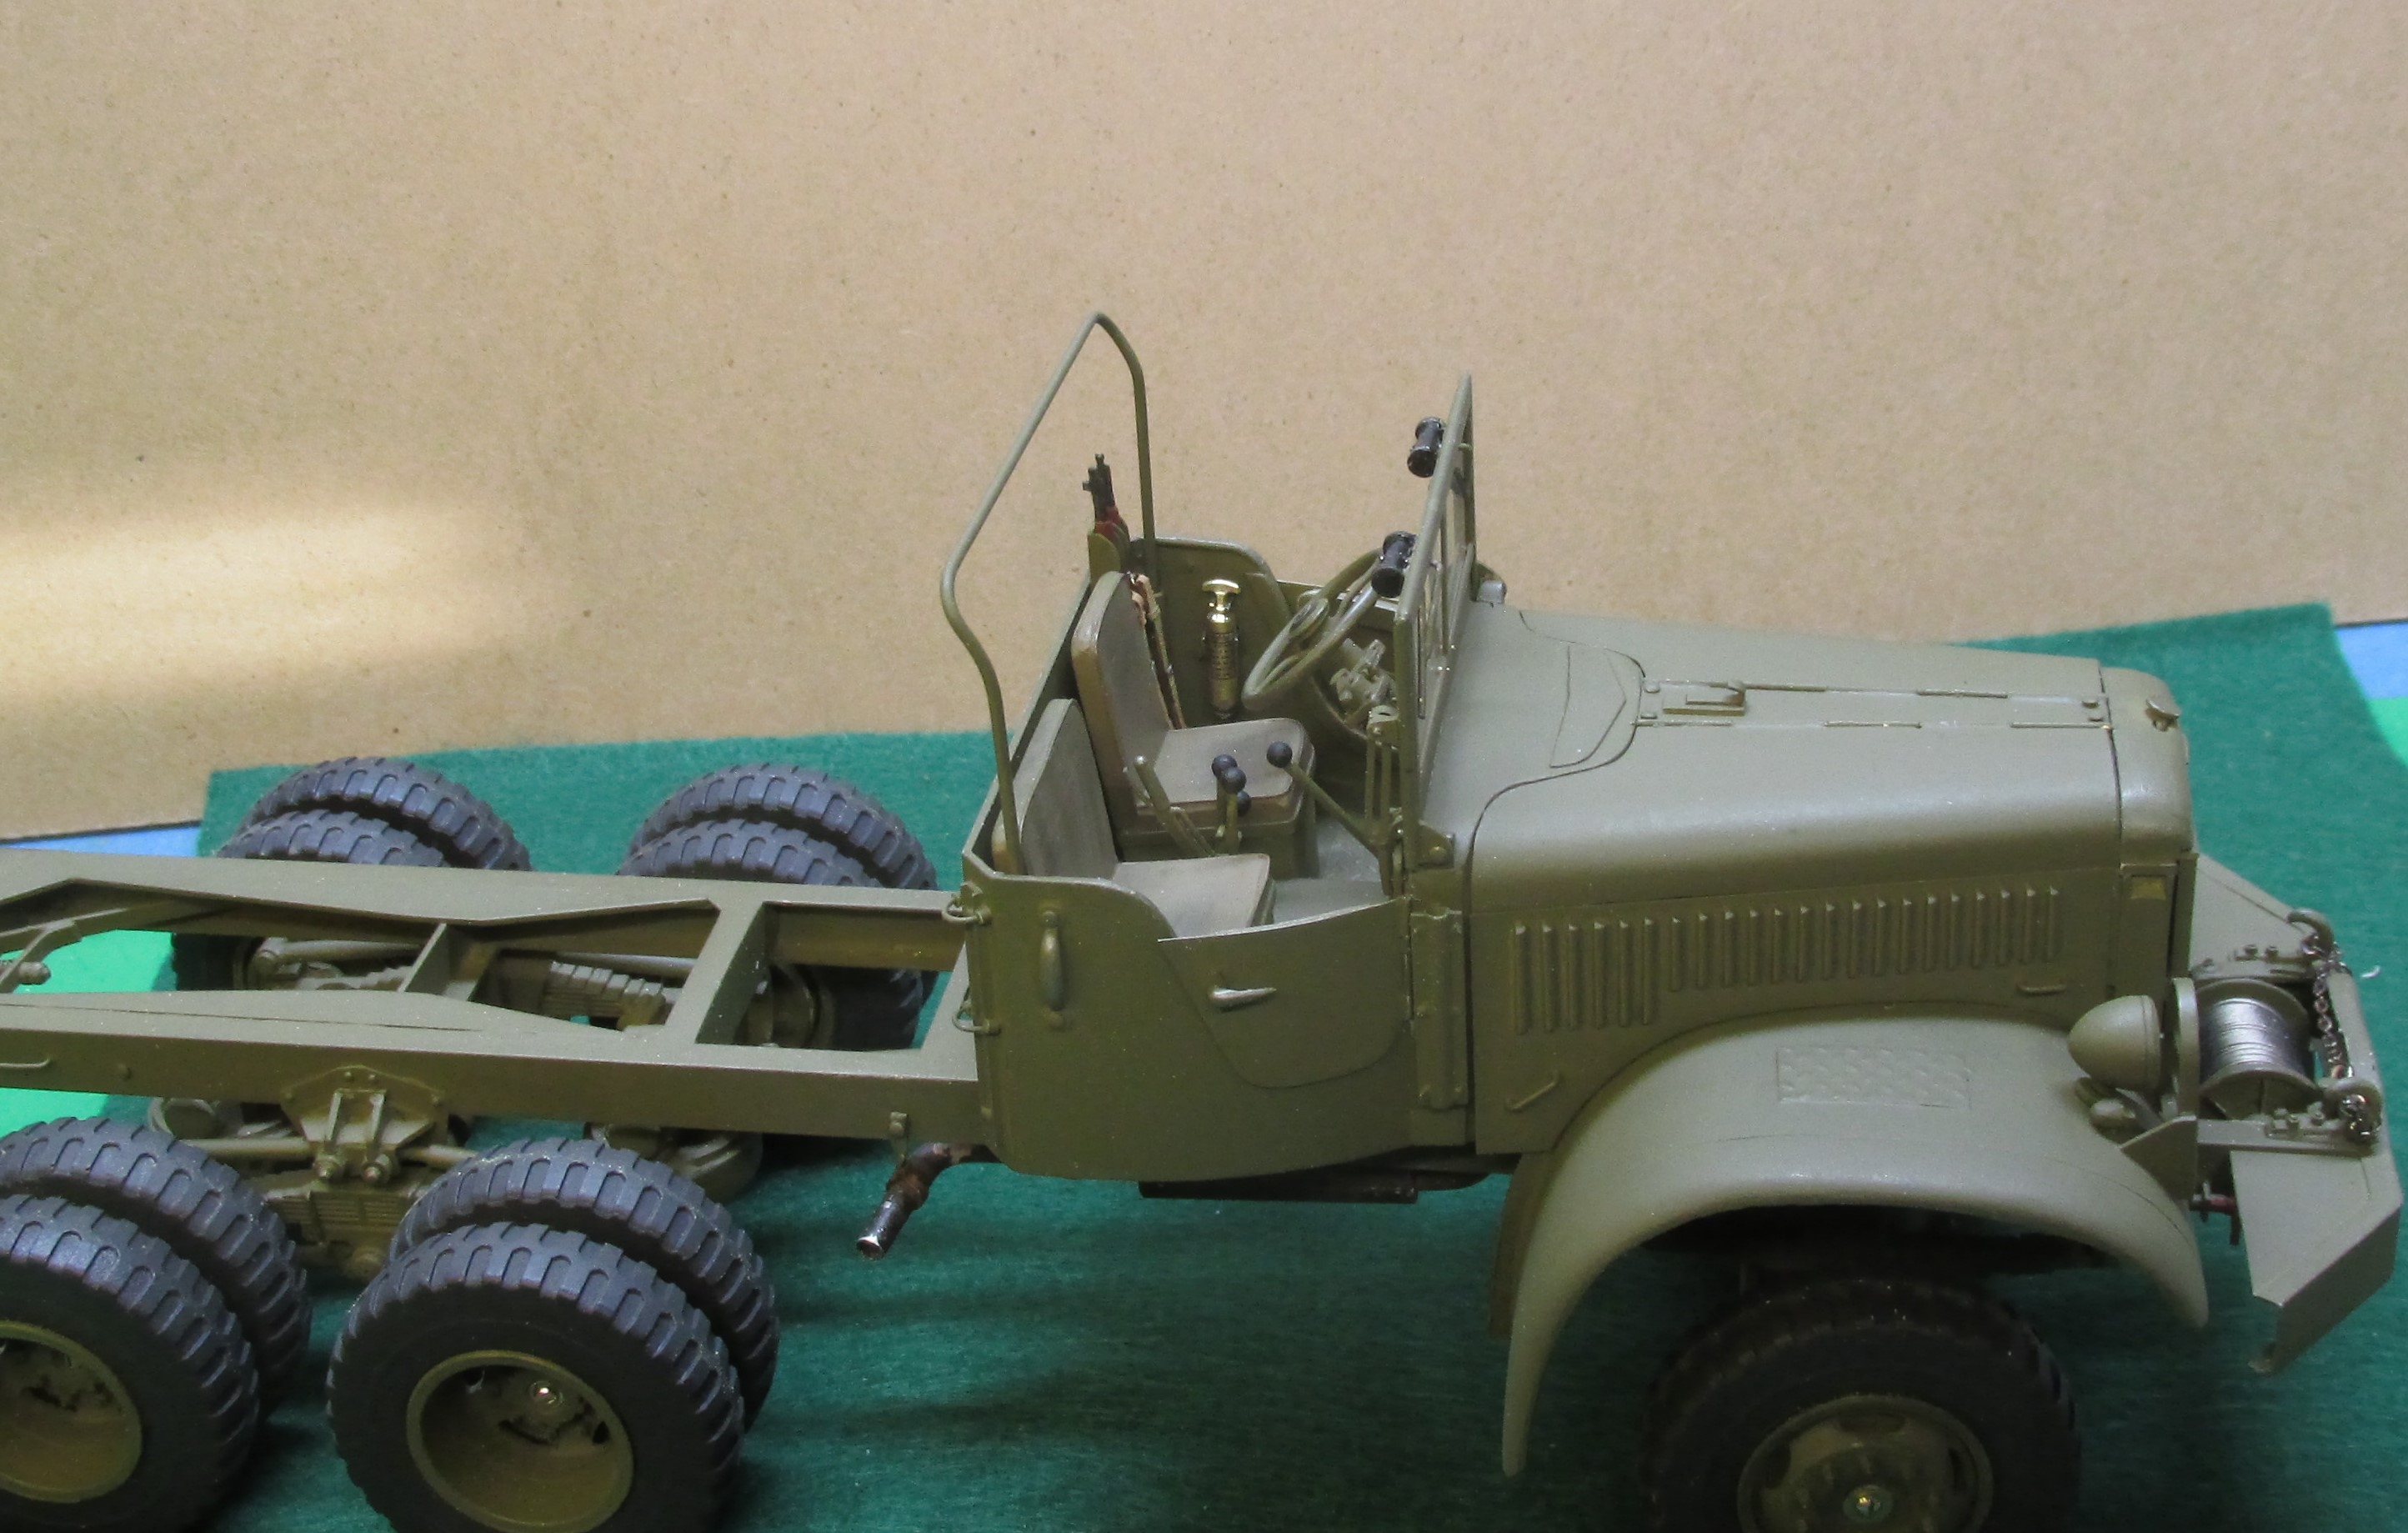
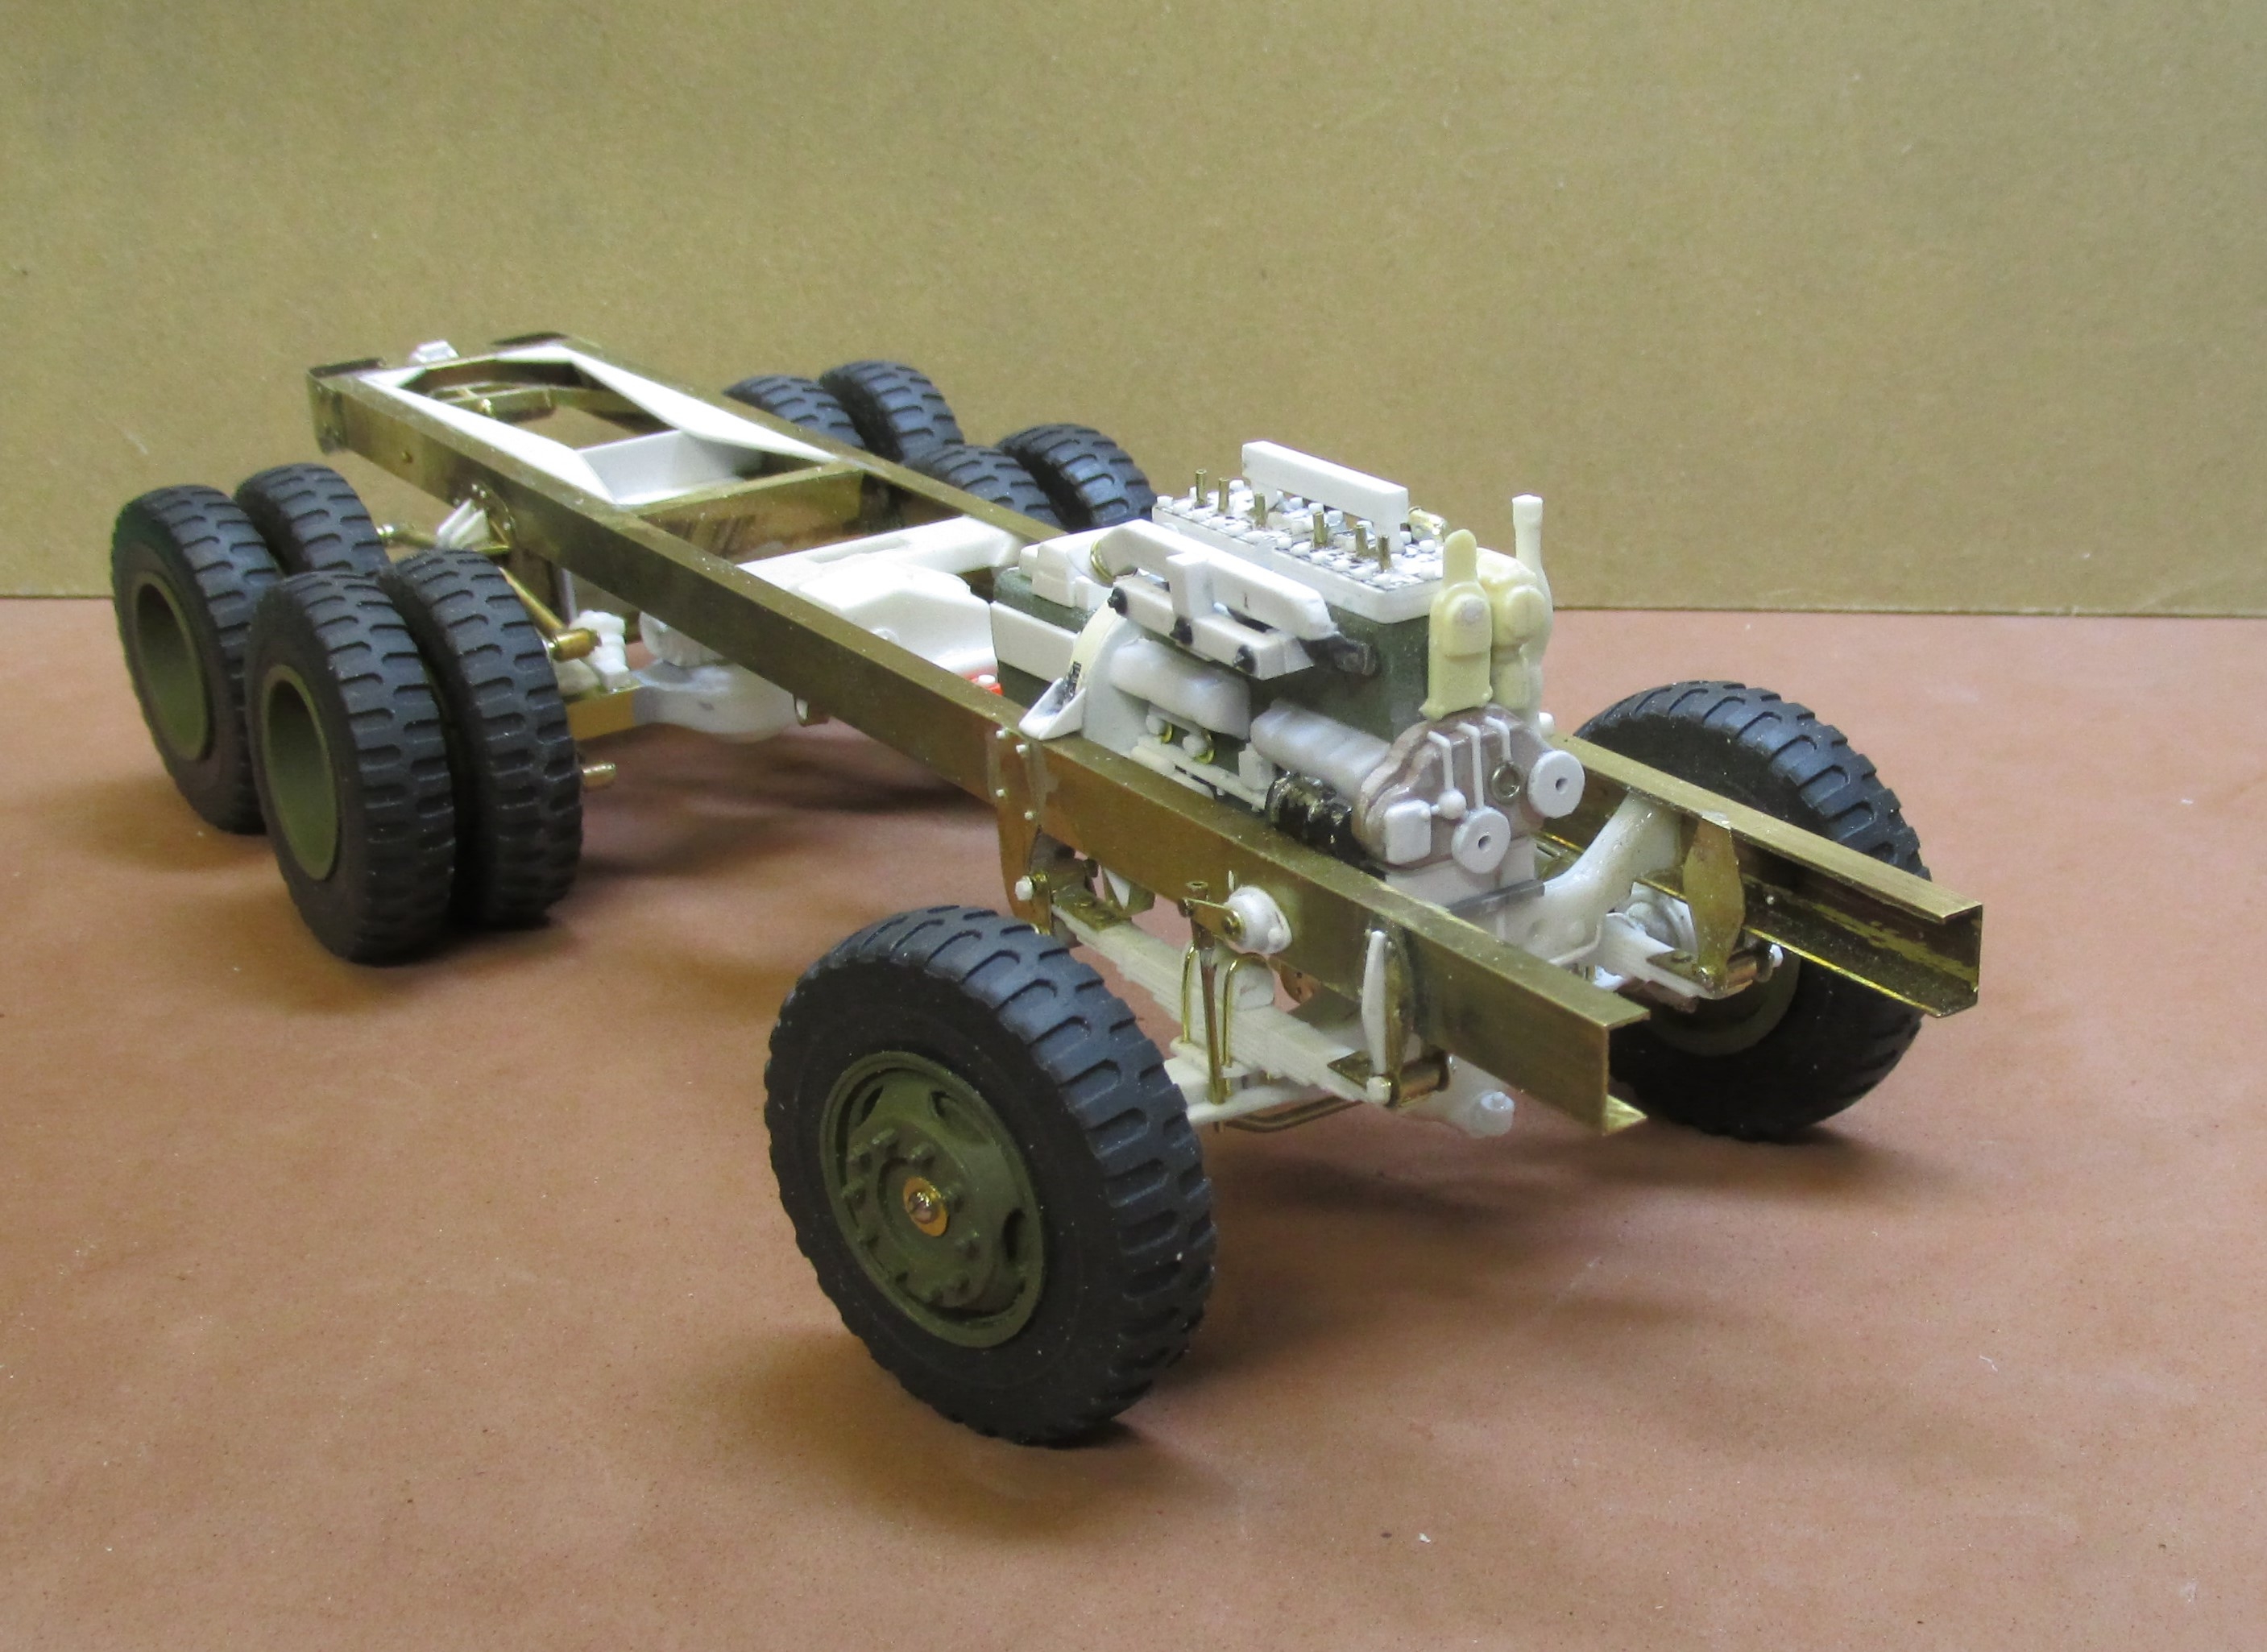
Been a while since posting progress on this rig. There have been a lot of detail pieces to figure out and get done. So this is where the chassis is of a couple of days ago.

Drive shafts are connected except for the one that goes between the transmission and transfer case. The engine has to be built first. Most of the chassis is now finished.
The steering is complete along with shocks and final connections for the springs.

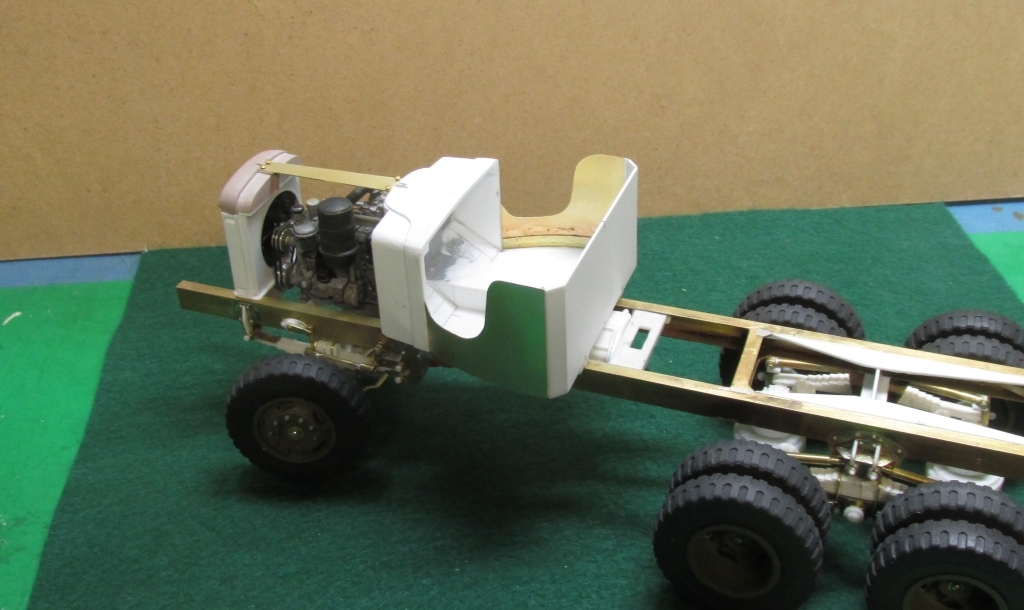
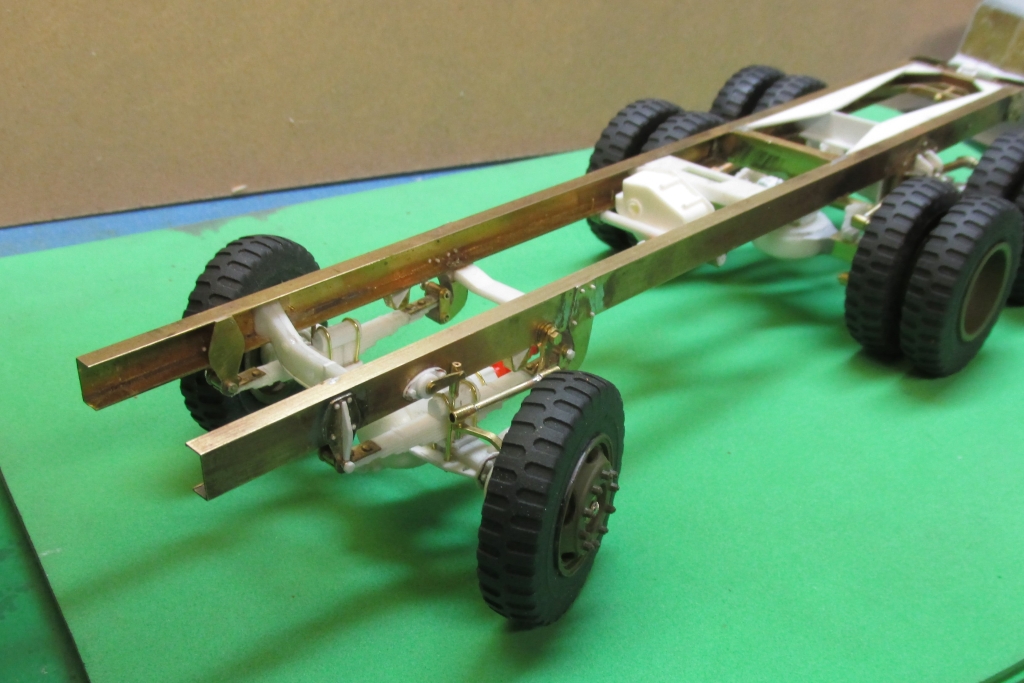
I made a buck to shape the bumpers on the back of the frame. The brass was first annealed to soften it for forming. The pintle hook opens and swivels. Brass pins were used for the rivet details.
A look at the rear spring details without the tires in the way.

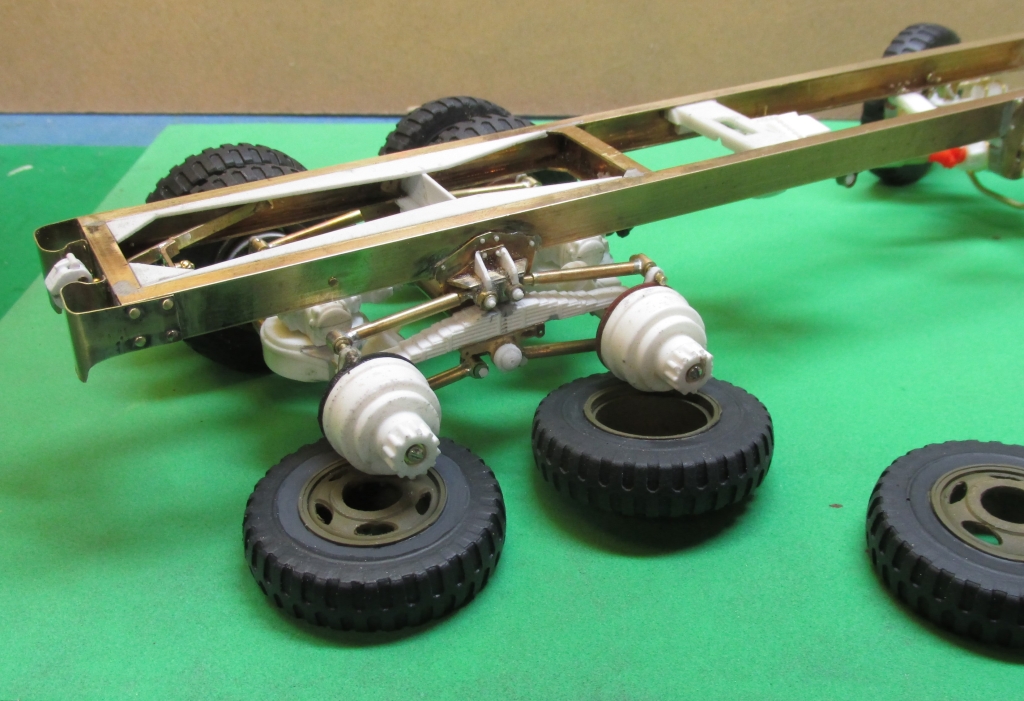
On each of the front wheels and the outside rear wheels I shaved away the lug nuts. When the wheels were cast, the lugs did not always come out as they should. They were replaced by drilling holes where the lugs were and inserting pieces of brass wire in their place and slipping some #15 fusion beads over them. CA holds them all in place. The rears were trimmed on the back side so that the wheels would fit against the inside ones. Once all is complete, the hubs where the screws and washers show will be covered with appropriate caps.
-
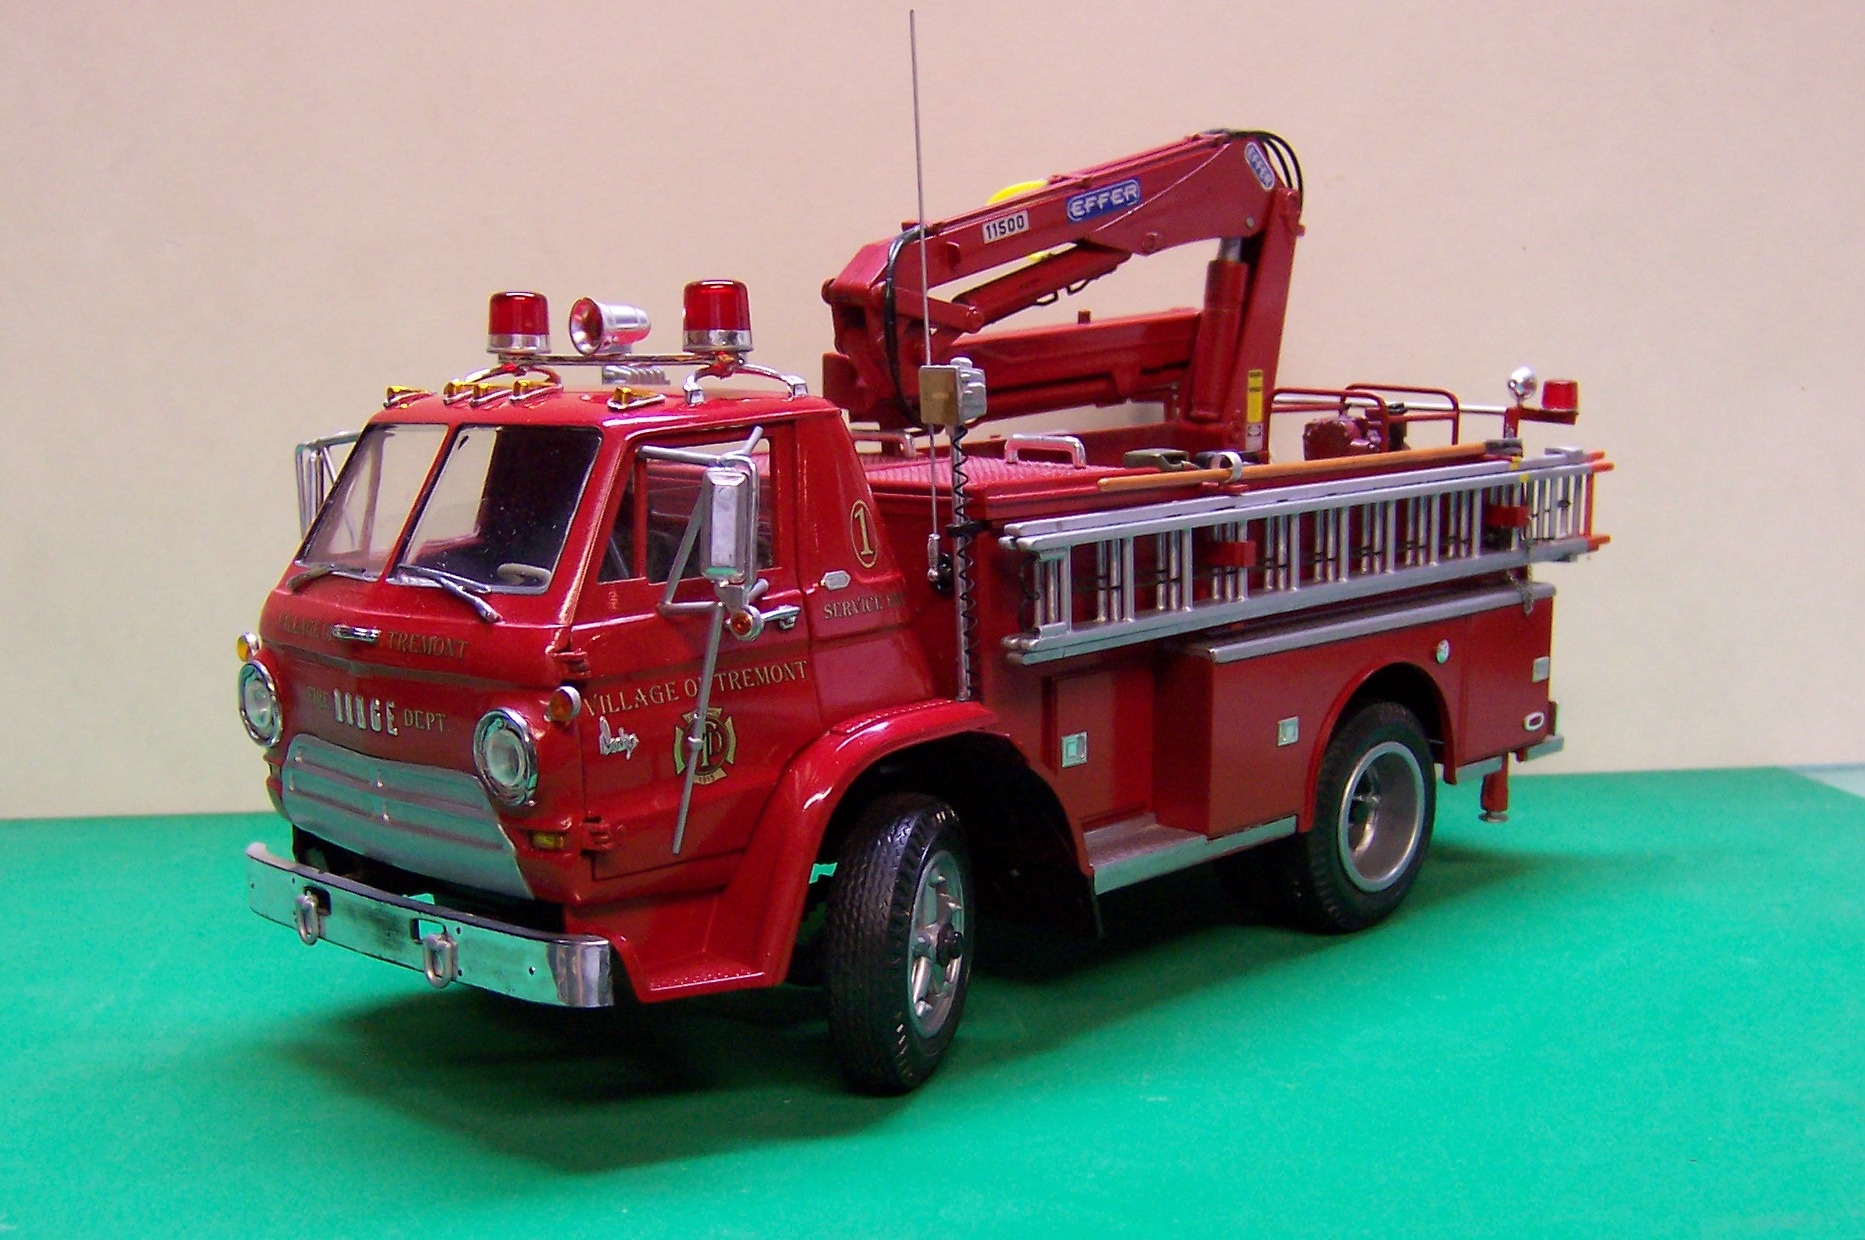
I recognize the Effer crane. I used one on a FD service vehicle some years ago. This is it.

-
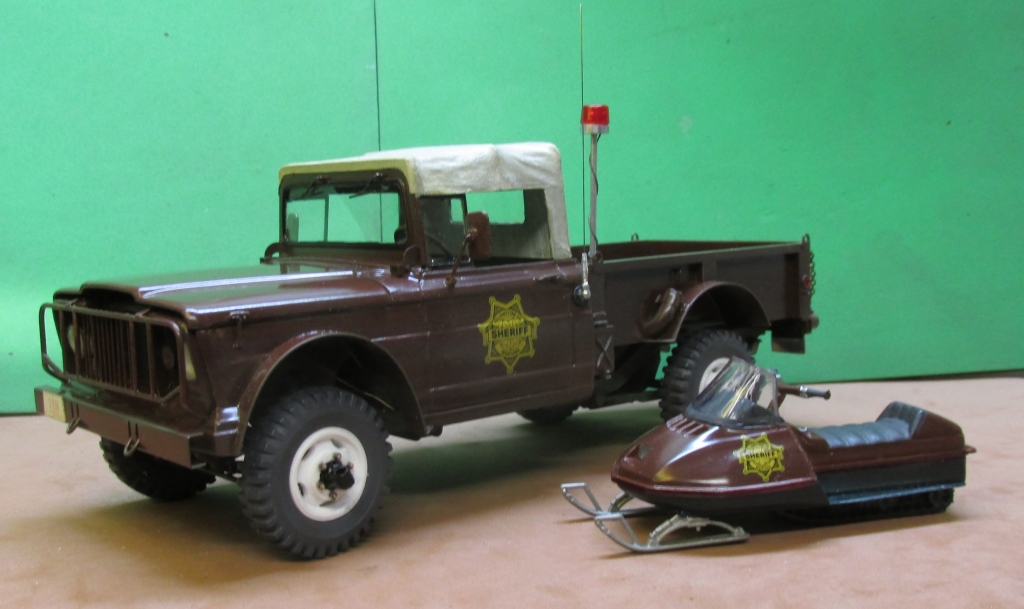
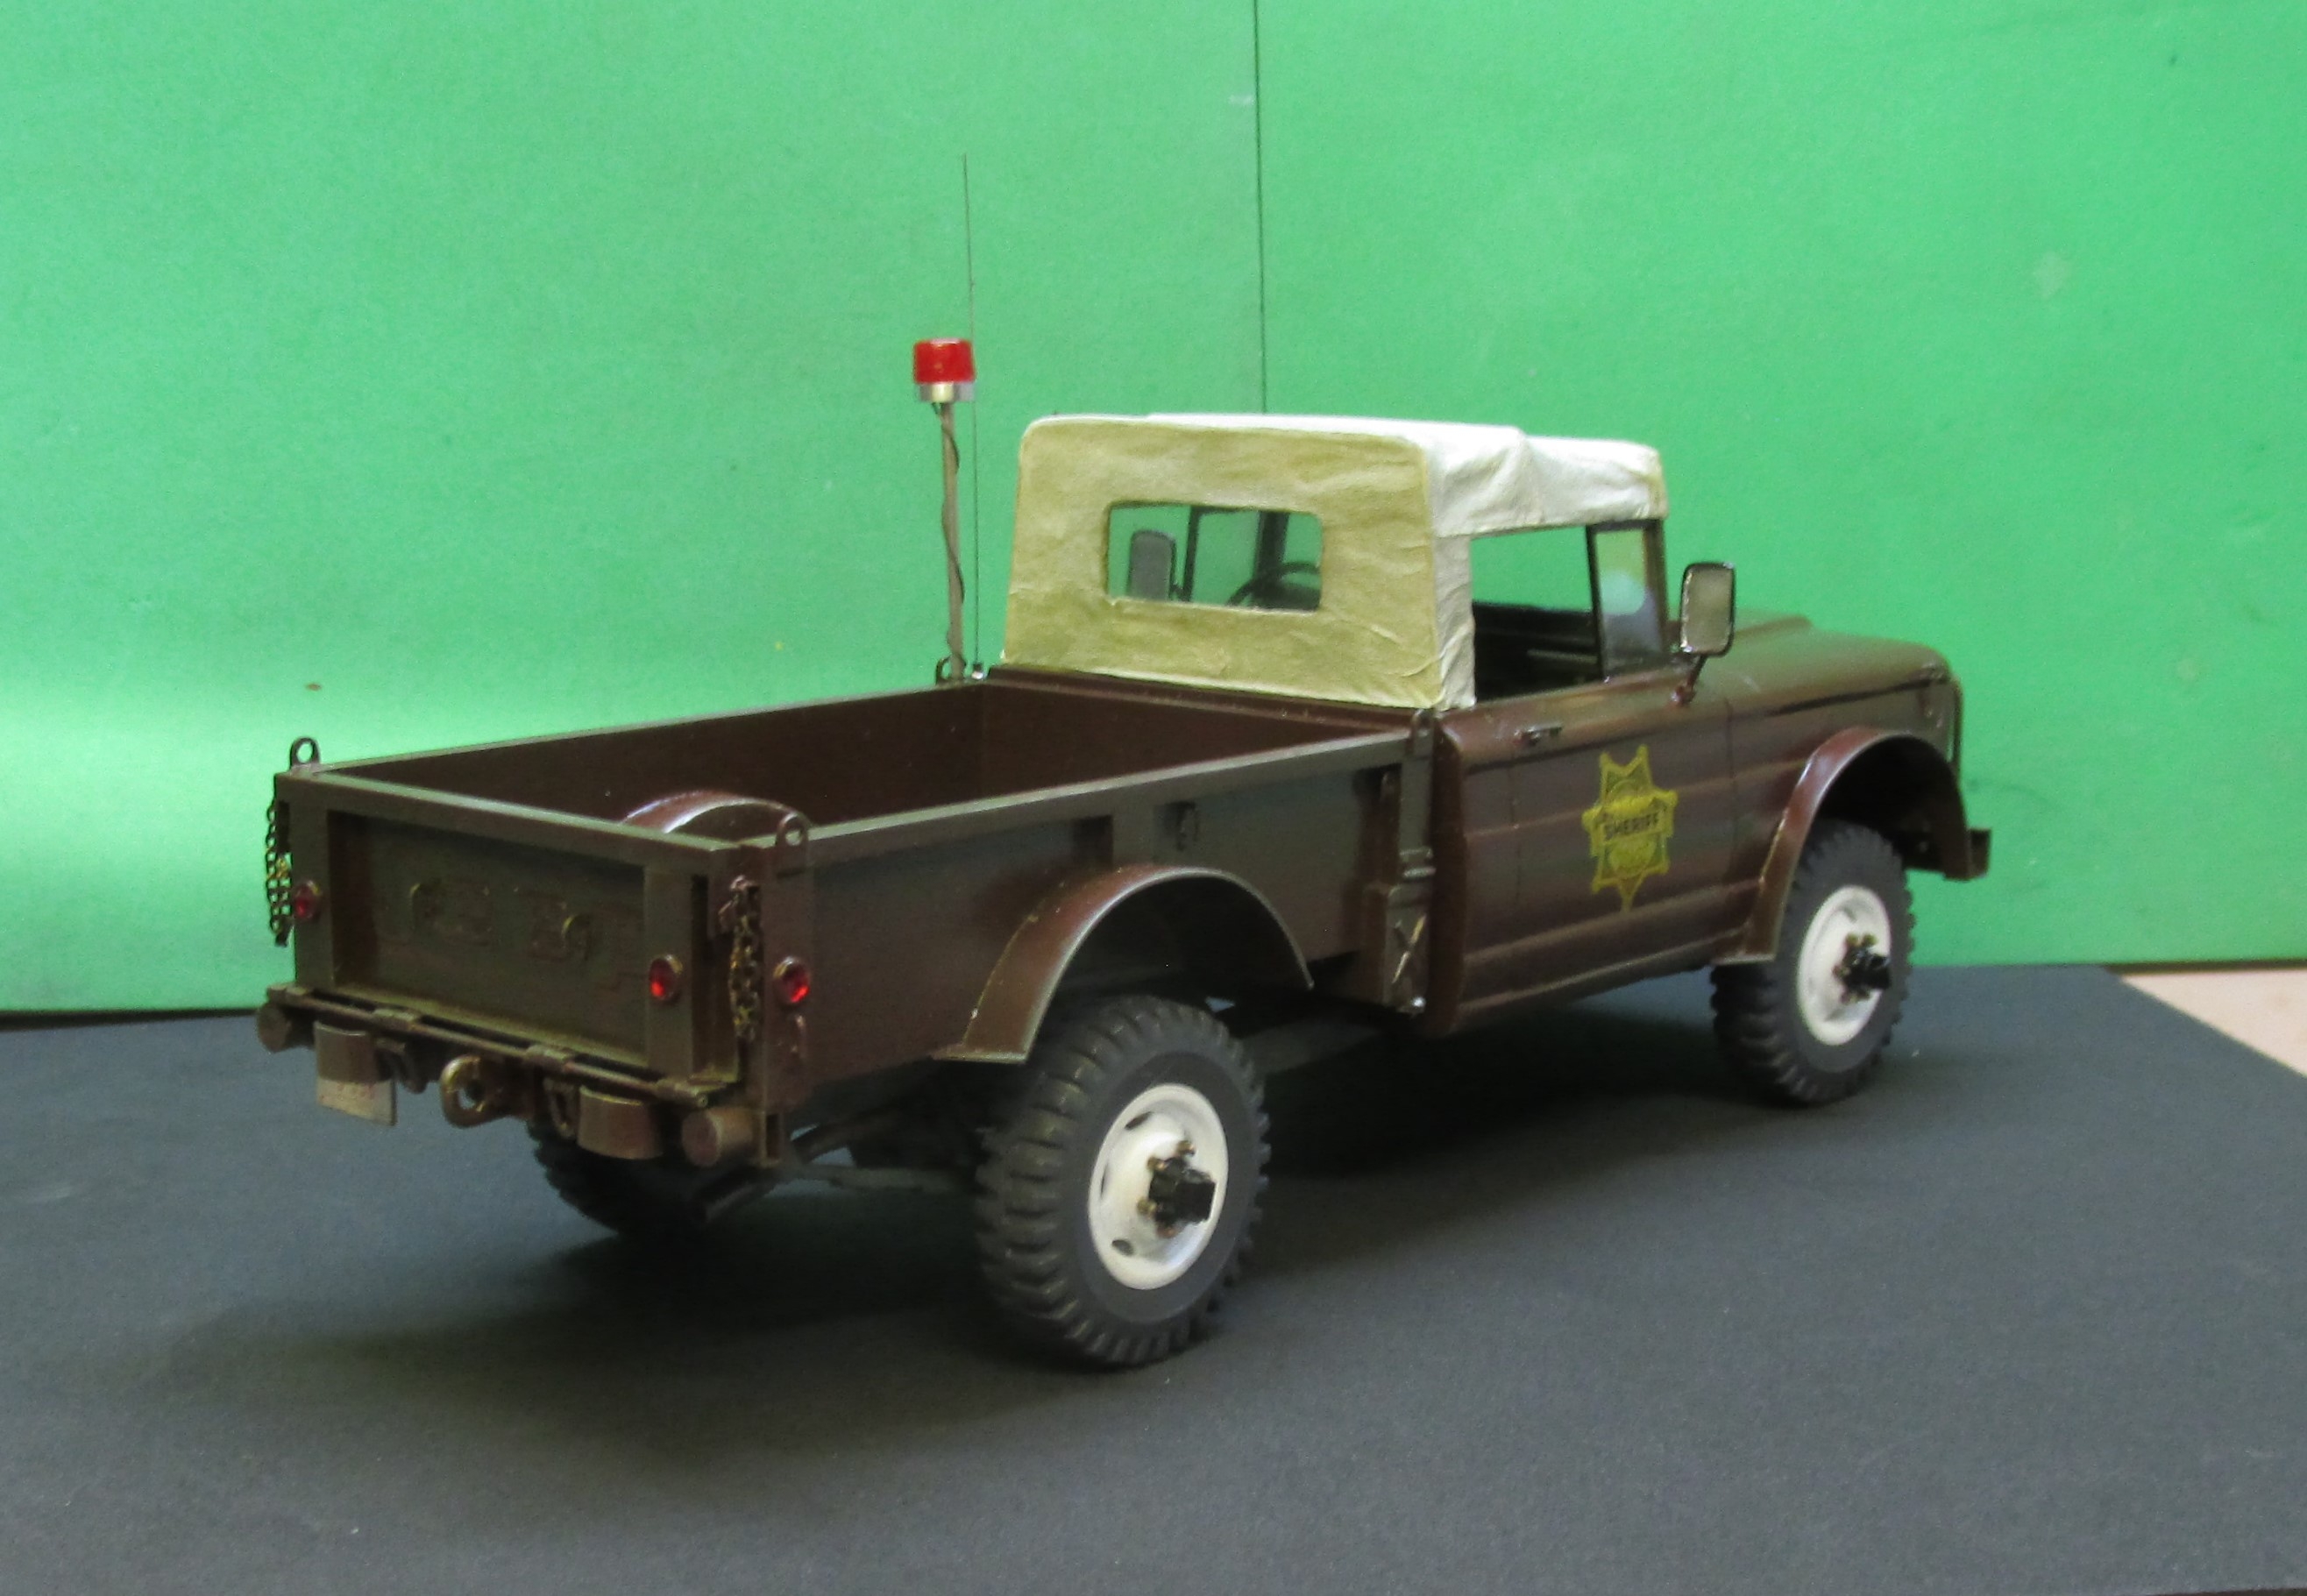
Done a few myself. I like your M-715. Here's one I did a few months back. A "surplus" piece given a second life.

-
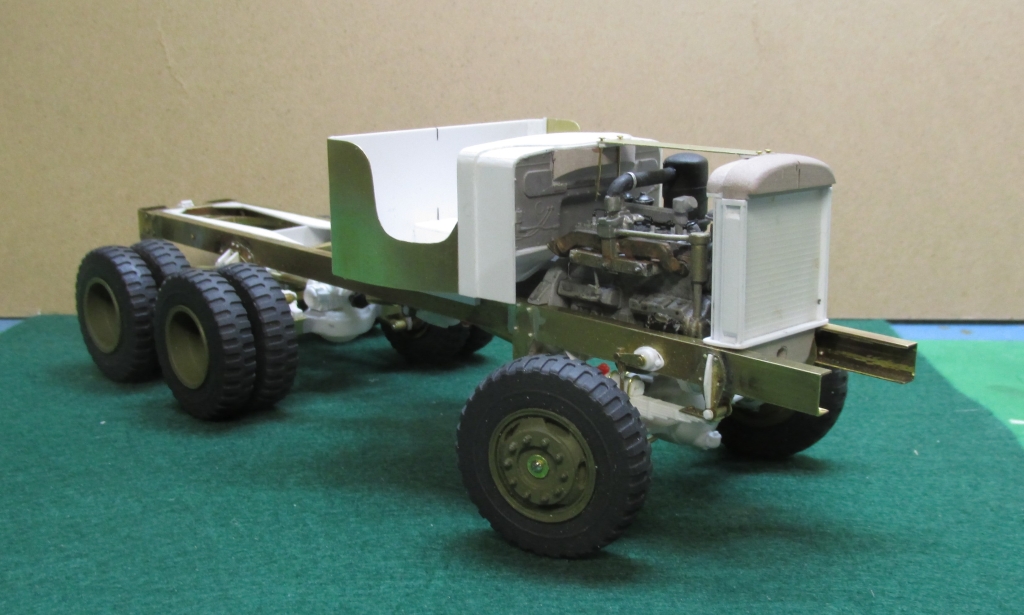
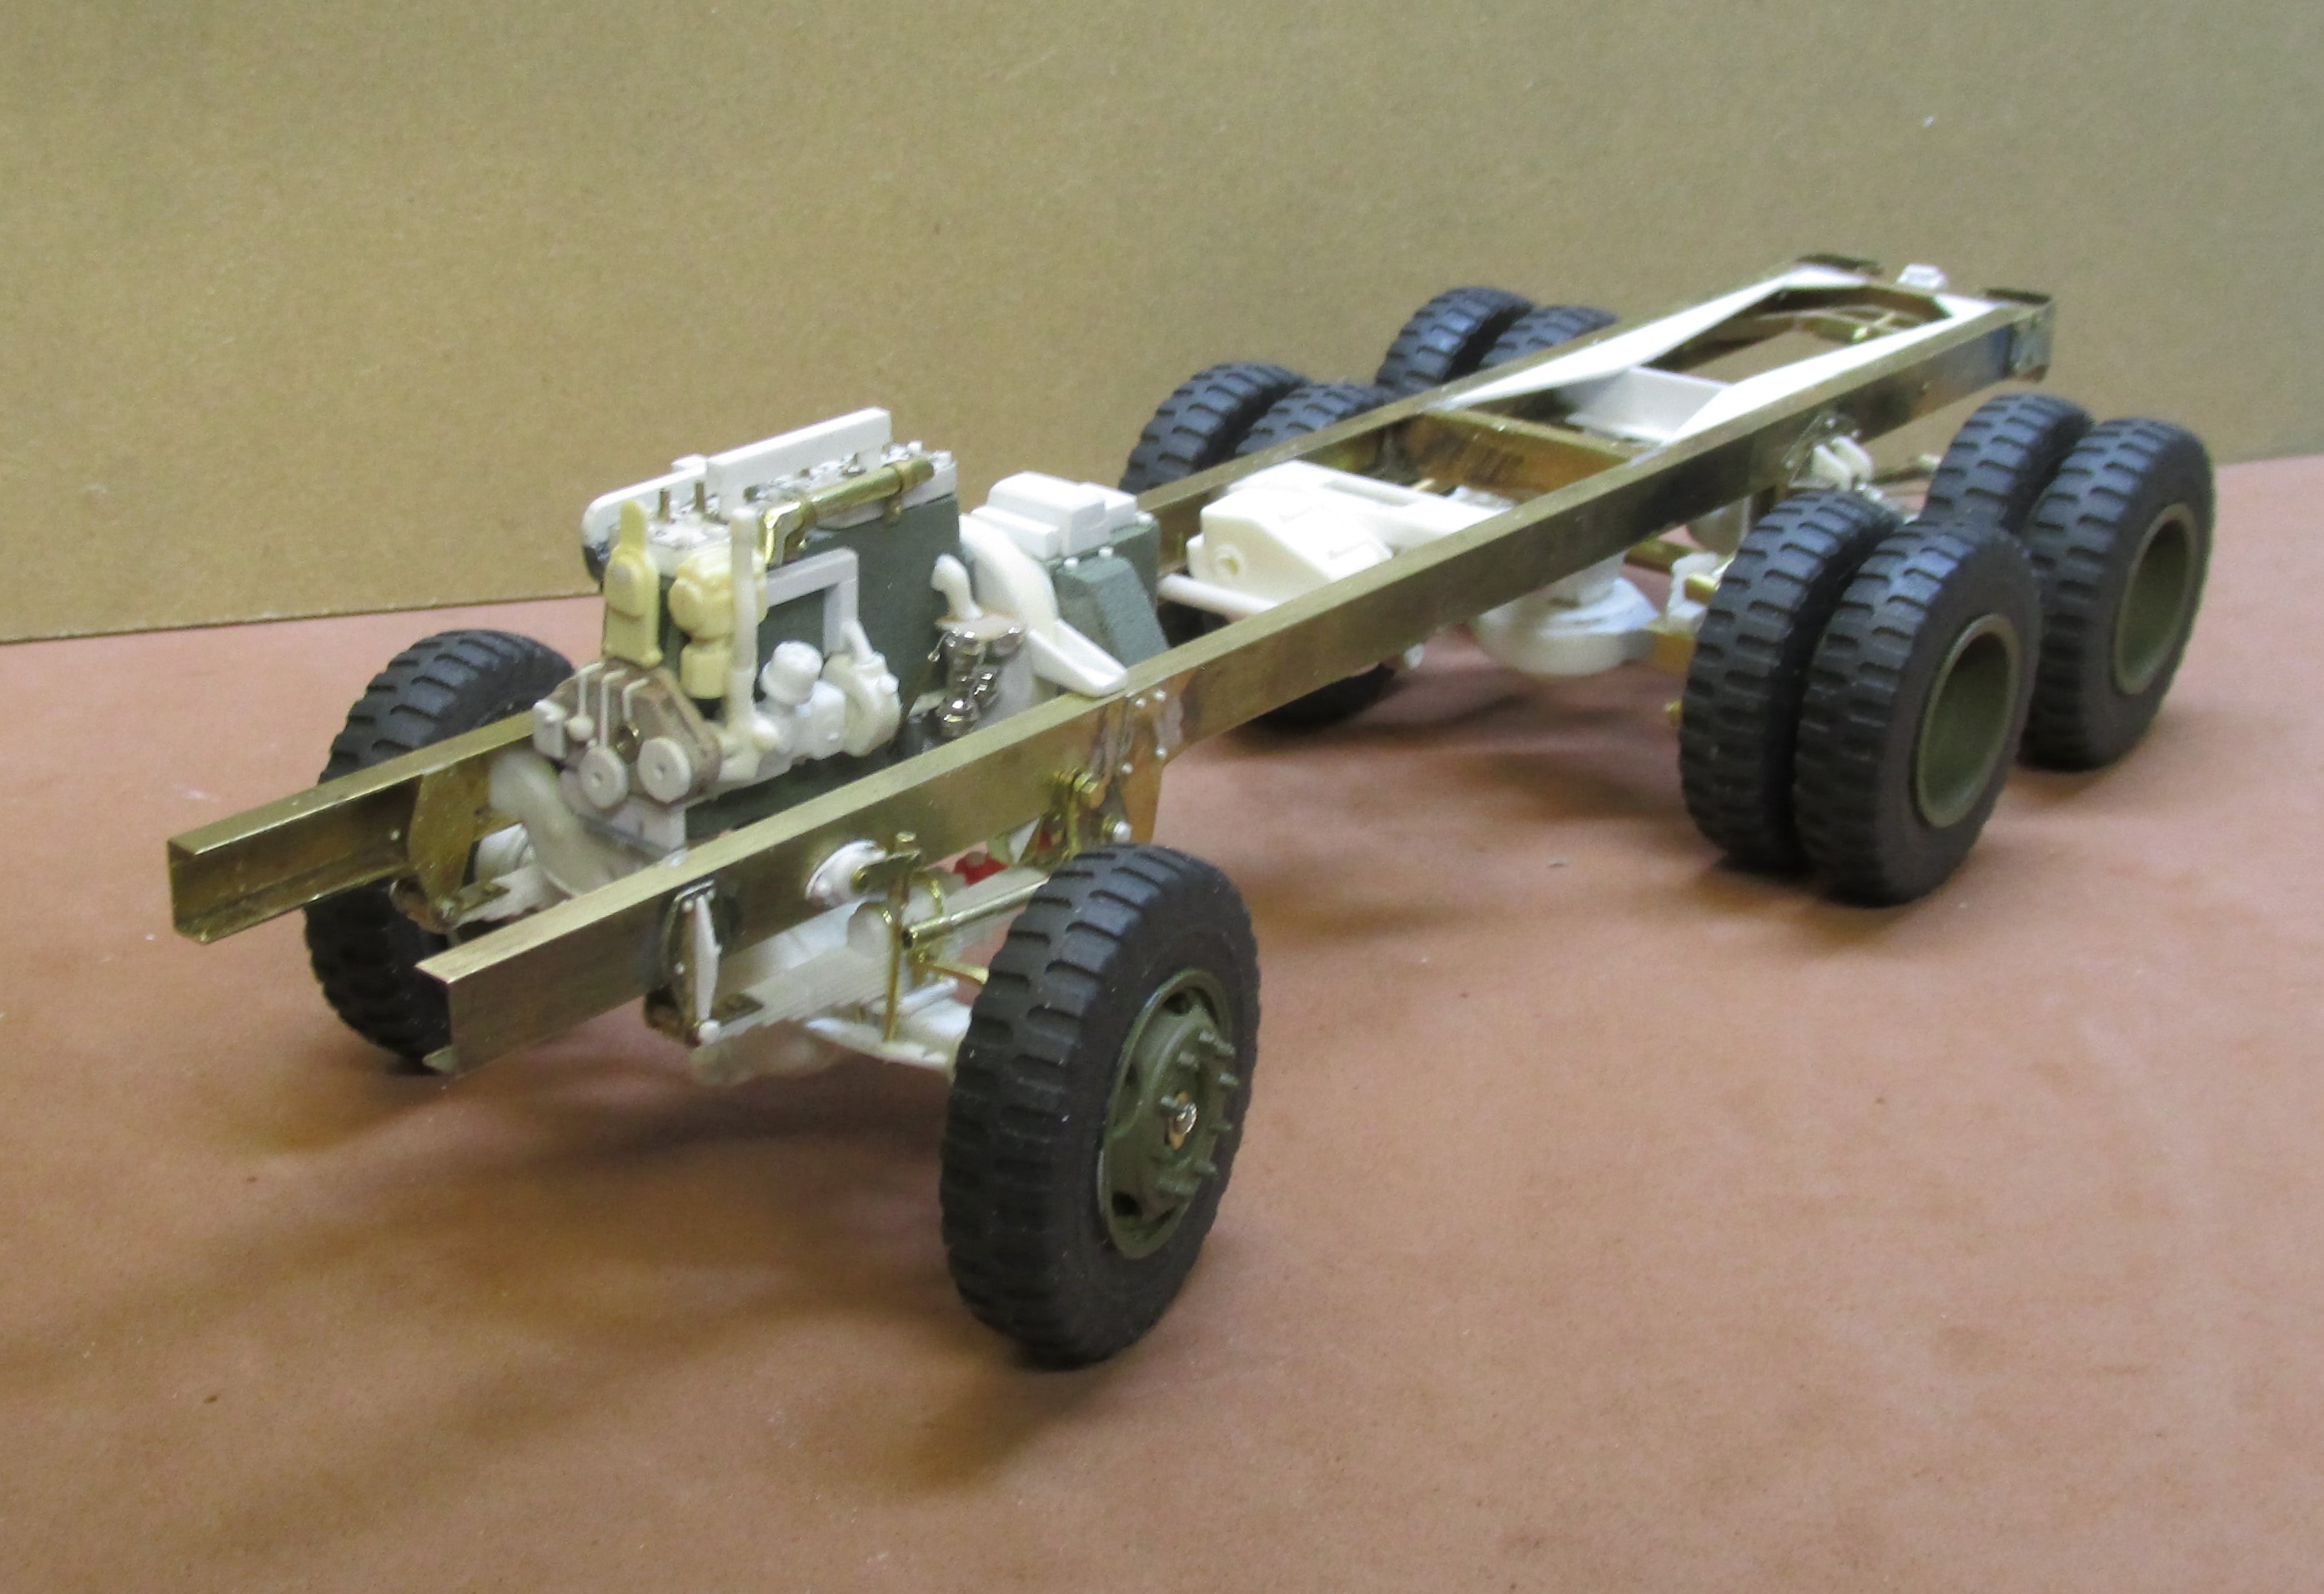
Got a bit more done on the chassis and axle assemblies. Lots of small stuff to do to get it all together. All torque rods are in place. Front axle is glued to the springs and U-bolts added. The springs are still detachable and will need final pinning. The rear axles are finished along with brake parts. The axles pivot up and down with the springs floating free on top. Drive shaft between axles is also in place. Tires and wheels are still unattached and will have to be painted before they can be mounted in place.

-
Nice work, Bill. Have seen your work in Vintage Fire Truck magazine. Any new fire projects on the bench?
-
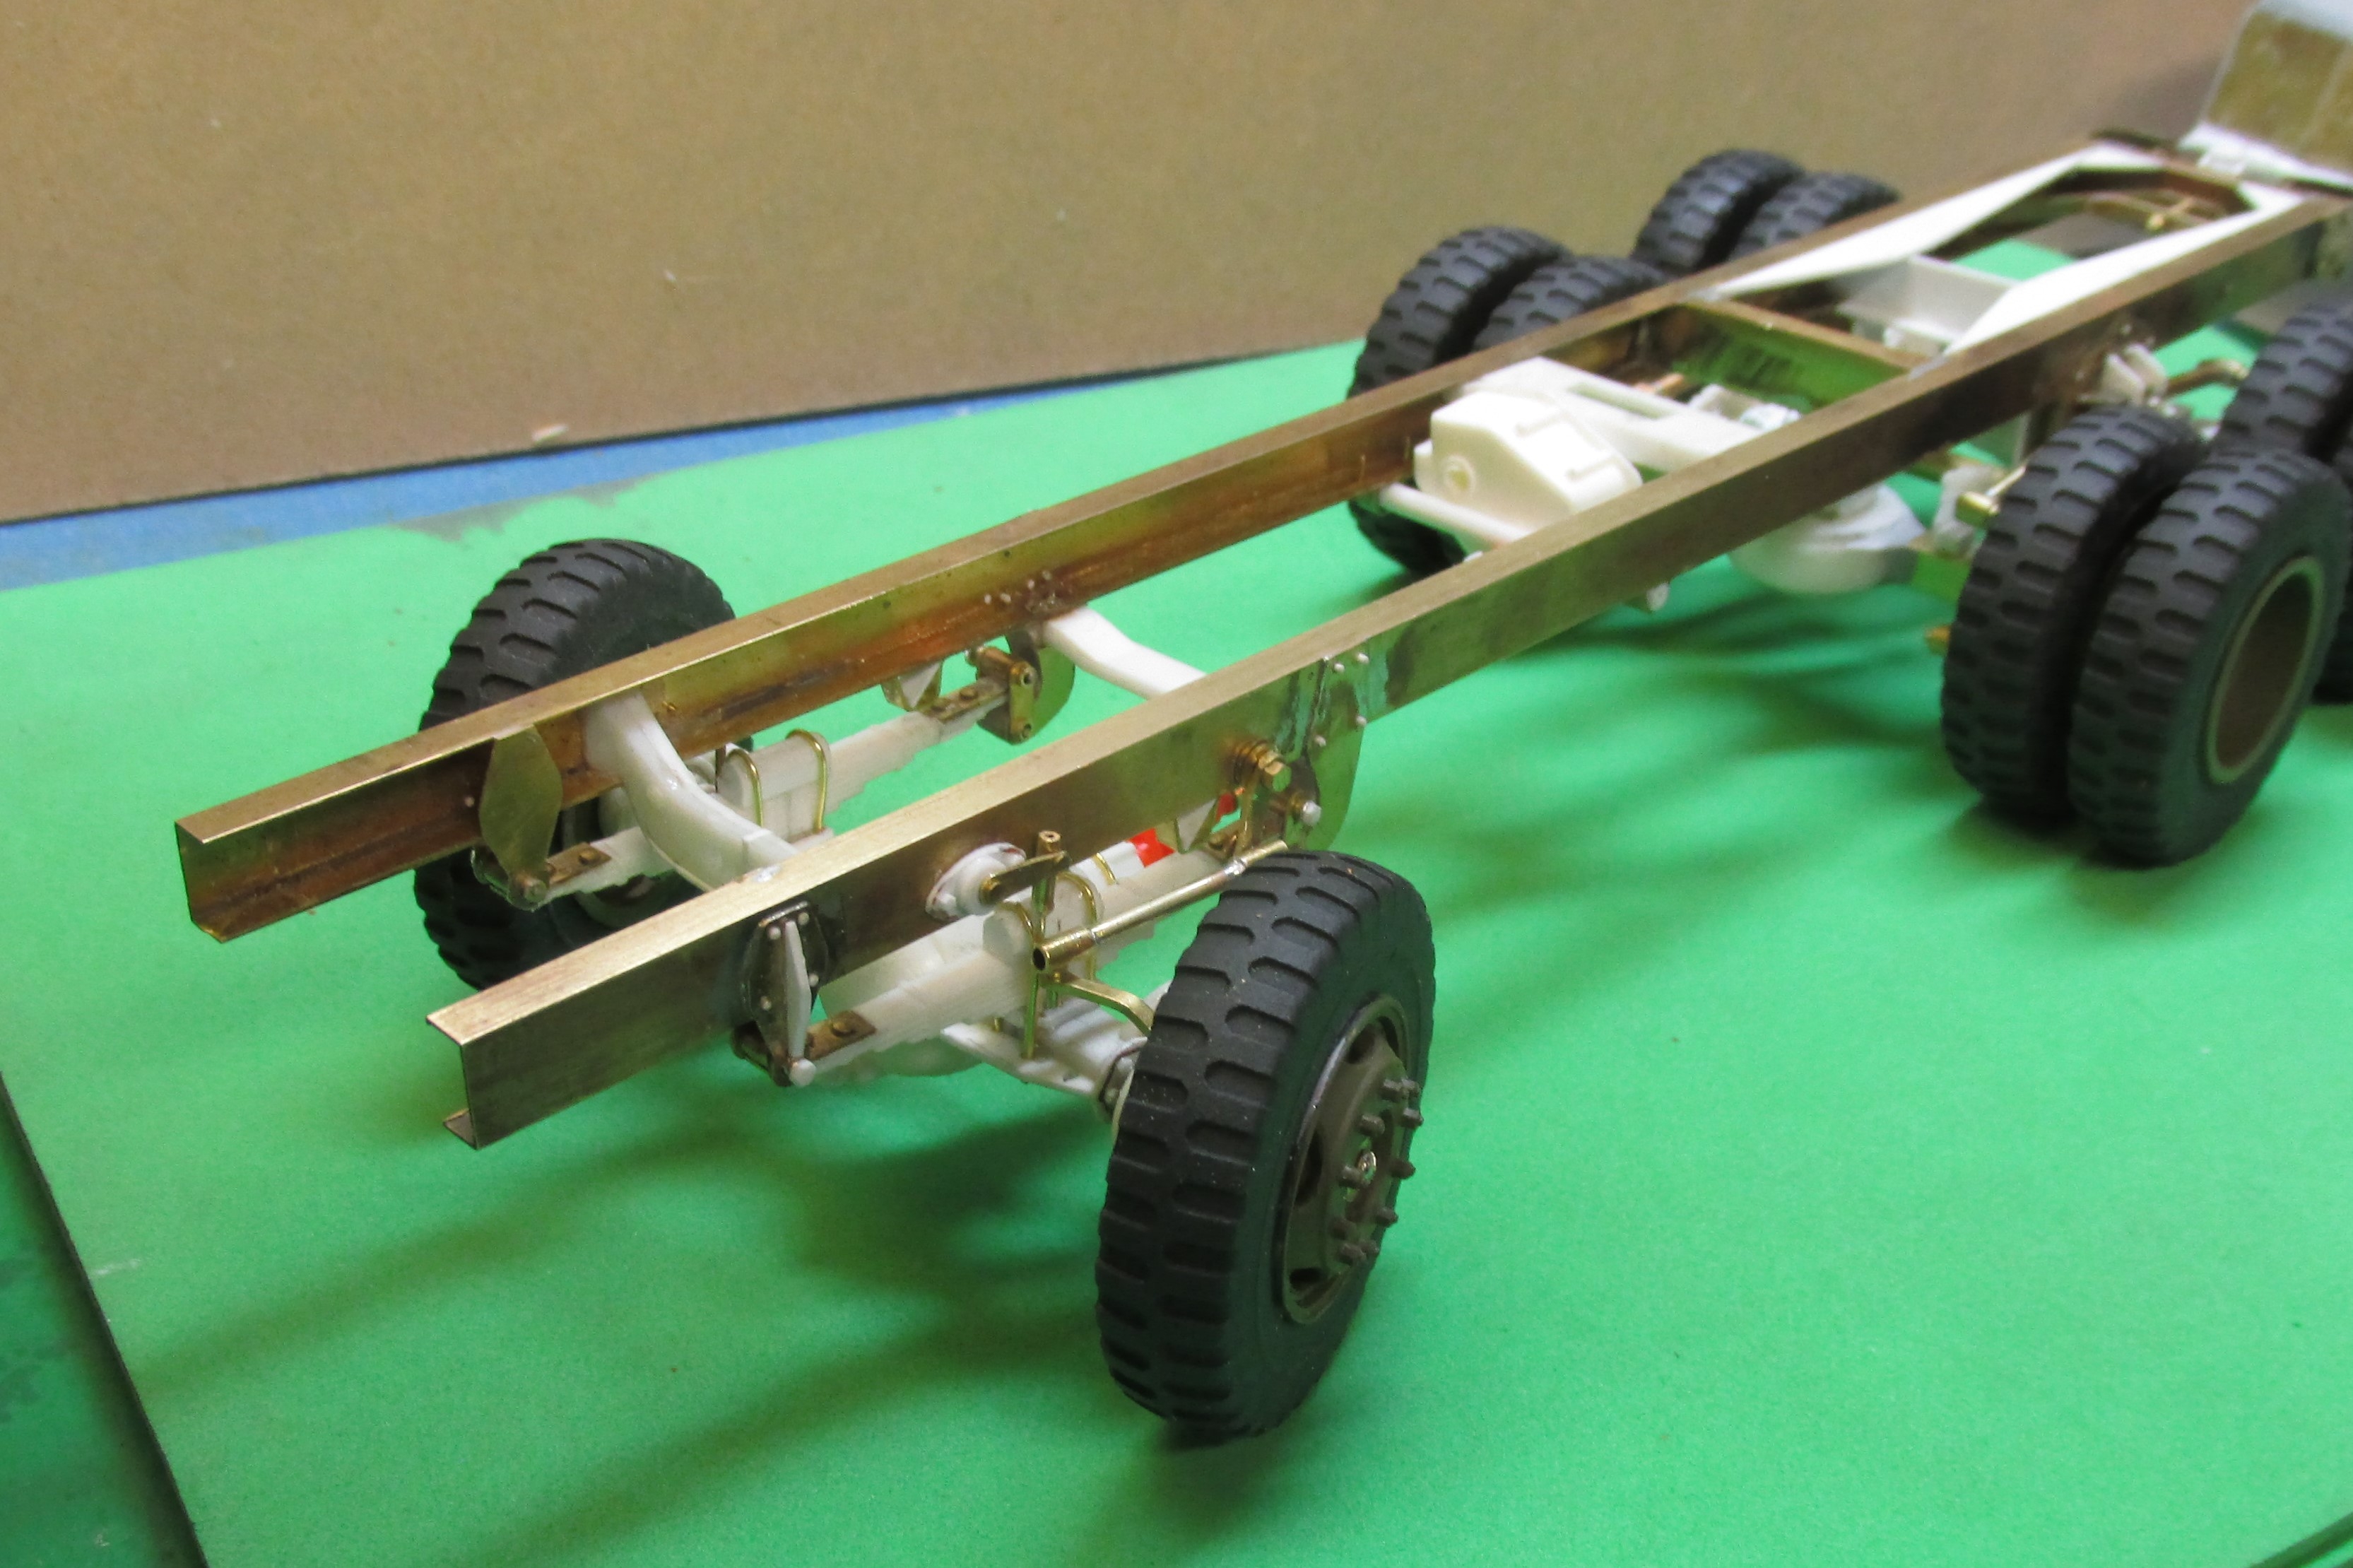
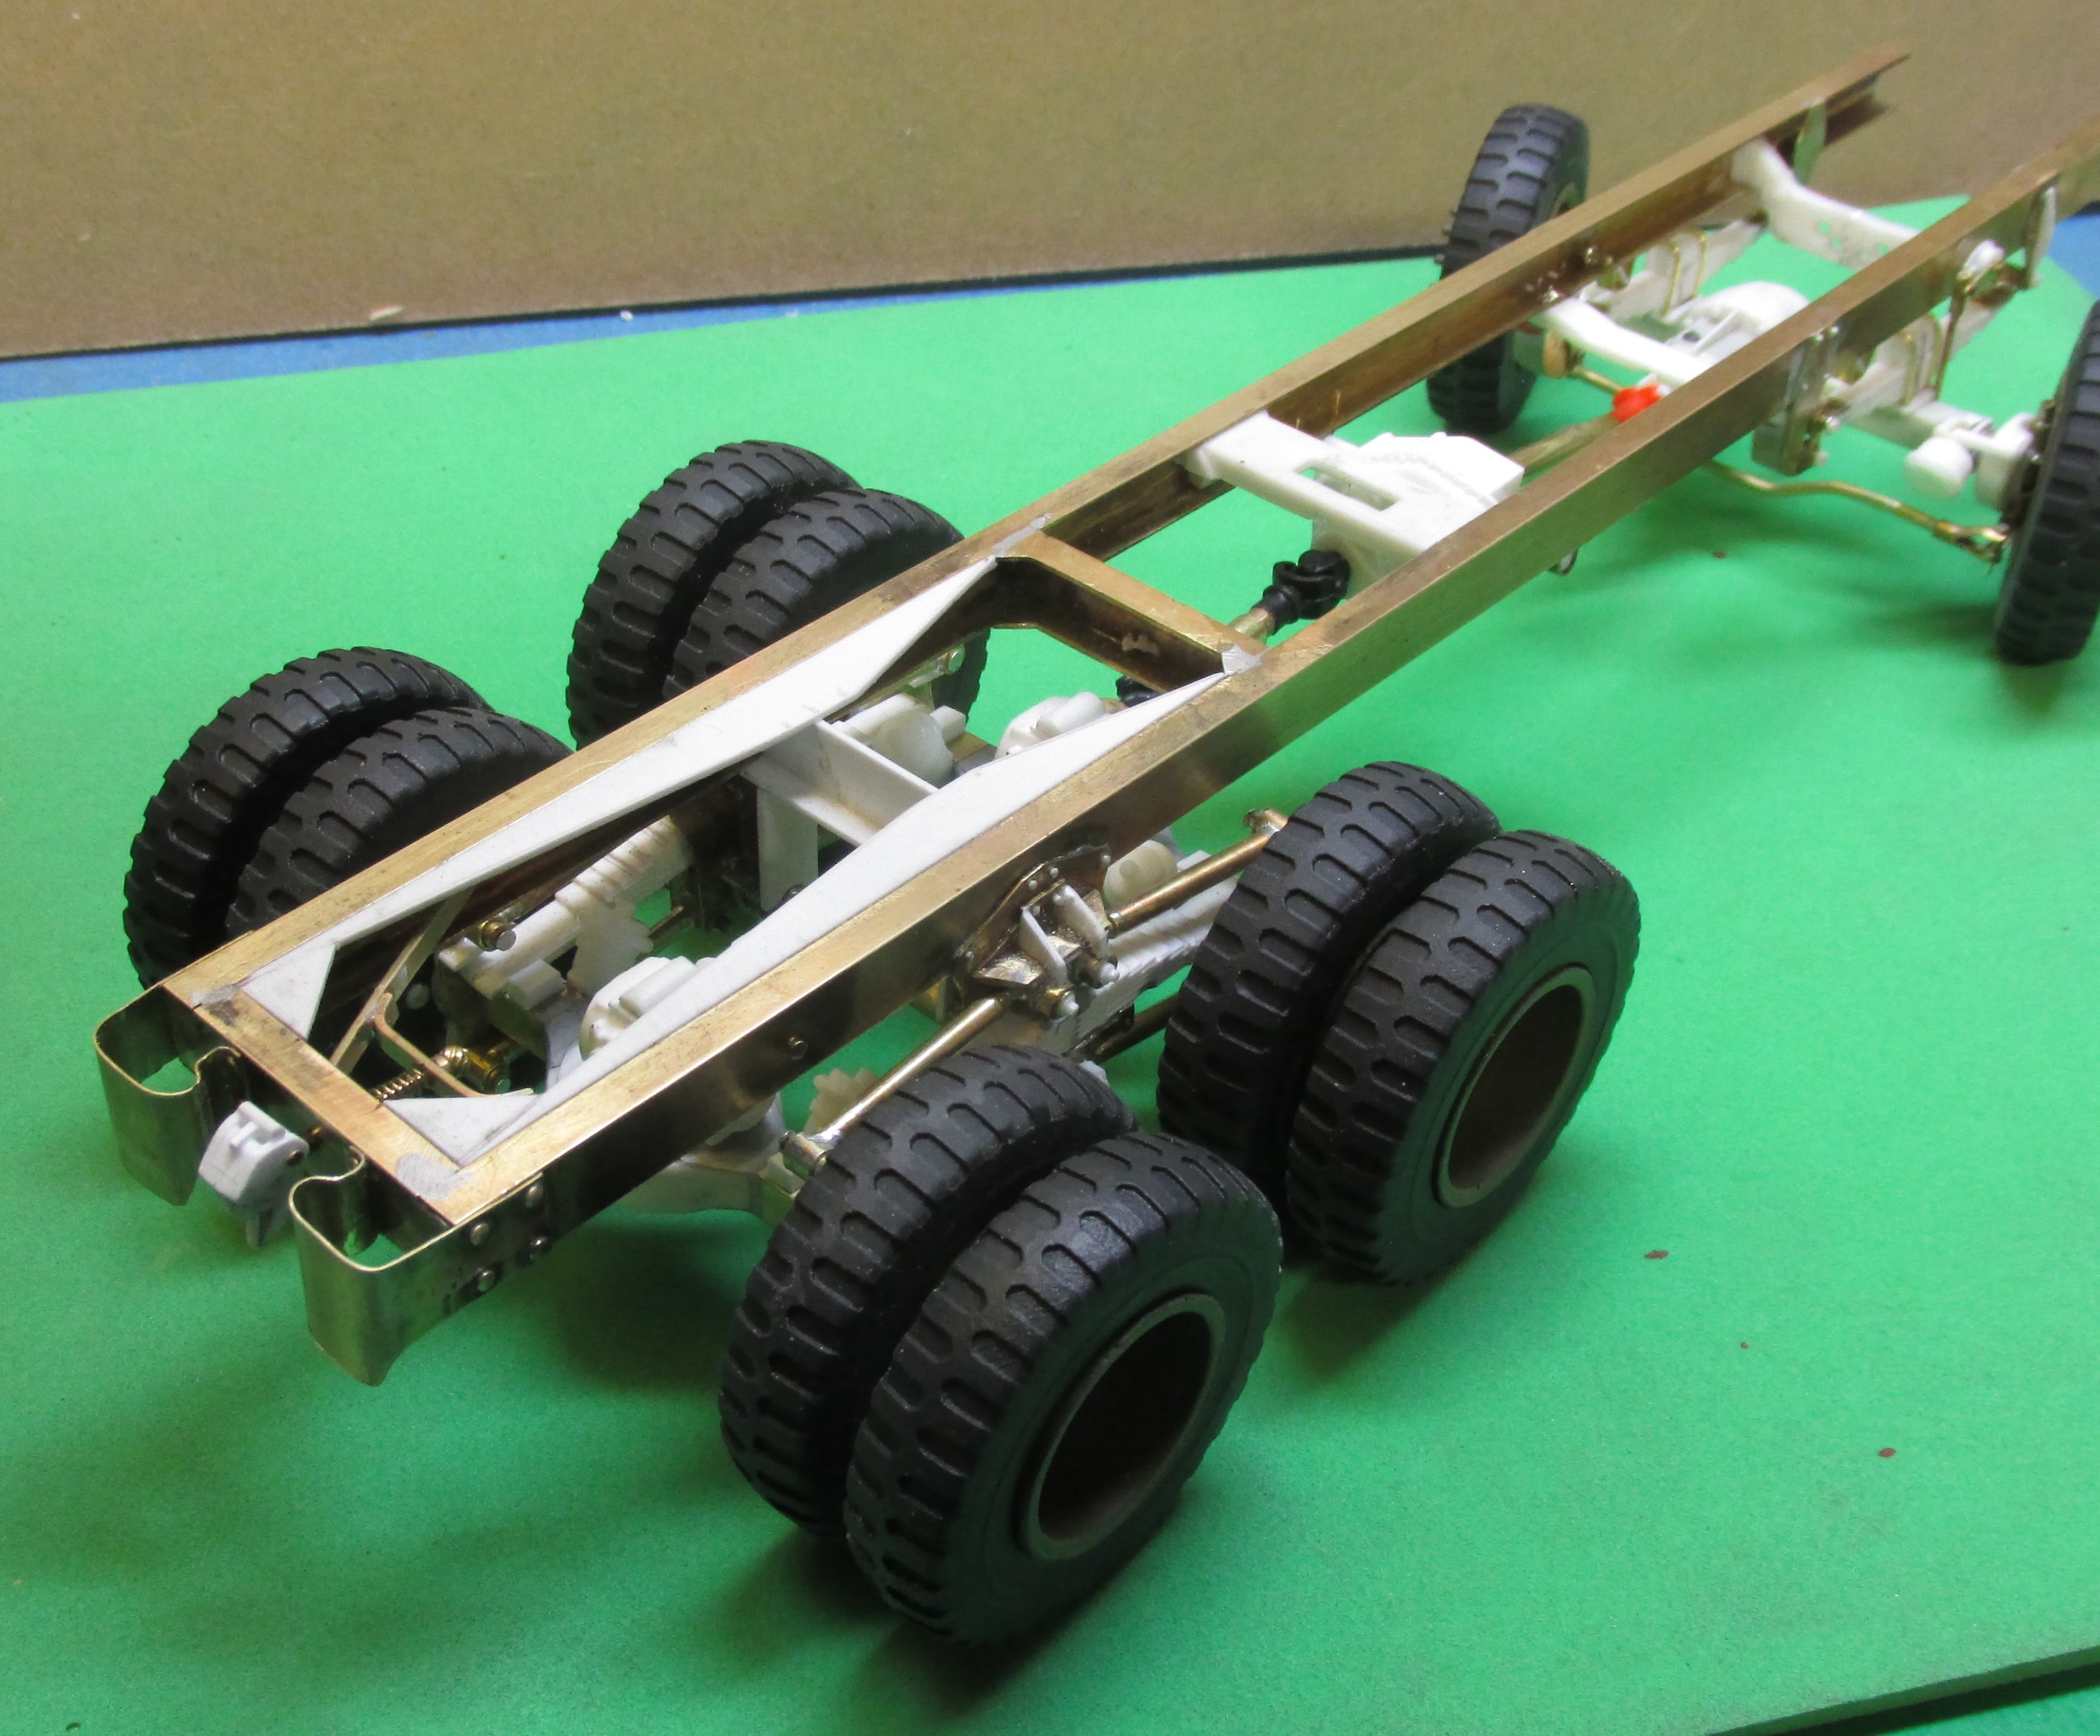
Got a bit more done. Axles are set up and as of last nite the front axle has the steering knuckles done along with the steering arm and tie rod. Will post pix of the work. But here is where we are as of a couple of days ago.

The "X" shaped pieces are the steering knuckles before being cut down to the proper length. The tubing is made so it can be inserted into the tubing that runs through the front axle. The wheels and wheel hubs have been made up and can be mounted with screws and small washers.
-
 1
1
-


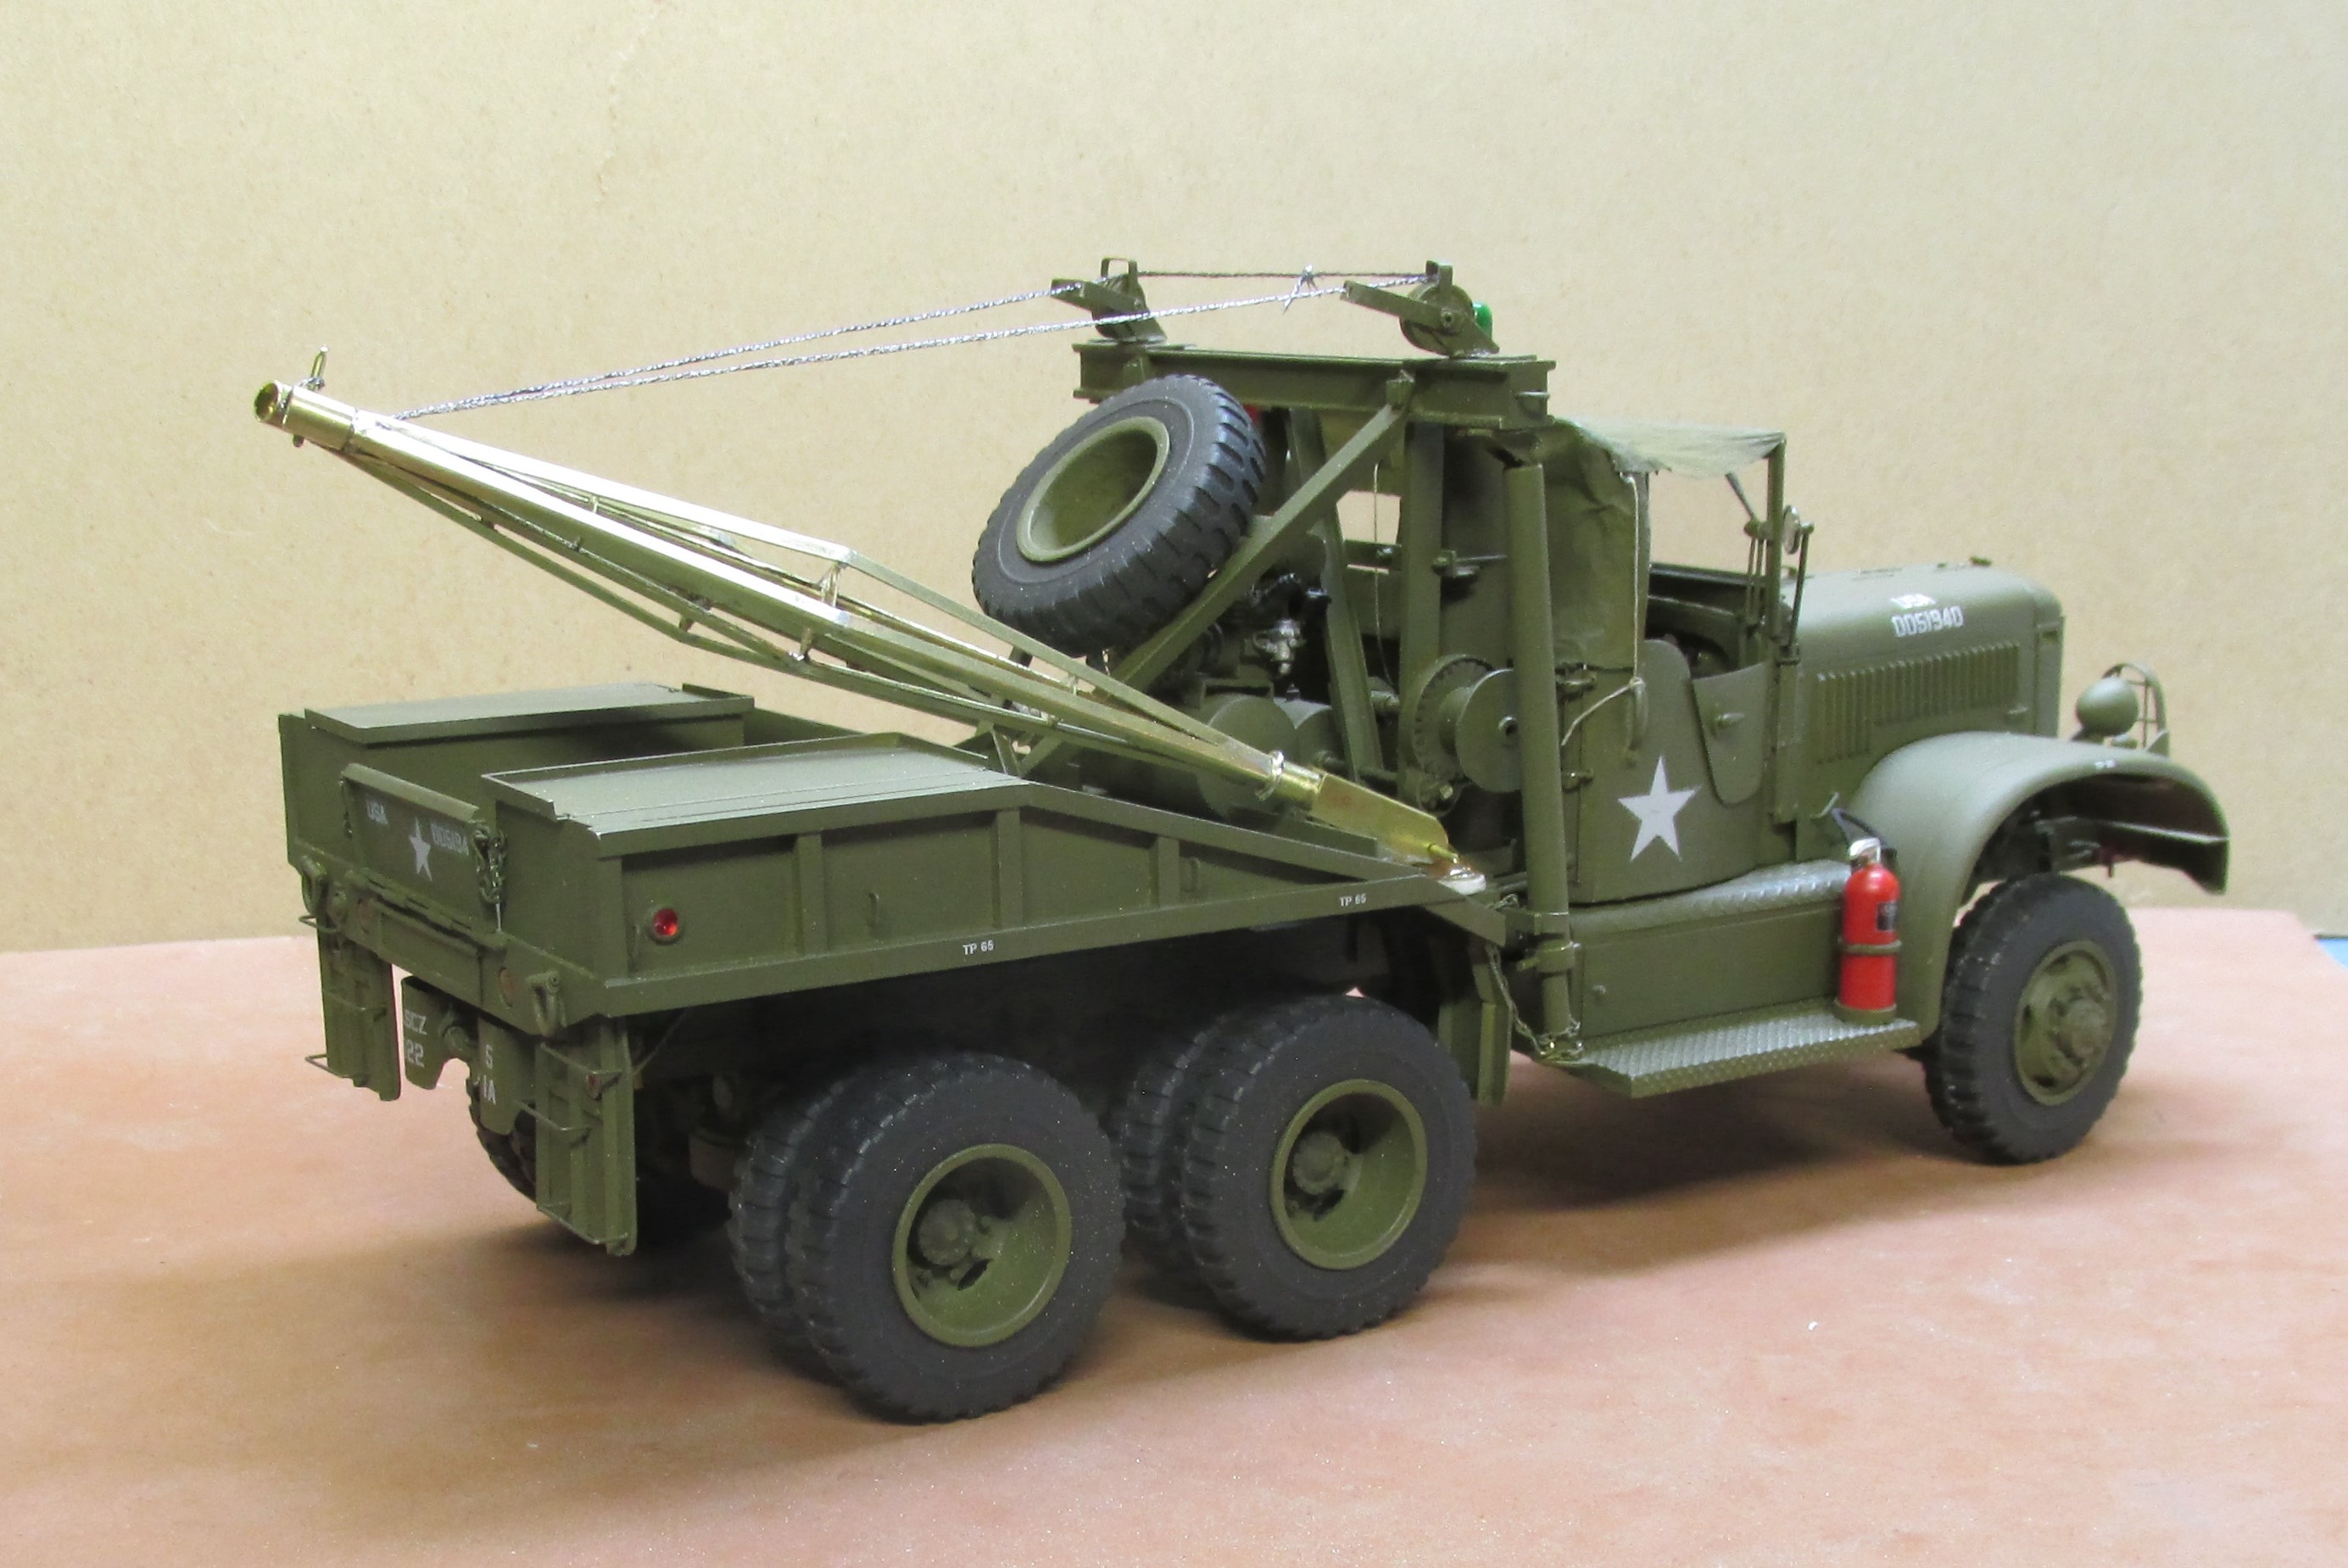


1944 Diamond T 6x6 4 Ton Wrecker
in Model Truck Show Room
Posted
Green one is O2 and the red one is acetylene.