
Cornbinder
-
Content count
409 -
Joined
-
Last visited
-
Days Won
67
Posts posted by Cornbinder
-
-
I think so- it was the old Ford Quality sponsored car.
-
Took several large bites out of the Raider today.
I'll start with the interior, which was actually completed a while ago- I just never bothered taking a pic until today.

The interior is box-stock, aside from the high-back bucket seats, which were taken from a GMC Astro. The gauge panel would be incorrect for a '75, which had square gauges, but I kept it anyway. One of these days I'd like to rework the gauge panel to do a proper mid '70's DR dash.

The chassis is more or less finished. Here you can see the Raider front bumper and grille insert installed. The 1:1 Raider's grille insert remained upright when the hood was titled, so I followed suit on the model. Since the original grille was so rough, I made a new "custom" grille using grooved Evergreen sheet. The Raider was only manufactured for about nine months in 1975, so I'm guessing a replacement grille would be a tad difficult to track down.
 I see i do need to perform a few touch-ups here and there, but overall I'm pretty happy with the "roller".

The hood and cab were painted earlier today, and I just couldn't resist a test fit to see how everything was looking. After that, I was motivated to work on the trim. The Diamond Reo logo from the kit grille was glued into the Raider grille surround. Two headlight bezels were cut from .030" plastic, with a hole punch used to make way for the headlight lenses. These, and the grille frame, were treated to some Ultra Bright BMF, along with the bumper. Again, I notice a few areas where touch up is needed, mostly with that foil on the grille! All in all, though, I'm fairly pleased with how the Raider is shaping up.
-
 1
1
-
-
The GATR-themed DR is a done deal.


-
And then, there were three...
The race truck is complete. Pics to come in the Showroom section.
-
Also- progress on two of them for today.
The GATR is speeding right along... fitting enough, I suppose.
The hood was cut down, and the grille and hinges were modified to match. I also cut away most of the fenders, and added a strip along the center of the hood. It sort of reminded me of an old Dodge Power Wagon at this stage.

A few hours later, I had not only paint-detailed the grille, and added some support struts for the fenders, but I'd thrown a quick coat of Farmall red on the hood and cab. I wasn intentionally less-than-careful with the paint, I wanted it to look like a quick, outdoor spray bomb... so that's basically how I did it.
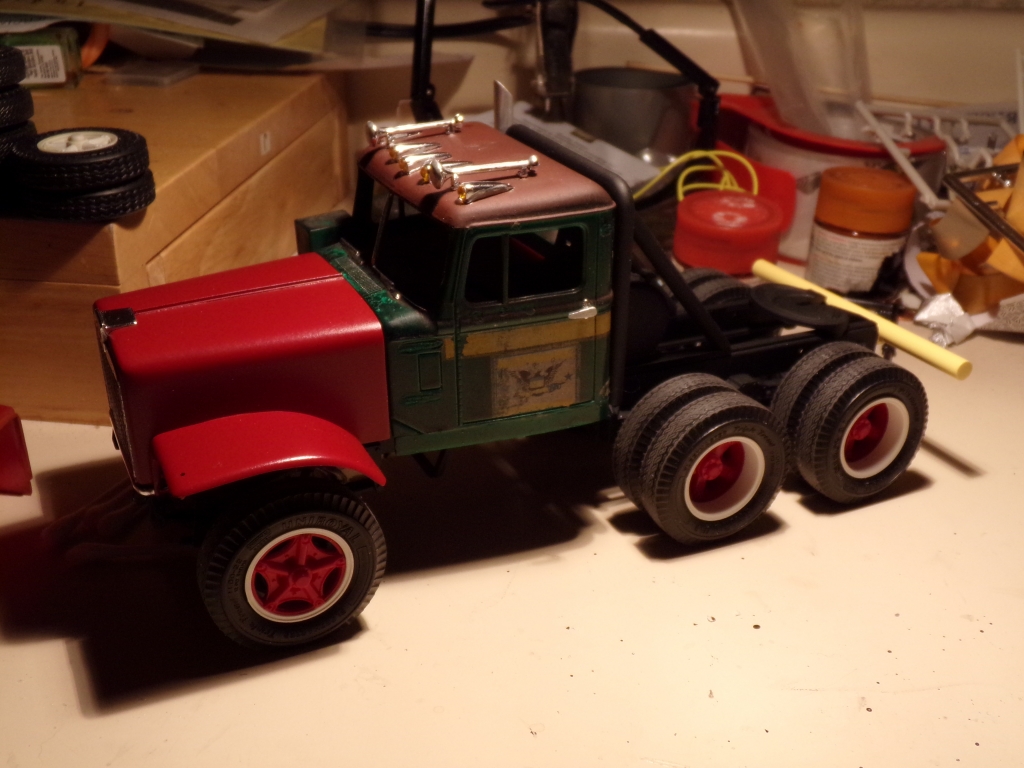
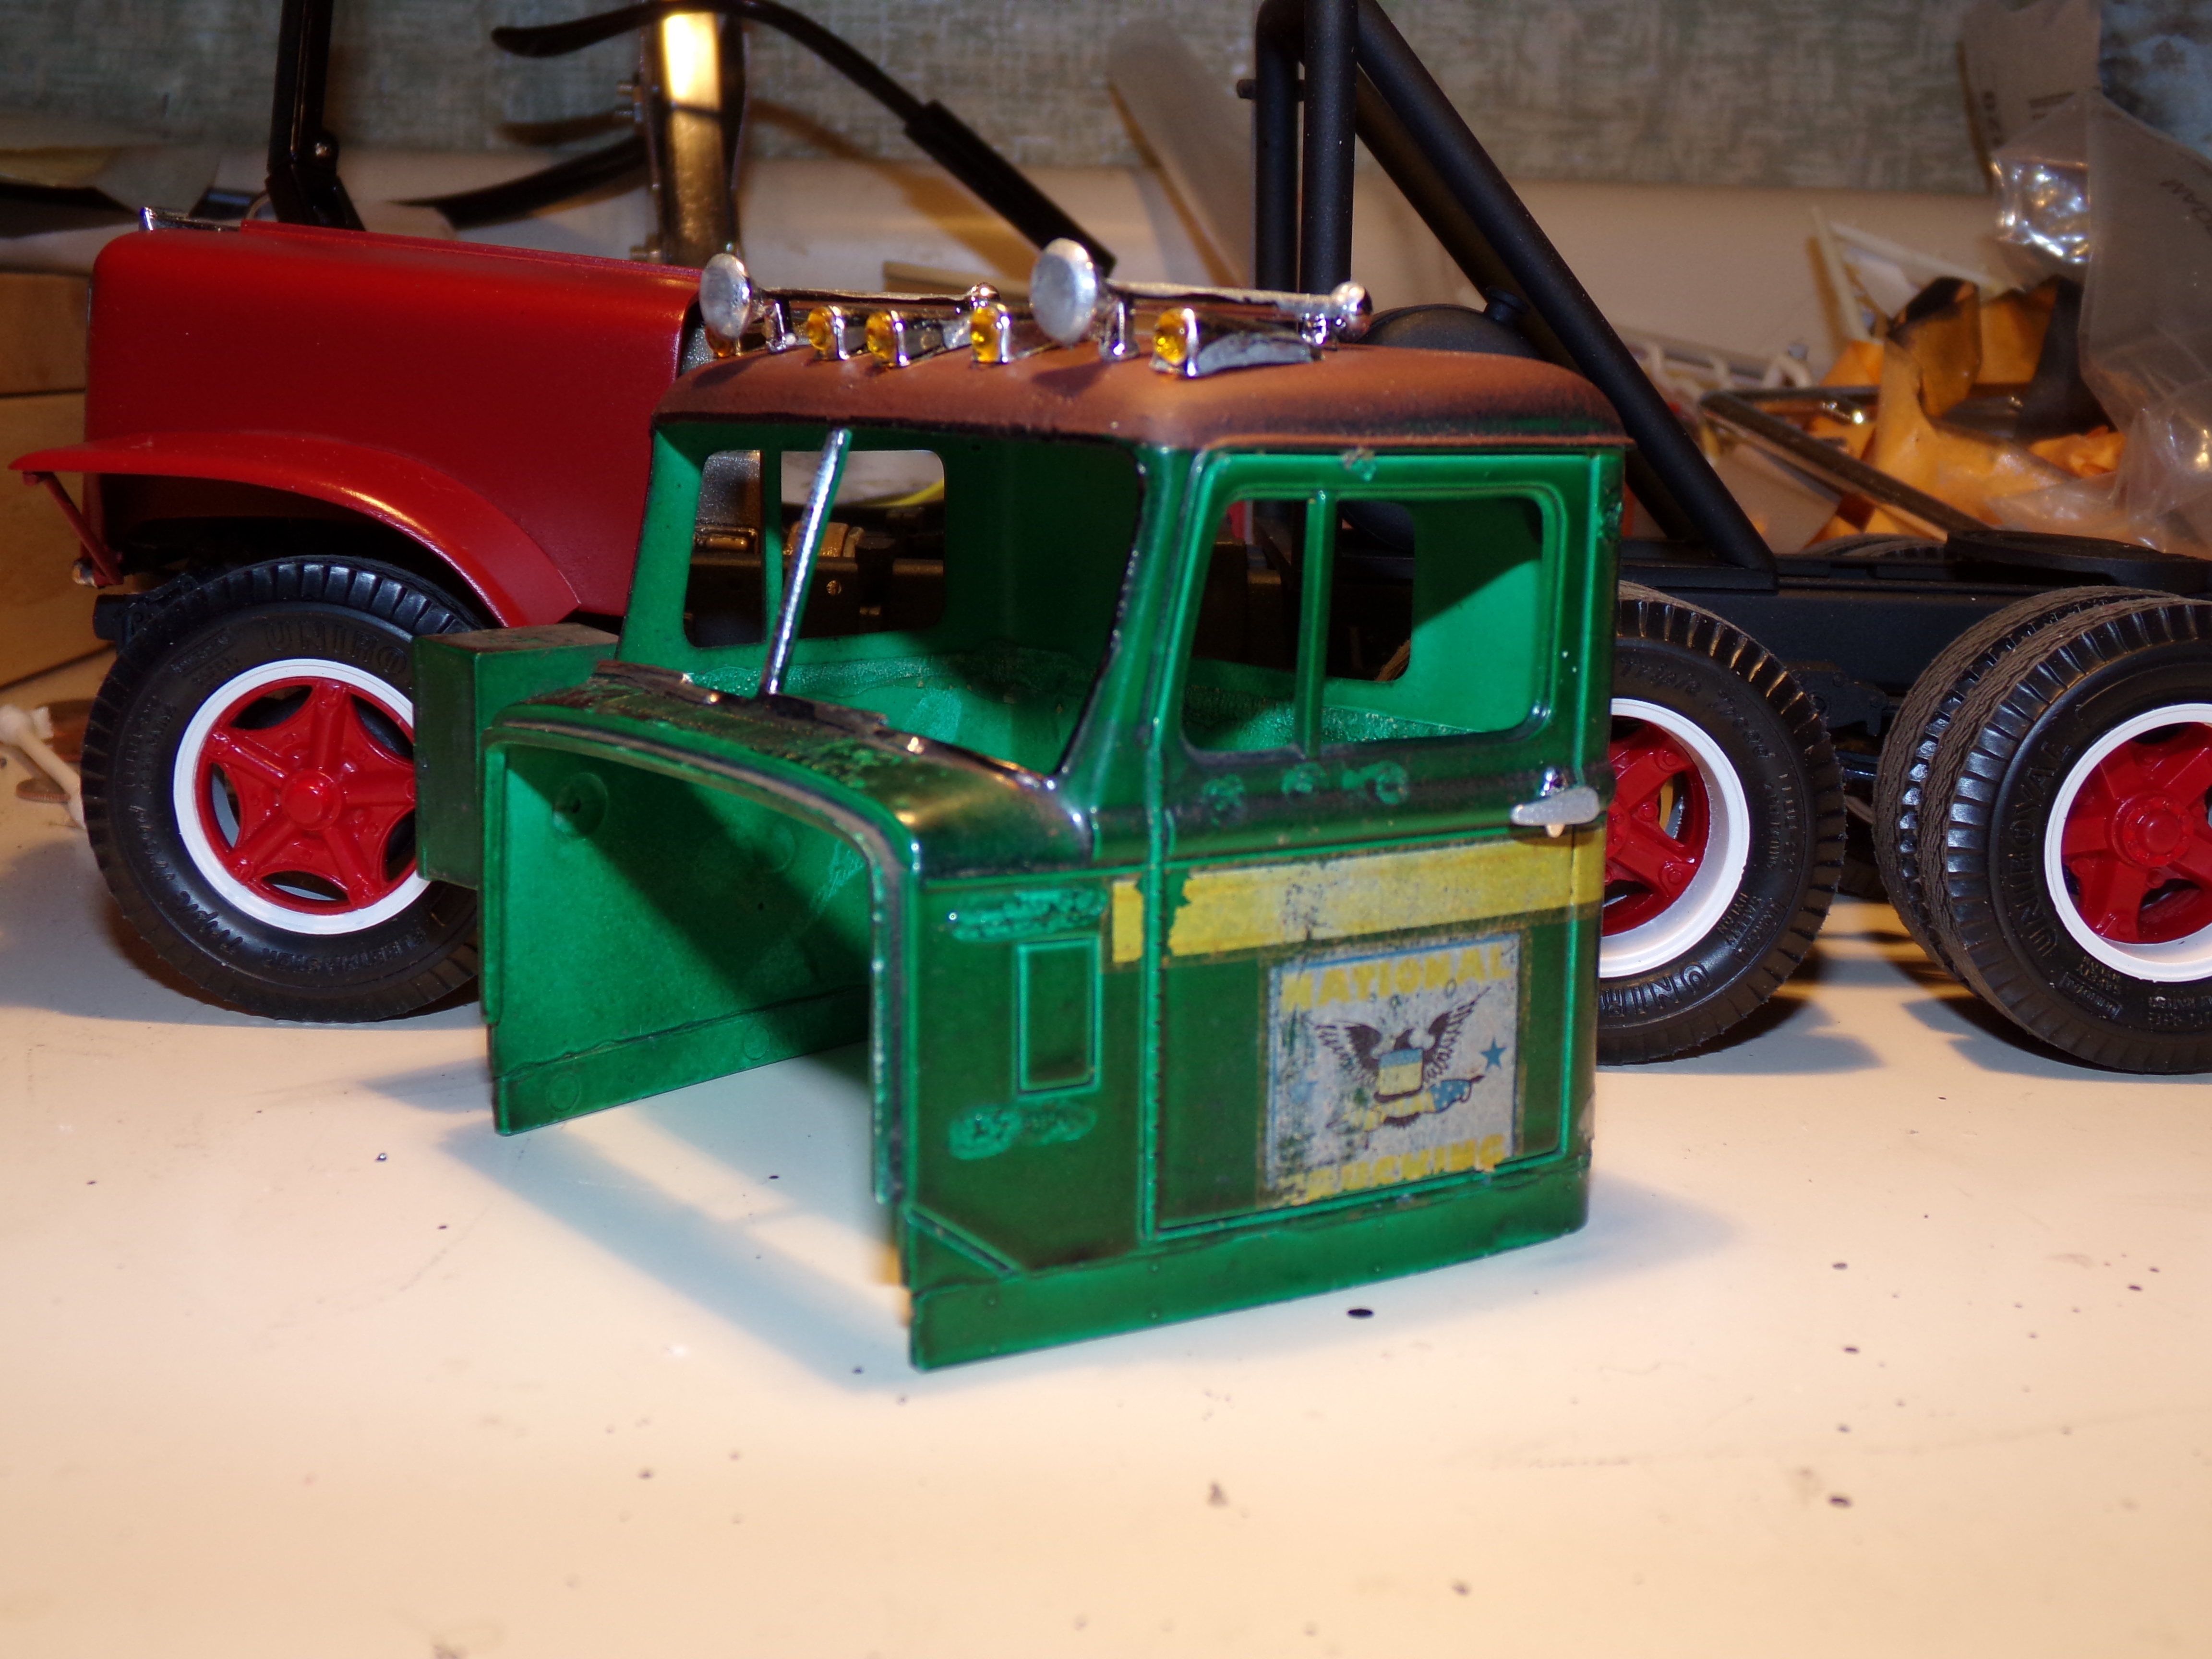
The green glue bomb also saw some action.

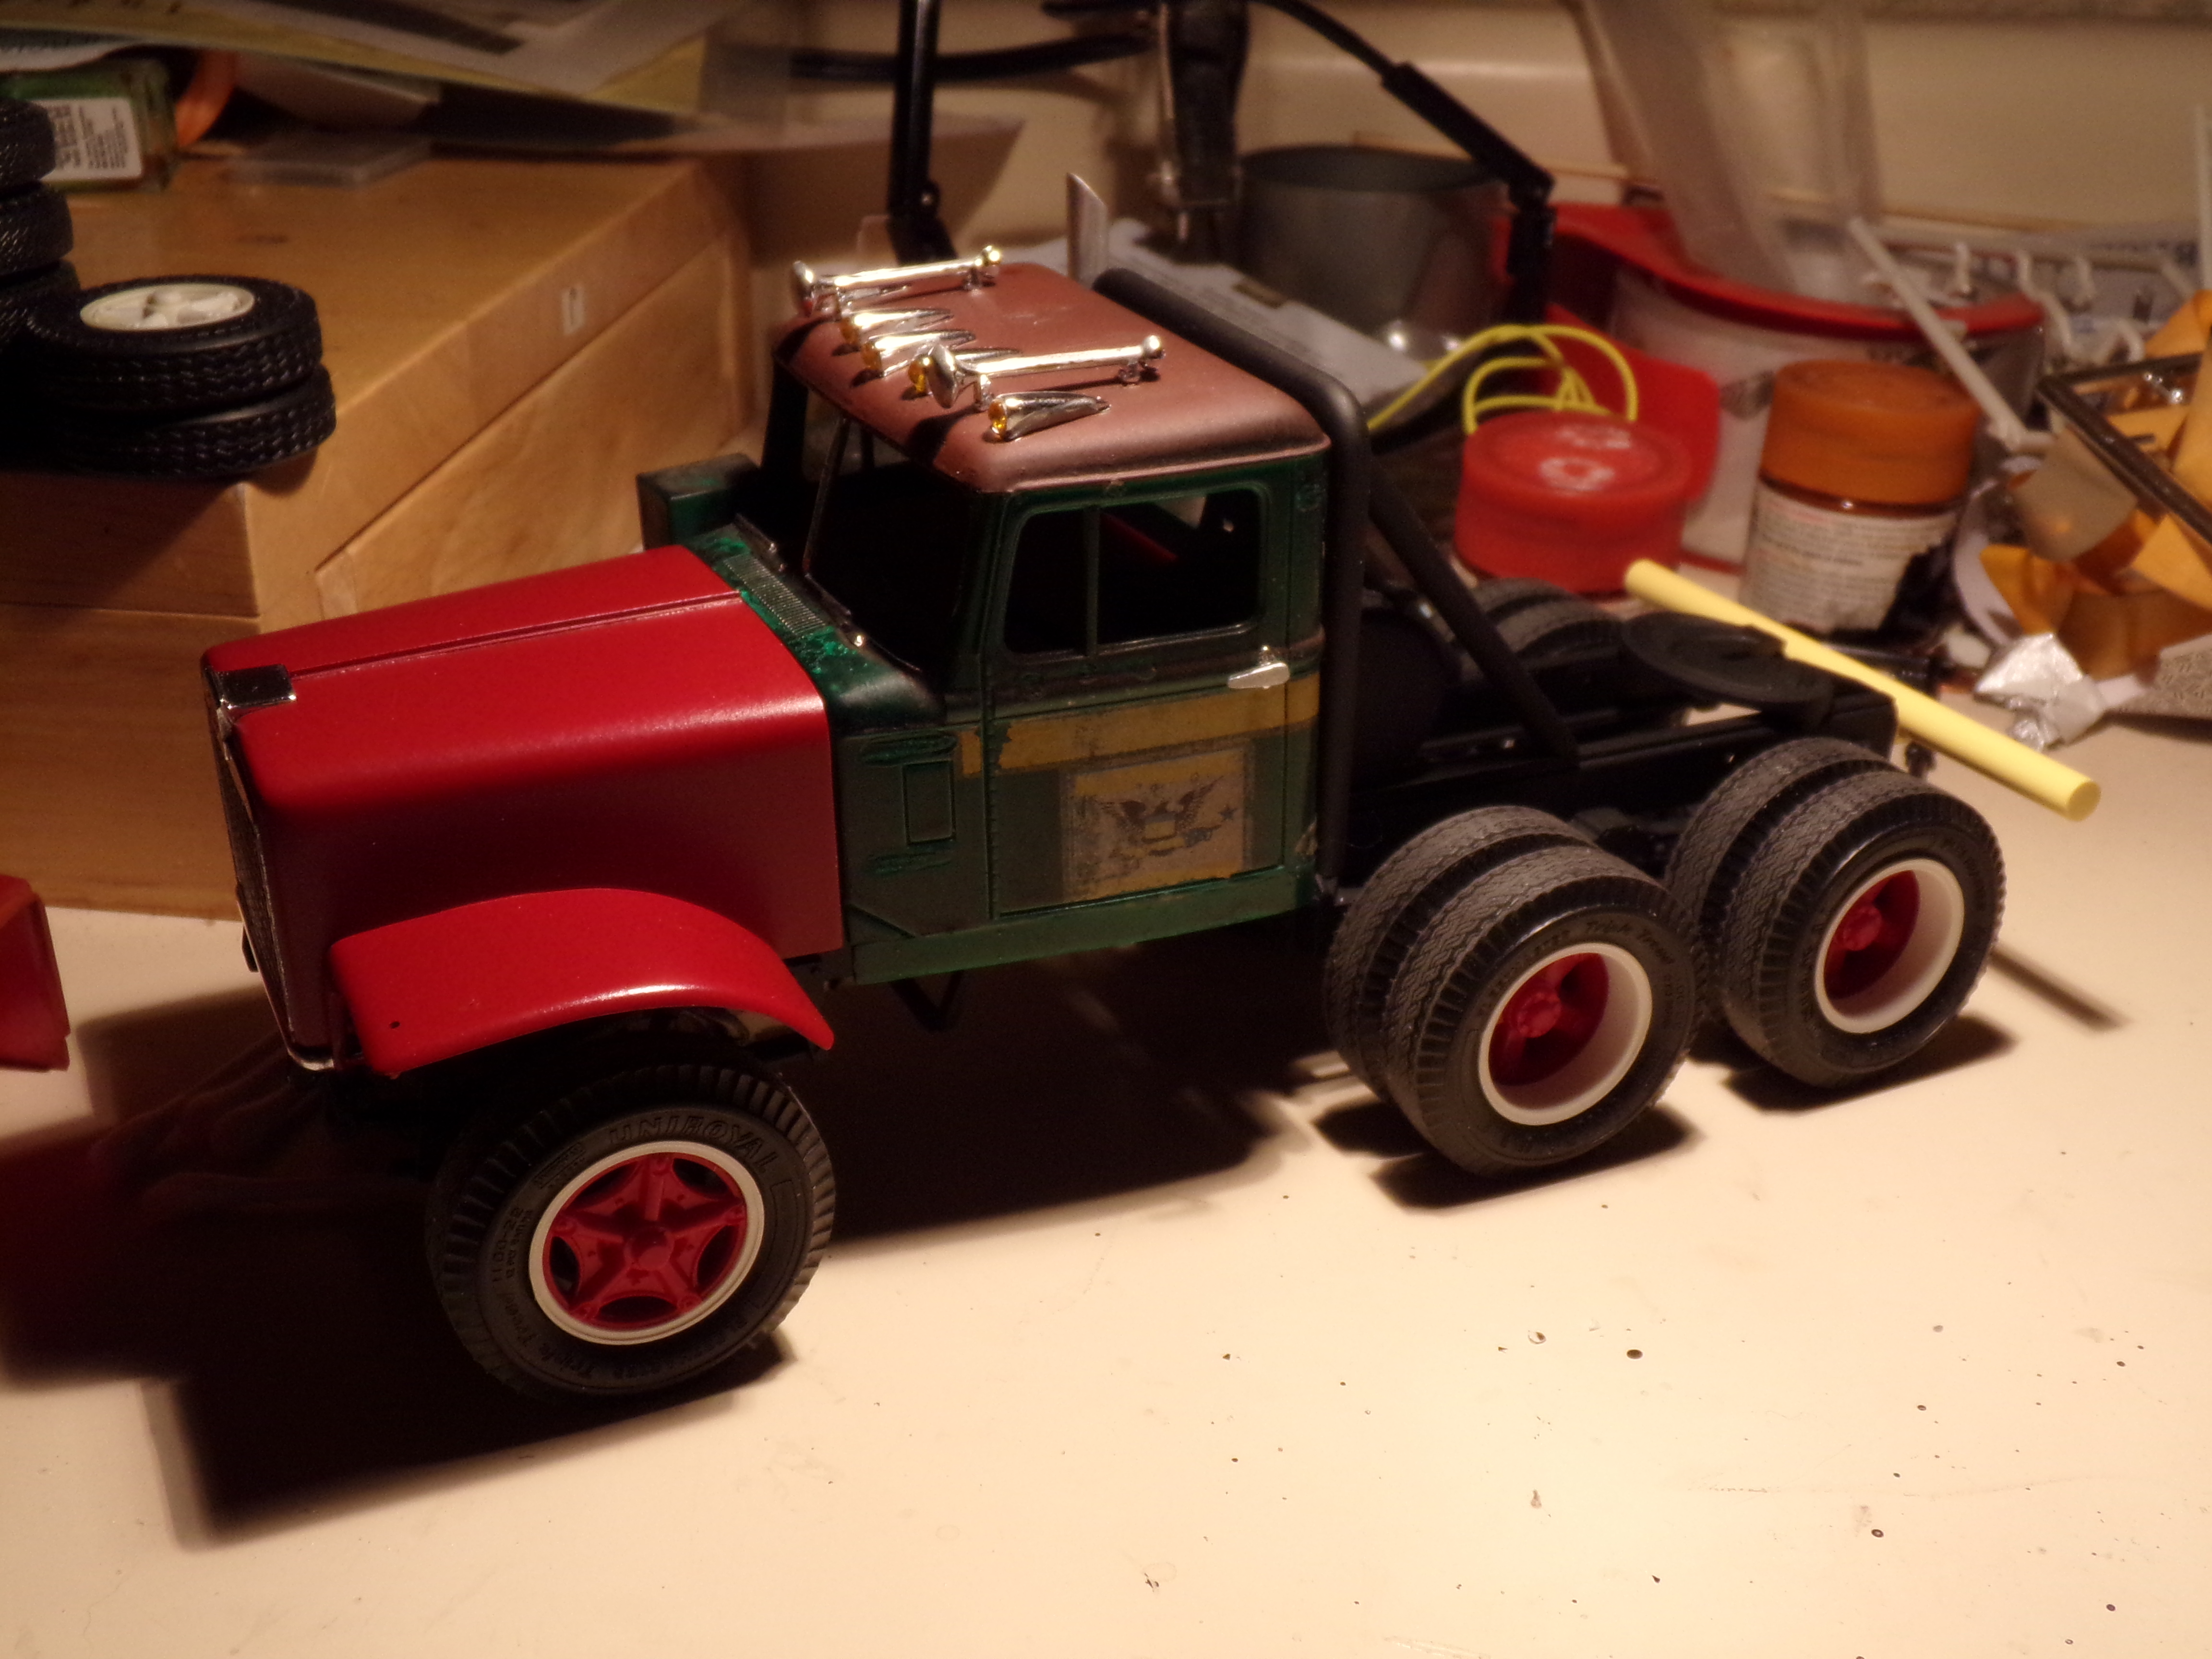
I took this pic with the flash just to show how splotchy that paint is! I did sand down the roof and add a little rust-colored primer. More rust effects will be added on the existing paint job. I added some new door handles, lights, and horns, and detailed the windshield trim and cowl. I still need to do the mirrors and detail the vent window frames, but here's a basic idea. I'm even going to dull coat over most of the grime you see on it in the pic, just to get the full "forlorn" effect.
And this pic is just for fun... I just had to try the beater cab on the GATR chassis!
-
So far, the Raider and GATR truck are rattle can.For the exhaust, it is round plastic rod, with an aluminum tube for the pipe. The clamps were just made from coated wire, bent around the aluminum tube, and attached with some flat plastic strip to the rollbar.
-
1
-
-
Why not both?

-
From (very, very late) last night...

U-bolts were made for the stand pipe, using coated wire, with drilled hex rods for the nuts. Thin styrene strips were used as brackets for the u-bolts to mount into.

I threw together the turbo side of the engine, so that I could mock things up and fit the exhaust. It went through a couple of incarnations, but here we have the final result.

TONIGHT... I cut a thin strip of pinstripe masking tape and wrapped it around the rim of the steering wheel, and added a pad over the hood, made with styrene sheet and a hole punch. Yes, it was every bit as tedious as you think it was.
It looks like hell, but so did "wrapped" 1:1 race car wheels, so at least you can say it's true to life, if not 100% accurate!

Chassis still needs side bars and a rear bumper, and it will likely get some weathering. Seems like most GATR trucks used 10-bolt disc wheels, either aluminum or steel... very few had spokes. I kept the kit's spokes (and Uniroyal tires) just because I liked them.

Interior's pretty sparse, as it should be. The steering wheel looks way better painted. The seat was stolen from a '90's Winston Cup T-Bird.
Now if you'll pardon me, that green glue bomb keeps trying to elbow it's way back onto the work bench...
-
46 minutes ago, AutocarJones said:Very nice work. I havent seen this hood used on anything yet. The only 1:1s Ive seen like this were loggers. Ive seen one with a mercury sleeper that looked awesome. Keep up the good work.
Dave recently re-released the AT64F, so there goes 80 bucks.
I have the notion to do that one up as a wrecker.
-
Today's update...
The chassis for the Raider is now "powered", I stuck with the kit engine and trans. I did use some chrome rocker covers just to jazz things up a tad.

I also paid a little attention to the GATR truck.

A roll bar was made from round rod, and the fuel tank was moved behind the cab. The fifth wheel was solid-mounted to the frame. I couldn't find the spacers for the front spindles, but I had some backing plates and drums from a WF DD, so I used those. I also made a stand pipe from aluminum tubing- straps and hardware will come later.
-
I might go with a similar stripe pattern to the white one on this. I'm not going to do the "fadeaway rainbow" things you see on Raiders quite frequently- they just ruin the look of the truck for me. Might just go with solid blue, too.
-
I'm hoping to get one. May need to reinforce the trailer to support it, but that's all part of the fun.
-
Did a little work on the Raider hood. More specifically, the grille. This older casting had the insert and surround done as one piece. As I understand, the castings you get from AITM now have the surround molded to the hood, and the insert is separate. That's a better way to do it anyway- on the 1:1 Raider, the insert is fixed to the radiator supports and stays upright, while the surround tilts with the hood. In any case, the casting of this one was rough- air pockets inside the grille bars had caused many of them to break off and disappear. So I carefully cut the insert from the surround. After that was done, the surround was glued onto the hood, and I did a little sanding to blend it all in. The insert will be replaced with a new one made from plastic strip.

That done, I turned my attention to the nameplate. It had an incorrect curve to it (likely a warp), and the logo is a little distorted. So the resin nameplate was cut free. Then, the nameplate from the kit grille was removed. A little trim and fit, and I had this...

DISCLAIMER- Please note that I'm working with a casting from the early to mid '80's here. The products AITM casts now are of much improved quality. Don't base your opinion of their entire product line by this particular 30-year-old casting! Modern AITM stuff is top-shelf stuff.

-
Got this e-mail earlier today...
Good afternoon all,
This is a general e mail to all customers with a KFS Michigan L190 kit on reserve & is to let you know that production casting has just begun. The kits are expected to start becoming available at the end of June with production of the entire run completed by the end of July.
As the kits become available all reserved customers will be contacted in numbered order, by e mail, to arrange payment.
The kit is priced @ £195.00 for UK & EU countries including vat & £162.50 ex-vat for export outside the EU (Australia, NZ, Canada, USA, Norway, switzerland etc)
Shipping will be Signed For or Tracked Air in all cases. Shipping costs will be notified once the first phase of production is complete & the kit can be weighed & priced accurately. The usual credit card or PayPal fees will apply.
There is no need to reply to this e mail unless you wish to CANCEL your reservation or have ANY QUERIES about your kit reservation or the kit itself.
Best regards & thanks......Howard @ KFS
Kit Form Services,
7 Horbling Lane,
Stickney, Boston, Lincs,
PE22-8DG, England.
Tel / Fax 01205 480766 (UK)
011 44 1205 480766 or 0044 1205 480766 (Overseas)
kfs1@btinternet.com -
Not one, not two, not THREE.... but FOUR... count 'em... FOUR Diamond Reos!
I'll start with the glue bombs.


I got these as part of a trade some time ago. I think. The green one will be rebuilt, but the twist is I sort of want to maintain some of the existing patina. The black one is interesting- it has the sleeper from an IH Eagle, and the original builder stretched the frame about 1-1/2", and also added what appear to be the wheels from an AMT Kenworth. Not sure what will happen with this one. But more of these two later.

This started with a fresh, new kit. Well, it was a fresh, new kit about a year ago- I bought it for parts. But there's still enough left to make something of it... I'm going with an old GATR racer. So far, the frame has been cut down, the rear suspension was substituted from a White Freightliner Dual Drive, and the cab mounts were cut down. I'm going for something along the lines of this...

Of course, I intend to add my own touches and features from other GATR racers I've seen. I'm not replicating any particular truck for this one.
Last up...

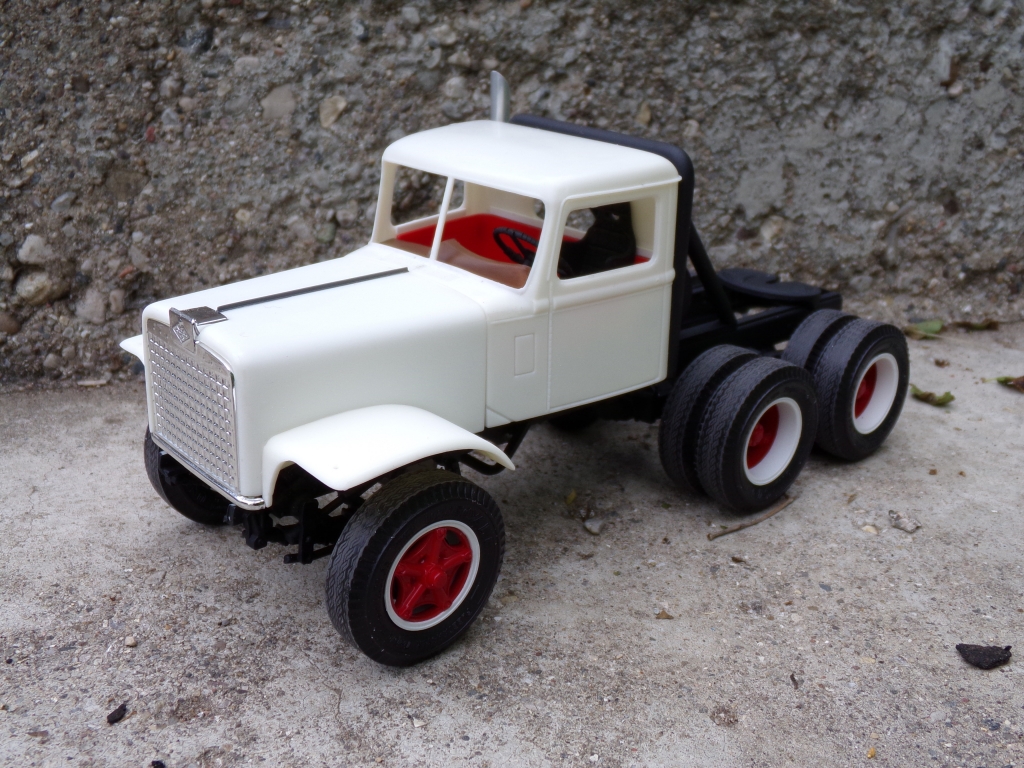
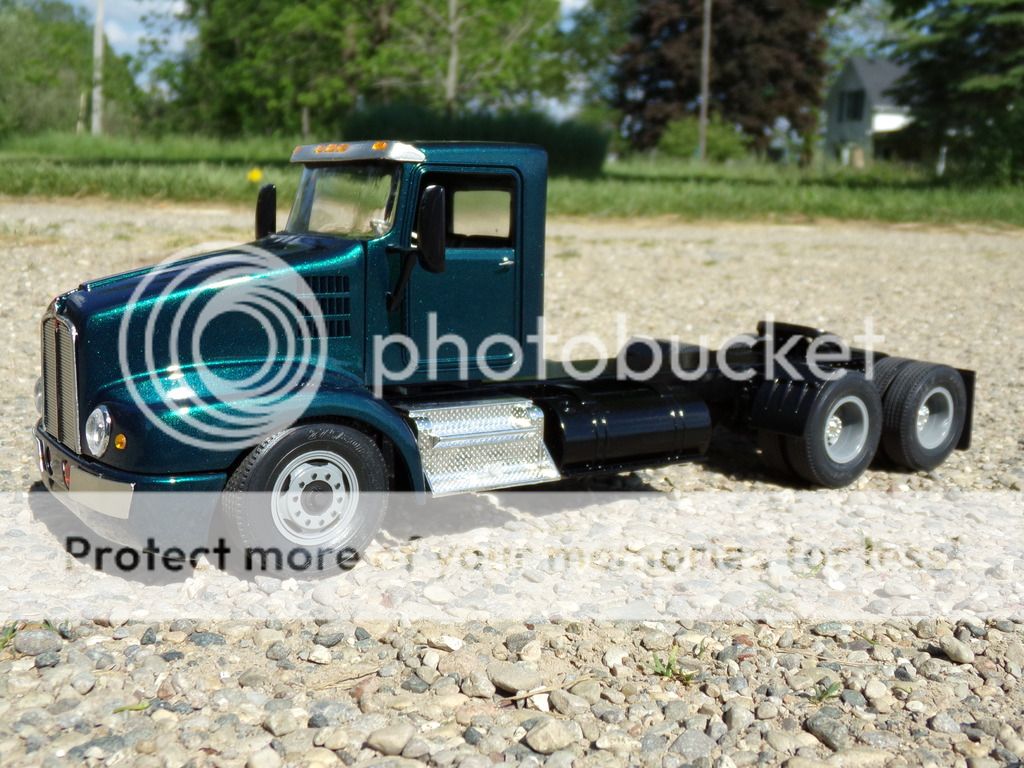
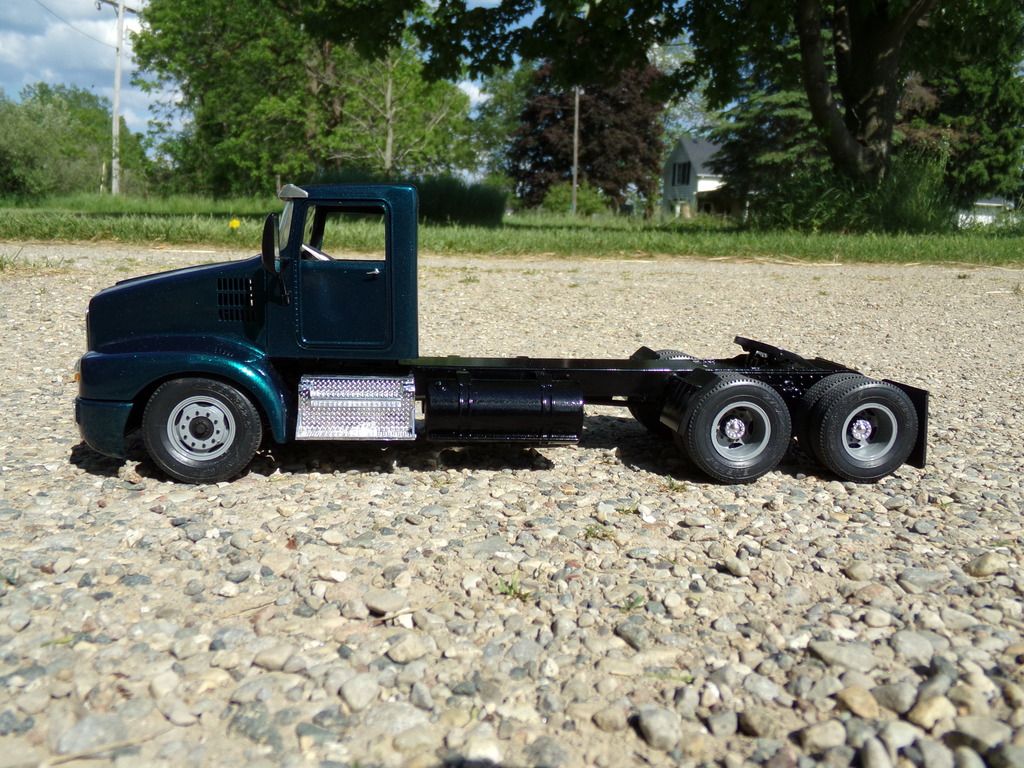
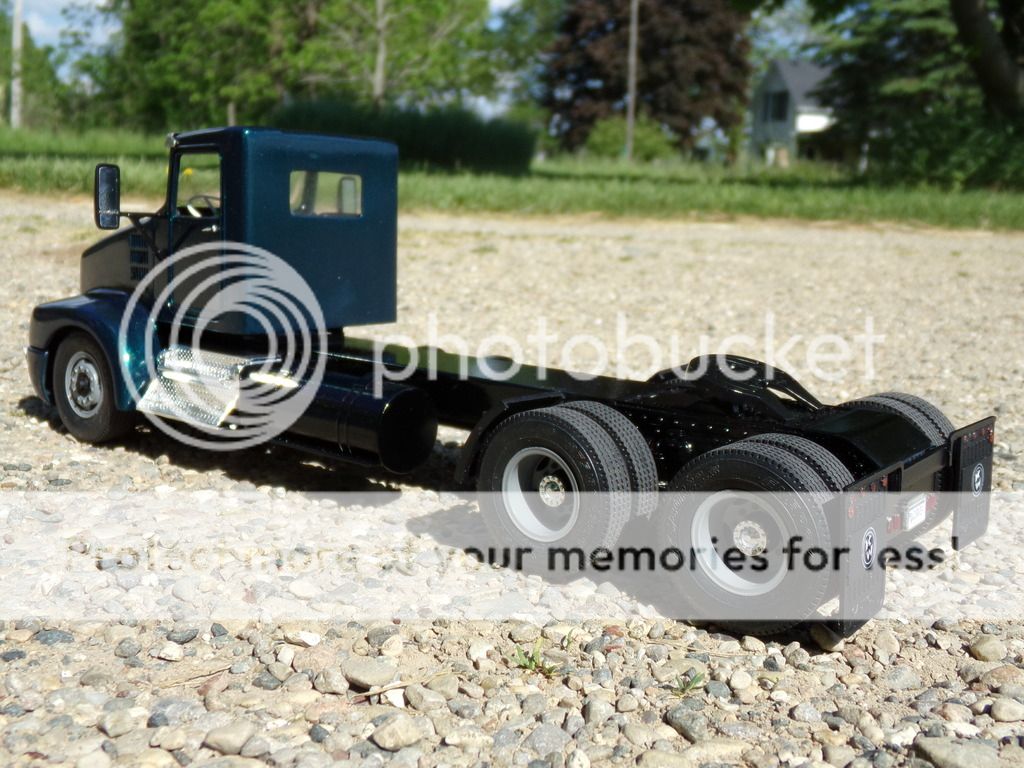
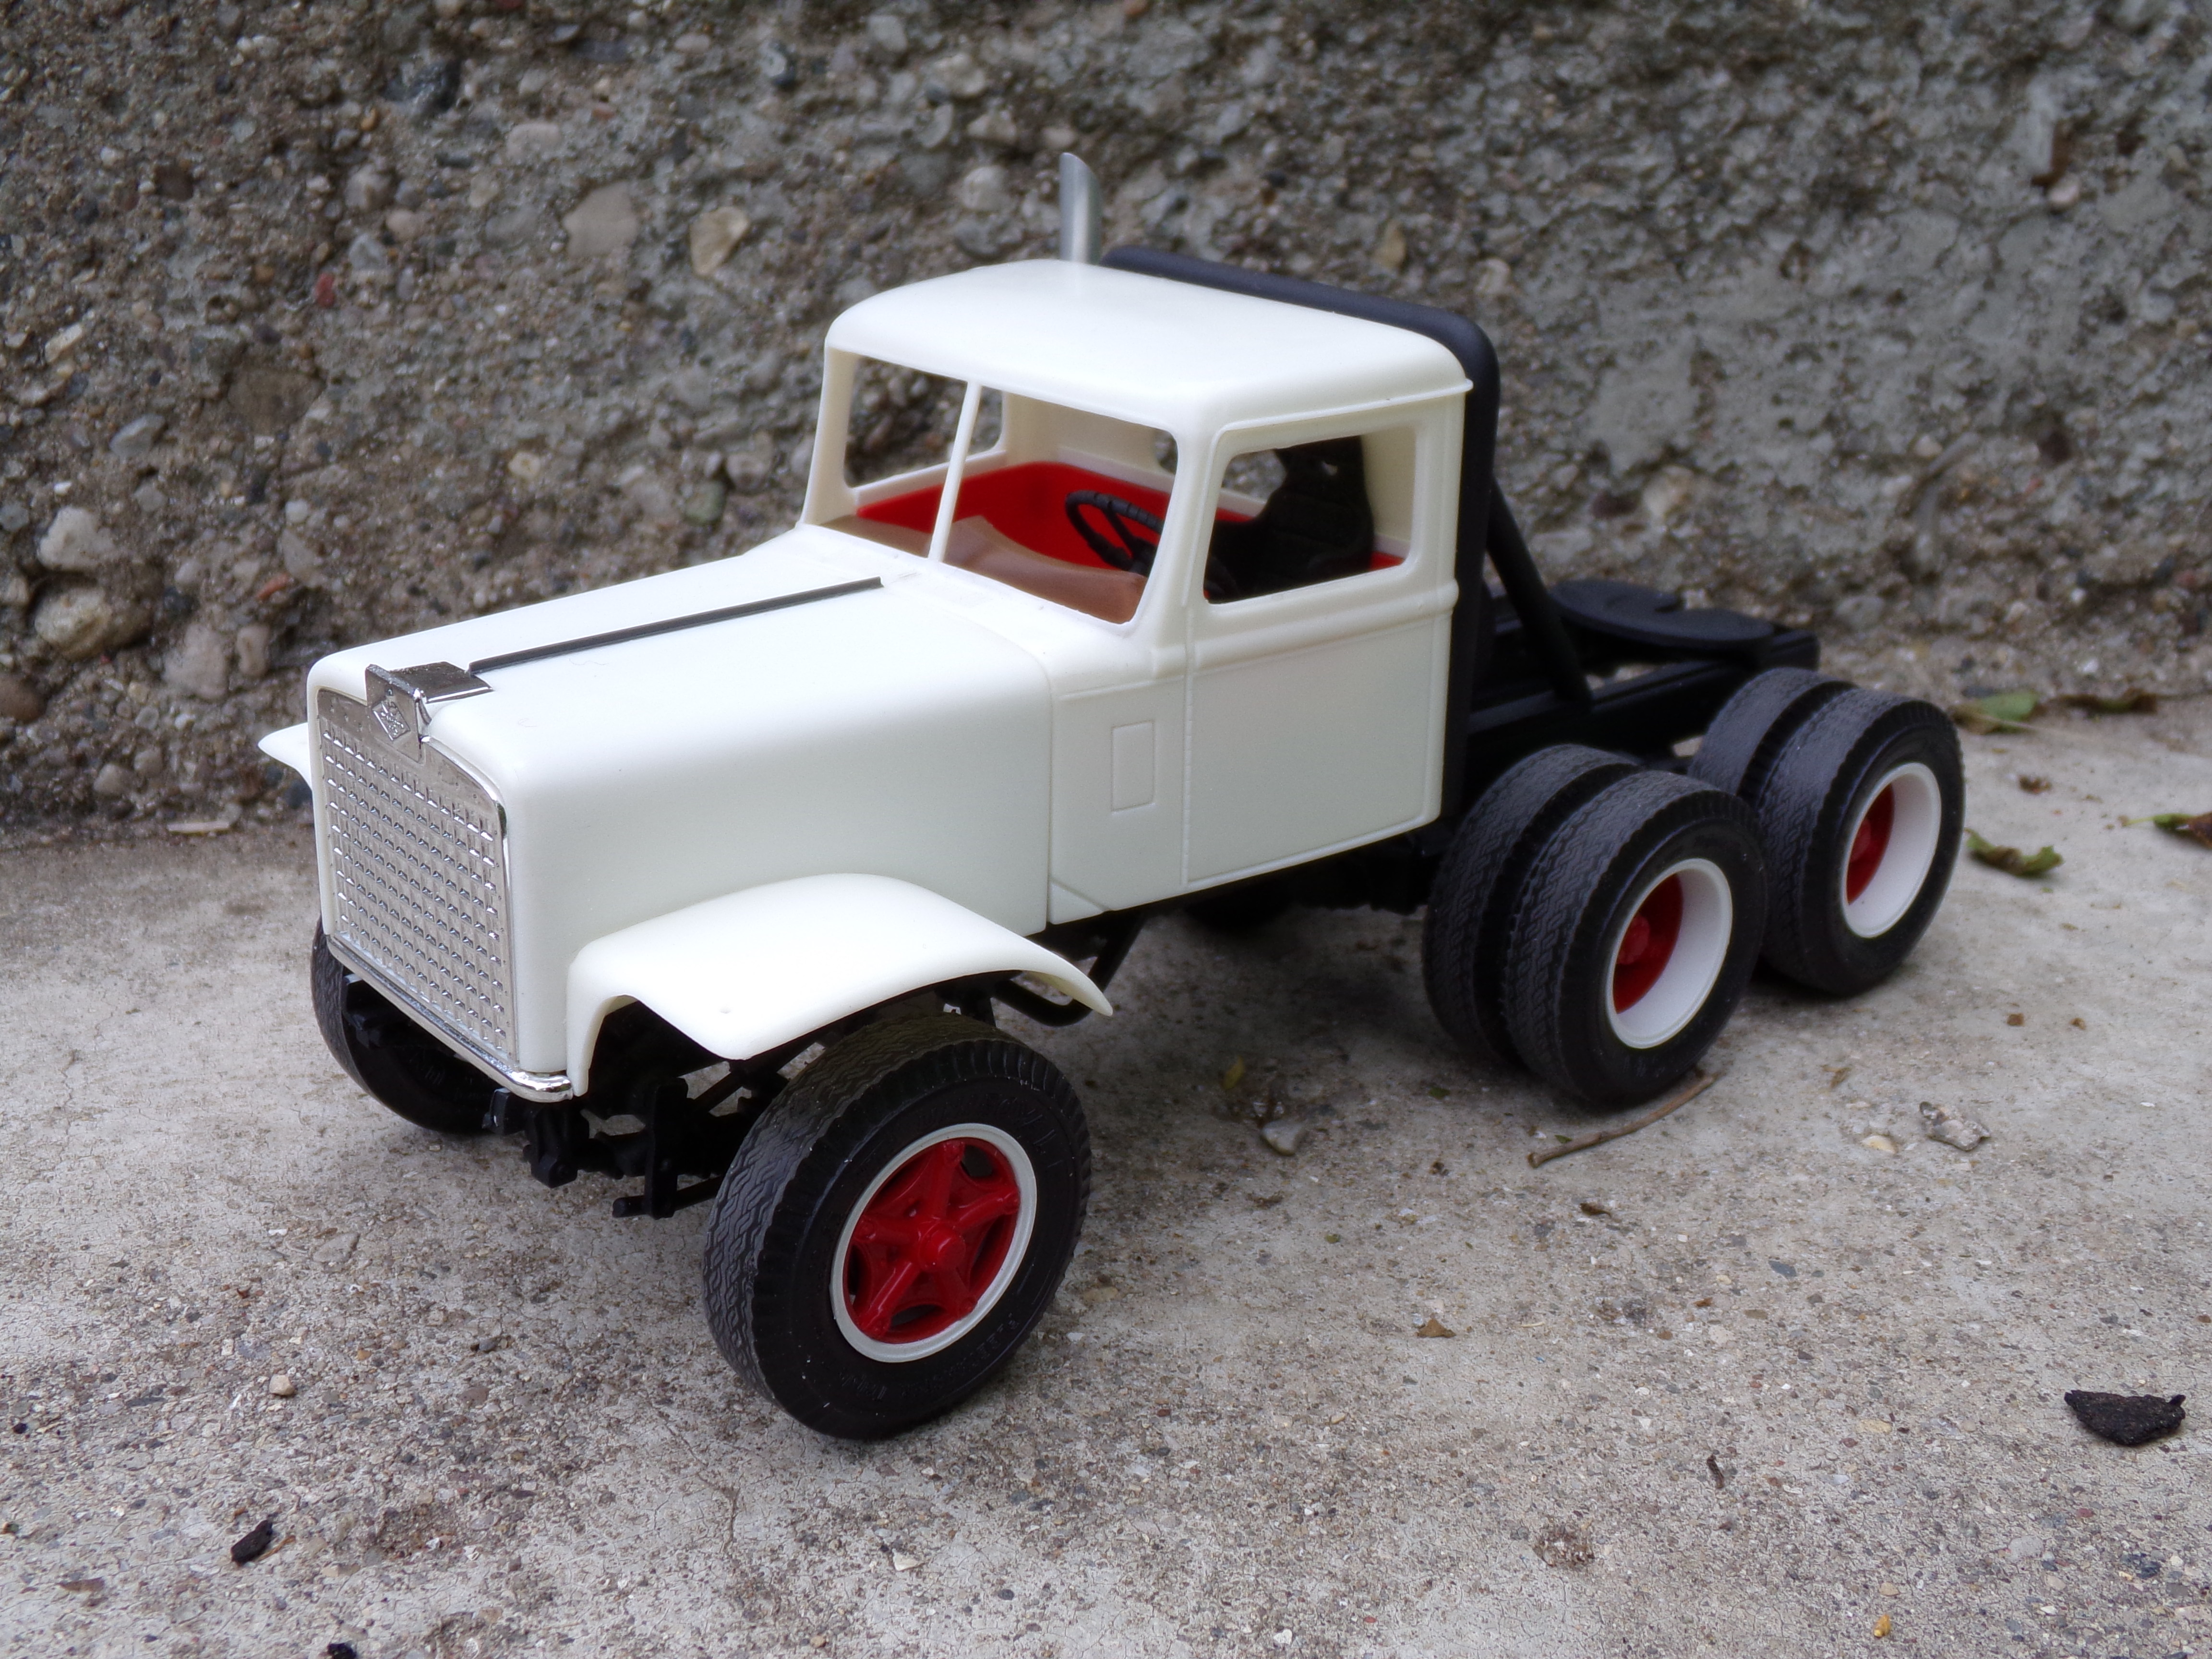
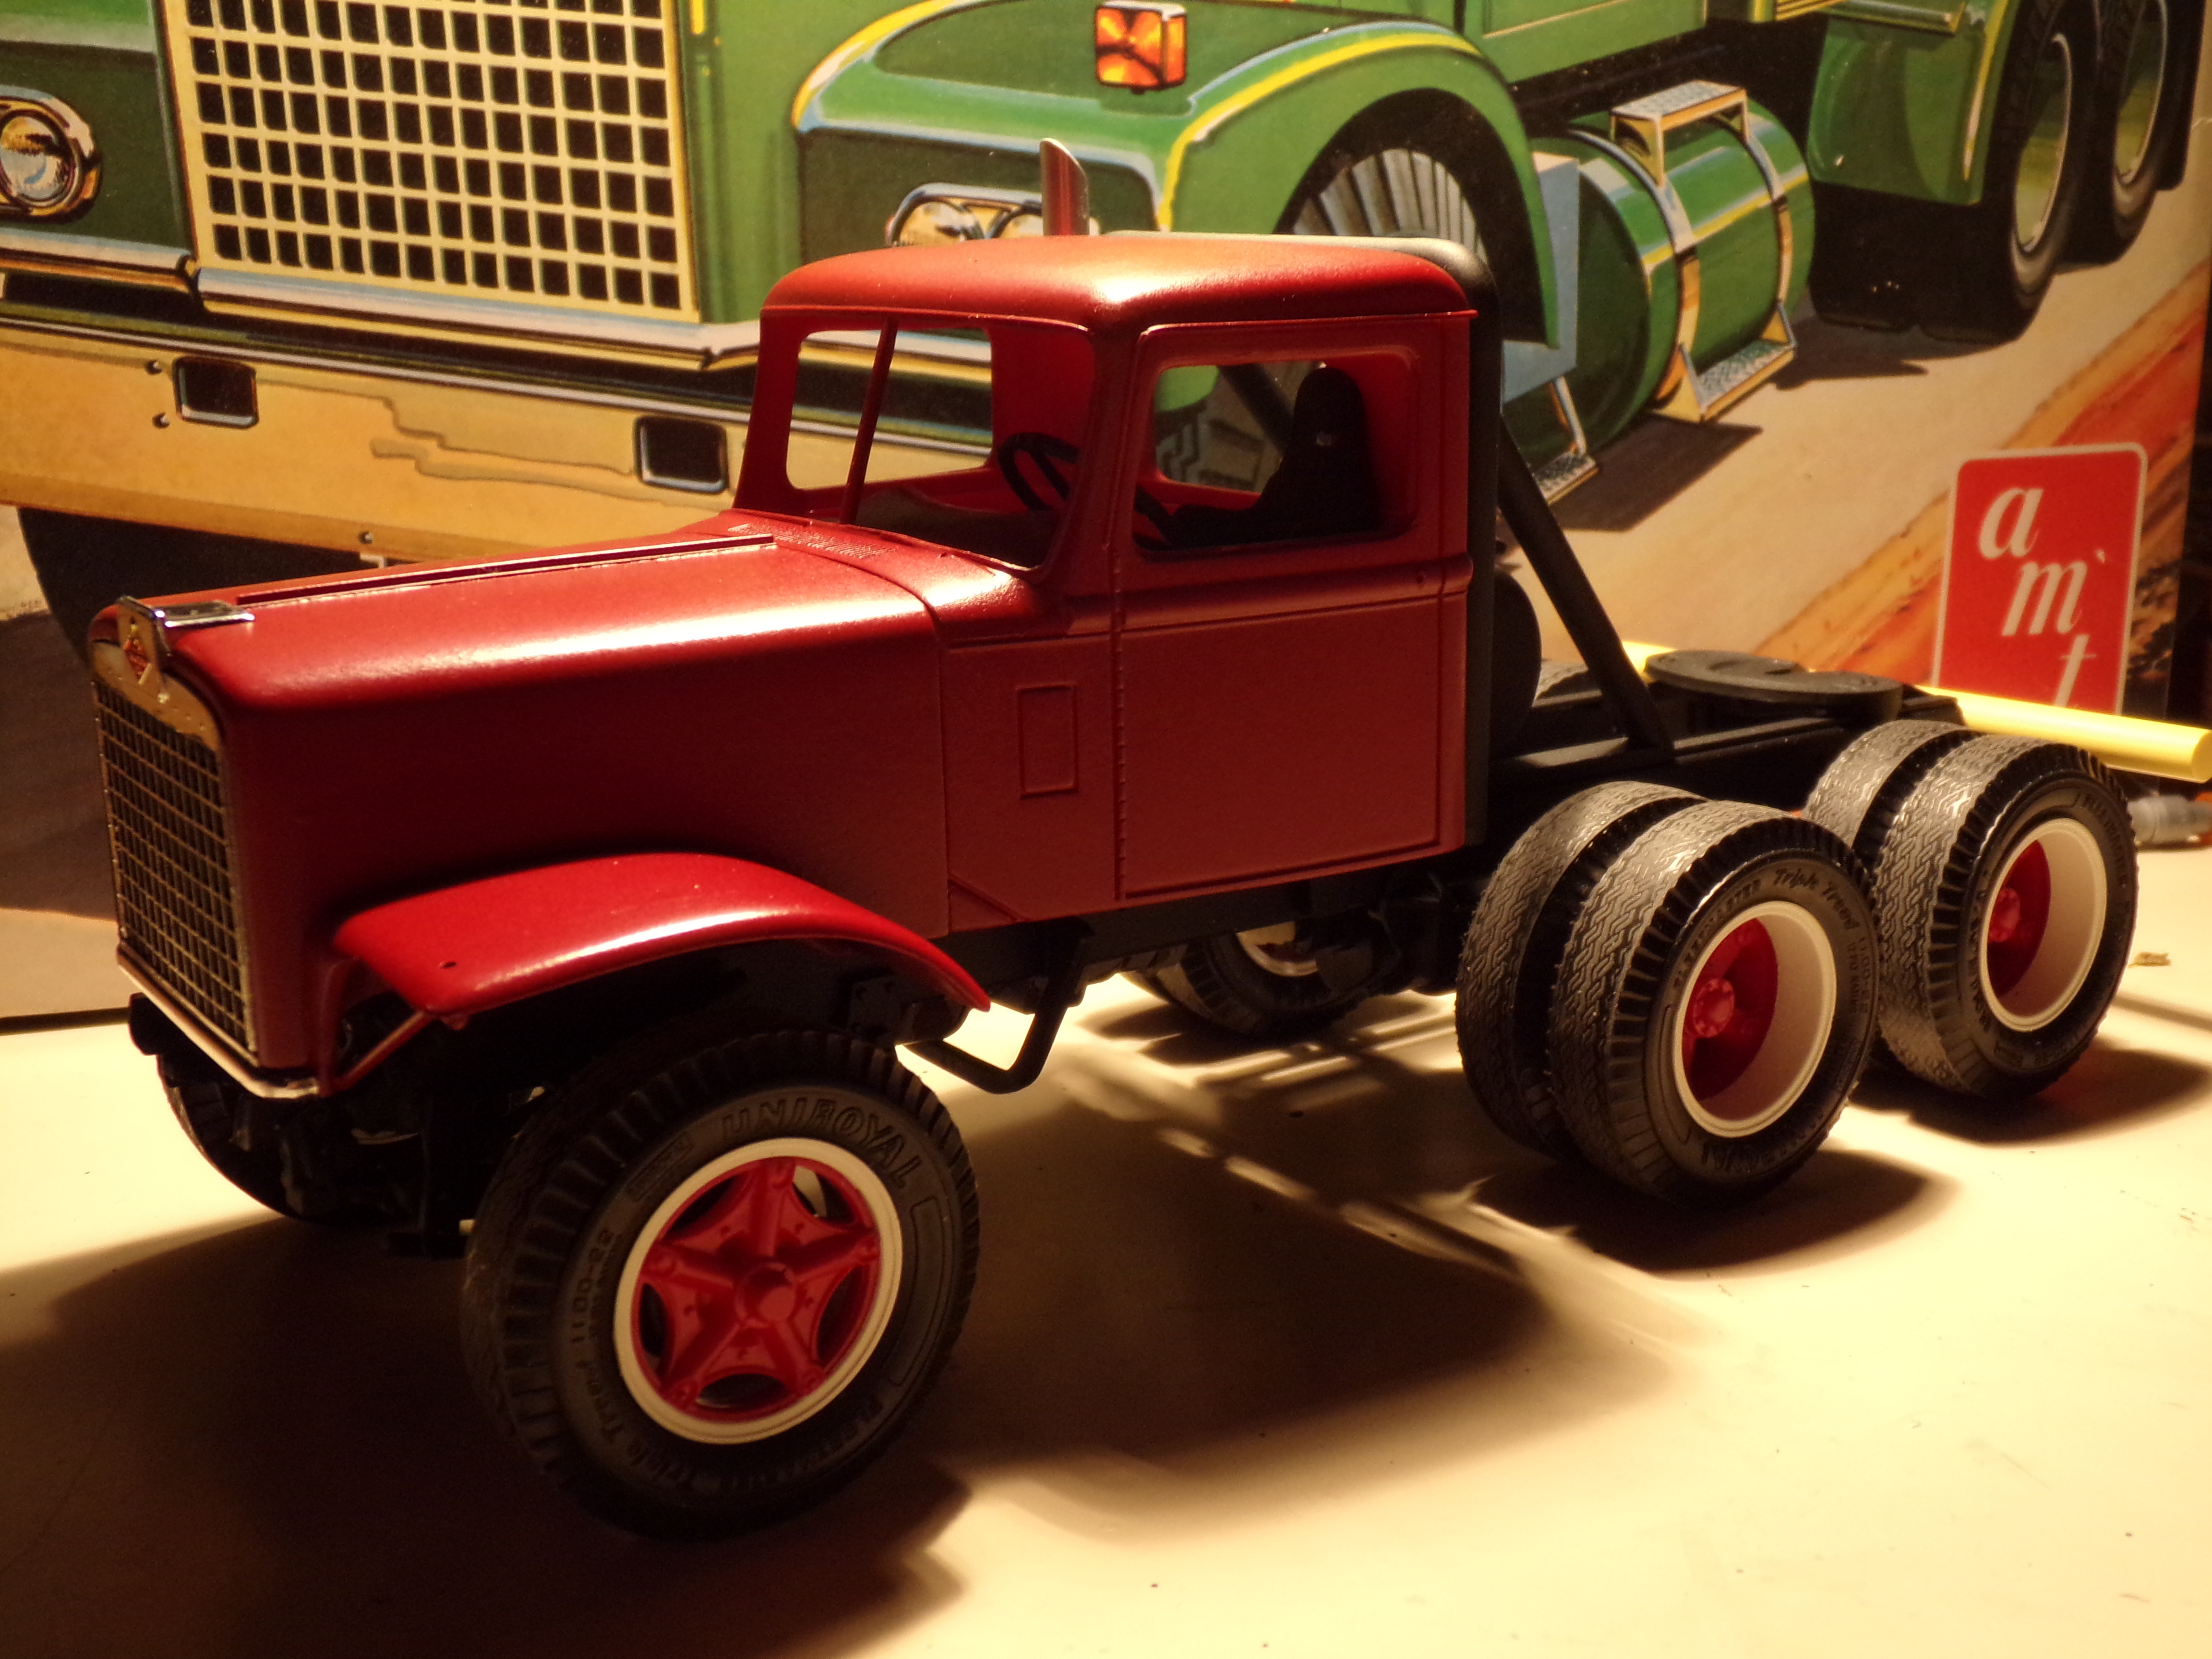
This will be a forward-set Raider, using an old AITM hood casting. So far it is mostly out-of box, aside from the addition of tires and rear wheels from the same incomplete Dual Drive that coughed up it's rear axles and suspension for the race truck, and Goodyear tires from that same kit. I used some thumb tacks for front Baby Moon caps. Paint is Chrysler Intense blue pearl. This will be a "restored" day cab owner/operator type tractor.
More to come...
-
Well, you all saw the WIP, and I'm finally able to call this half-decade misadventure a done deal. I still might add some skirts along the bottom of the cab to hide my less-than-pleasing-looking cab mounts, but other than that it should be a decent shelf filler.

-
1
-
-
All I will say for now is...
keep an eye on the Model Truck Showroom section.
-
4 hours ago, Anthony Oteri said:It looks pretty darn good with all of them. Maybe you need to build a few more....
Seriously, the Raider needs a dump trailer, or 2
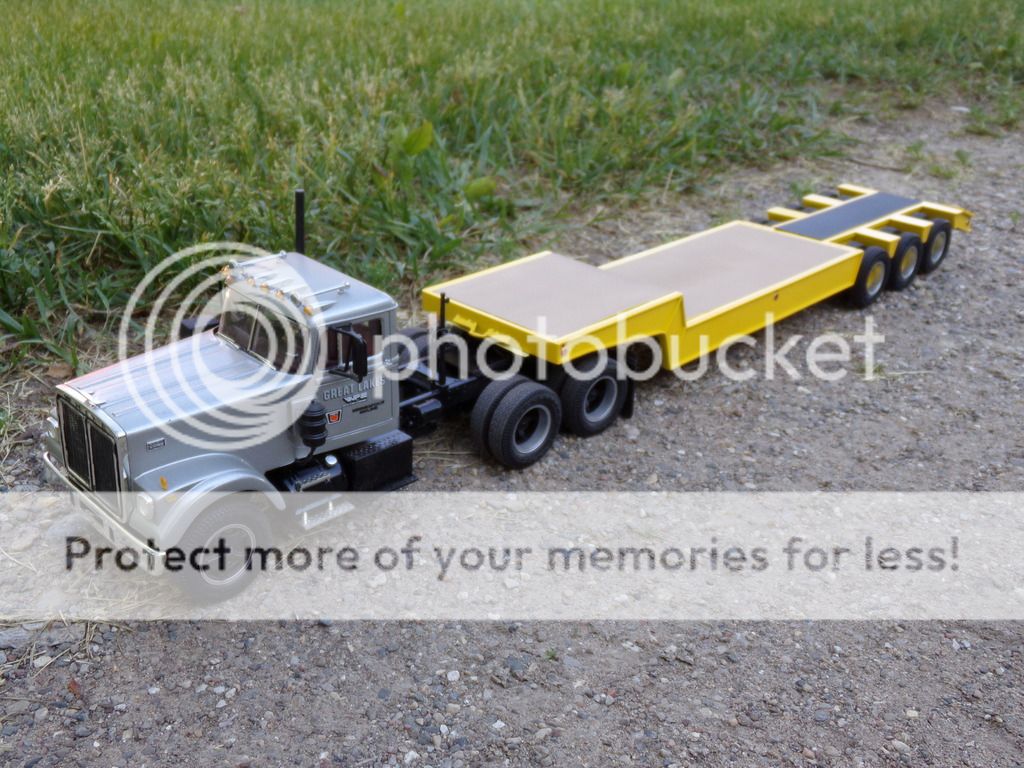
Agreed- and that is indeed the eventual plan for the Raider. The Road Boss is going to end up with a lowboy as well- I might scratch or kitbash a detachable neck unit for that one. I'm thinking the 4300 will end up with an old Fruehauf van.
-
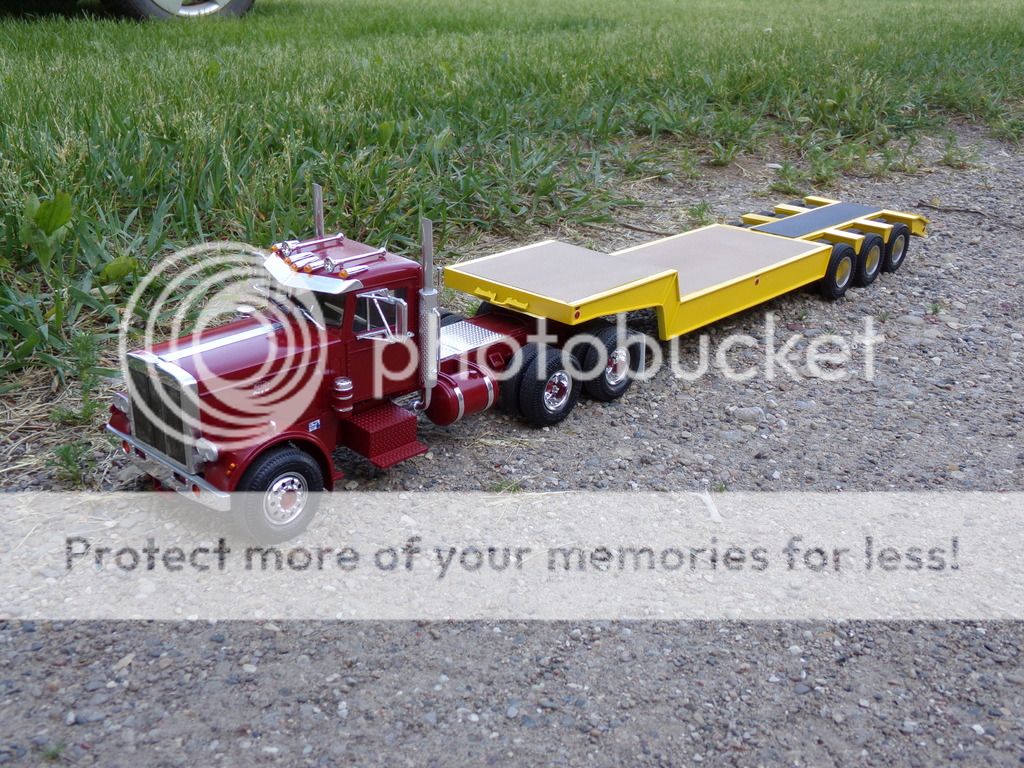
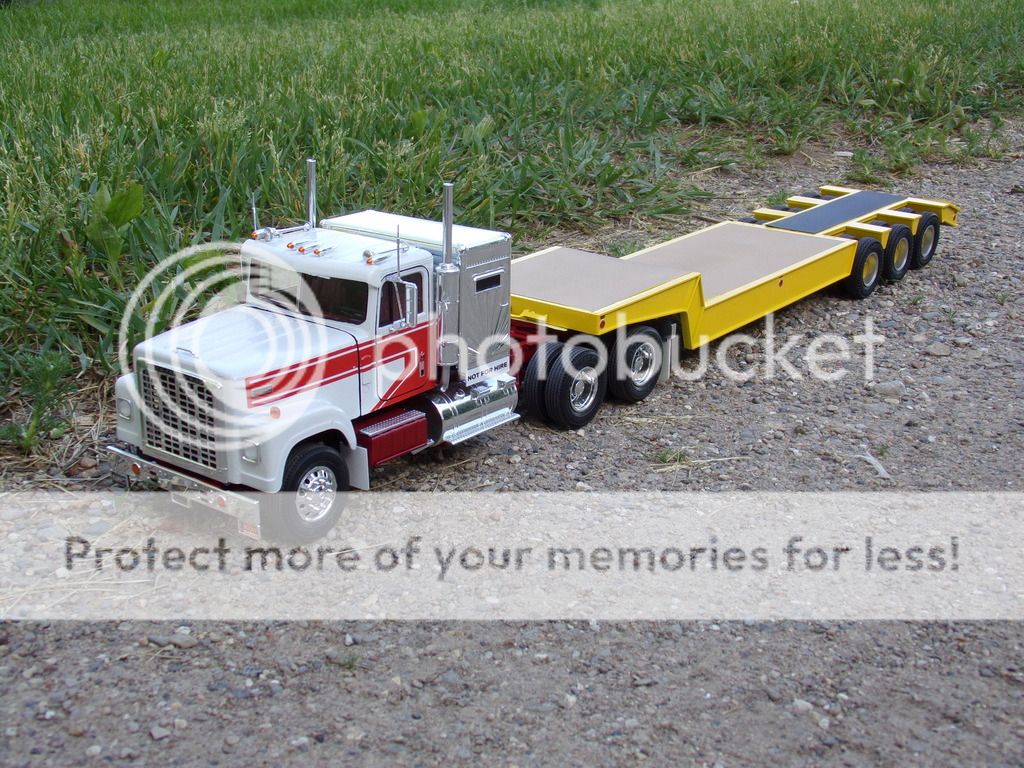
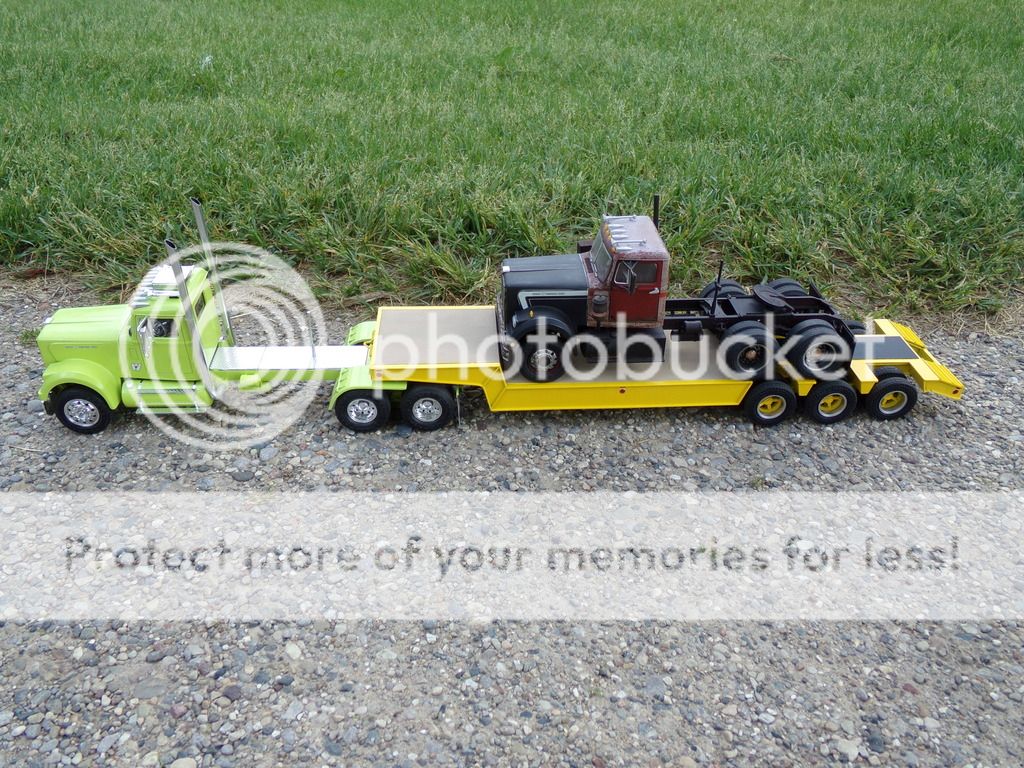
Couldn't resist hooking it up to a few other tractors sitting around.

-
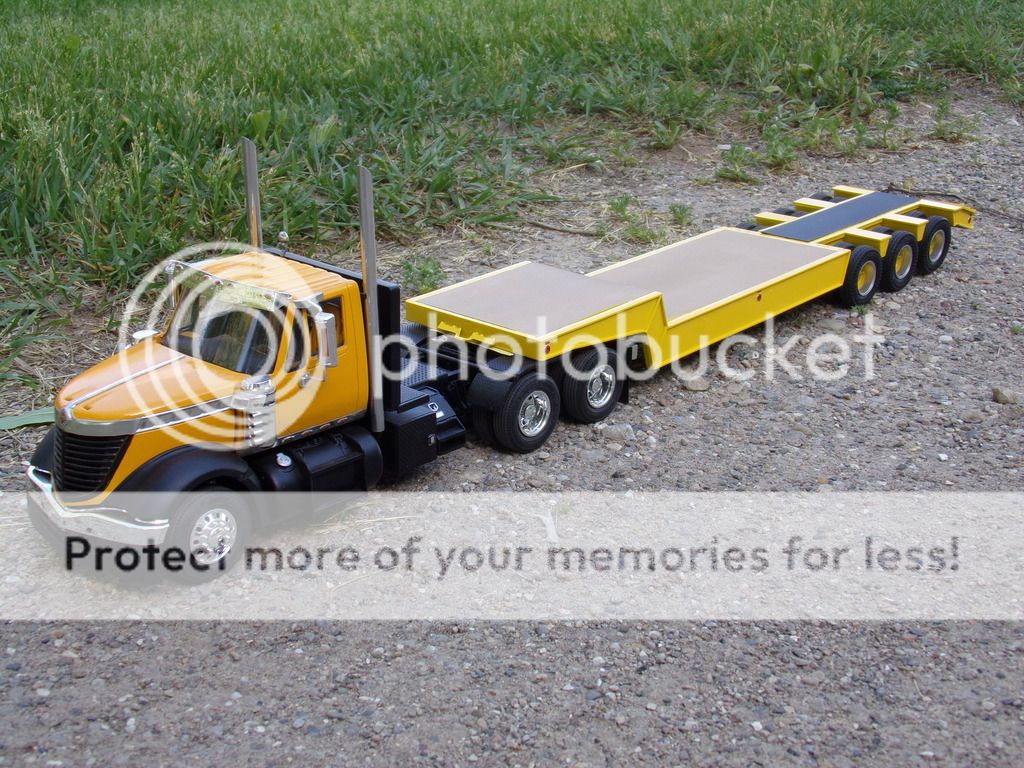
This was just a simple, box-stock, weekend buildup of the Esci boxing of the good old AMT kit. An entire can of Krylon Sun Yellow was used on the trailer, along with Tamiya Buff and flat black, and some hardware store silver. This is easily the worst-fitting kit I've ever built to date, but I hung in there and got it done.
I still need to add the tie-down hooks on the sides- I may make some that actually swivel. If not, the kit parts stand at the ready.
The plan was always for the two WWSs to be paired up like this- the restored custom version pulling the shabby one on the flatbed. So... scratch that one of the ol' to-do list.


-
Could have been a lot worse. It's still at the shop, but if it were still at my place it would mean I'd be attempting the repair in this muggy, rainy weather.
-
Well, I was going to order a couple of cab conversion kits from AITM. But I guess that's on hold until next payday now.
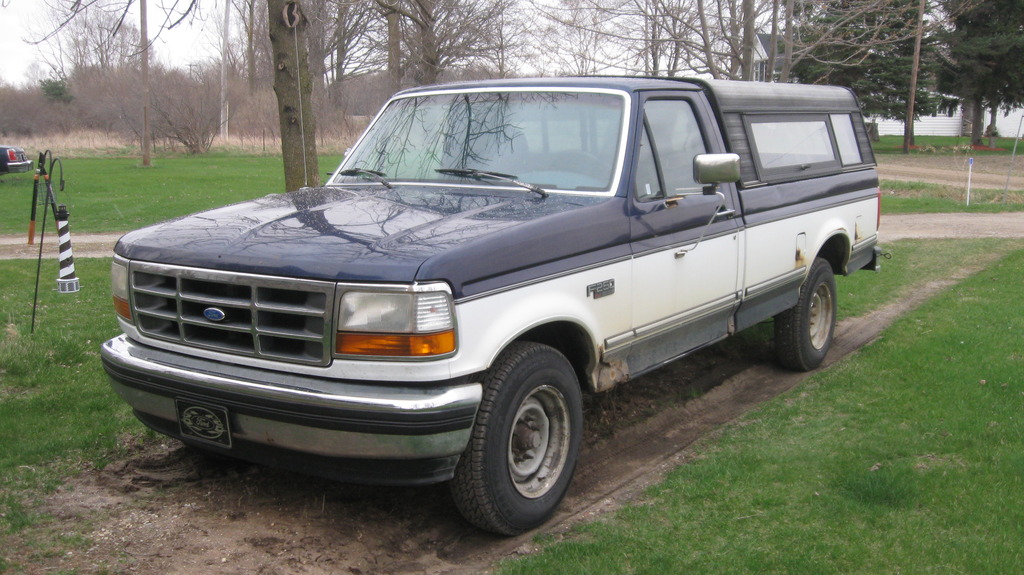
23 years of exposure to the elements and metal fatigue and the left front leaf spring mount on my F-250 decided to file for (and receive) a divorce from it's lower half.

Hard to see in the pic, but the eye of the leaf spring is touching up against the fuel tank filler tube. So tomorrow after work it's getting lugged off to Midas, because even though it'll cost me quite a bit more to have them do it (the mount itself is only about 40 bucks), they can do in a few hours what would take me all weekend.
So... the Ford F600, IH Fleetstar, and GMC 9500 long hood are on hold for the time being. I suppose that means I have a bit more time to worry about the current projects I already have without having to worry about any new distractions.
-
-
In the home stretch now!

The "teardrop" theme established by the '37 Ford headlights is carried by the twin sets of '39 Ford taillights. An Ertl Transtar Eagle coughed up the license plate bracket, while the decal came from a Revell Chevy SSR.
 \
\
A set of '32 Ford door handles were installed, replacing the factory "slam lock" type latches. I have no idea what's going on in the pic- the paint isn't that wavy looking in person! Macro setting, perhaps. Still figuring out this fancy-pants Kodak.

Diamond Reo Race Rig
in Model Truck Show Room
Posted
One of these days I'd like to build a tube-chassis GATR racer, but that's a ways off.