

Cornbinder
-
Content count
401 -
Joined
-
Last visited
-
Days Won
61
Posts posted by Cornbinder
-
-
Love it! Diamond Reo made a truck called "Giant" after Osterlund took over, but this one is more worthy of the name.
-
Very nice! Those LTLs were a fine-looking machine, and it's cool seeing one done up as a heavy hauler.
-
I build a variety of model types- everything from HO scale buildings to RMS Titanic. But my favorite thing about the big truck kits is variation. There aren't too many other genres you can build in so many ways.
Take the AMT Diamond REO. Right out of the box it makes a decent day cab or sleeper tractor. Or you can modify the hood (or get the hood from GW Trucks) and do it with a set back front axle. You could make up the steel butterfly hood and pit fenders for it. Or rework the existing grille to the earlier style... or even built it as a Diamond T or REO. You can leave it a tractor, or put a wrecker body on it. Or a cement mixer. Or a dump box...
That's just one example, but you see what I mean. You can name pretty much any one truck kit out there, and then go on to come up with at least 20 or 30 different ways you could build it.
-
 3
3
-
-
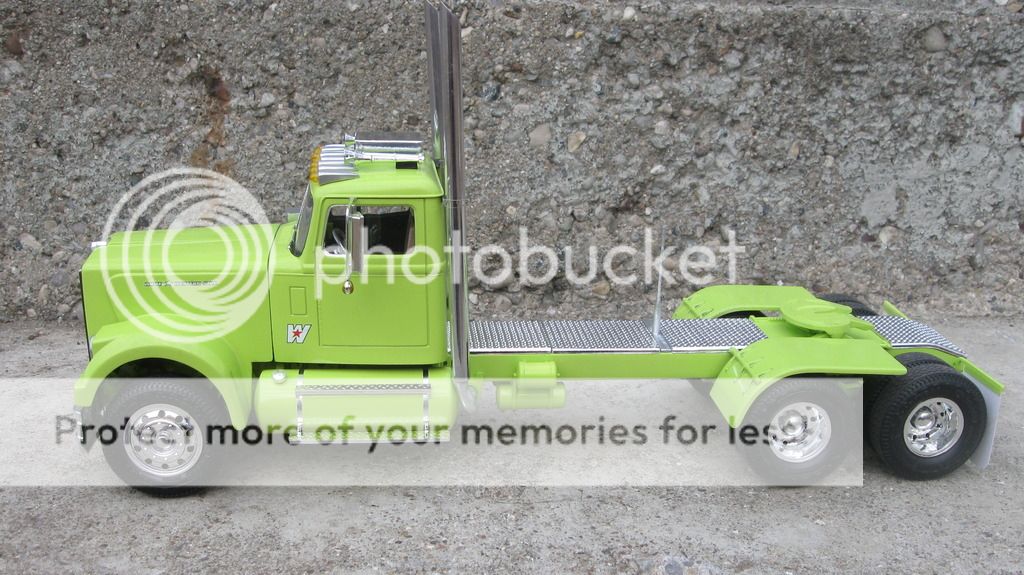
Here are the two White Western Star 4800 tractors I've finished. First, the dim one...

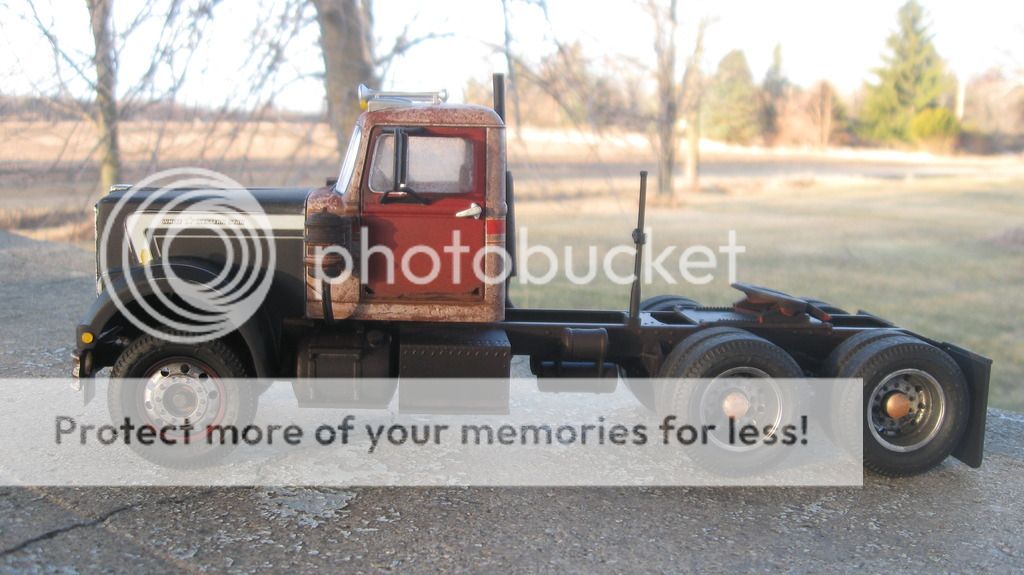


This junky one was built while I waited on paint and adhesives to dry on the other one. This is an original T546 kit, which differs from the current reissue with it's skinny Firestone tires, crappy decal sheet, and Western Star logo mud flaps. I used only the mud flaps- the decals are left over from the Round2 reissue. I repowered this with a CAT, and used the leaf spring rear suspension and the rear wheels from a White Freightliner Dual Drive. That kit also coughed up the tires... the original Firestones just looked a bit too dainty for me. I wanted a rig that had lived a hard life, but wasn't quite ready for the scrap heap. This Star isn't quite supernova... but it's getting pretty close to white dwarf!
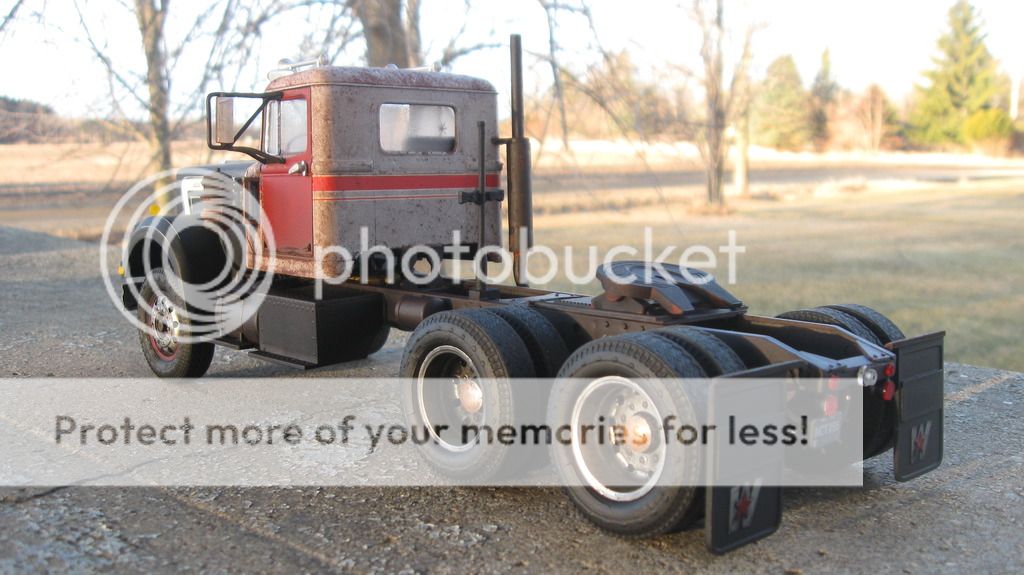
Now here's the bright, twinkly one...
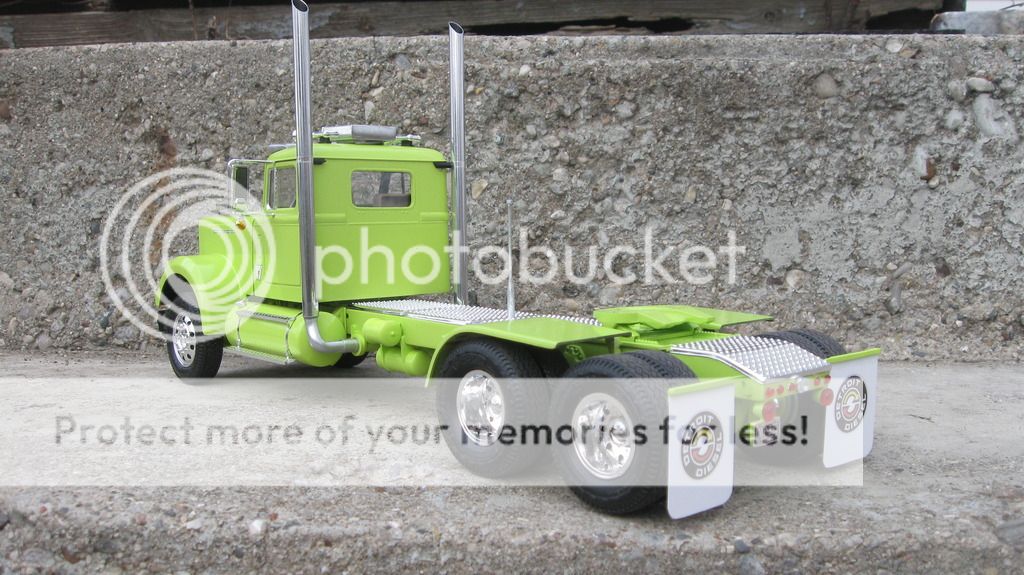
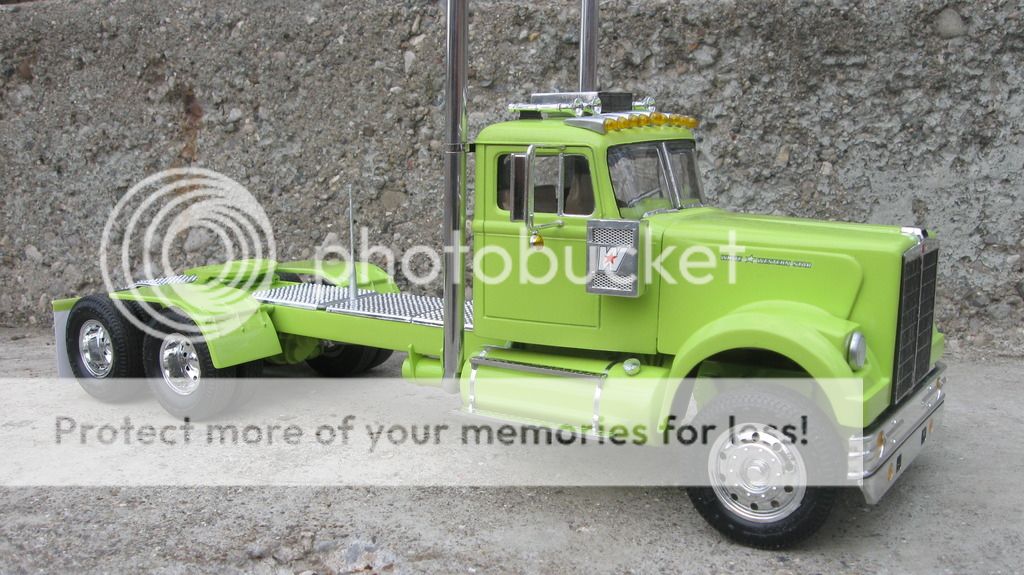

This one's a bit more "custom" as you might have noticed! I stretched the frame, and installed a Detroit 8v71 from a LaFrance pumper. I used a long fuel tank from a Road Boss and reconfigured it slightly so I could have long tanks on both sides. Let's just say the batteries are underneath one of the deck plates. The mirrors, roof AC and horns are from an Italeri parts set, and the rear fenders came from a Revell Pete 359. I used a Freighliner air dam under the bumper and made my own Detroit Diesel mud flaps... just in case the noise coming from the straight pipes didn't tip you off as to what just passed you.
Eventually I will build a matching lowboy for this, and chain the crusty one down to it as a load. But in the meantime...
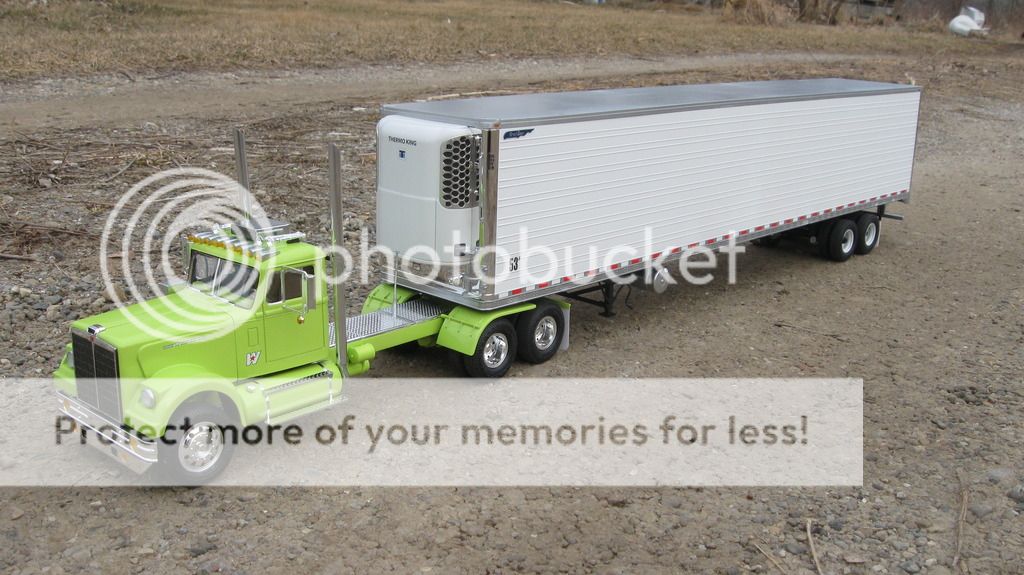
Here it is with a Moebius Great Dane 53' reefer van. Other than the Class A Budd 2-hole wheels and the reefer decals from modeltruckin.com, the trailer is box stock. It will eventually be hooked up to a ProStar.
-
1
-
-
Nice.
-
-
I started with the Round2 reissue of the AMT Dual Drive, and set about converting it to a traditional "Michigan Special"- basically a short-wheelbase heavy-spec tractor. I used wheels and tires from an Italeri parts set (with wide floats up front), converted the engine to an NTC-350, and did it up in a blue/white paint scheme with yellow stripes separating the colors. The numbered flags are from a Peterbilt 352. I made my own mufflers and smokestacks because that seemed like it would have been less of a headache than cleaning up the kit-supplied parts. I also added the more common "stirrup" steps to the cab.
The MPC Gravel Trailer is pretty much box stock- eventually I plan to make a dolly and hook up a second dump trailer for an old-style Michigan "Gravel train". In the meantime it takes up plenty of shelf space as-is. The "Thunder Sand & Gravel" markings came from the trailer kit.


-
Oh yes, that'll certainly do.

I have to ask- where did you get the tires?
-
I bought this kit back when it first came out and everybody was tripping over each other to build one. A lot of people went box-stock, quite a few went custom, so I decided to do something different. How might a 2011 LoneStar look sometime around 2031, after it's been through a series of owners and several million miles of (mostly hard) use?

Obviously there would be quite a bit of grime, and some surface rust on the steel surfaces. I added in a few other cues- the kinked bumper and mis-matched hood suggest a light front end "thunk" happened sometime during this old girl's lifetime.

The broken sleeper window was replaced with a bit of plywood- actually thin basswood in this case. In hindsight I should have greased up the fifth wheel, but I suppose I could do that any time.

I've noticed a few LoneStars and ProStars with missing "batwings" on the back of the sleeper- if I built this model today I'd have probably tried to replicate that. Somehow the batwings on this one are intact.

I was never happy with my weathering job on the passenger's side- the "rust" looks more like primer, but I guess that would be realistic. Note that the passenger's fender is mismatched, and the lens has been fixed with a "Red Green Universal Repair Kit". Looks like Mr. Becker has a habit of overfilling the fuel tanks, too.

Here's a better look at the duct taped passenger's side lens, the busted-up grille, and the kinked fender. A lot of old trucks in Michigan had a name painted on them somewhere, I decided to call this one "Miss Katie". It doesn't really show in the pic, but there is a crack and a stone peck in the windshield.

Here you can see a broken taillamp, and a bent mudflap bracket with it's flap missing.

The door lettering was printed out on photo paper and glued to the door... it could represent a vinyl sticker or a magnetic panel. A bent-up coat hanger replaces the broken door handle.

Plenty of grime under the hood too, and an old Hills Bros. coffee can and more duct tape used to plug a hole in the intake piping.

It's worn and slightly dingy, but it looks like at least our guy does a halfway decent job of keeping it clean inside, despite some very minor clutter. I didn't want to trash the interior too much, as so little of it is visible once the cab is assembled. If I were to build another one of these I think I'd leave the roof unglued so it could be lifted off for display.

Inspired by my high-school buddy Matt's '85 Buick Regal... the missing interior door panel was replaced with a duct-taped trash bag. The power window switch was fastened to the door with a piece of aluminum bent into an L-shape and some self-tapping screws.
So... there it is. Now all I need to do is wait another 20 years or so and start looking at LoneStars in junkyards to see how close I got it!

-
I love this one. I have a big green Paystar in the works with dual stacks and a sleeper. Mine will be paired up with a Peerless Roadrunner.
-
-
One very heavy duty unit! Those old Autocars always were lovely machines, in a functional kind of way.
-
Nice! Hopefully you can rebuild it one of these days.
Diamond Reo C9064D "Bruiser"
in Model Truck Show Room
Posted
This is a short-nose DR I build using an incomplete kit and a bunch of spare parts. The hood and fenders were cut down, the grille was back dated to the earlier style, and a Detroit engine was used. The rear fenders were made from Plastruct corrugated sheet. Front wheels are modified Ford C-600 units with the float tires from an IH Paystar. The rear wheels also came from the Paystar- I dug out the rear tires from my spares box. It also has White Freightliner mudflaps, because the junkyard didn't have any unmarked or Diamond Reo flaps "in stock" when the old girl was in need of a set.