

41CHEVY
-
Content count
334 -
Joined
-
Last visited
-
Days Won
24
Posts posted by 41CHEVY
-
-
I agree. I can deal with small as long as I'm comfortable. Good lighting, Shelves and storage , music, comfy temp and a lockable door. That combo makes my spot good. BUT my work bench is a 34" by 8 foot and no matter I still end up working in a cluttered 1 foot spot
-
 1
1
-
-
try AITM
-
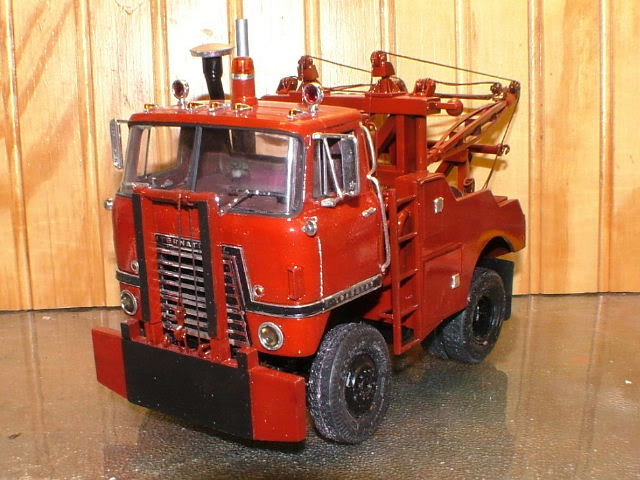
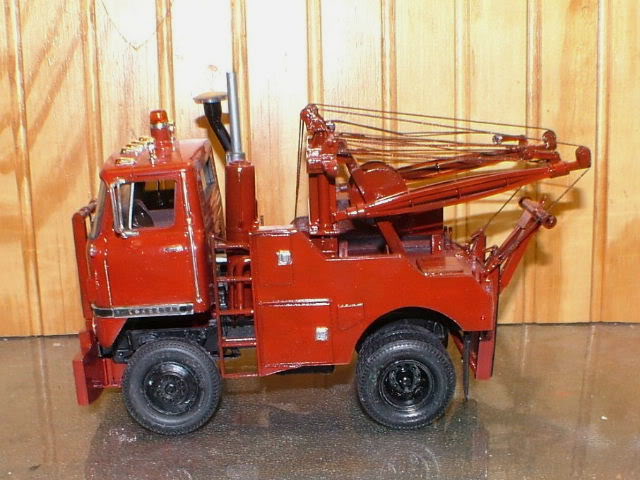
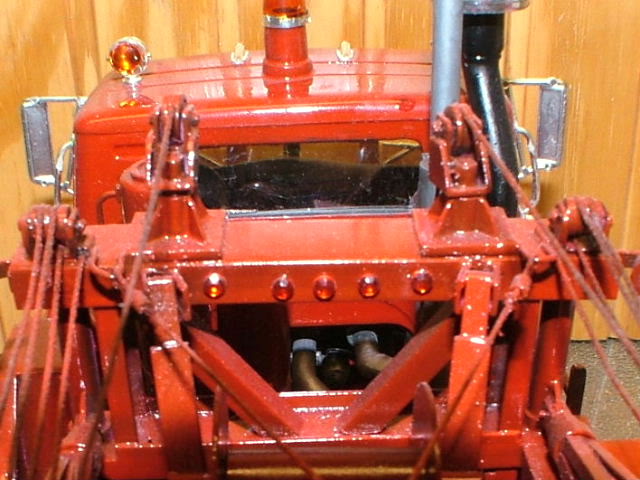
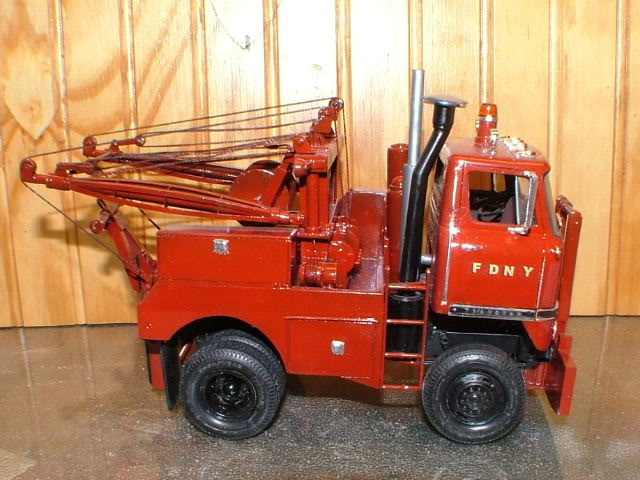
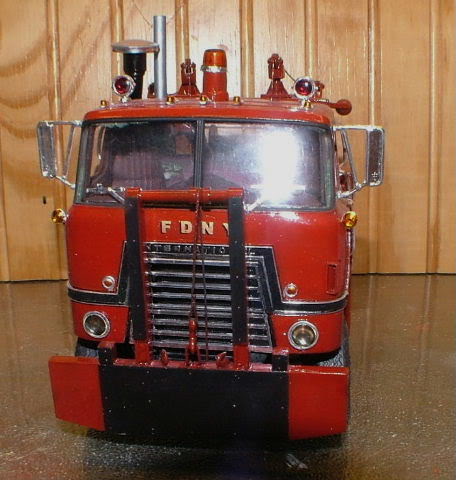
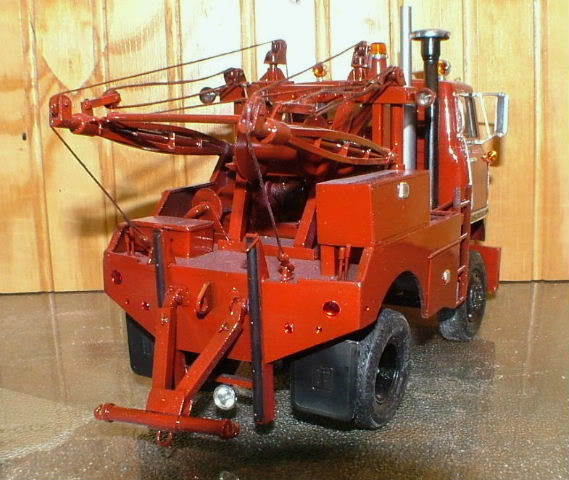
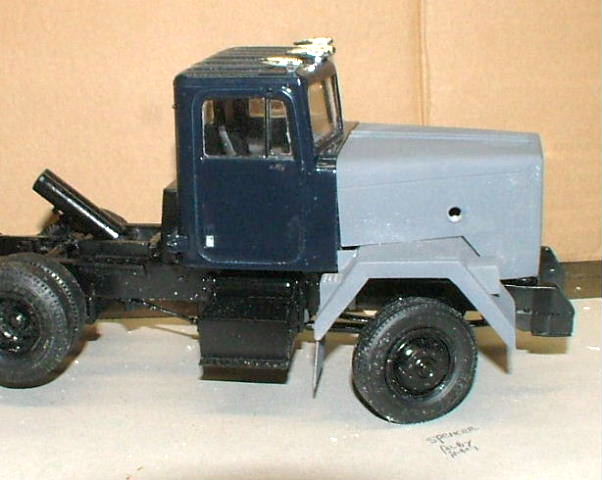
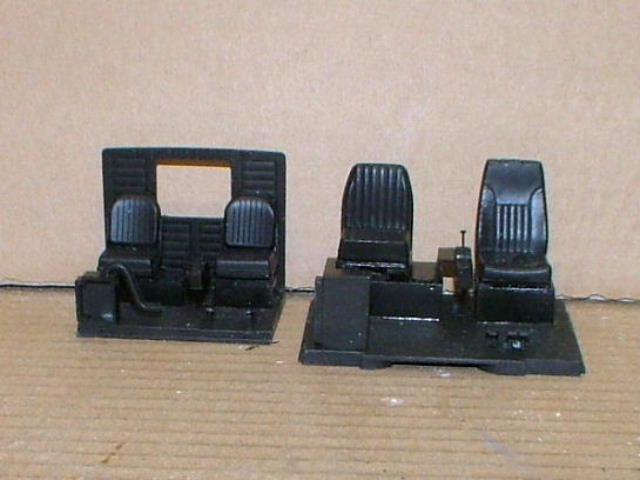
Started with the ERTL kit and first back dated the cab and trim to the 4070A Transtar. The wrecker body is a Holmes 750 built to FDNY specs. It is most all scratch build. This is what FDNY used for bridge and tunnel wrecks. Wrecker consists of foam unit, person breathing air, and 80,000 lb winch unit. They are only on a 95 inch wheel base so the unit can turn around in a tunnel. it can tow a loaded semi. Power is a 6V92T with an Allison auto.
-
2
-
-
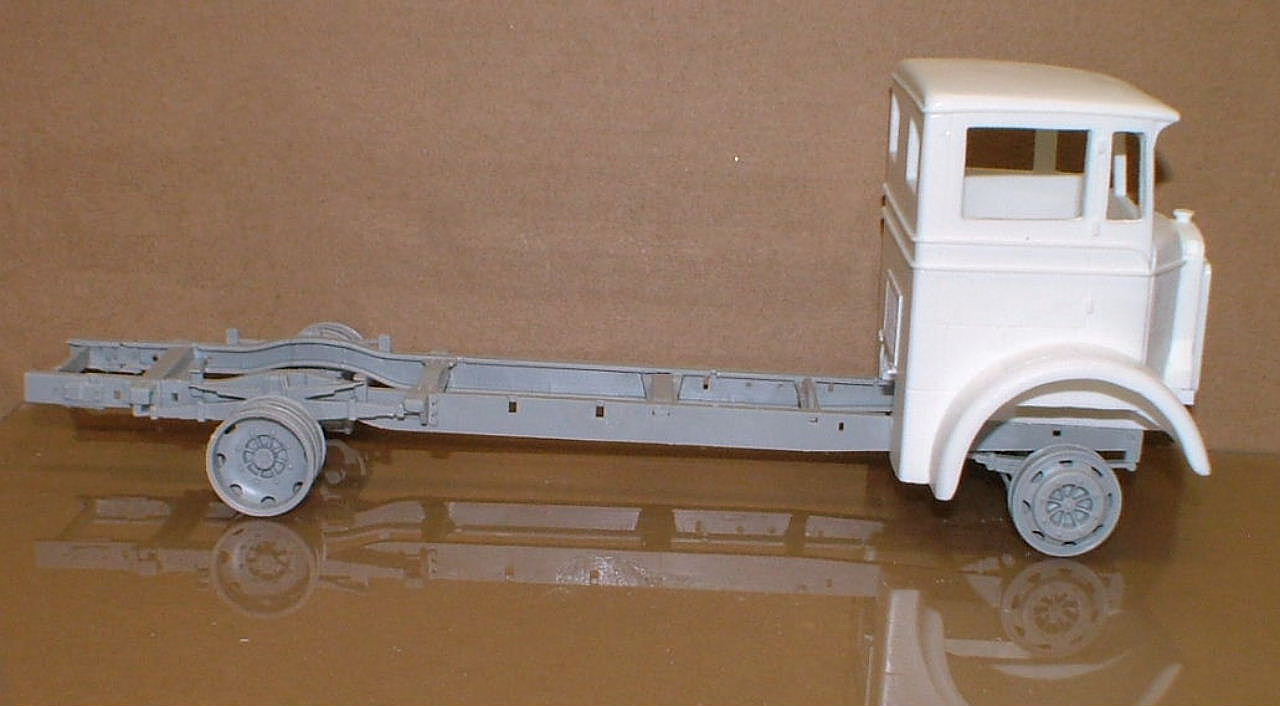
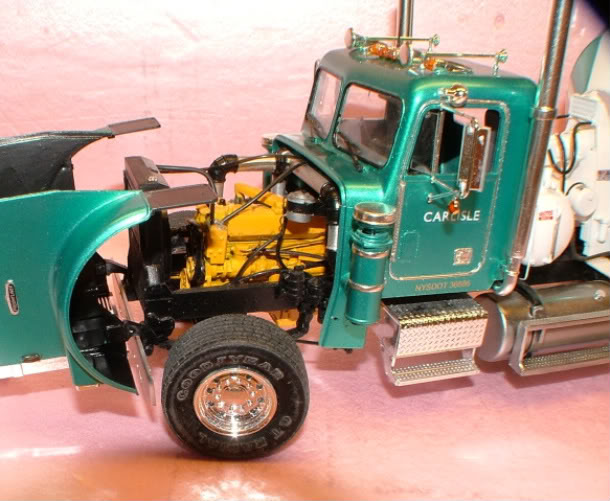
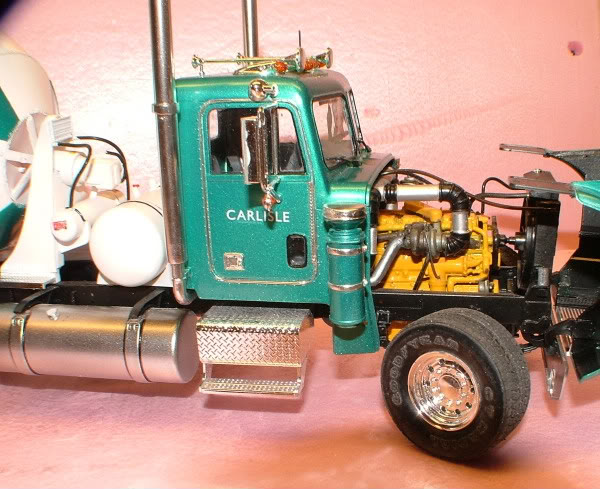
Body and chassis are assembled. This pic is close to the true color. Still in the process of making the 30's style big stop light, a pail and some more goodies for the racks.
-
Nice work on the Fabco! I'd forgotten all about those units.
-
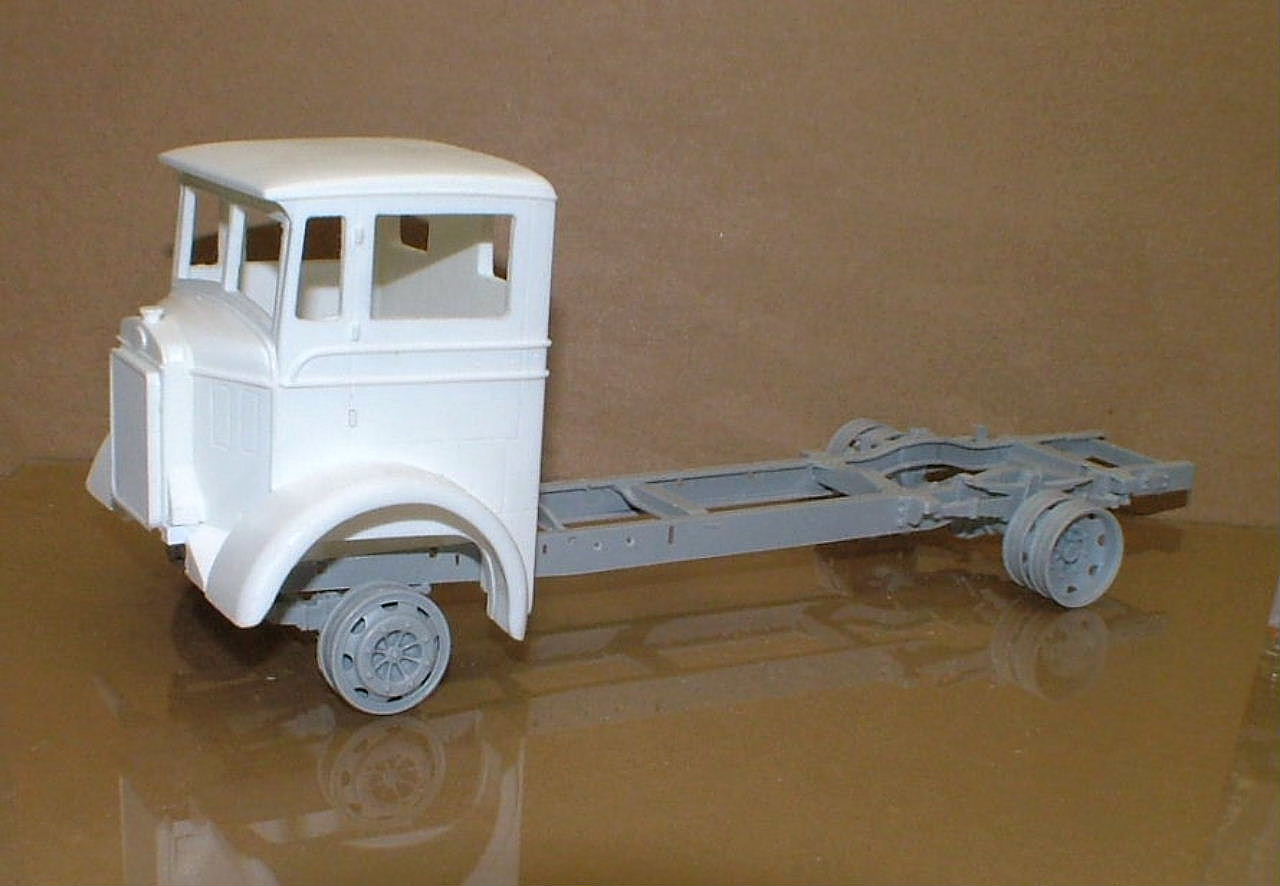
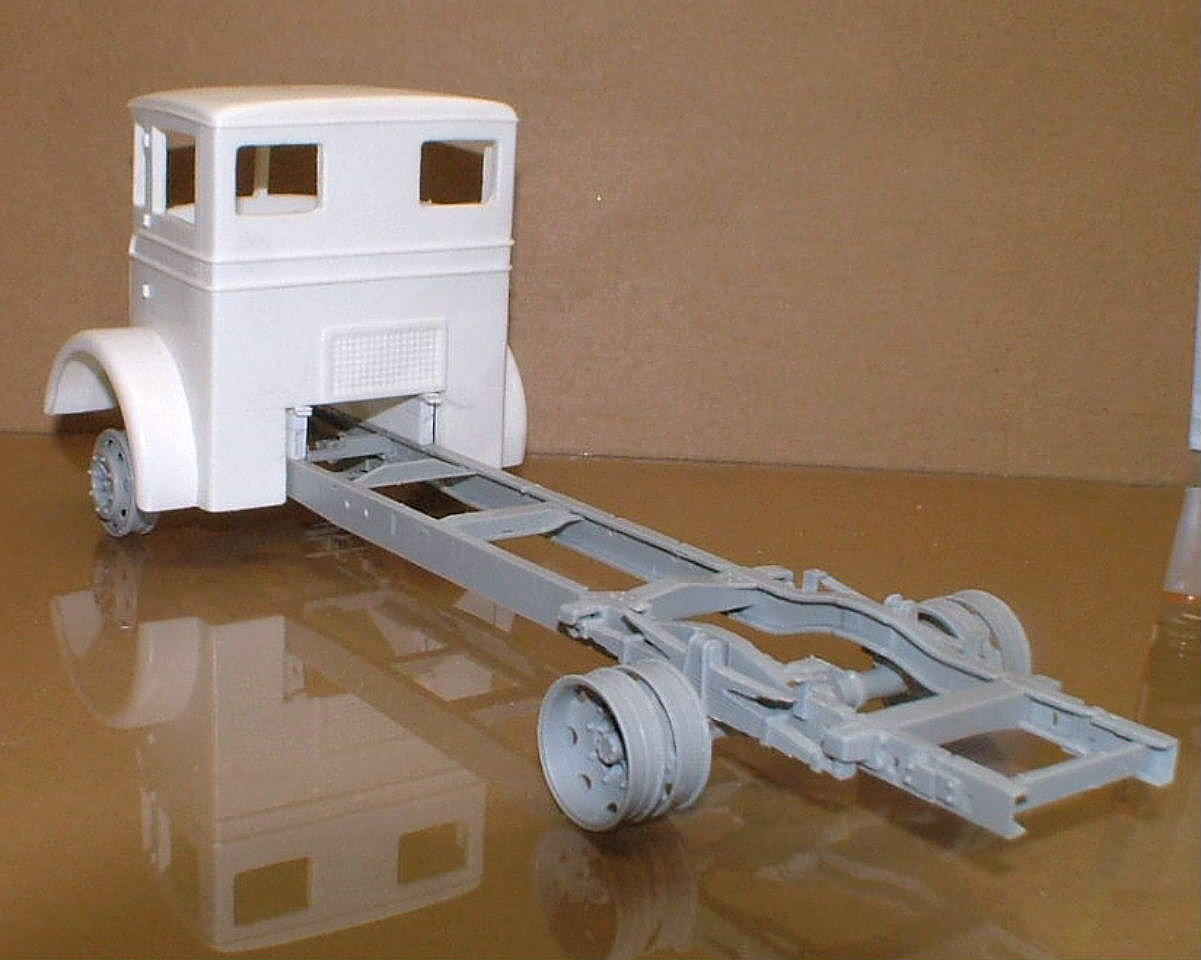
Got the modifications done to the chassis. Converted it to left hand drive, spare tire mount, shortened the tail end 3/8 inch, added MACK fuel tank and a battery box on the left.
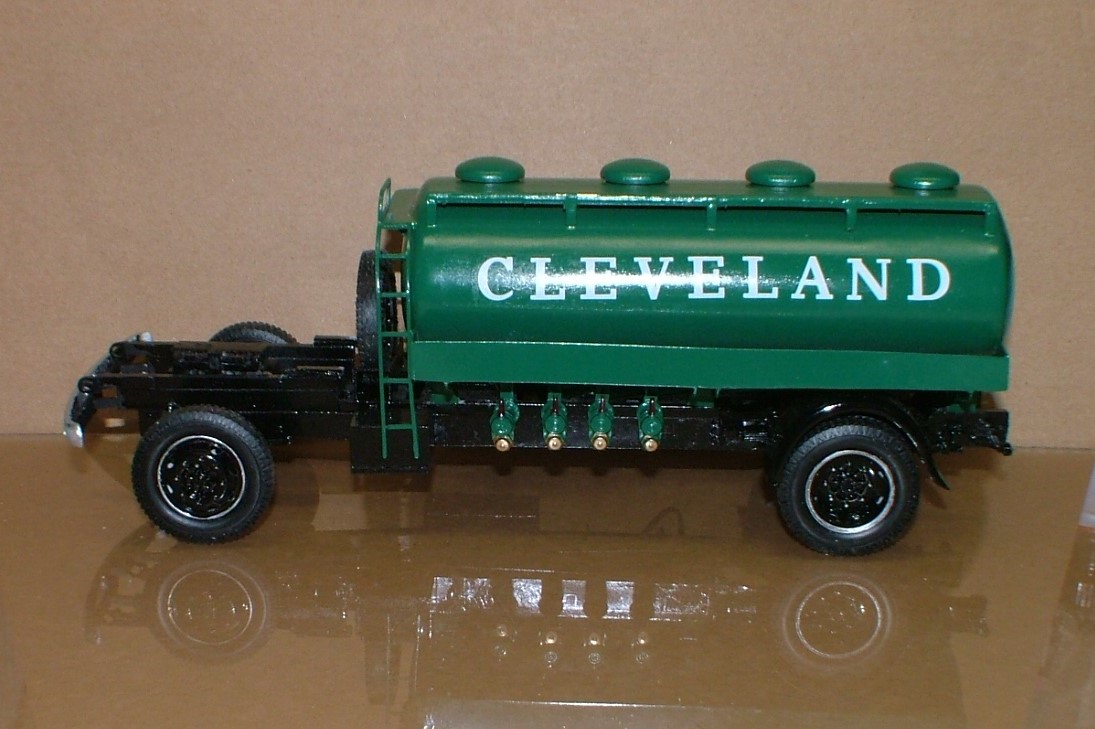
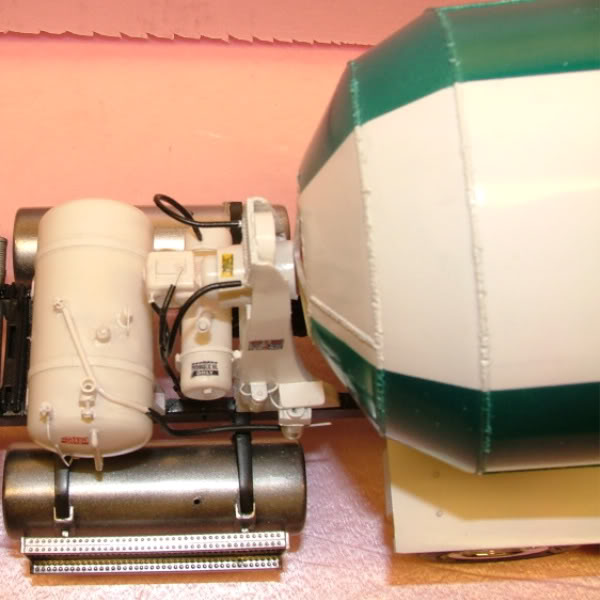
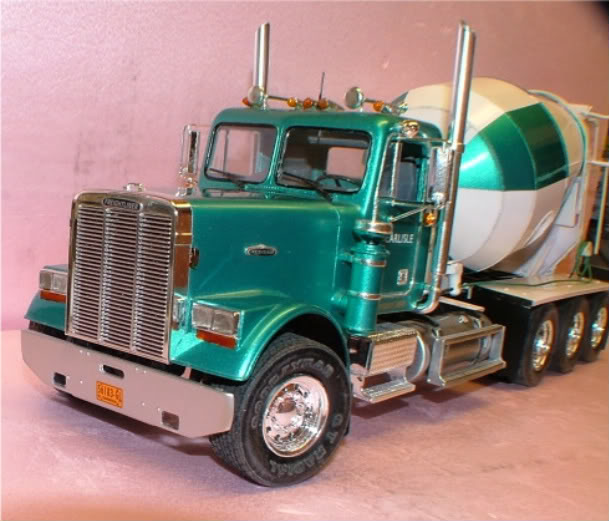
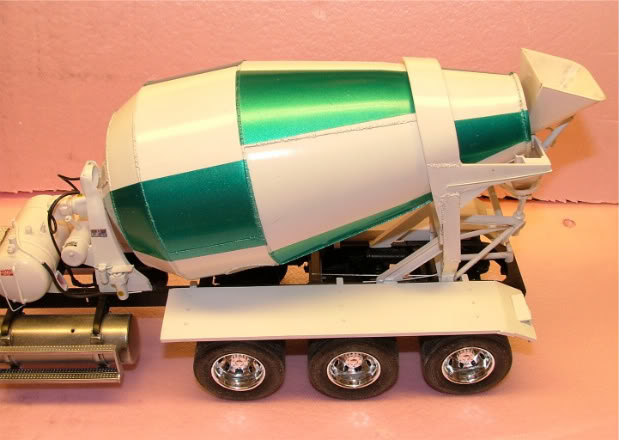
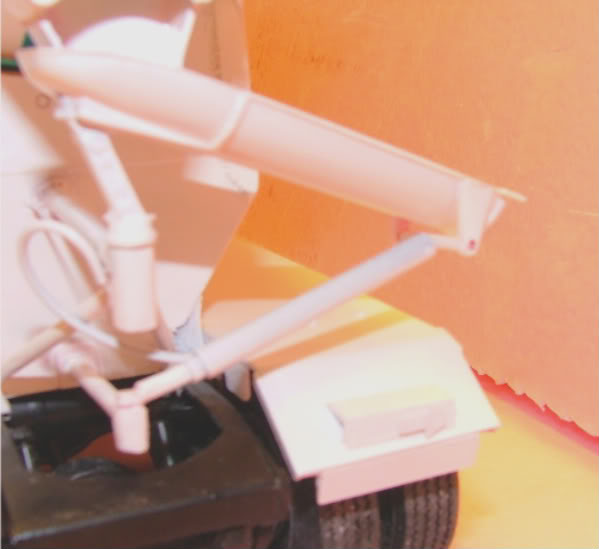
The Tank is finished except for detail painting. Add racks on the right side for 5 gallon cans of Kerosene and oil. made the cans for Evergreen 1/2 square tube a piece of 030 for the top and a sliver of .100 rod for the caps. Added on the left a hose rack for the four dump hoses. Made a hose reel and meter for the right side. Now we need to make a fuel nozzle a pair of "drip buckets and a large "STOP" light for the center of the tank. The green came out 2 shades lighter in the photo. It is actually called Dark Forest Green from ACE Hardware. Paul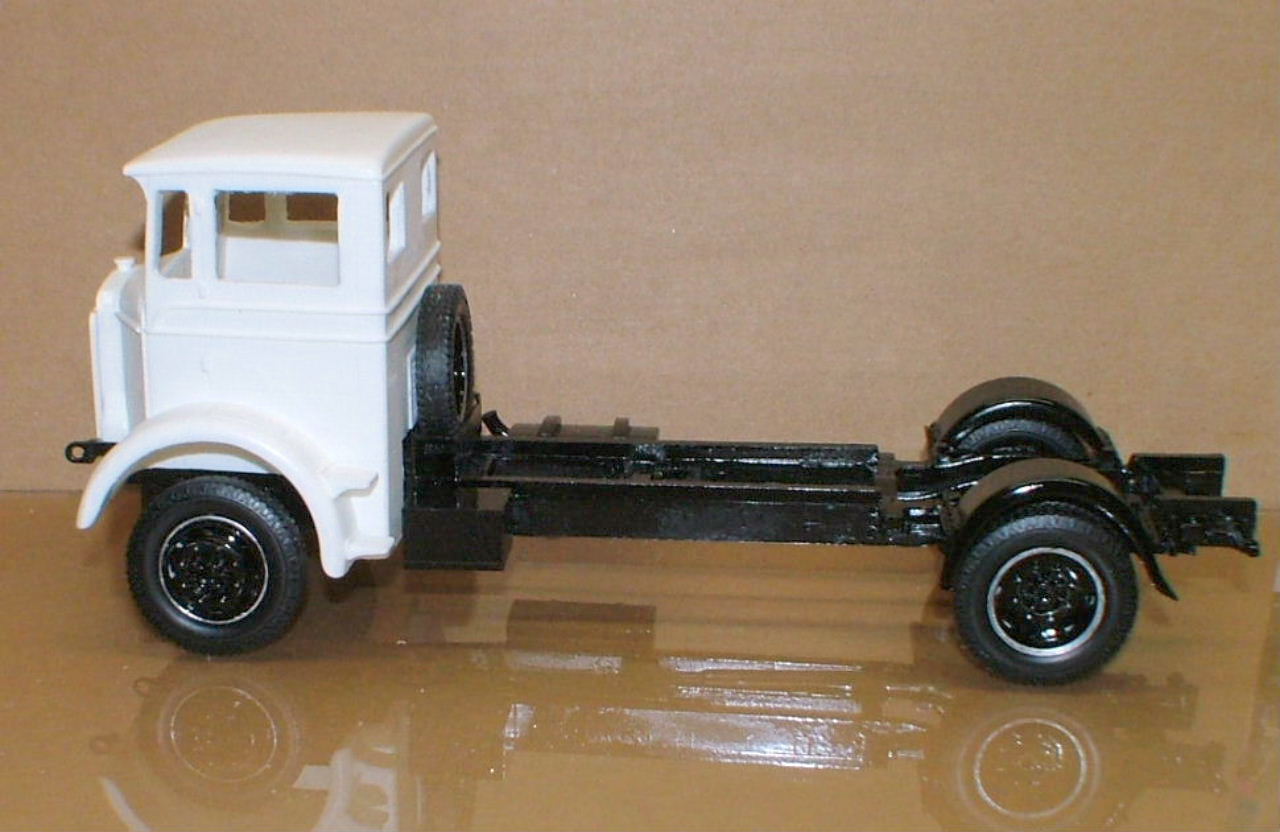 Hosted on Fotki
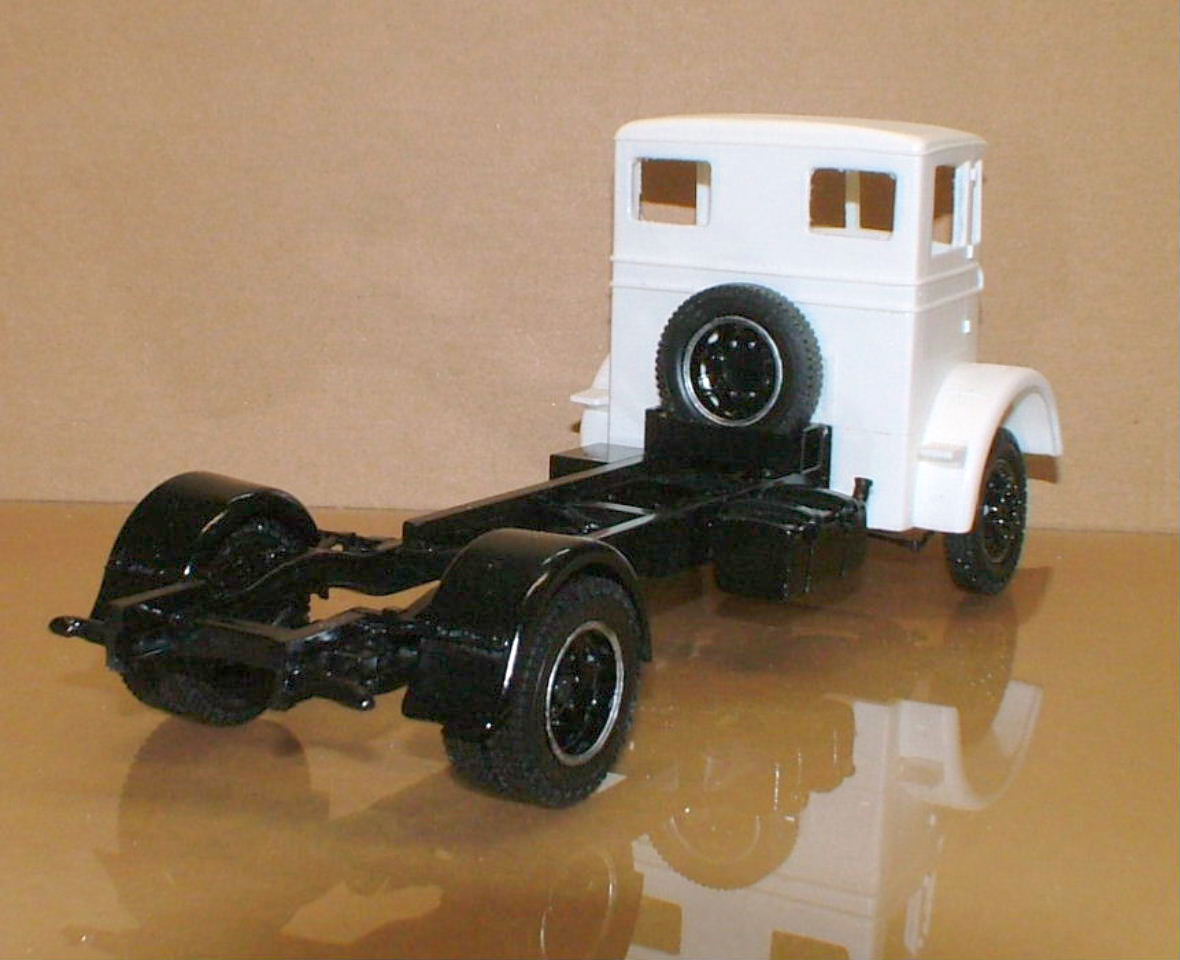 Hosted on Fotki
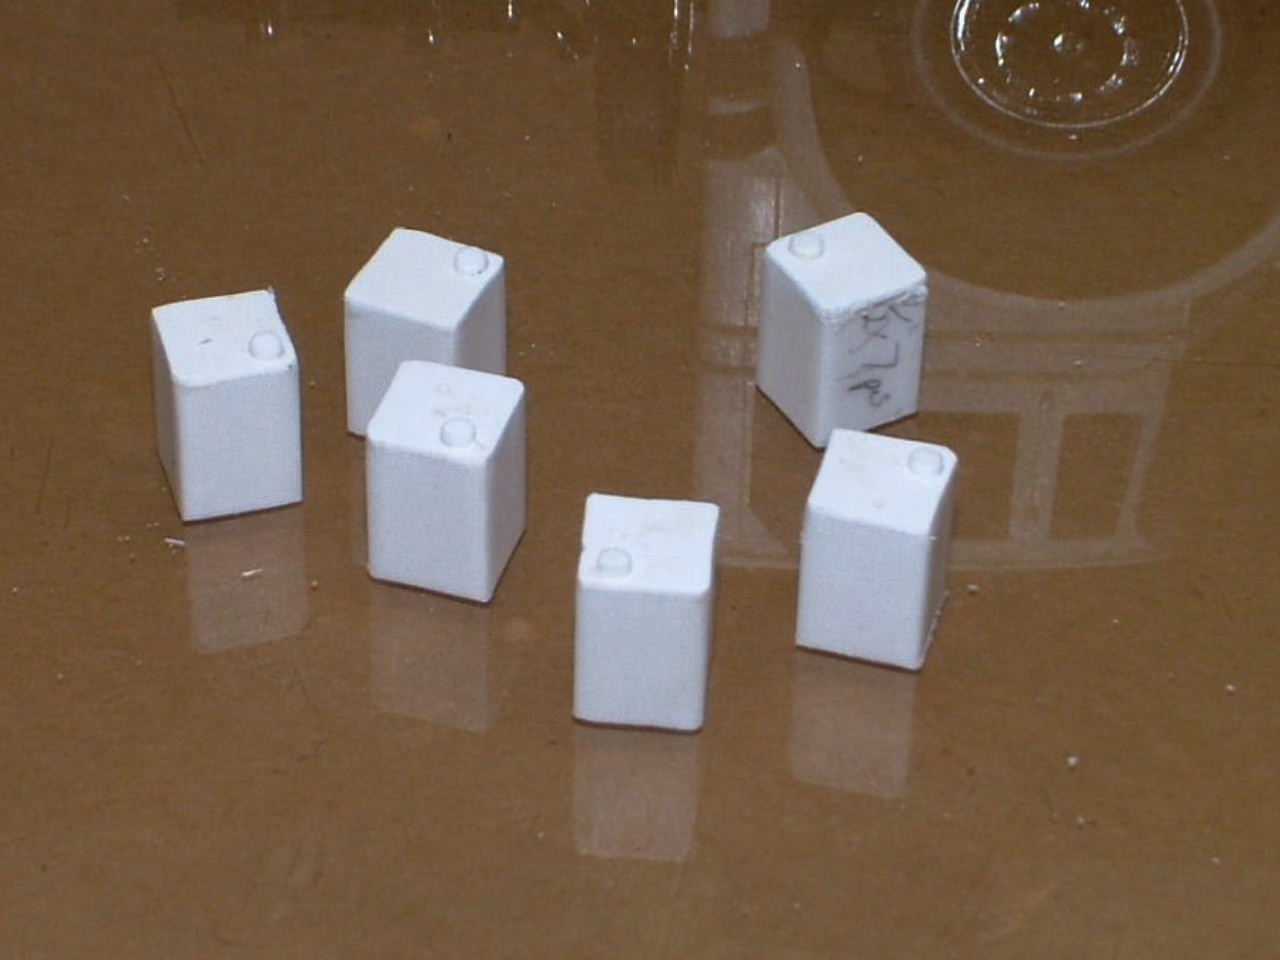 Hosted on Fotki
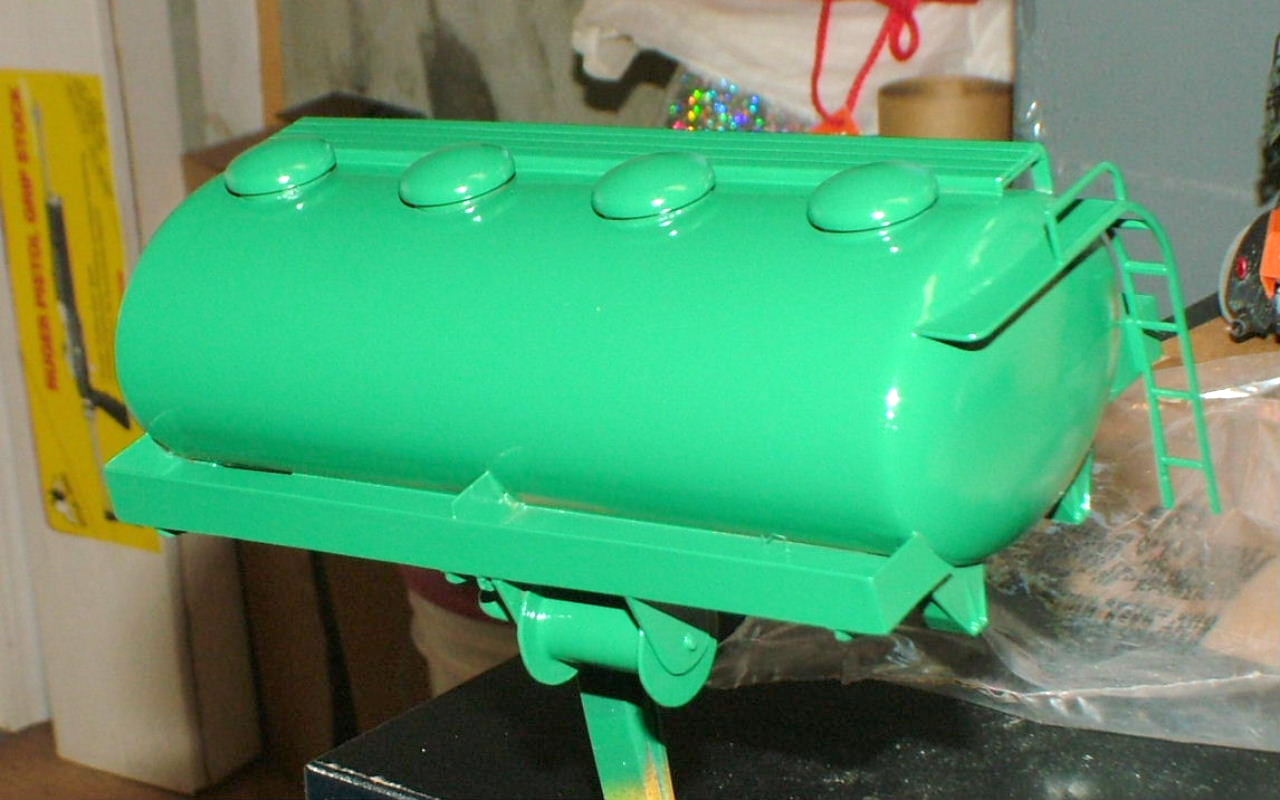 Hosted on Fotki
-
4 hours ago, plastic trucker said:So are you using the Bedford tanker body, being that this is the Emhar frame?
Yes a fair bit of it, with parts for home oil delivery scratch built instead of the gas dumps. Mainly a hose reel set up, a meter and a rack for "lamp" oil cans and lastly full fenders with skirts.
-
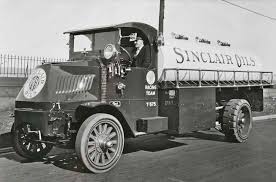
An oval tank set up with hose reel, meter and bulk dump tubes. Tanker truck bodies go back to the early teens, This is the lay out but much earlier than my build. Paul
-
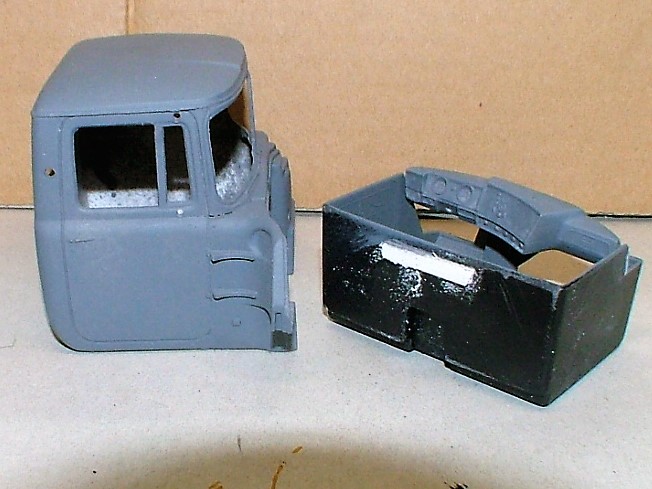
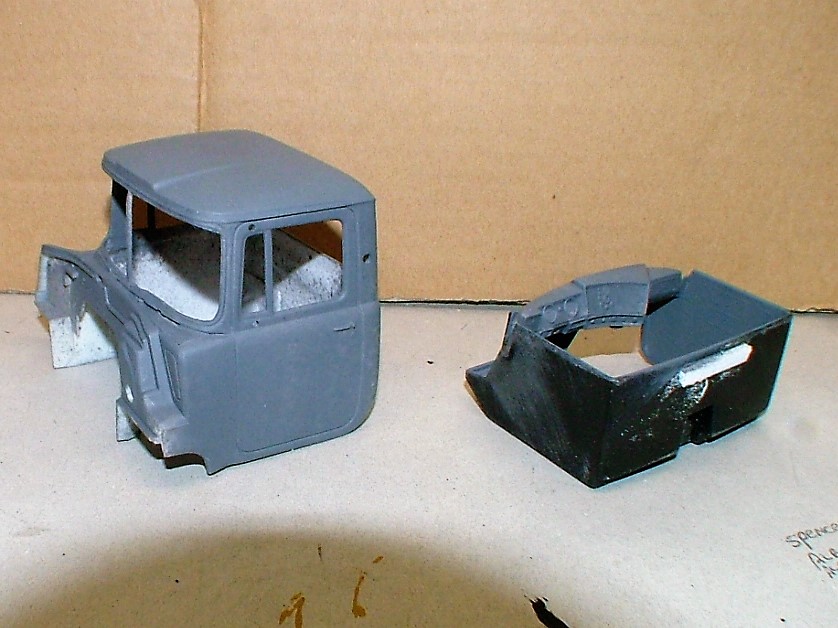
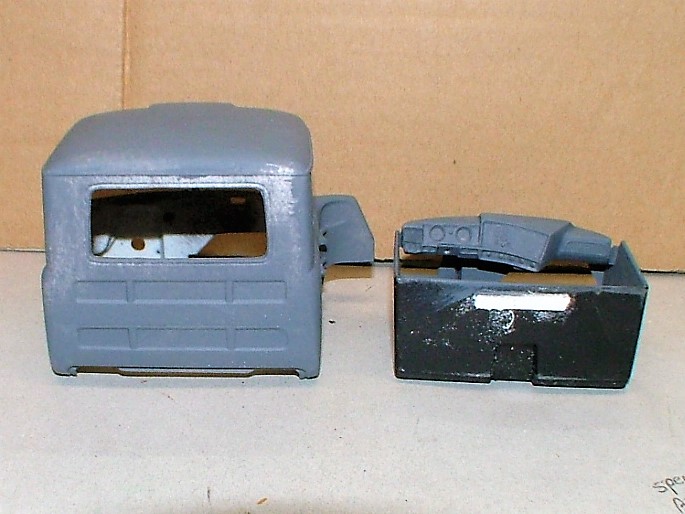
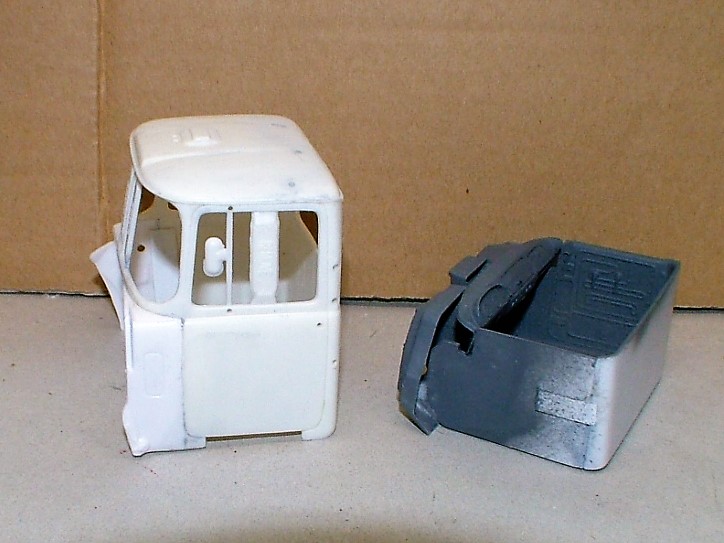
This is an AITM body that I am using an ENHAR chassis and suspension as a basis for a 30's NYC Heating Oils delivery truck. Paul
-
1
-
-
Saw this type of truck in photos a friend took while in Central Africa. Thought it would be a cool exercise in weathering and multiple color body panels. Apparently as long as they move any other item (like headlights) is a luxury. Paul
 Hosted on Fotki
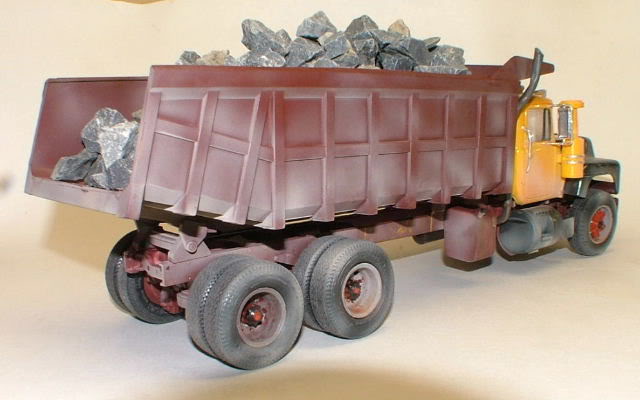 Hosted on Fotki
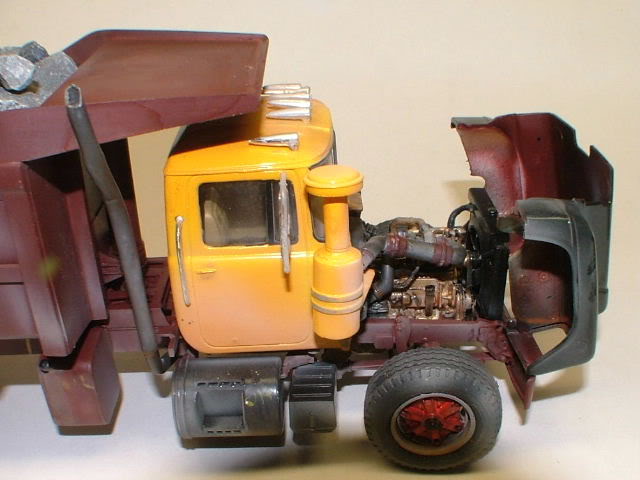 Hosted on Fotki
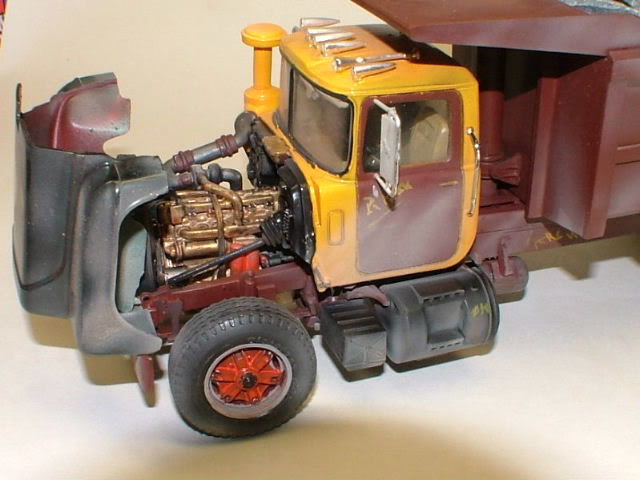 Hosted on Fotki
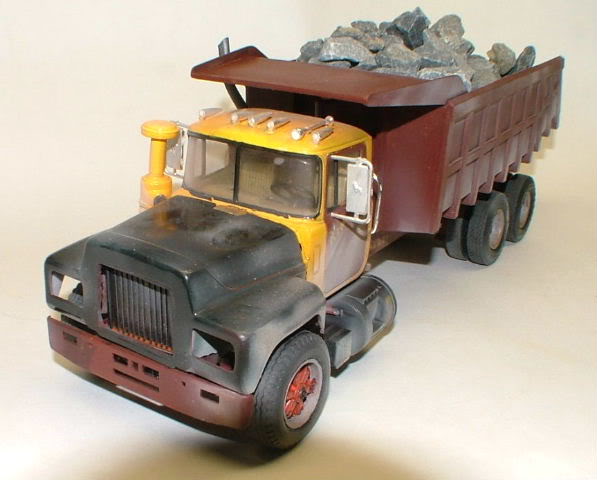 Hosted on Fotki
-
This is Trumpeters 1/35 kit I bought as reference to do my 1/25 version. Funny but it's got better details than almost all 1/25 kits, Pro and LoneStars included! This is OOB 100%.
-
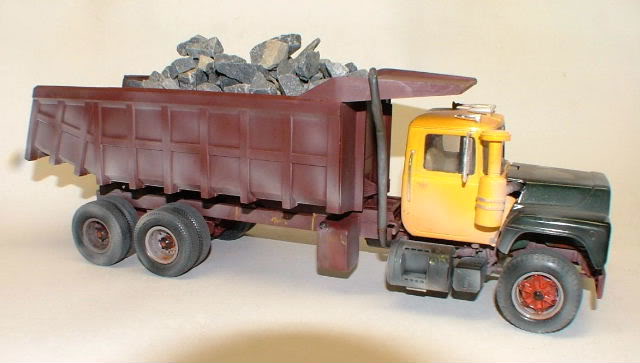
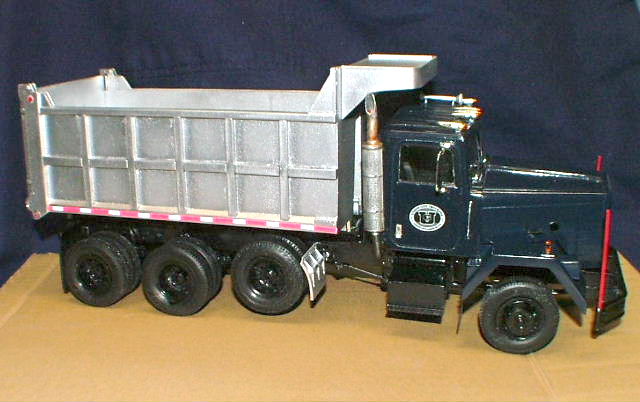
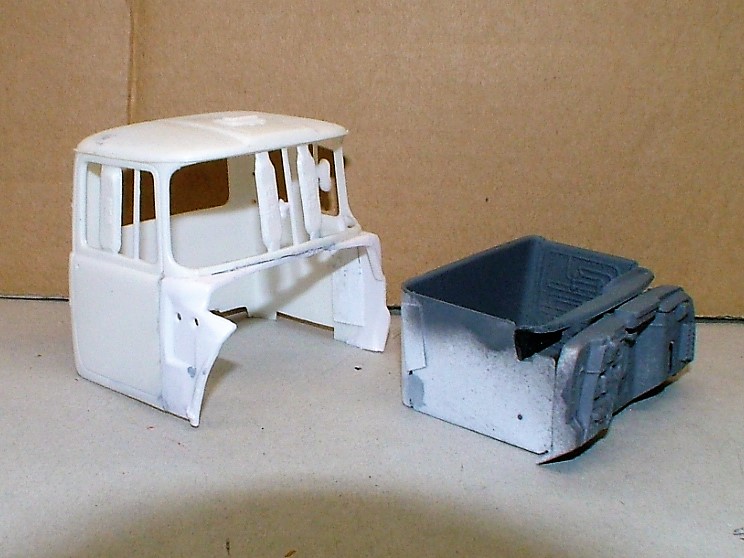
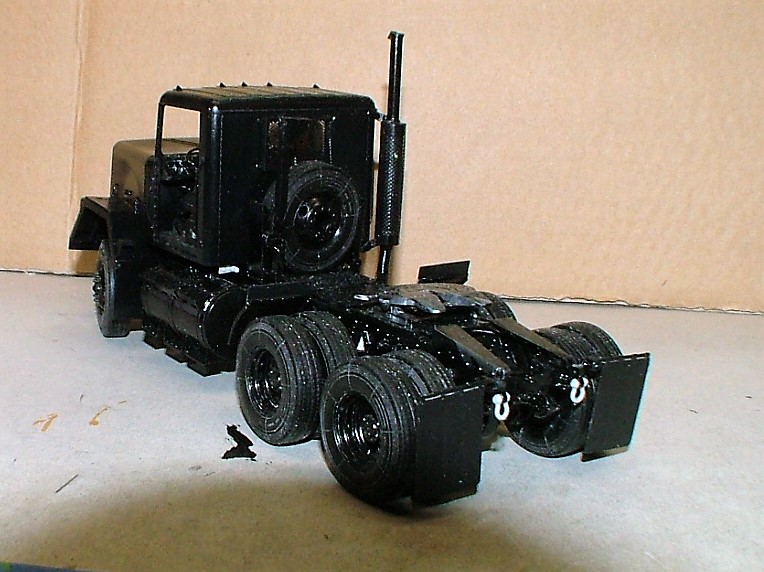
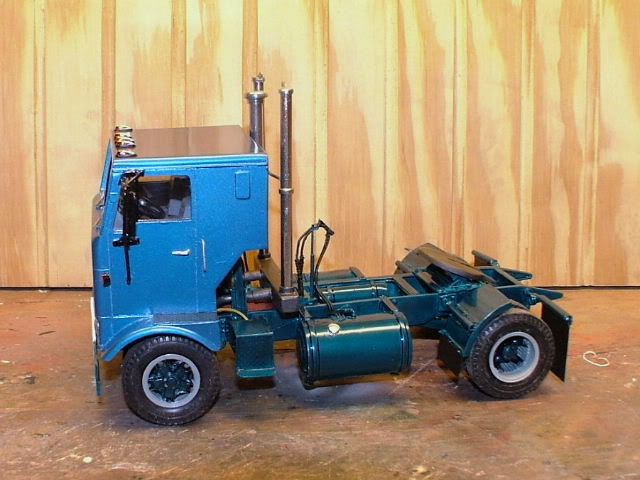
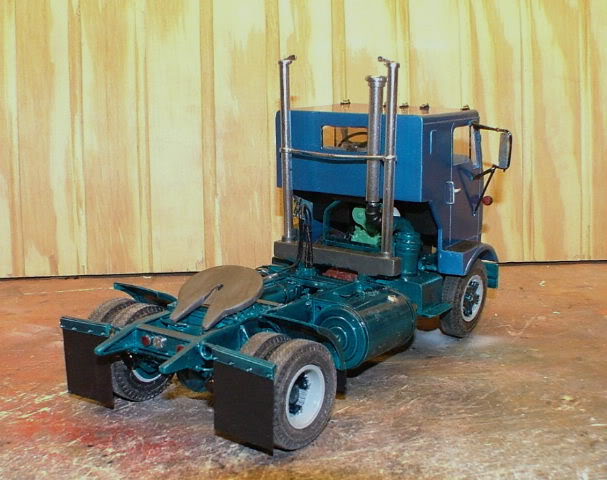
The 1974 AMT R685 MACK was converted to the earlier steel dash "short Cab" by swapping the R cowl onto the rear of the DM cab. The interior was back dated to the steel dash,early seats and twin stick. The Rears were changed to the DM 58,000 lb. the steer axle was swapped with a narrowed DM 18,000 lb one and the trans was changed to the "quad box" 5 /4 twin stick unit. I left the air start tank in too. The idea was to do a heavy duty R in a sand pit or quarry roll. I'm starting a5 axle Michigan style dump trailer for it.
 Hosted on Fotki
 Hosted on Fotki
 Hosted on Fotki
 Hosted on Fotki
-
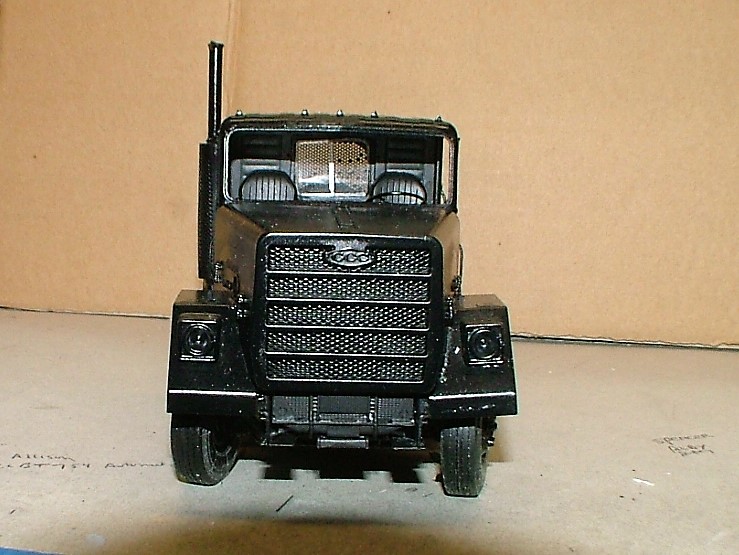
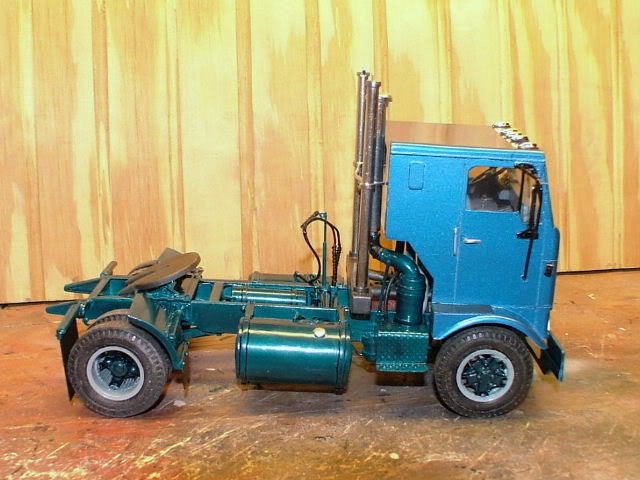
The 1970 AMT DM600 was converted into a 1983 U 600 with the late "plastic" dash and late seat patterns, The cowl from the DM was swapped onto the R685 cab back. The 38,000 lb. light suspension from the R685 along with the 12,000 lb. steer axle. The 5 speed trans was also swapped in. To give the fleet look and to be just plain different, I used the under chassis exhaust. When the Moebius 53 foot trailer is finished I'll add the Air Lines and light hook ups.
 Hosted on Fotki
 Hosted on Fotki
 Hosted on Fotki
 Hosted on Fotki
 Hosted on Fotki
 Hosted on Fotki
-
-
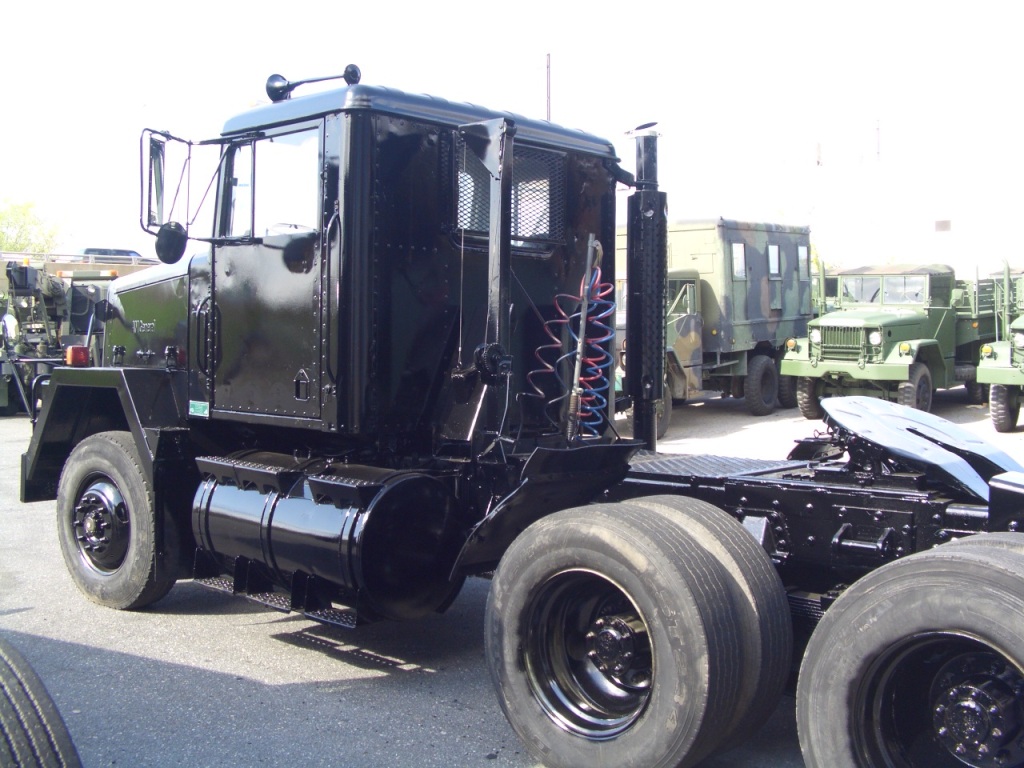
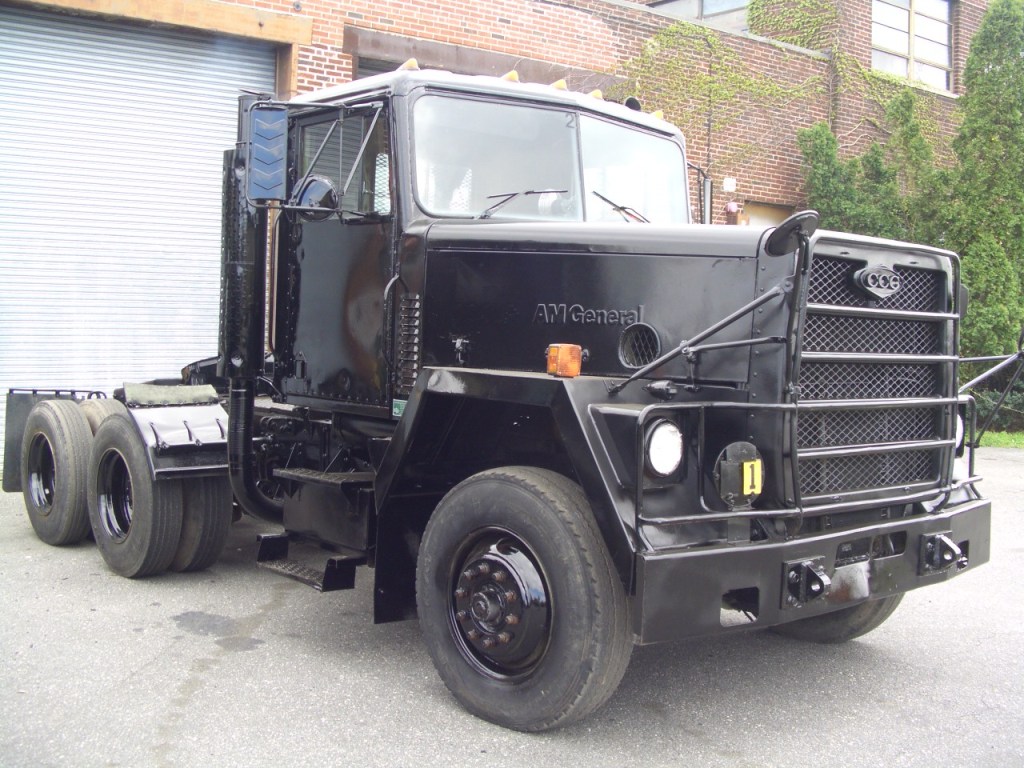
Done. Temporary teaser photo's I need to make my photo background a bit bigger for this truck! Modified cab and chassis. scratch built lift axle, interior, dash, nose and front fenders. Surplus ex military with coal body. Better photos coming the end of the week. Paul
 Hosted on Fotki
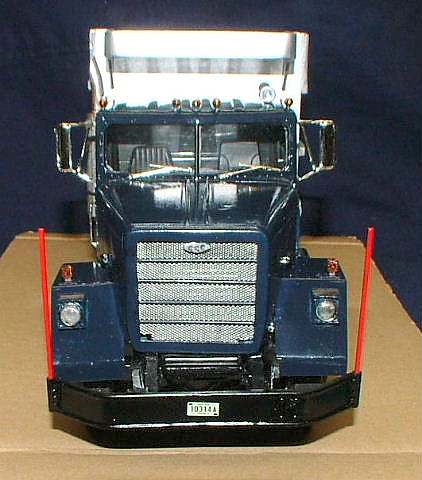 Hosted on Fotki
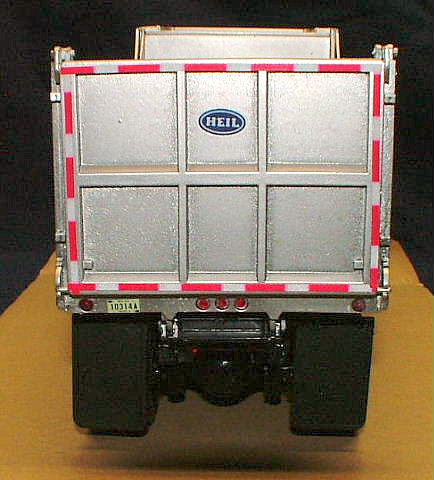 Hosted on Fotki
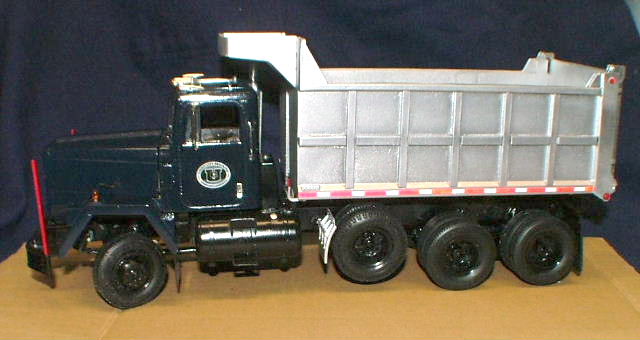 Hosted on Fotki
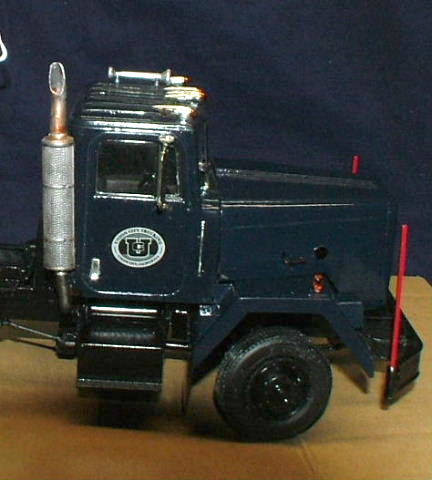 Hosted on Fotki
 Hosted on Fotki
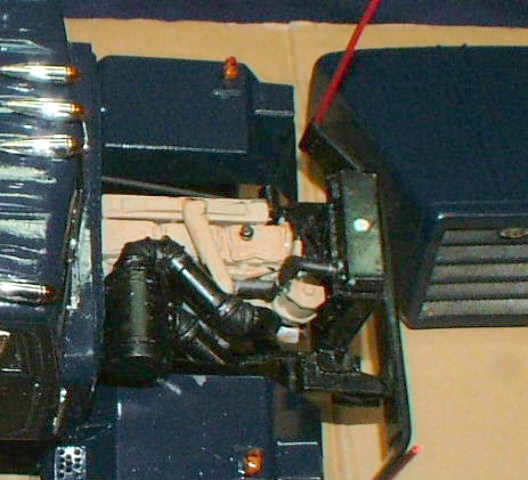 Hosted on Fotki
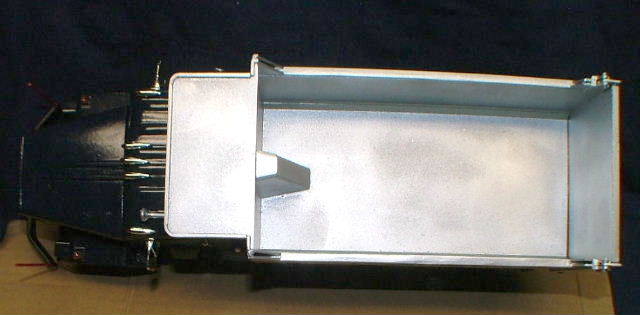 Hosted on Fotki
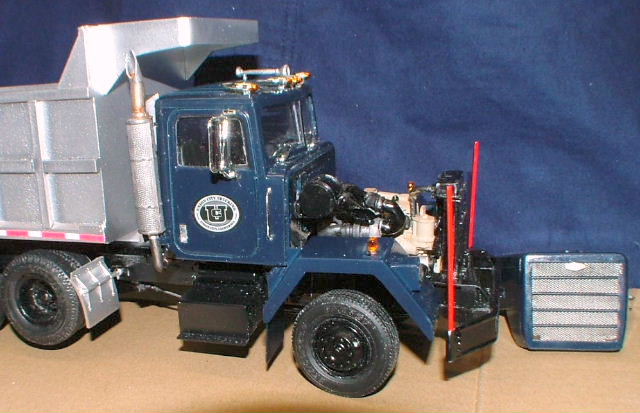 Hosted on Fotki
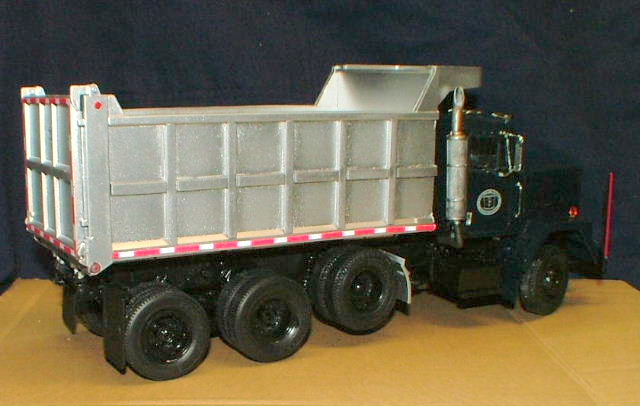 Hosted on Fotki
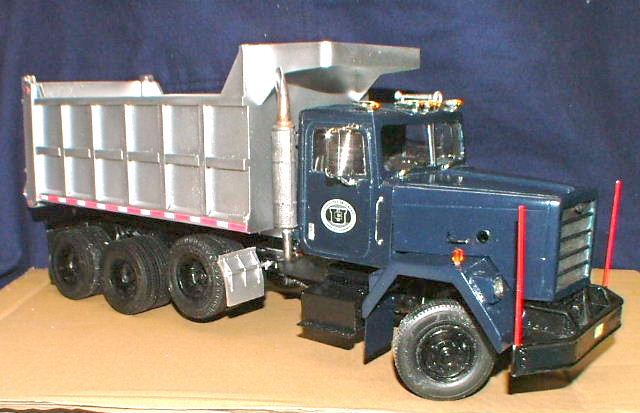 Hosted on Fotki
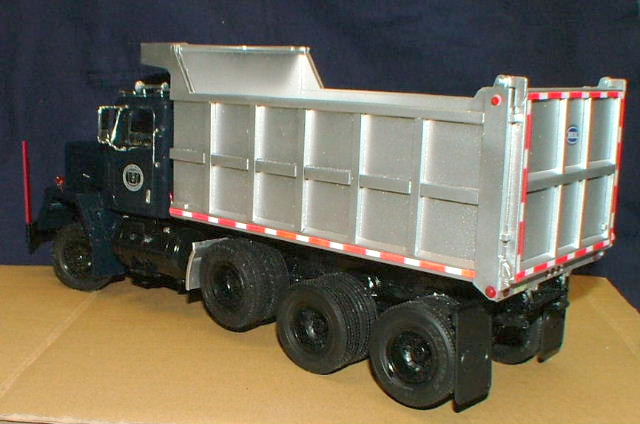 Hosted on Fotki
-
1
-
-
Aside from the modified Rex drum the balance of the drive and accessories is all scratch built. Paul
-
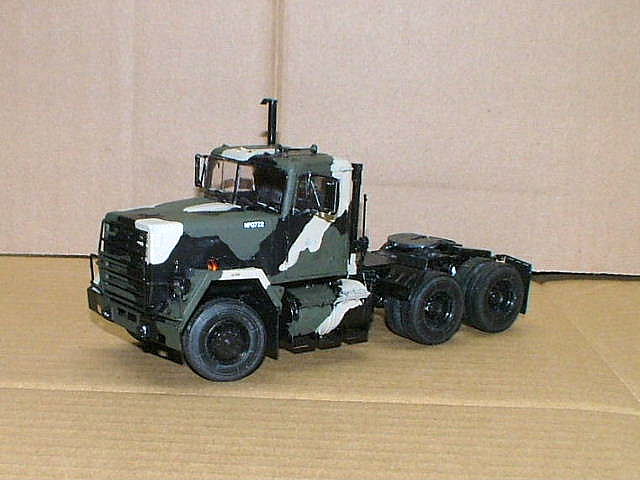
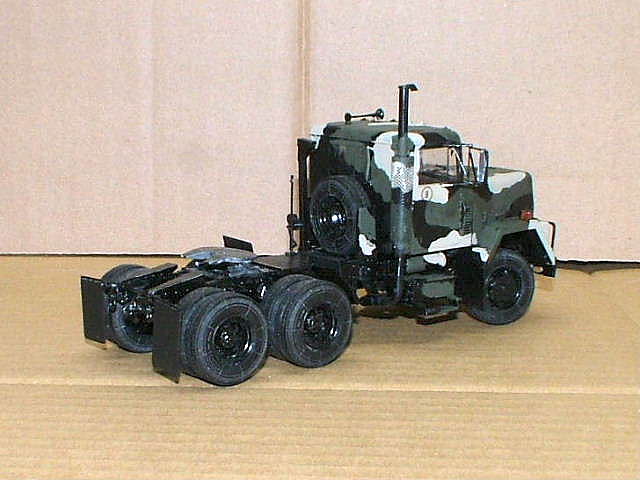
Because I can't seem to do one or two projects at a time and the M917 /915 projects are in the fiddly stages I started this.
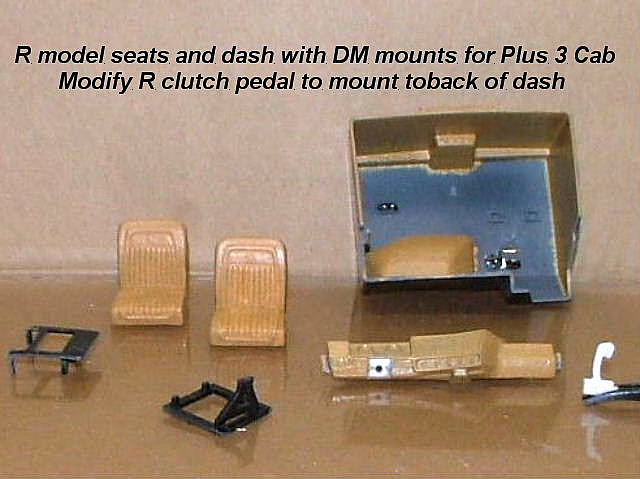
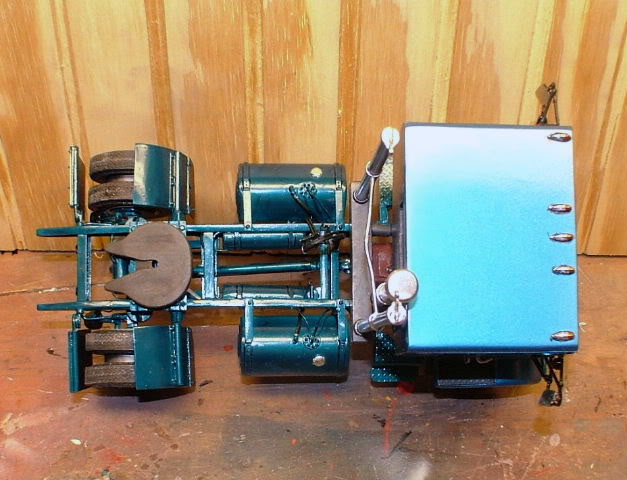
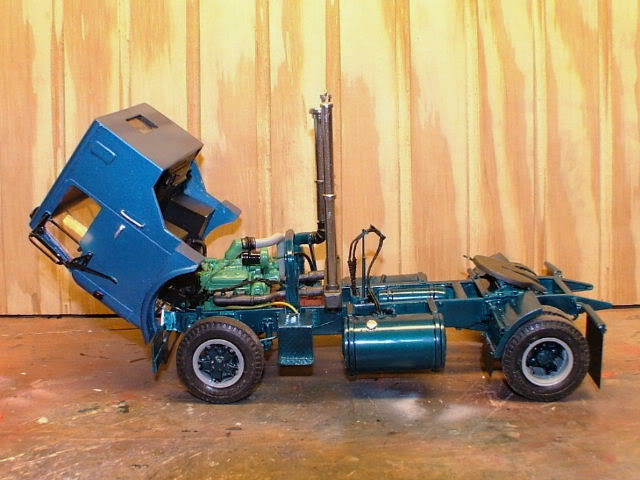
In 1973 MACK went from the flat back cabs like the AMT DM 6 and 800's have to the Plus 3 cabs (they were 3 inches longer for the driver comfort). I'm making the R685 into a 1969 Steel Dash flat back cab and the DM600 into a 1975 U-600. The biggerst asset to this conversion is a .005 thick Gyro saw for the Dremmel.
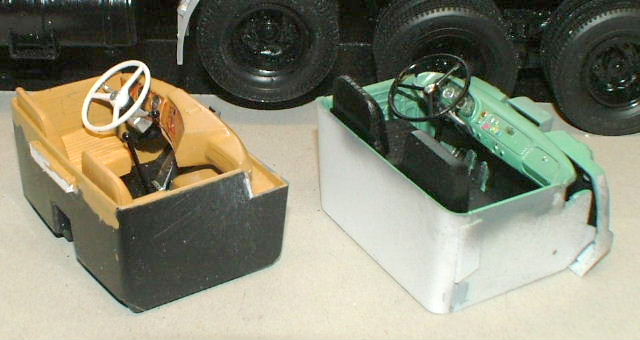
First step is to cut the fronts of both cabs off at the front door line and at the base of the windshield.swap and reglue the fronts on the opposite cabs. The DM interior needs a 1/8 inch shim on the rear to fit the plus 3 cab and the R interior needs a 1/8 inch to zero pie cut out of the reas sides to shorten it to fit the flat back cab.
The interiors now need modifications to update the DM and back date the R. The DM needs to had a 3/16 piece of .020 plastic glued on the right side to hold the passenger side of the R dash. The DM interior is 1/8 inch wider. The shifter holes need to be filled to use the R 5 speed shifter. The R dash needs the filler cut off where it fits under the windshield originally. The R clutch pedal needs to have the pedal arm cut off and glued back on 180 degrees around. The part than glues to the dash instead of the DM firewall The seats from the R are used but you need the DM seat mount frames. The R steering wheel is also needed for the smaller diameter and the late horn button.
The R interior needs the dash mount slots cut 1/8 inch deeper to lower the steel dash down a bit. Seat mounts are the R mounts with the DM seats used. The DM steering wheel is used for it's larger diameter and early horn button. Use the stock DM clutch pedal and the DM shifters. The reason for the shifter changes is the R ends up with the DM 5/4 Quadbox and the DM/U ends up with the 5 speed from the R.
-
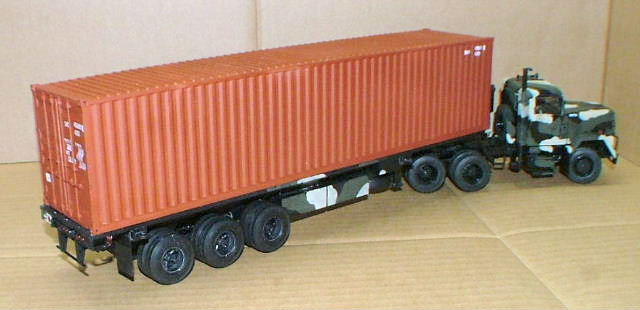
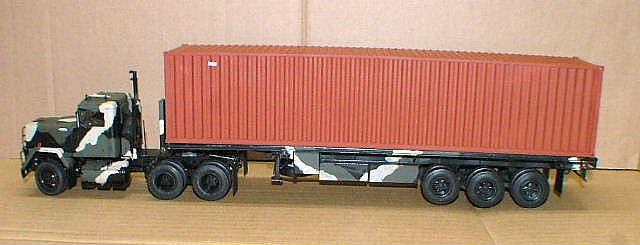
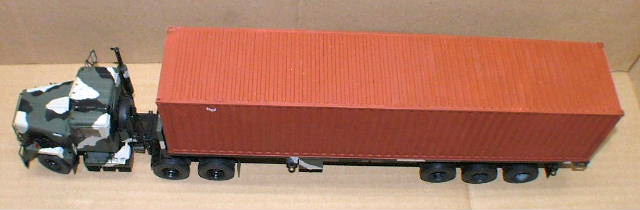
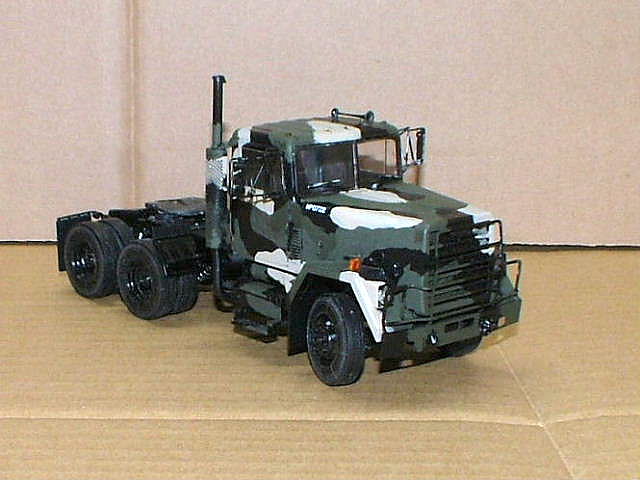
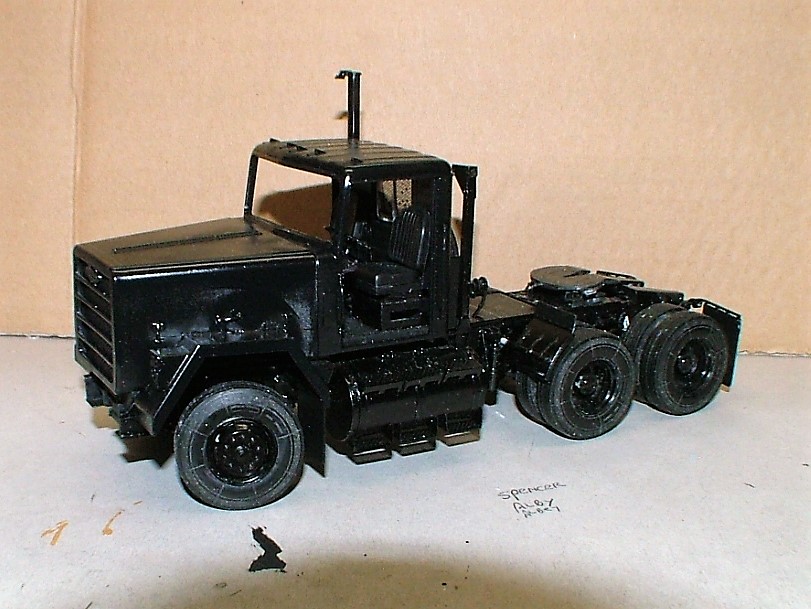
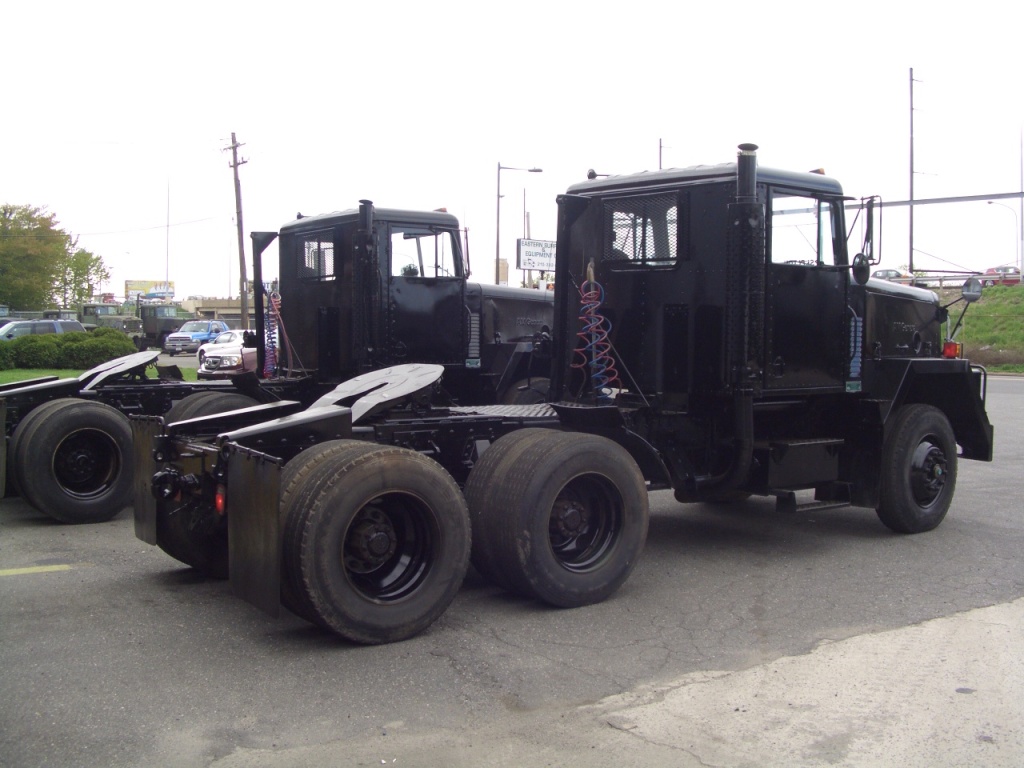
The 1/35 is in the first color of NATO Black. I saw 5 of these at Eastern Surplus and Equipment in all black for export to the Middle East and Africa. I may do it as one of hose. Paul

-
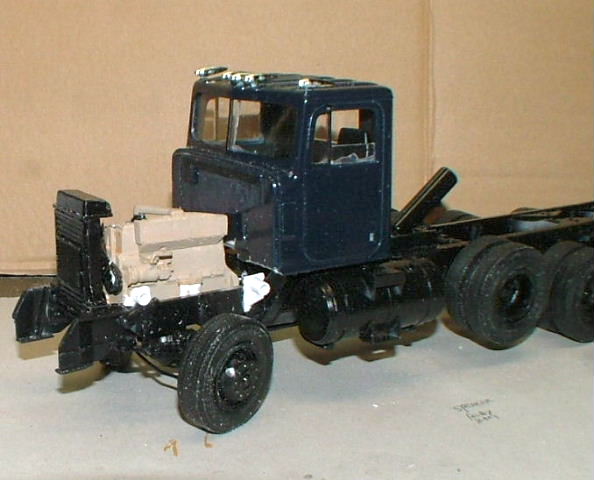
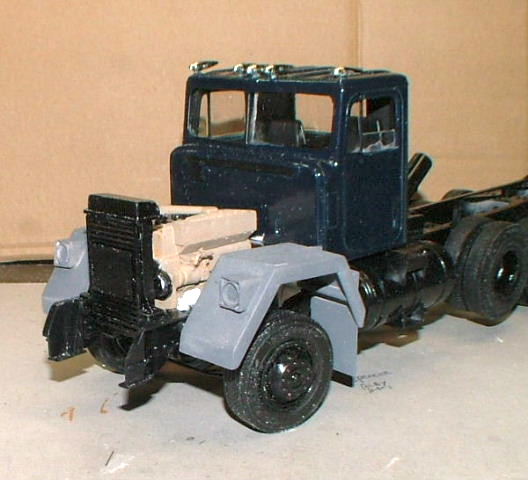
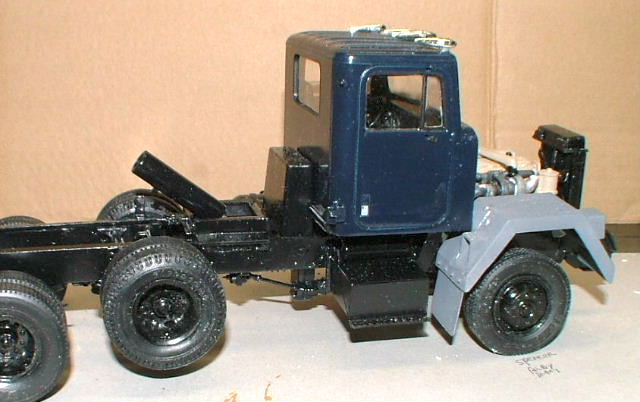
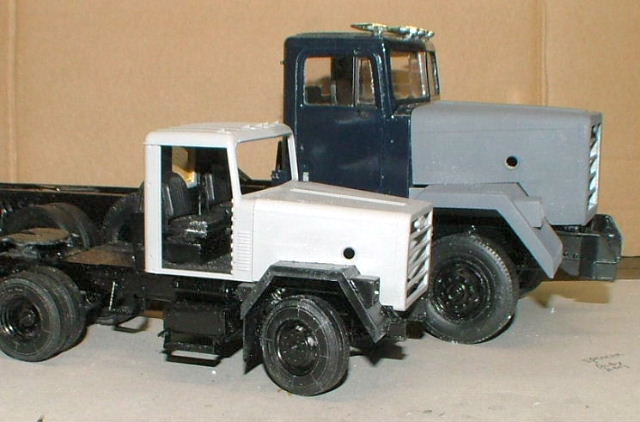
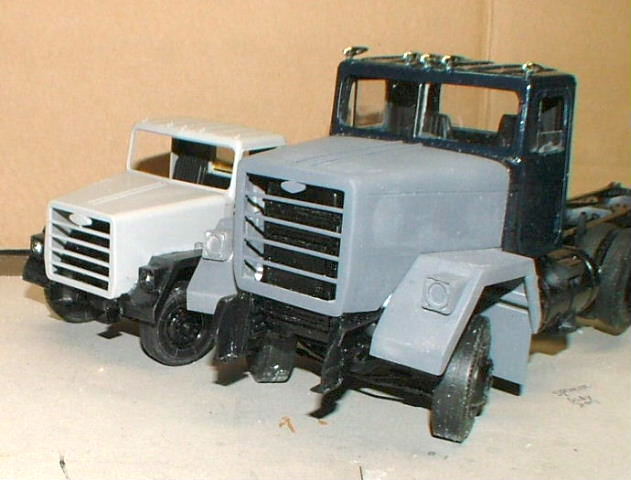
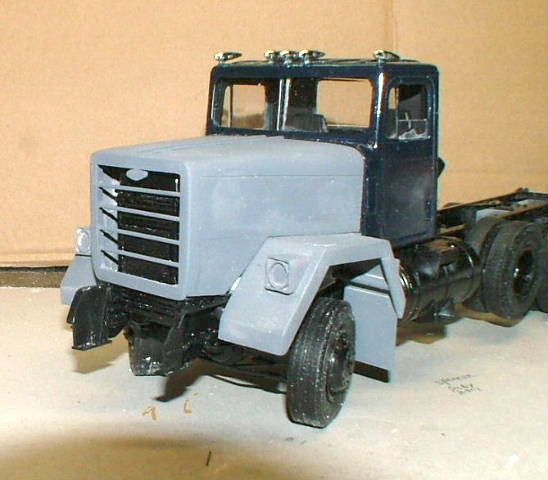
Up on wheels, cab and interior are painted, assembled and located on the chassis. The fender mounts are done there is a few modifications to the fender to cab area but it is pretty minor. I had to make tthe fenders so they will slid in to mount to do the paint and fit the hood assembly. I had to lengthen the I.H. hood over a scale foot in the front and add 6 scale inches to the height of the side panels The hood and grill are done less the line scribbling and mesh installed. Air filter housing, piping and elbow for exhaust stack is next. Paul
-
1 hour ago, DRIPTROIT 71 said:I didn't receive the PM, so I PM'd you to see if that would go through.
Thanks though!!
I'll resend tomorrow and post the pages here too. Paul
-
16 hours ago, DRIPTROIT 71 said:Wow!! Yes I would!!! Thanks!!!
Sent them in a PM. Let me know if they got through. Paul
-
6 hours ago, DRIPTROIT 71 said:Awesome Build!!! Your work on the frame and chassis is incredible!! I like how you cut the driver's side tool box out of the cab. I have one of these to build in the future. I will have to look to yours for reference. Top notch build!!
Would you like copies of the factory brochure? Paul
-
1960 Cracker Box 95% scratch build with independent front suspension and four link rear axle all on height controlled air bags. 6v53 Detroit Diesel with Spicer 5 speed over drive trans. The chassis less fuel tanks and differential carrier is all scratch built and is a 145" wheelbase unit. The resin ab was modified to eliminate the standard visor. The windshield was modified to get the 8 degree "Vee". I cut the sleeper down to the optional 75"x 30"x 22" unit, which gives it a 68 1/2 " BBC. Mirror assemblies, door handles, windshield wipers, and even the can type directional lights are scratch built. Mud flap bracket are made from 1.5mm x 1.5mm heat bent into a coil. Scratch built exhaust ,air intake and "rumblebox" for the exhaust. The 6v-53 is made from a 8v-71 engine. Paul
-
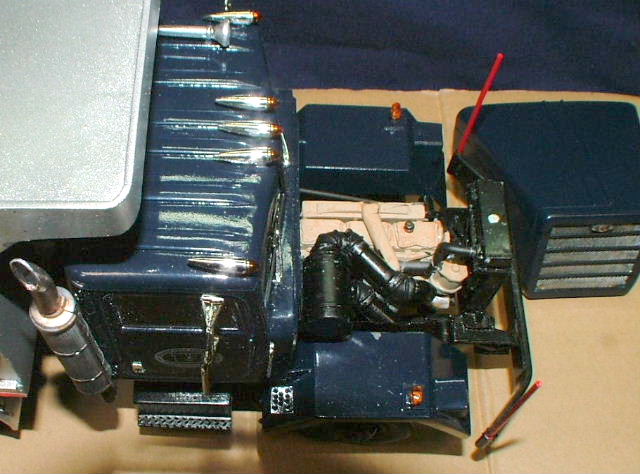
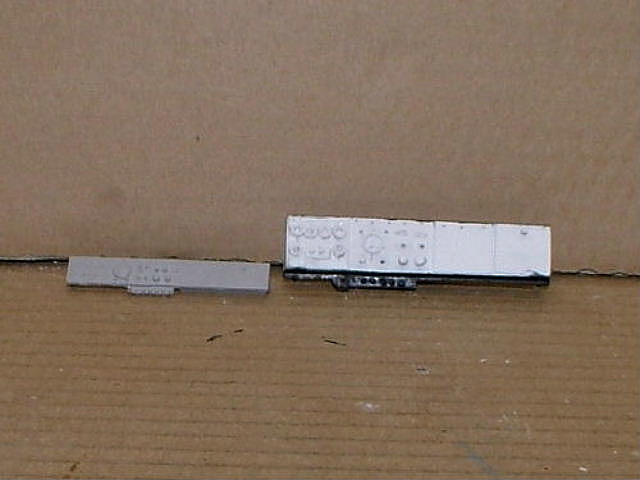
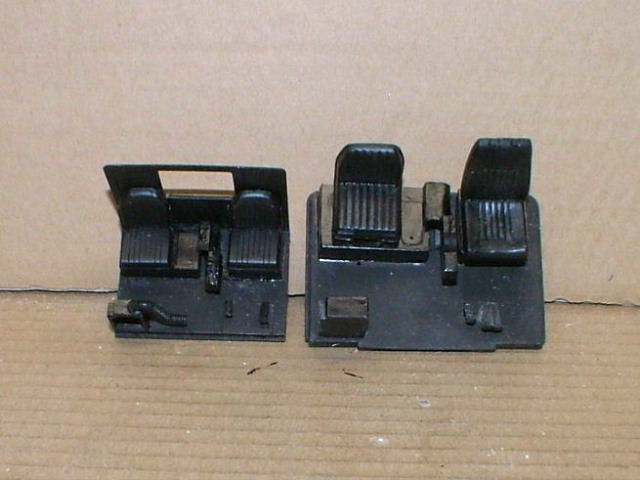
Some progress. I got chassis almost done, Cummins finalized, fenders almost done,the 1/25 dash board is all scratch built, both interiors finished except for cab junk, cab mods are done. Next is to install power pack, add wheels and tires to locate fenders and cab. Than the fun begins. The 1/25 hood assembly needs to be extended a scale foot and 3 inches and the grill surround made up.
The 1/35 chassis is done less pogo stick and air lines. If Trumpeter ever makes 1/25 truck kits with the detail that is in the 1/35 kit, they'll dominate the market. this has a 7 piece fifth wheel and 5 piece mounting plate. Even the hollow rubber tires has all the lettering and side wall details. The 1/35 M915 is going to be in military colors and the 1/25 M917 dump will be done as a surplus unit bought and done in civilian colors, hence the mismatched drivers seat. Paul


1935 MACK CH Heating Oil Delivery Truck
in Model Truck Show Room
Posted
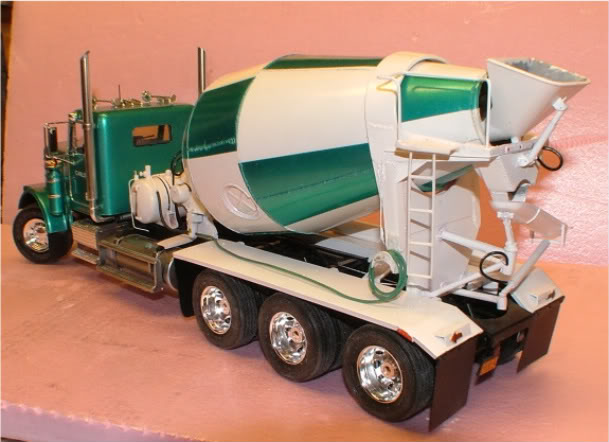
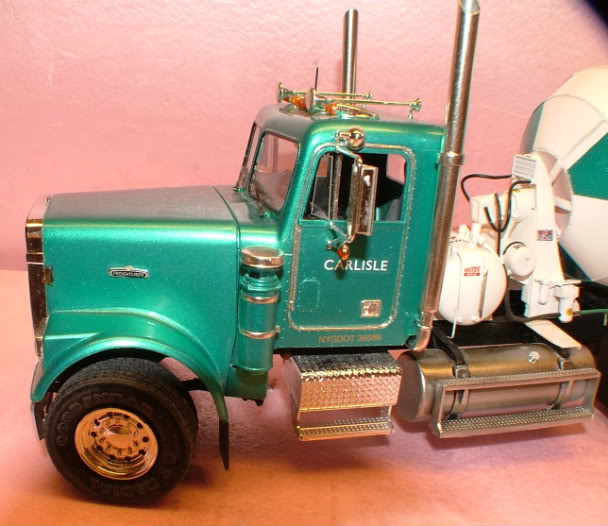
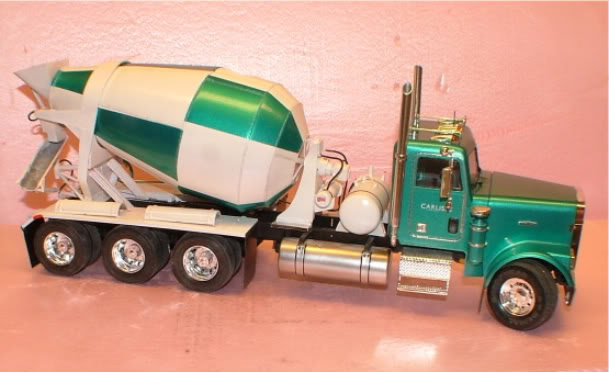
All I can say is it's done. AITM body, chassis and basic tank from Emhar and a ton of scratch building, including the large STOP light on tank. Enjoy. Paul