


Joris
-
Content count
175 -
Joined
-
Last visited
-
Days Won
6
Posts posted by Joris
-
-
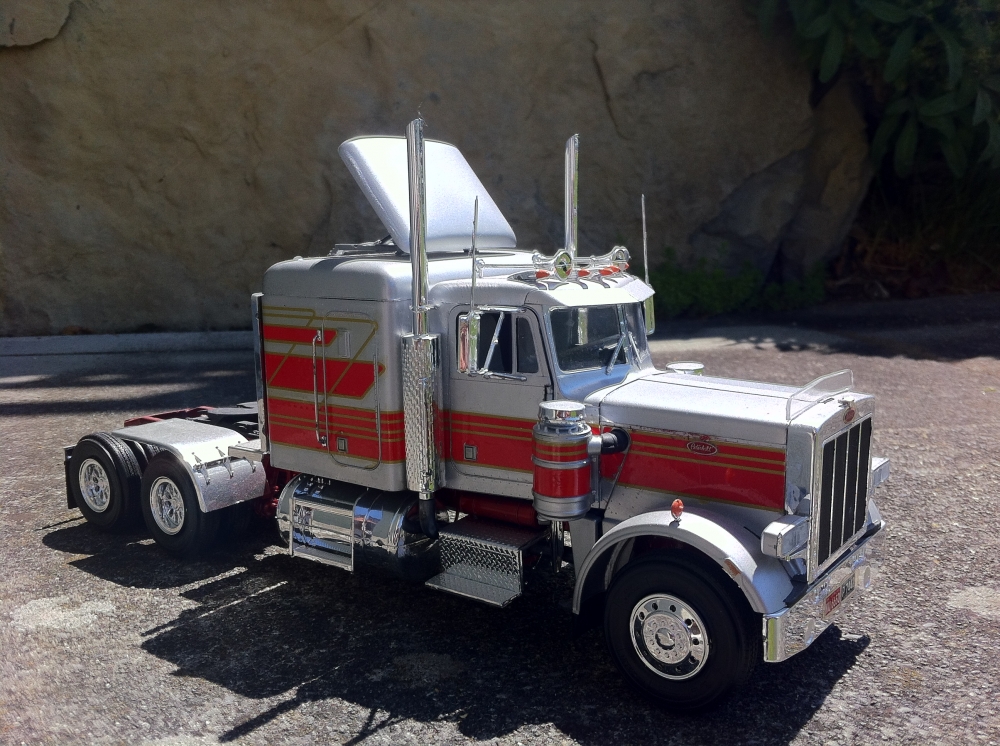
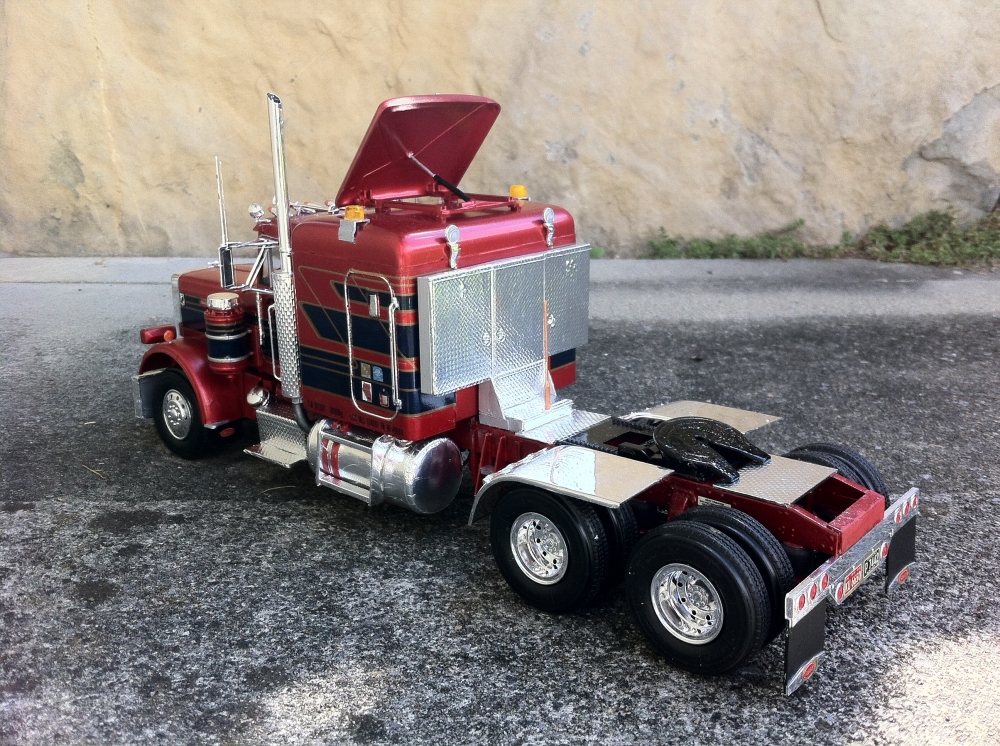
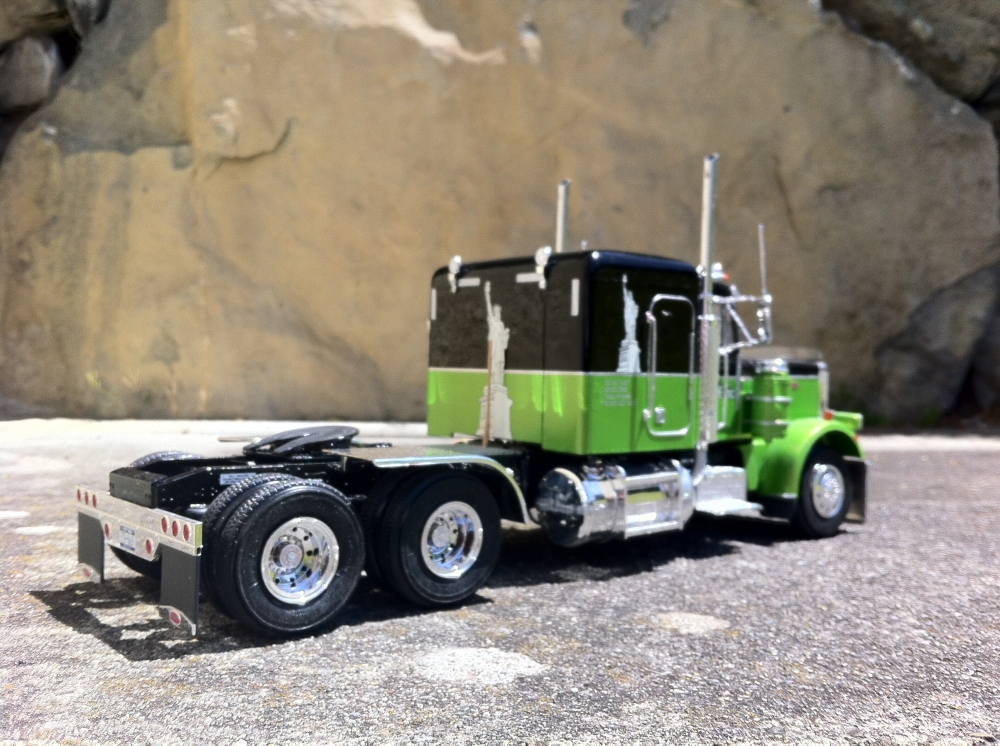
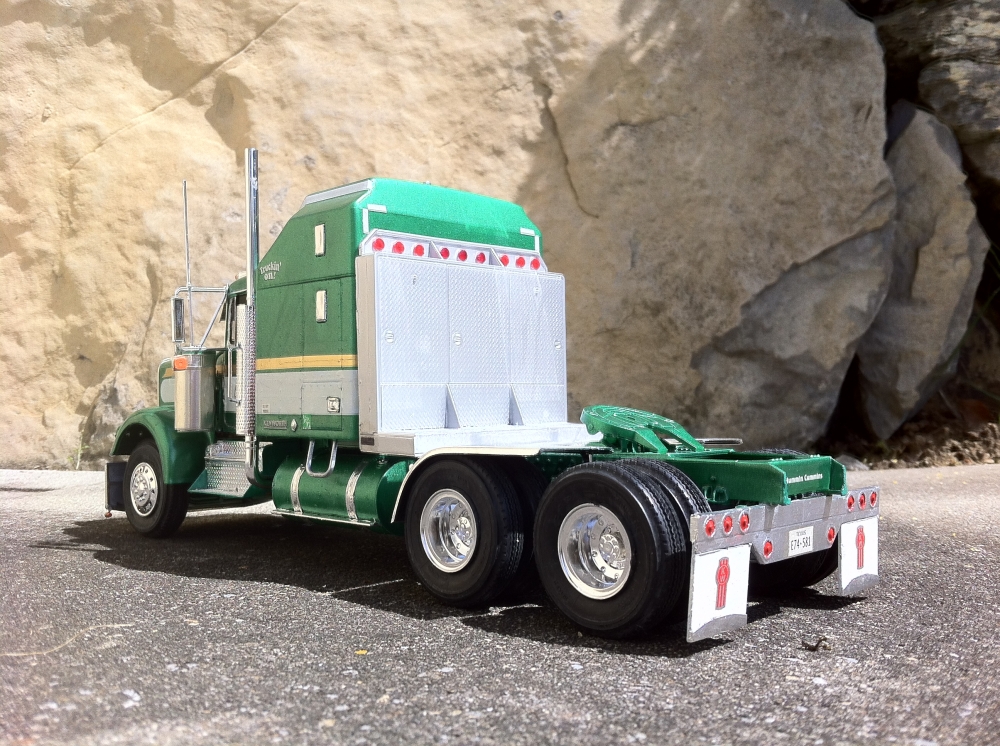
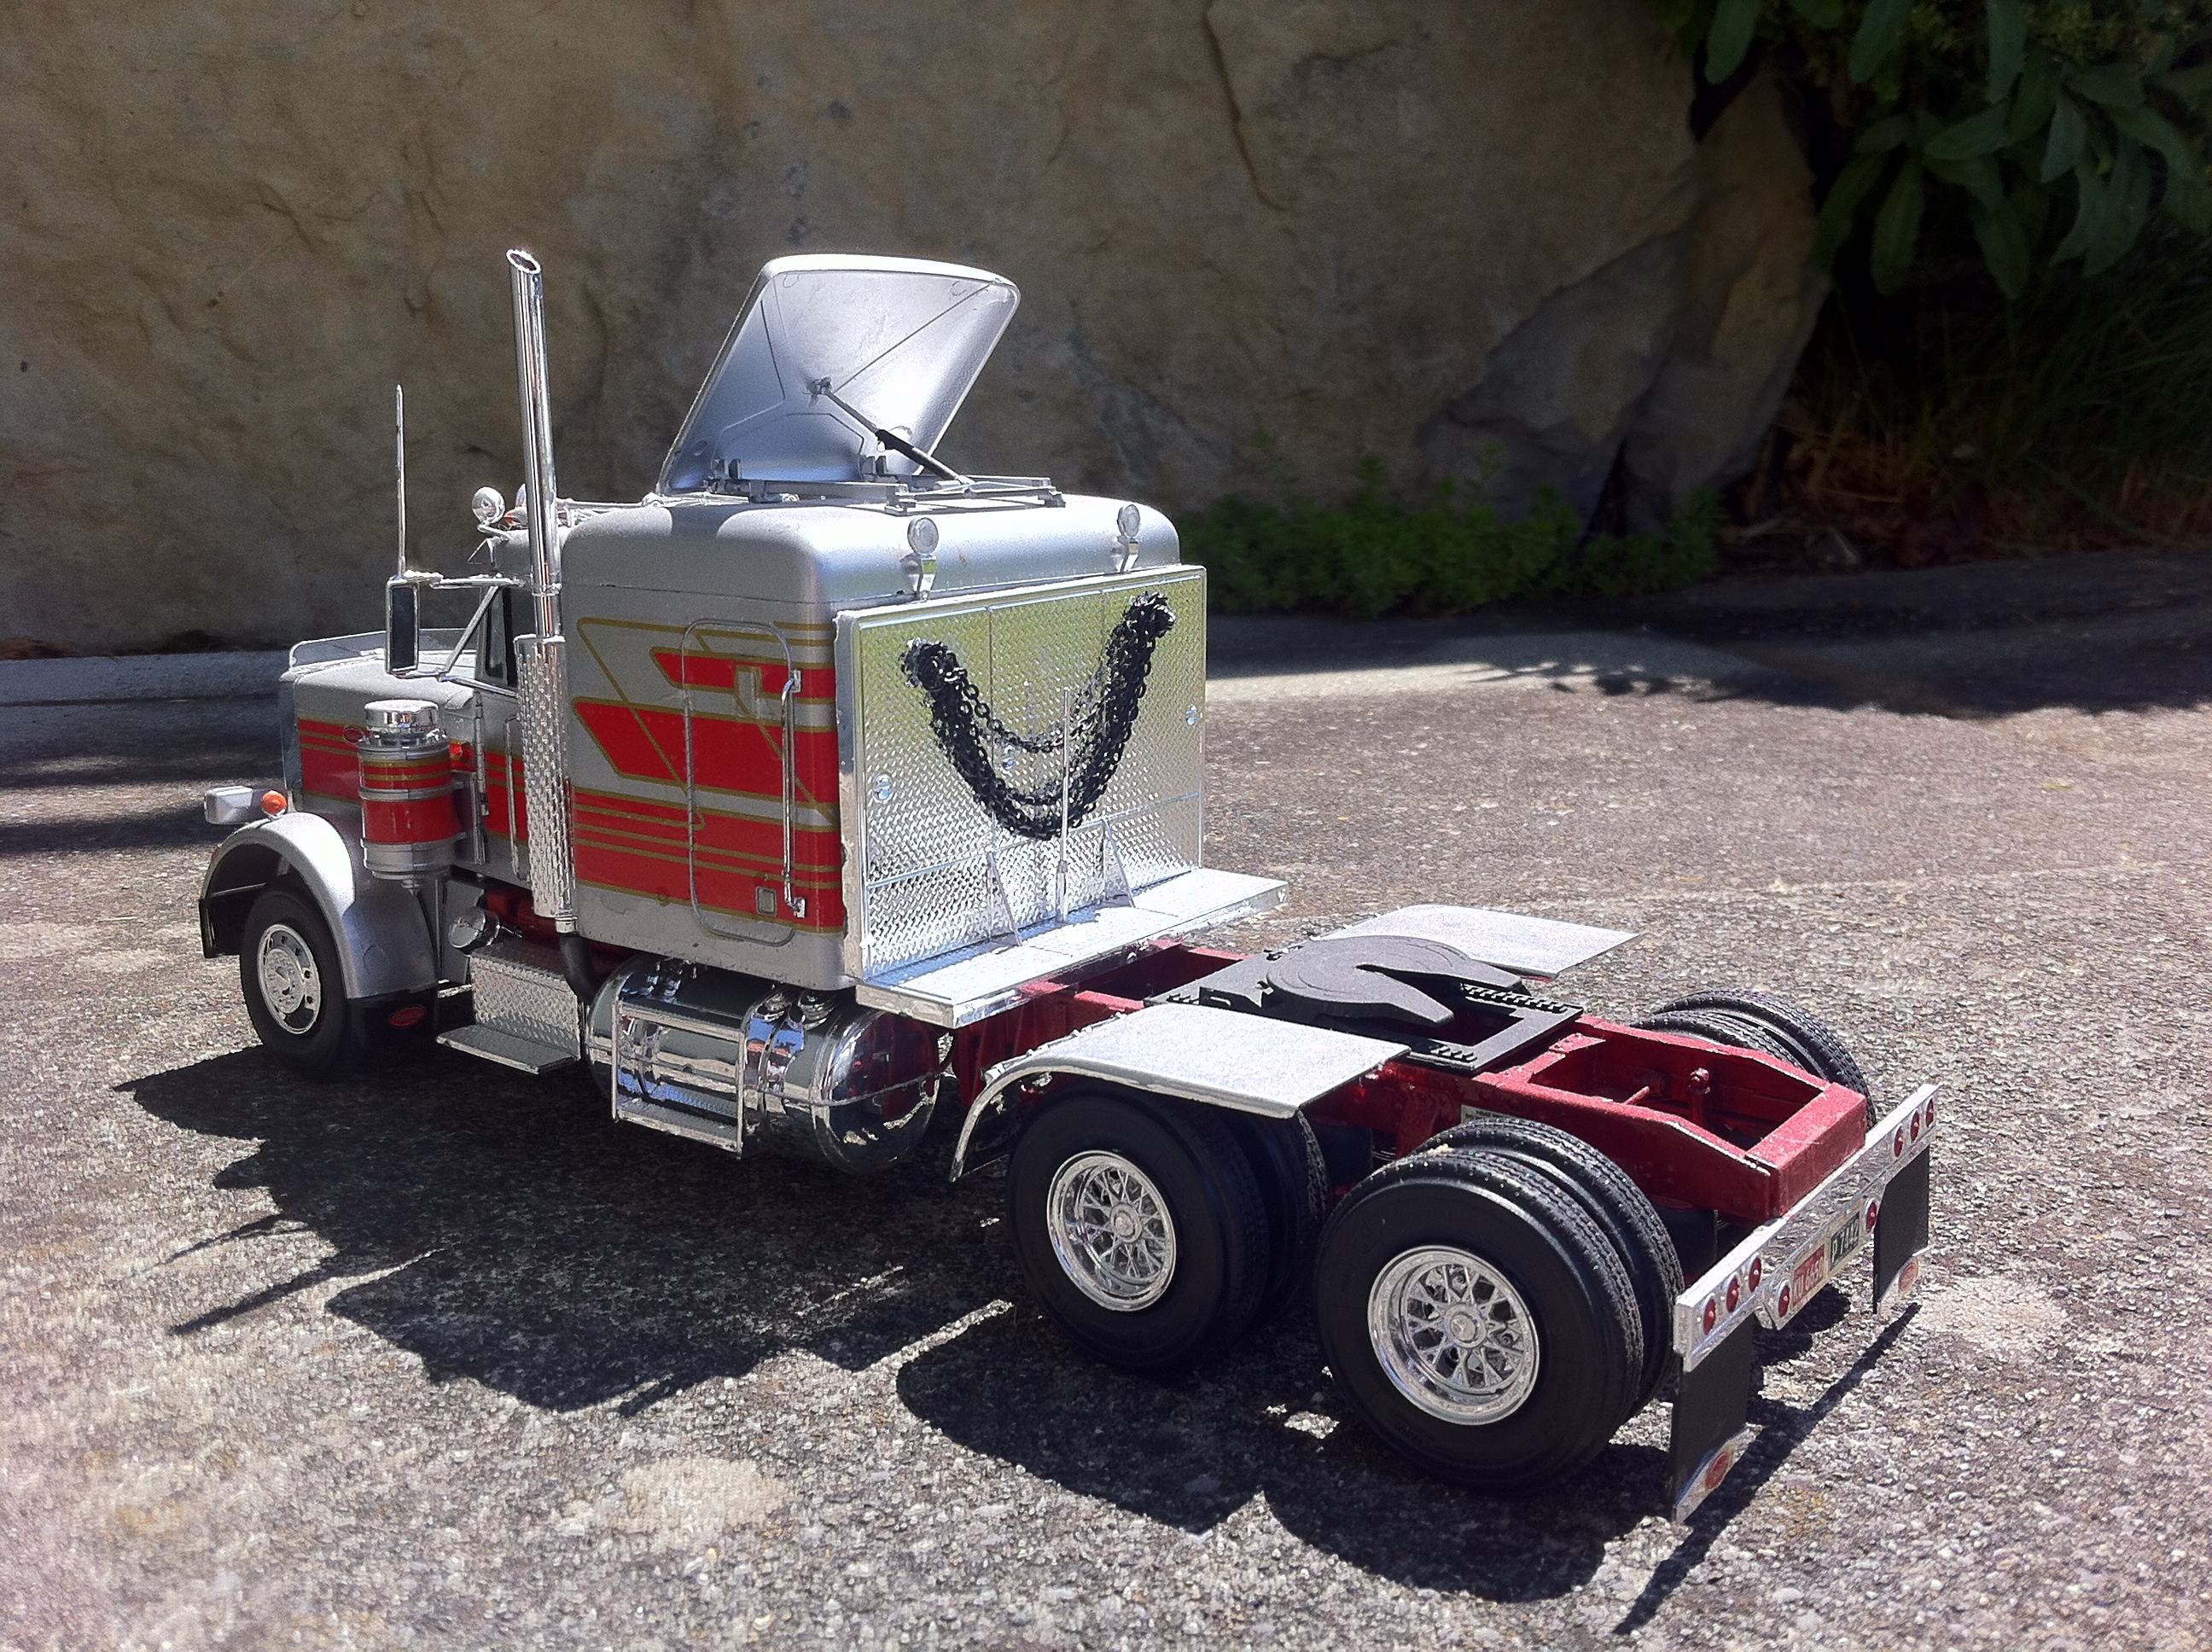
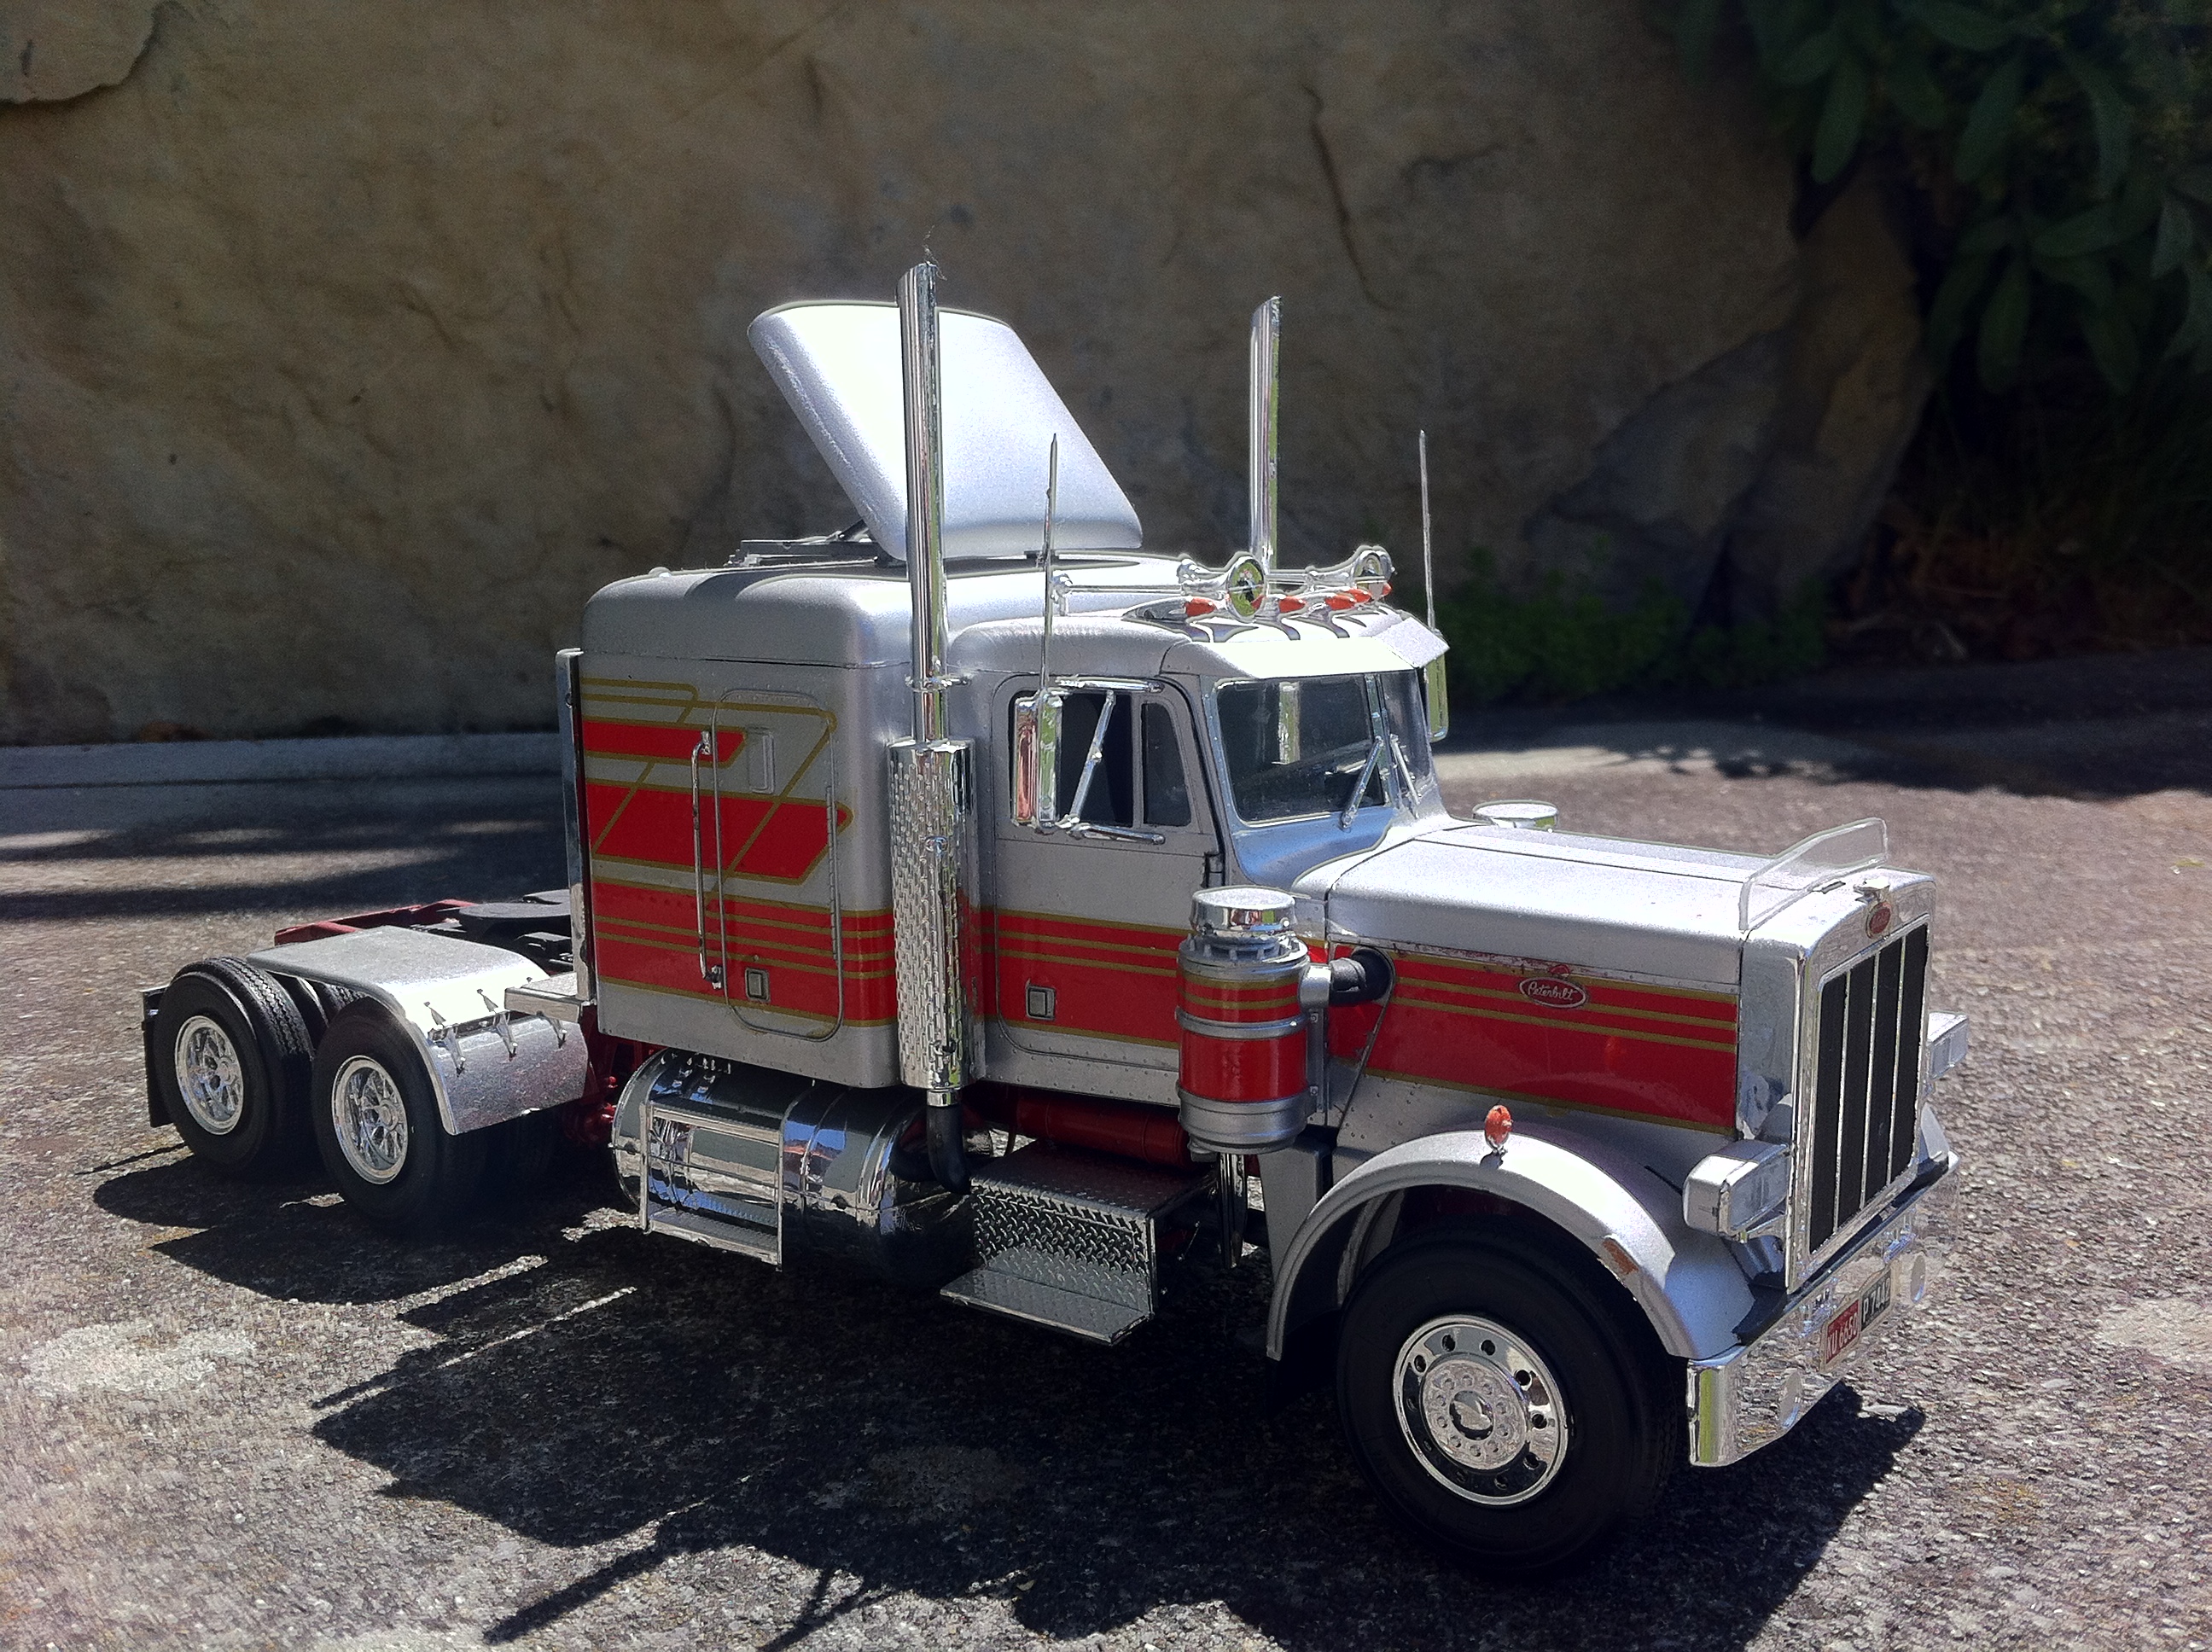
My very first truck kit I built was a Revell of Germany Peterbilt 359. I built it with some flaws, and I chose the wrong color for the frame. This year, more than 10 years later, I decided to rebuild it. I left the frame untouched, but I brought the hood, cab and sleeper more in style, swapping silver for cherry red. Also I scratchbuilt a Texas tapered bumper, and redid the headache rack. The BMF on the bumper didn't go on exactly as I wanted, so I tried masking that a little with an oversize banner. Beacons on the sleeper to keep in theme. The tanks I need to redo again, not completely happy with how they turned out...


-
 1
1
-
-
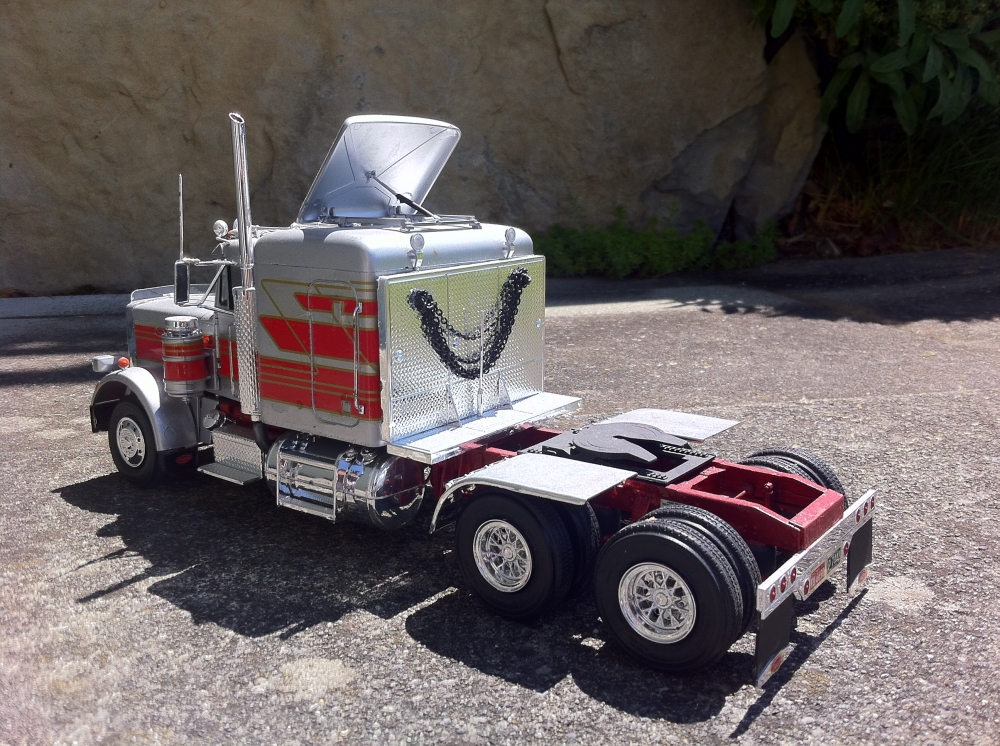
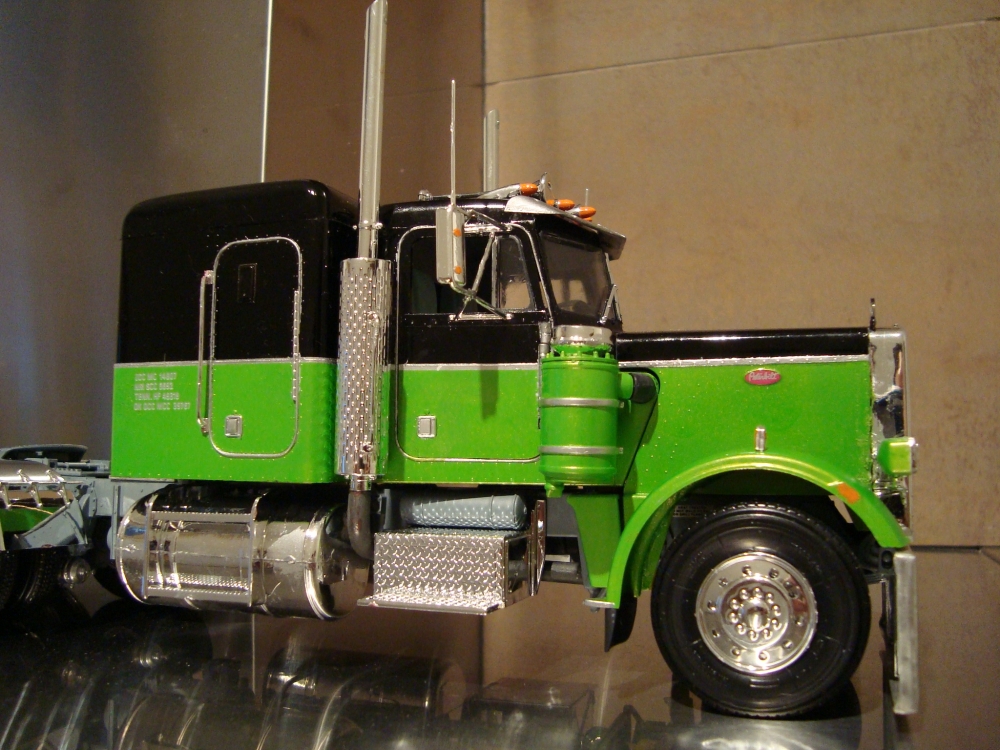
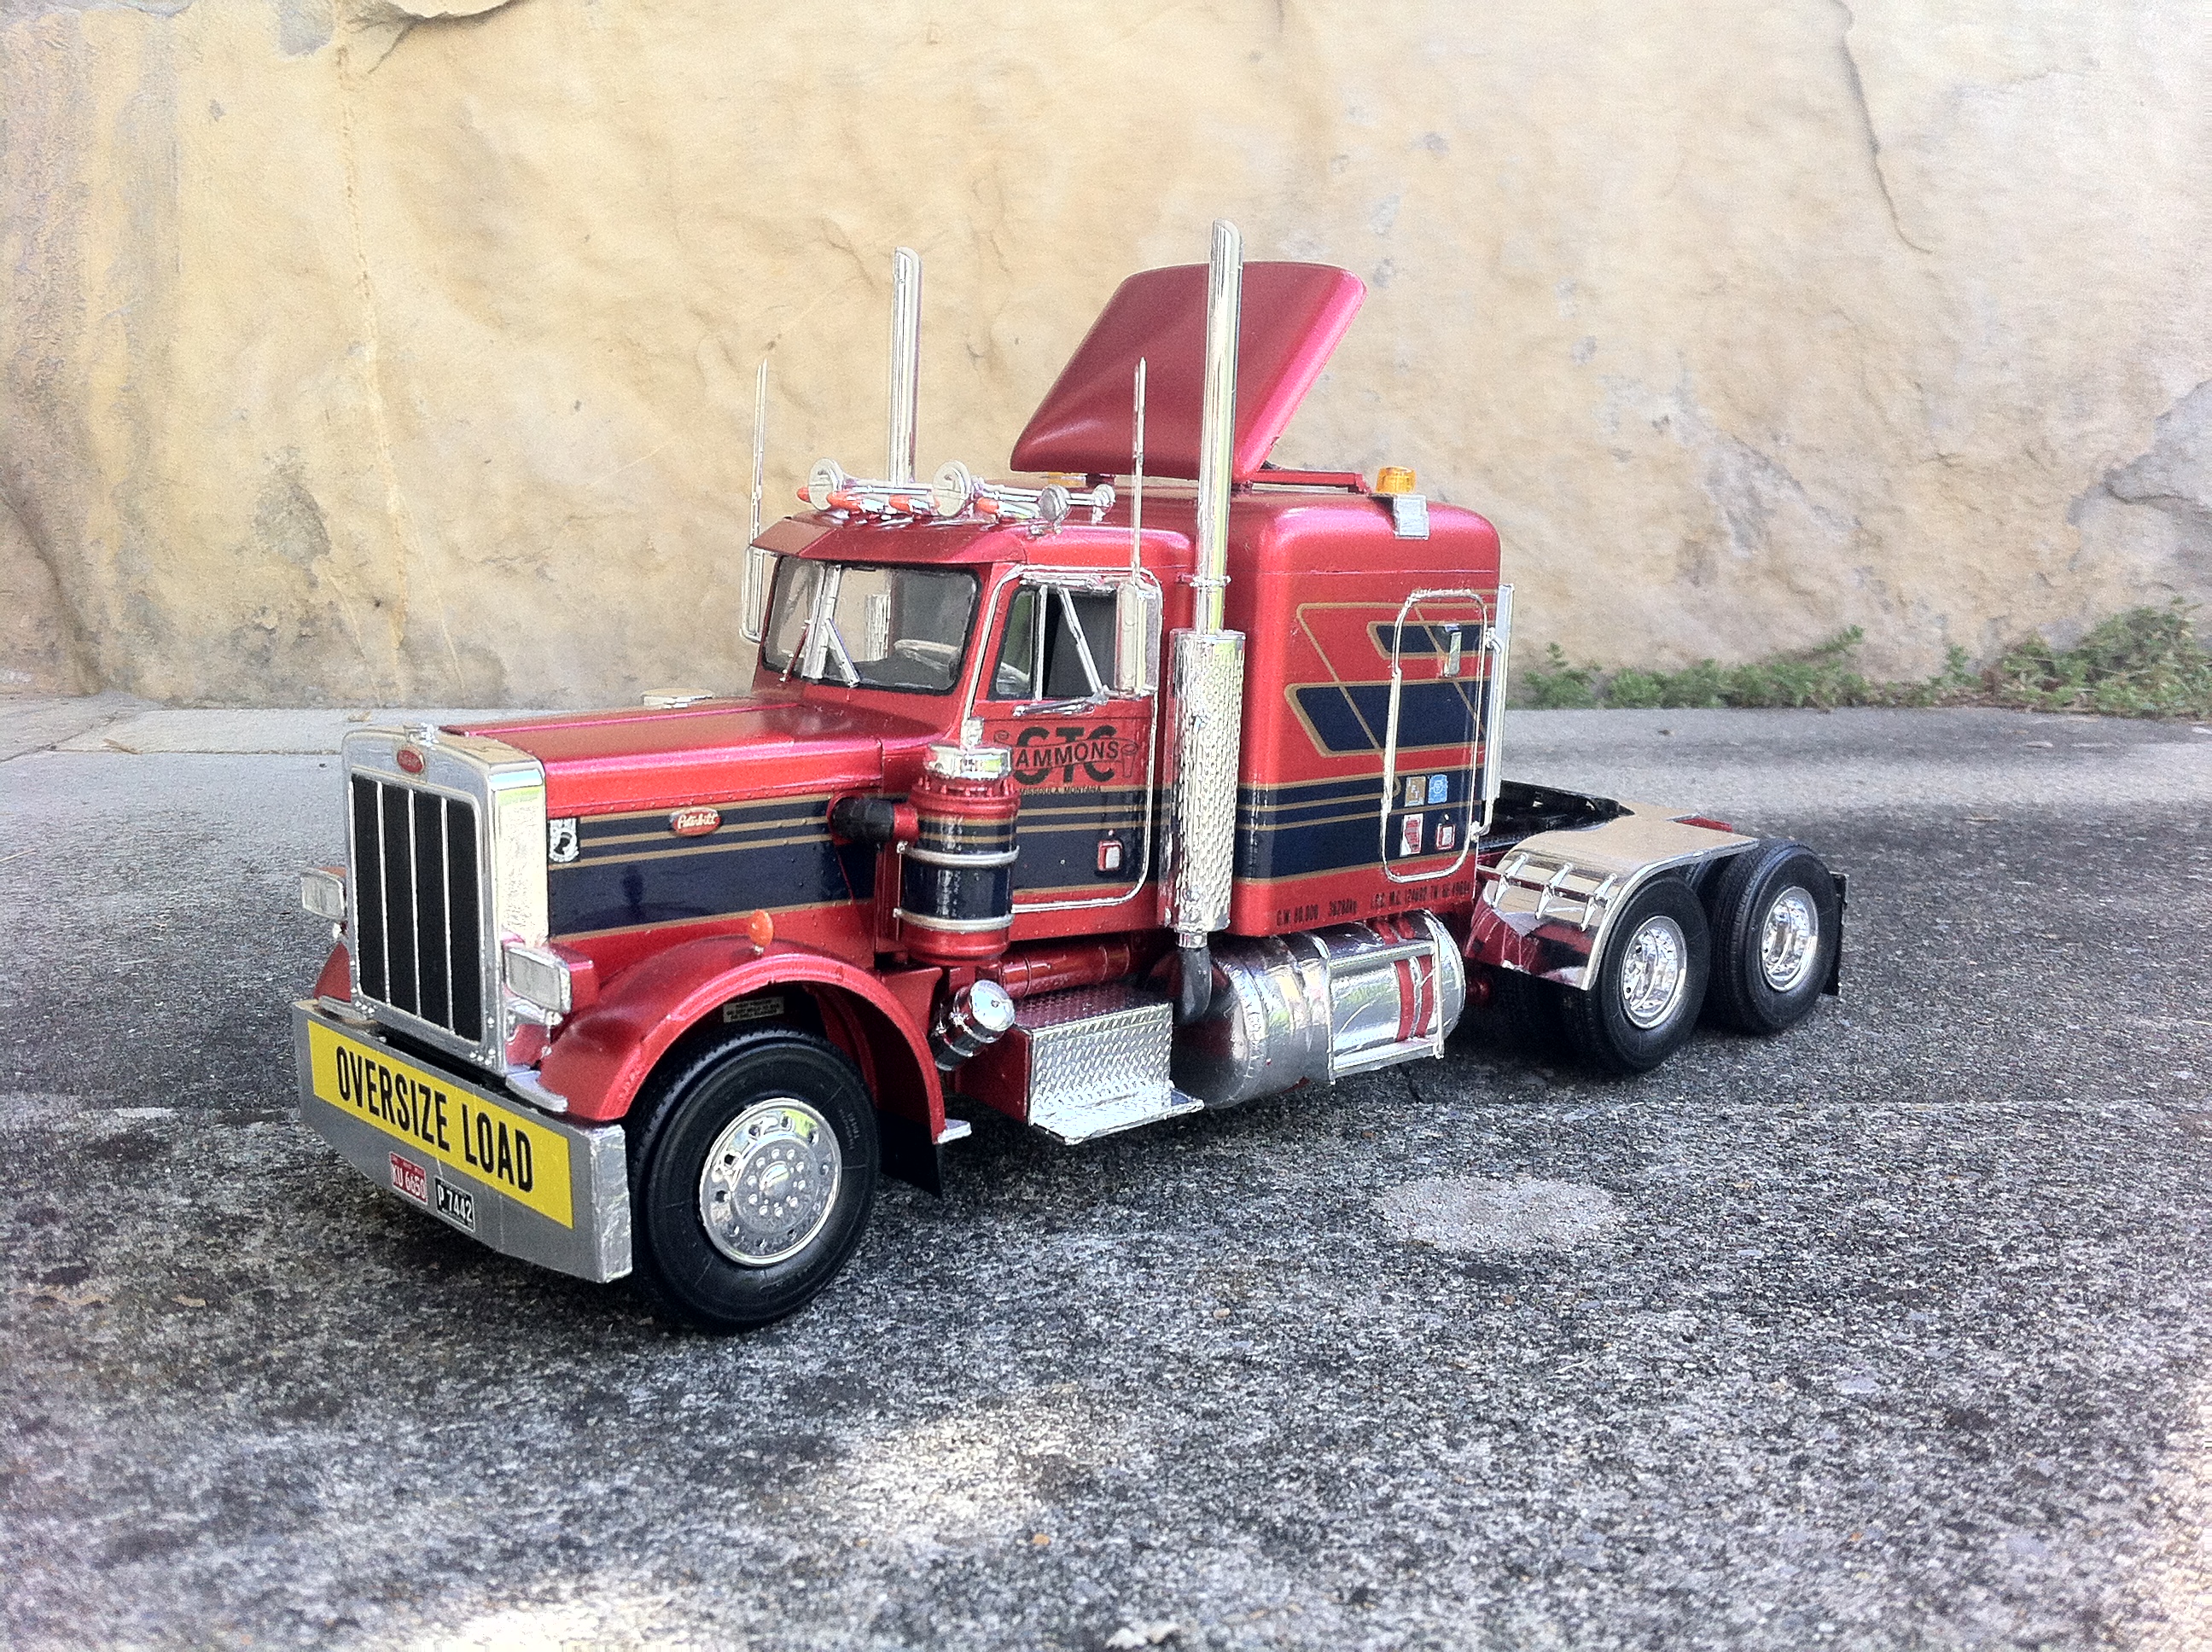
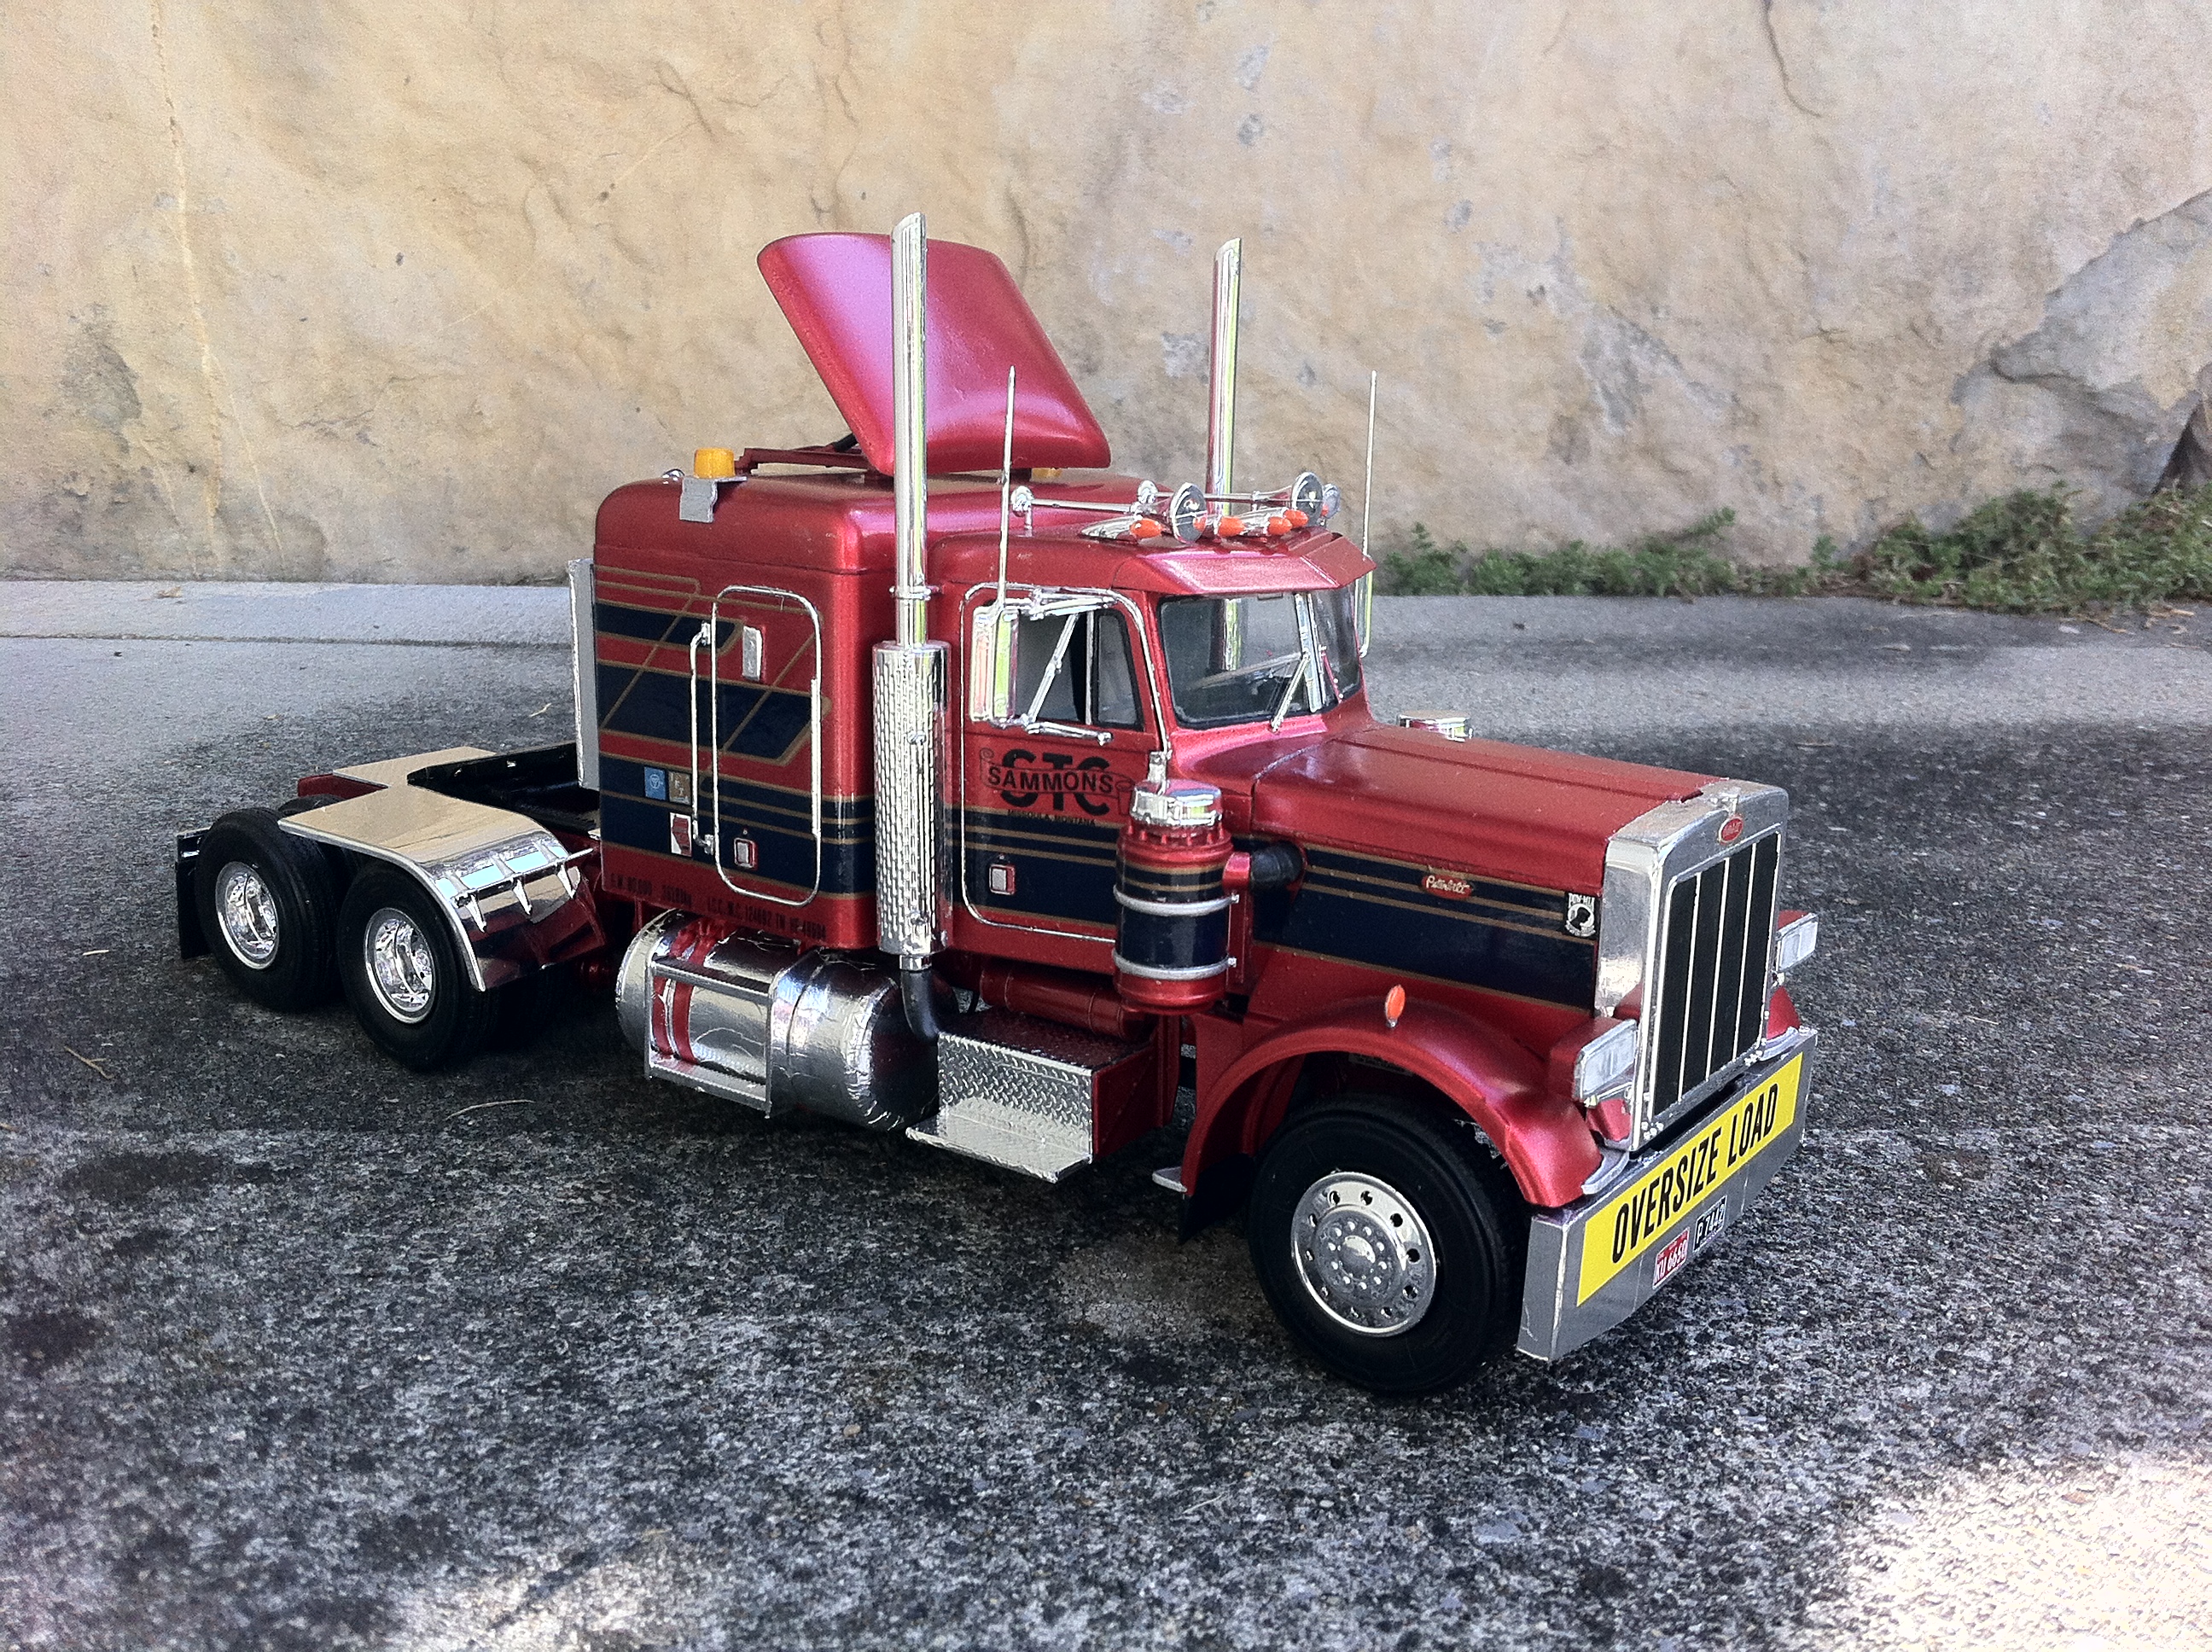
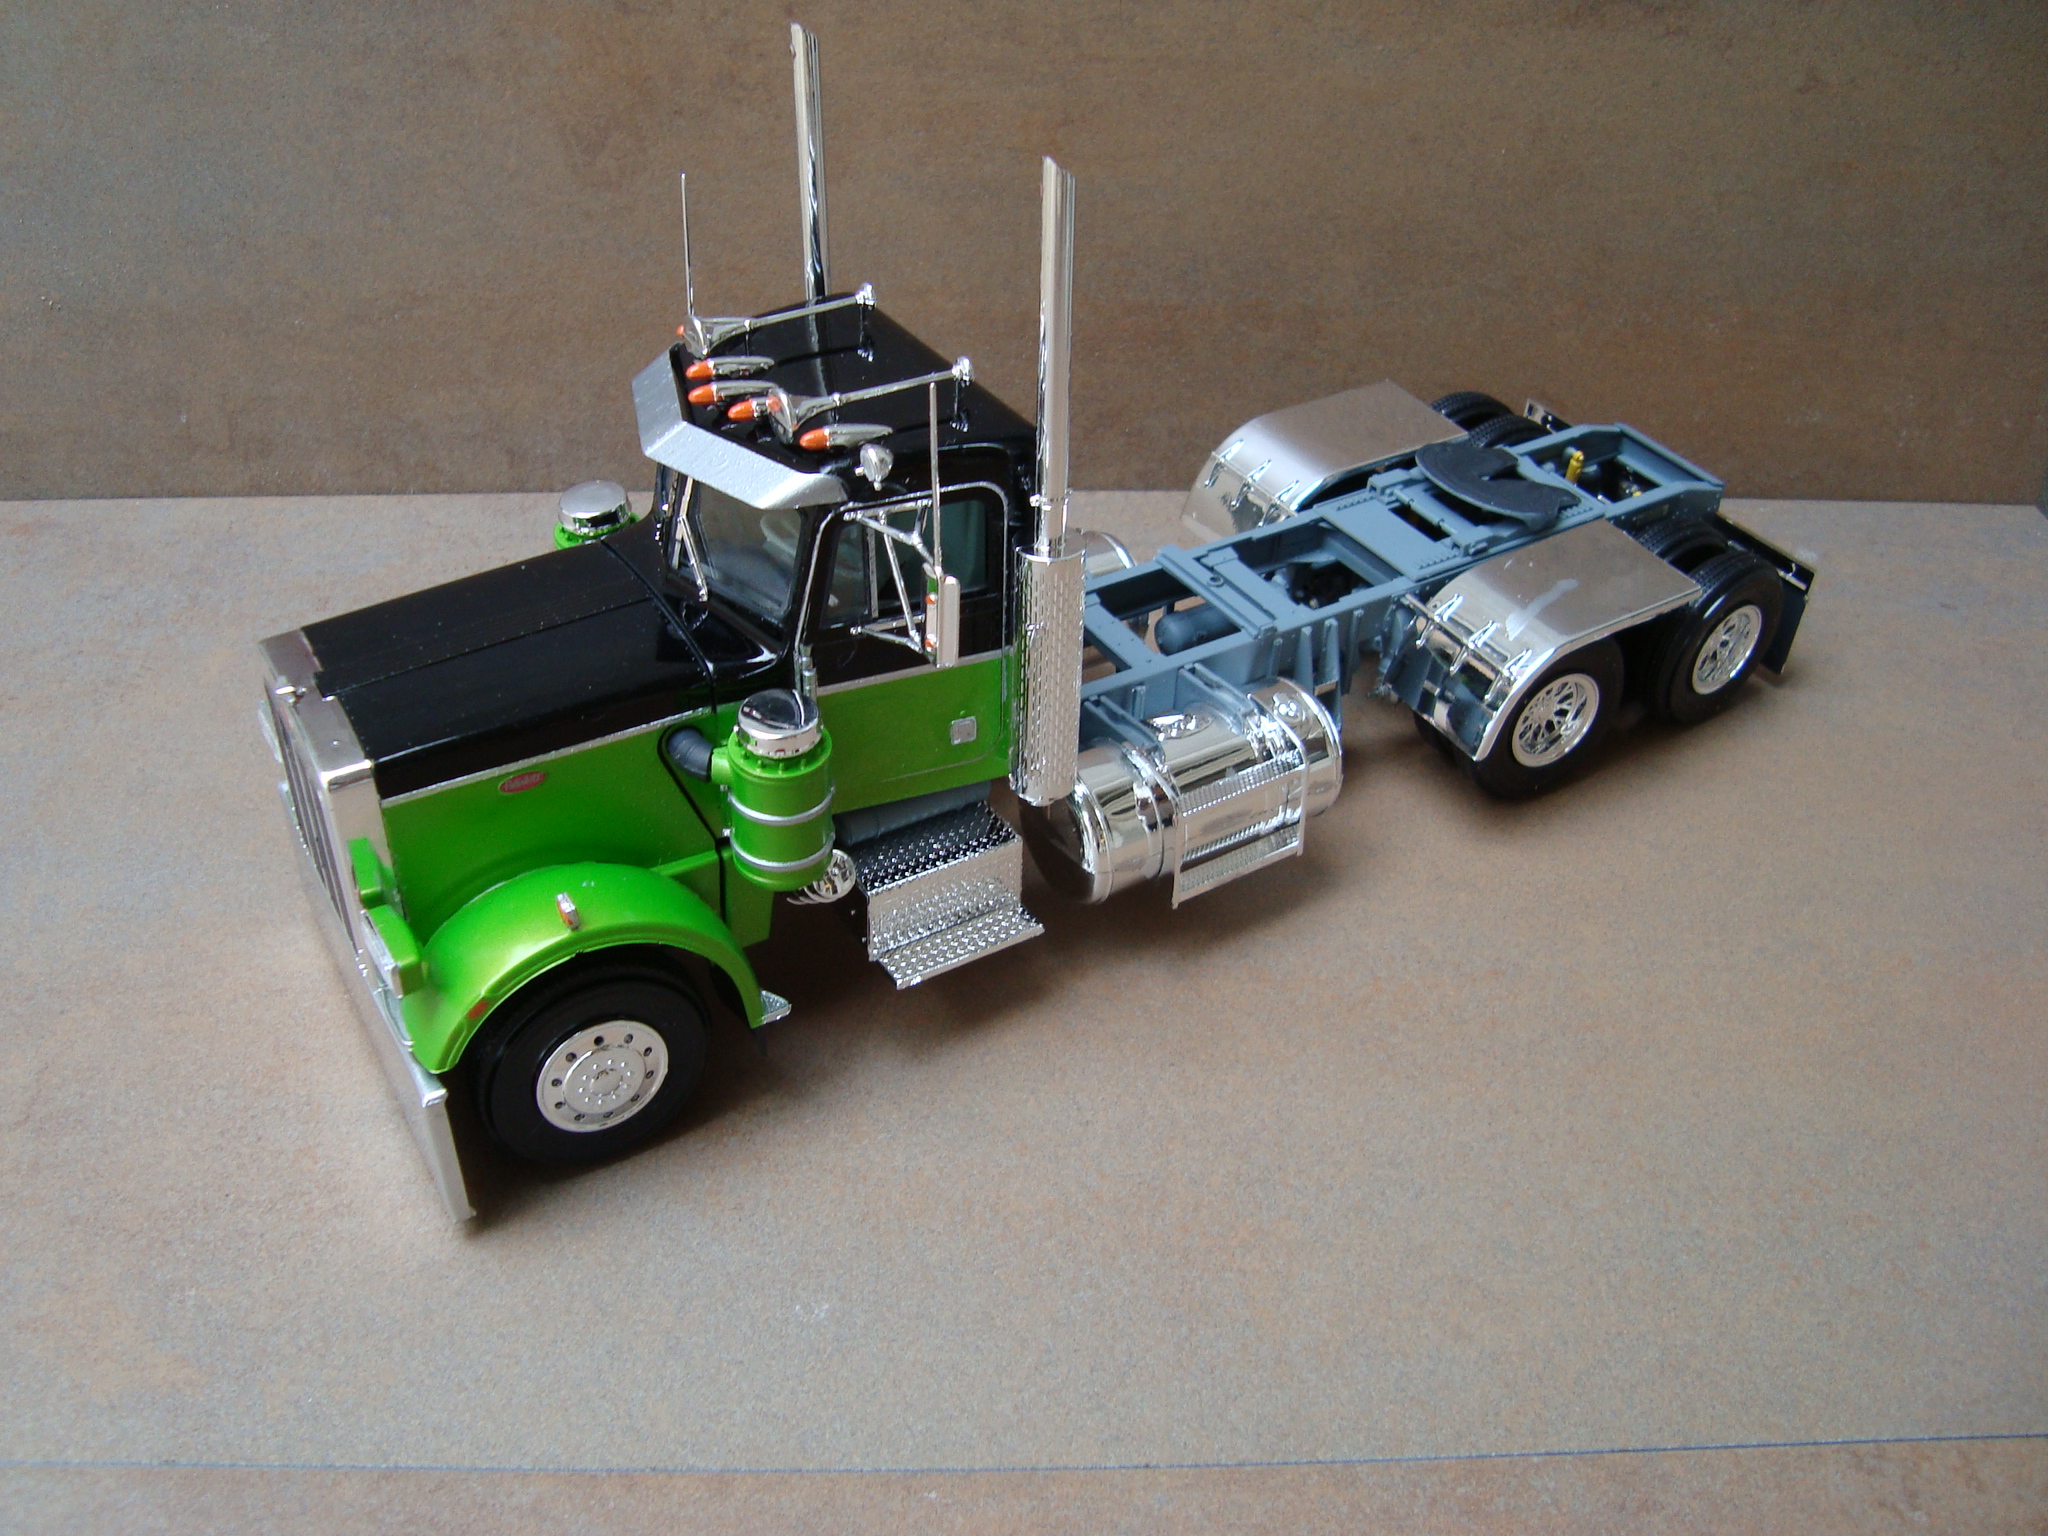
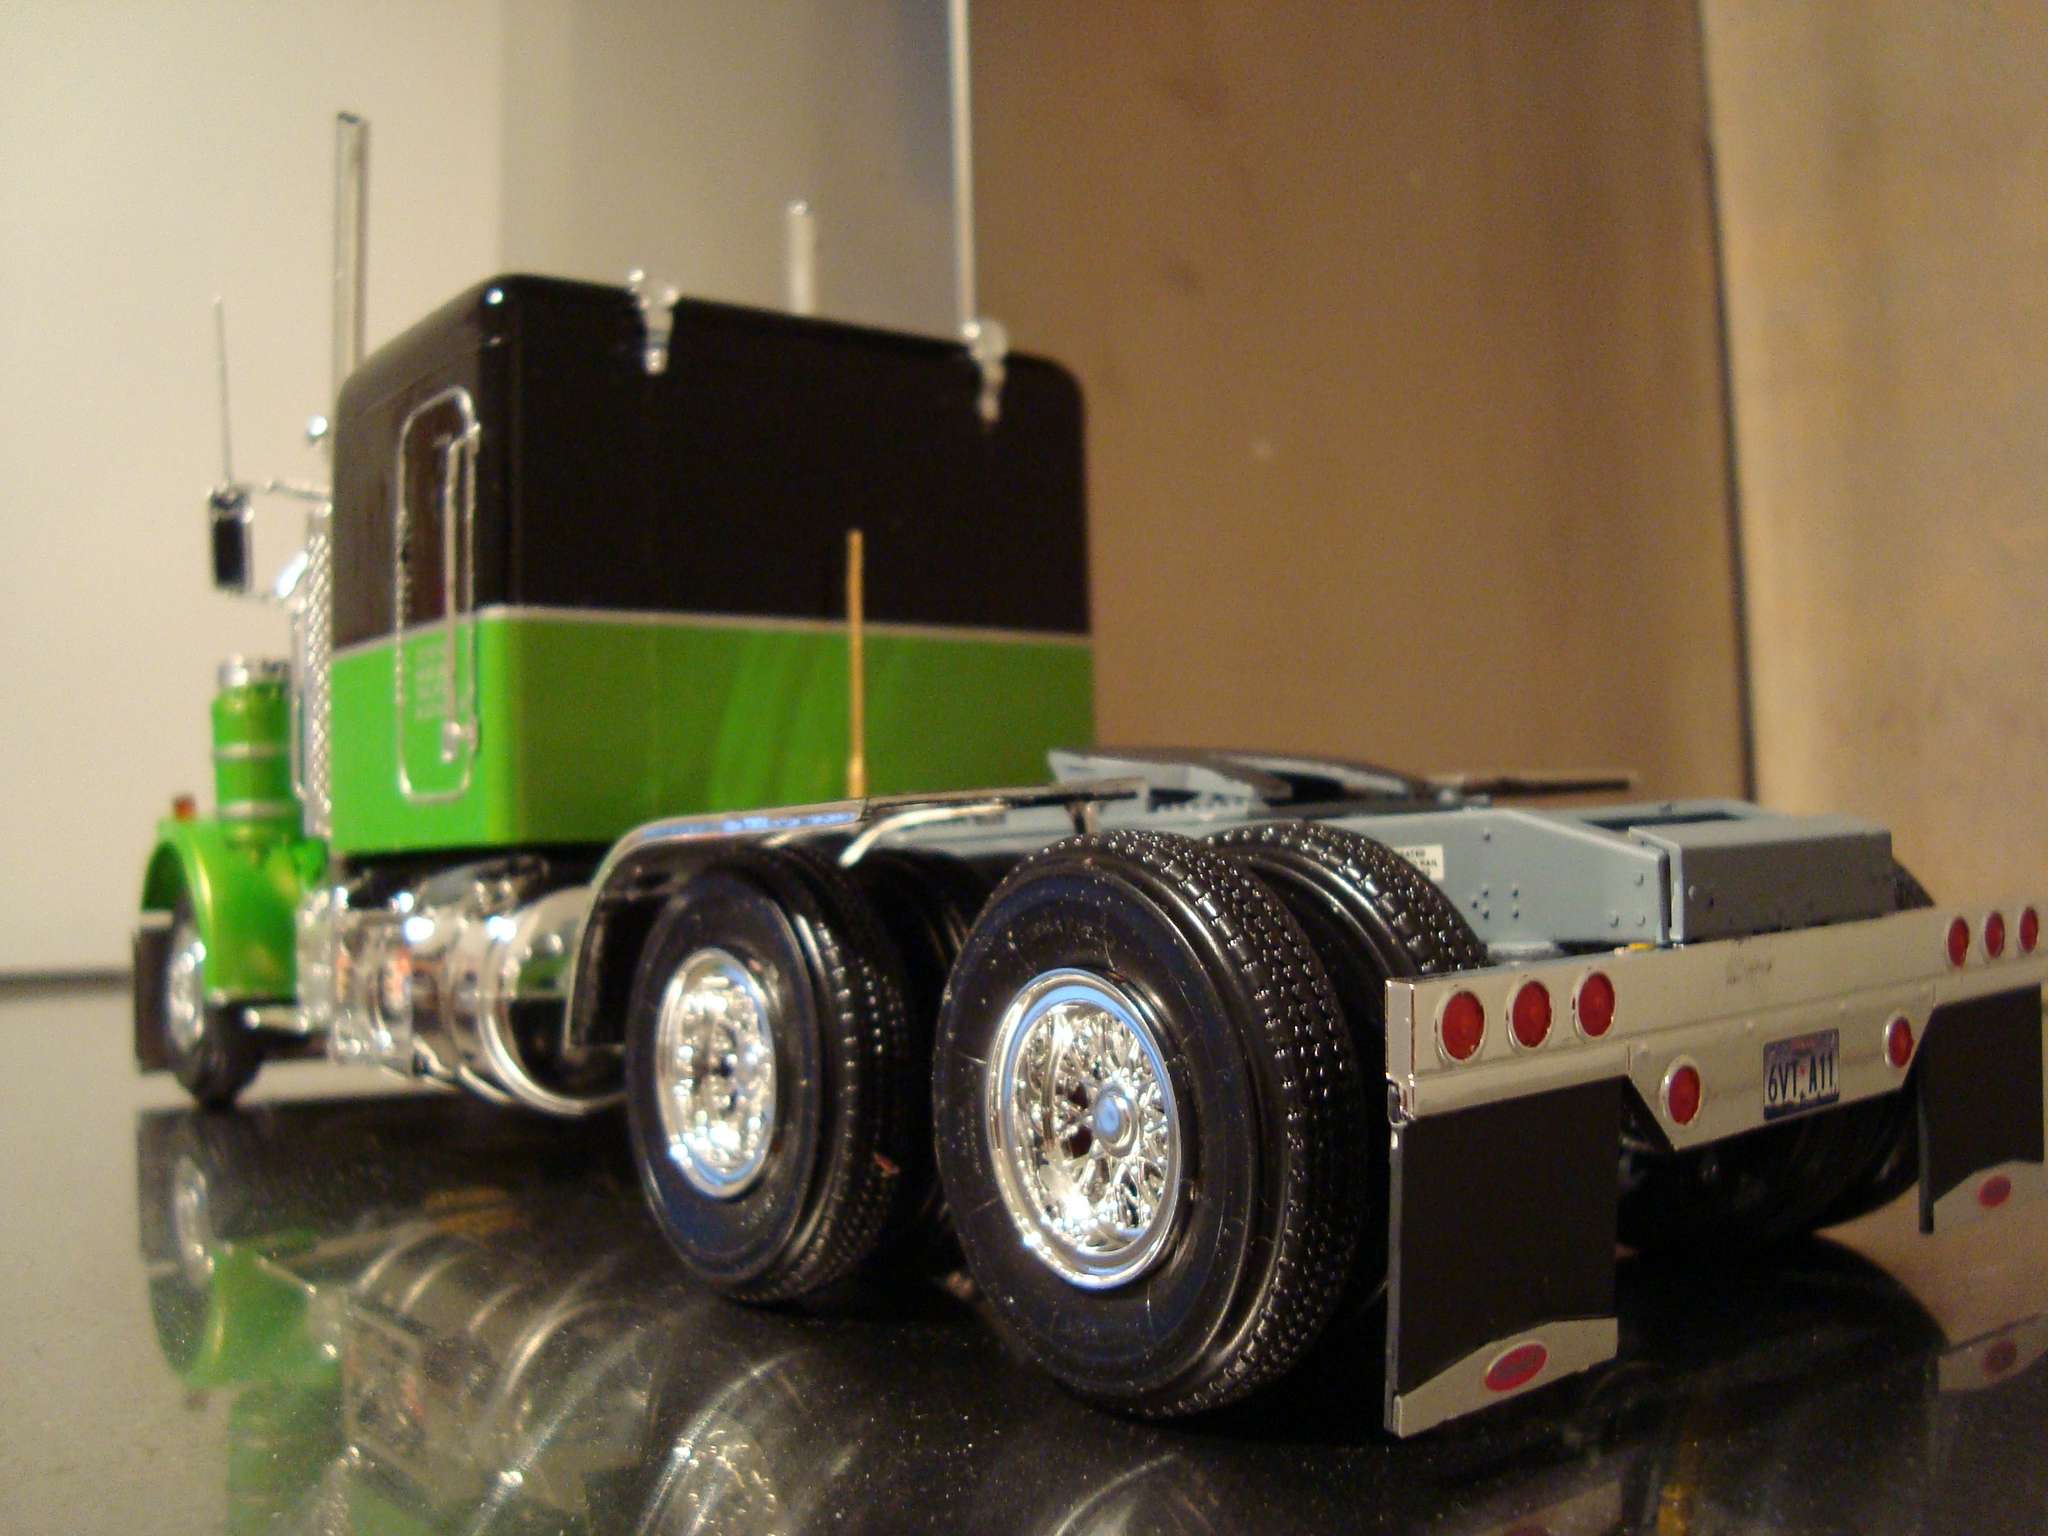
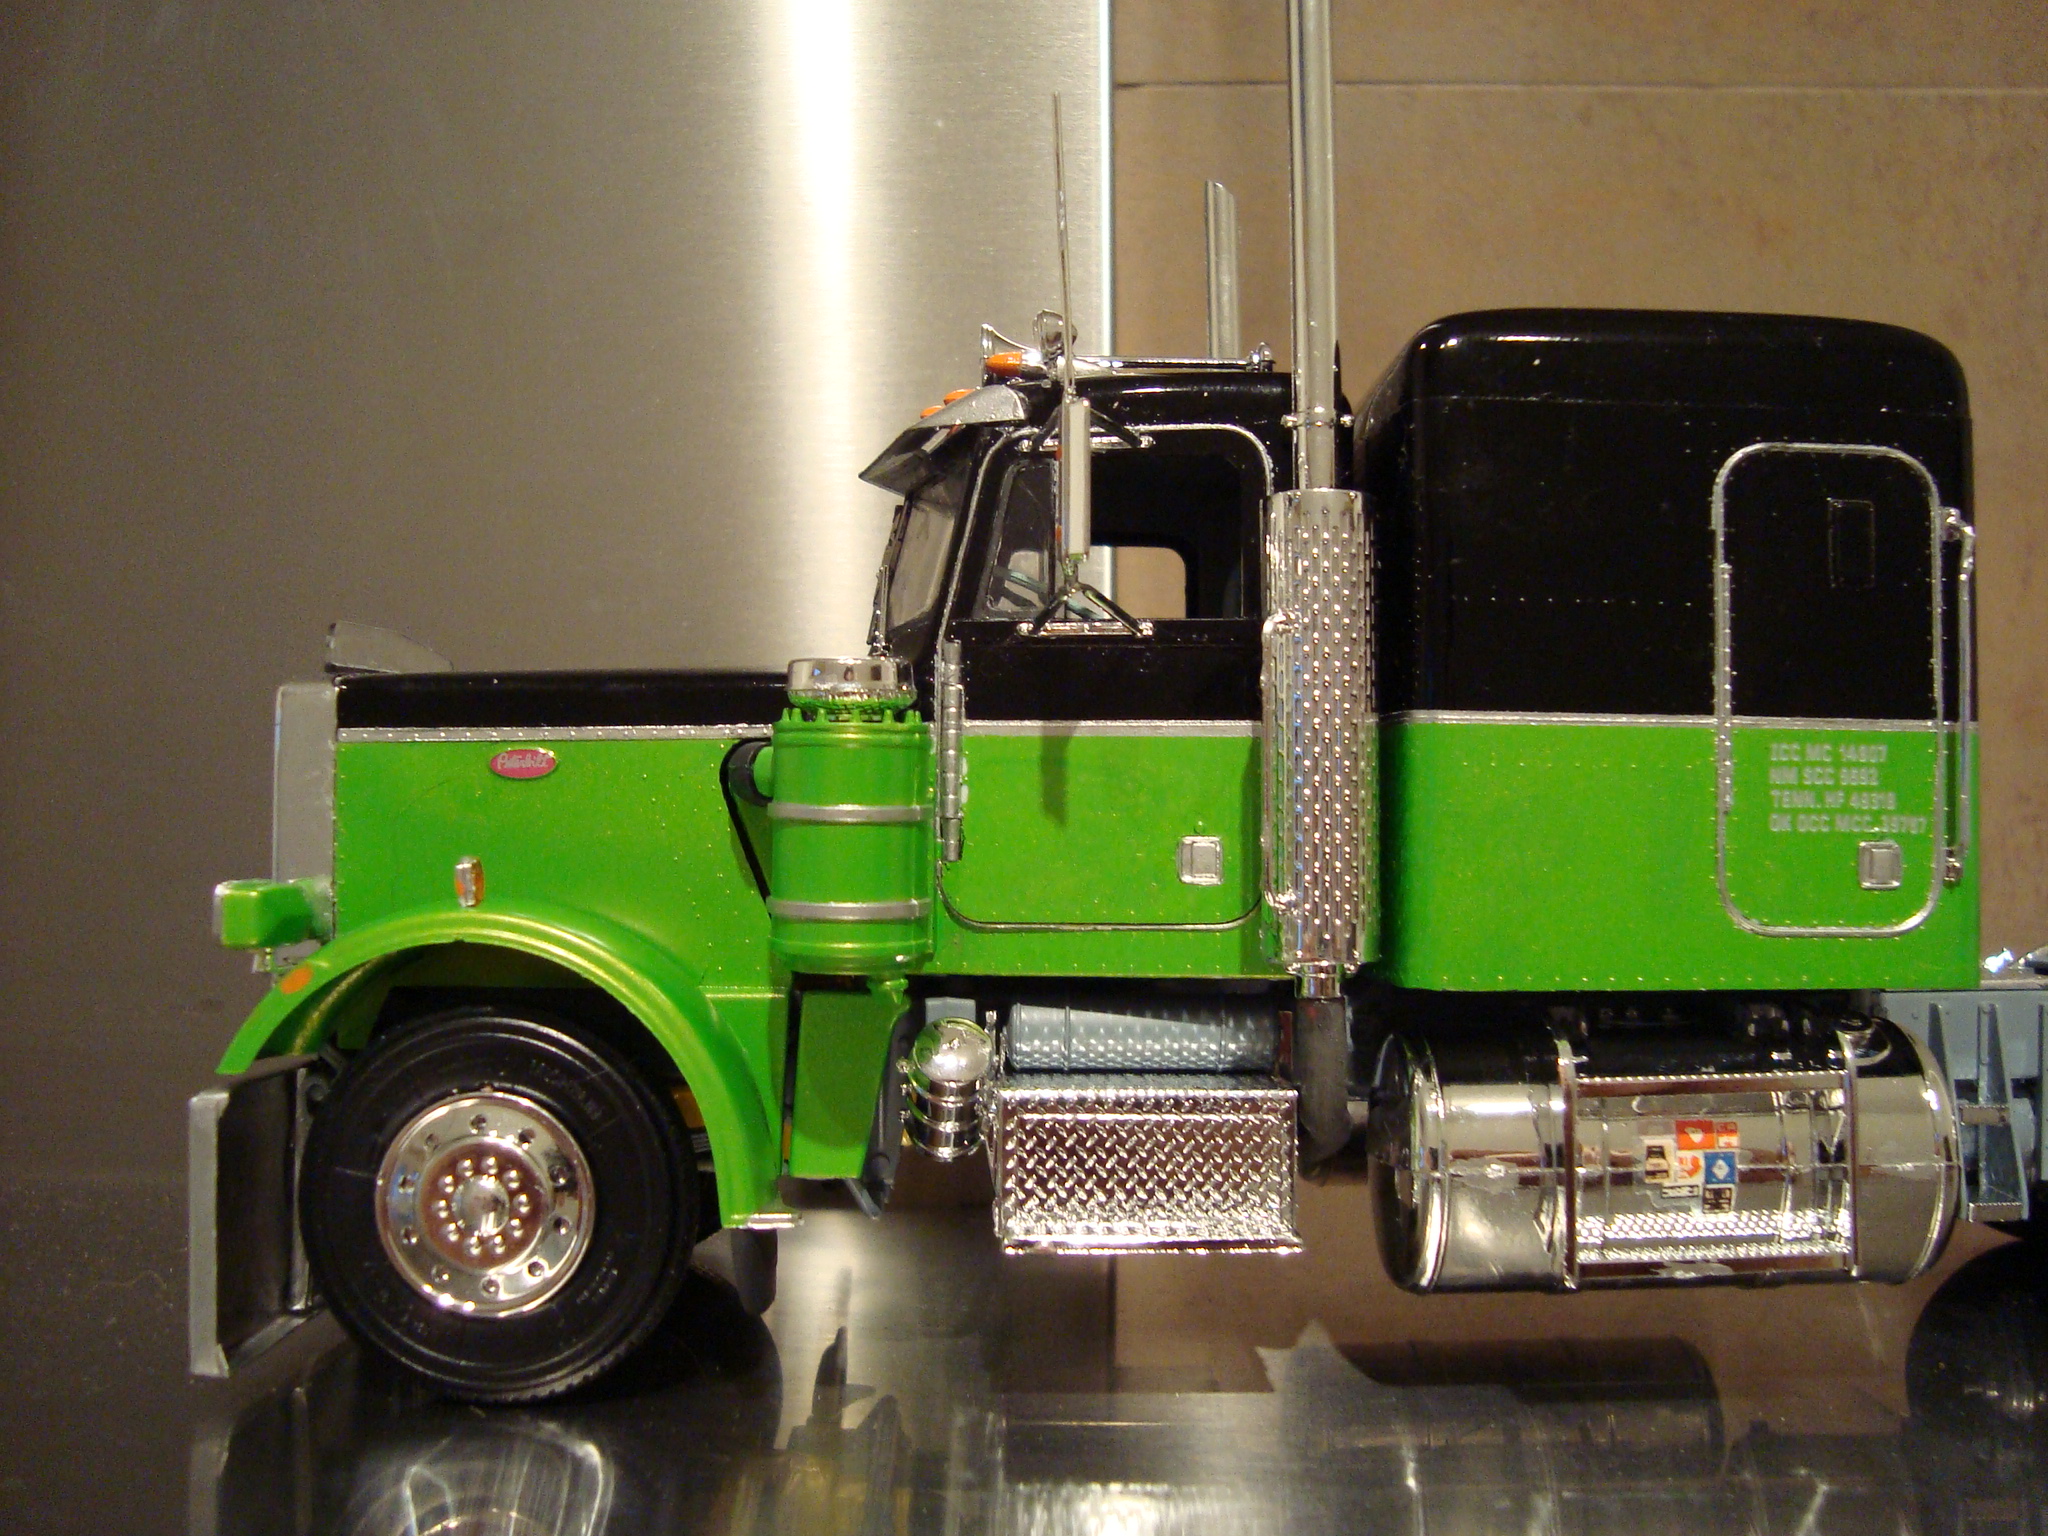
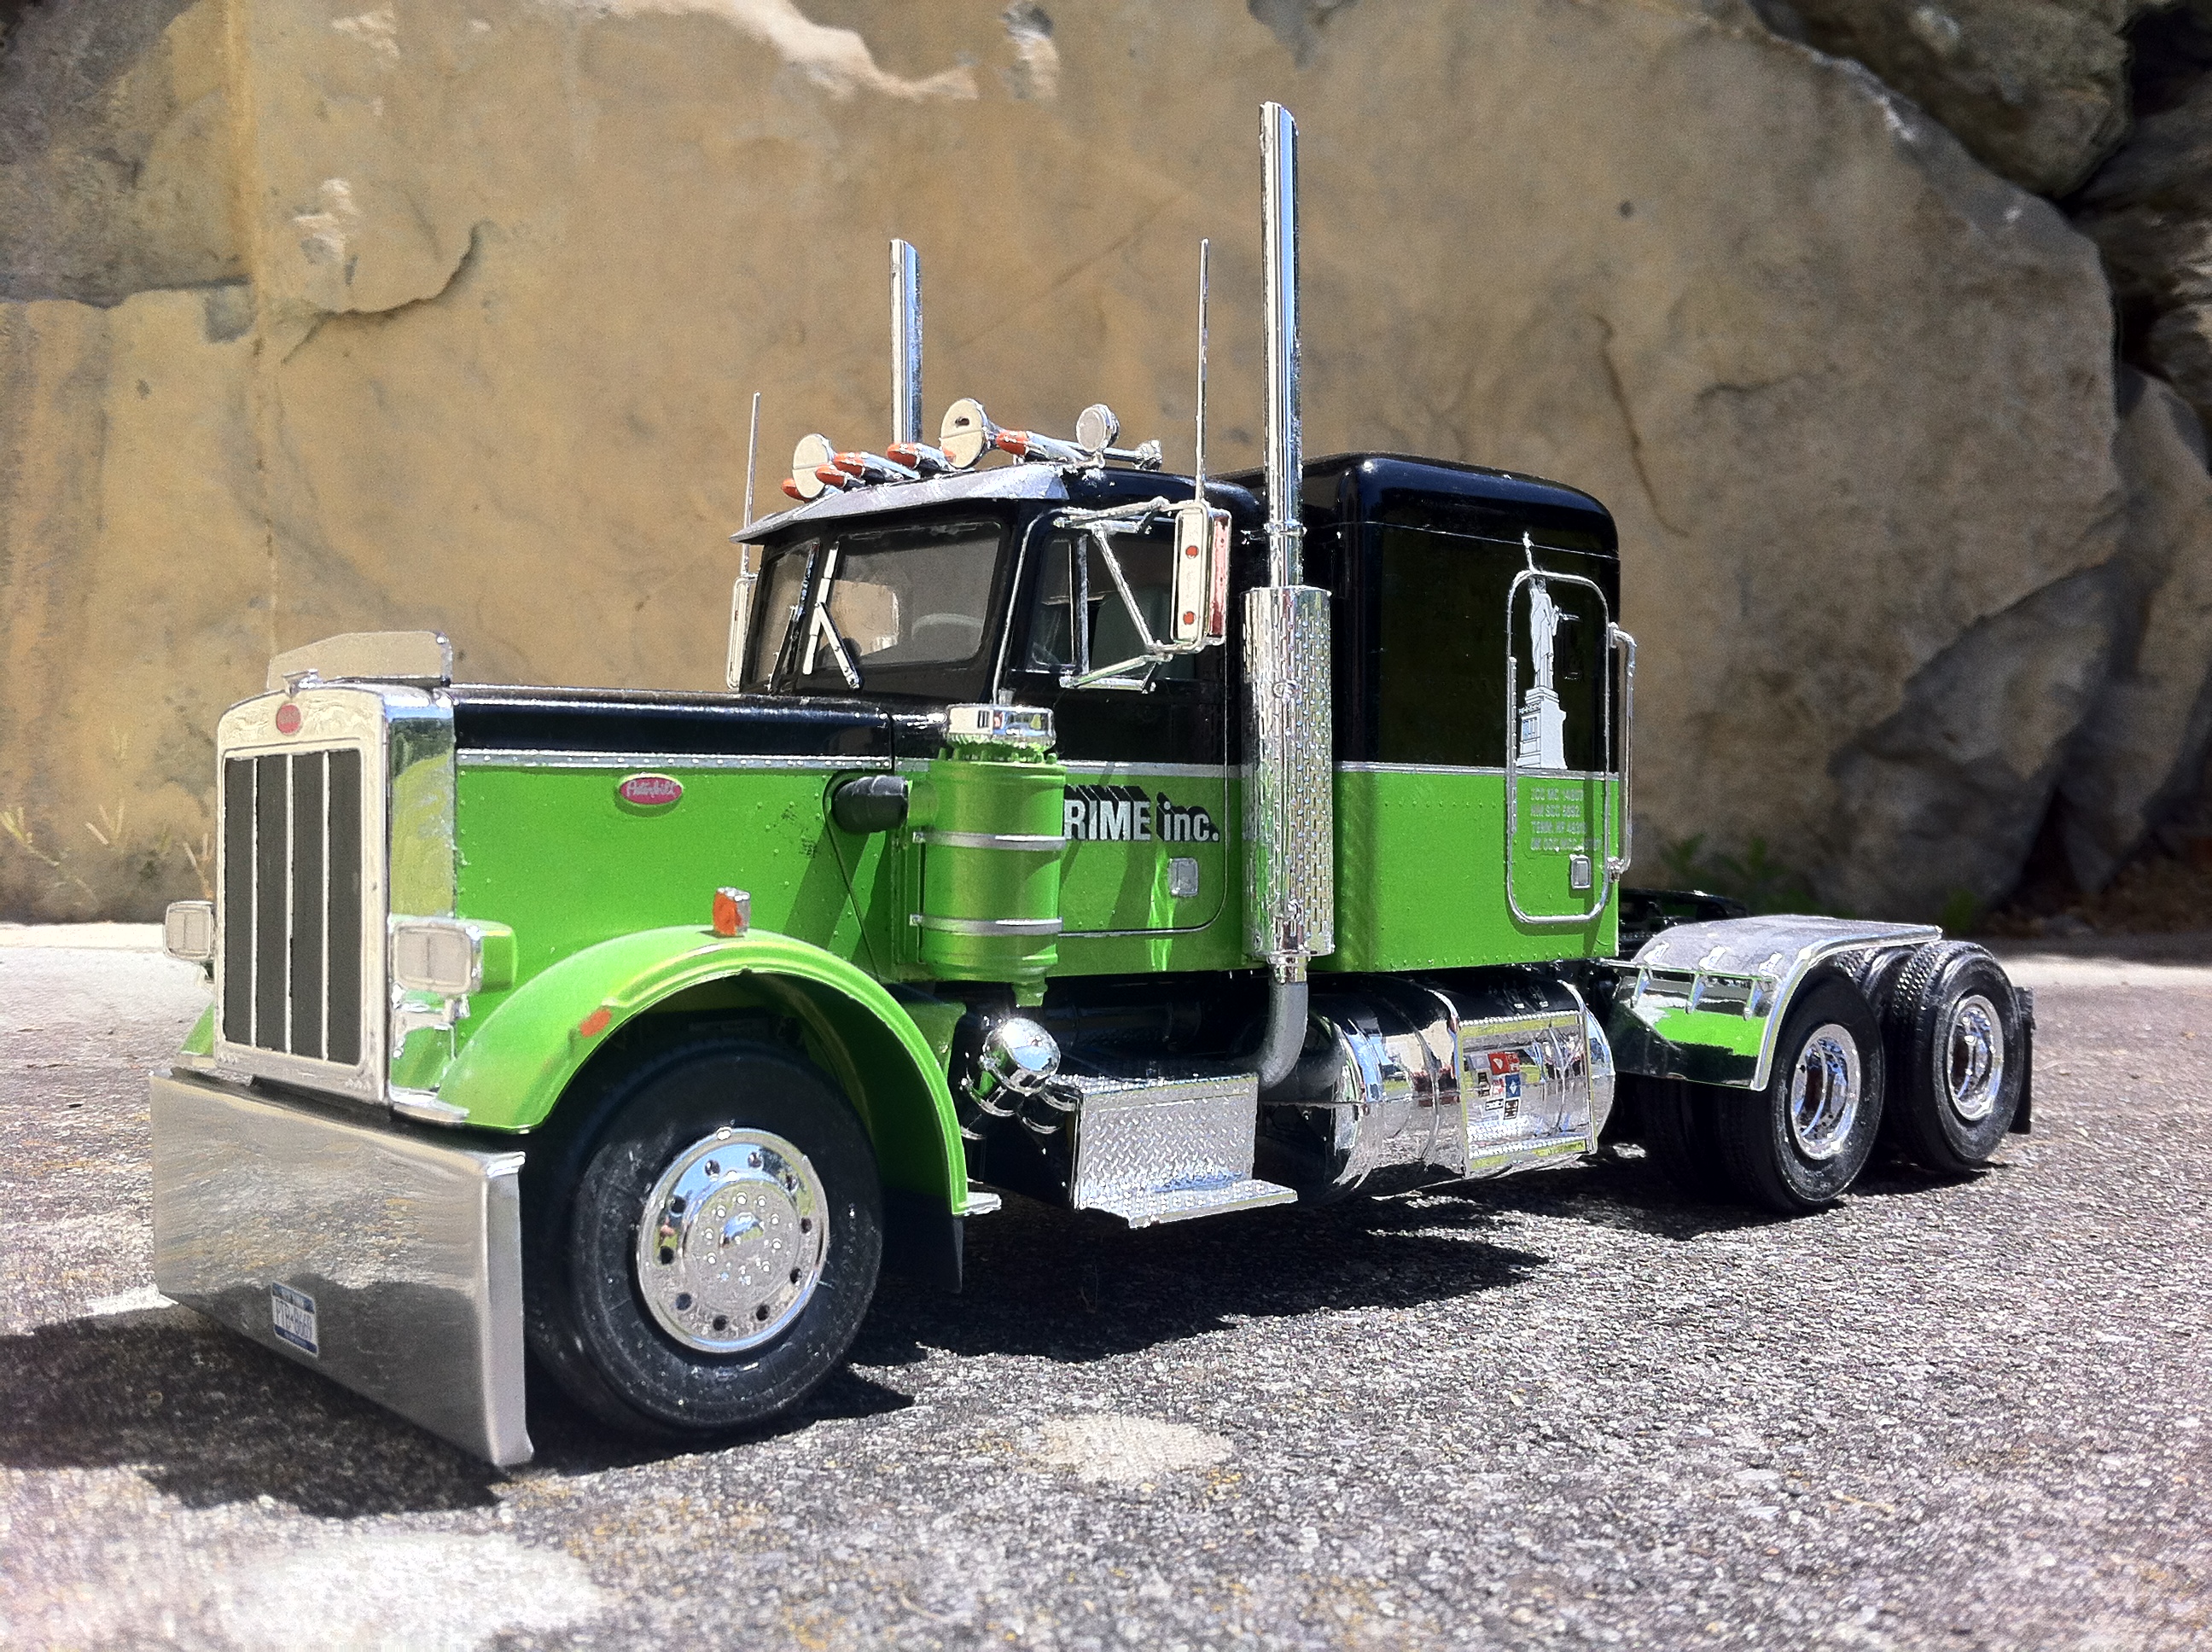
One of the first kits I built was this Revell of Germany Peterbilt 359. The grey frame I never liked, so recently I tore it down and repainted the frame in black. Some extra decals on, different license plates and a completely different look! Like a truck that gets sold and the new owner alters it a little to his style.


-
1
-
-
Thanks! Spur-of-the-moment idea, but turned out pretty well I'd say too.
-
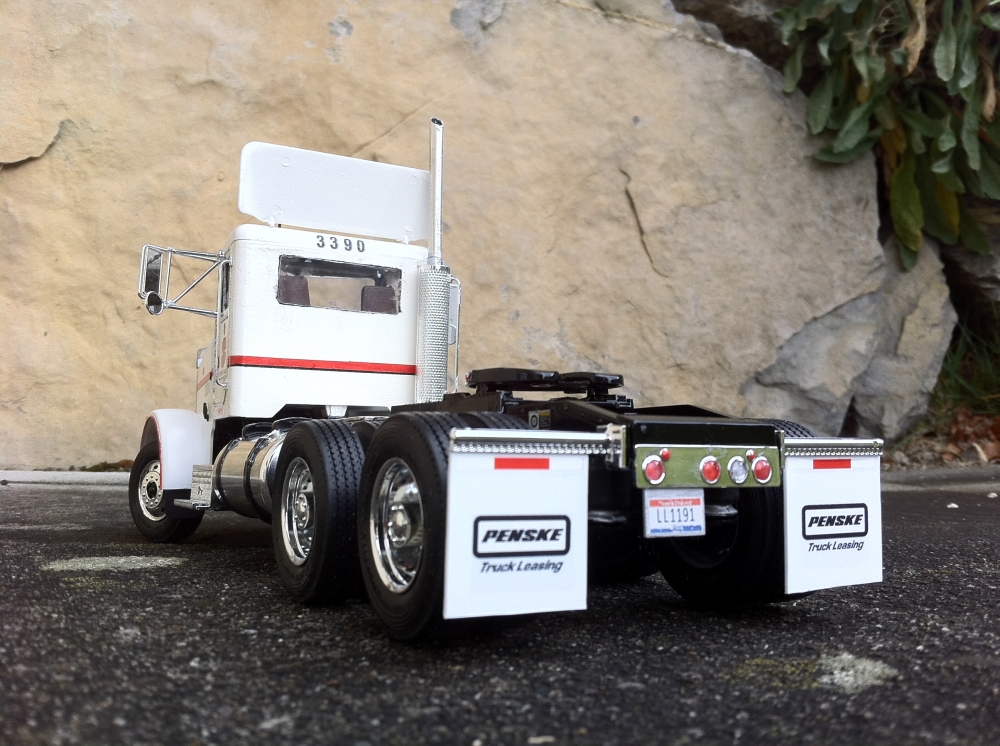
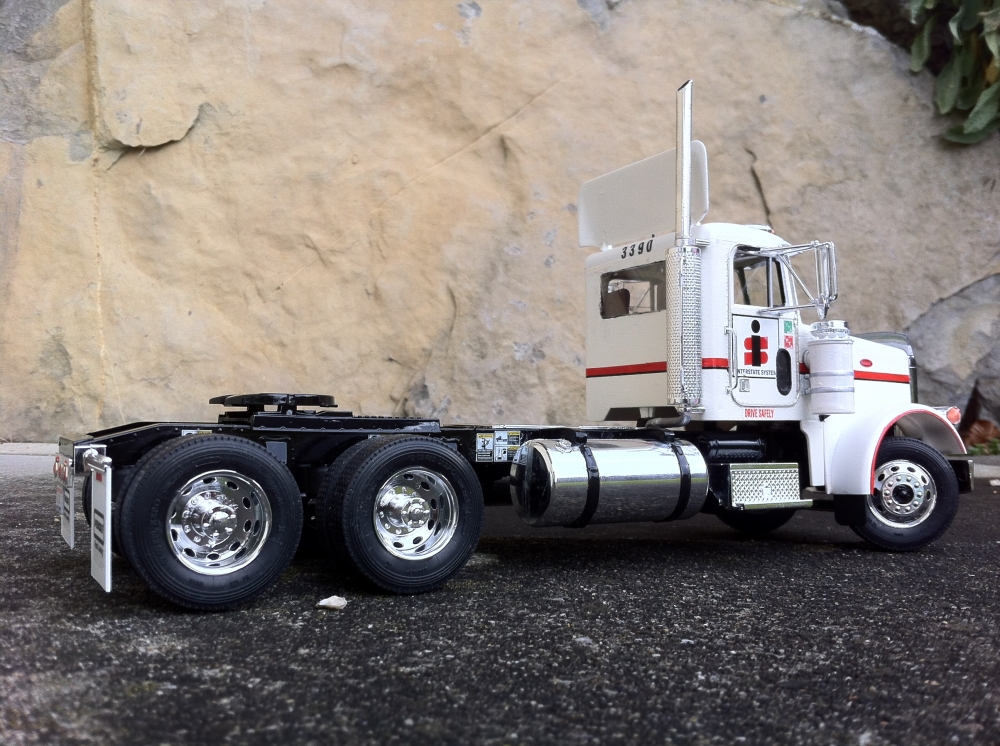
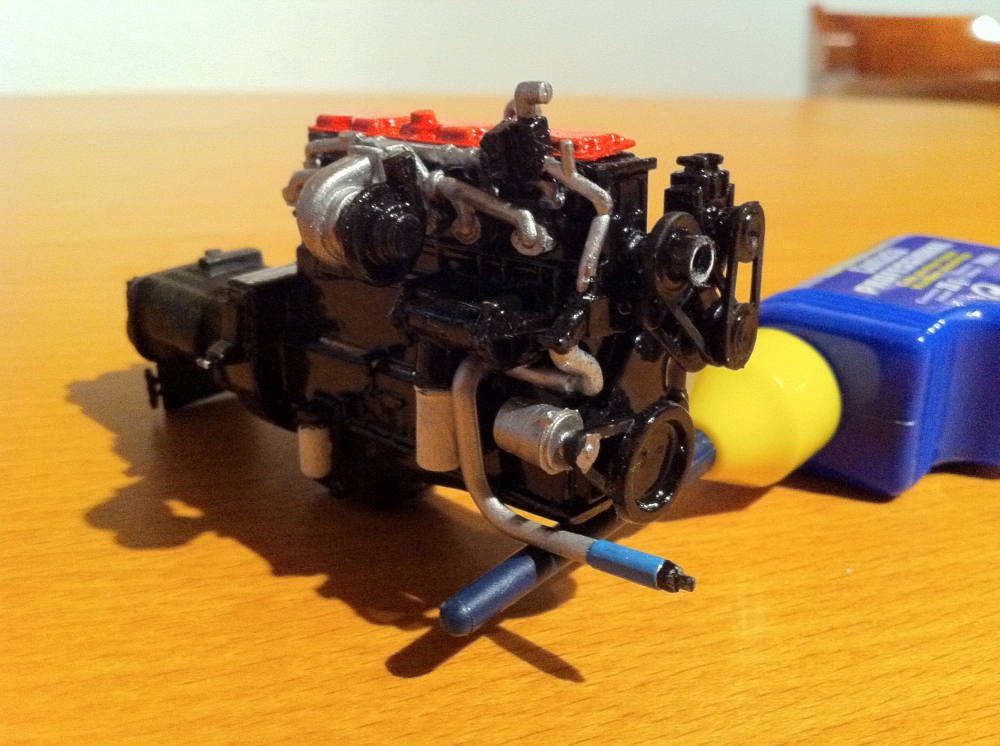
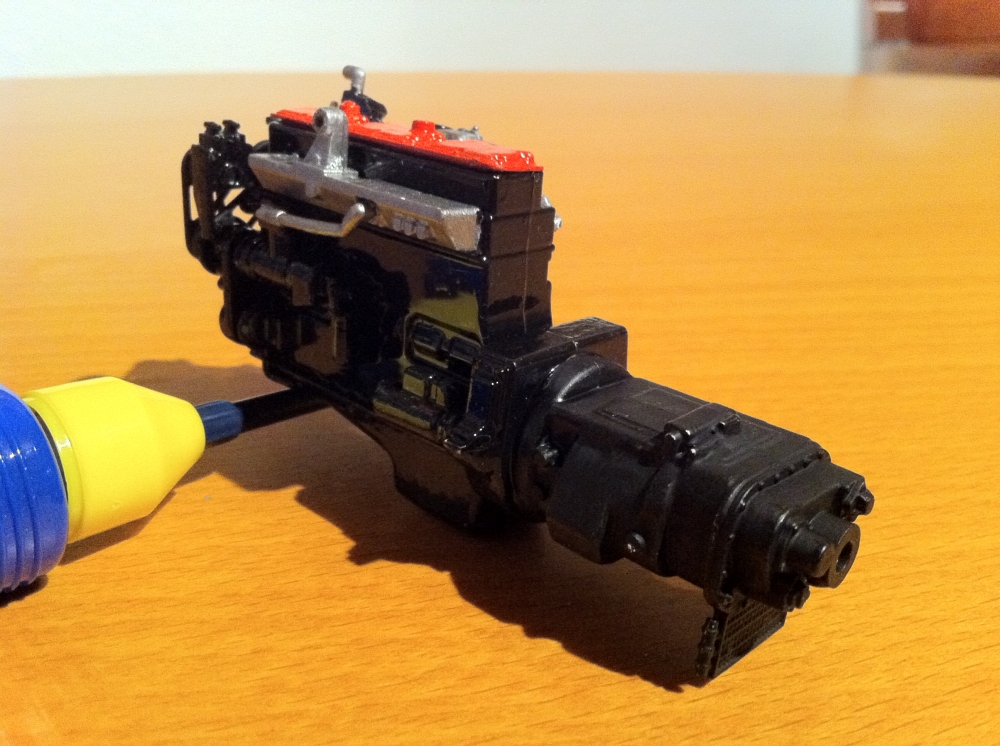
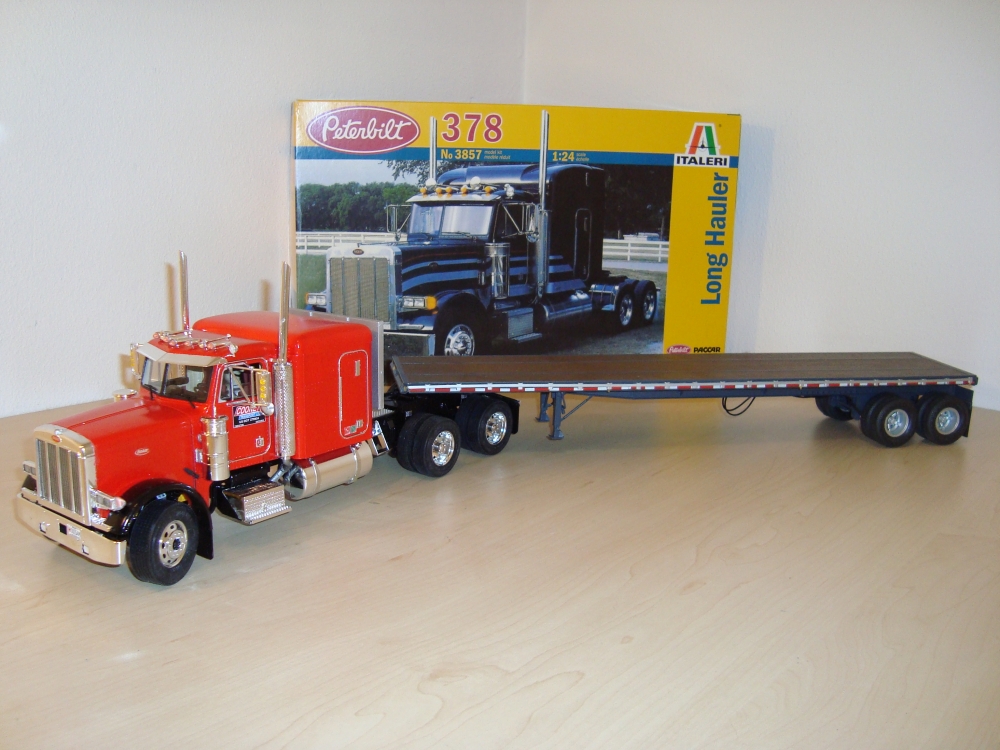
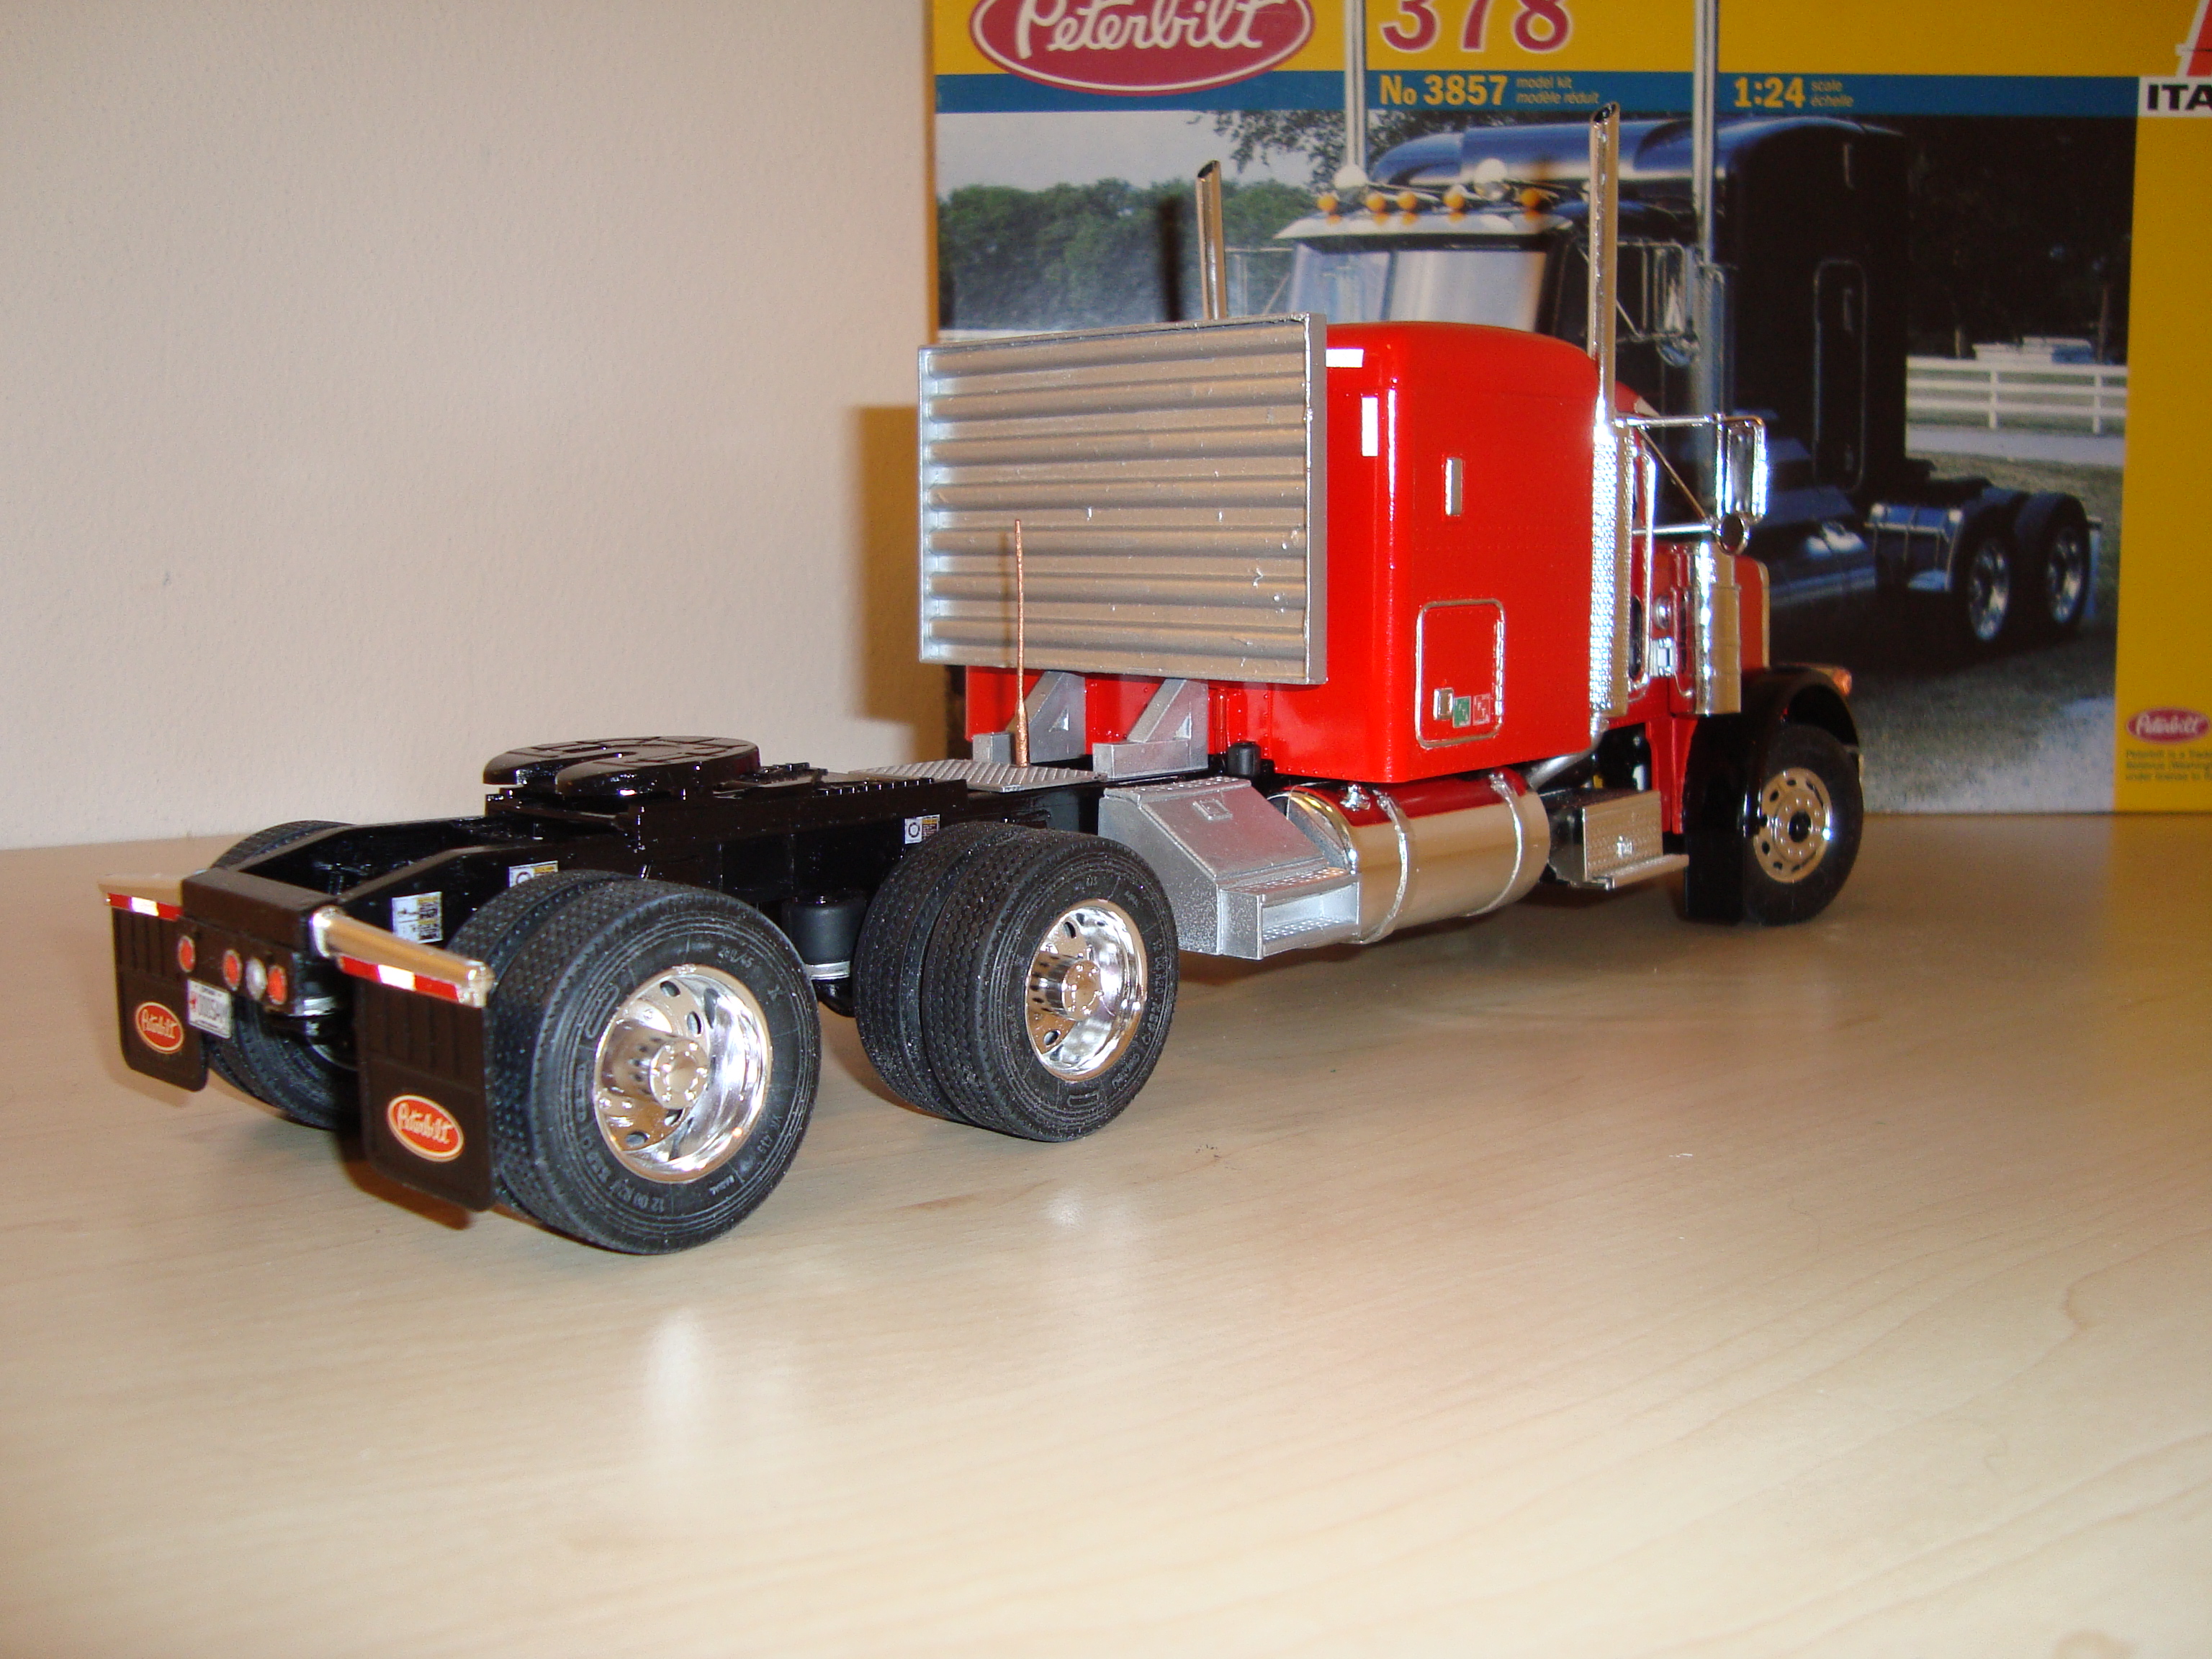
Just a quick down-and-dirty build; a very basic Peterbilt 378 day cab. Nothing fancy, just a hard-working fleet truck. Even leased, perhaps. Cummins under the hood. Exhaust behind the cab, for a change.
-
Somewhere I picked up the Italeri LAFD Heavy Wrecker kit. I wasn't too hyped about it, because I have seen pics of the real truck and it's not a WS but a Pete. Anyway, the kit was dirt cheap so I decided to get it.
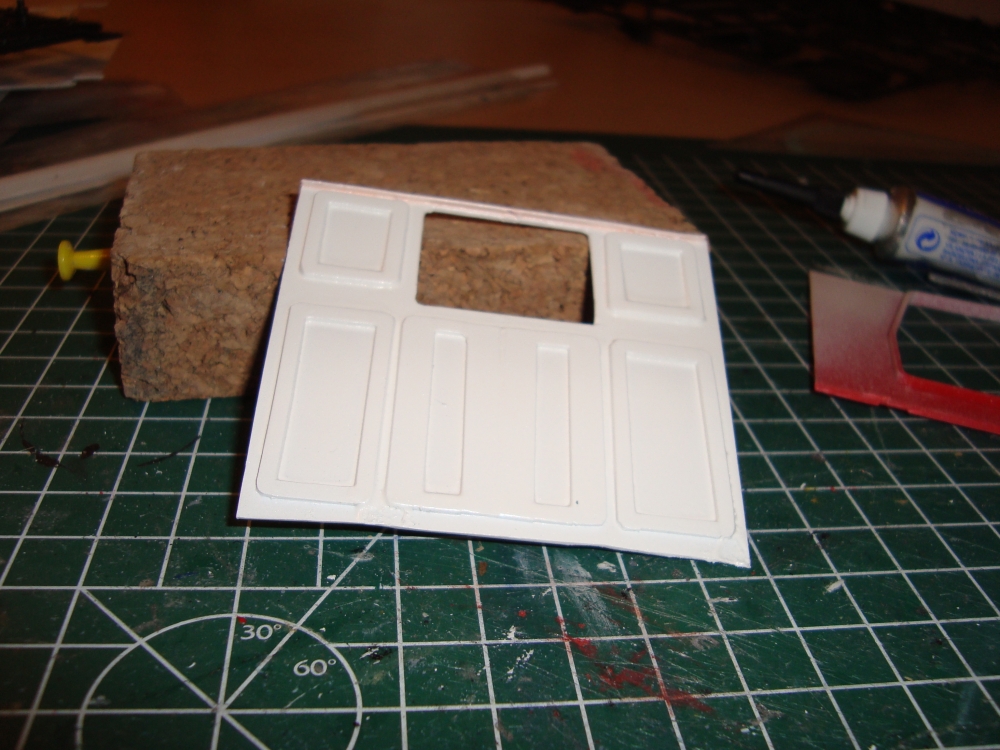
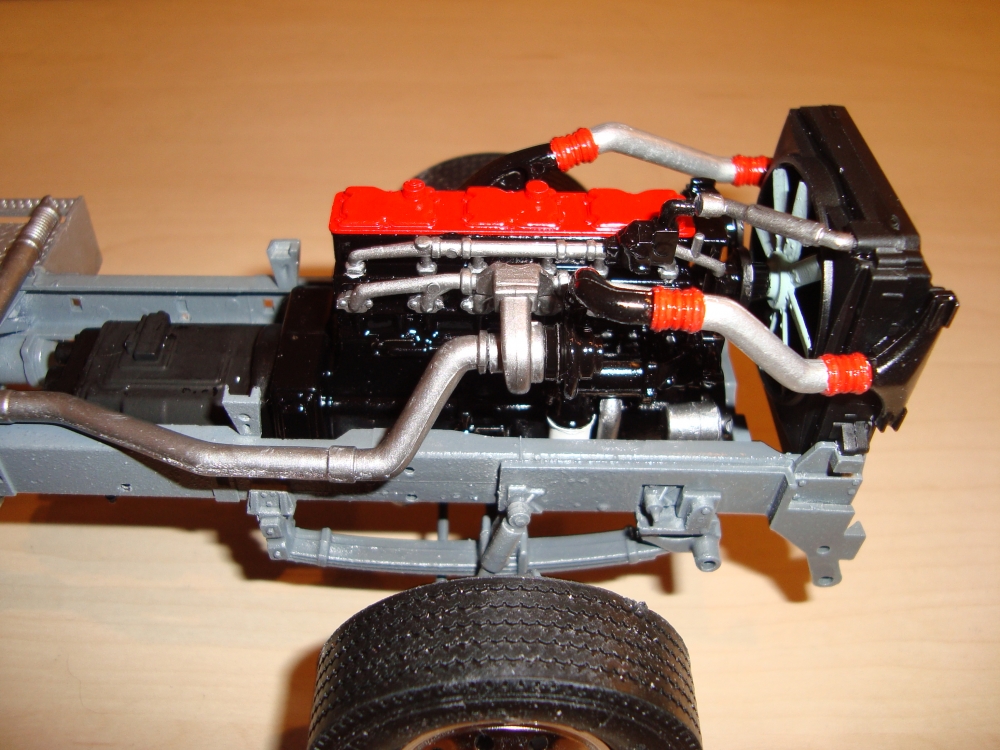
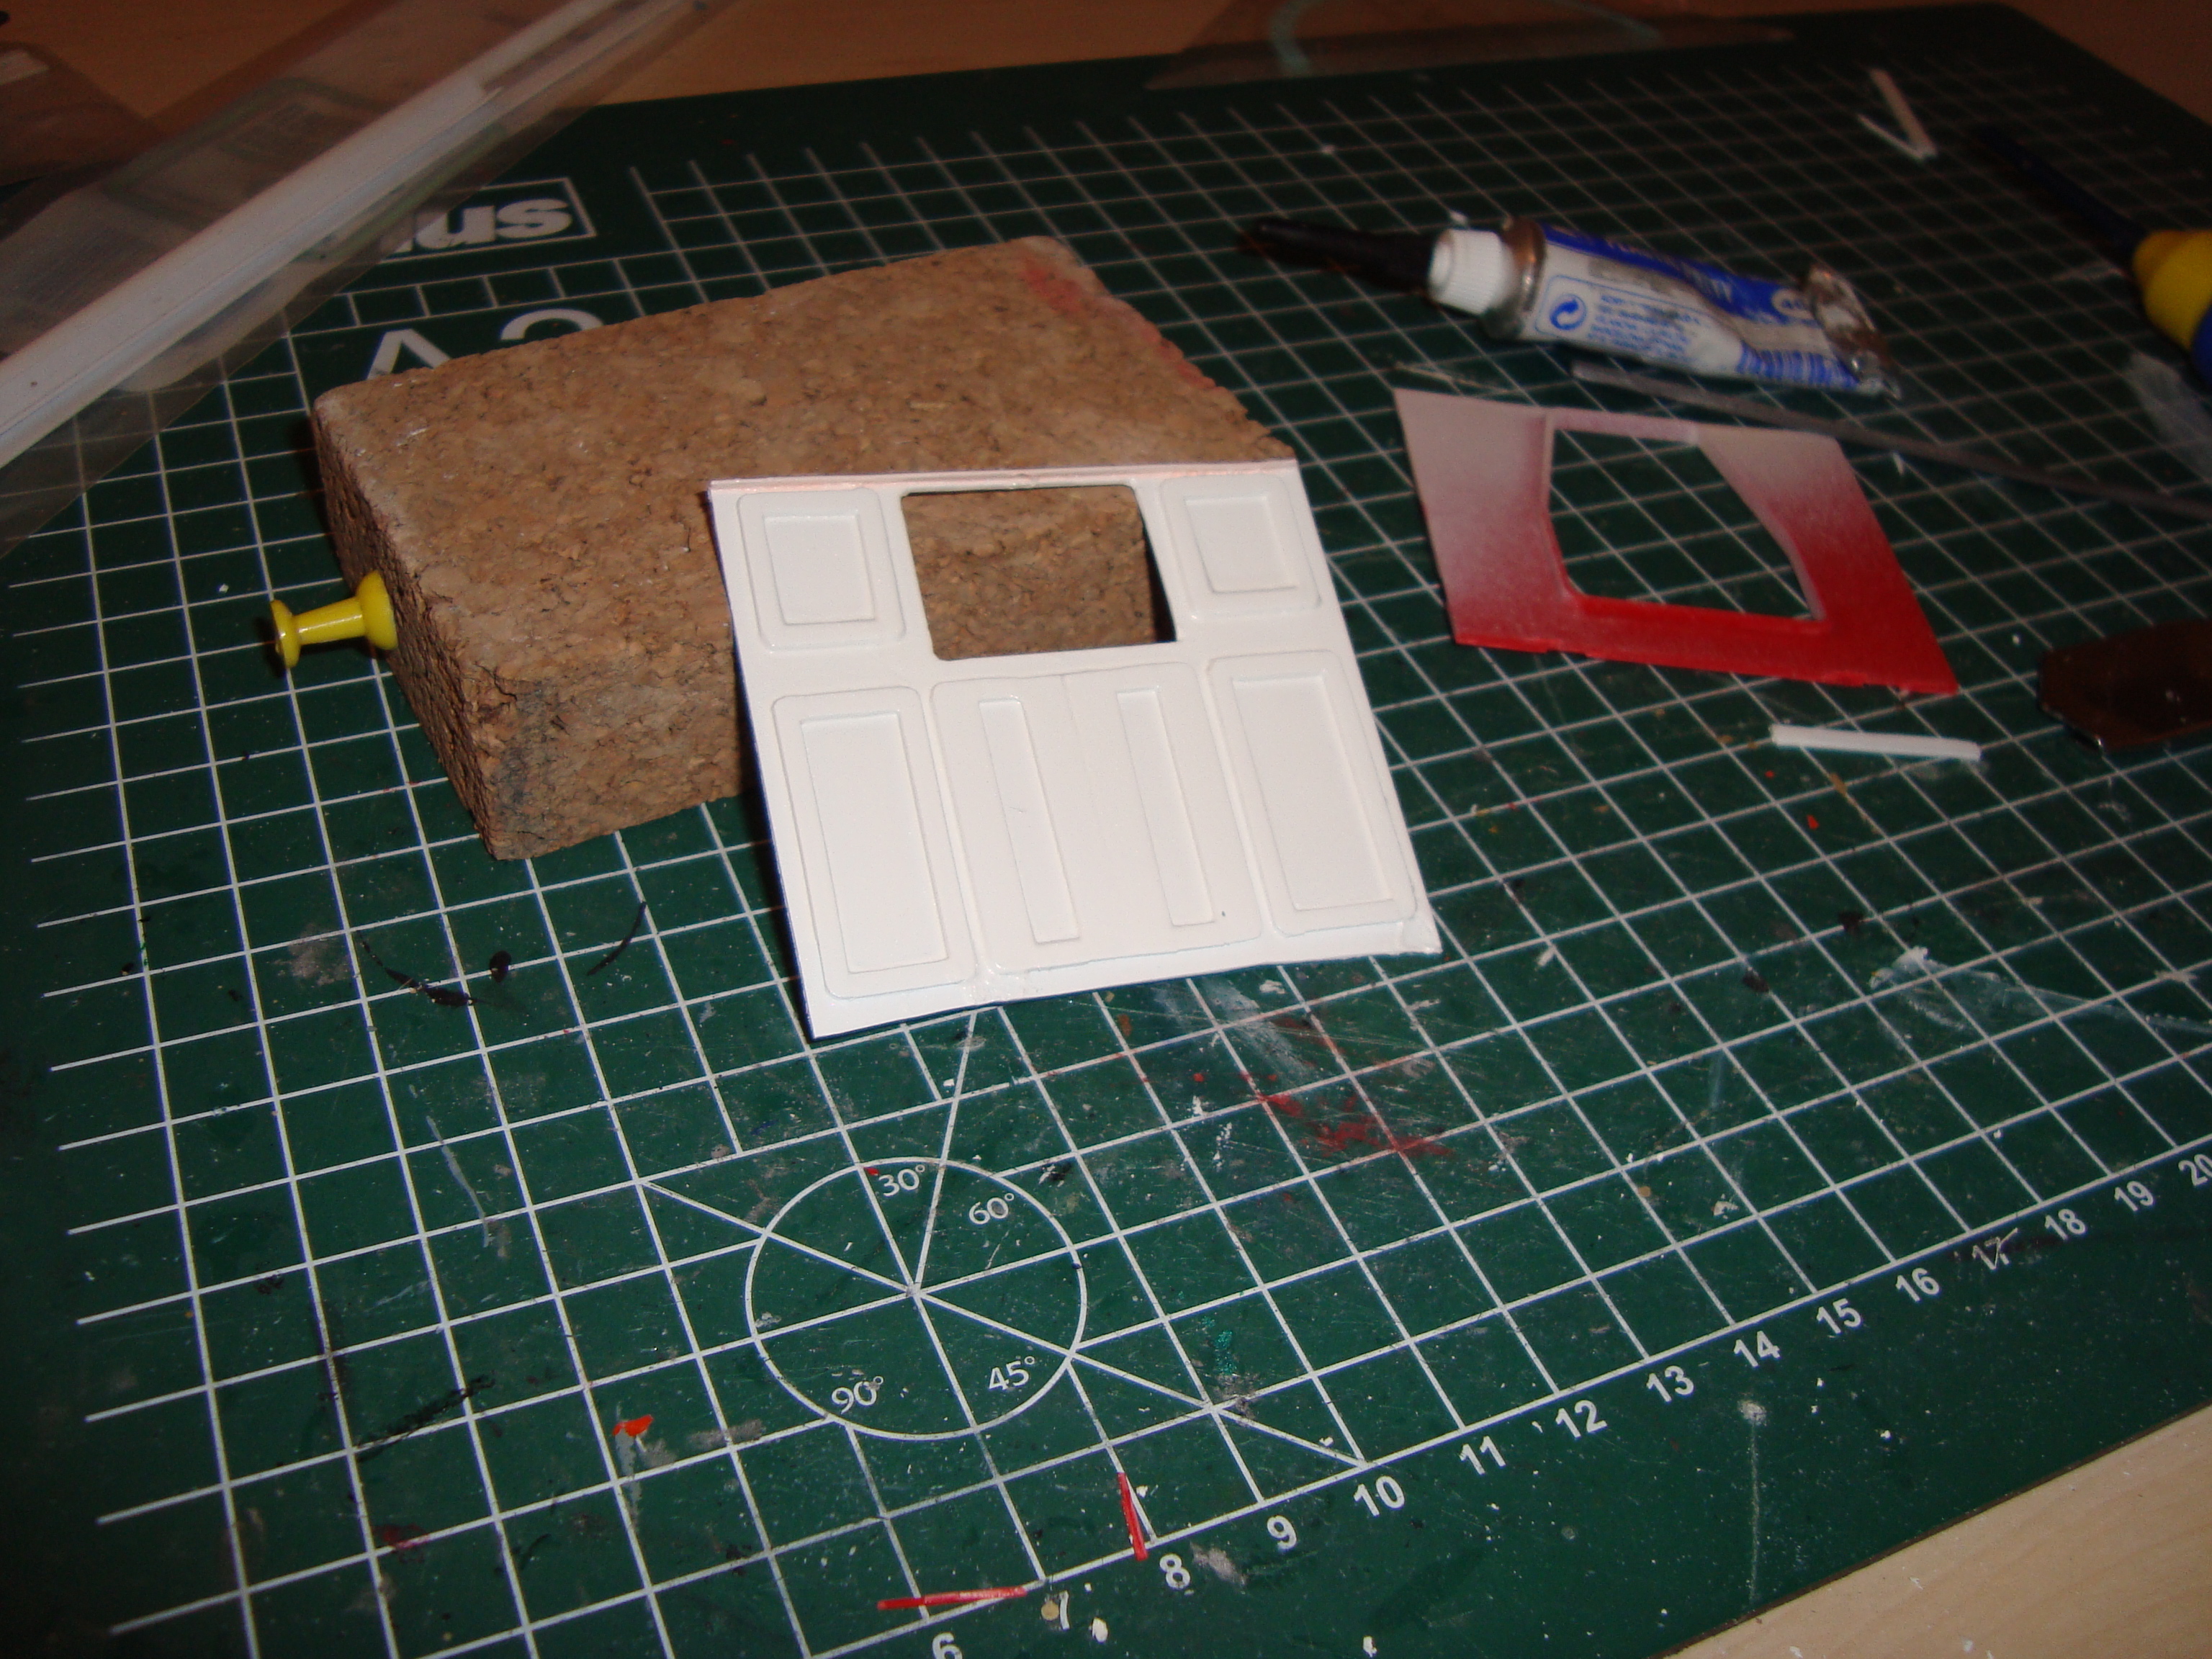
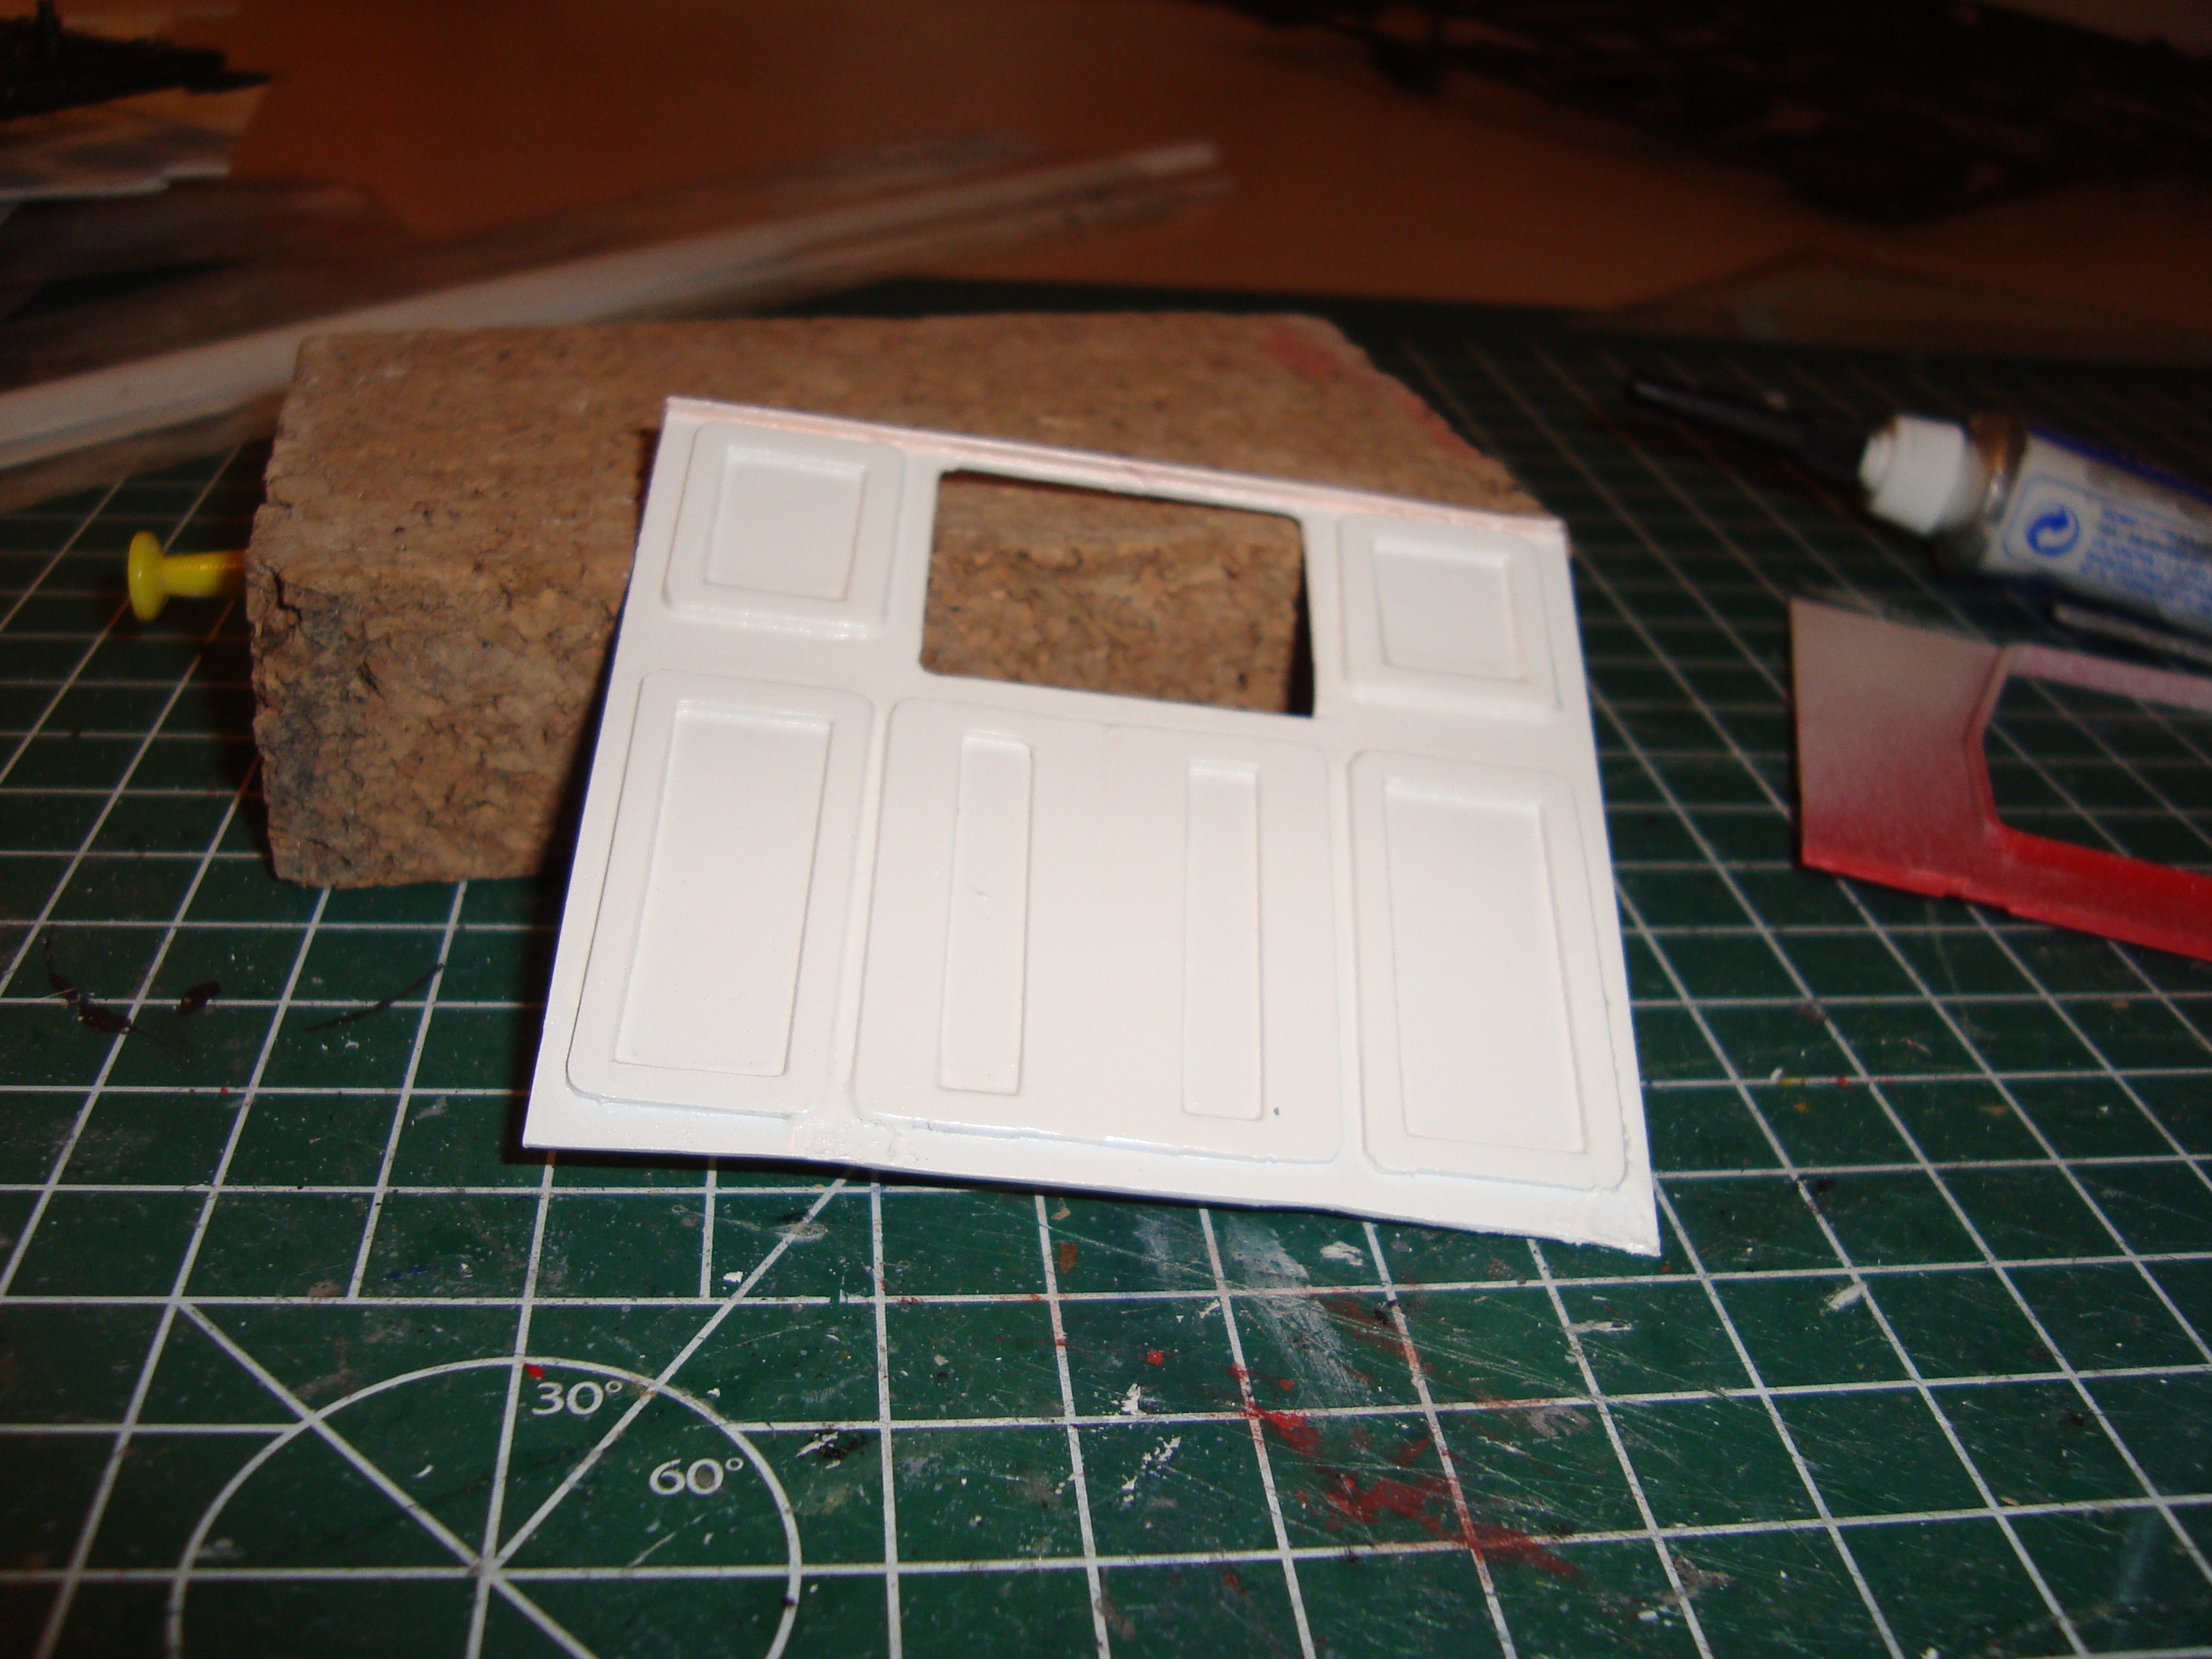
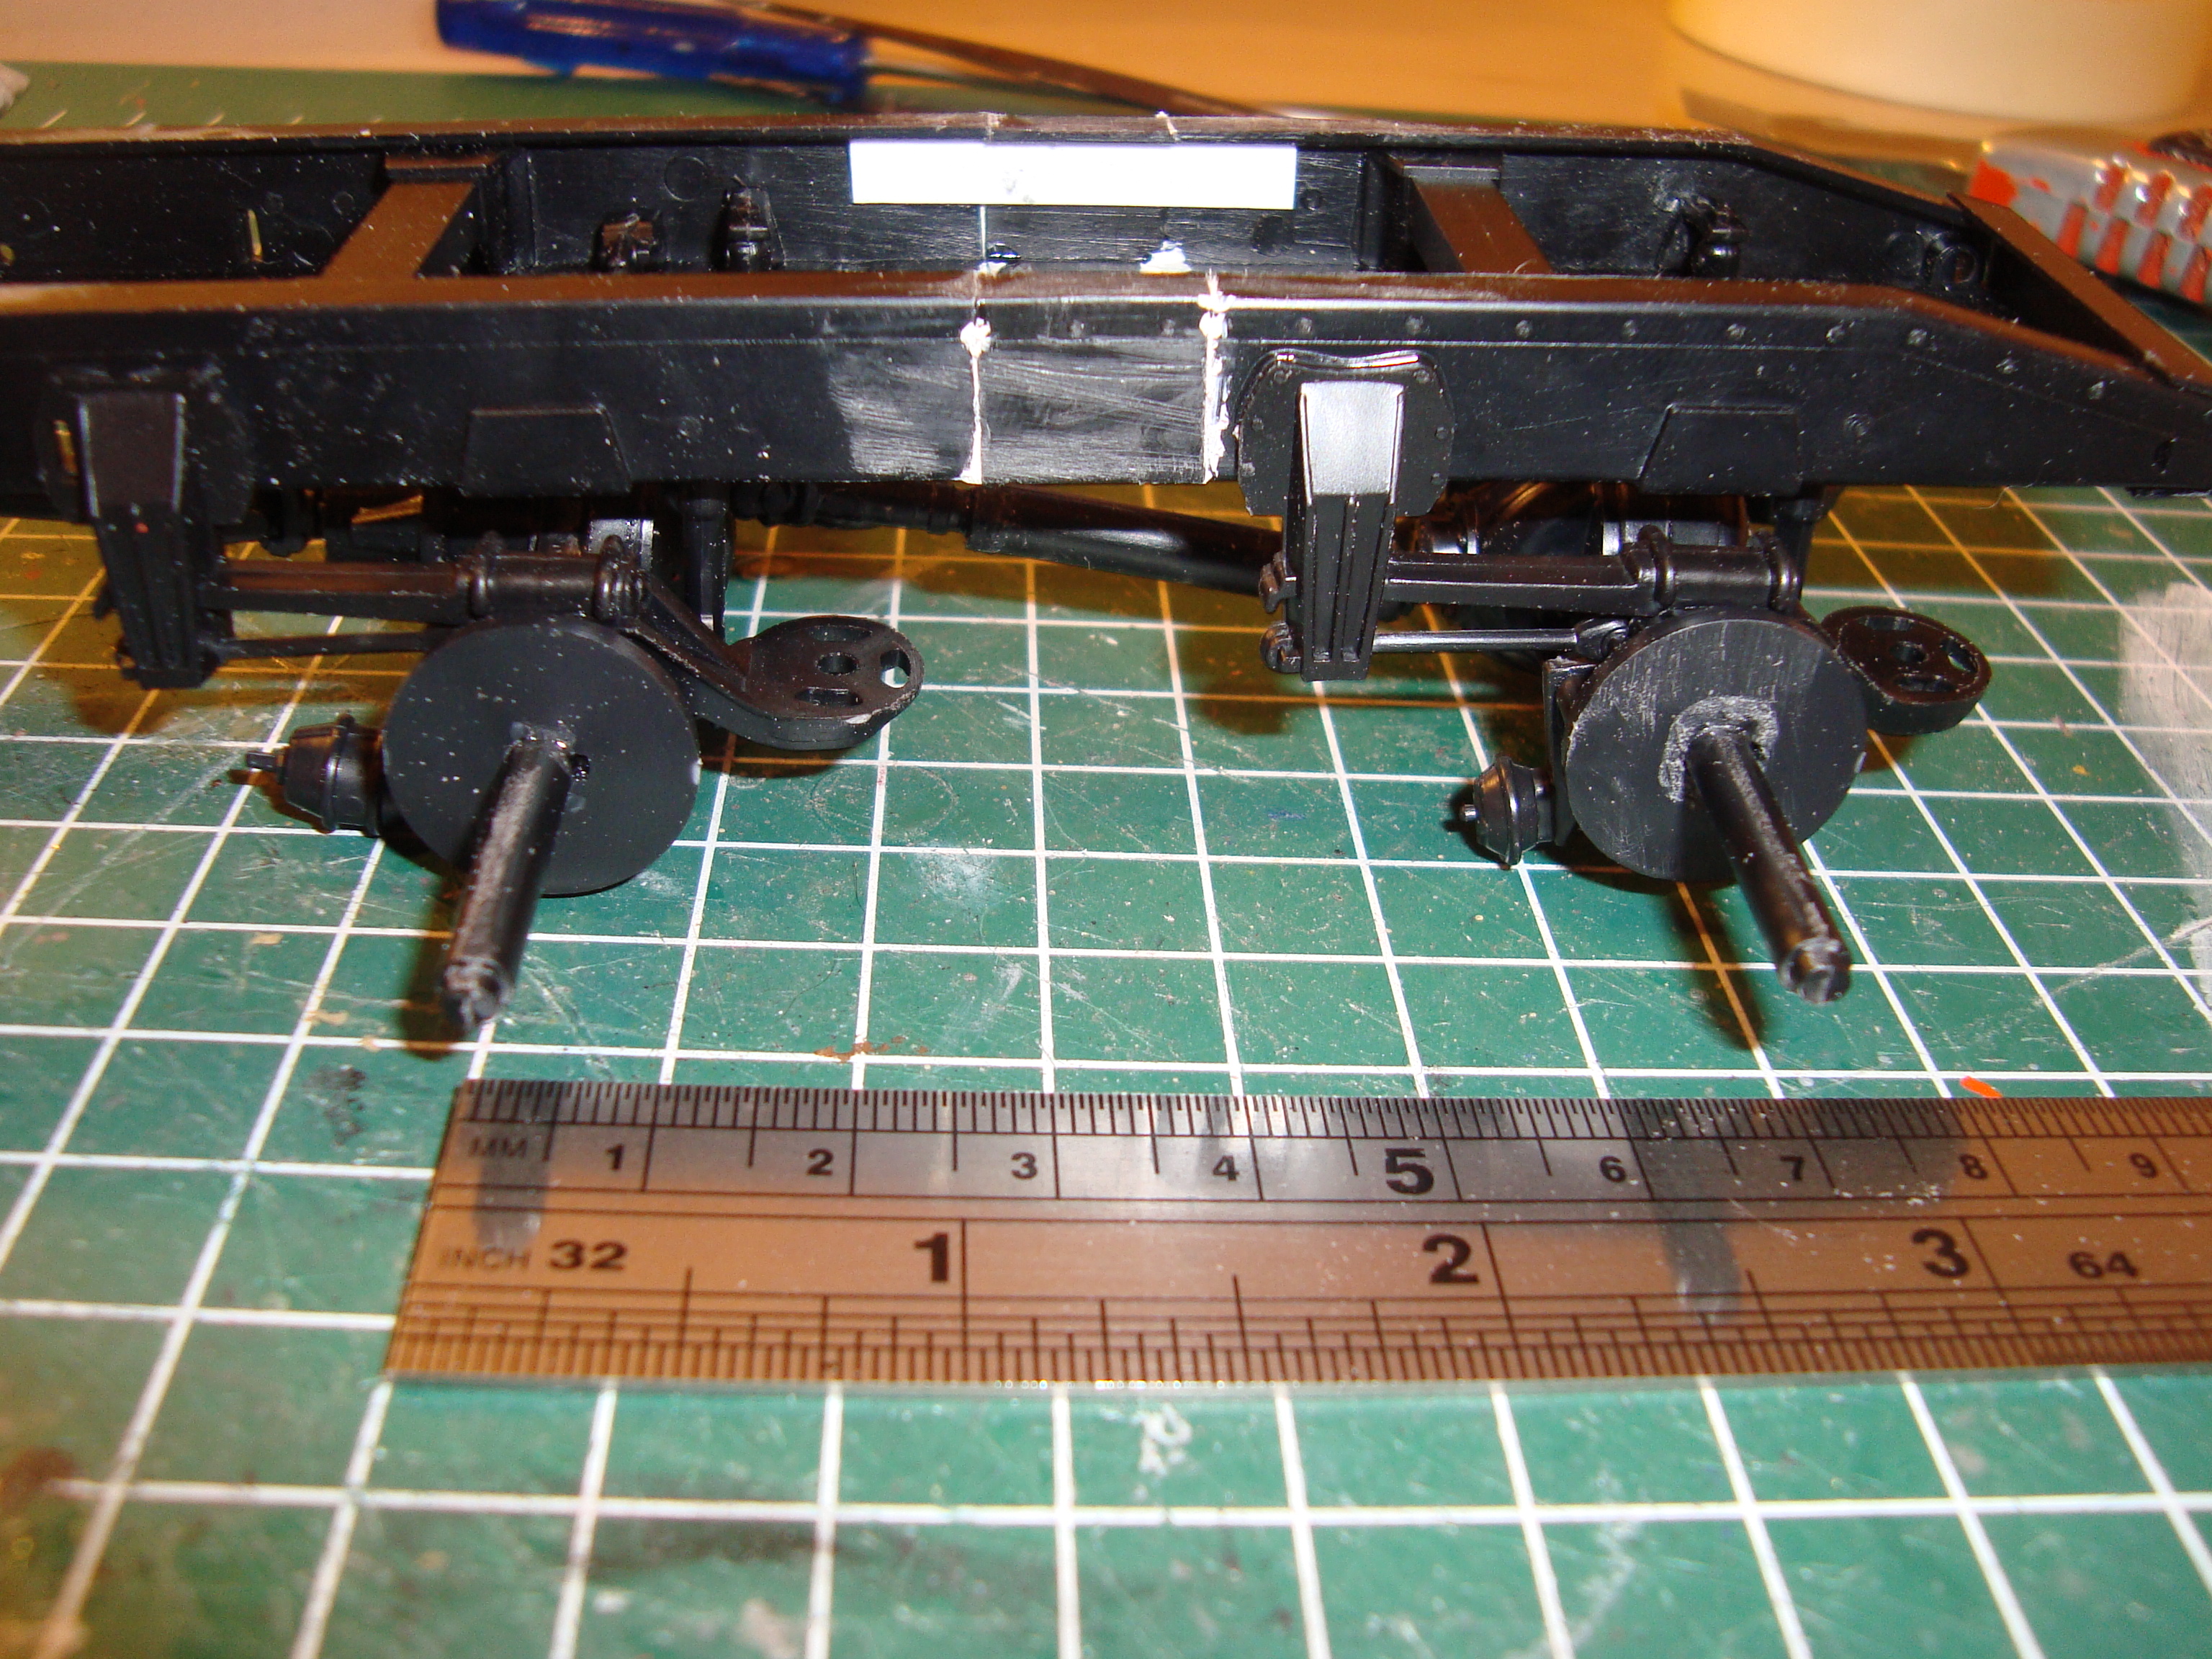
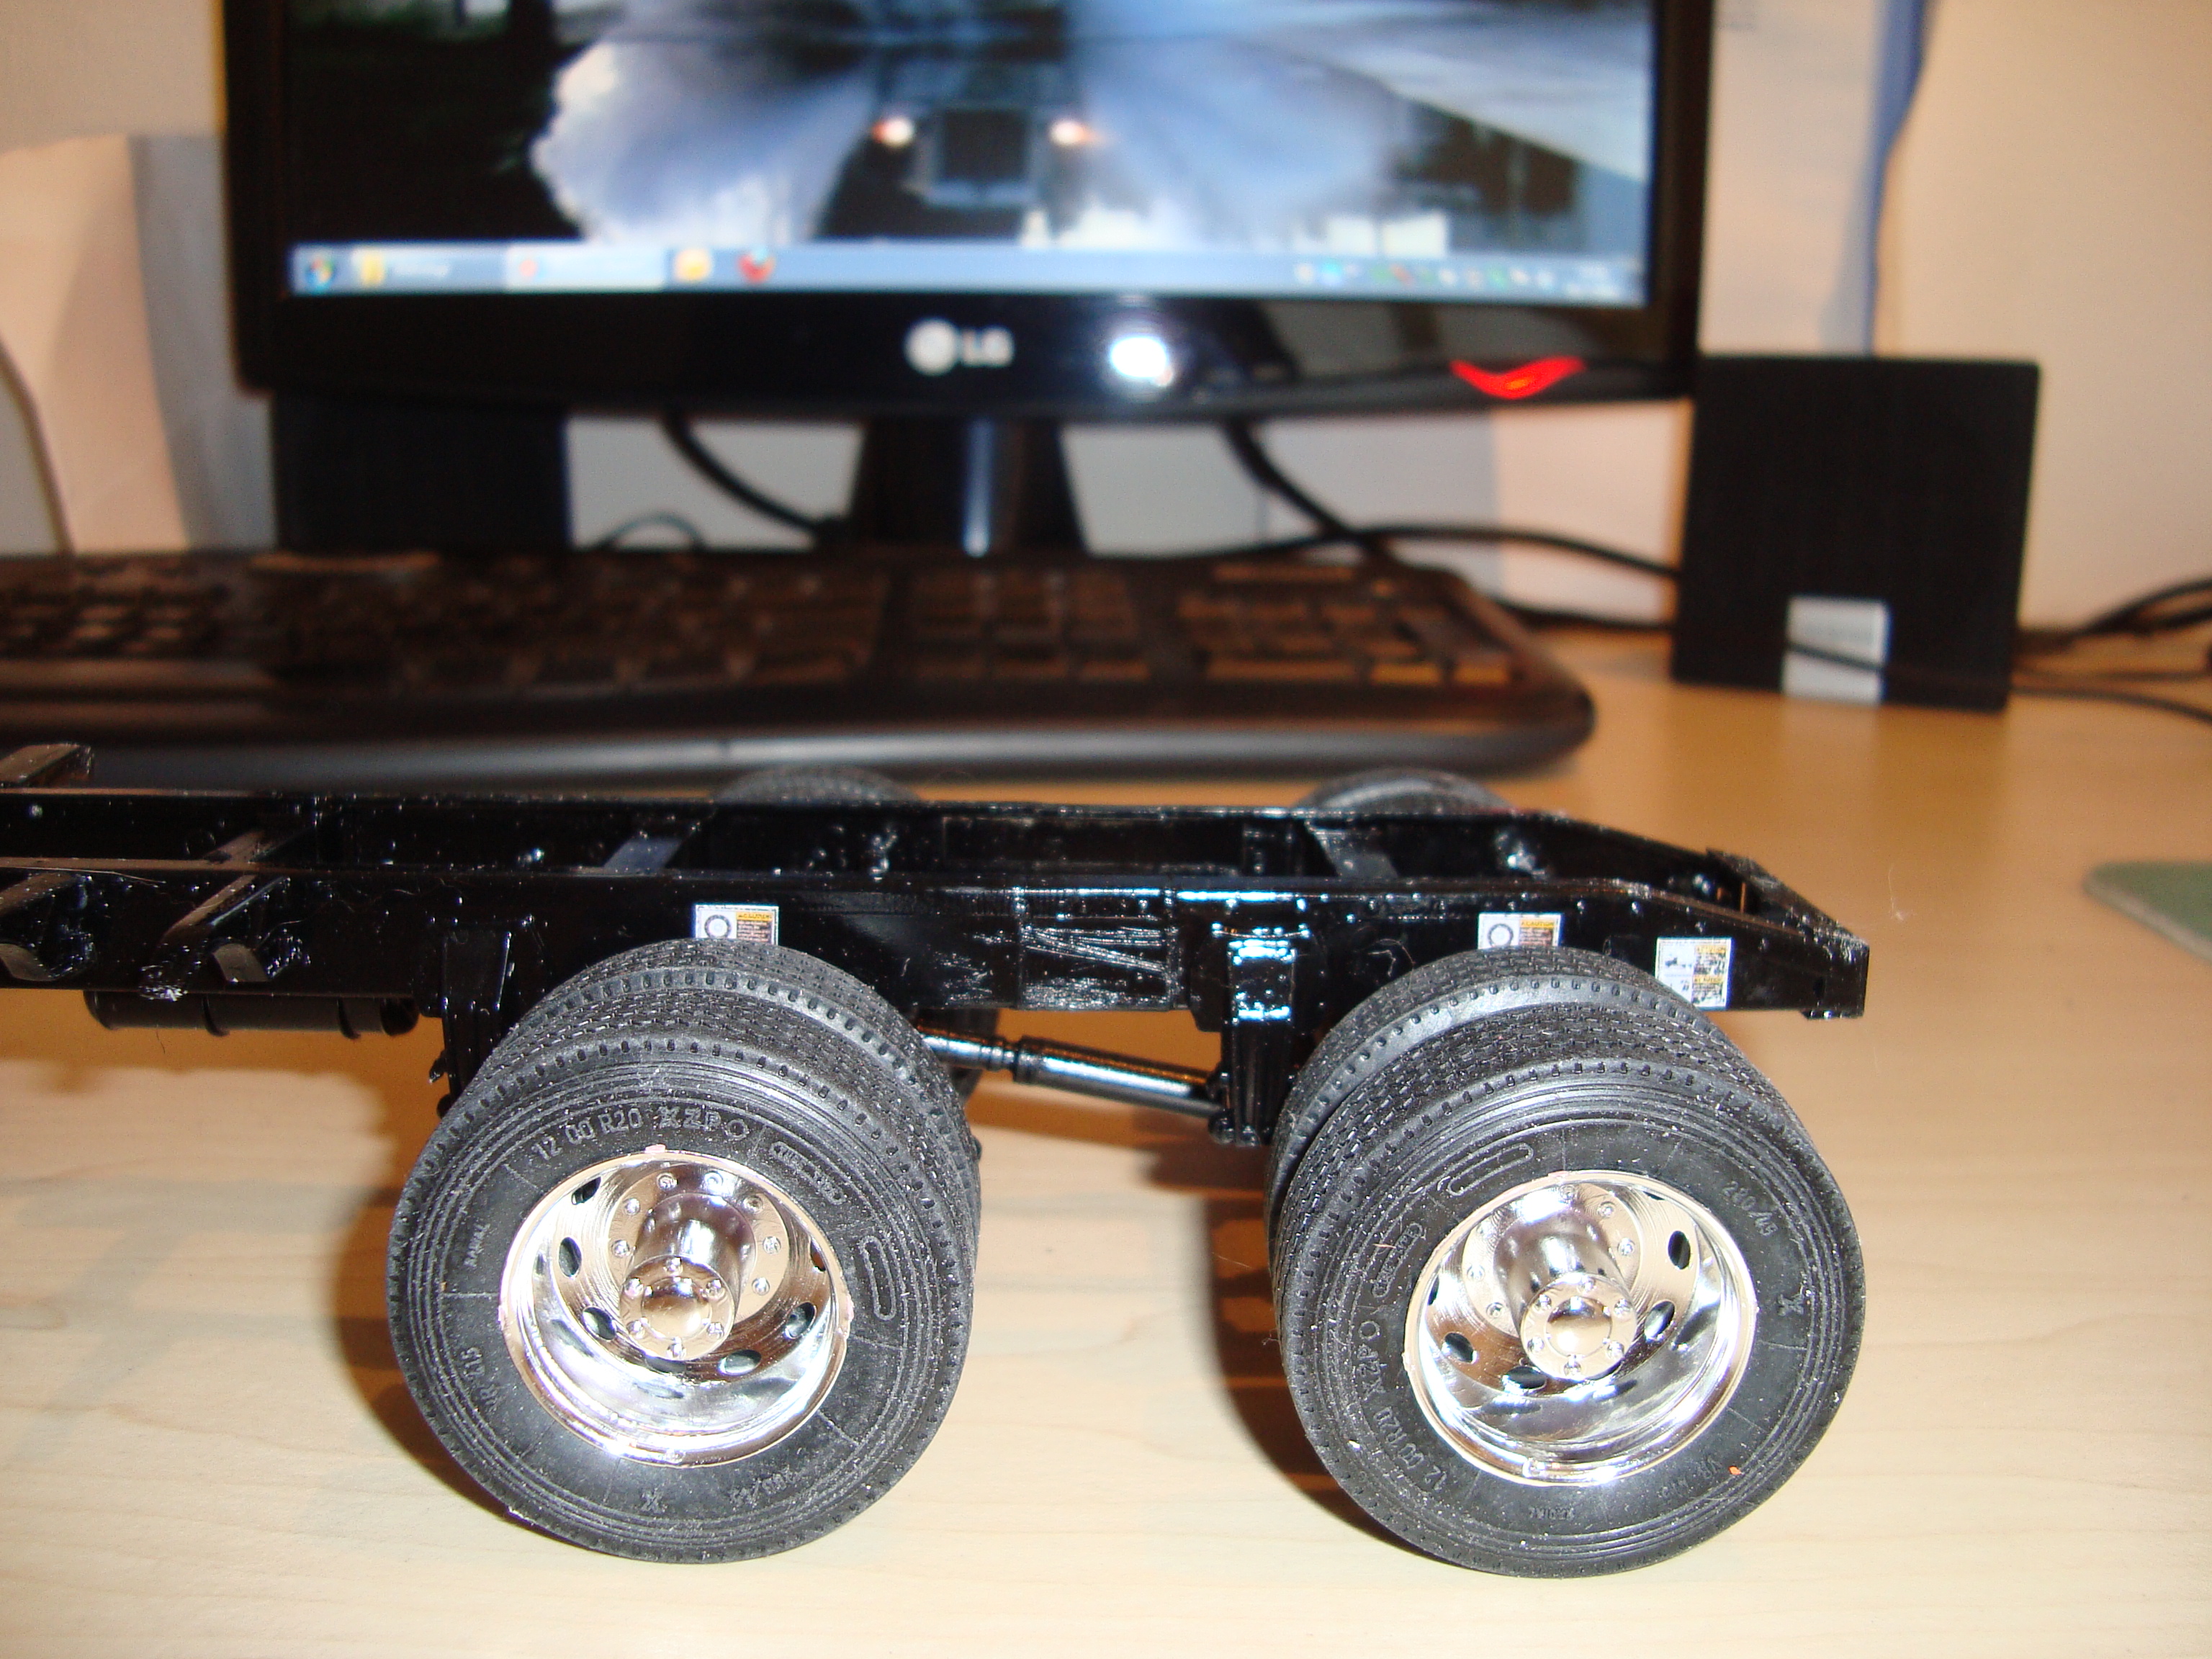
I (still) have tons of Italeri Peterbilt kits in stock, and started with the assembly of a 377 model. I built a daycab panel from styrene, and used tanks from a Revell of Germany kit (slightly cut down); no battery box, they can also fit under the passenger seat, right?The wrecker body (I think it's called a Bro) I assembled and painted next. Also I scratchbuilt a tool cabinet. When I did the final assembly, I found out the Italerians designed this kit with two separate frames; one for the truck and one for the wrecker body. If you don't adapt either, the body will sit too high, as you can see in one of the pics. Nice…

I cut out the frame from the wrecker body to make it sit better. This also meant I had to adjust the tool cabinet. The final result from this operation is that the white stripe over the side looks a little bit misaligned...


-
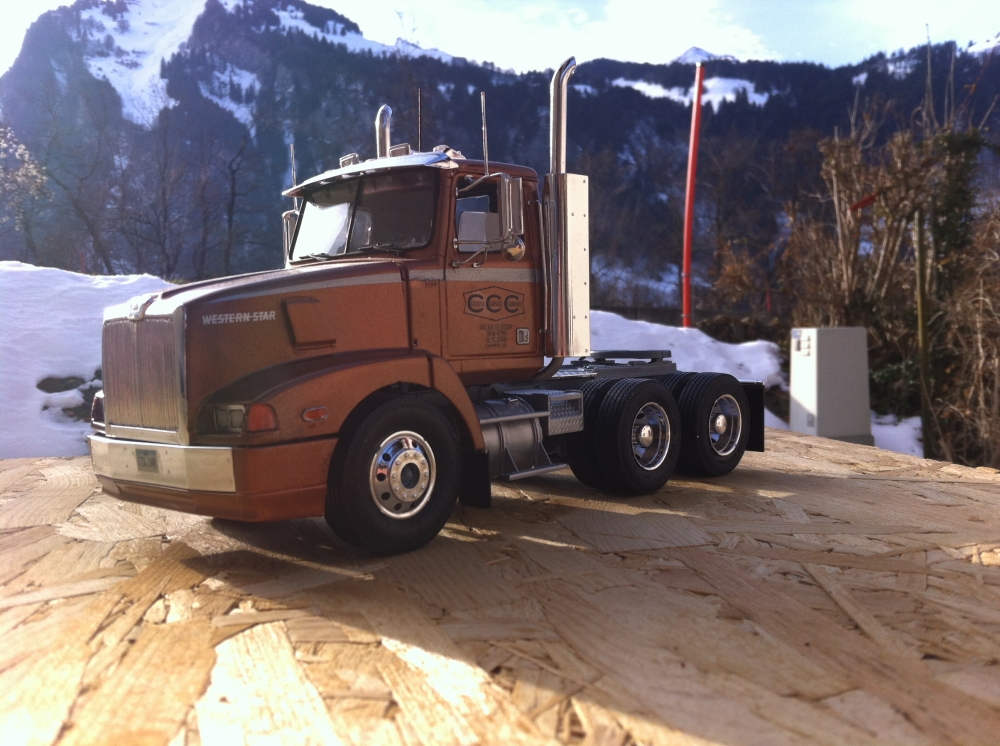
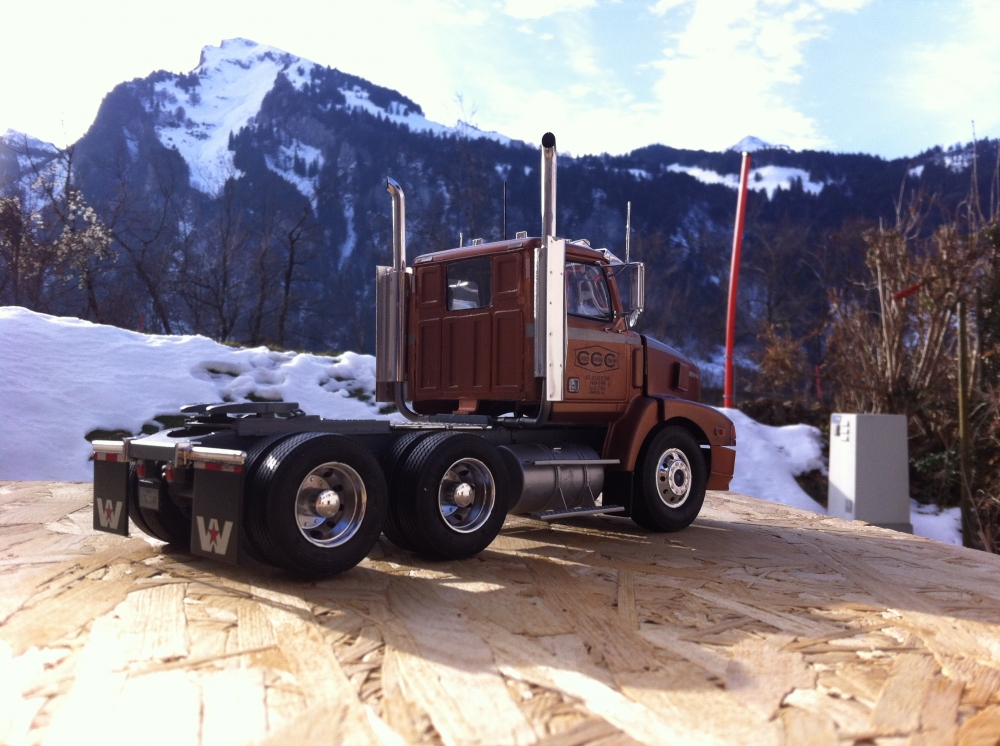
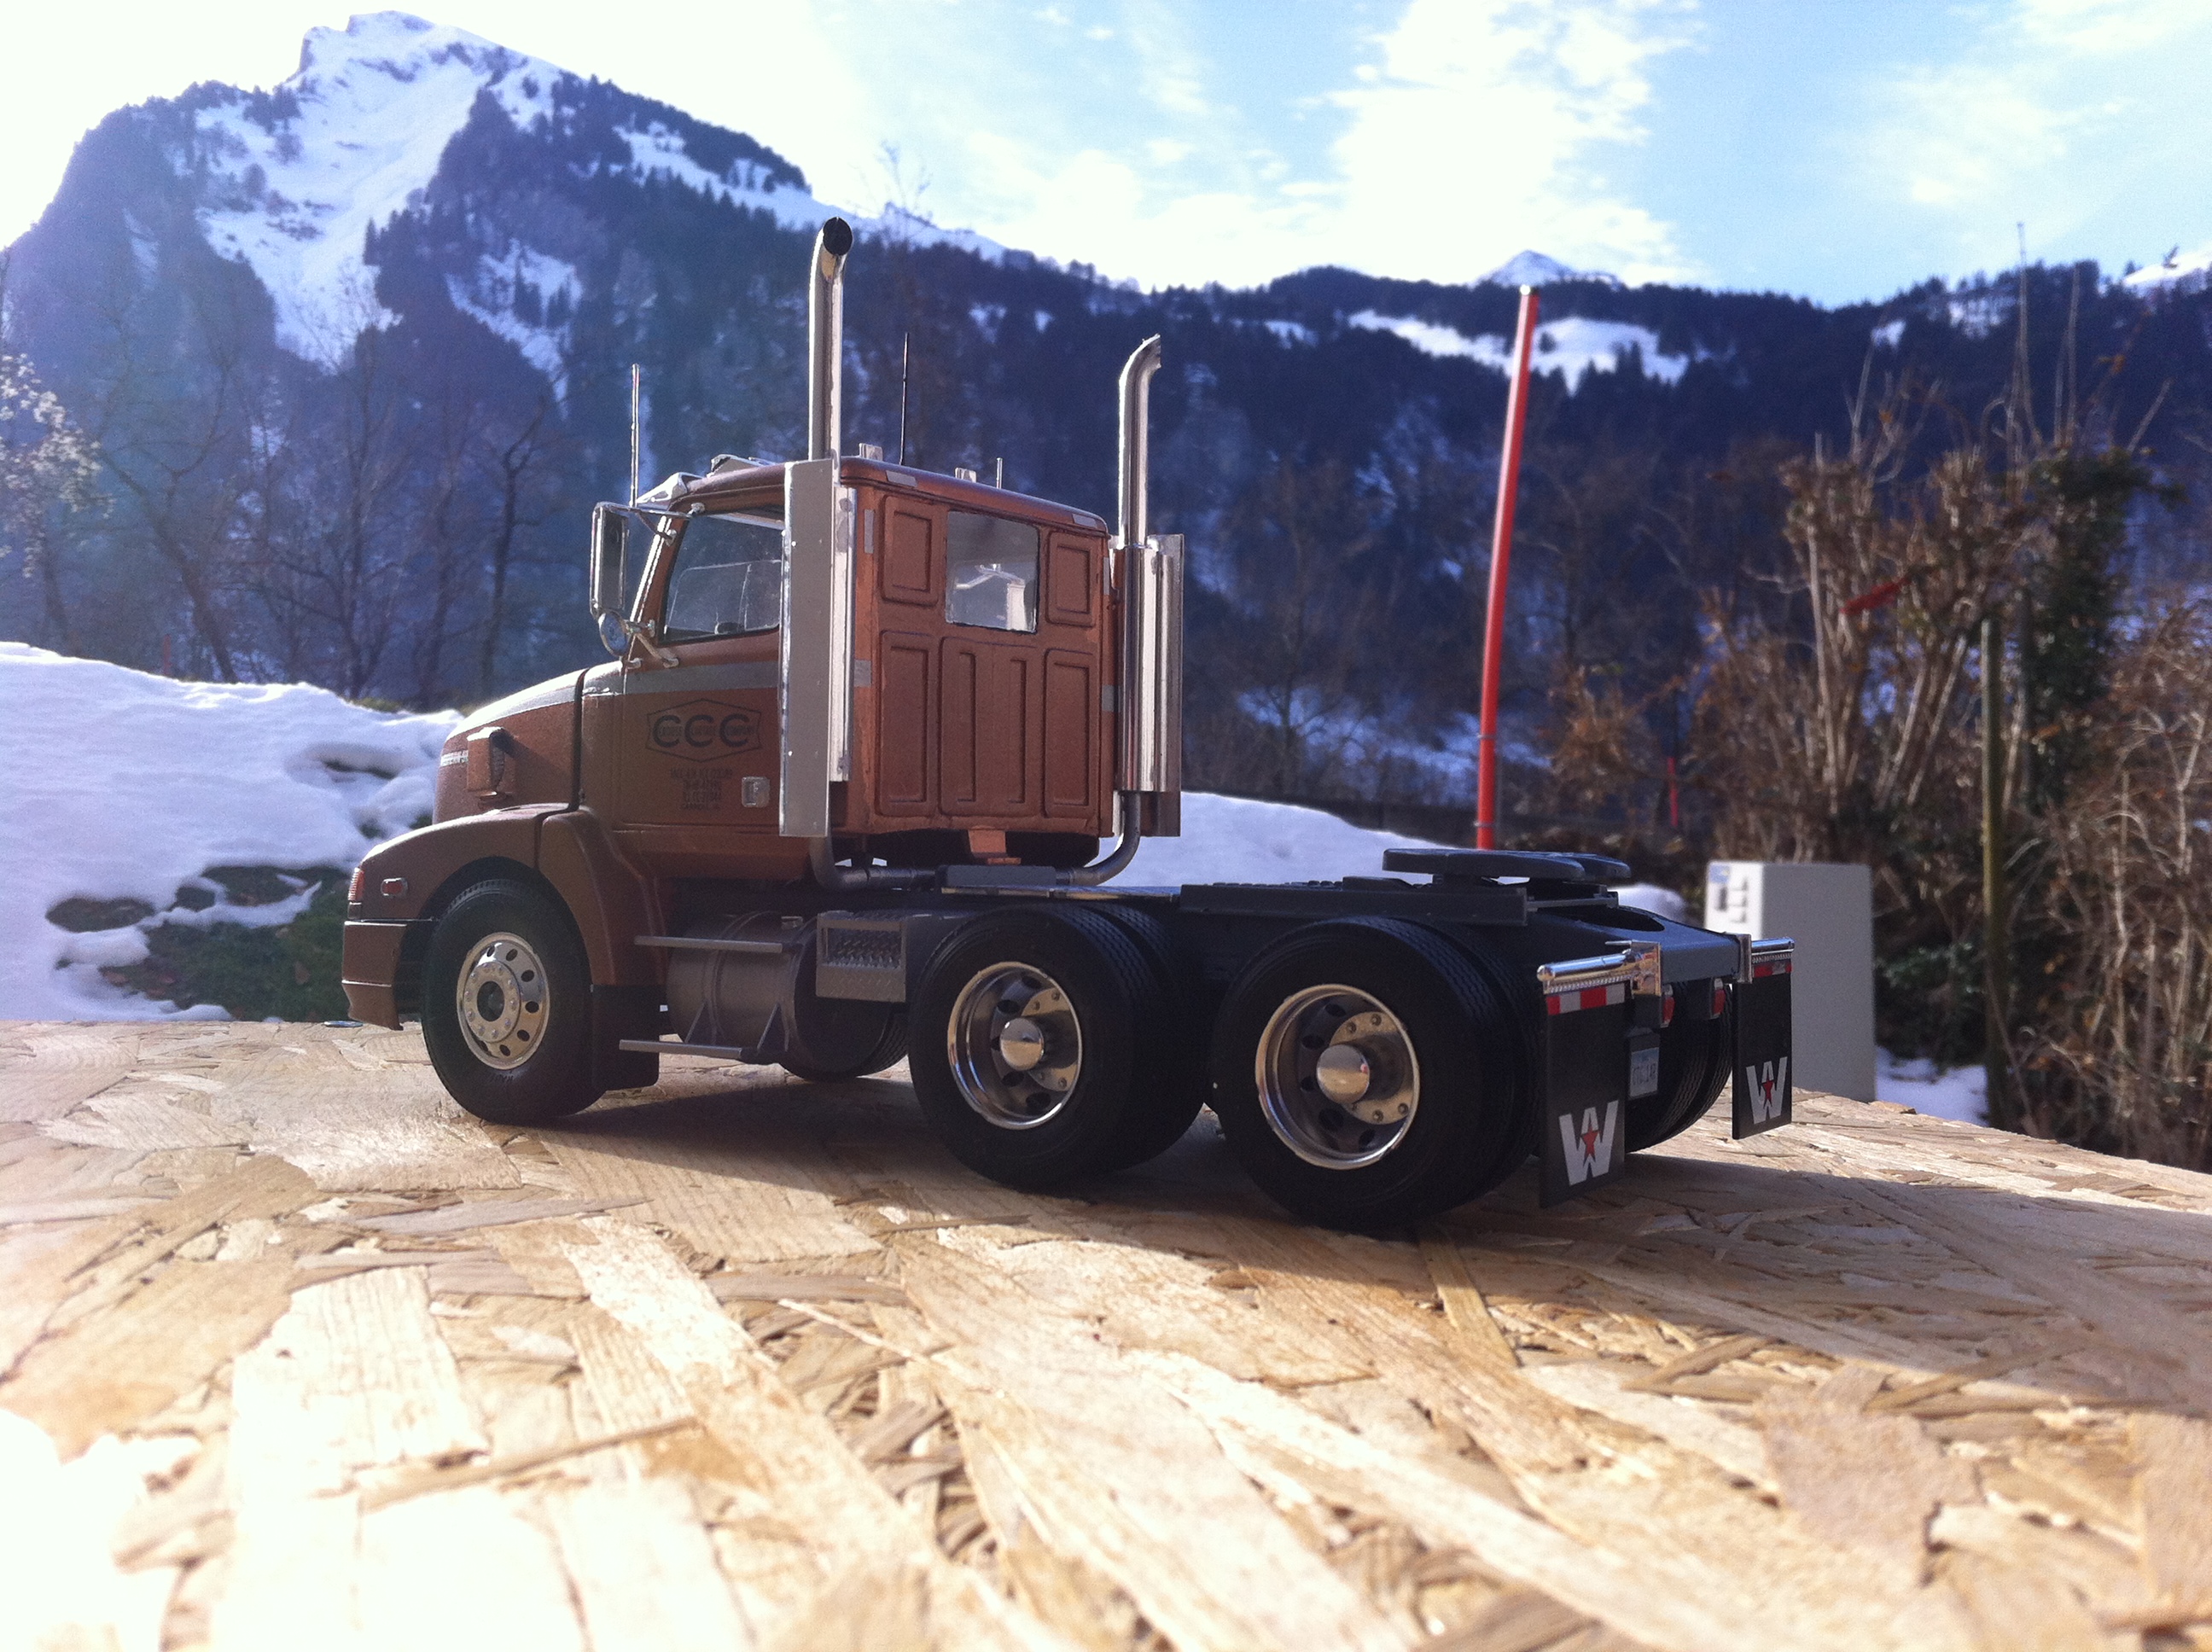
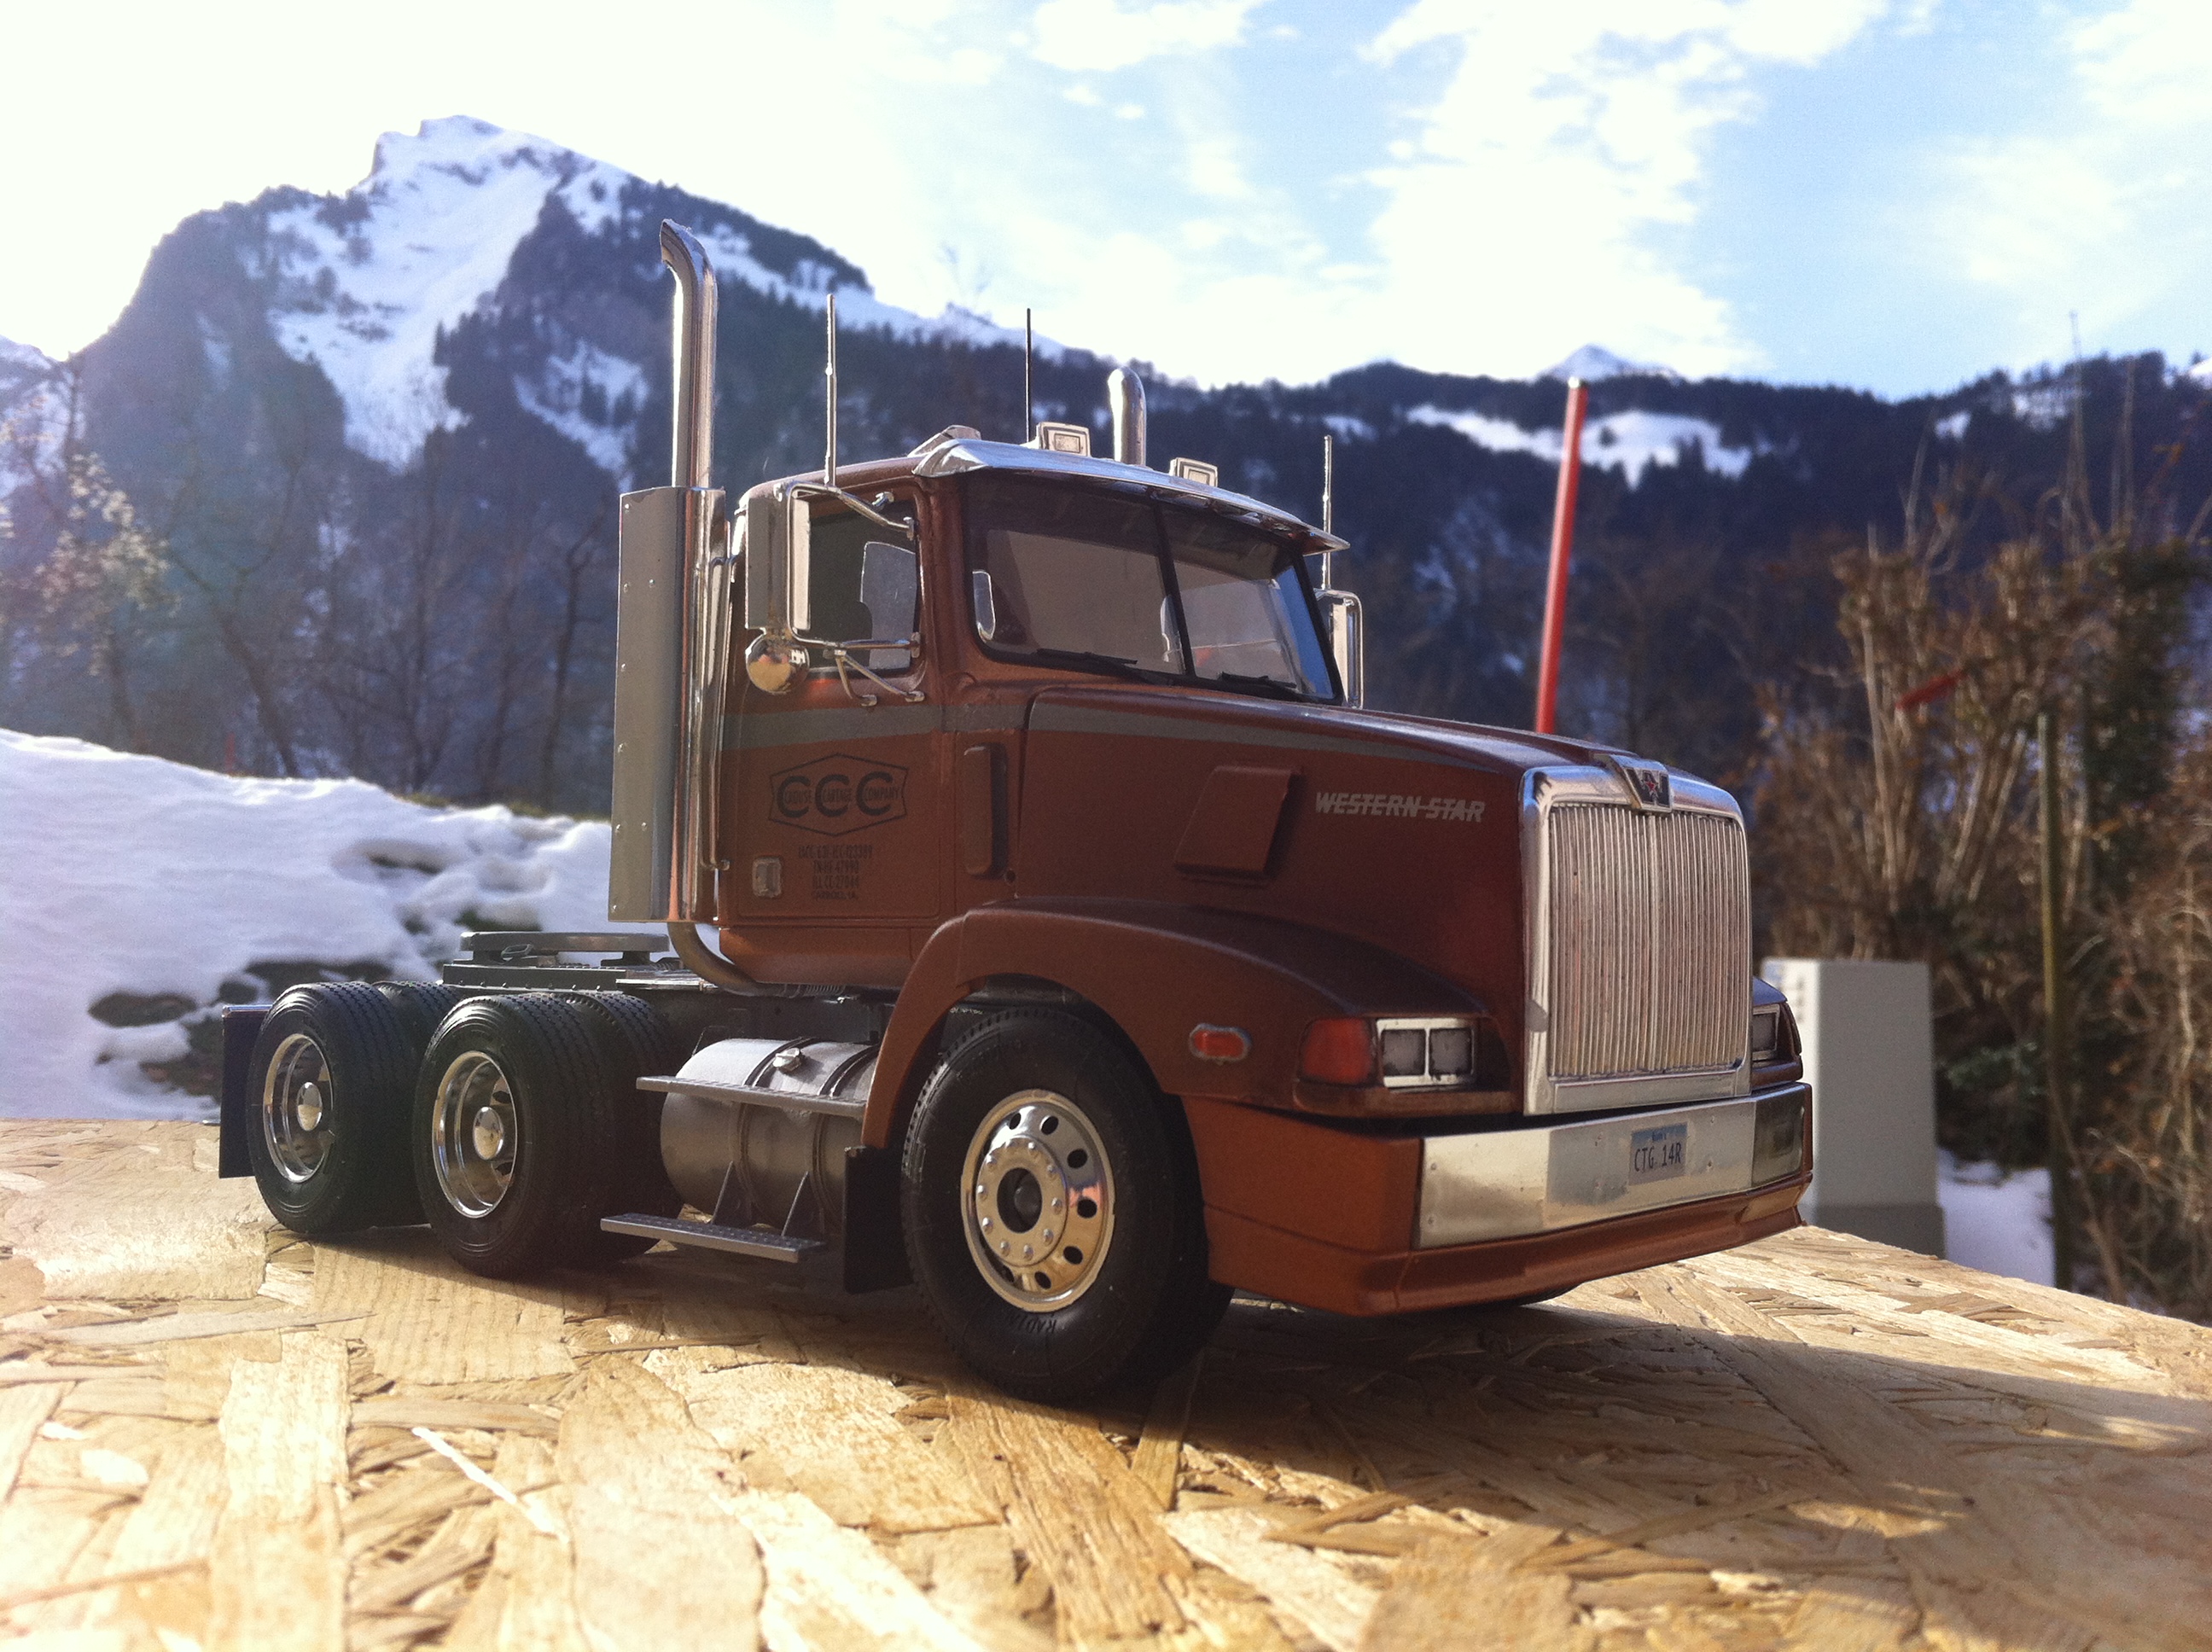
Having used the wrecker body from the Italeri LAFD Heavy Wrecker kit, I still had the Western Star parts left. I don't really like the way the cab assembles, and I definitely hate the 36"generic sleeper the Italerians toss in every kit they find suitable, I still figured the WS would be a waste not to build.
I looked online for pics of a WS daycab panel, and made my own from styrene. Also I cut down the frame (and therefore the tanks too) to make a city tractor. The bumper came warped in the kit but I decided to use it anyway; I could see a city tractor getting hung up on steep loading docks, badly parked cars etcetera. All in all I'm pretty happy with the result.


-
1
-
-
Looks great man! I happened to build something similar...
-
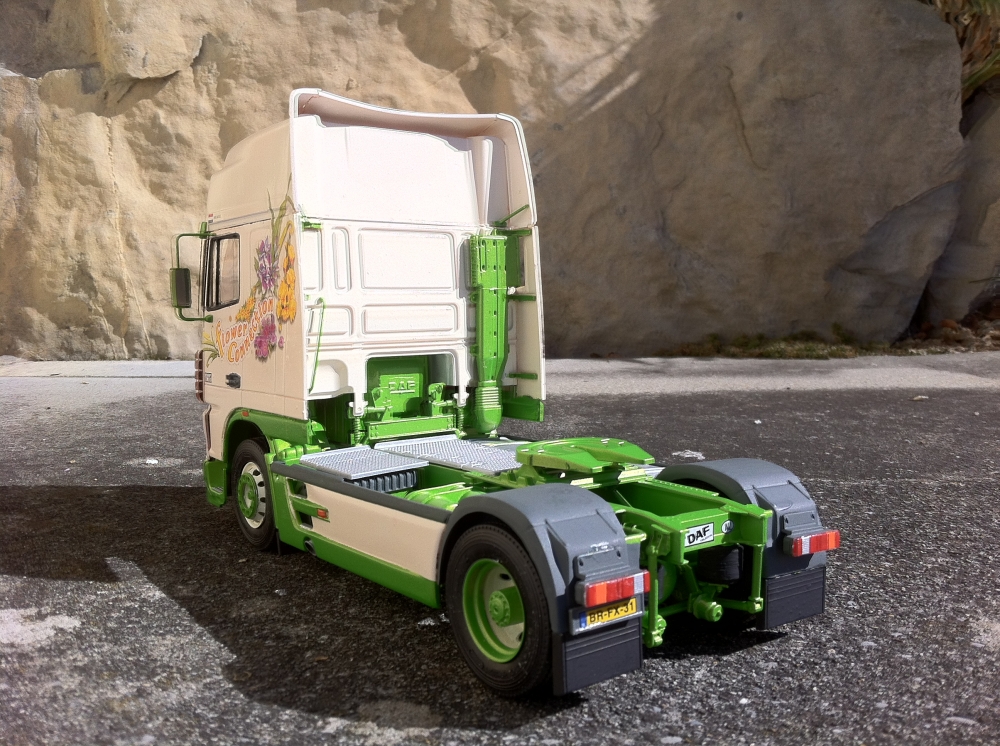
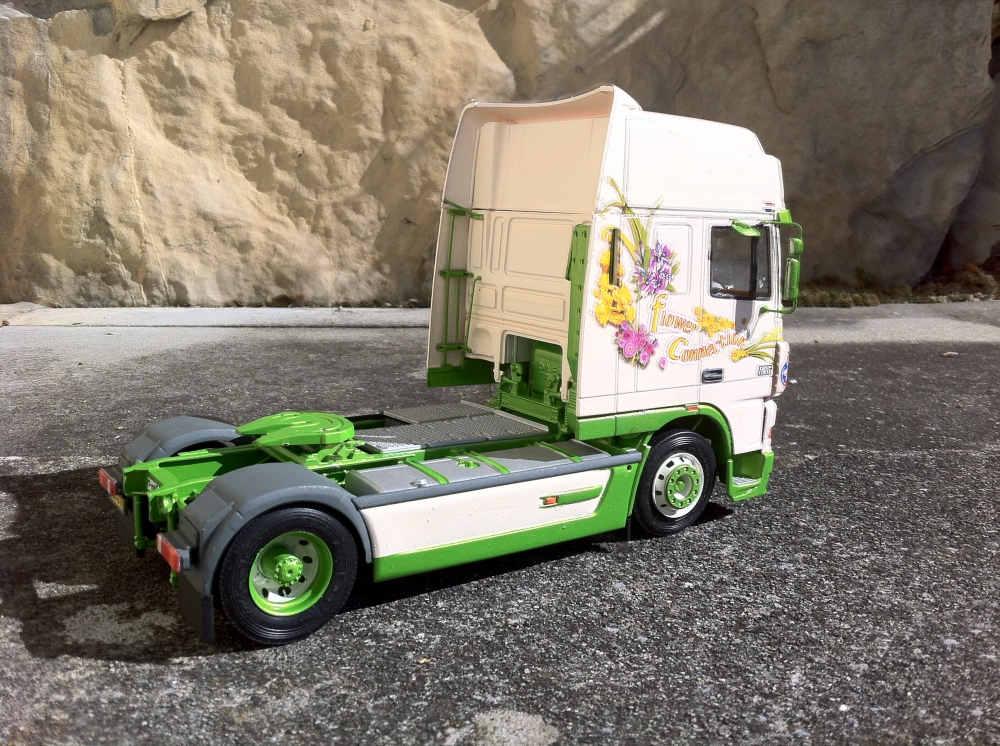
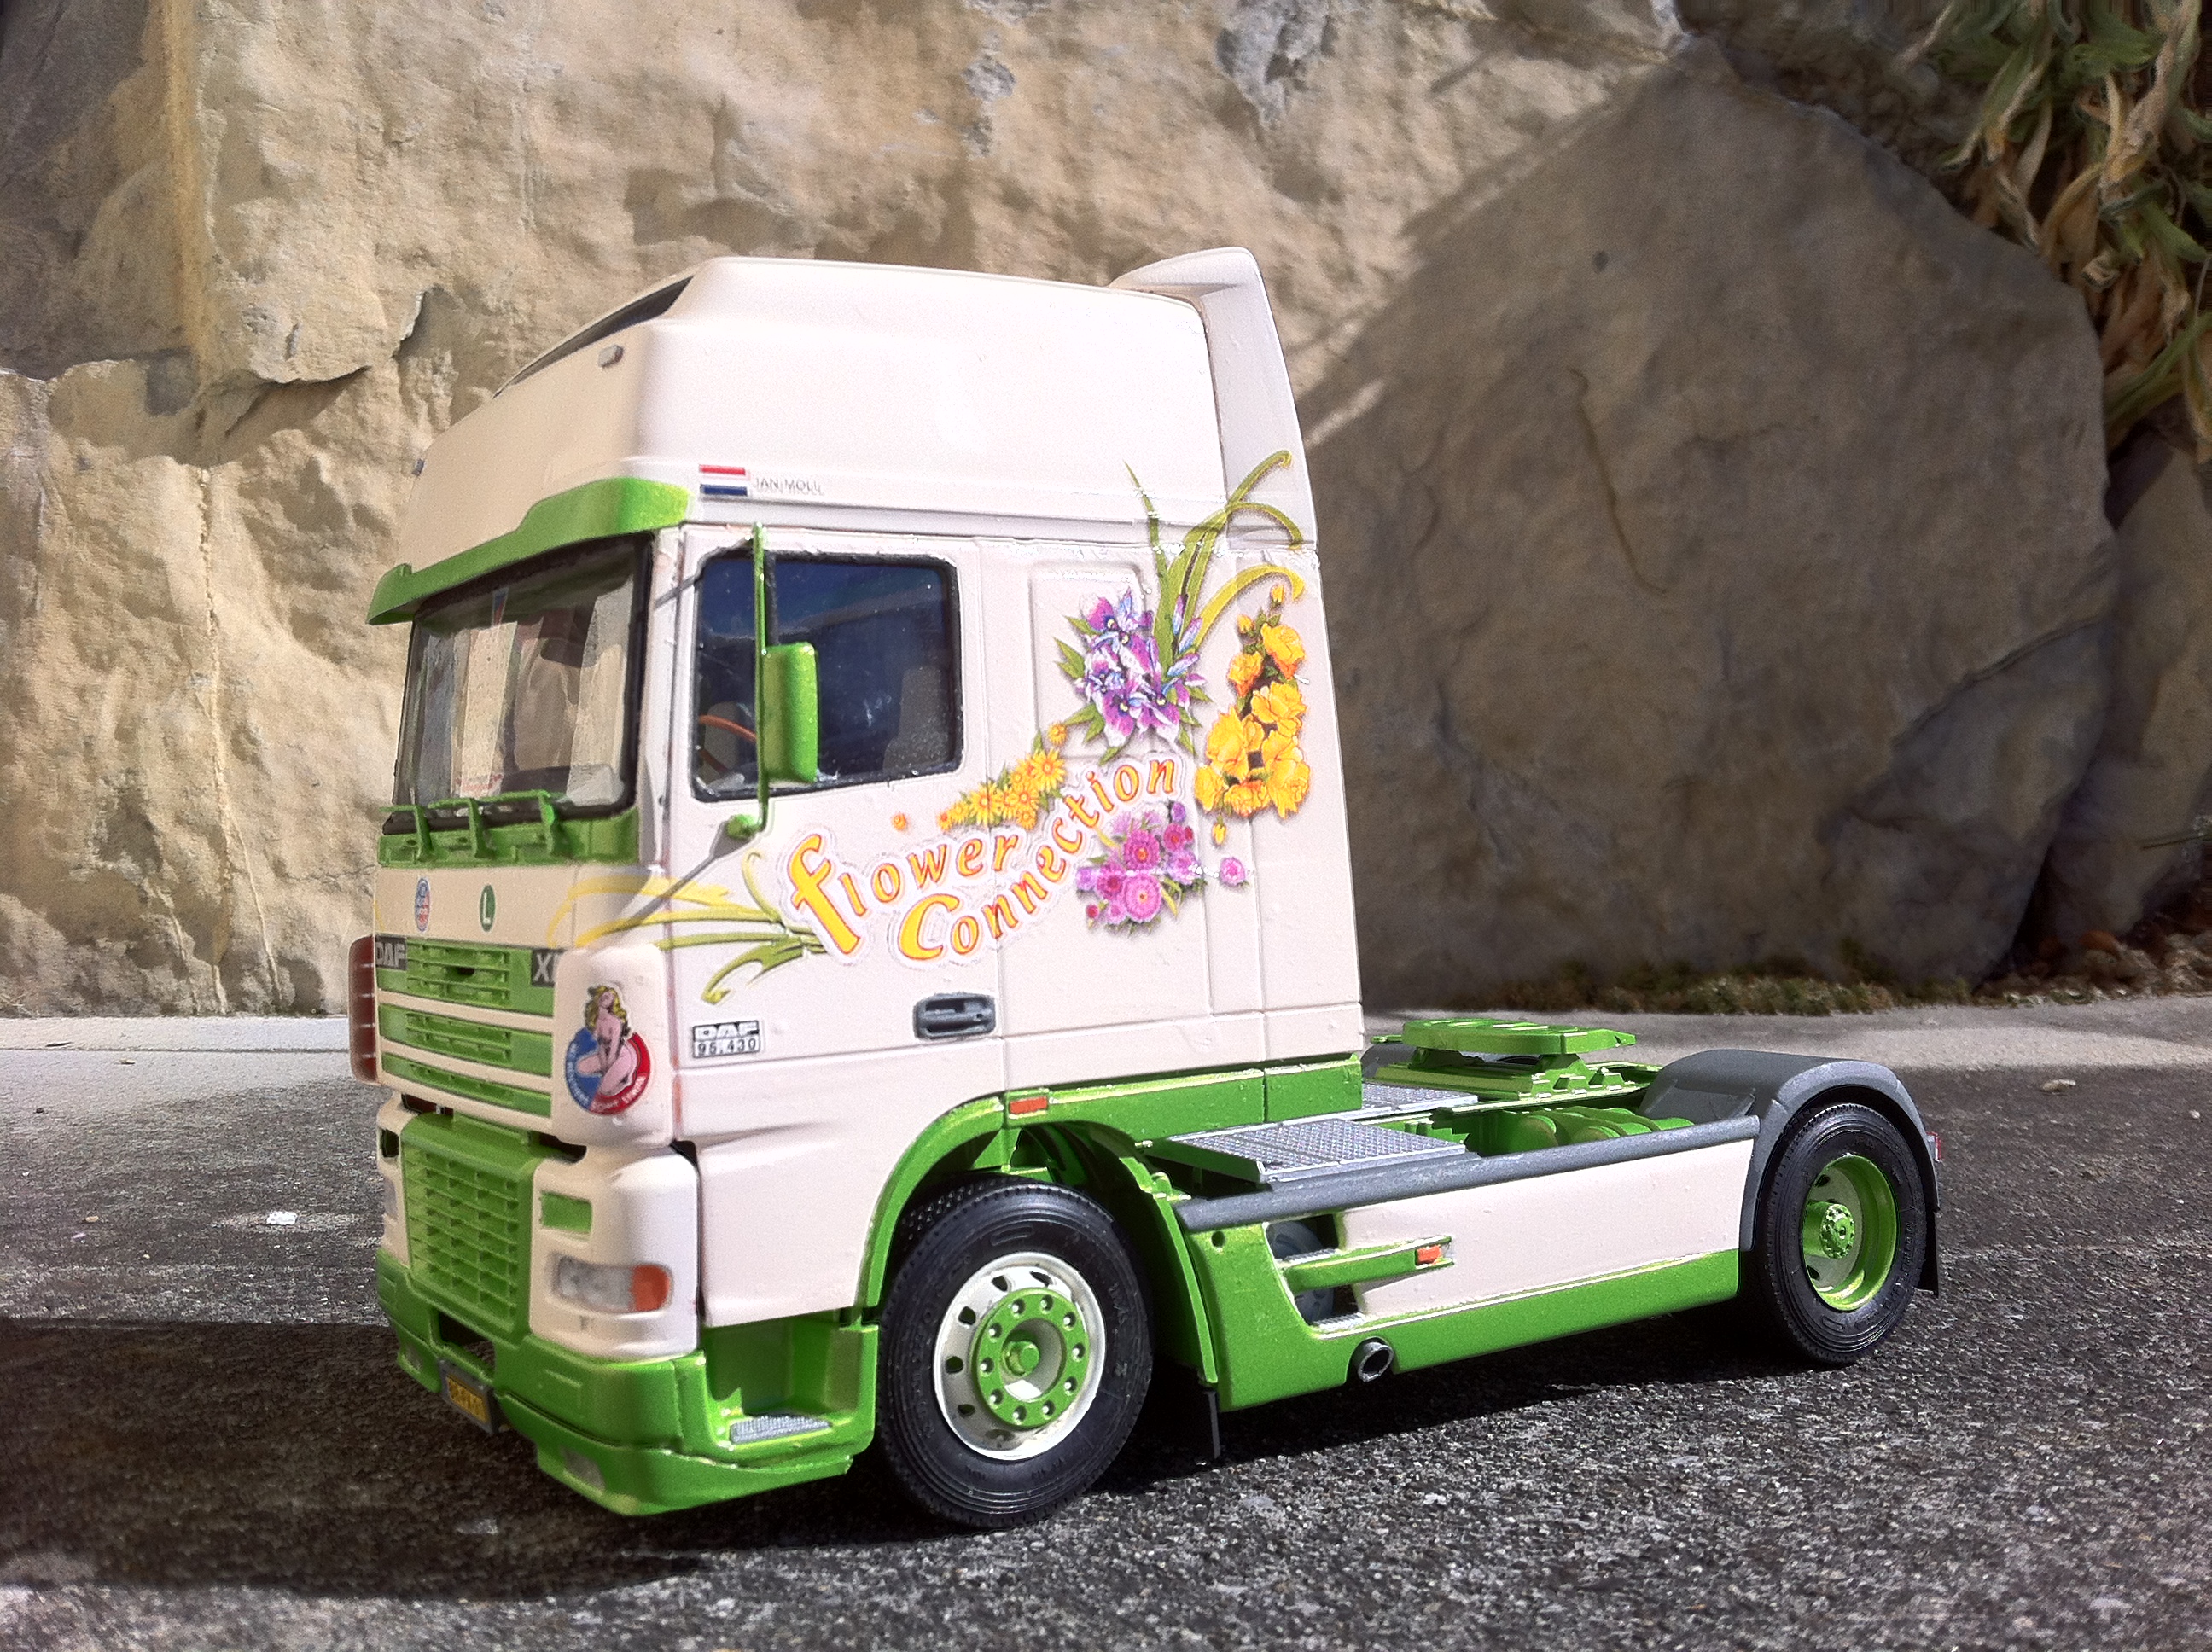
That's something different… A european DAF 95XF Super Space Cab, I built in early 2015. I got this kit from my then local hobby store, mainly because it was on sale and fit cheap. Although living in yurp, I don't have that much "feeling" for the trucks around here; I prefer the American types. For instance, I have no idea how to customise a eurotruck kit…
The DAF 95XF was produced from 1997 until 2002 (succeeded by the 105XF, which looks more or less the same), this kit representing the last face lifted type. I built it with a flower truck theme in mind. Sadly this kit is a so-called "curbside", no engine in it…
I do have a eurostyle reefer trailer to build in matching colors and style for the near future.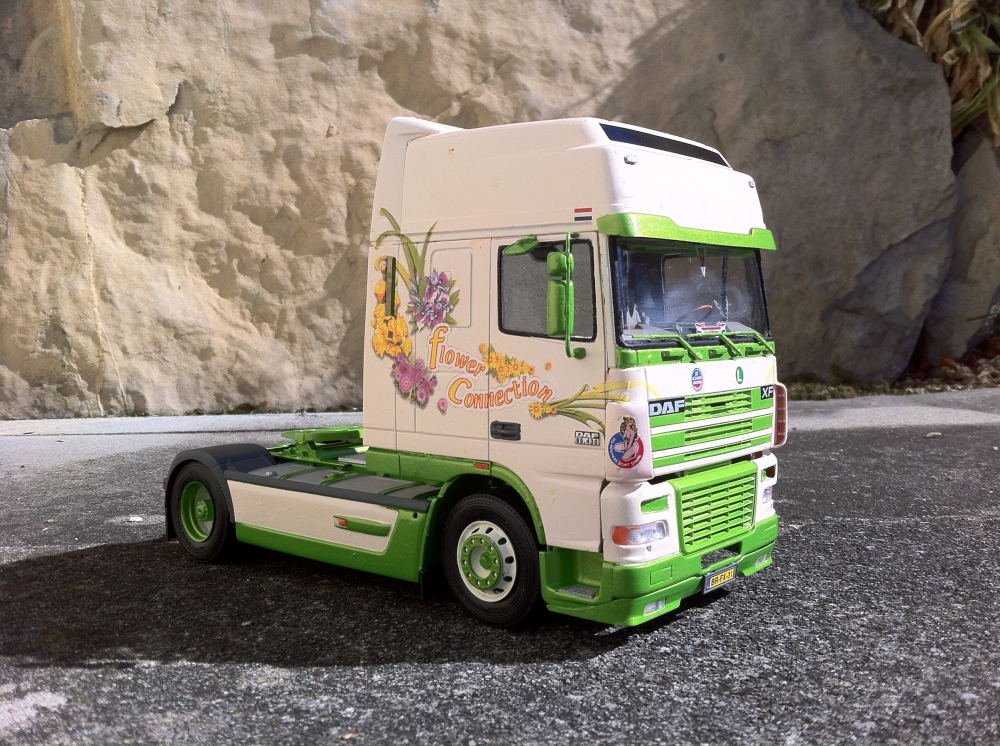

-
Trucks are fun! you can build them how you want, they don't take up as much space as model planes for instance and they're versatile. When I was a kid I built little fighter planes, but they take up more space and you're more or less bound by the real world colors.
-
I usually have the Revell of Germany glue, with the needle. The needle is for pinpoint application. Also superglue for resin and metal parts, but that just depends on what's available (and cheap)...
-
 1
1
-
-
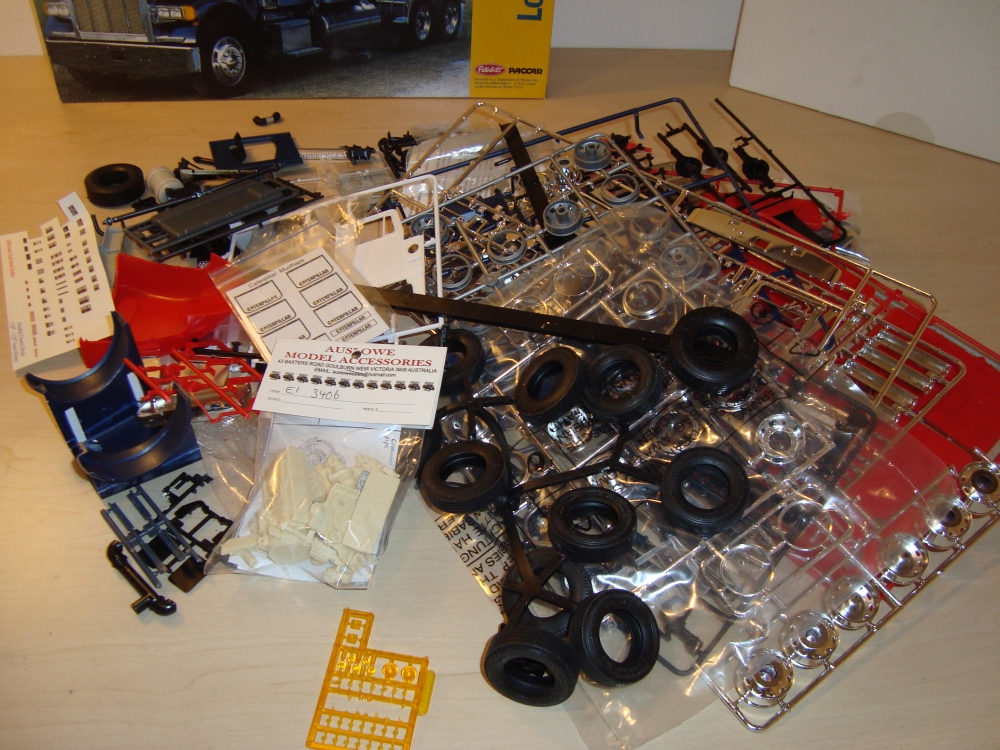
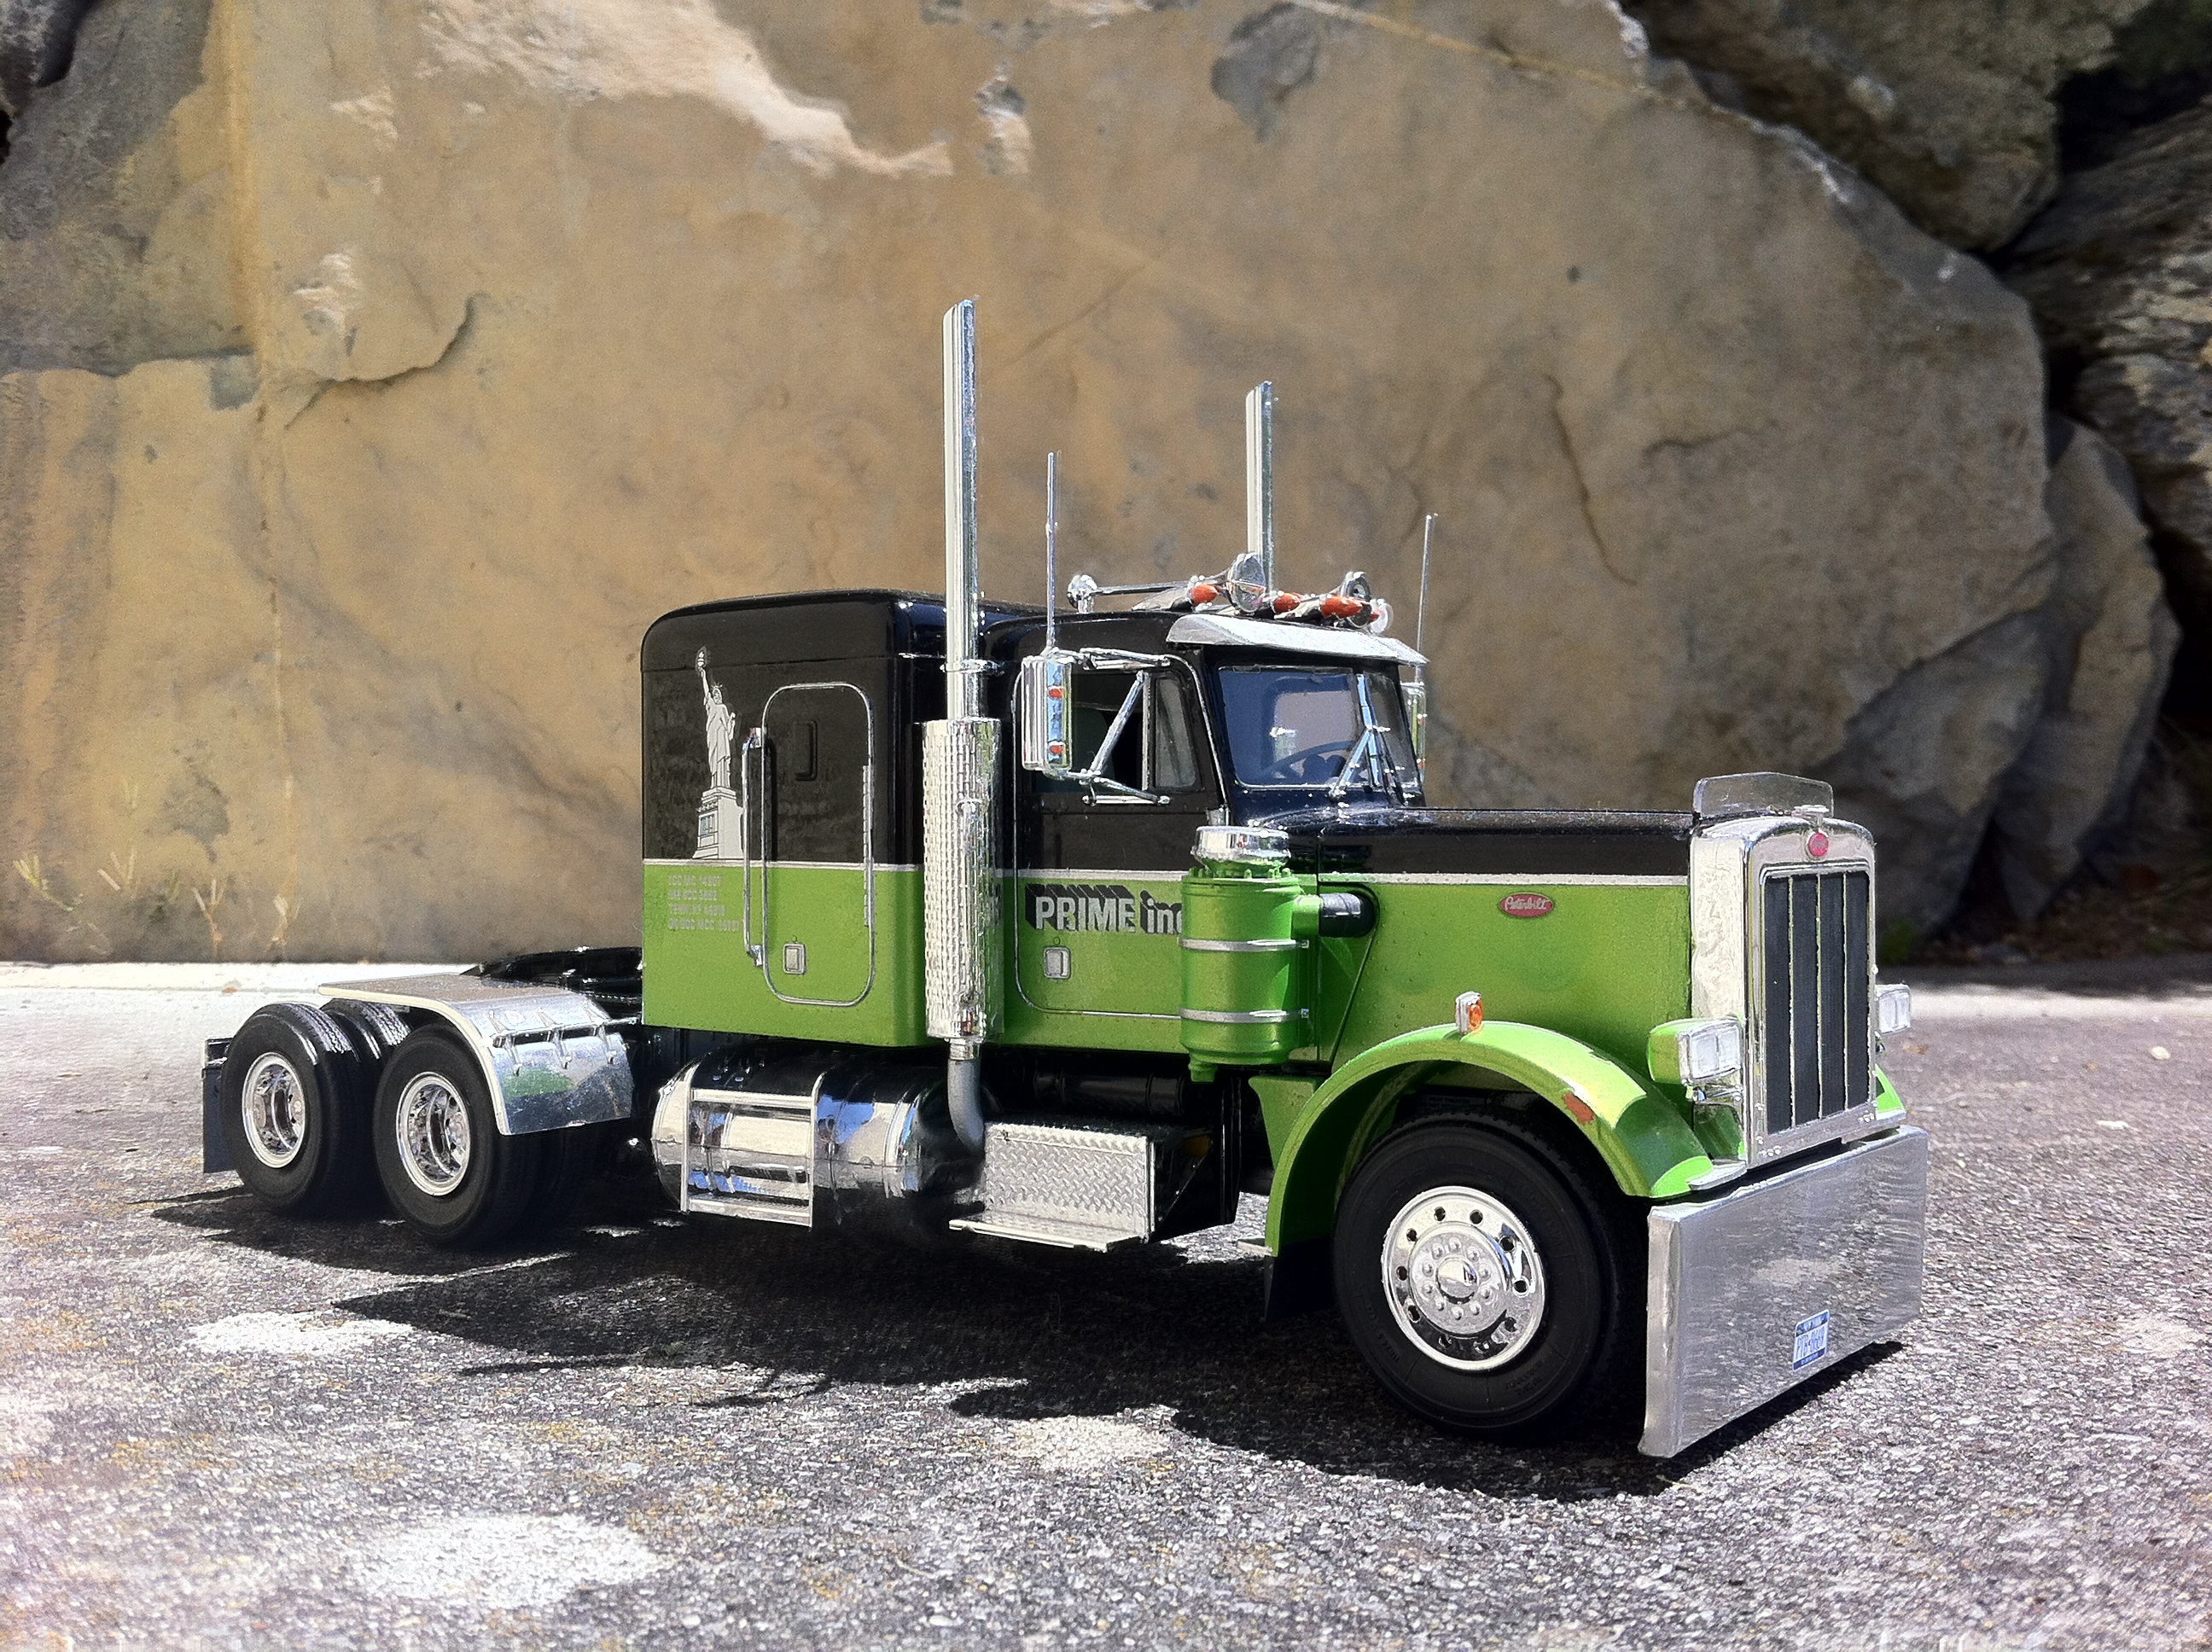
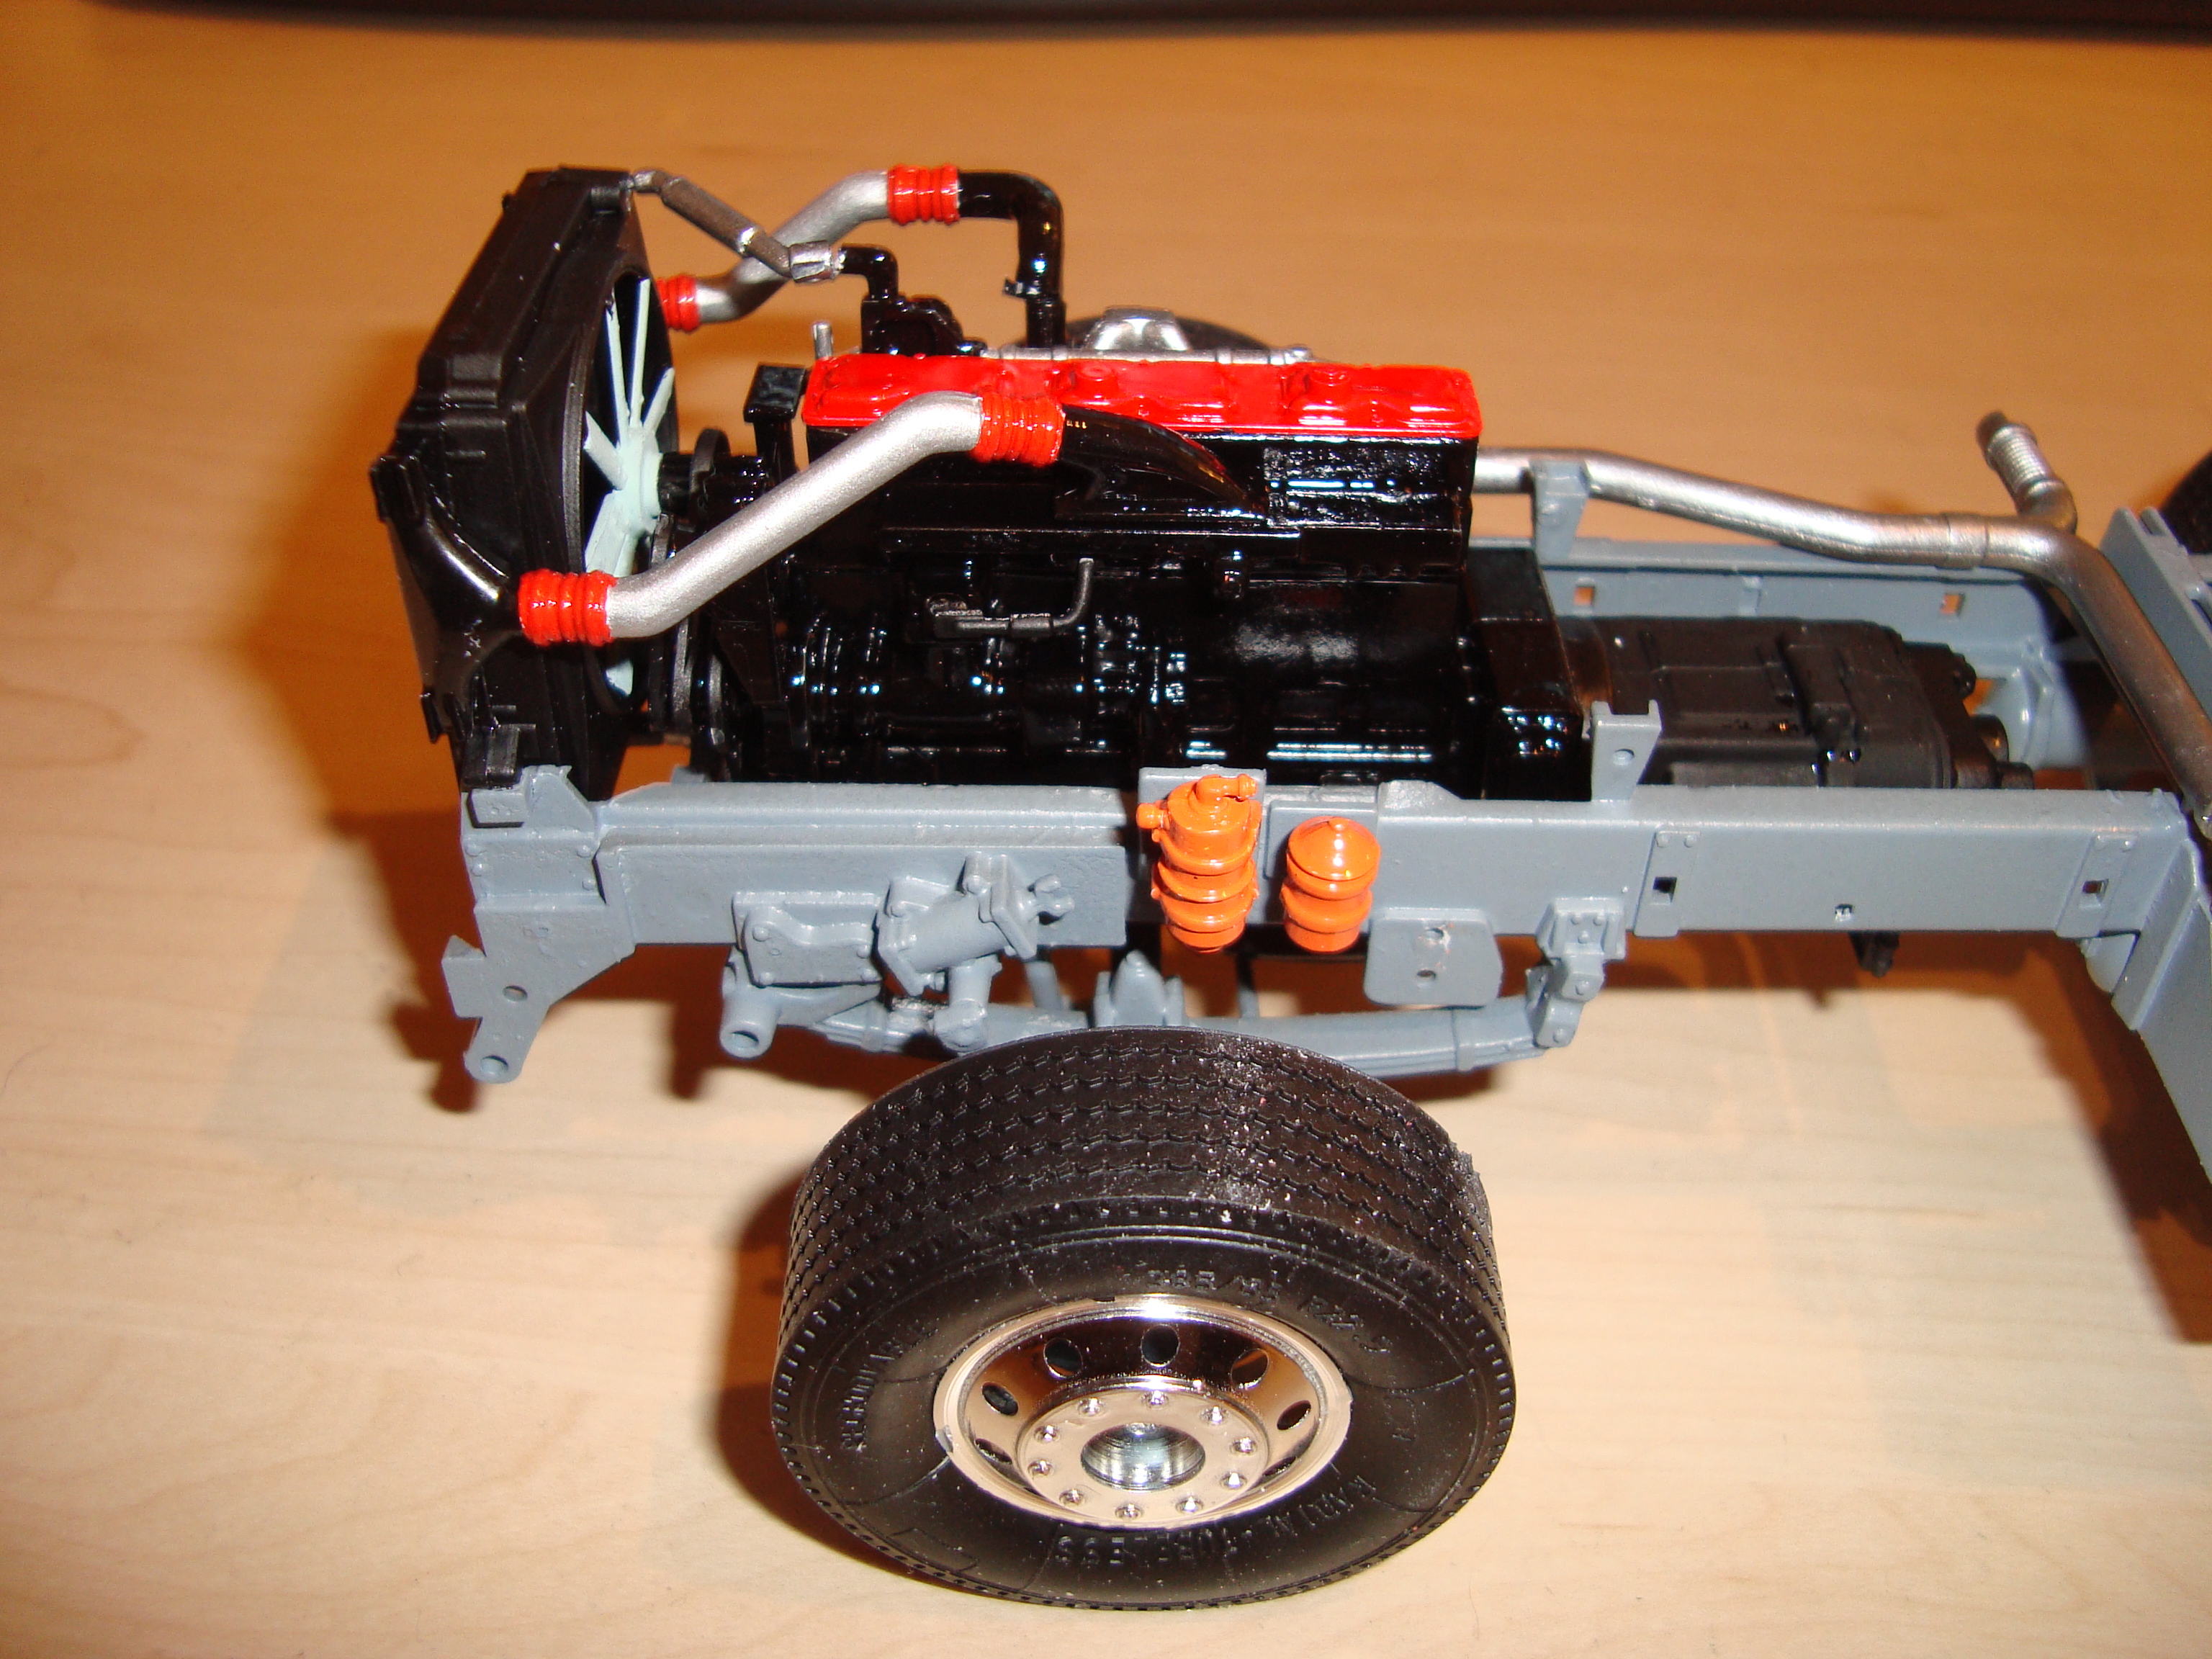
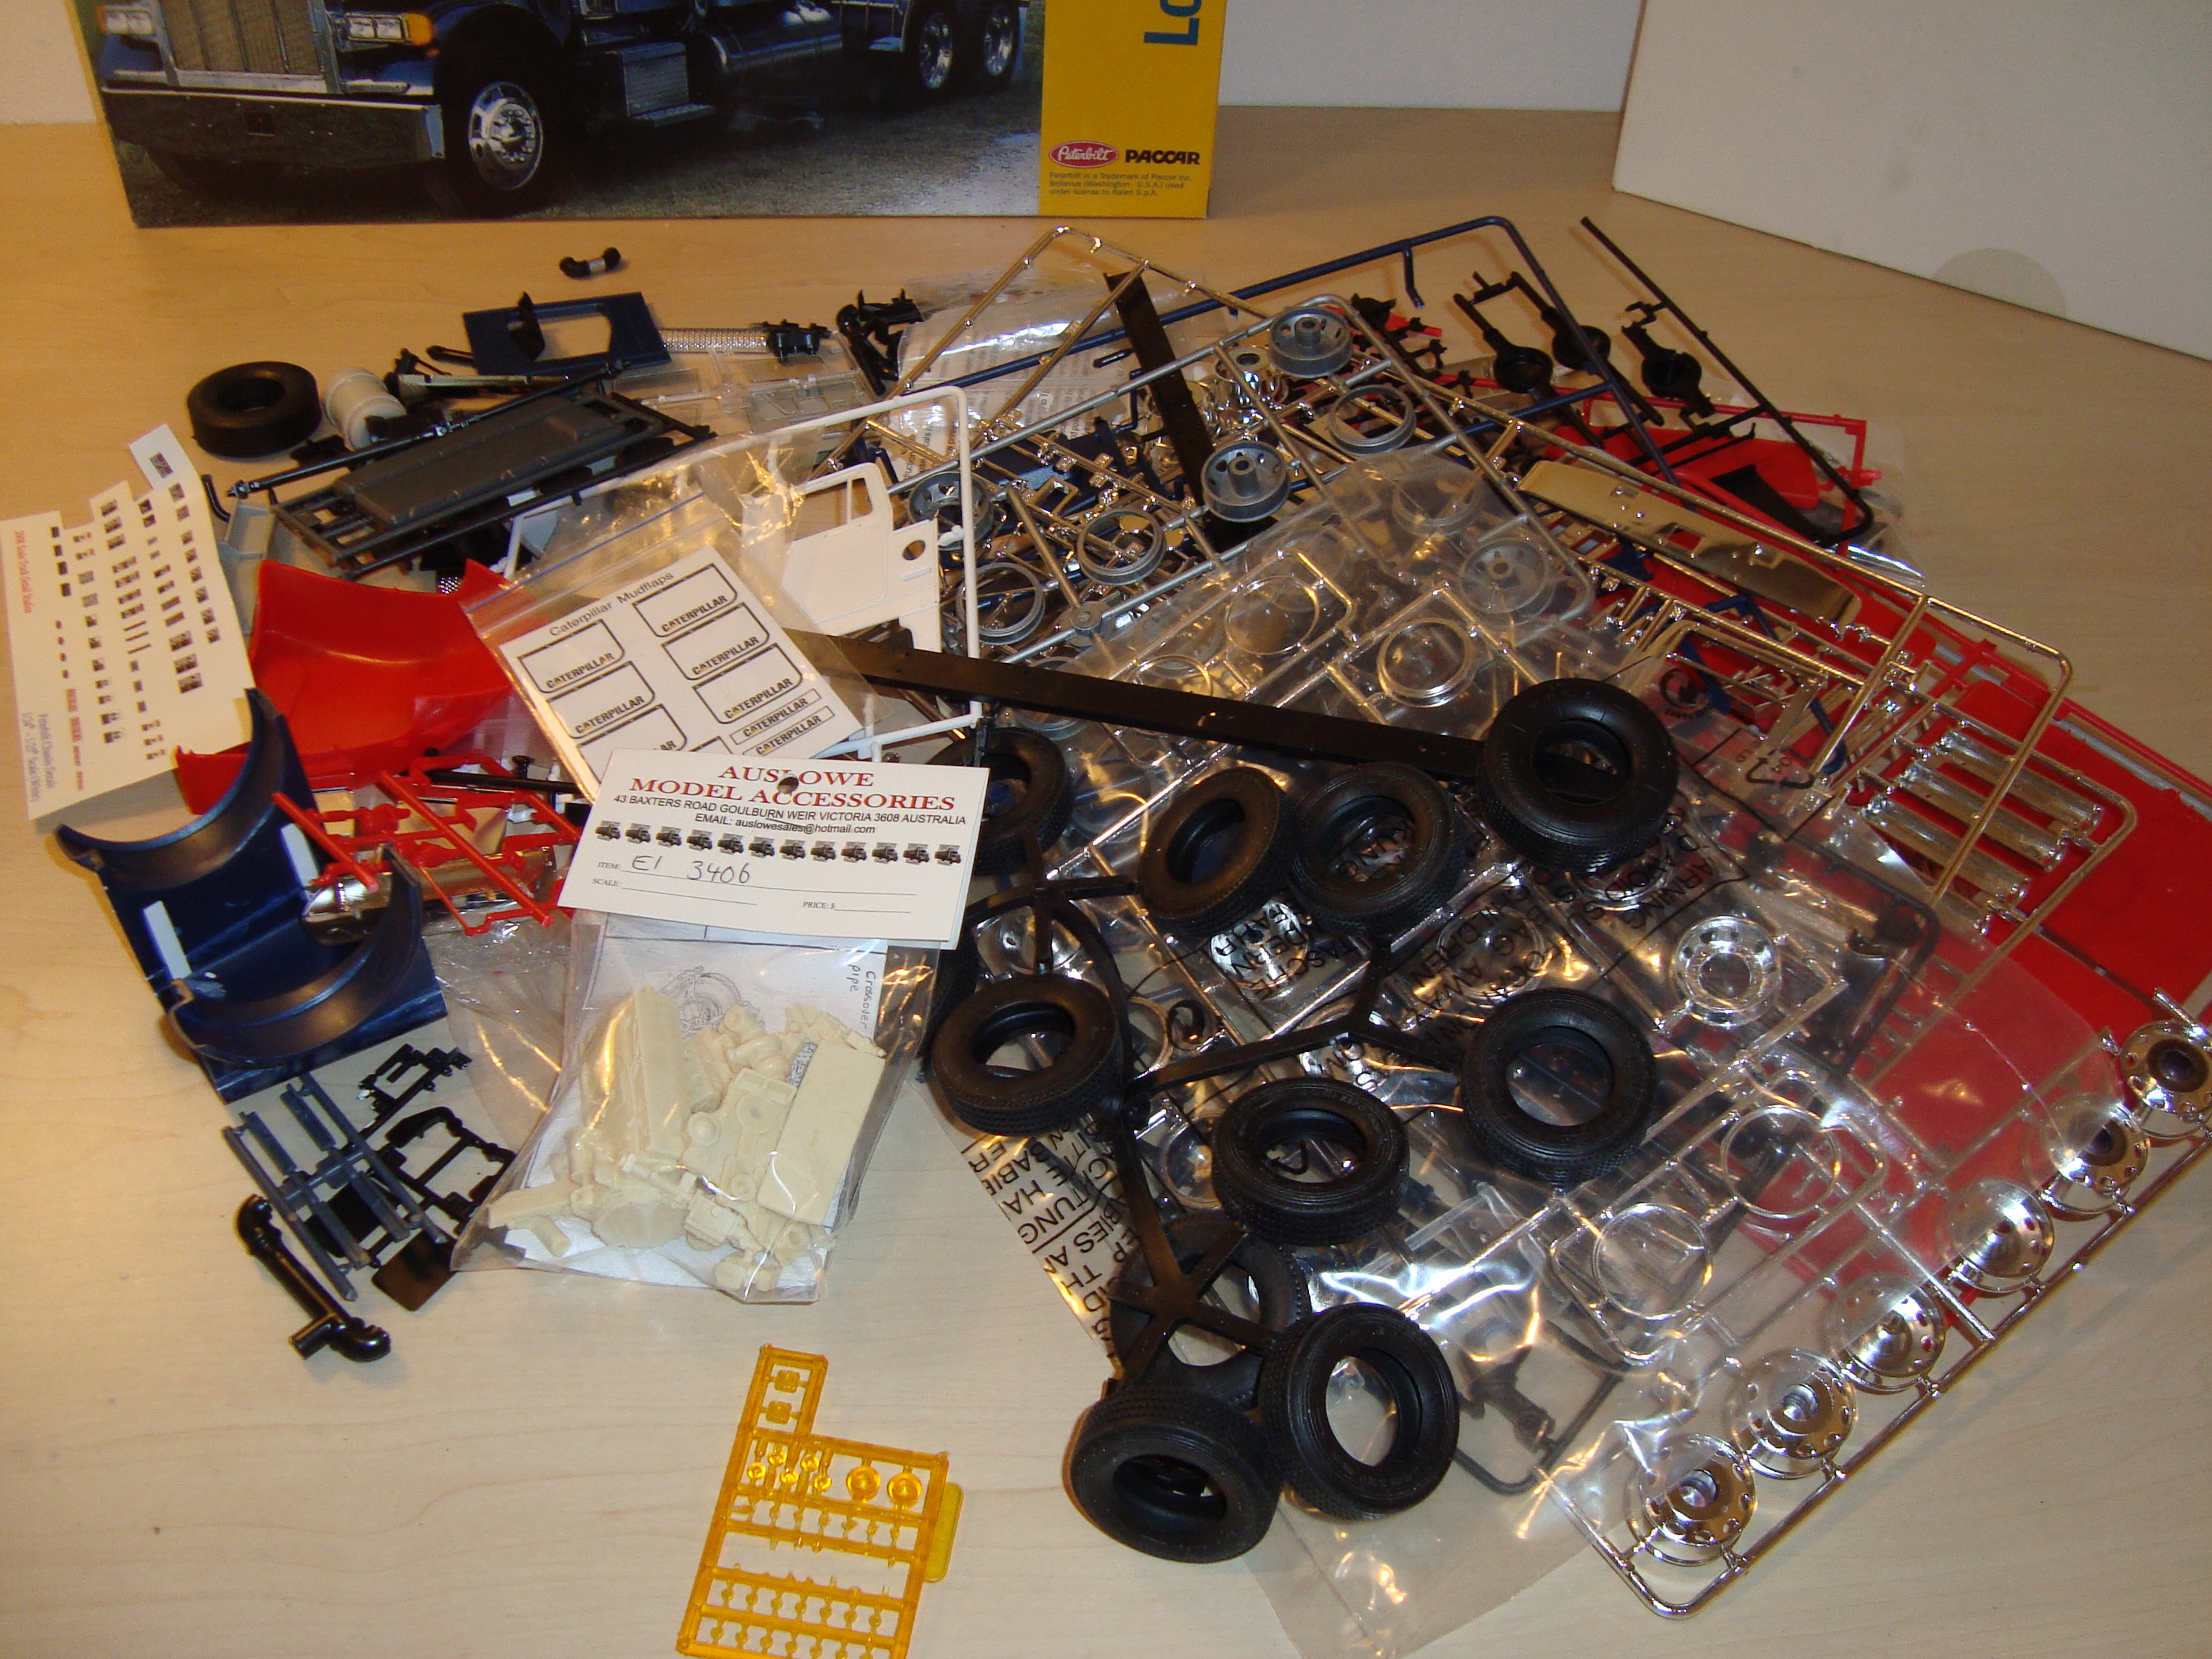
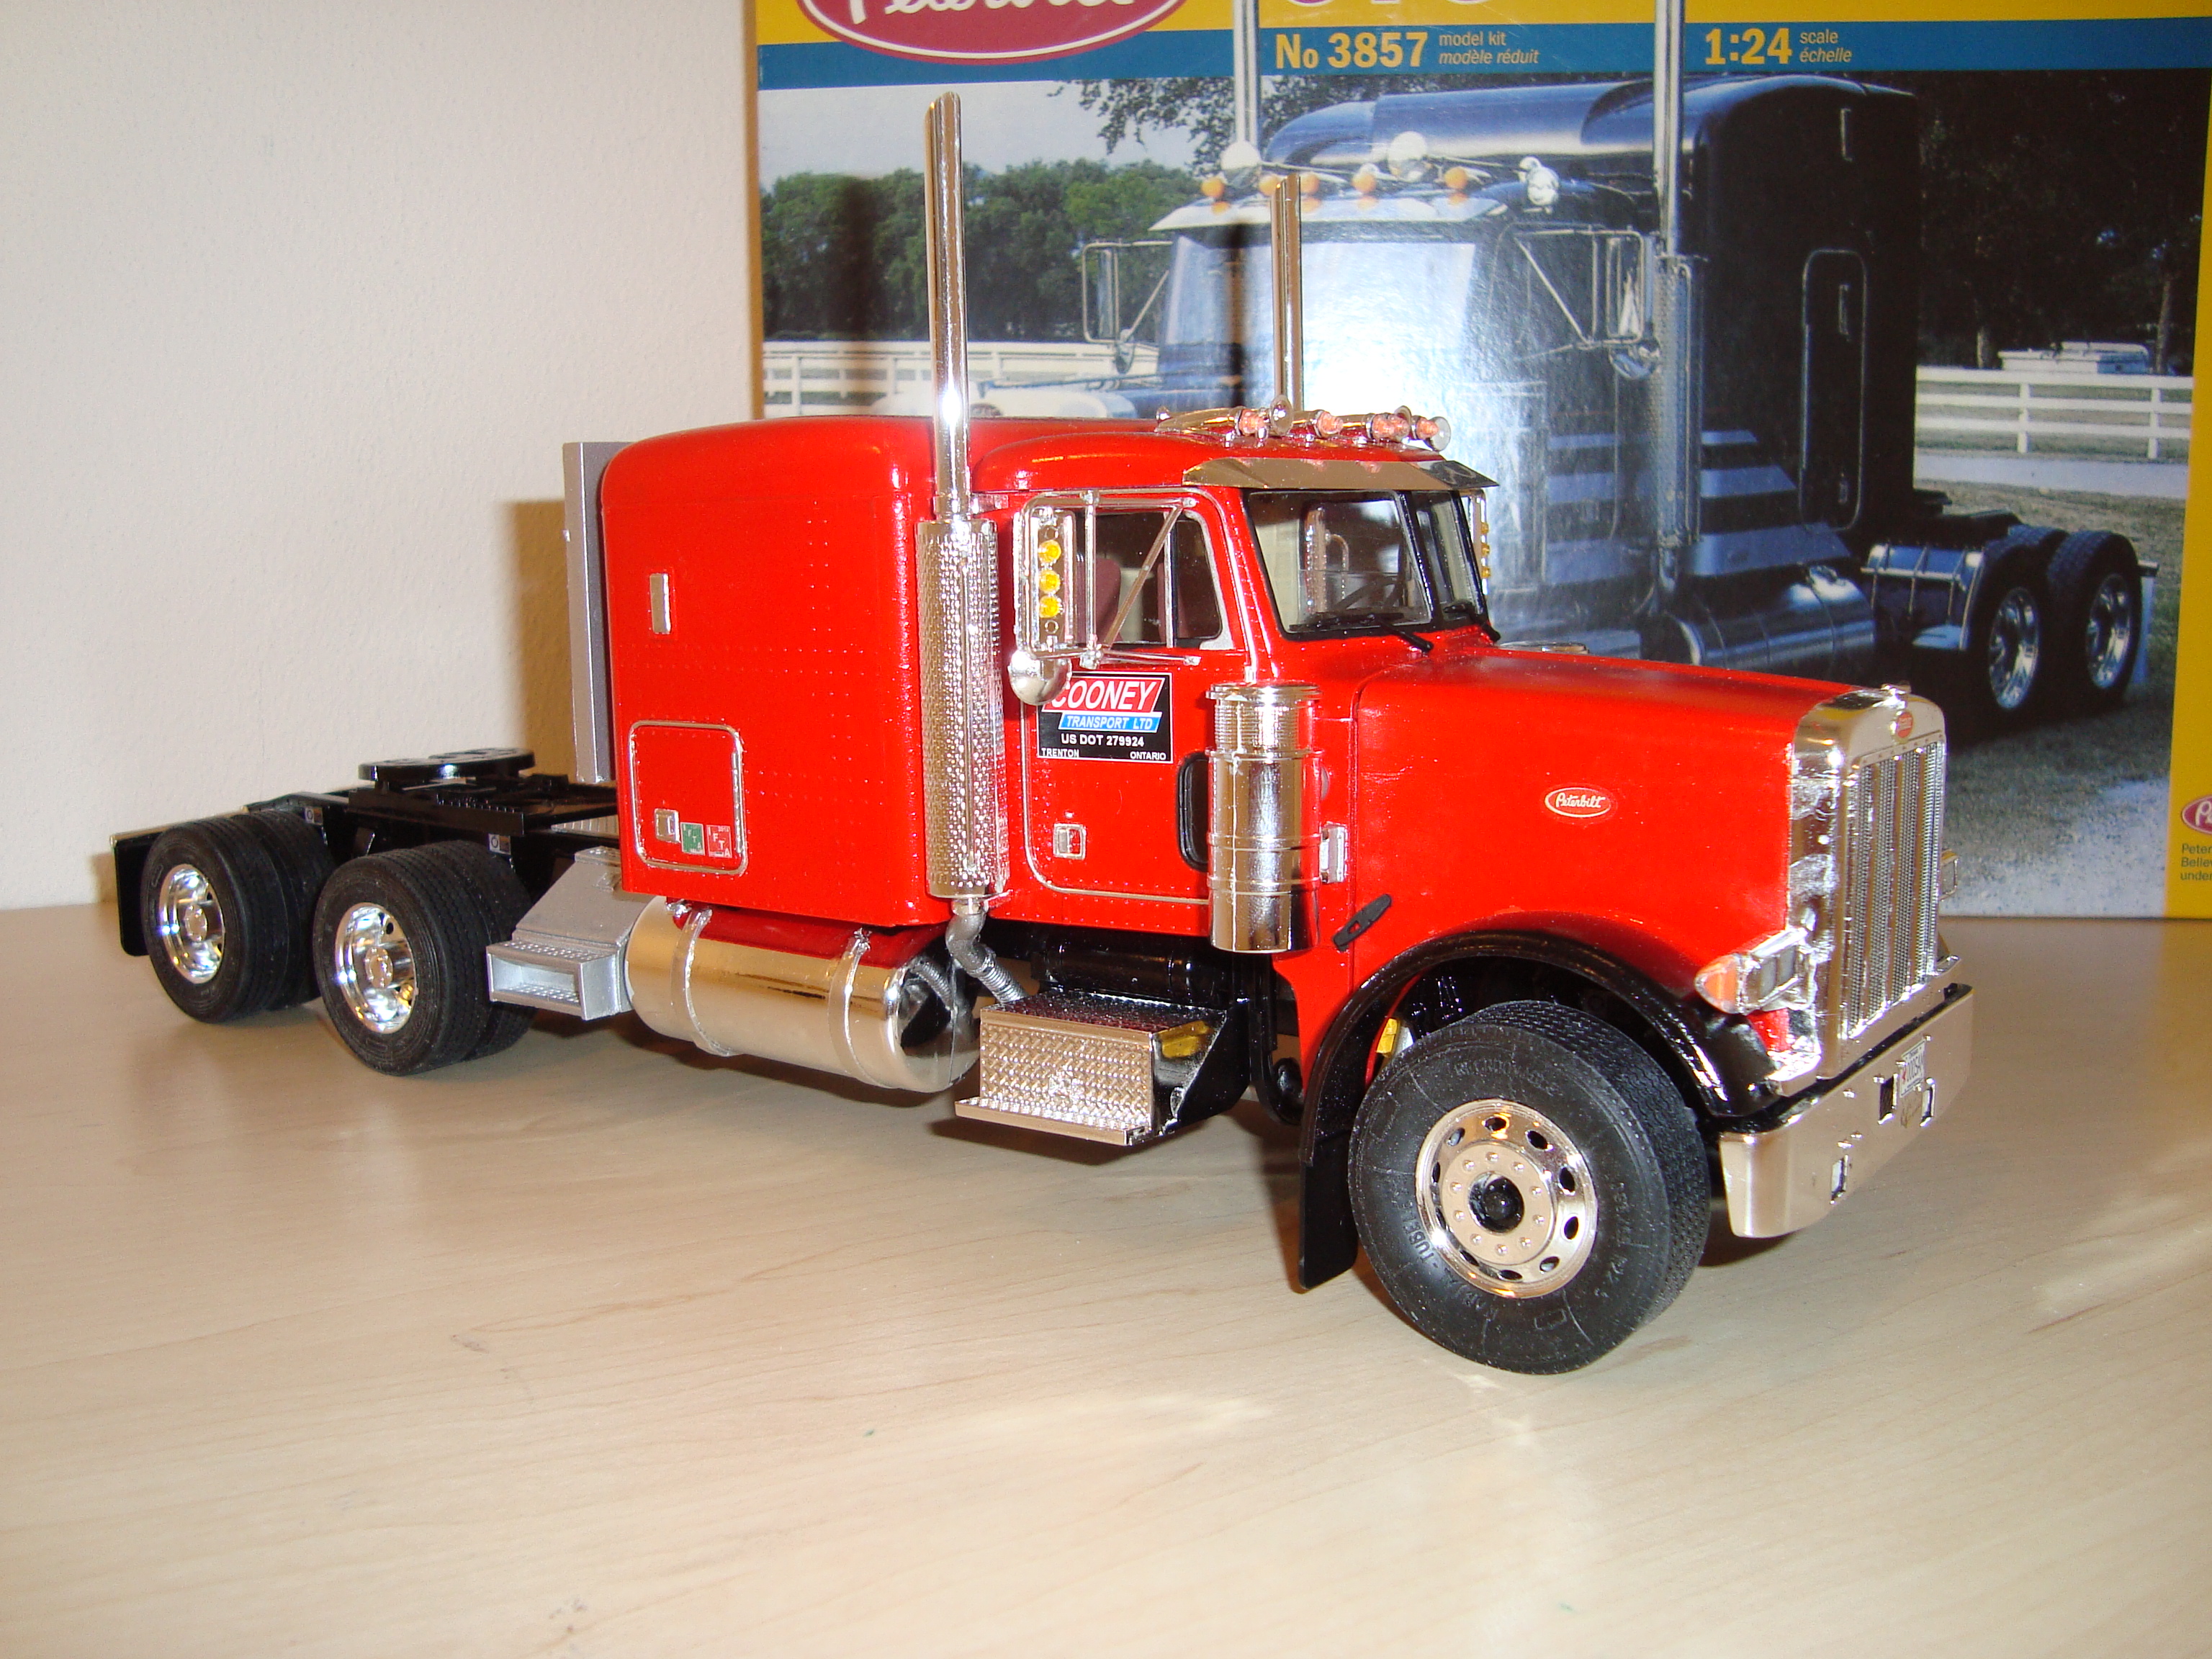
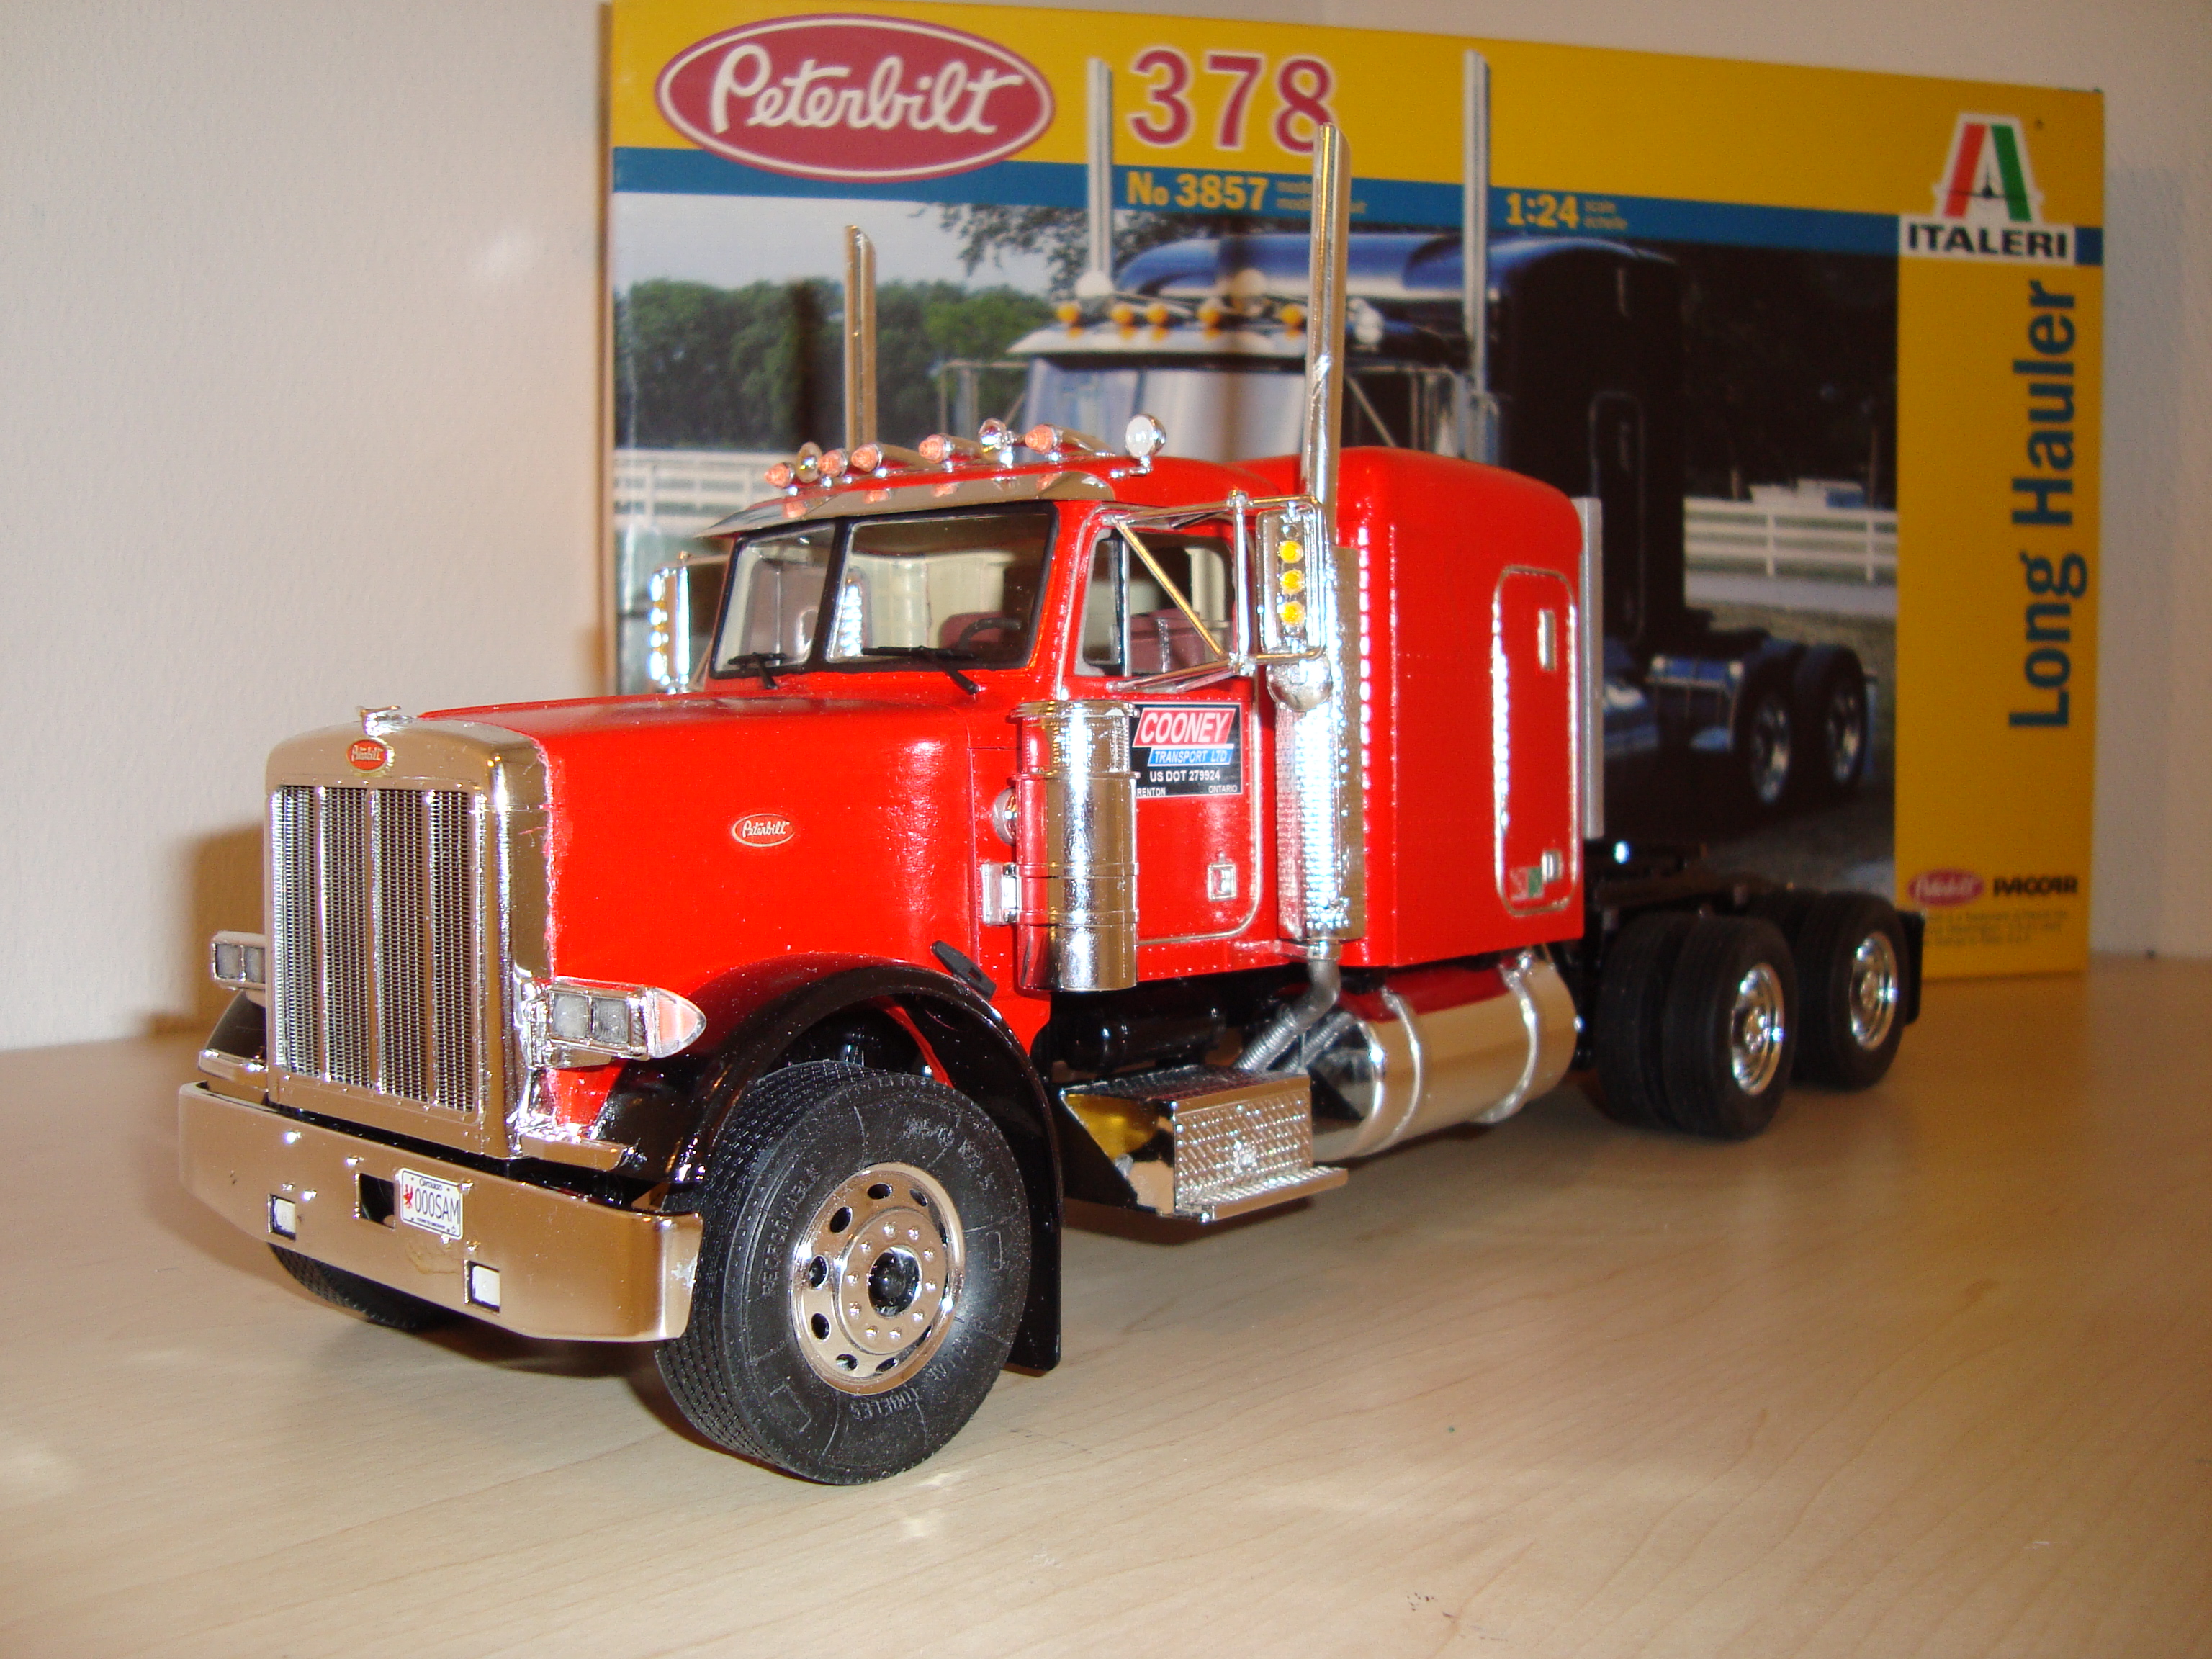
Over the years I have accumulated many leftover parts, aftermarket parts and what not; most of them Peterbilt parts. I figured there might be a complete truck hiding in them all, and set out to see how far I got. I had a 378 hood already converted to a 379-119, Peterbilt cab and sleeper parts, so the make and model were easily determined.
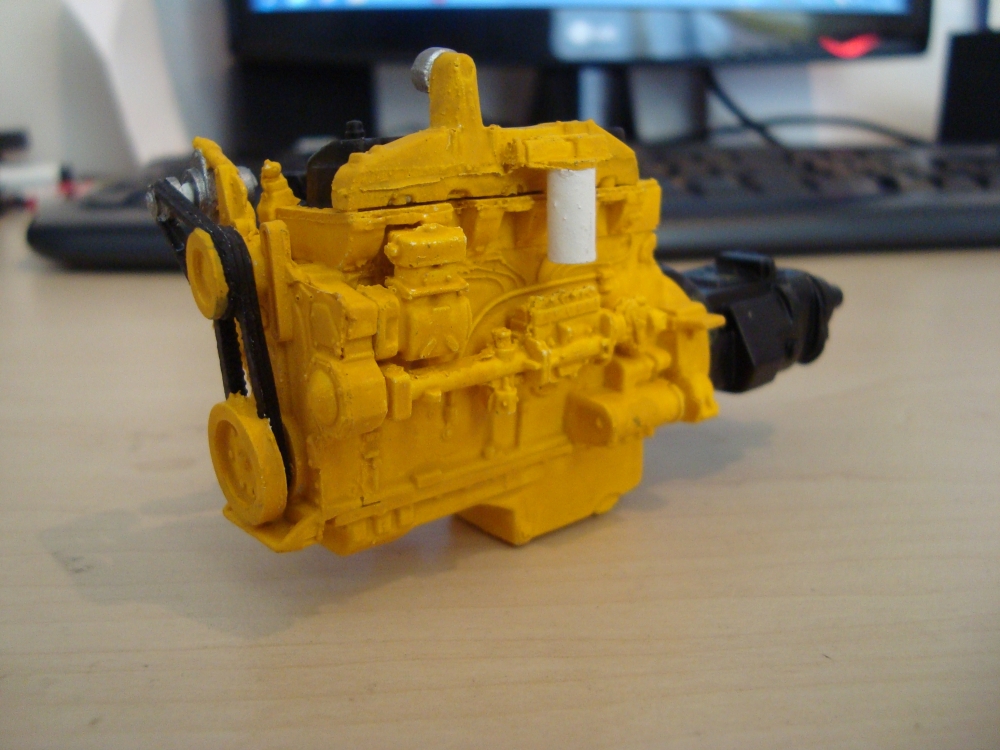
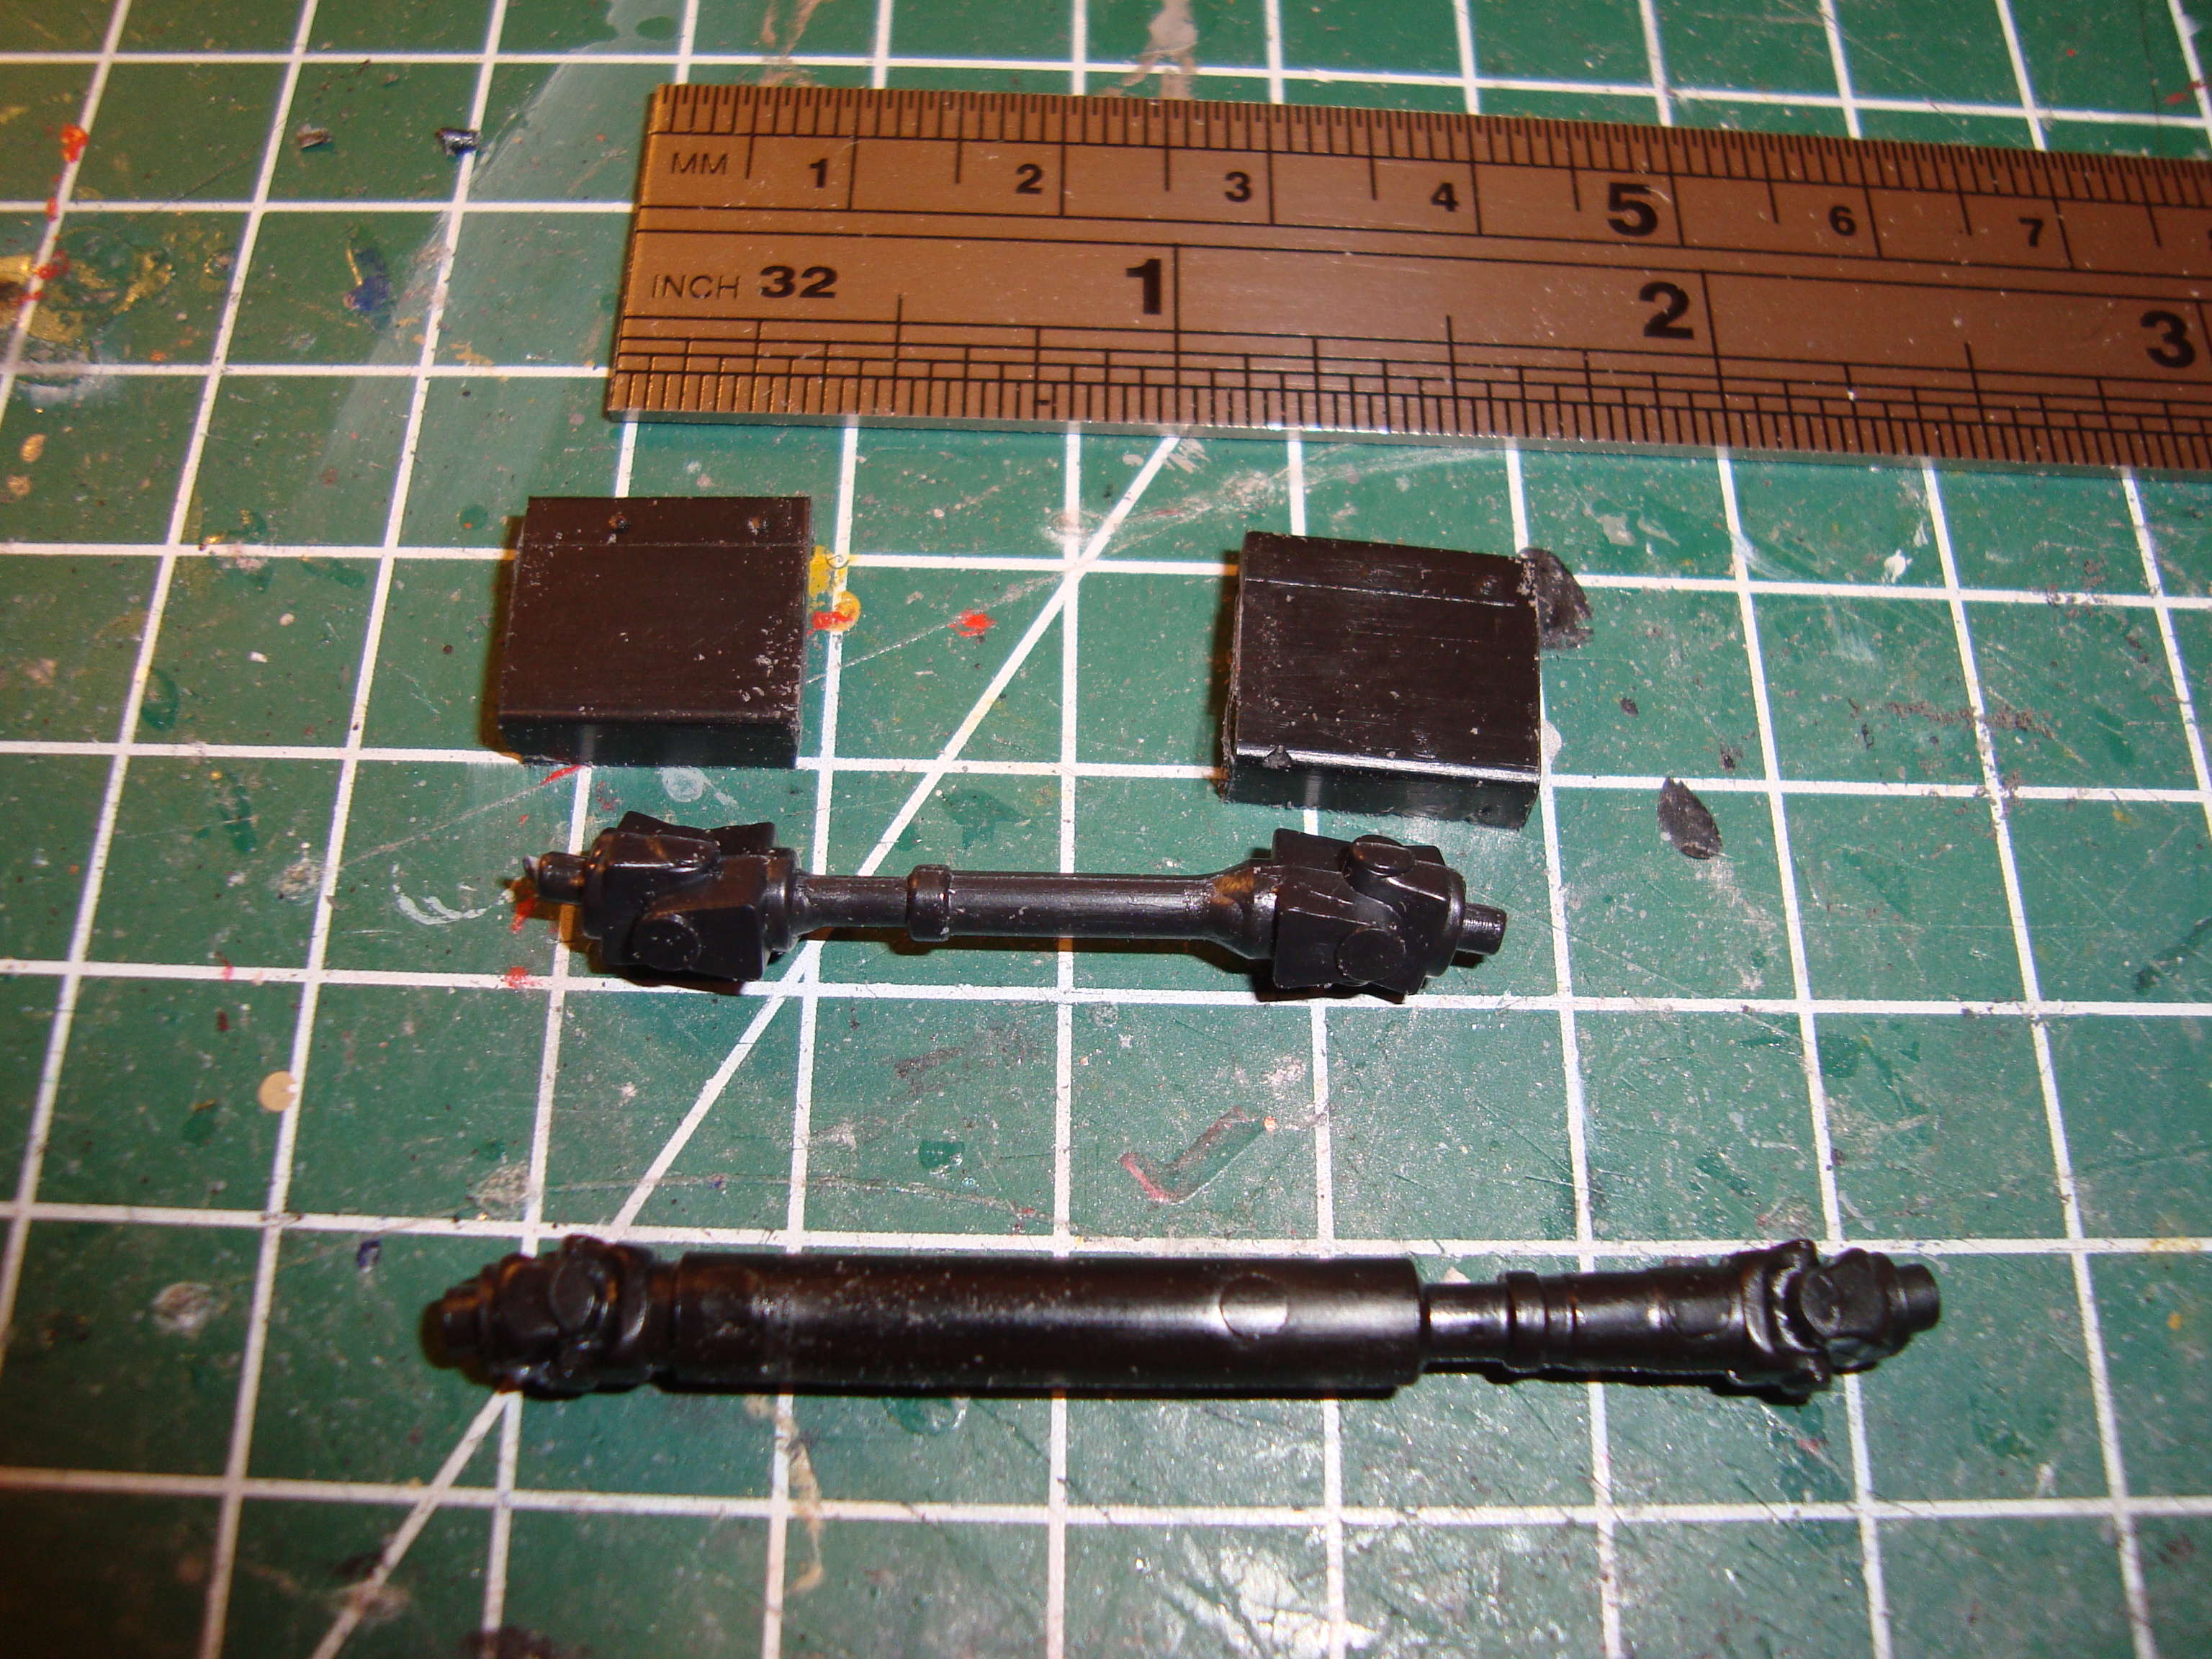
The one thing I didn't have, however, was a spare engine. KFS sorted that problem with their CAT 3406 kit; sadly discontinued as well. Somewhere in the pars I found a second drive shaft that was a little longer and sturdier that a normal one, so I figured a "Canadian Spread" would be nice. Also a flattop, since I had the 63" sleeper flat roof part lying around.
For the Canadian look, I ordered Cooney decals from (yes, again) www.modeltruckin.com. I'm very happy with their products!
I had a little help from some Canadian friends in them sending over reference pics of Cooney Peterbilts.All in all I'm pretty happy with the result; in my Big Move 3 years ago I lost a mudflap however, I still need to cut a new one… And make some outside pics.


-
1
-
-
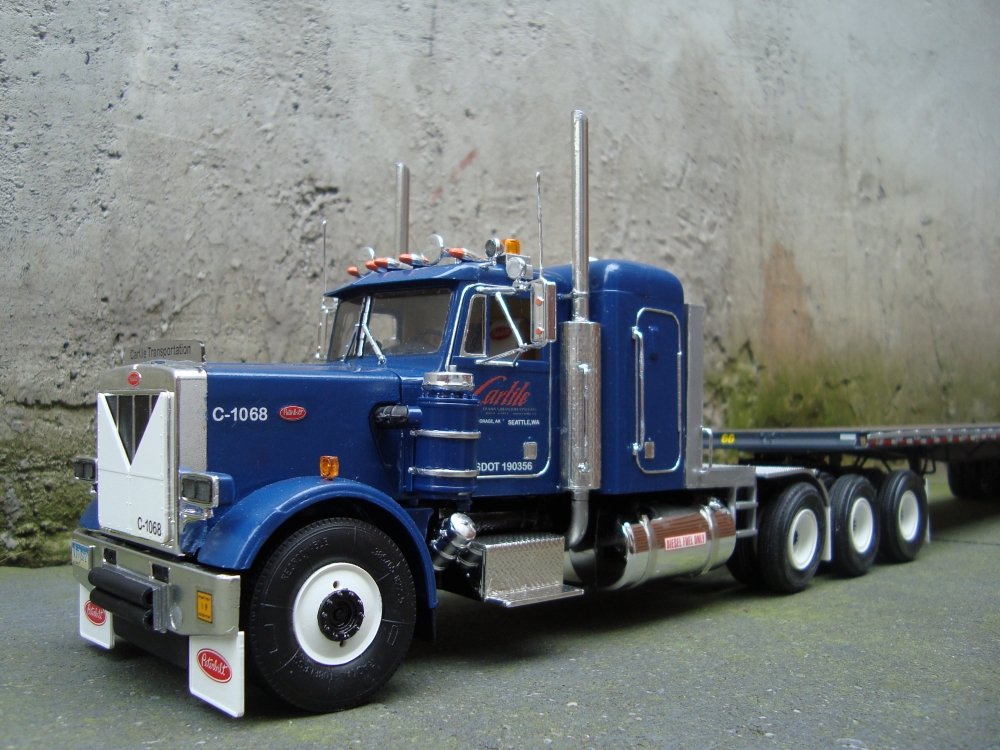
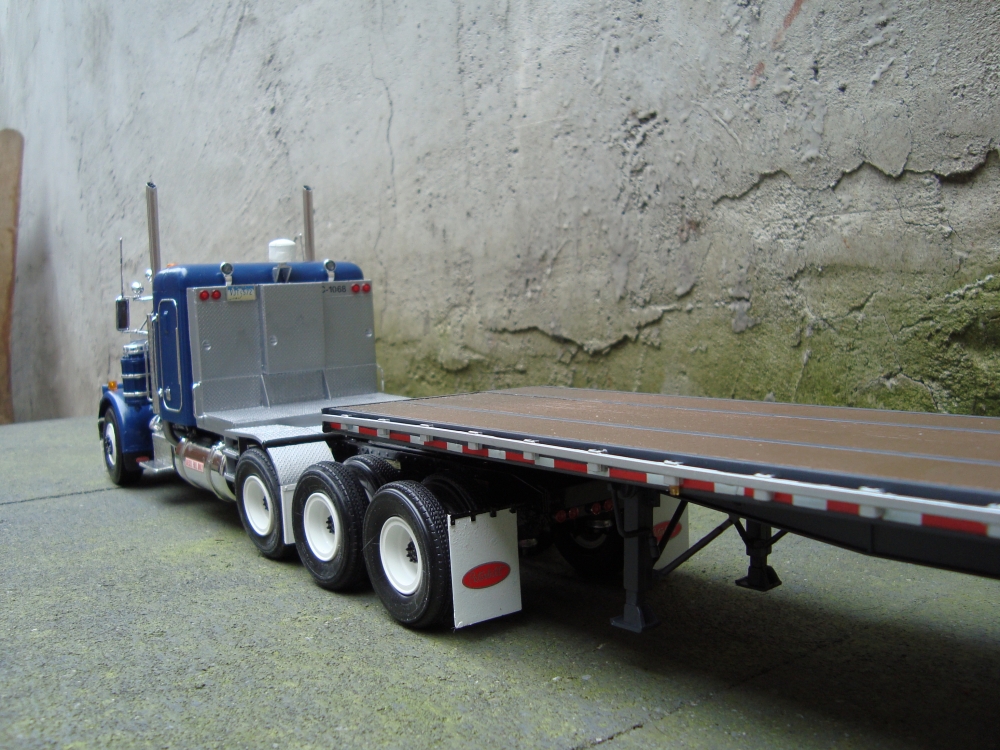
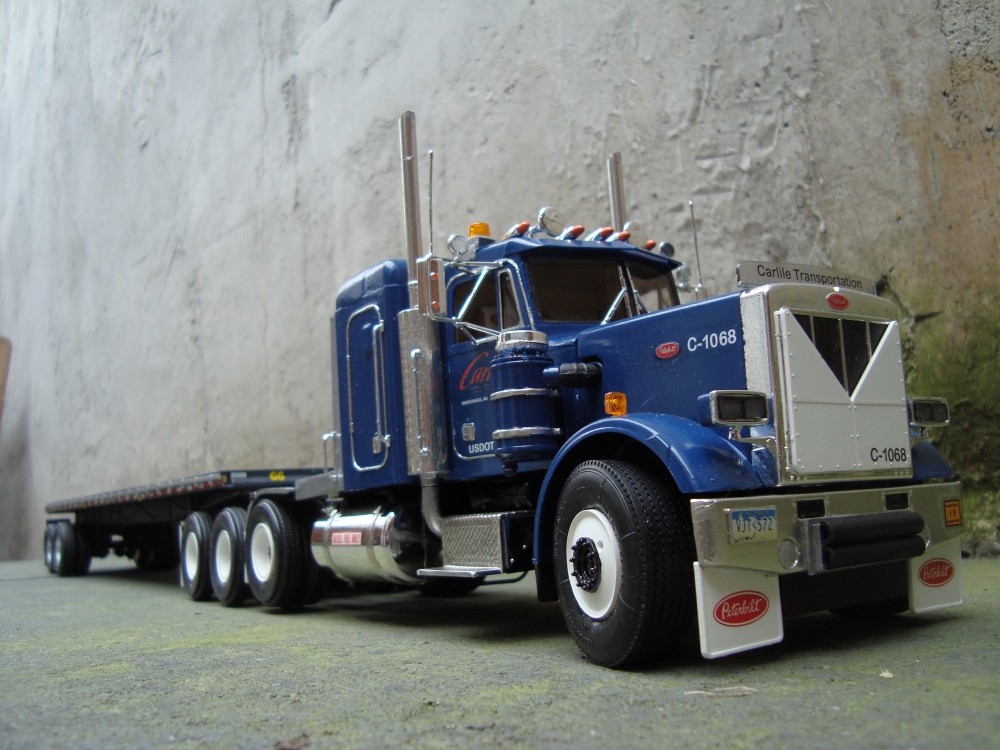
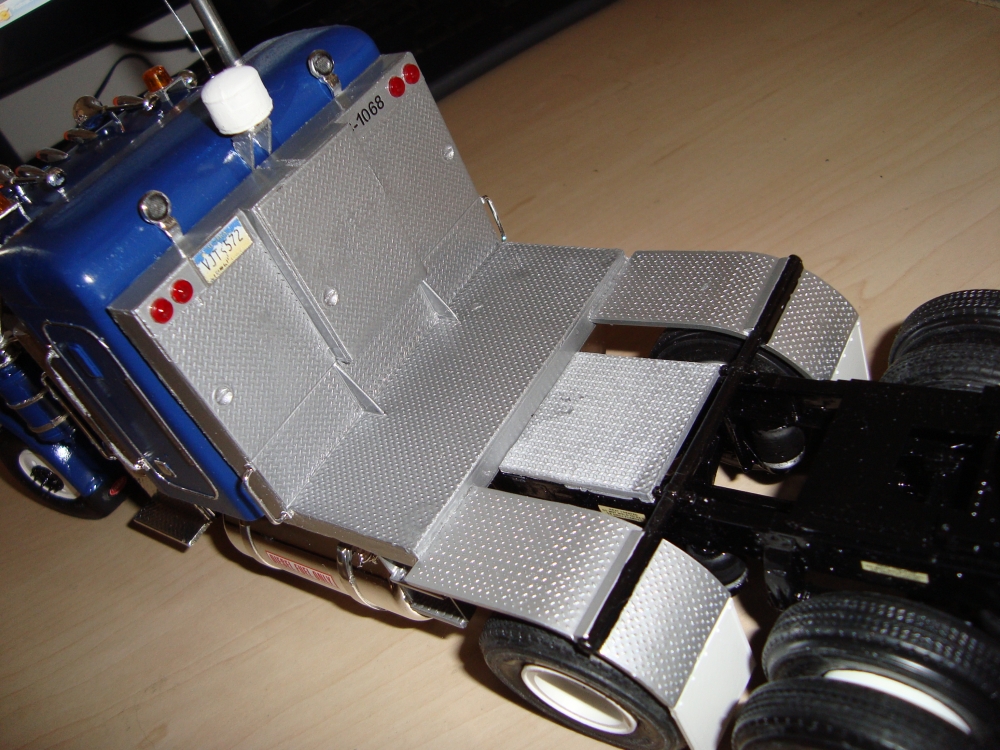
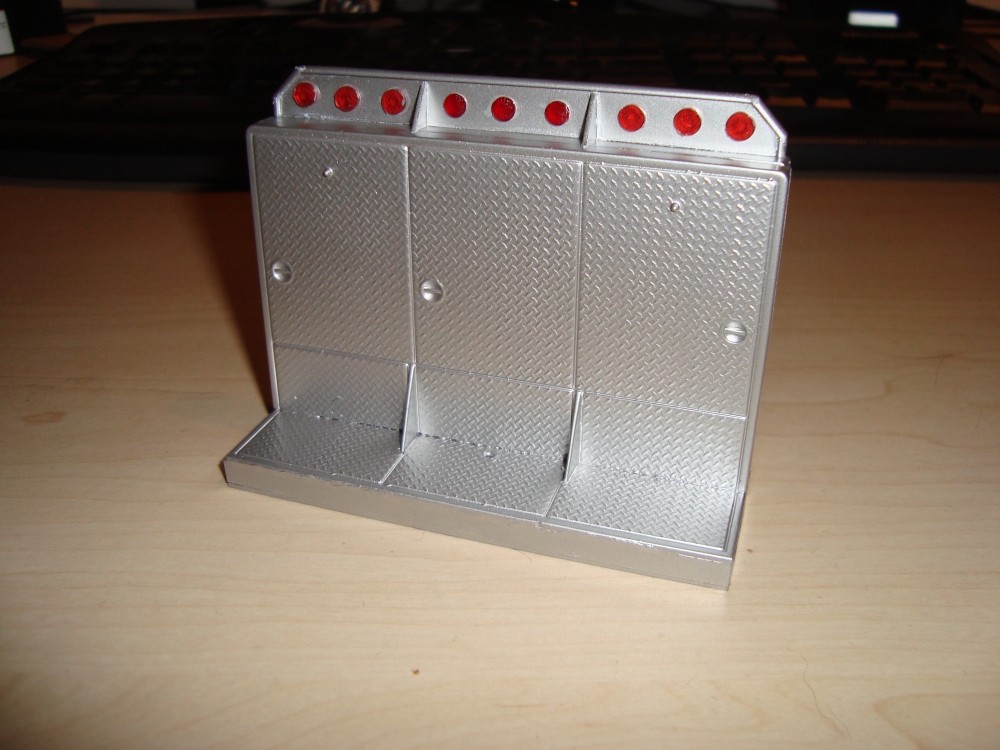
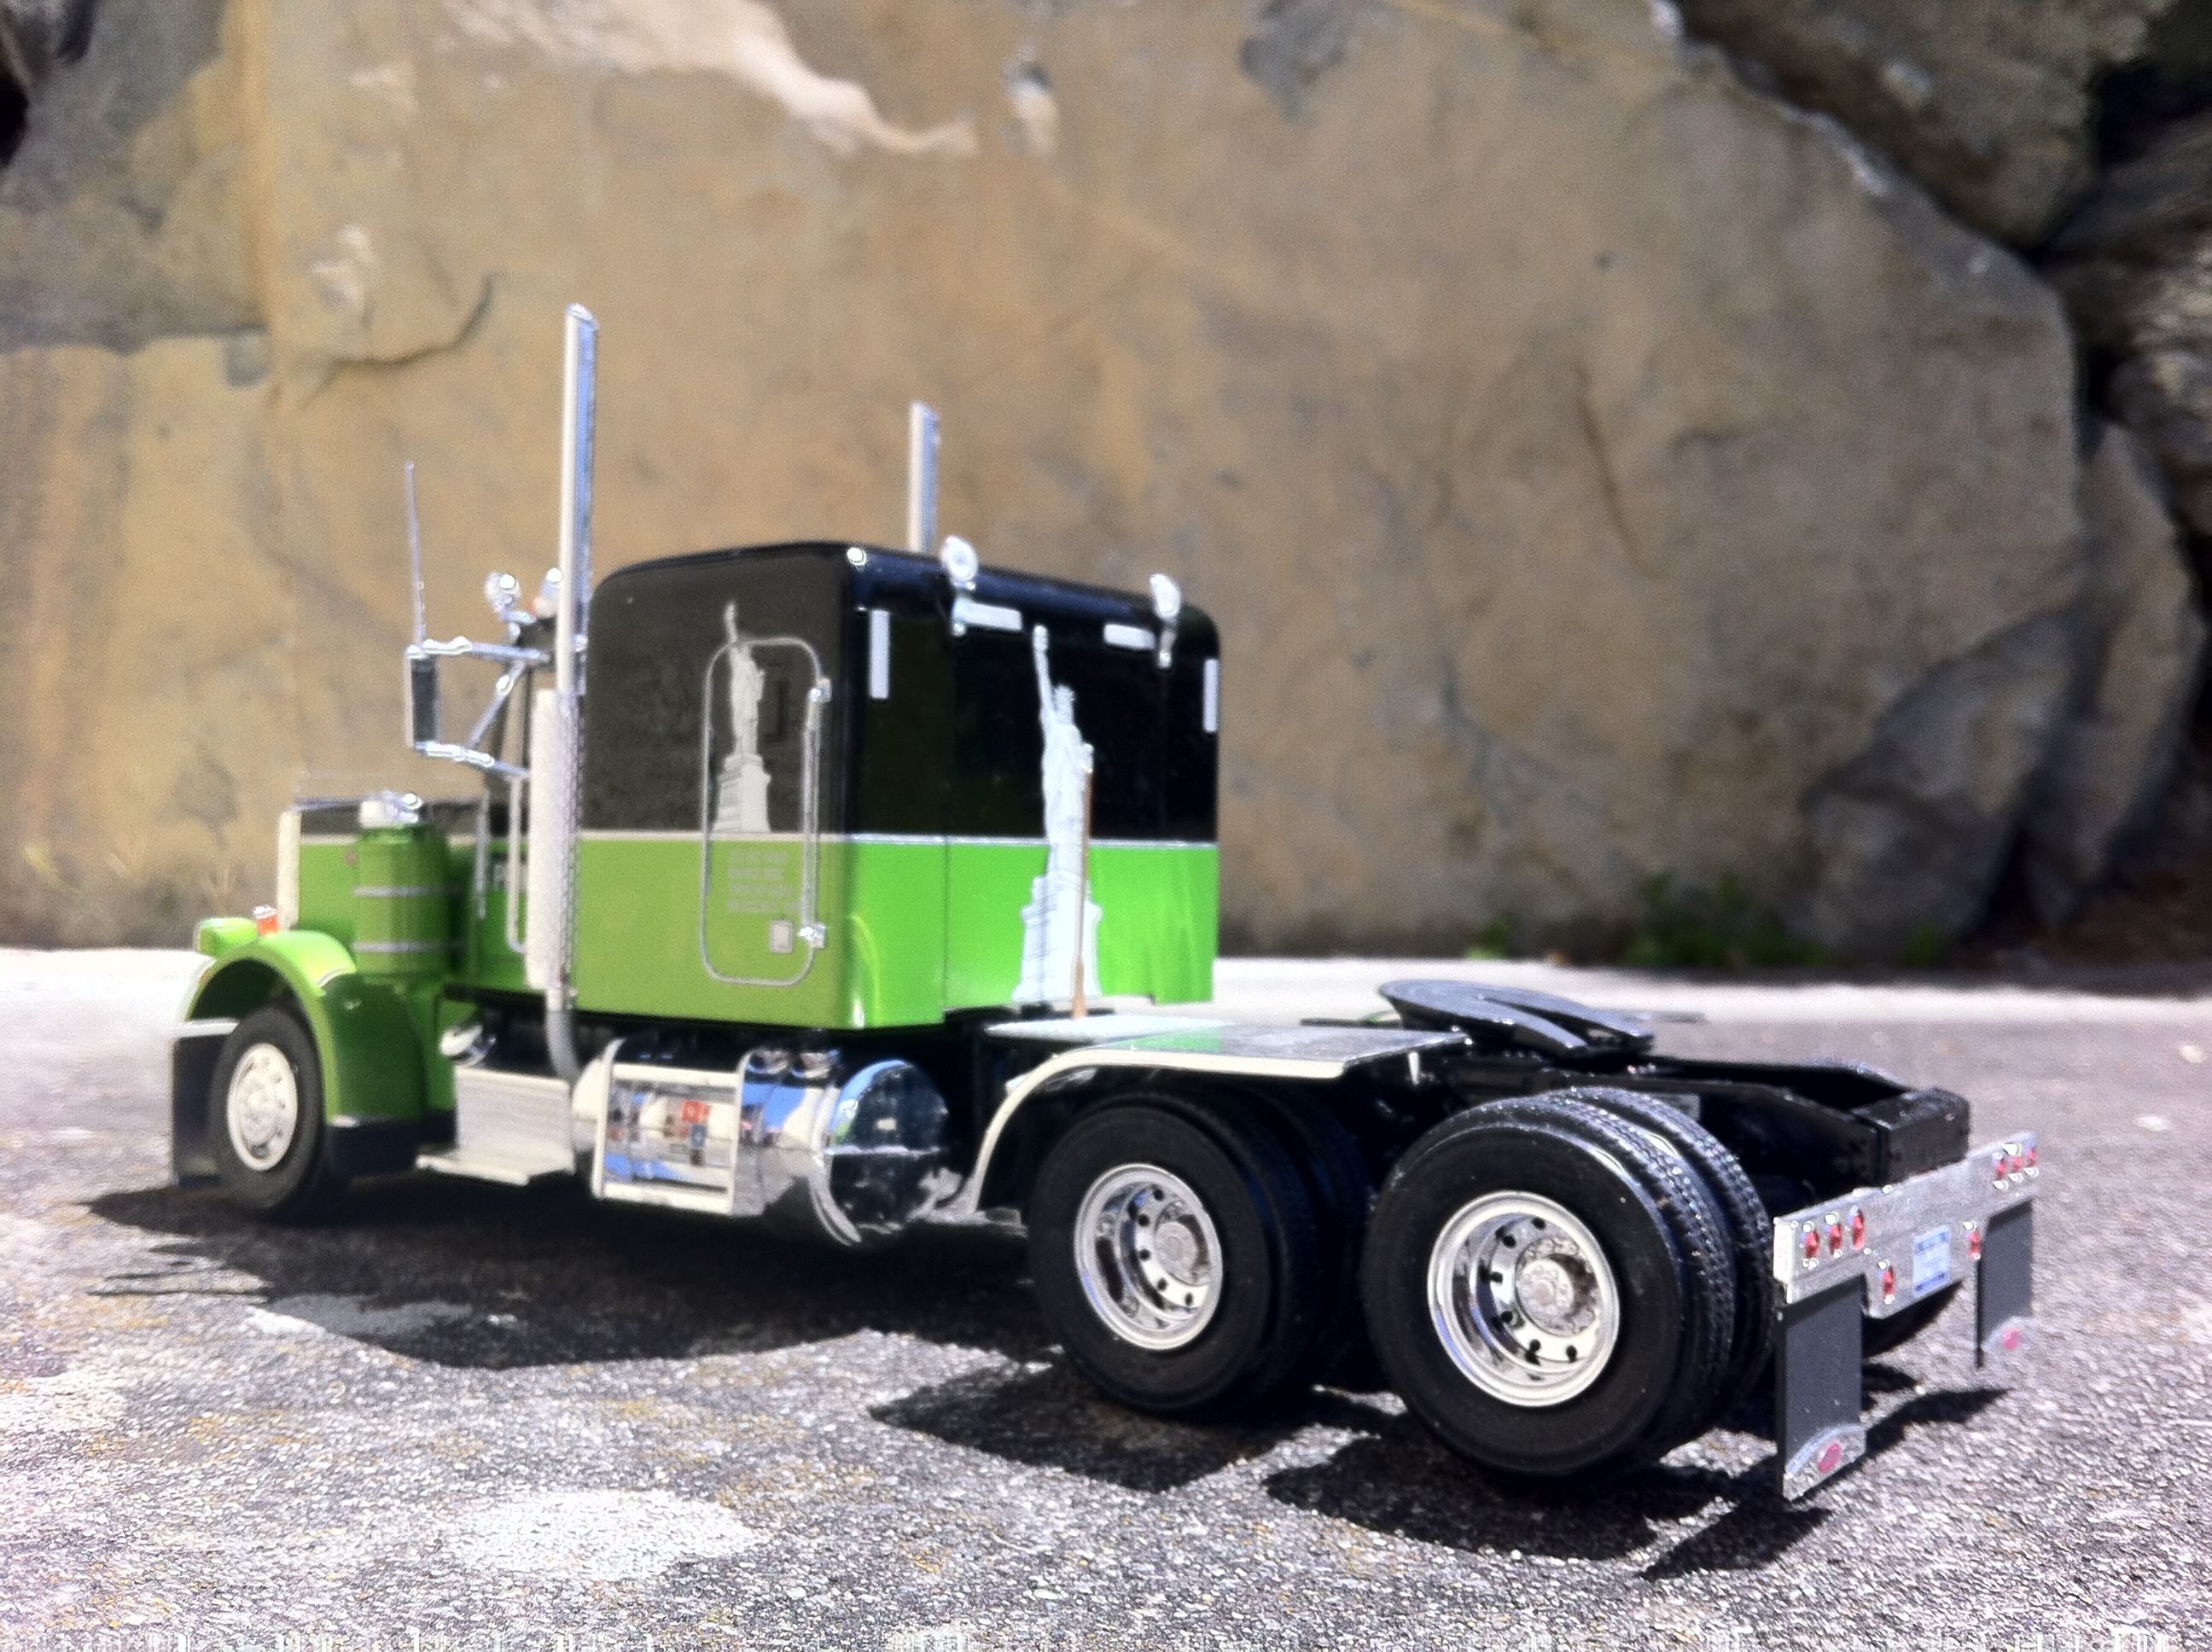
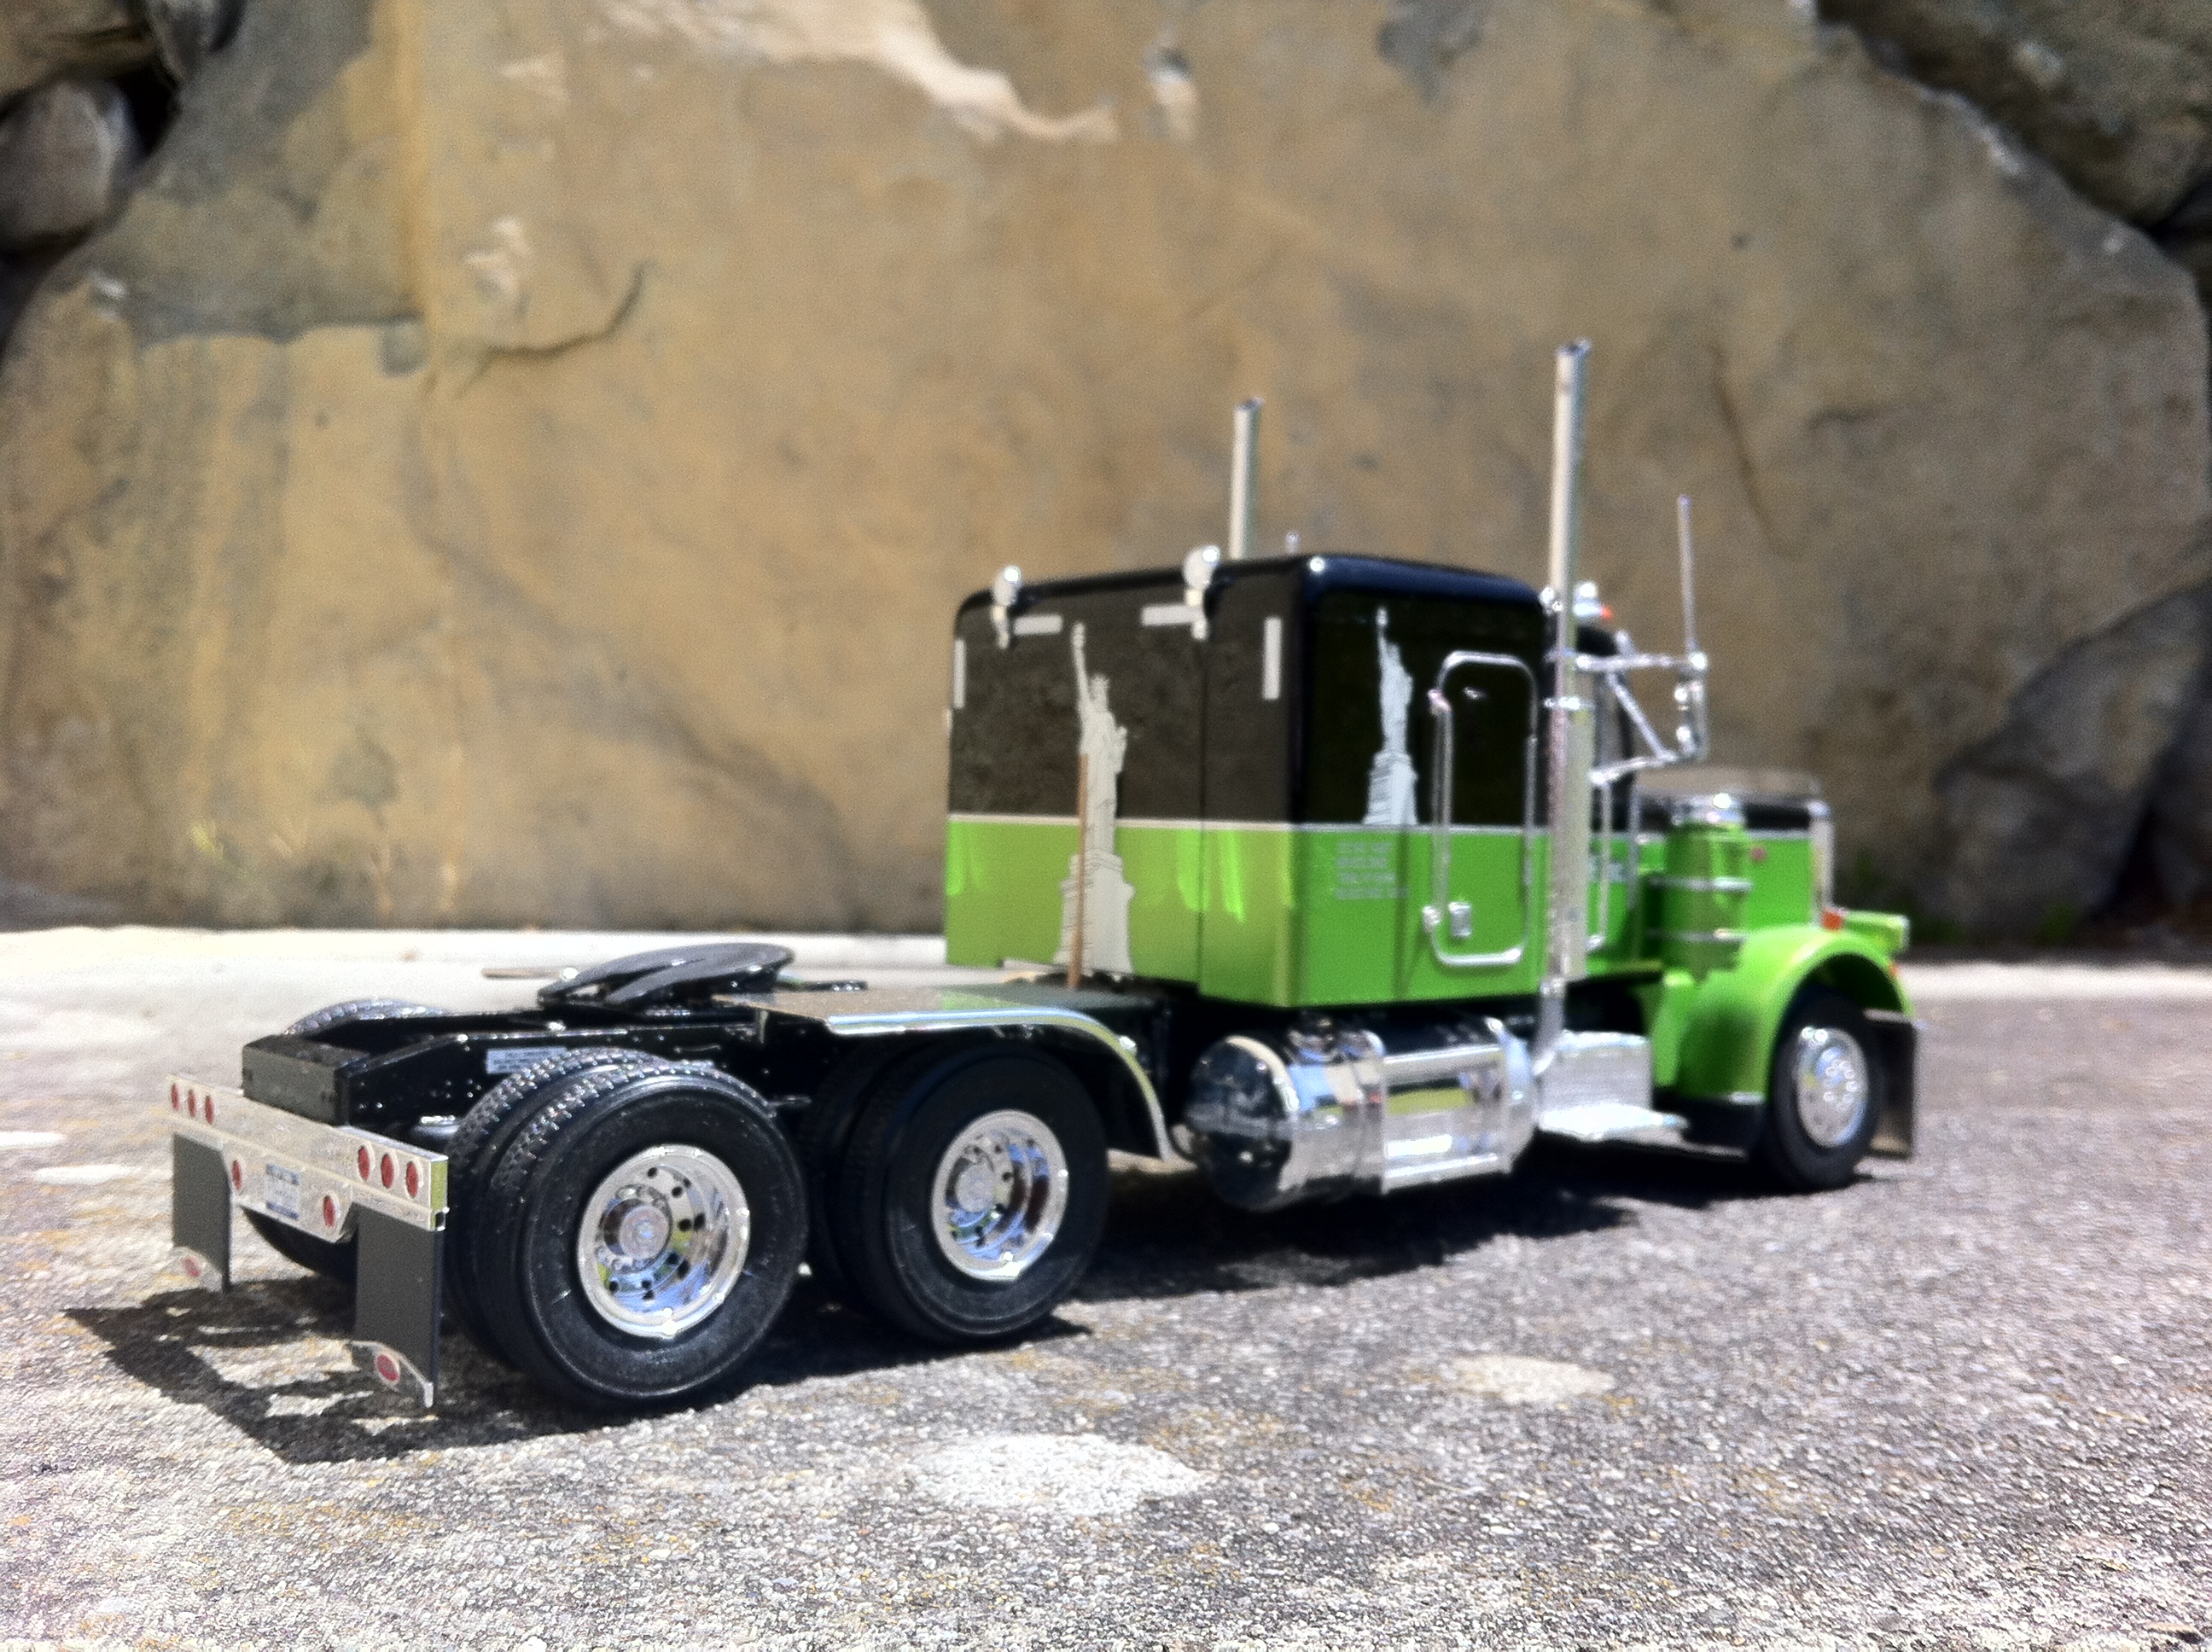
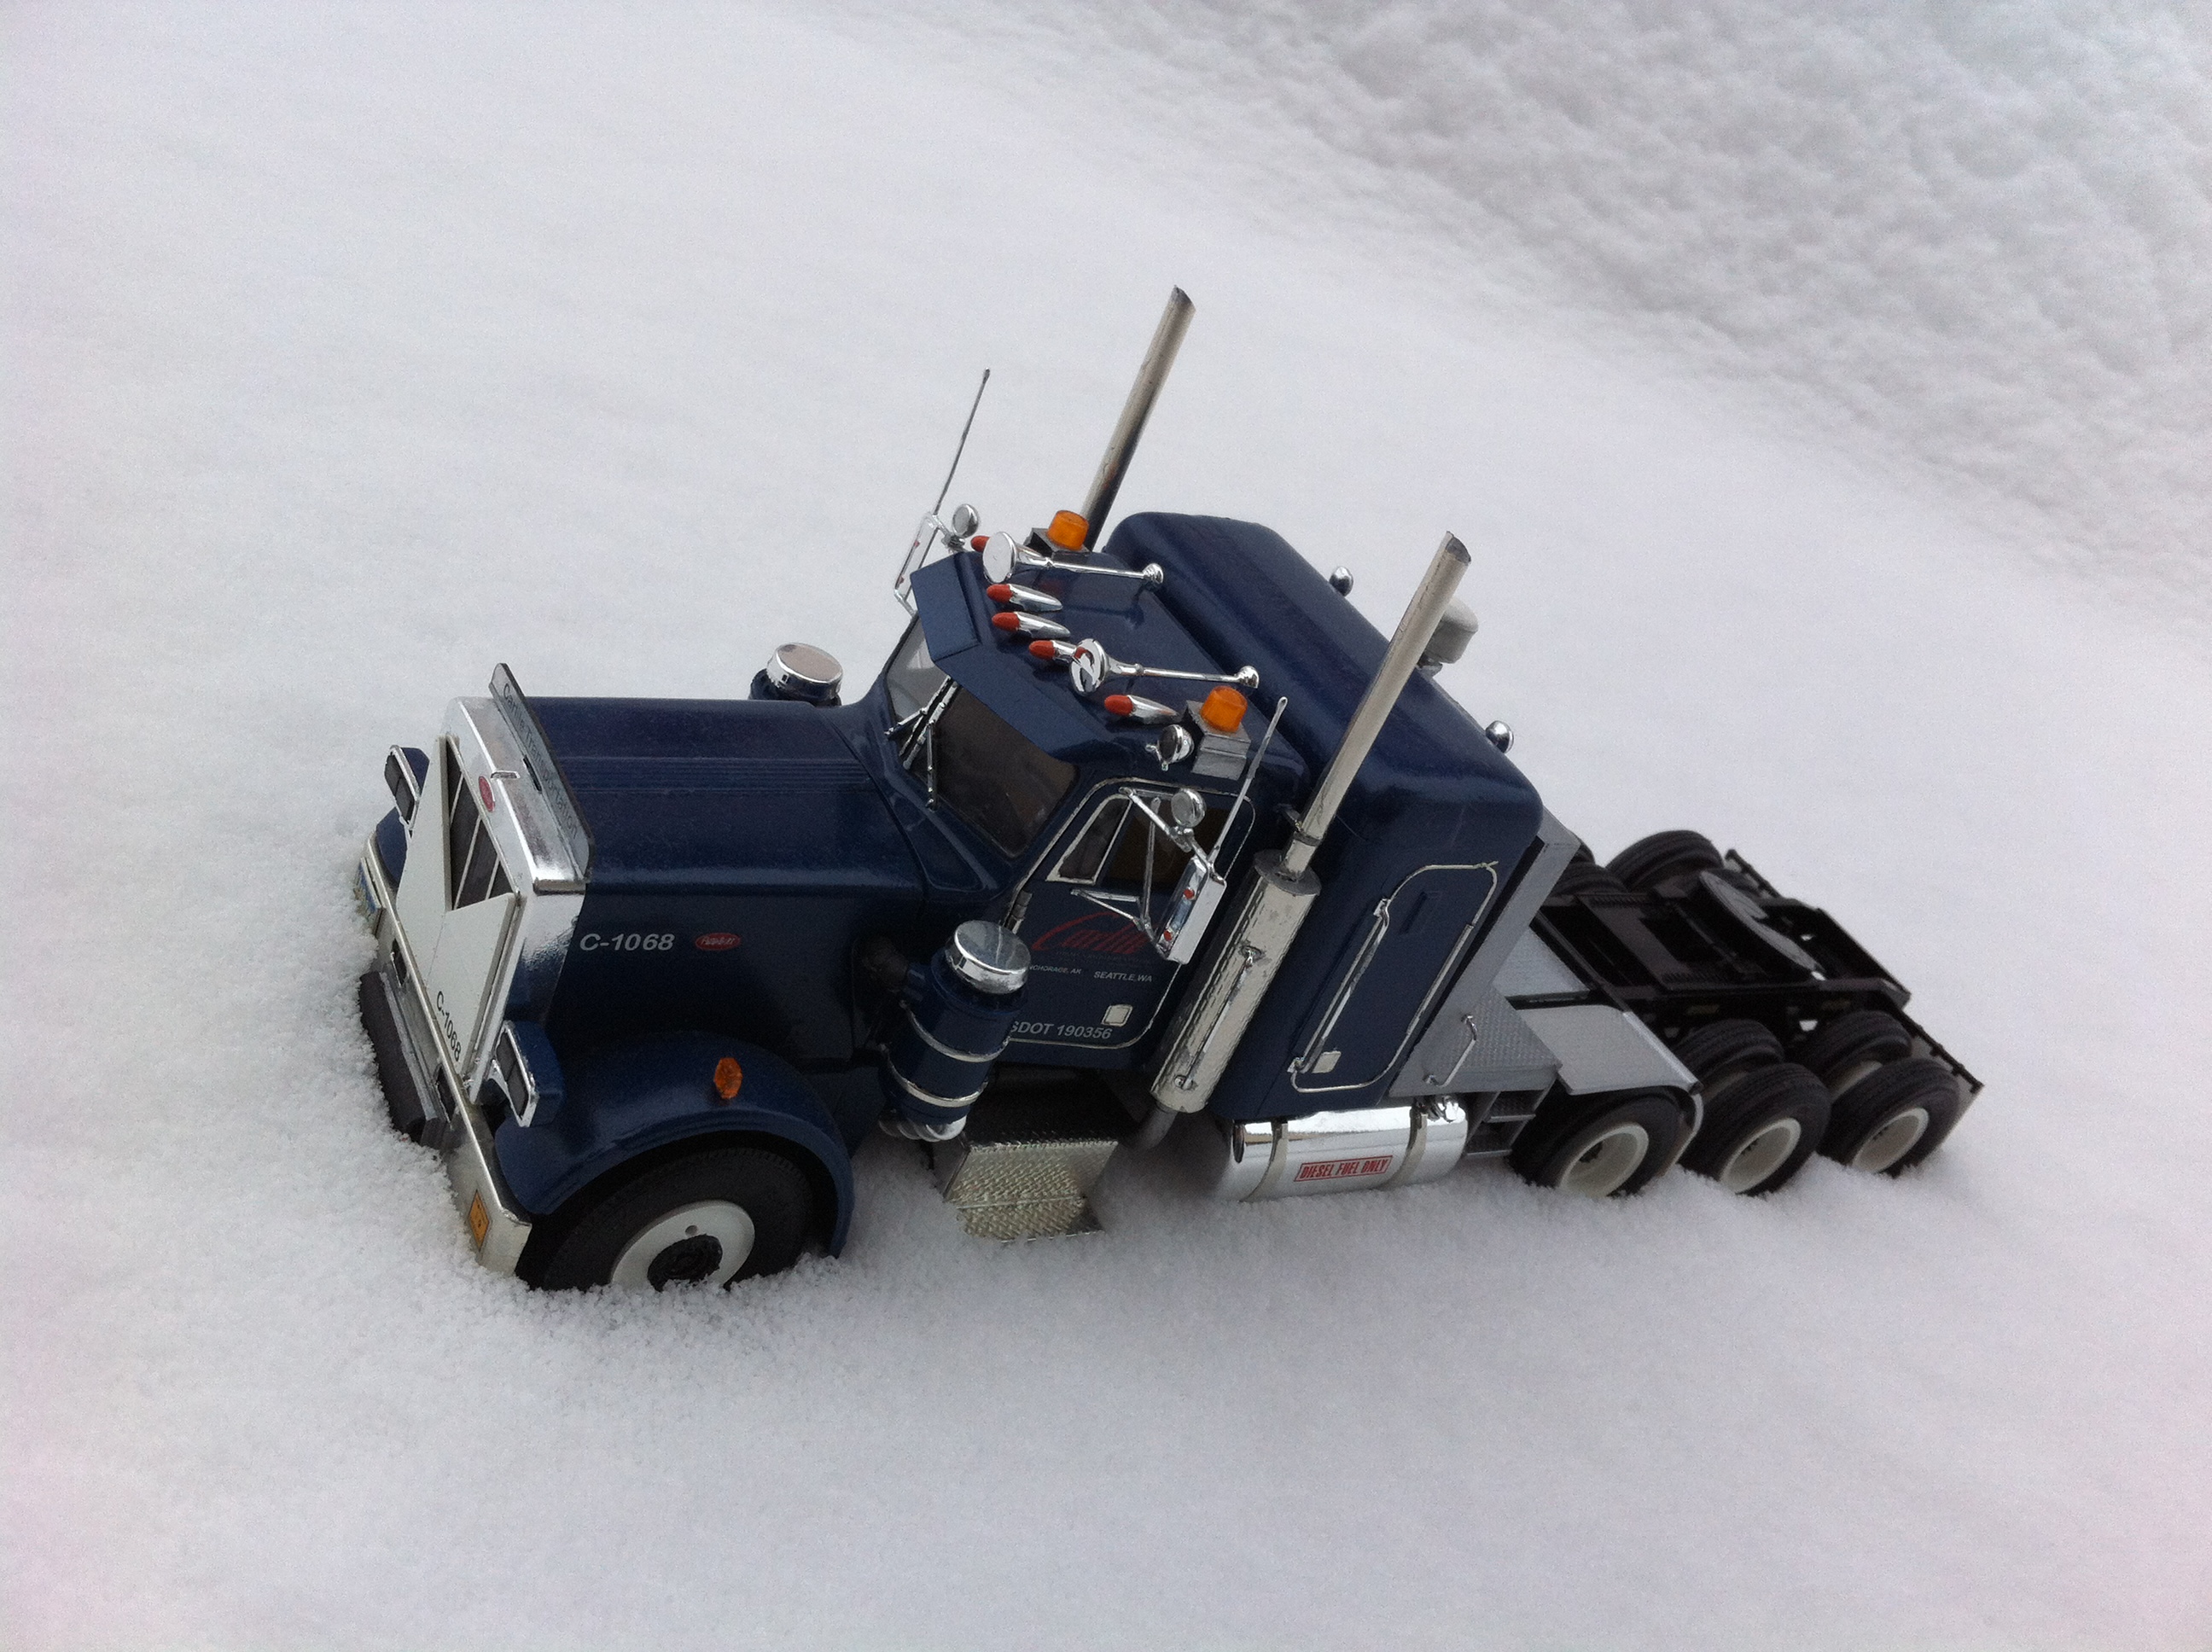
The Revell of Germany Peterbilt 359 "Alaskan Hauler" kit, made into a true "what-if" Alaskan hauler. I adapted the hood to a fibreglass hood, many thanks to Tim Ahlborn for giving me that tip. Also I cut down the bunk, and inadvertently "suicided" the sleeper doors… Headache rack and deck plating adapted, as well as a scratch-built Track & Trace dome. Of course the inspiration for this truck came from History Channel's Ice Road Truckers, so I made a Push-Truck bumper on the front. Mandatory beacons and extra lights. Also I put on Italeri Peterbilt tanks.
The lift axle is not a drive axle, but still has double wheels. The Carlile Transportation theme was a no-brainer; decals again by www.modeltruckin.com.


-
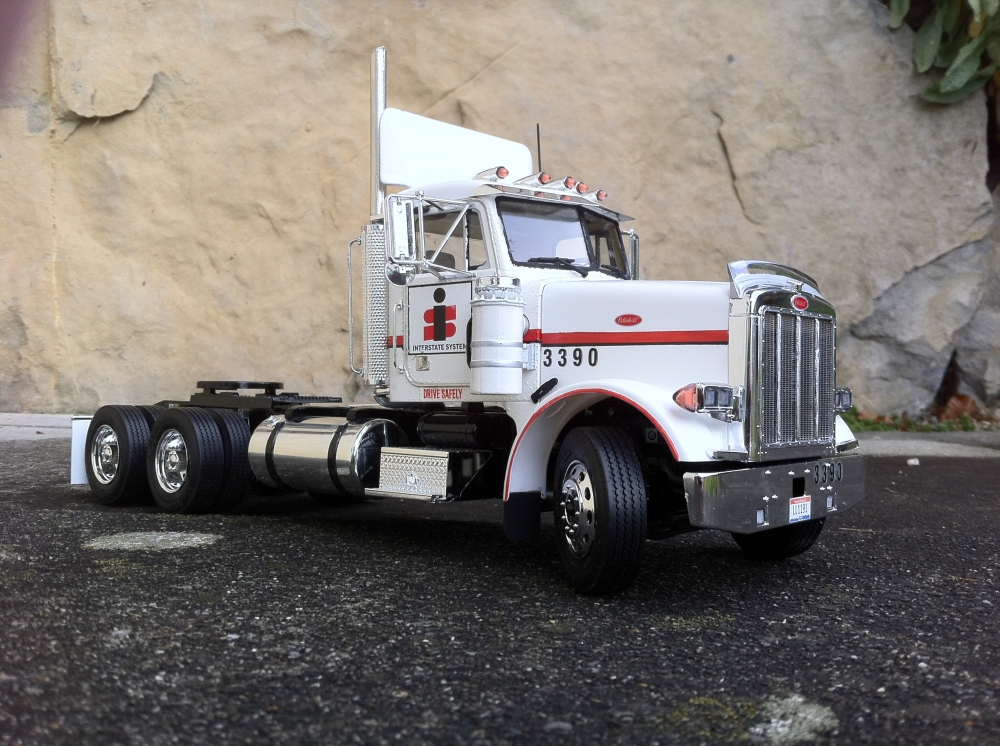
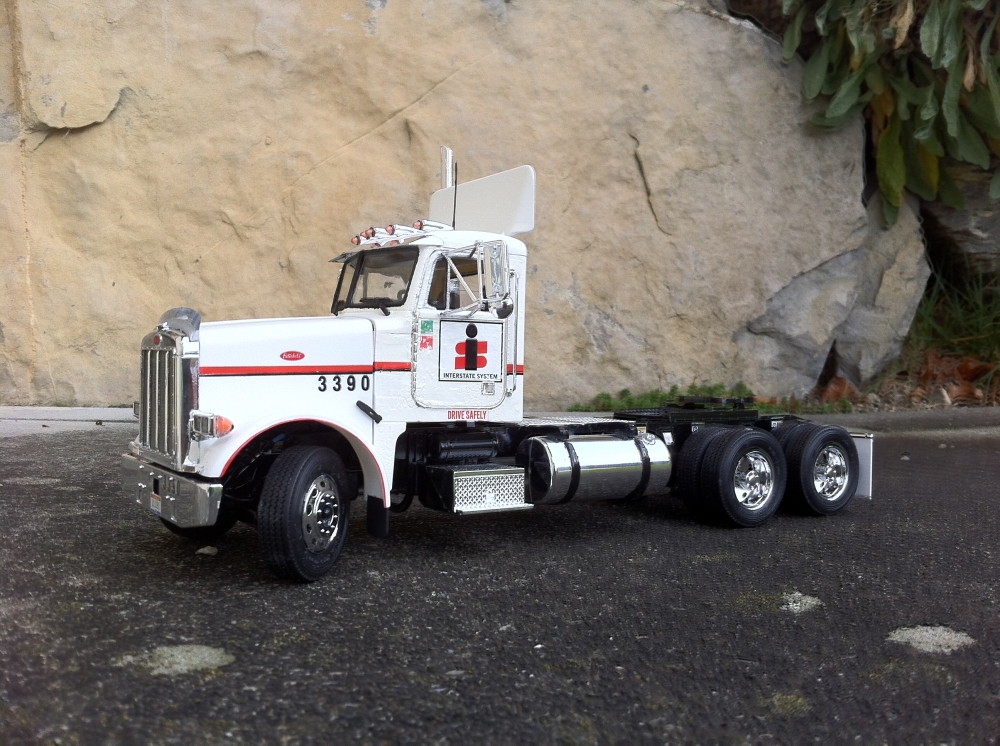
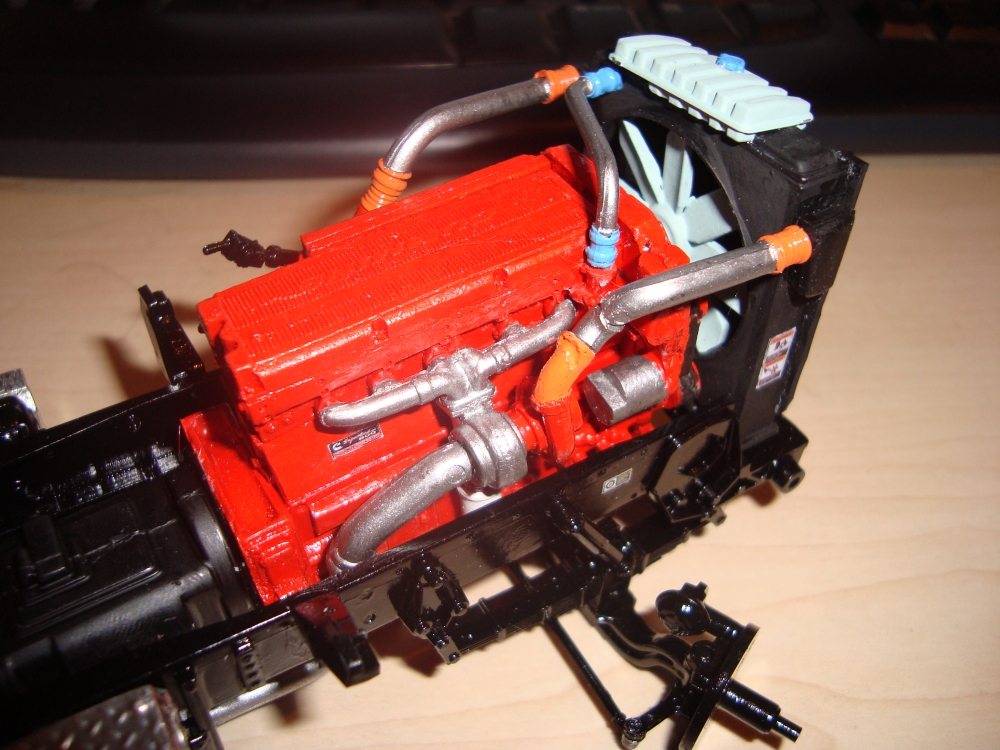
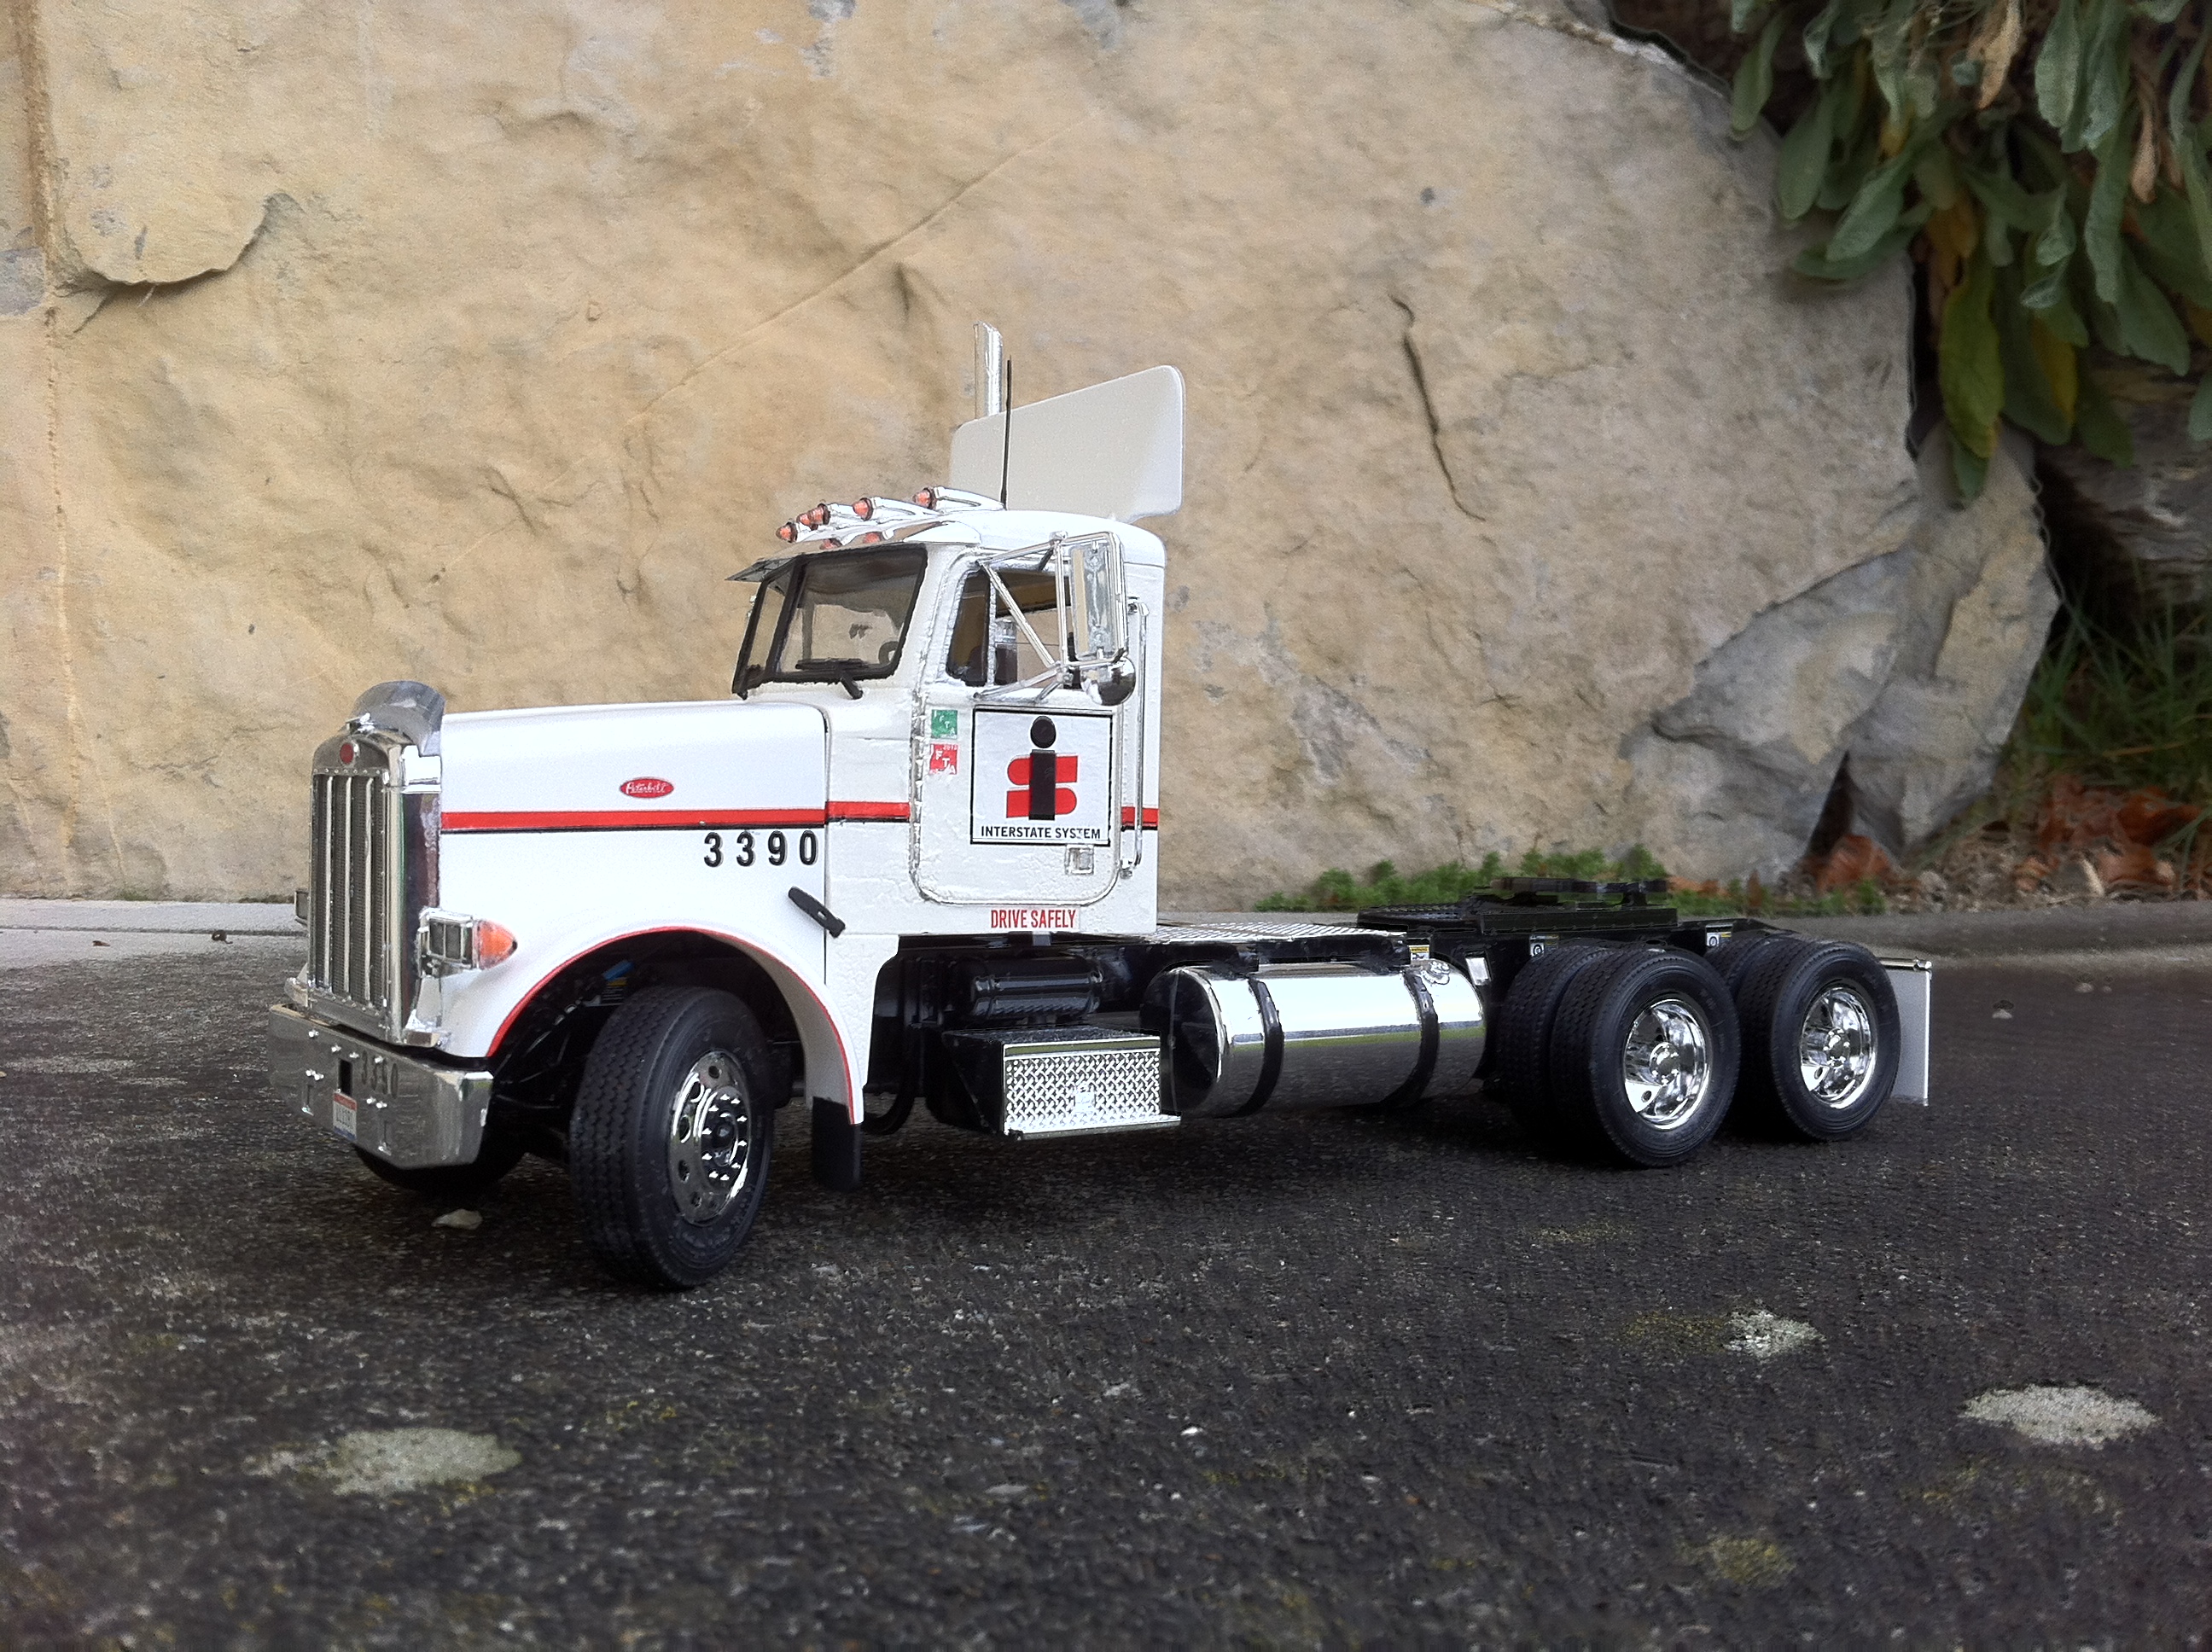
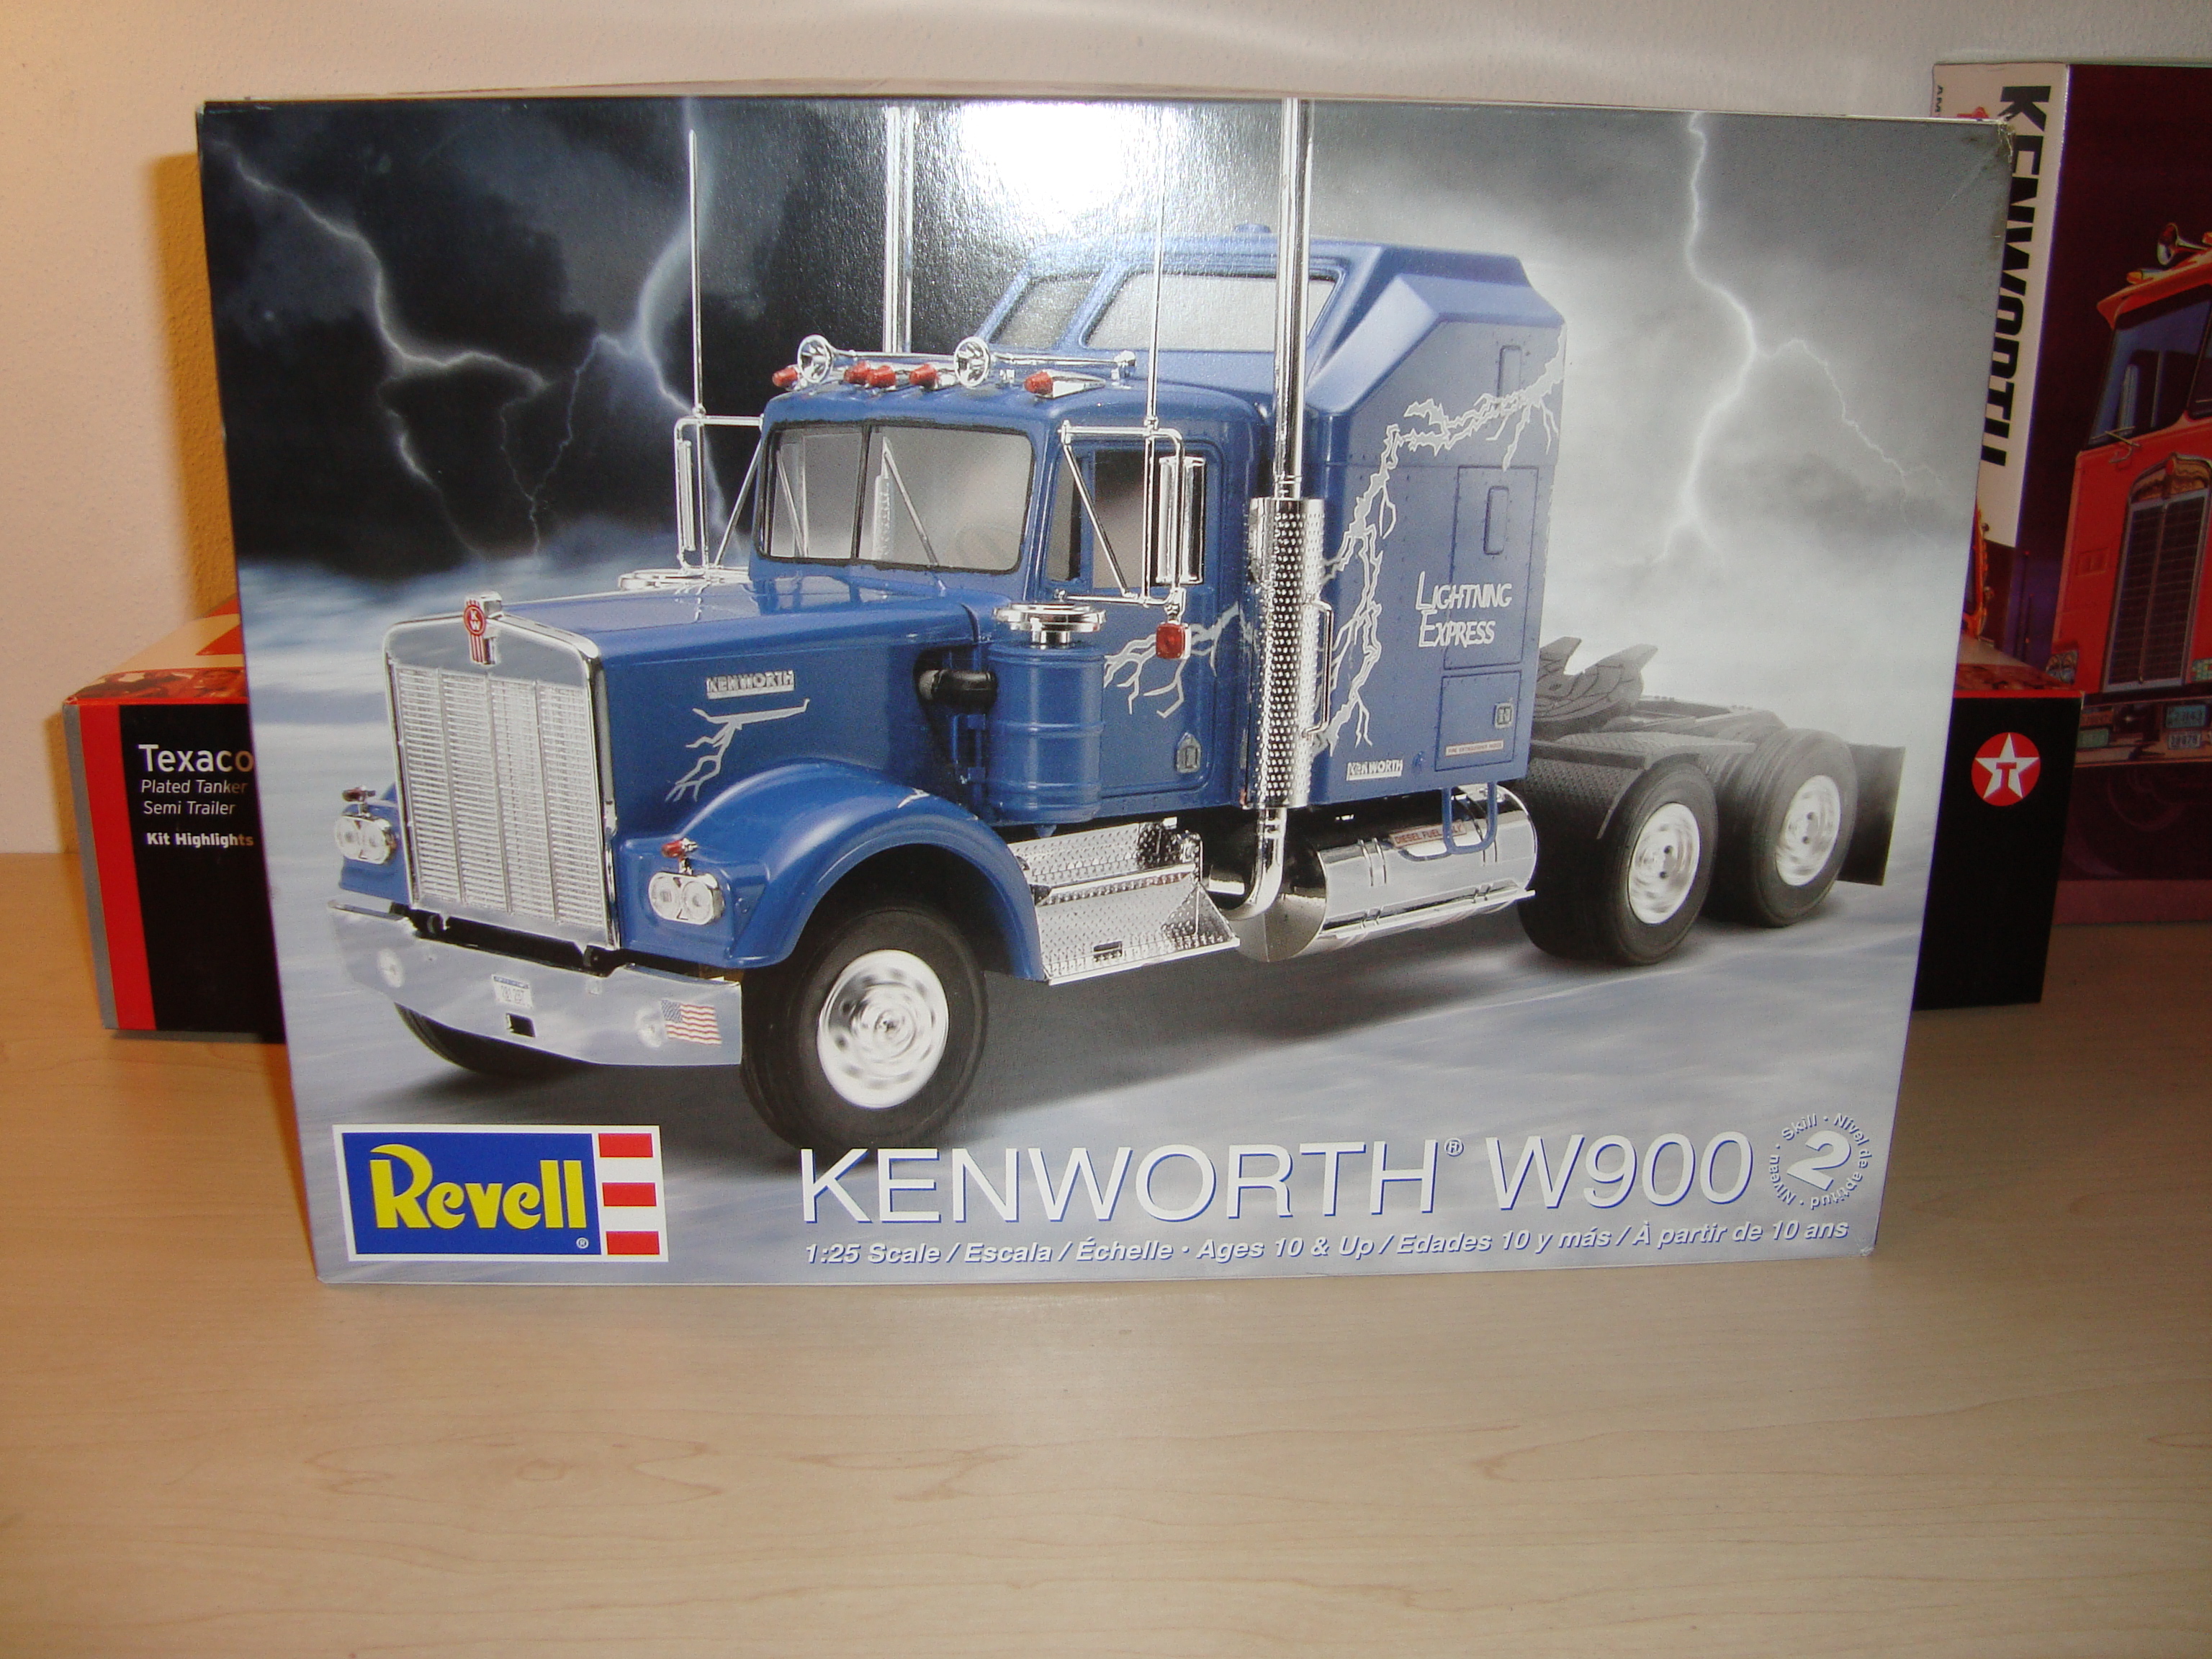
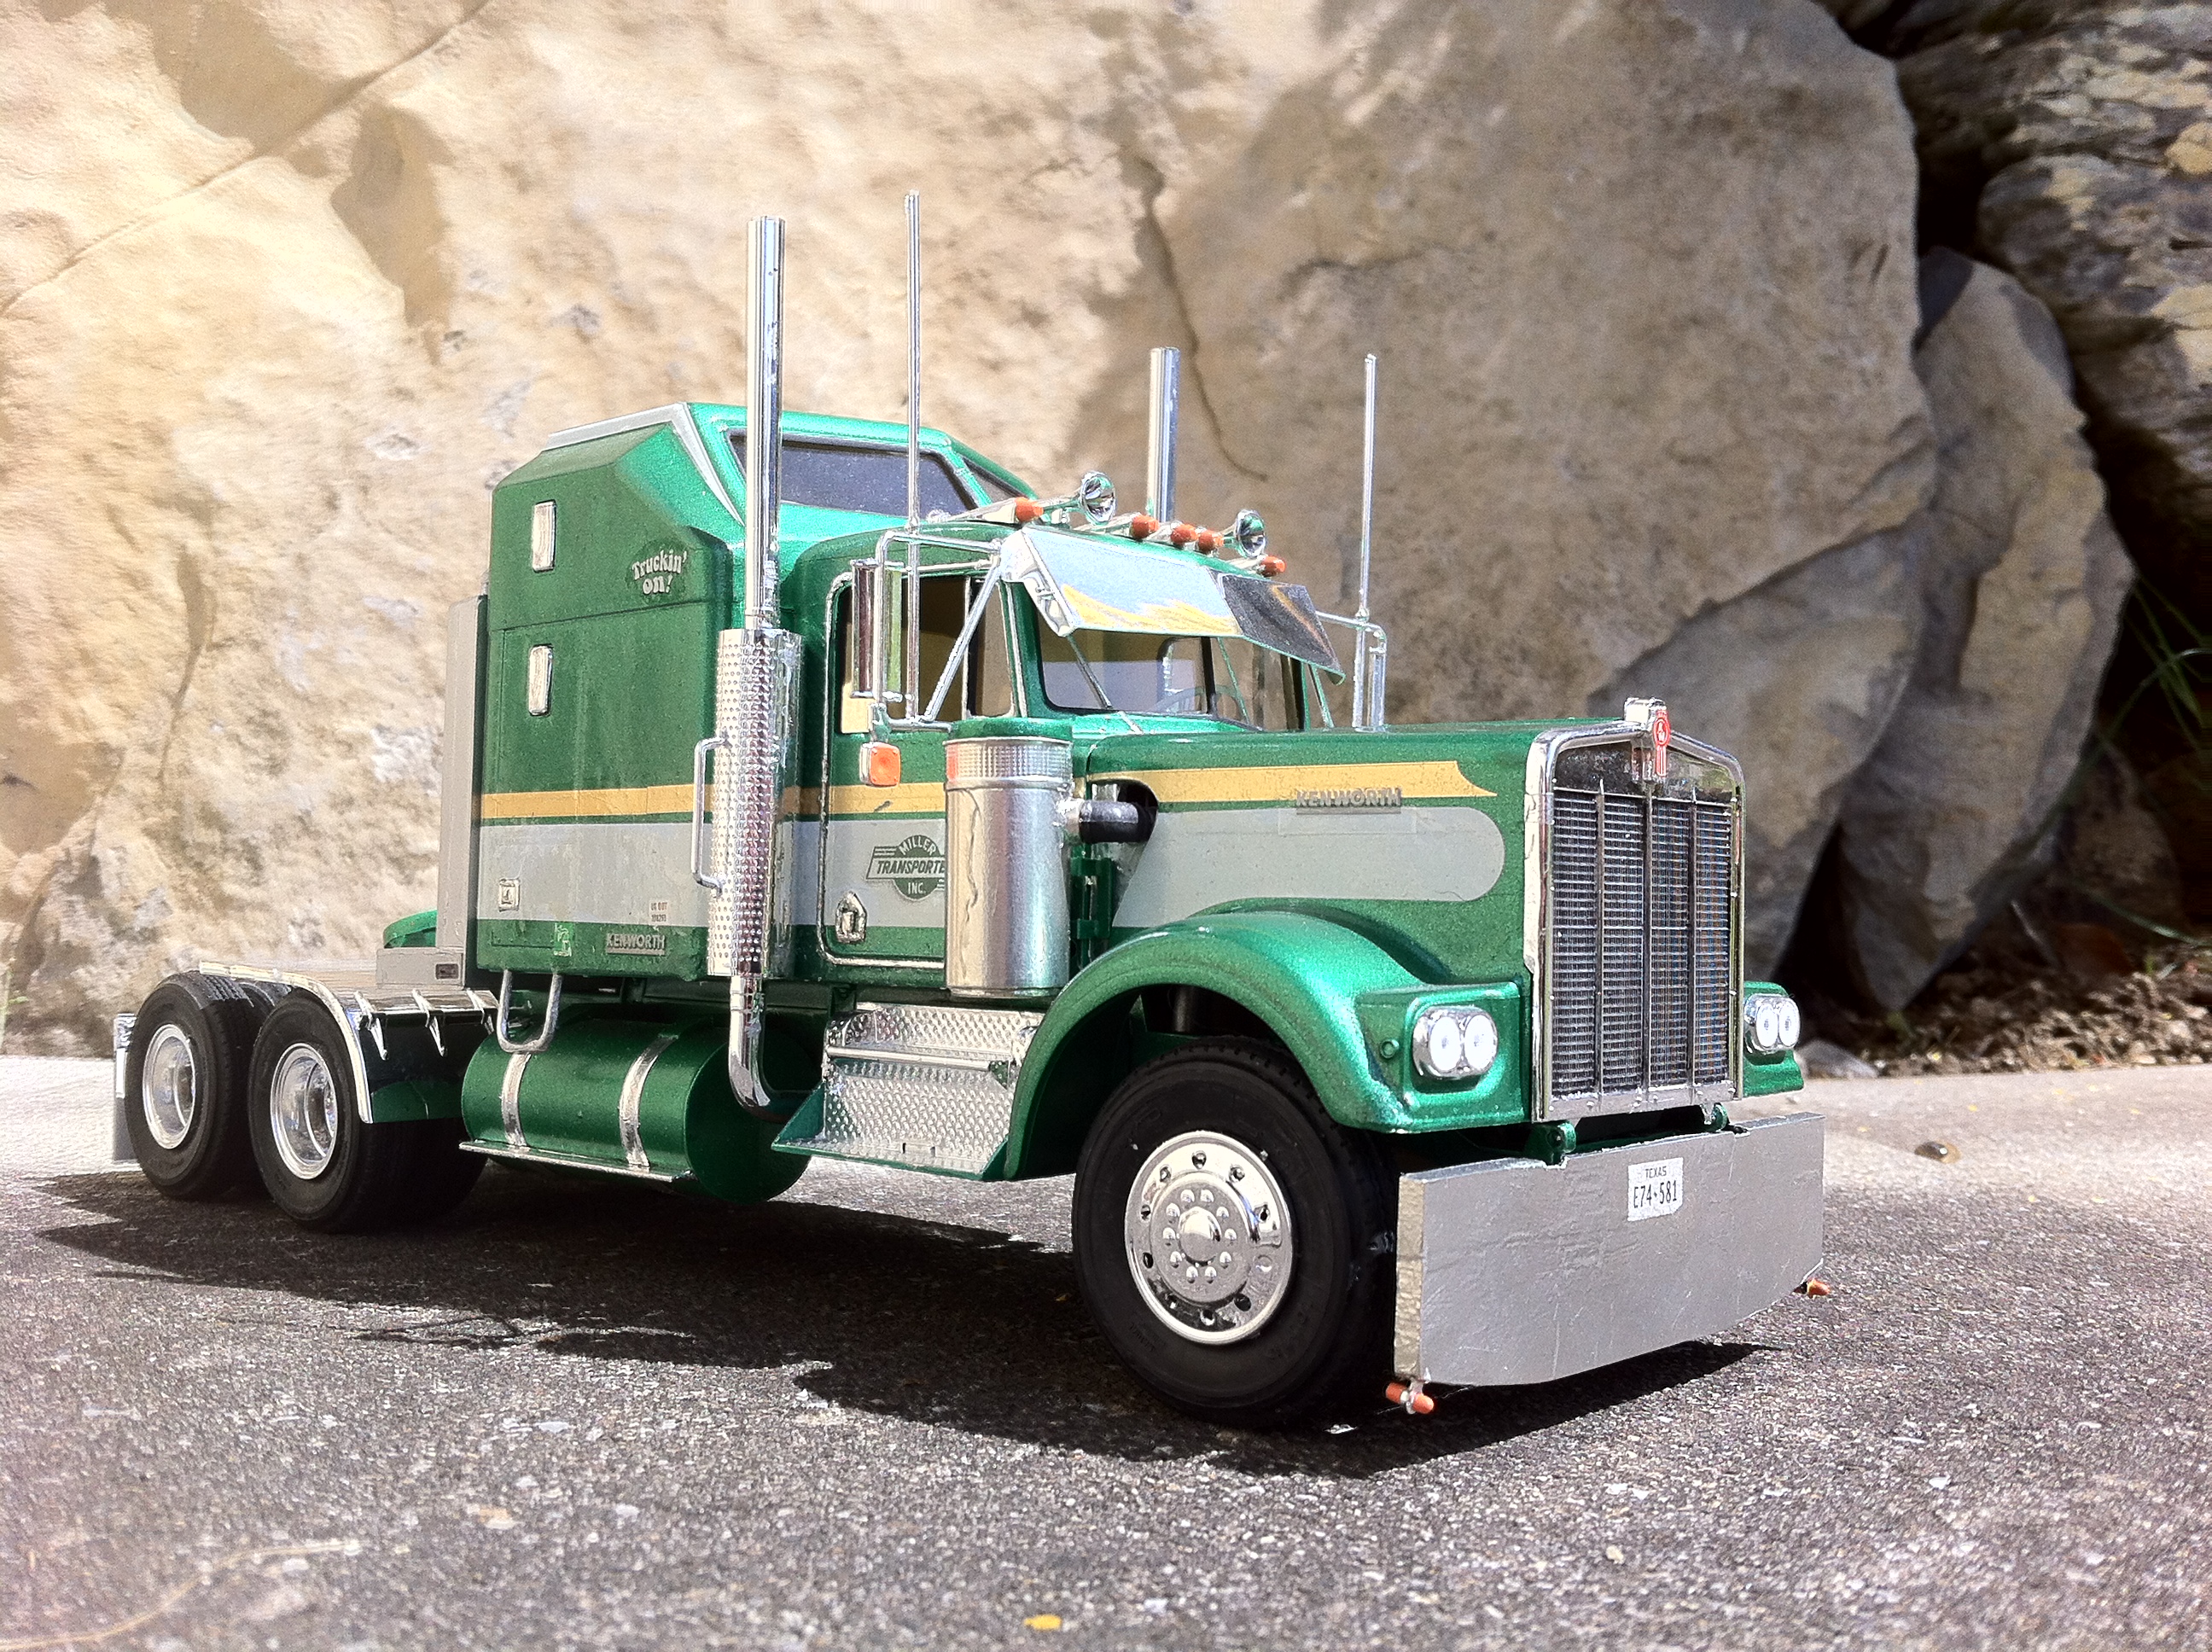
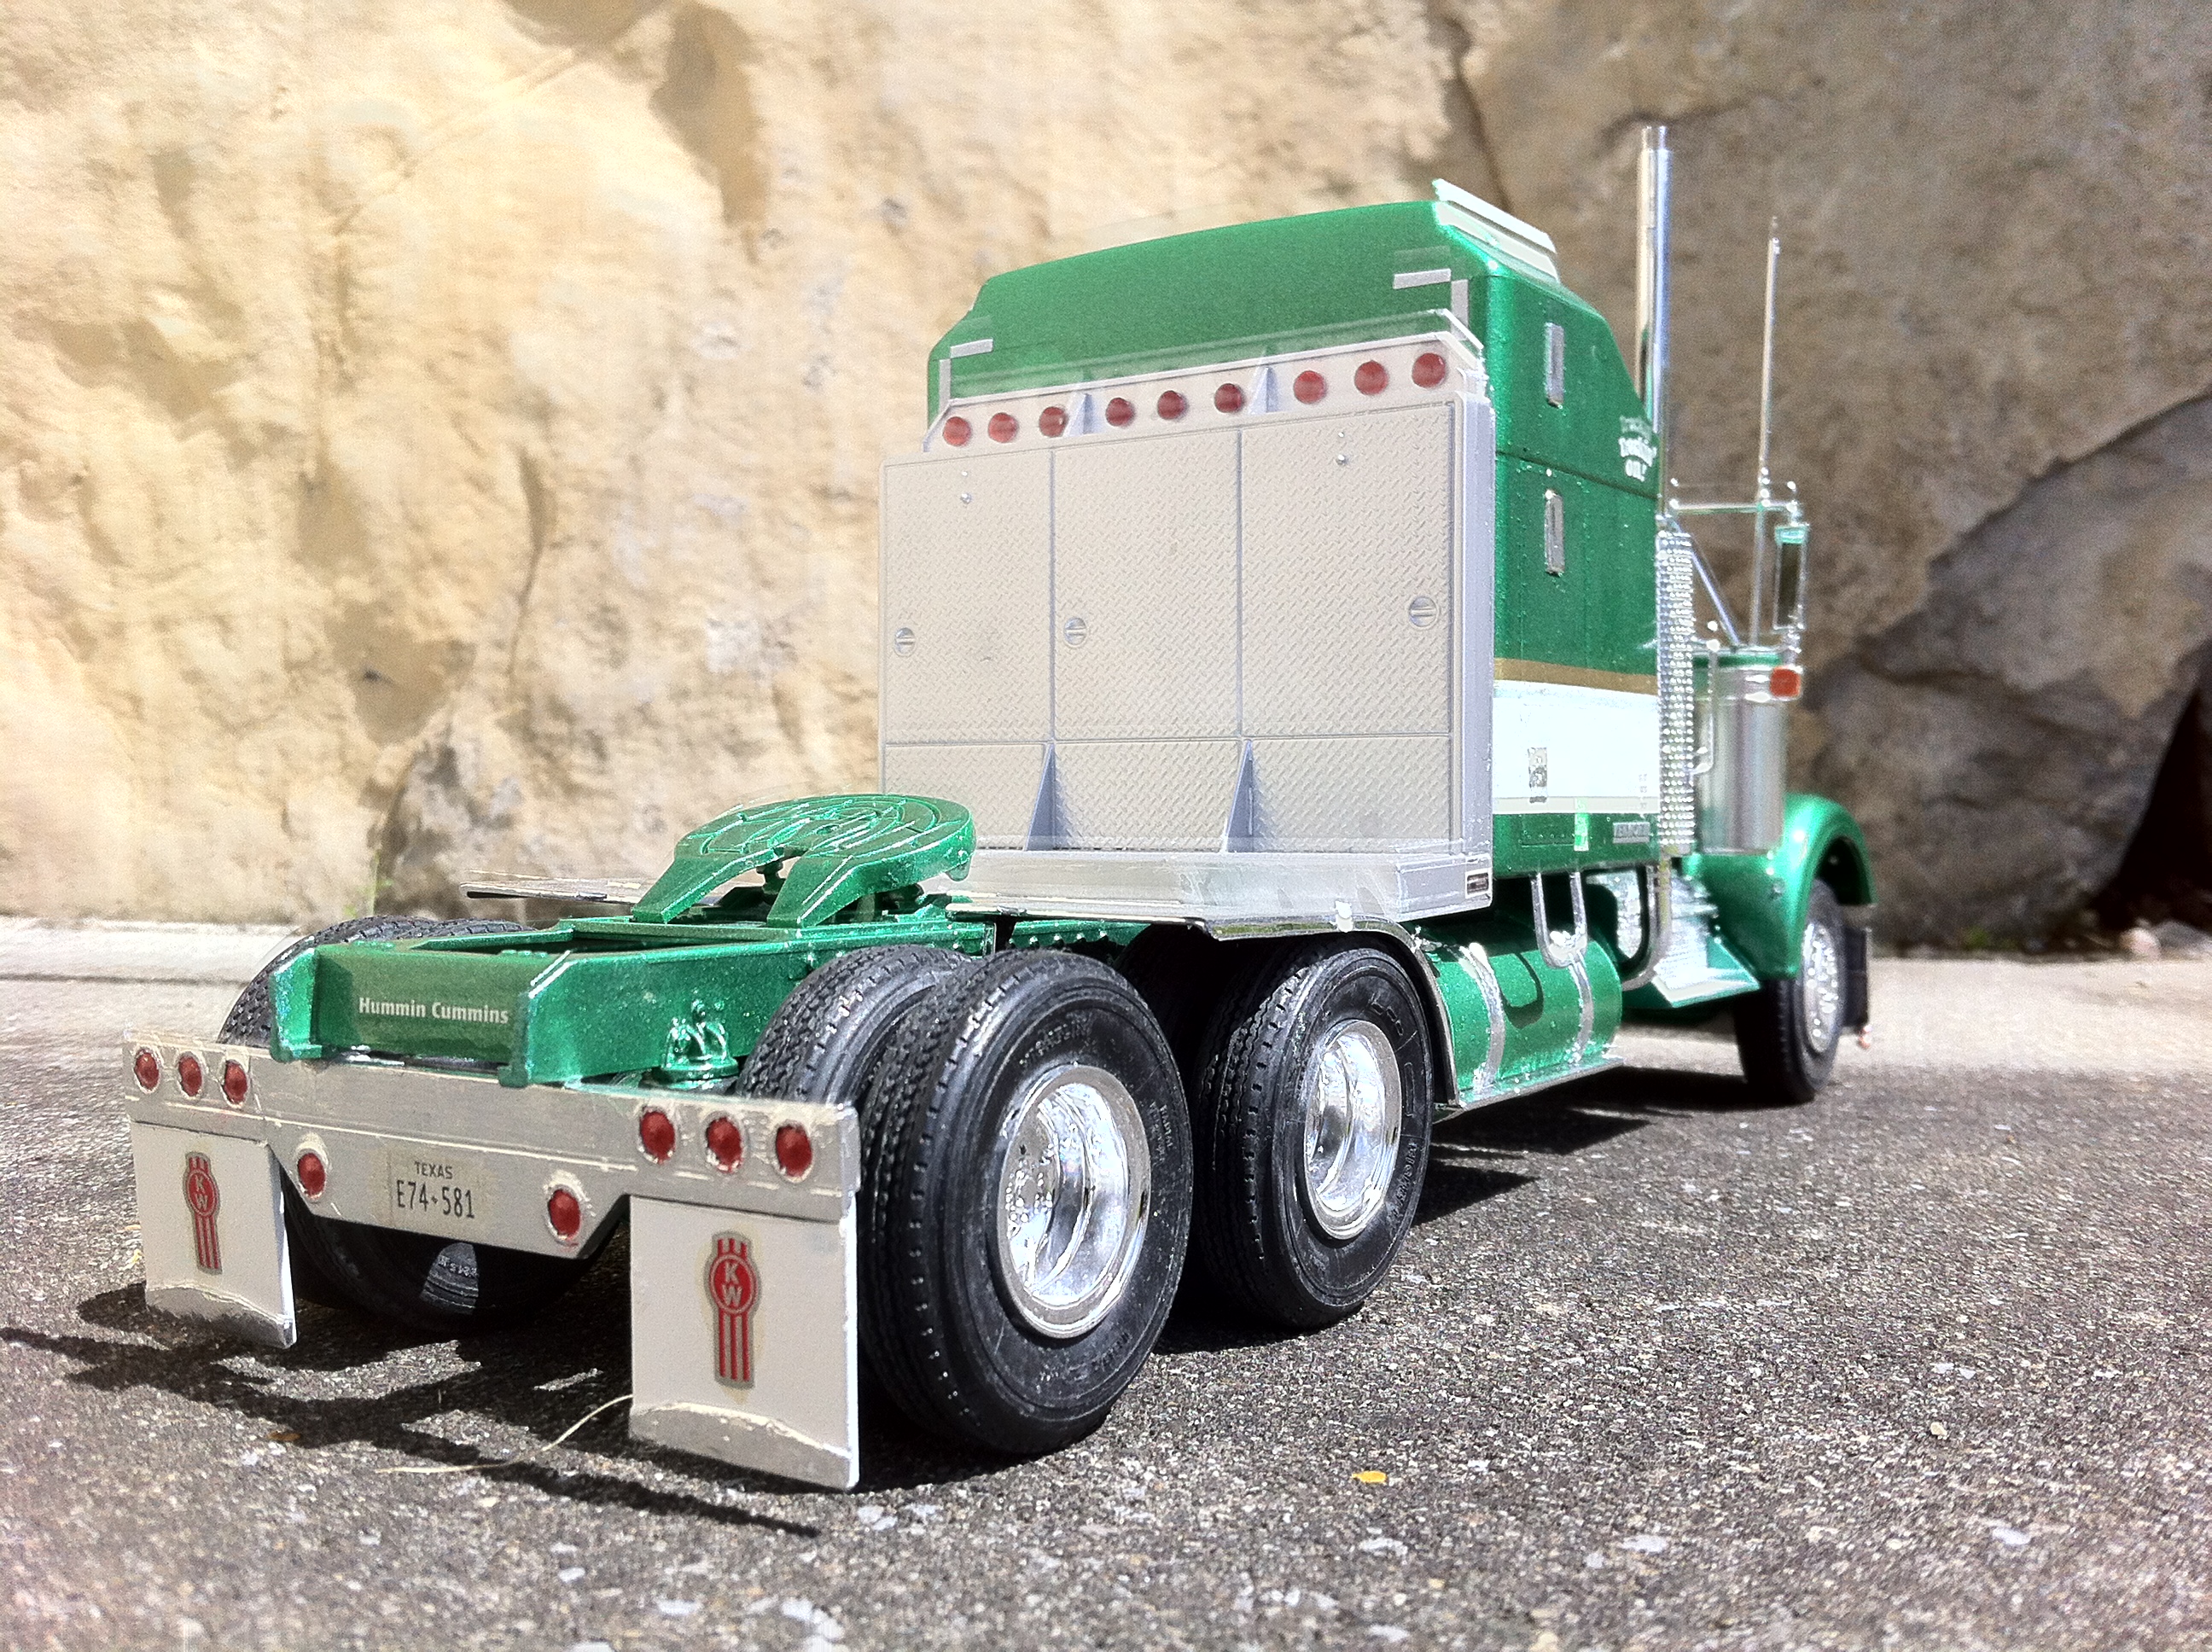
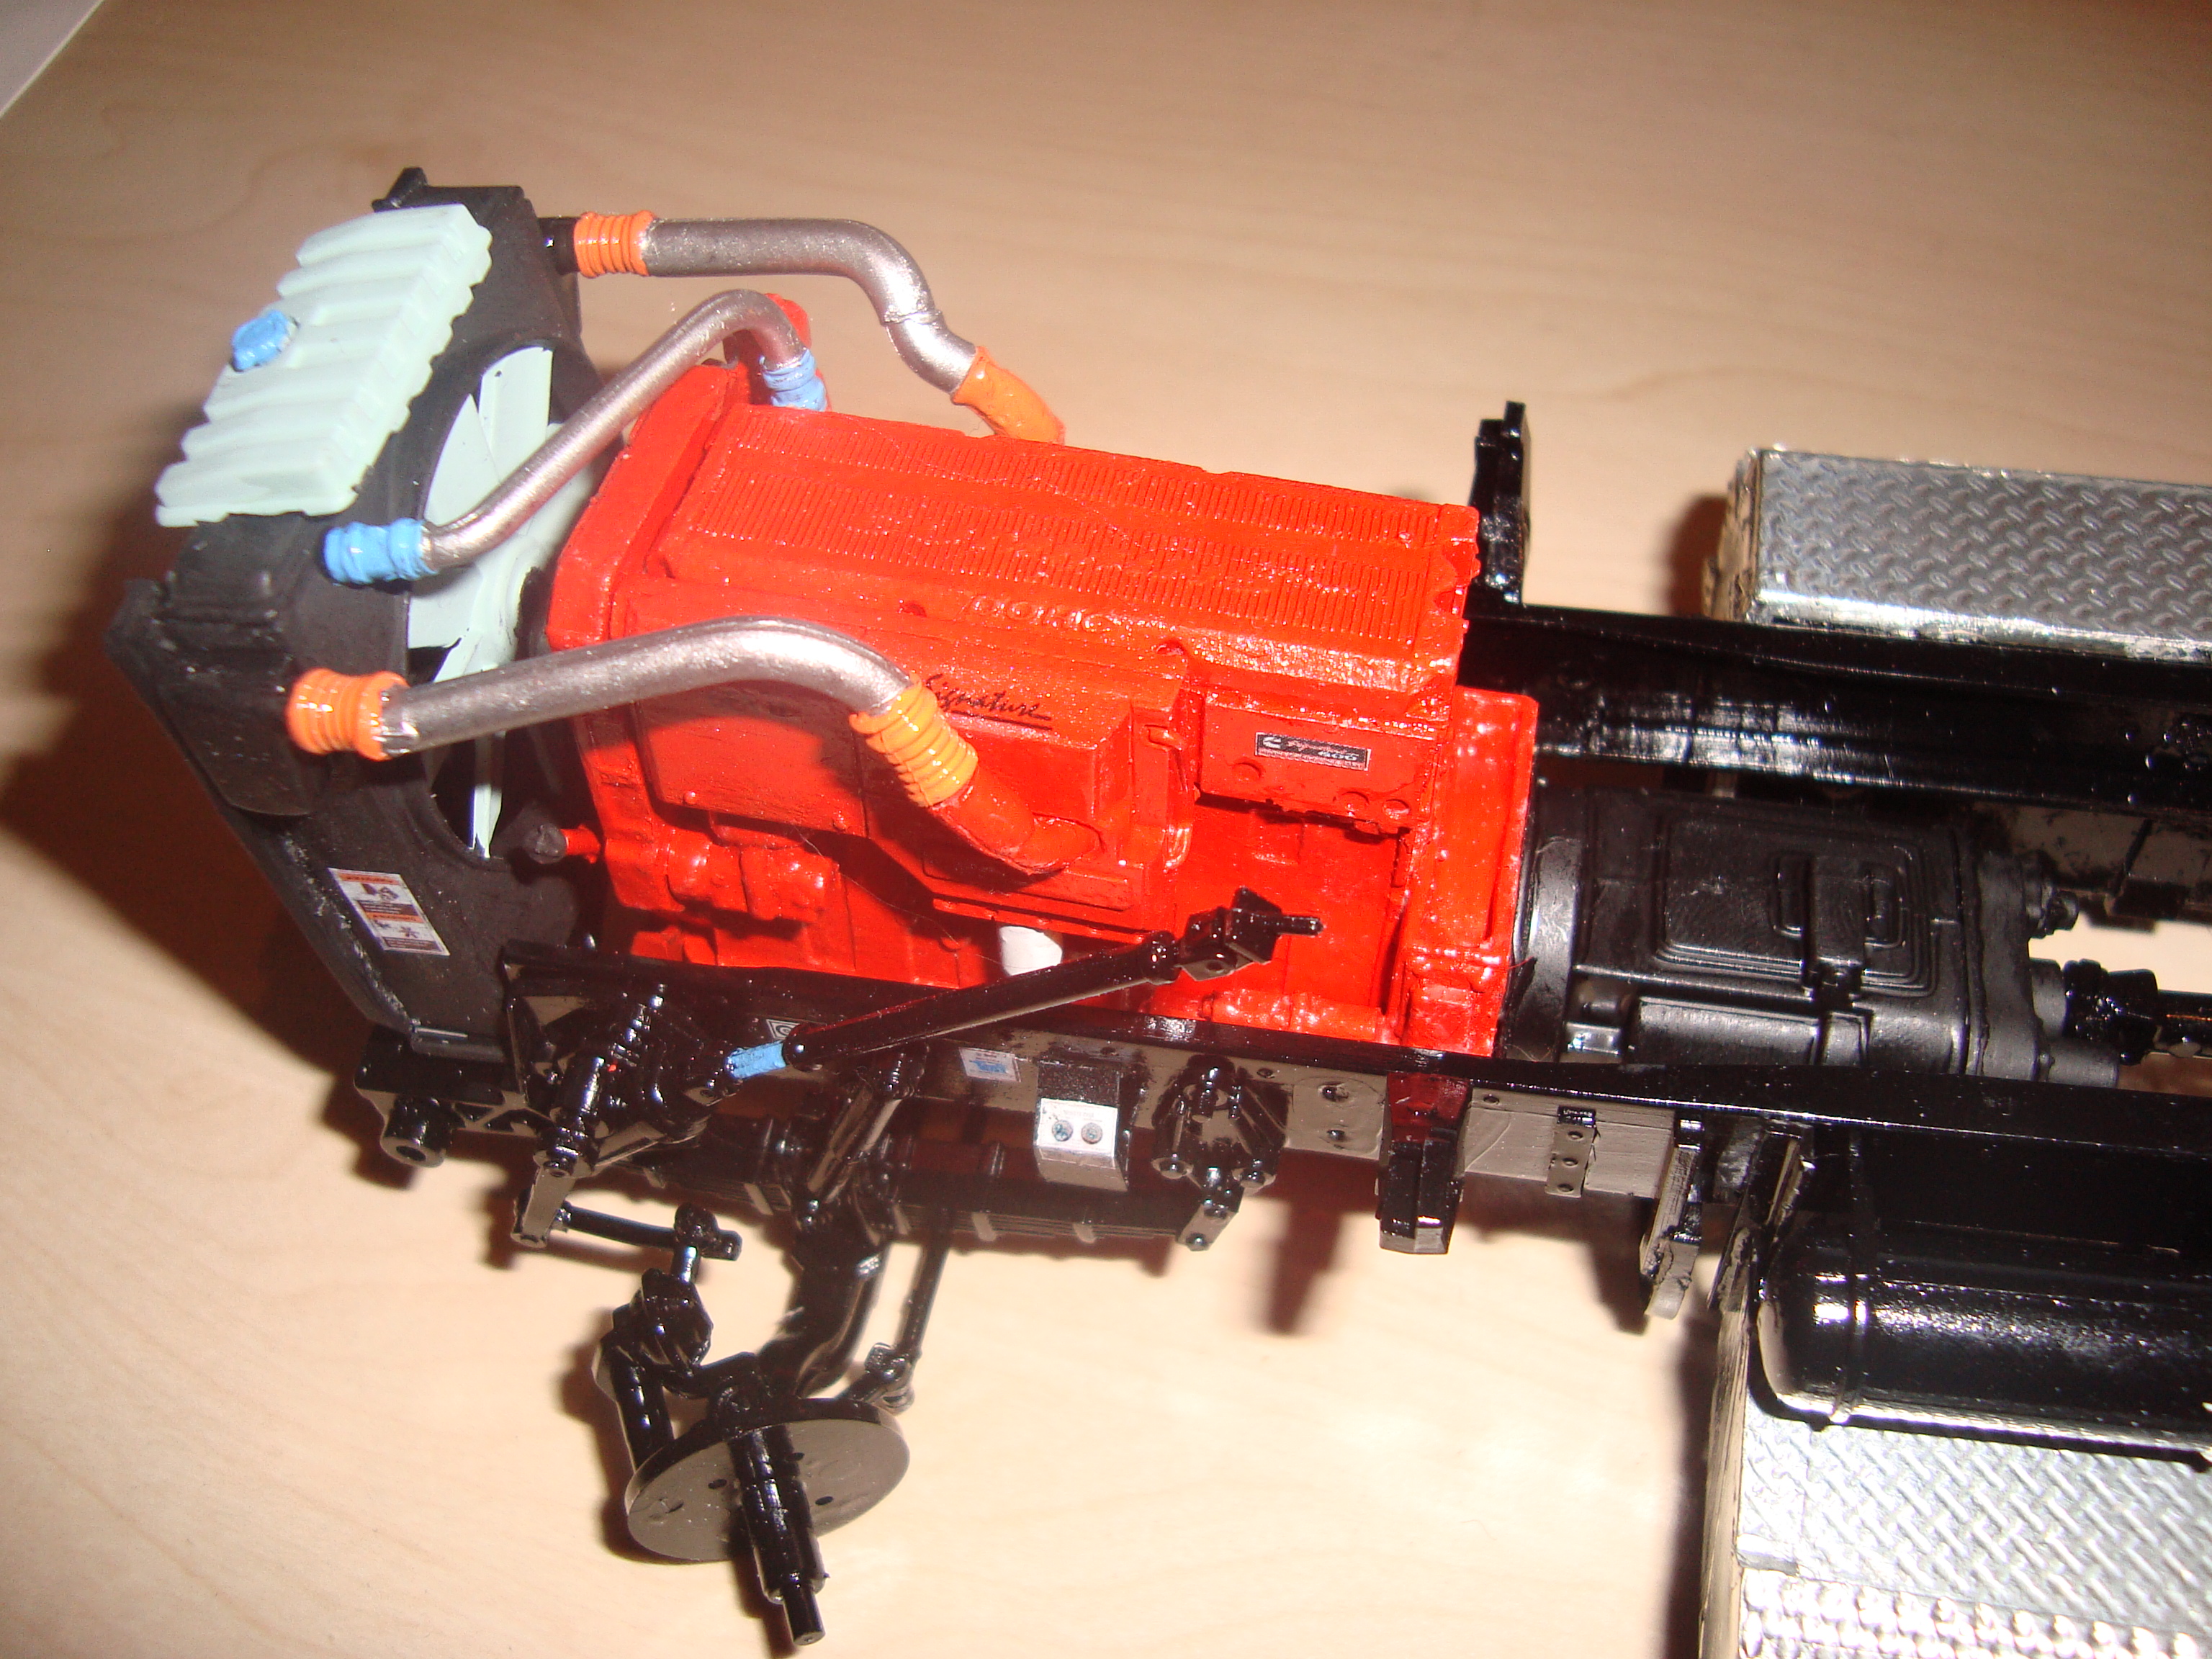
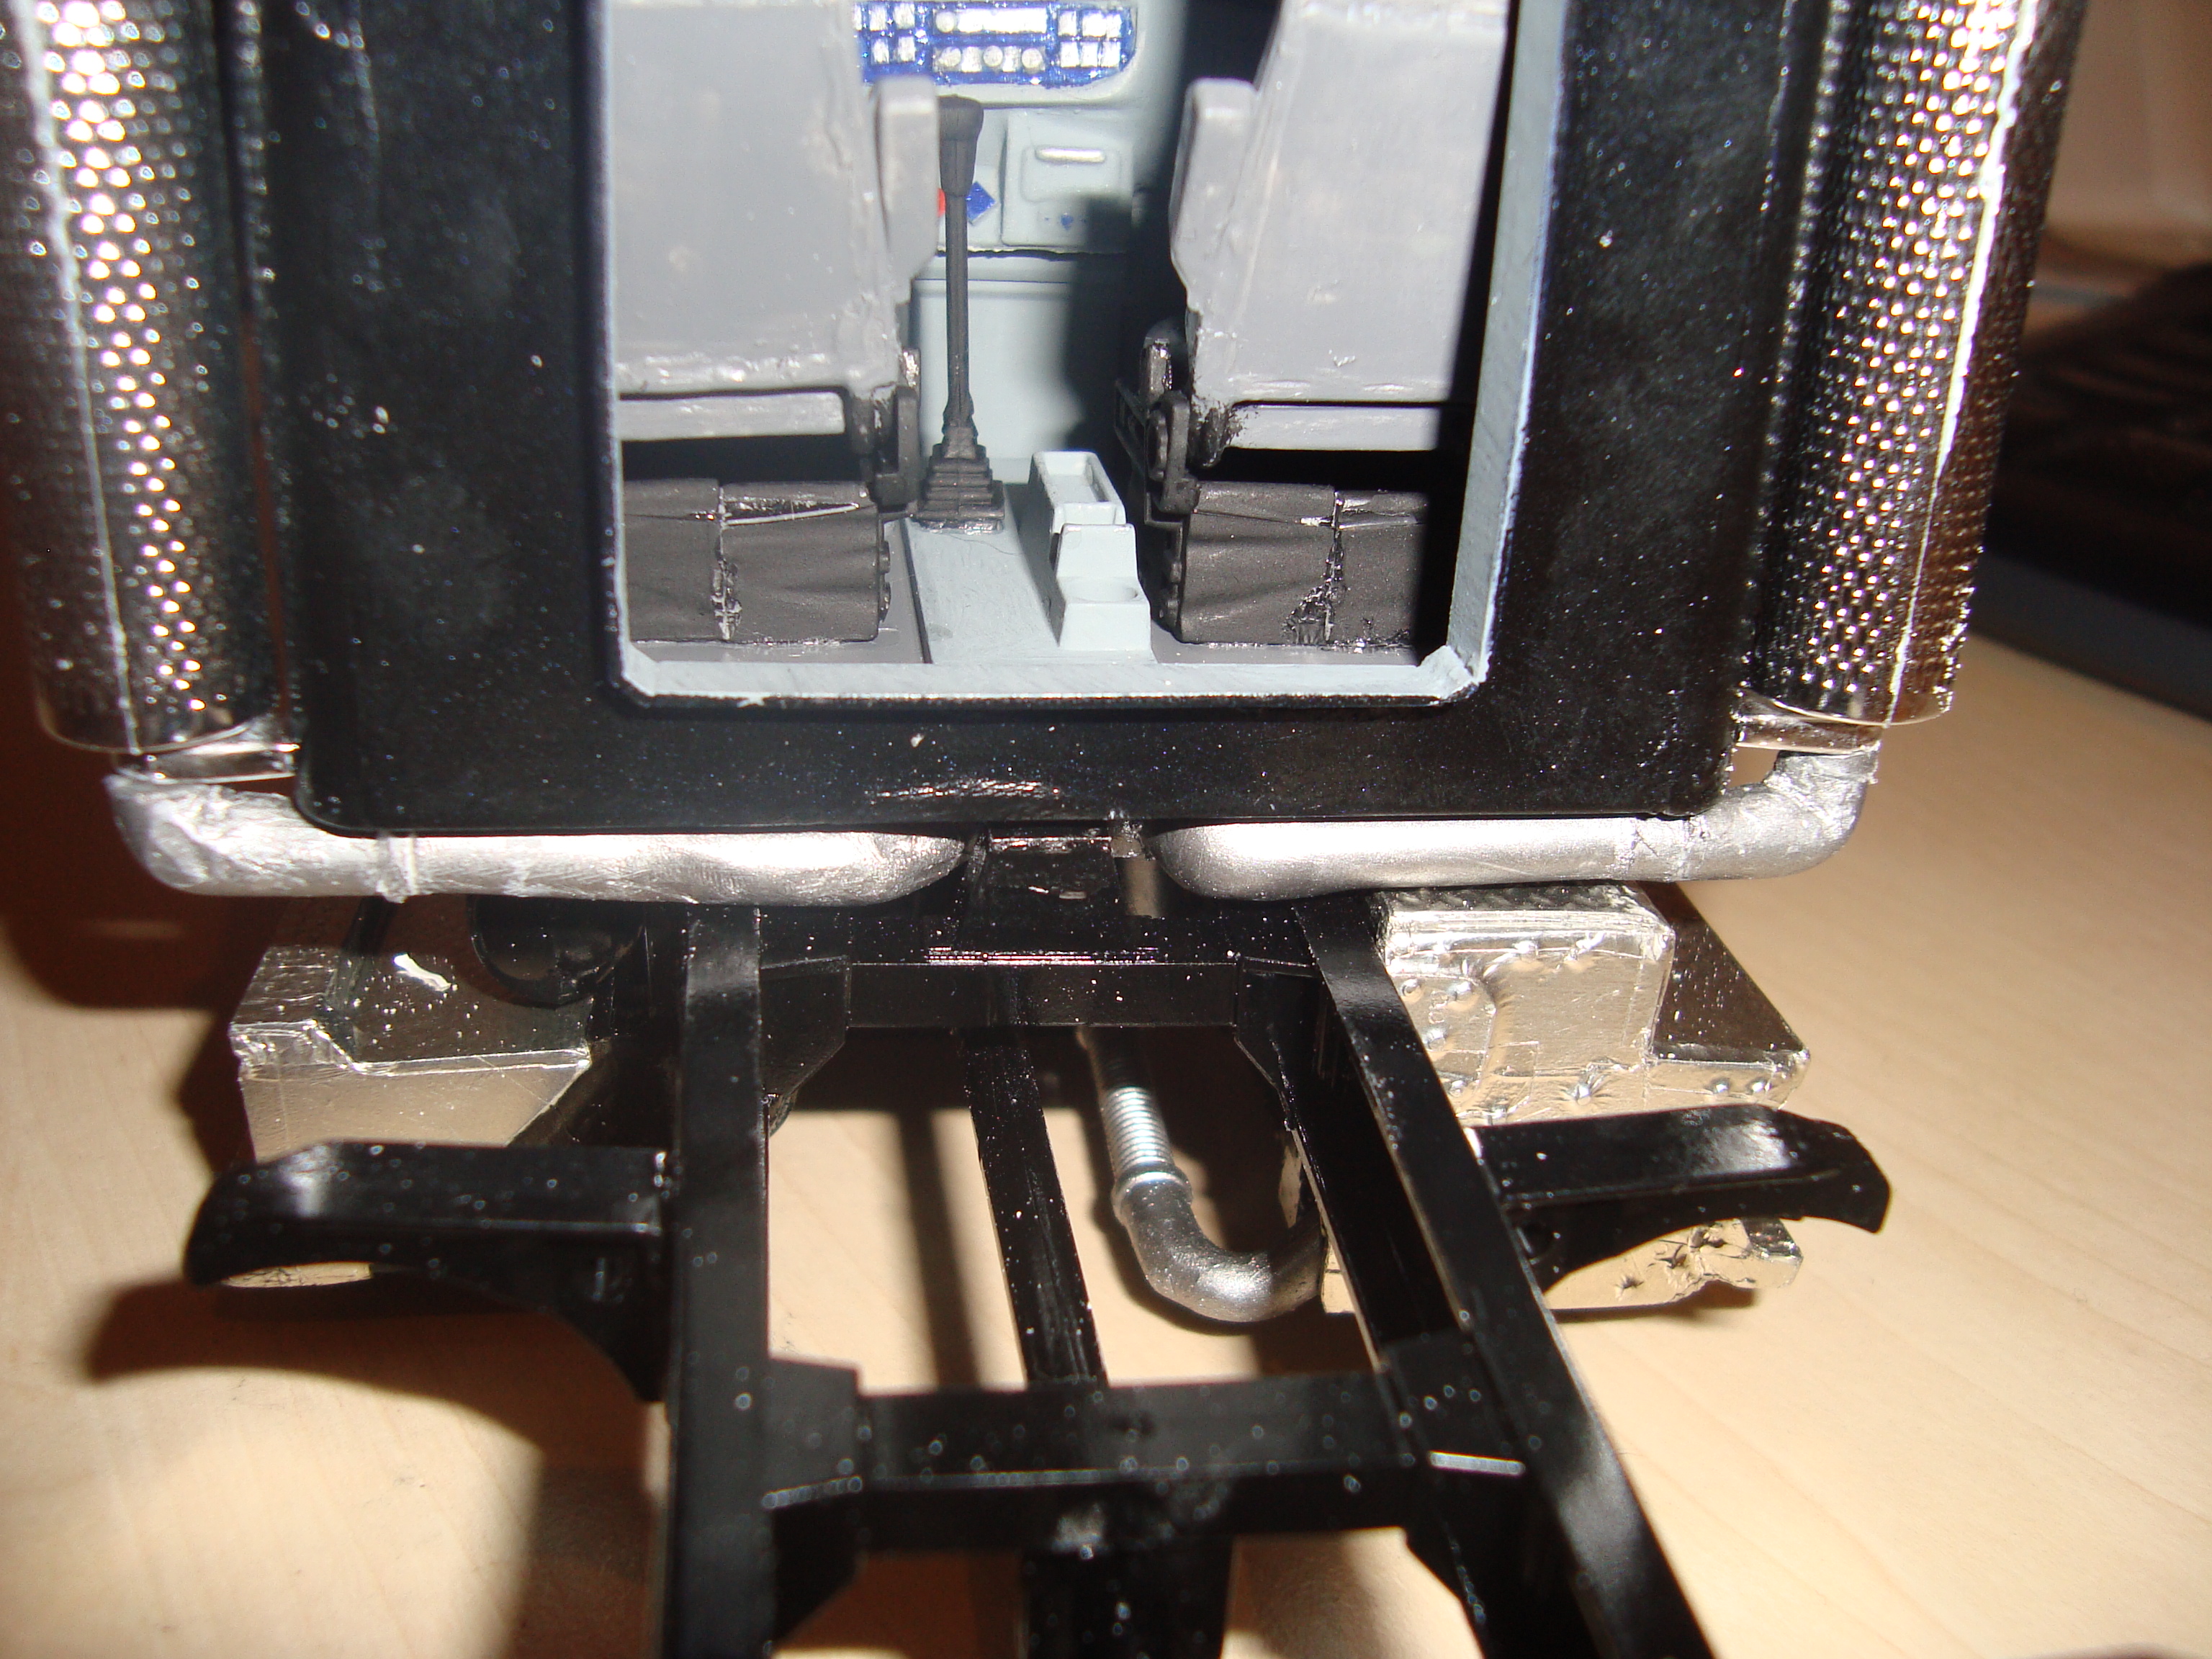
The Revell USA W-900 aka the SnapTite. Pretty easy kit, but also a little plain, don't you think…?
I decided to swap out the engine for a Revell of Germany Cummins NTC-475. A redundant RoG headache rack I adapted a little too. A real aluminium drop visor I found in my parts box, since the kit lacks a visor itself. The Vortec/Vortoc/Vortox/Vortex breathers (please use the spelling that you think is right ) were sent to me by a good Canadian friend (that's you, Tim Bogema).
I had a Texas tapered bumper lying around as well, figured I'd play a little with the marker lights that usually go above the headlights. Of course the Seminole decals were ordered on www.modeltruckin.com, just like the Miller Transporter decals. Rear bumpers and quarter fenders from a RoG Peterbilt kit as well.


-
Thanks! Yeah, with the cut-down sleeper I like it better too; Large-Car look...
-
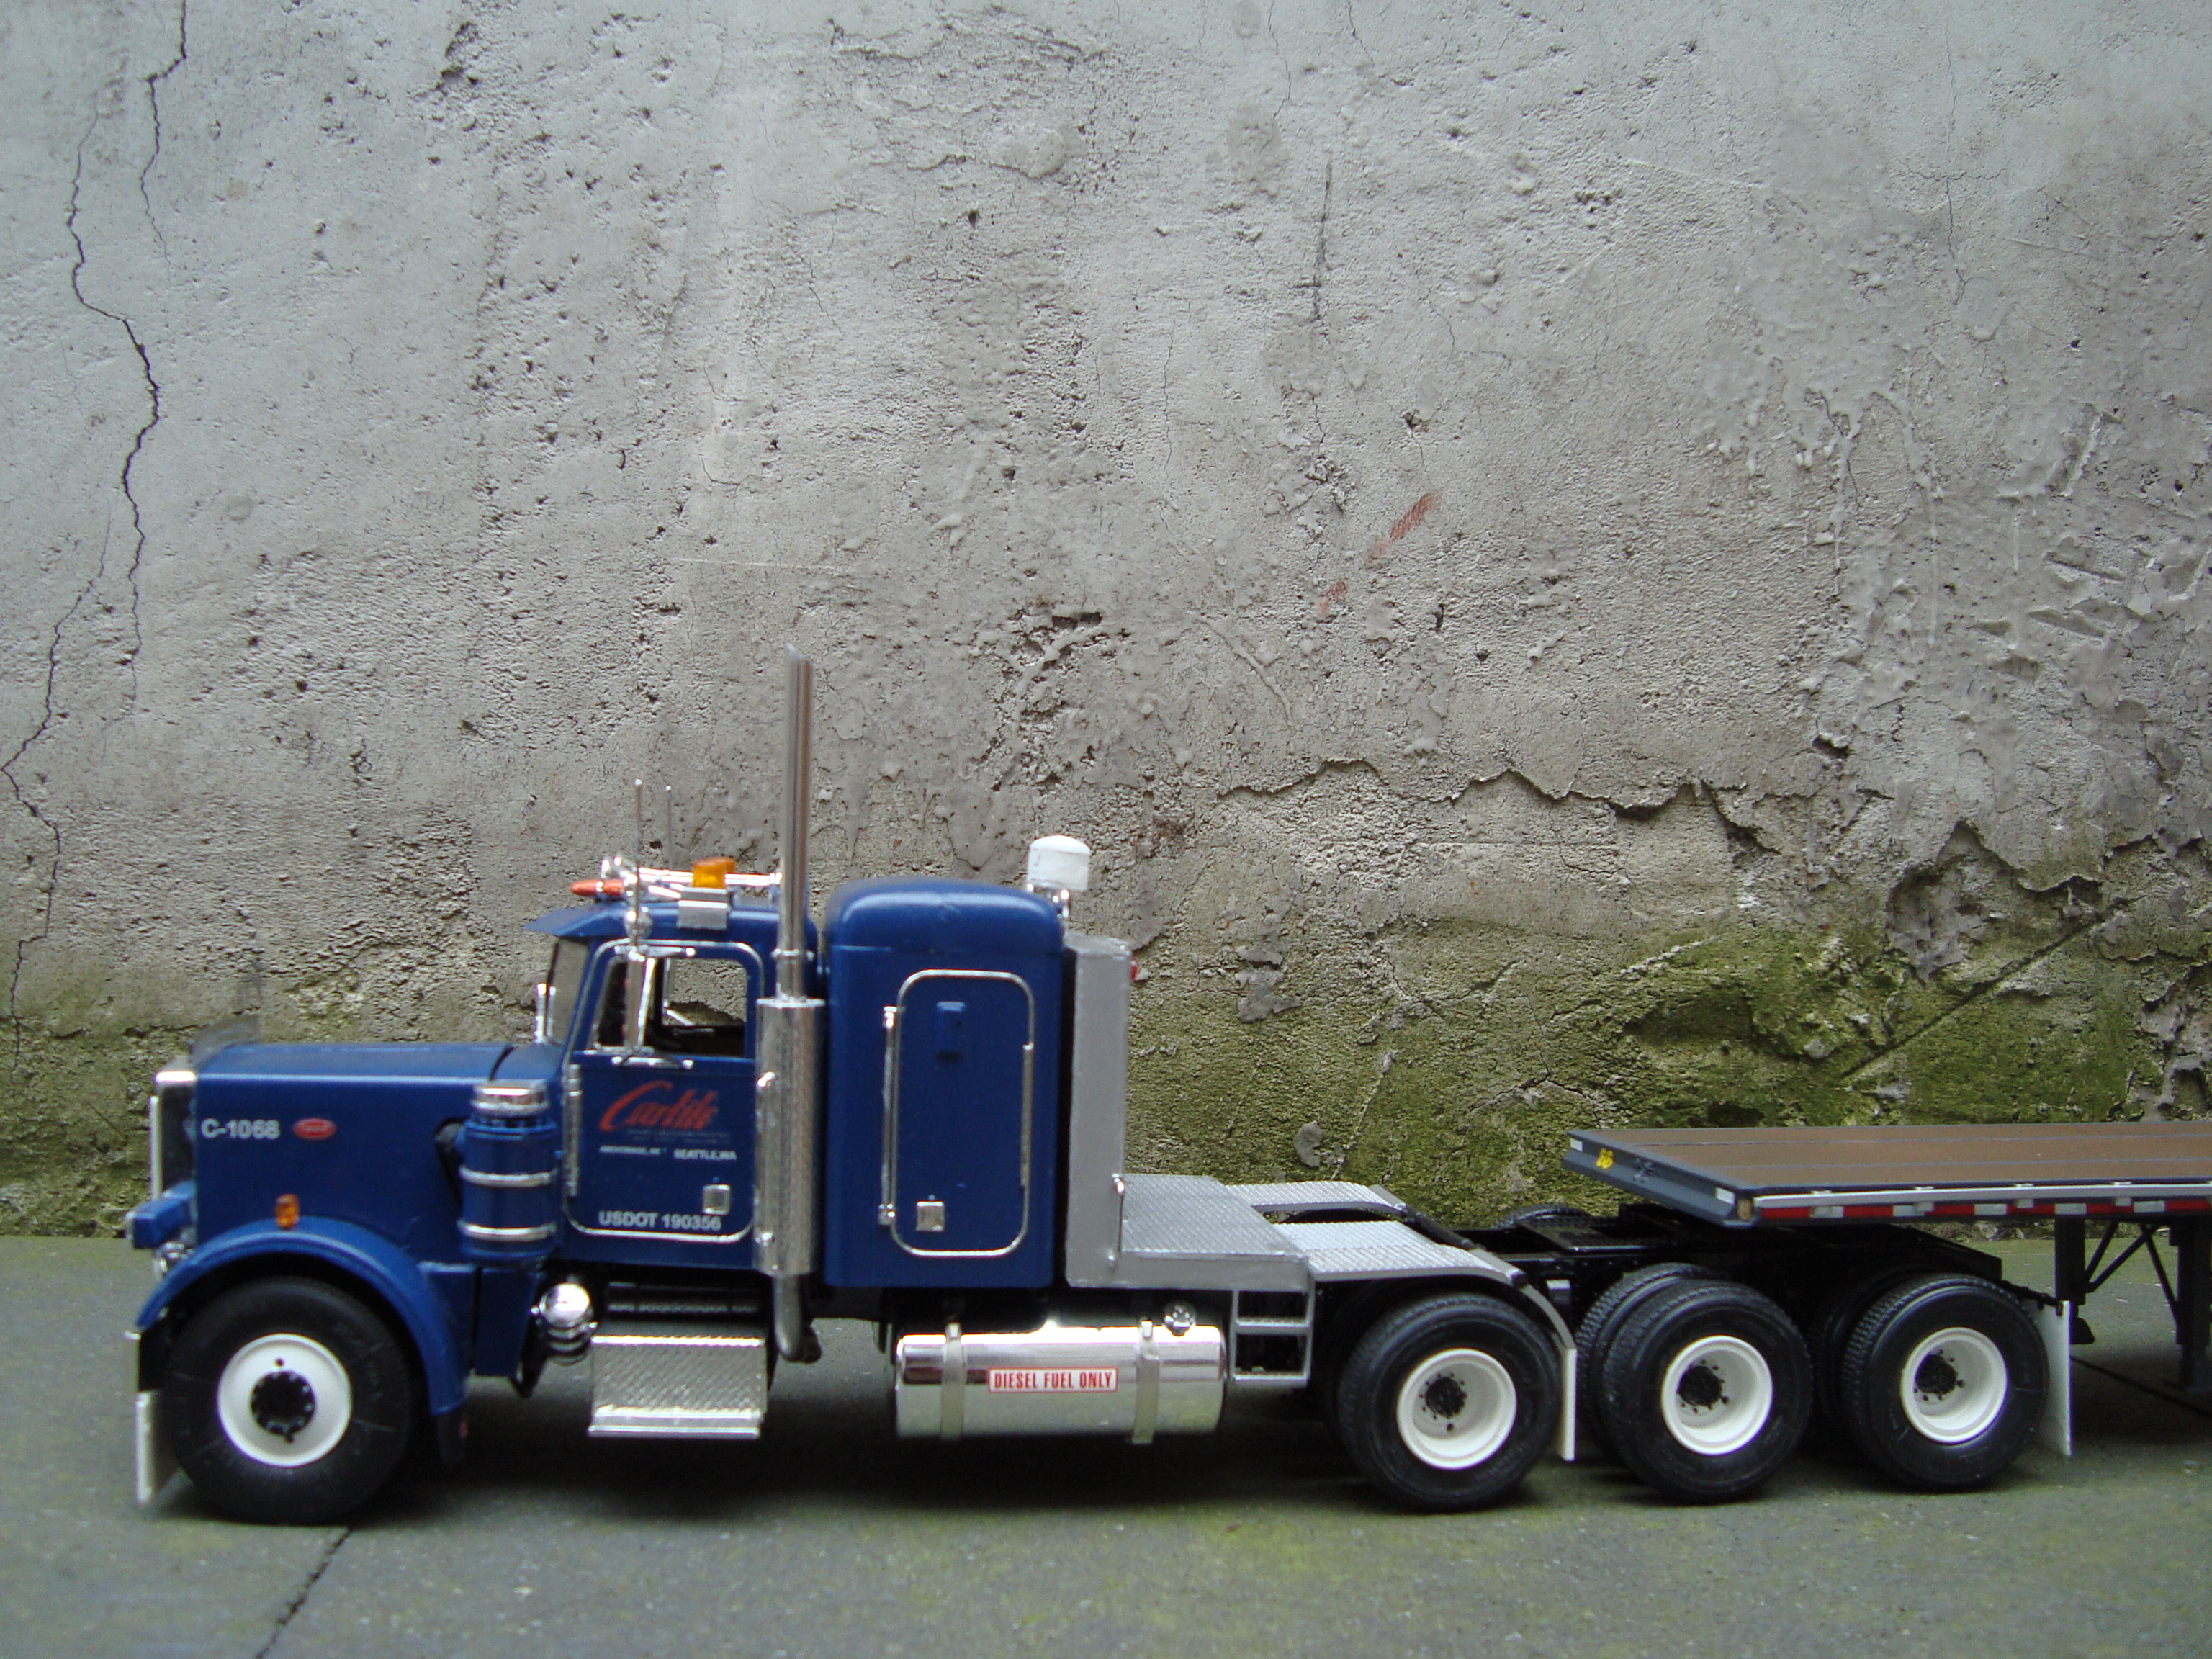
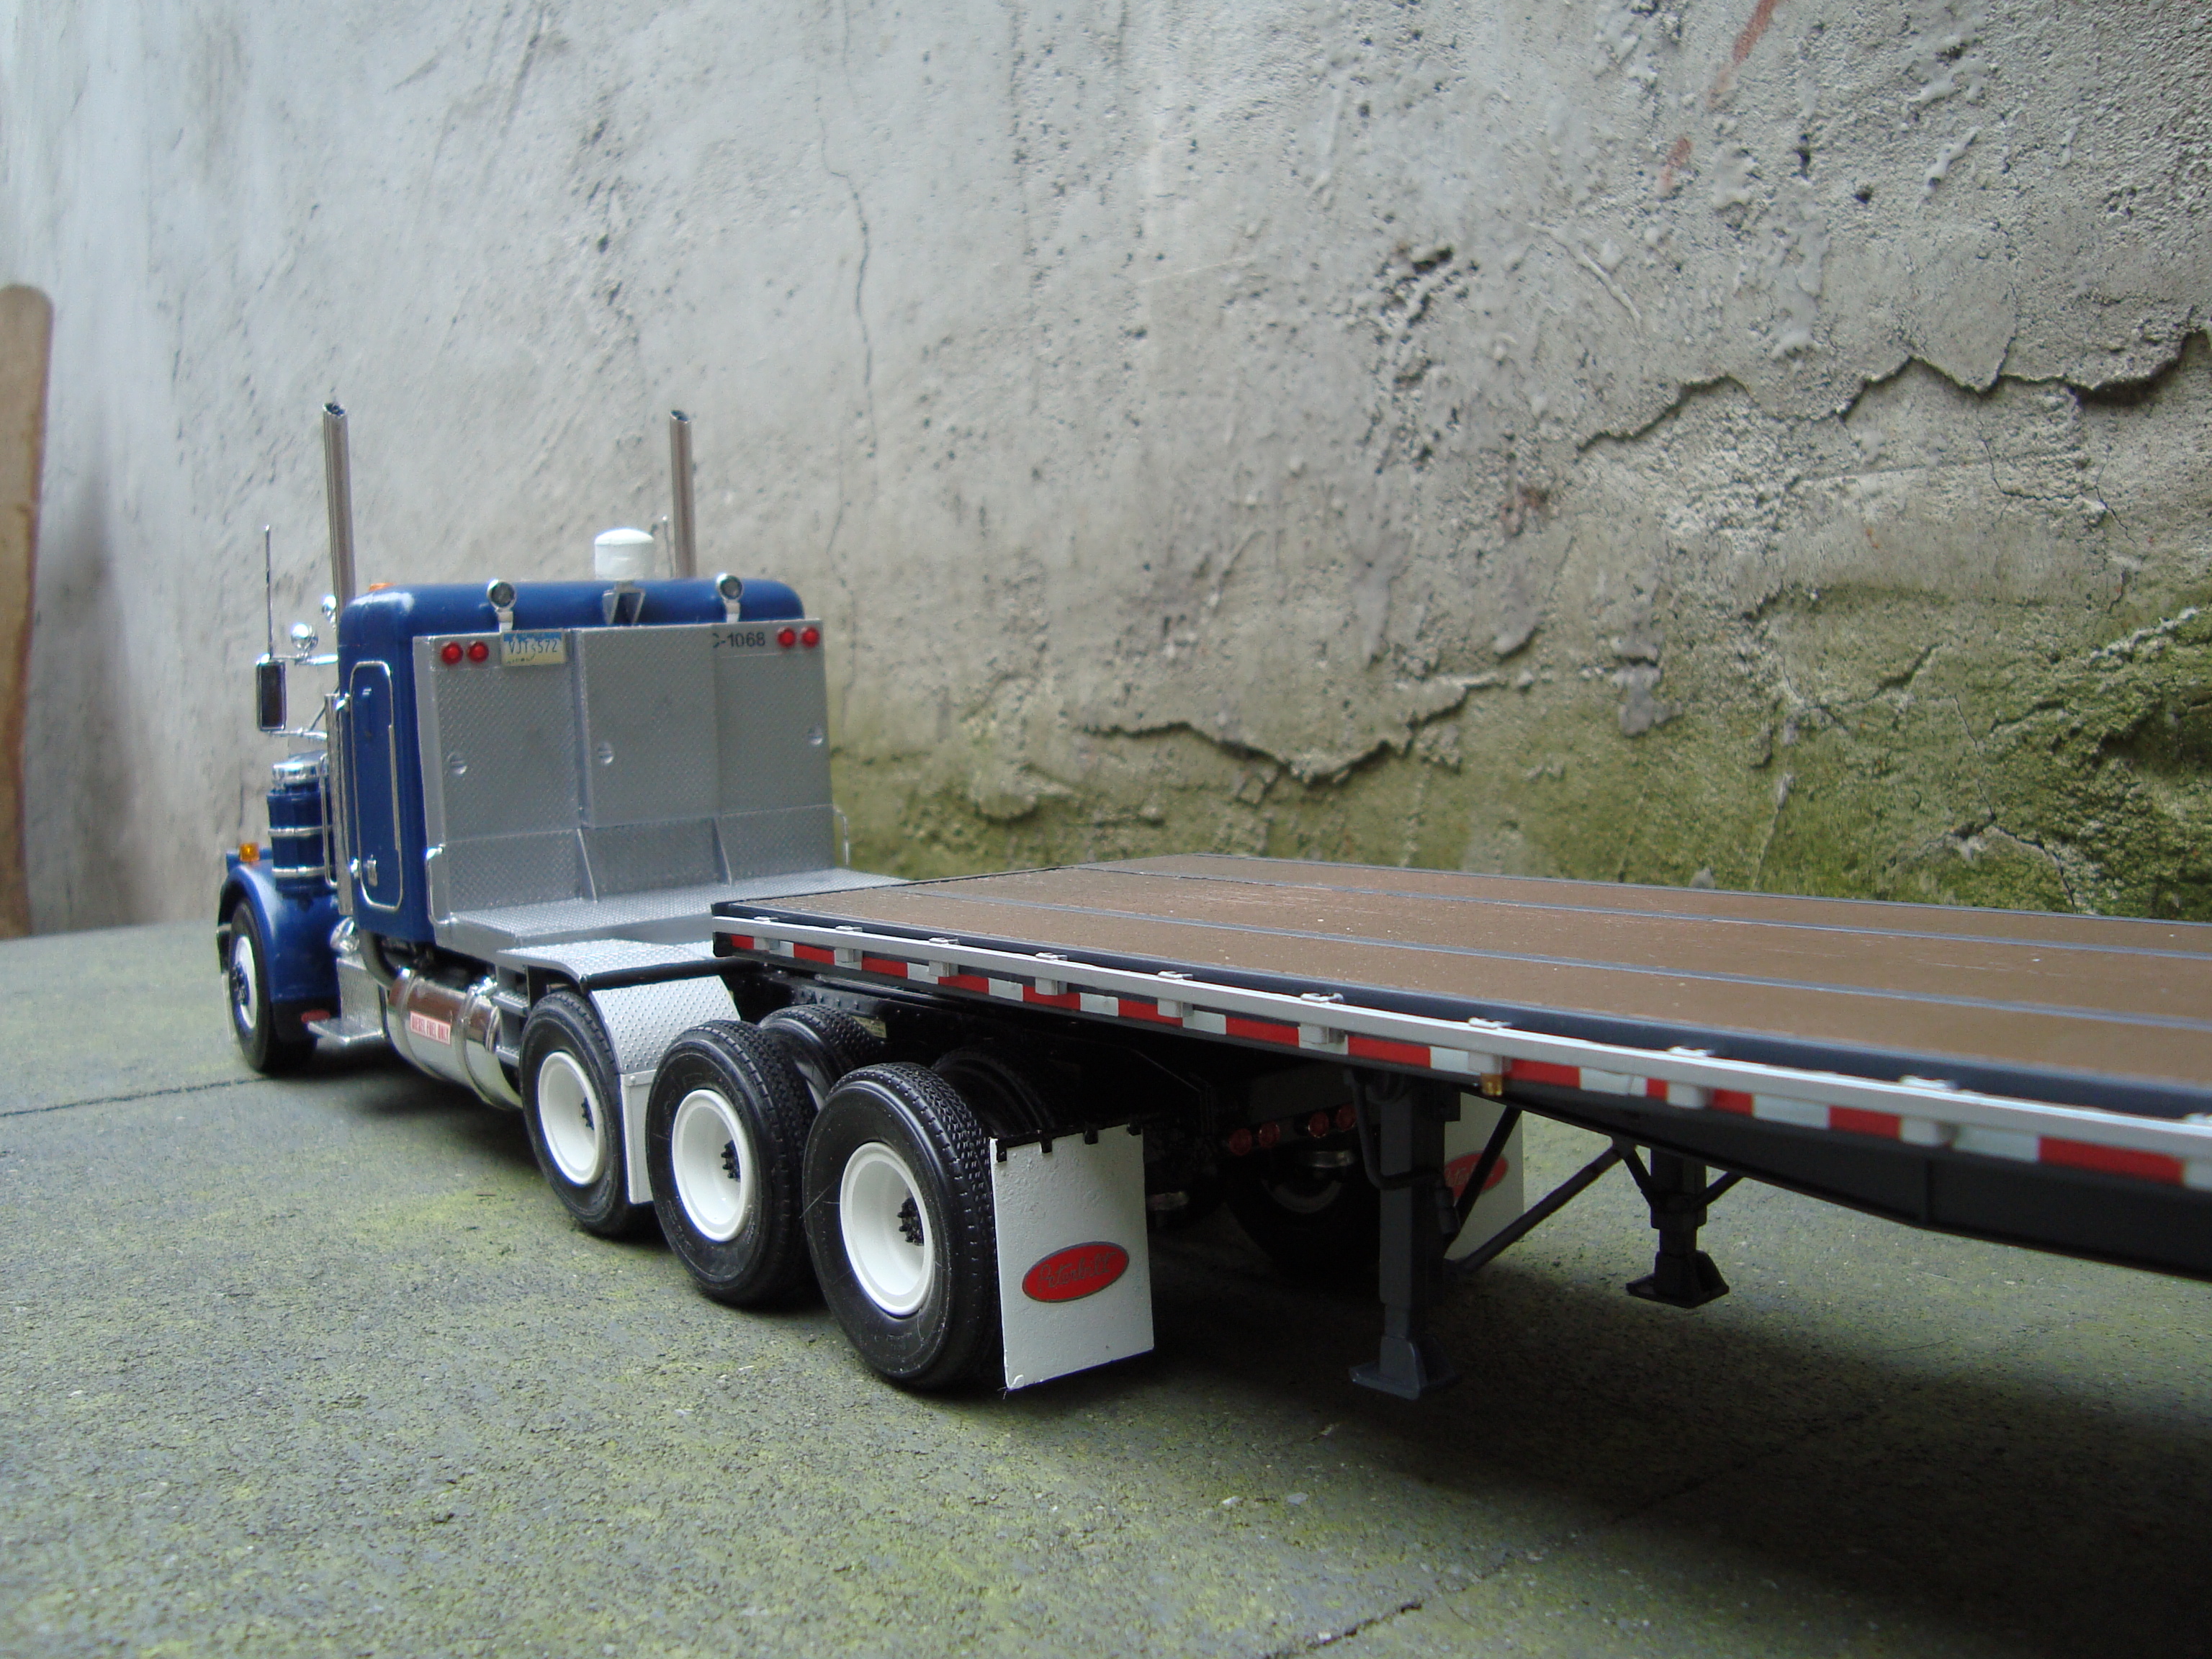
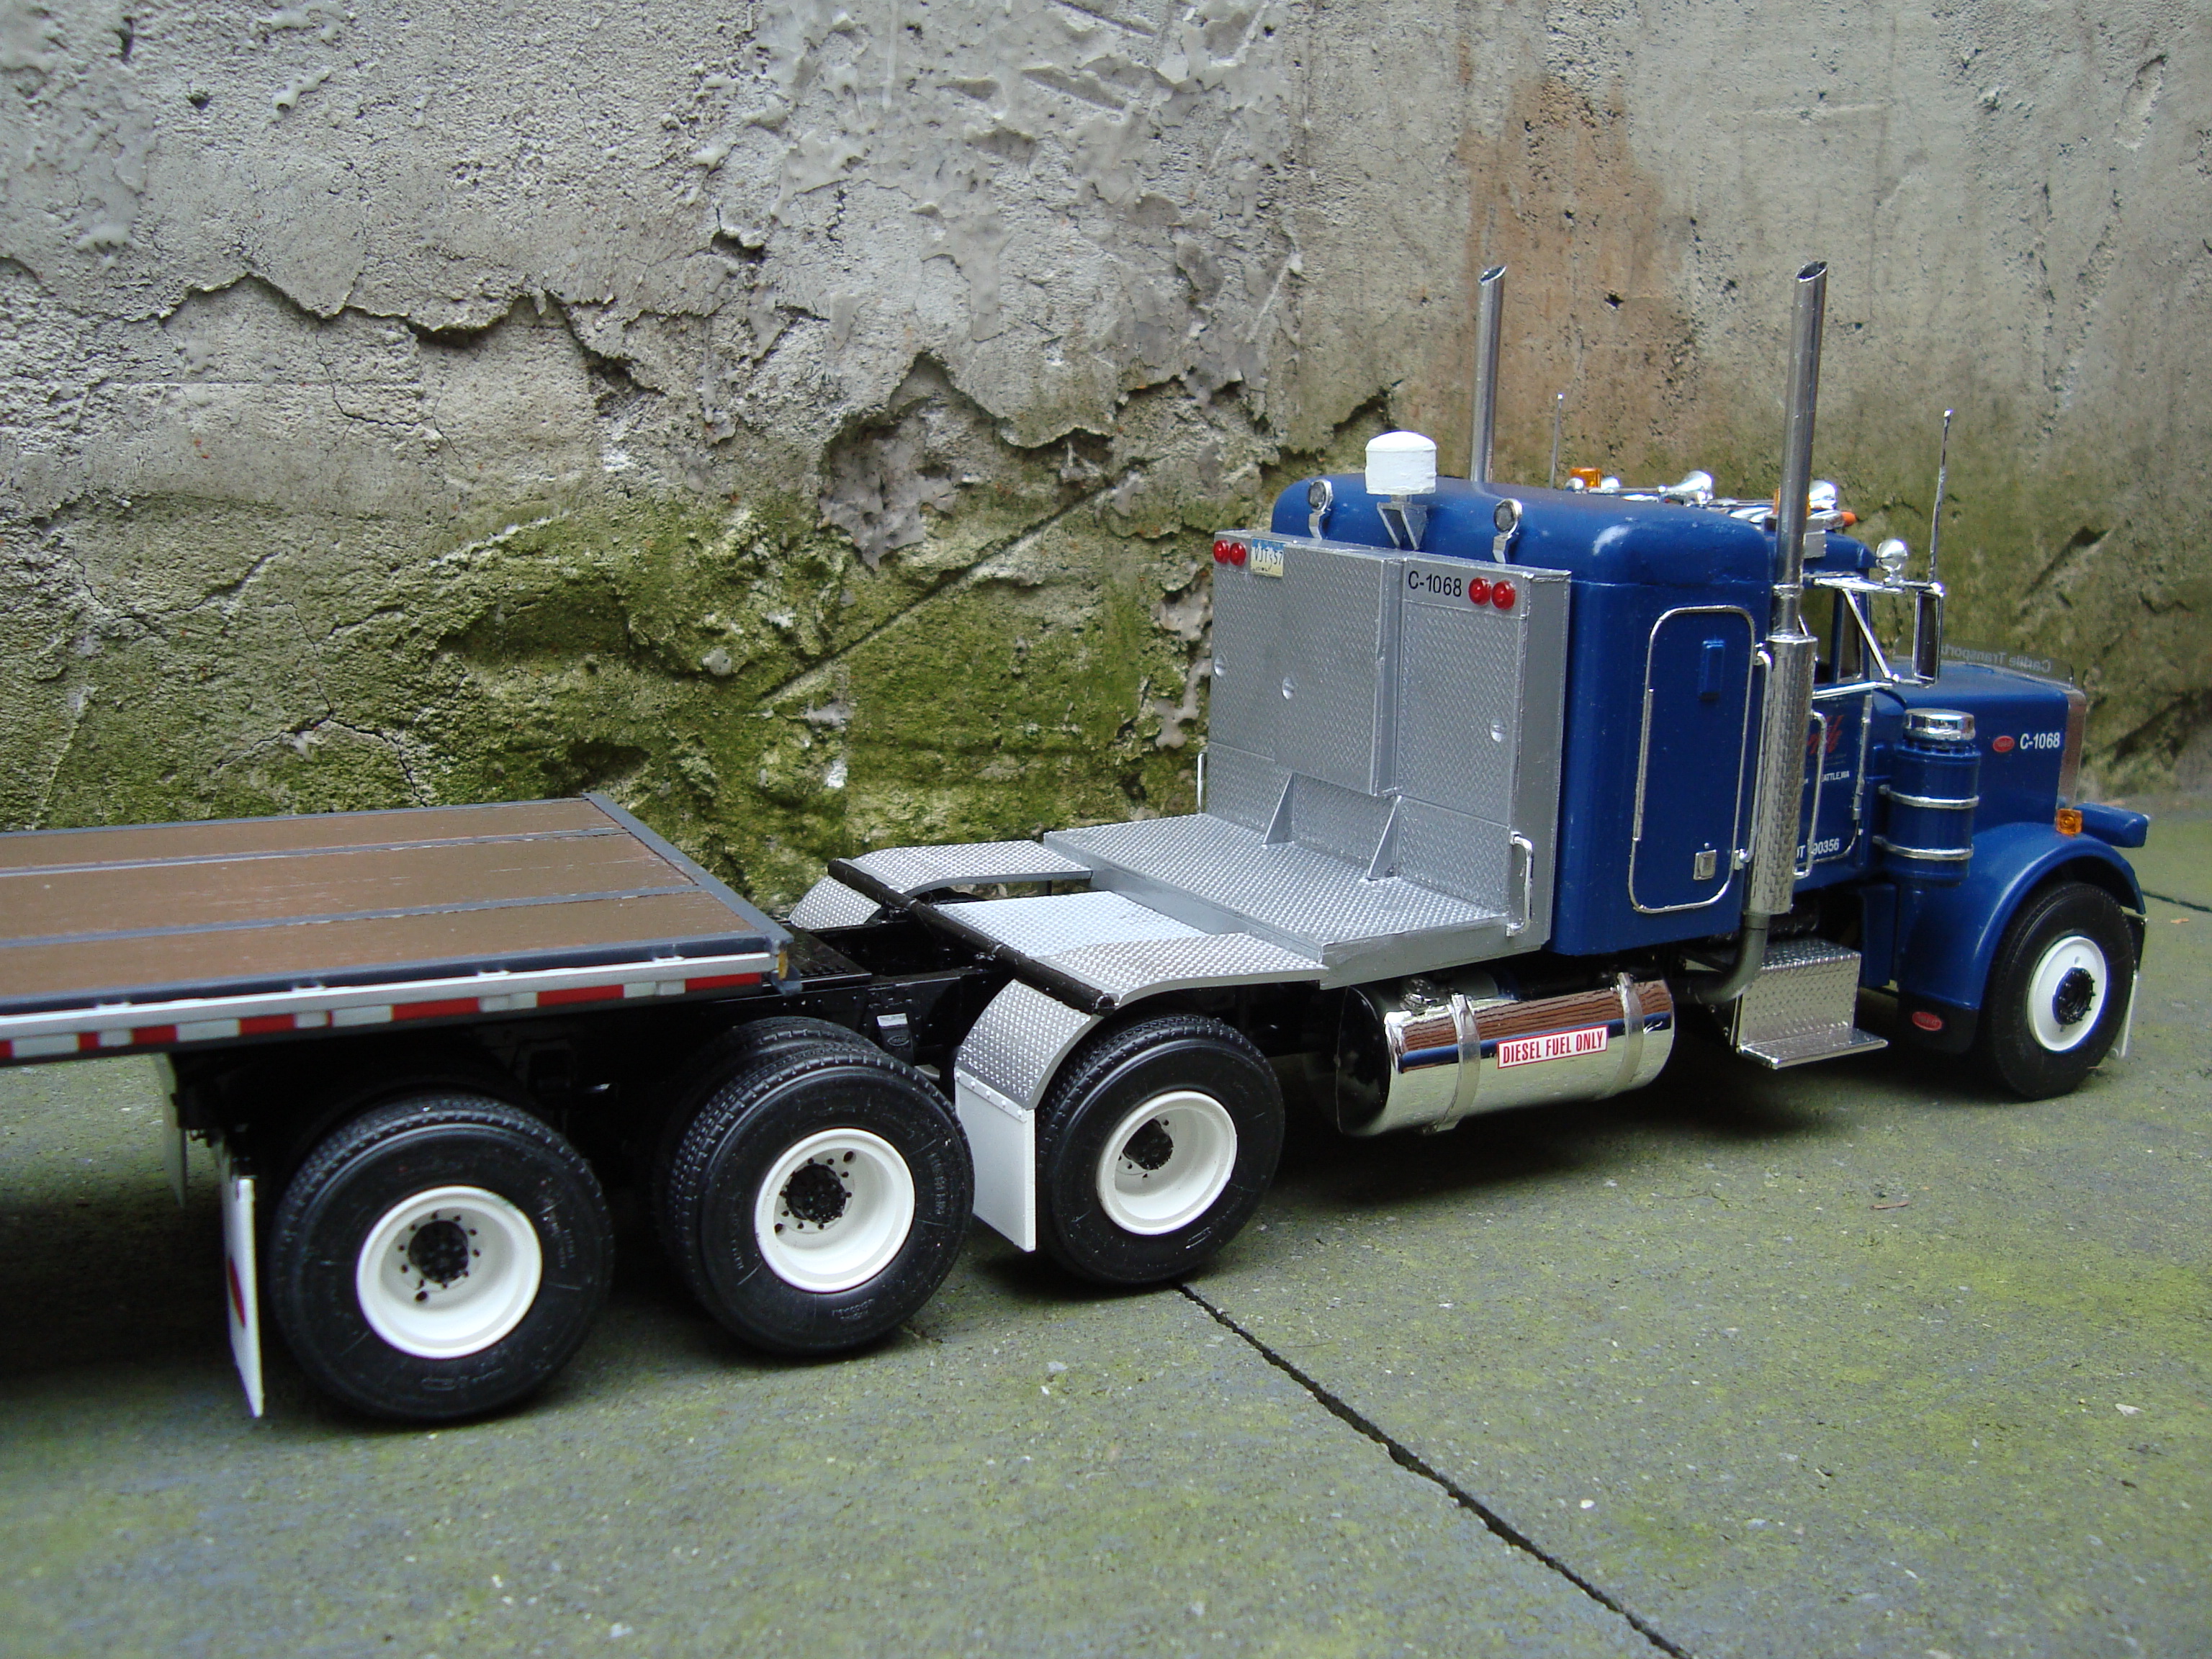
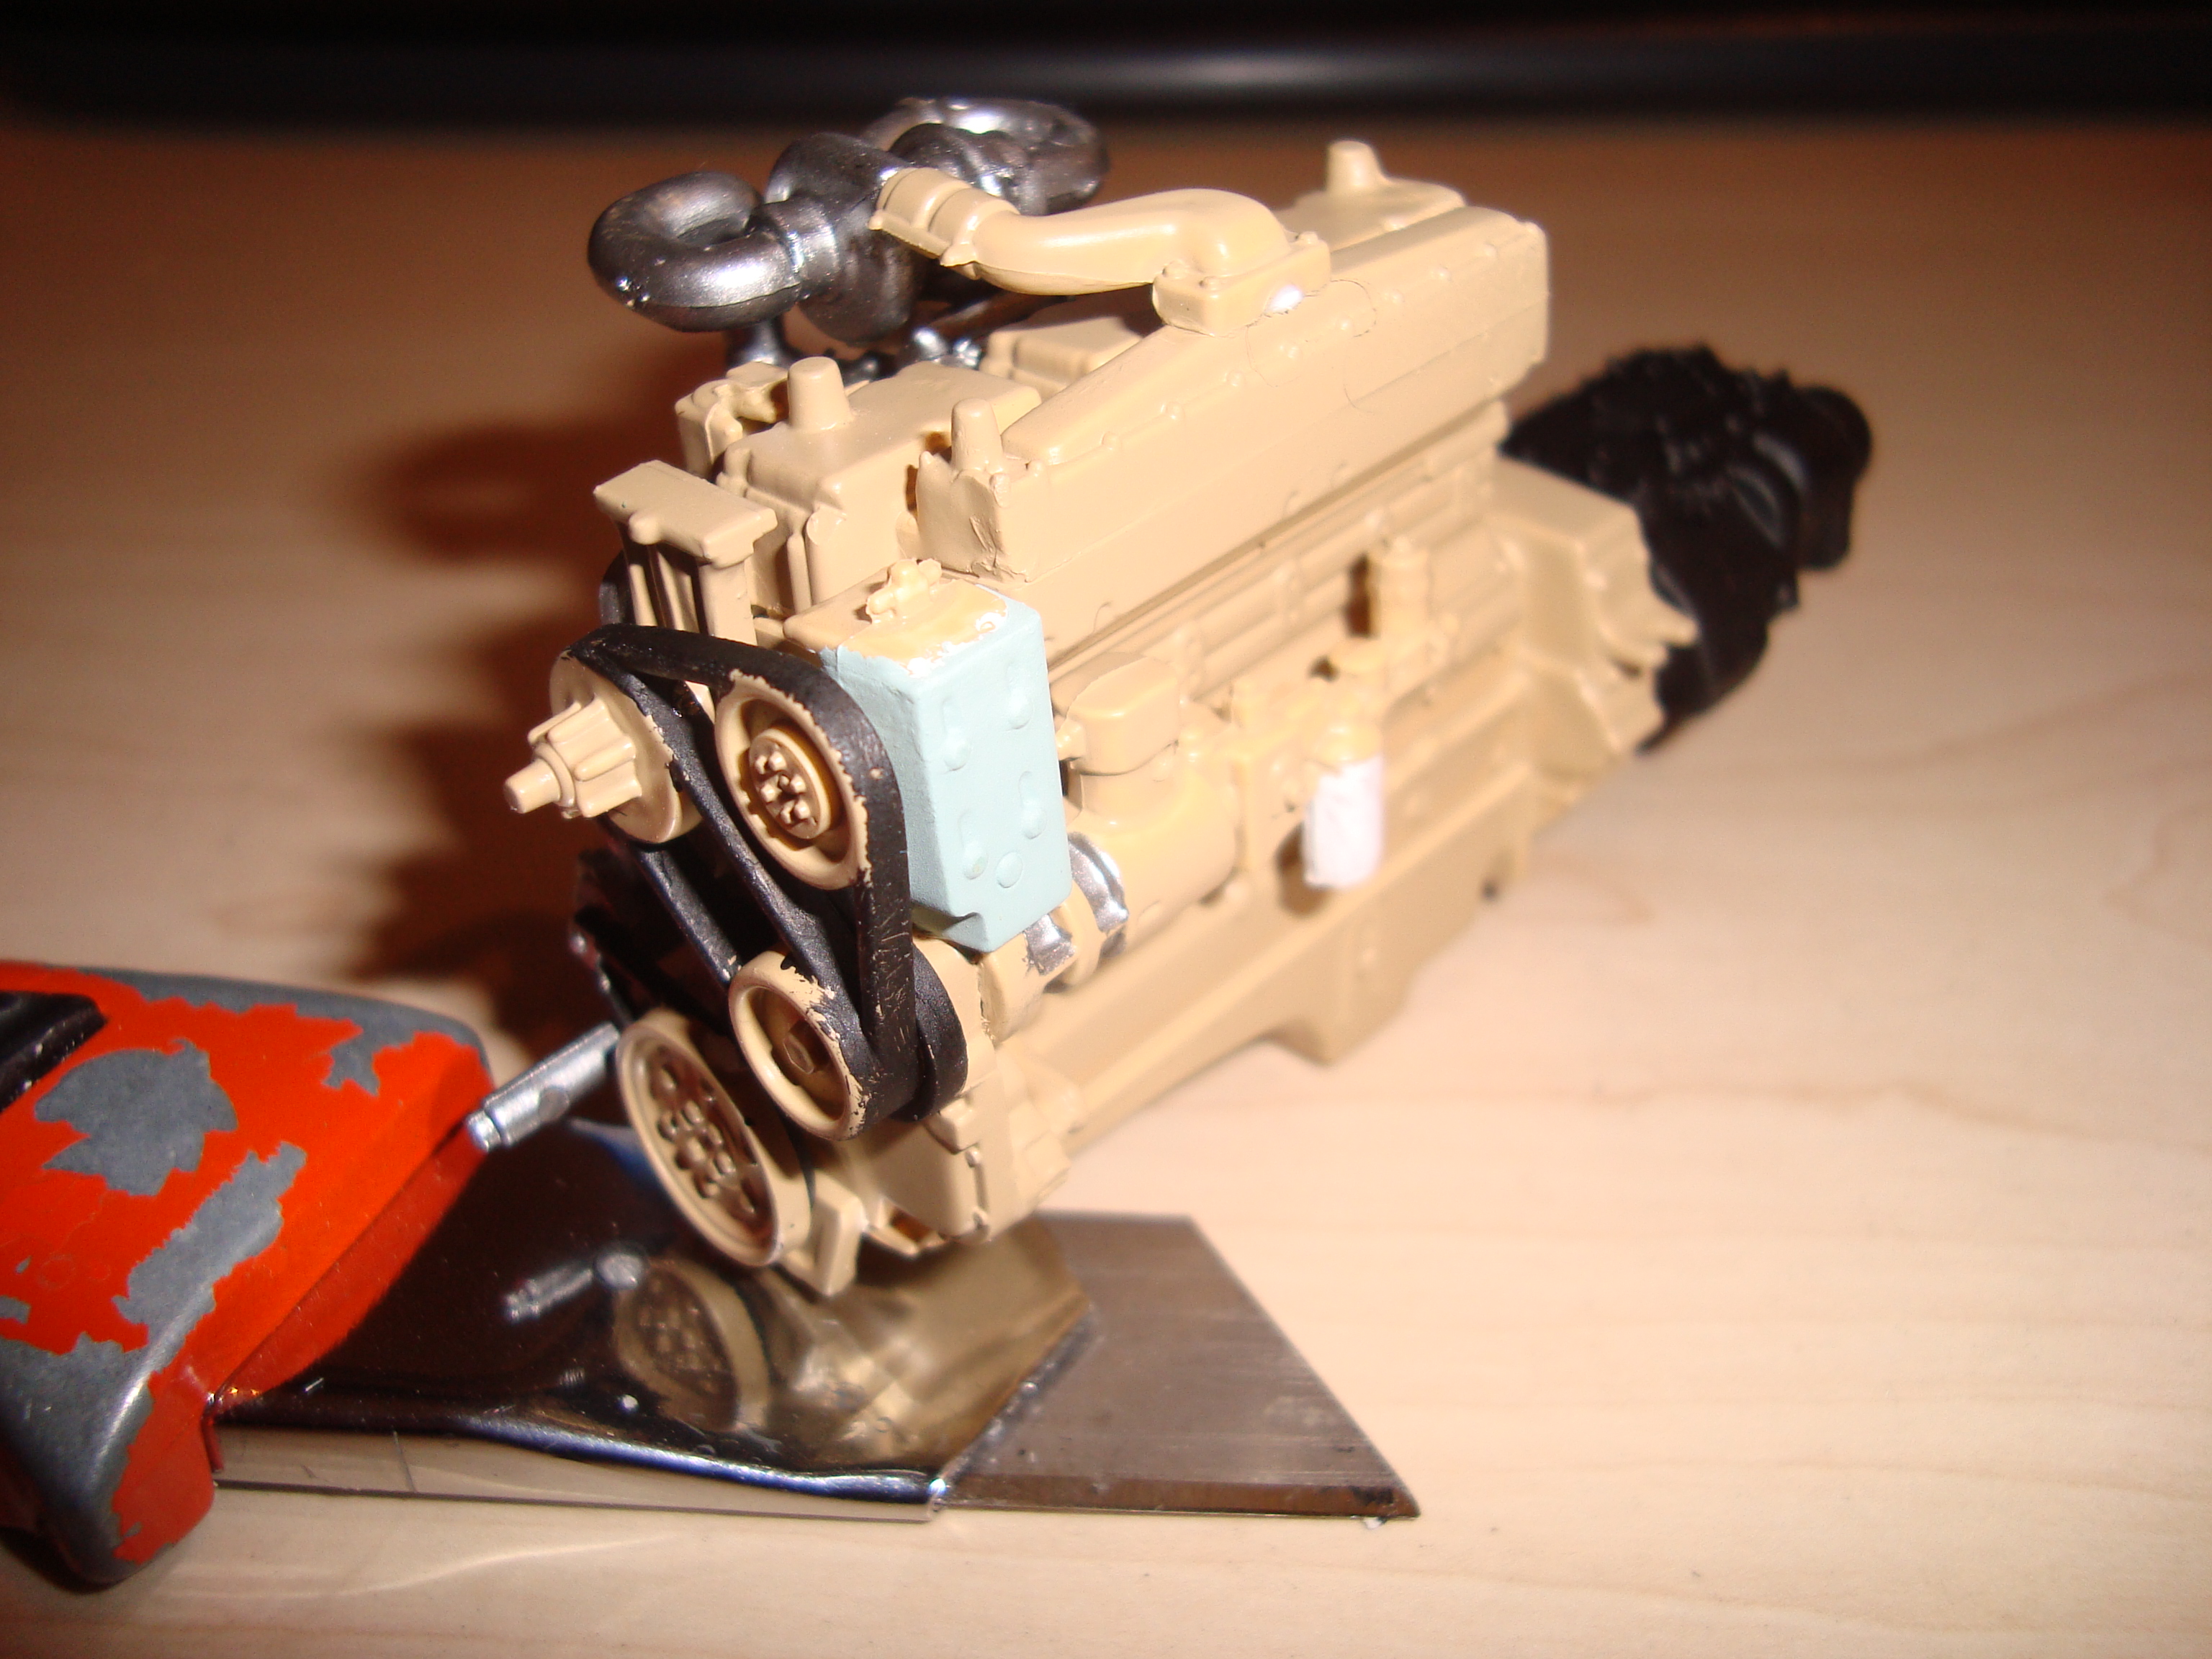
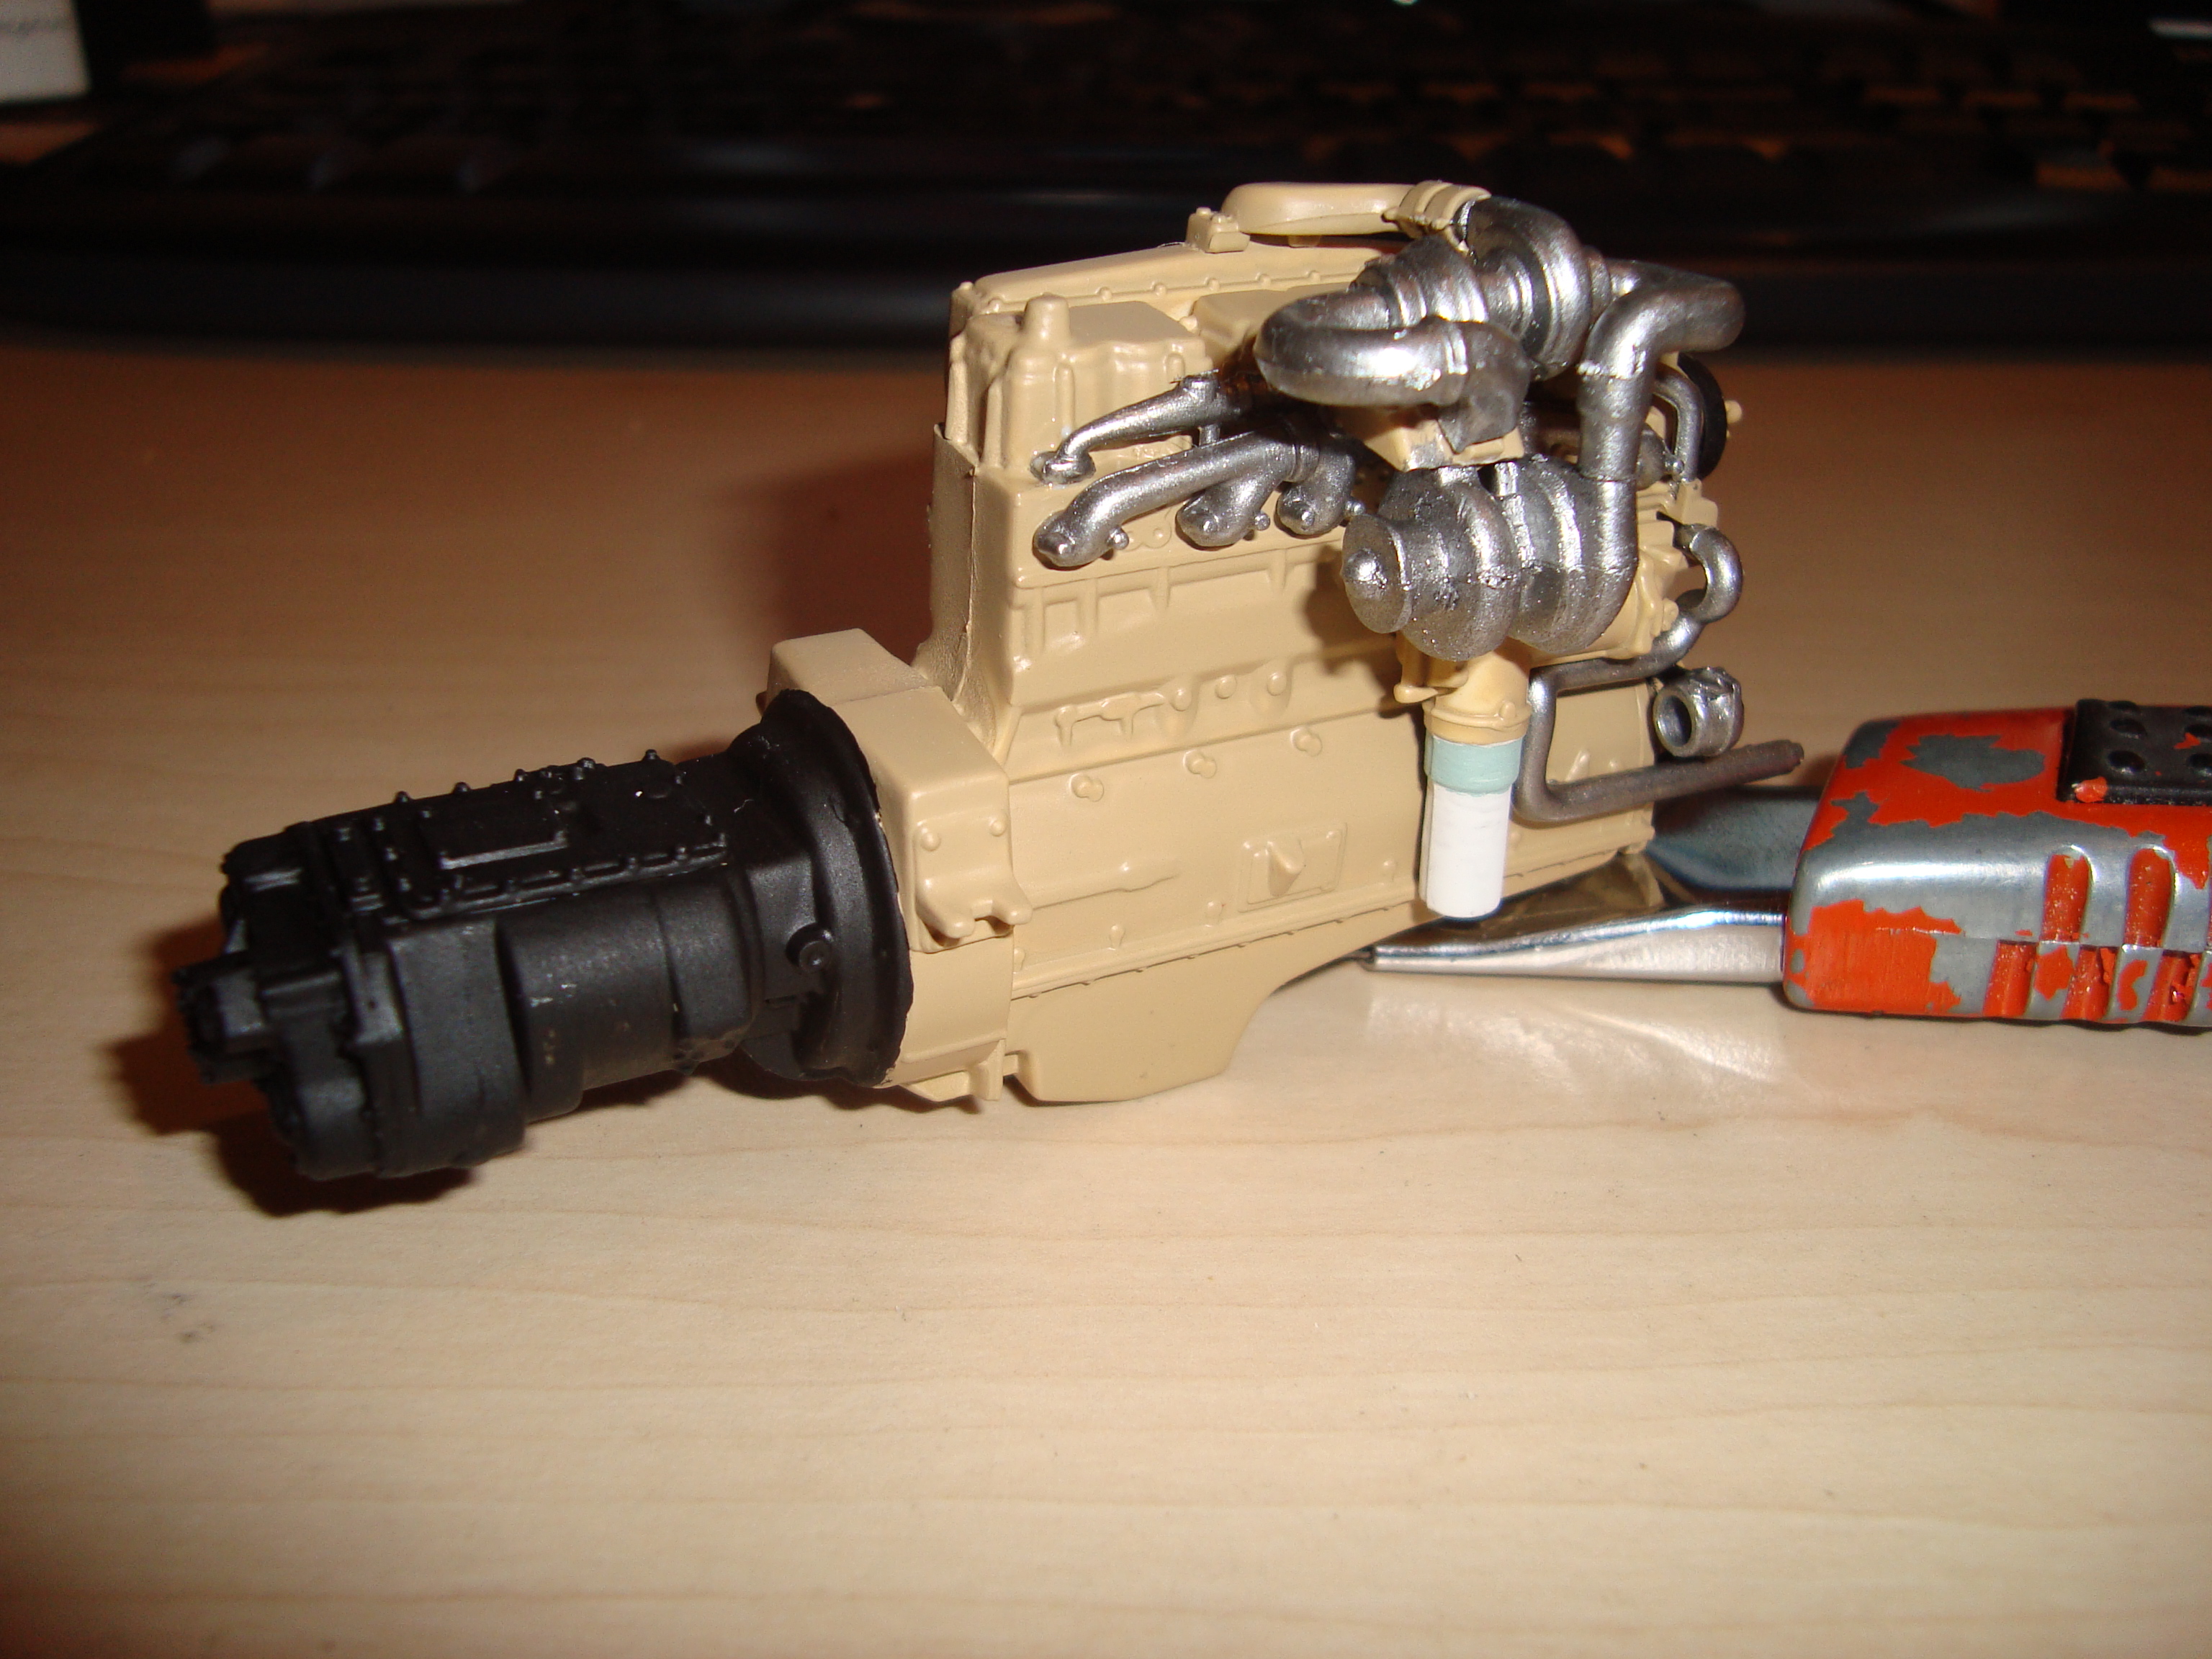
Several years ago I built this Peterbilt 388. Started with an Italeri 378 kit, mild frame stretch and a KFS Cummins signature engine; (too bad that engine is no longer available from KFS…). The 63" Standup Sleeper I robbed from an Italeri 377 kit, and cut in a rear window and a Unibilt transition as well.
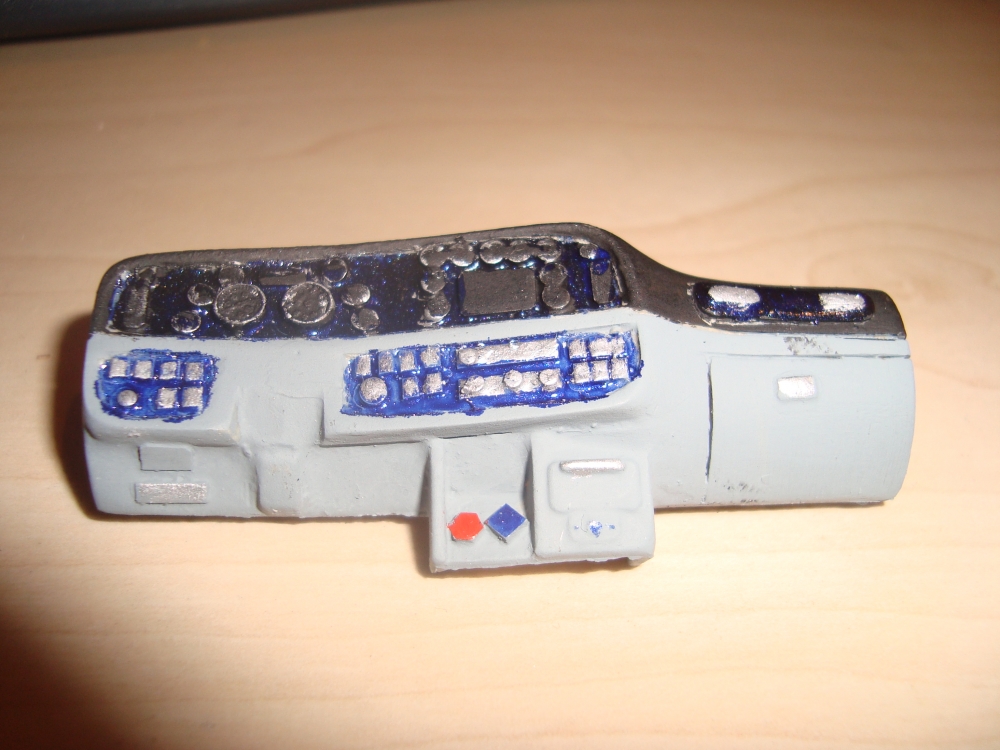
The 388 conversion kit I got from P&P Vintage, a supplier some have mixed feelings about but I can't complain about them. The conversion kit included not only a hood and grille, cab side panels with the newer style door latches and windows, but also a DPF and correct battery box. A newer style dashboard I got from them as well.
The DPF meant that I had to bend and twist my own exhaust plumbing, took a few attempts to get them right. The exhaust tips I made myself too. The grille mesh (with Ovals) I got from Plano Products.


-
1
-
-
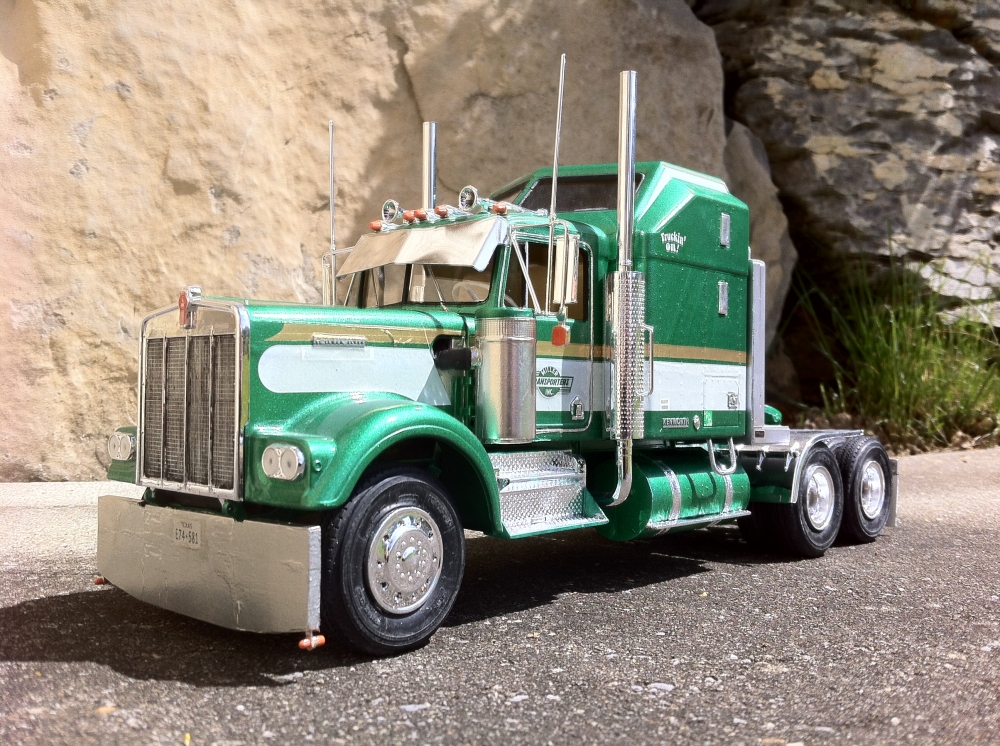
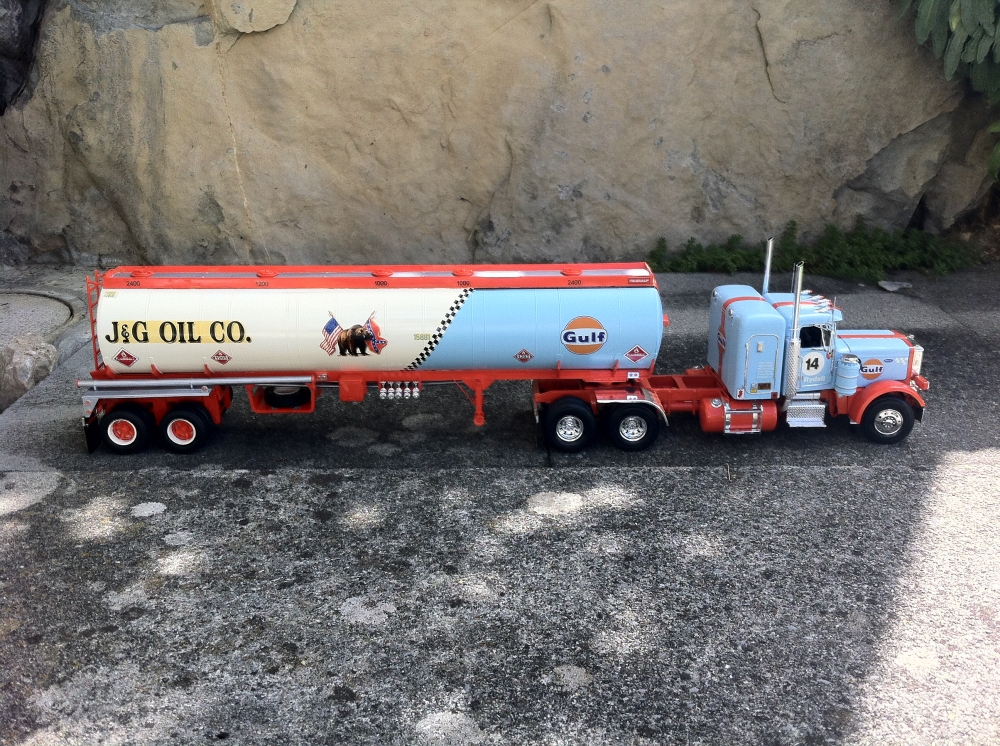
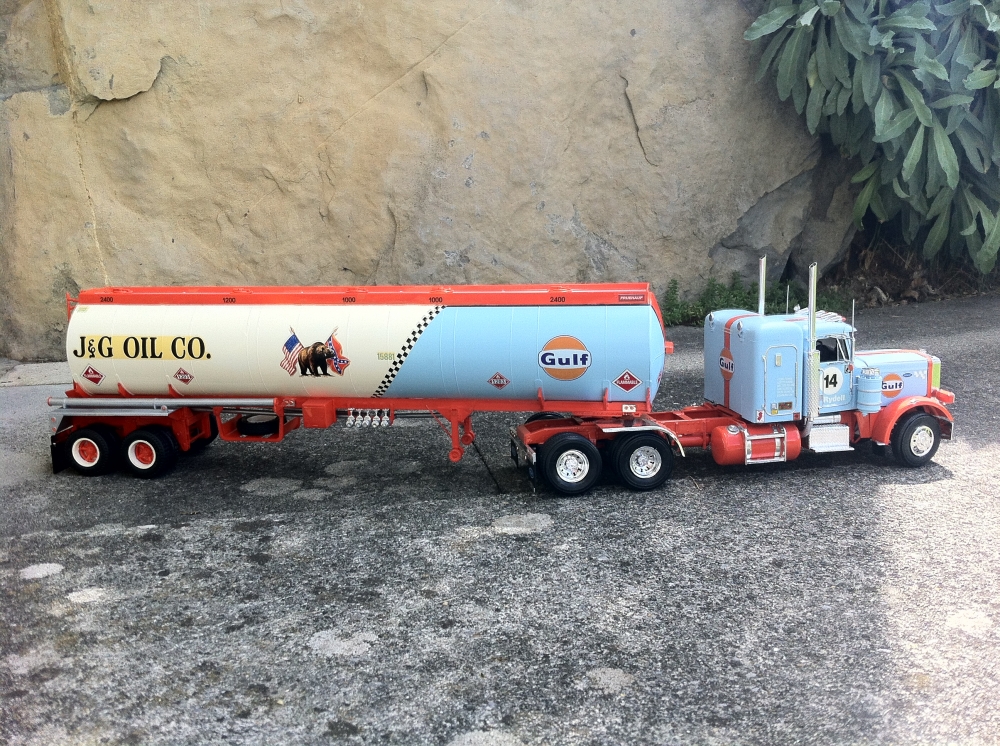
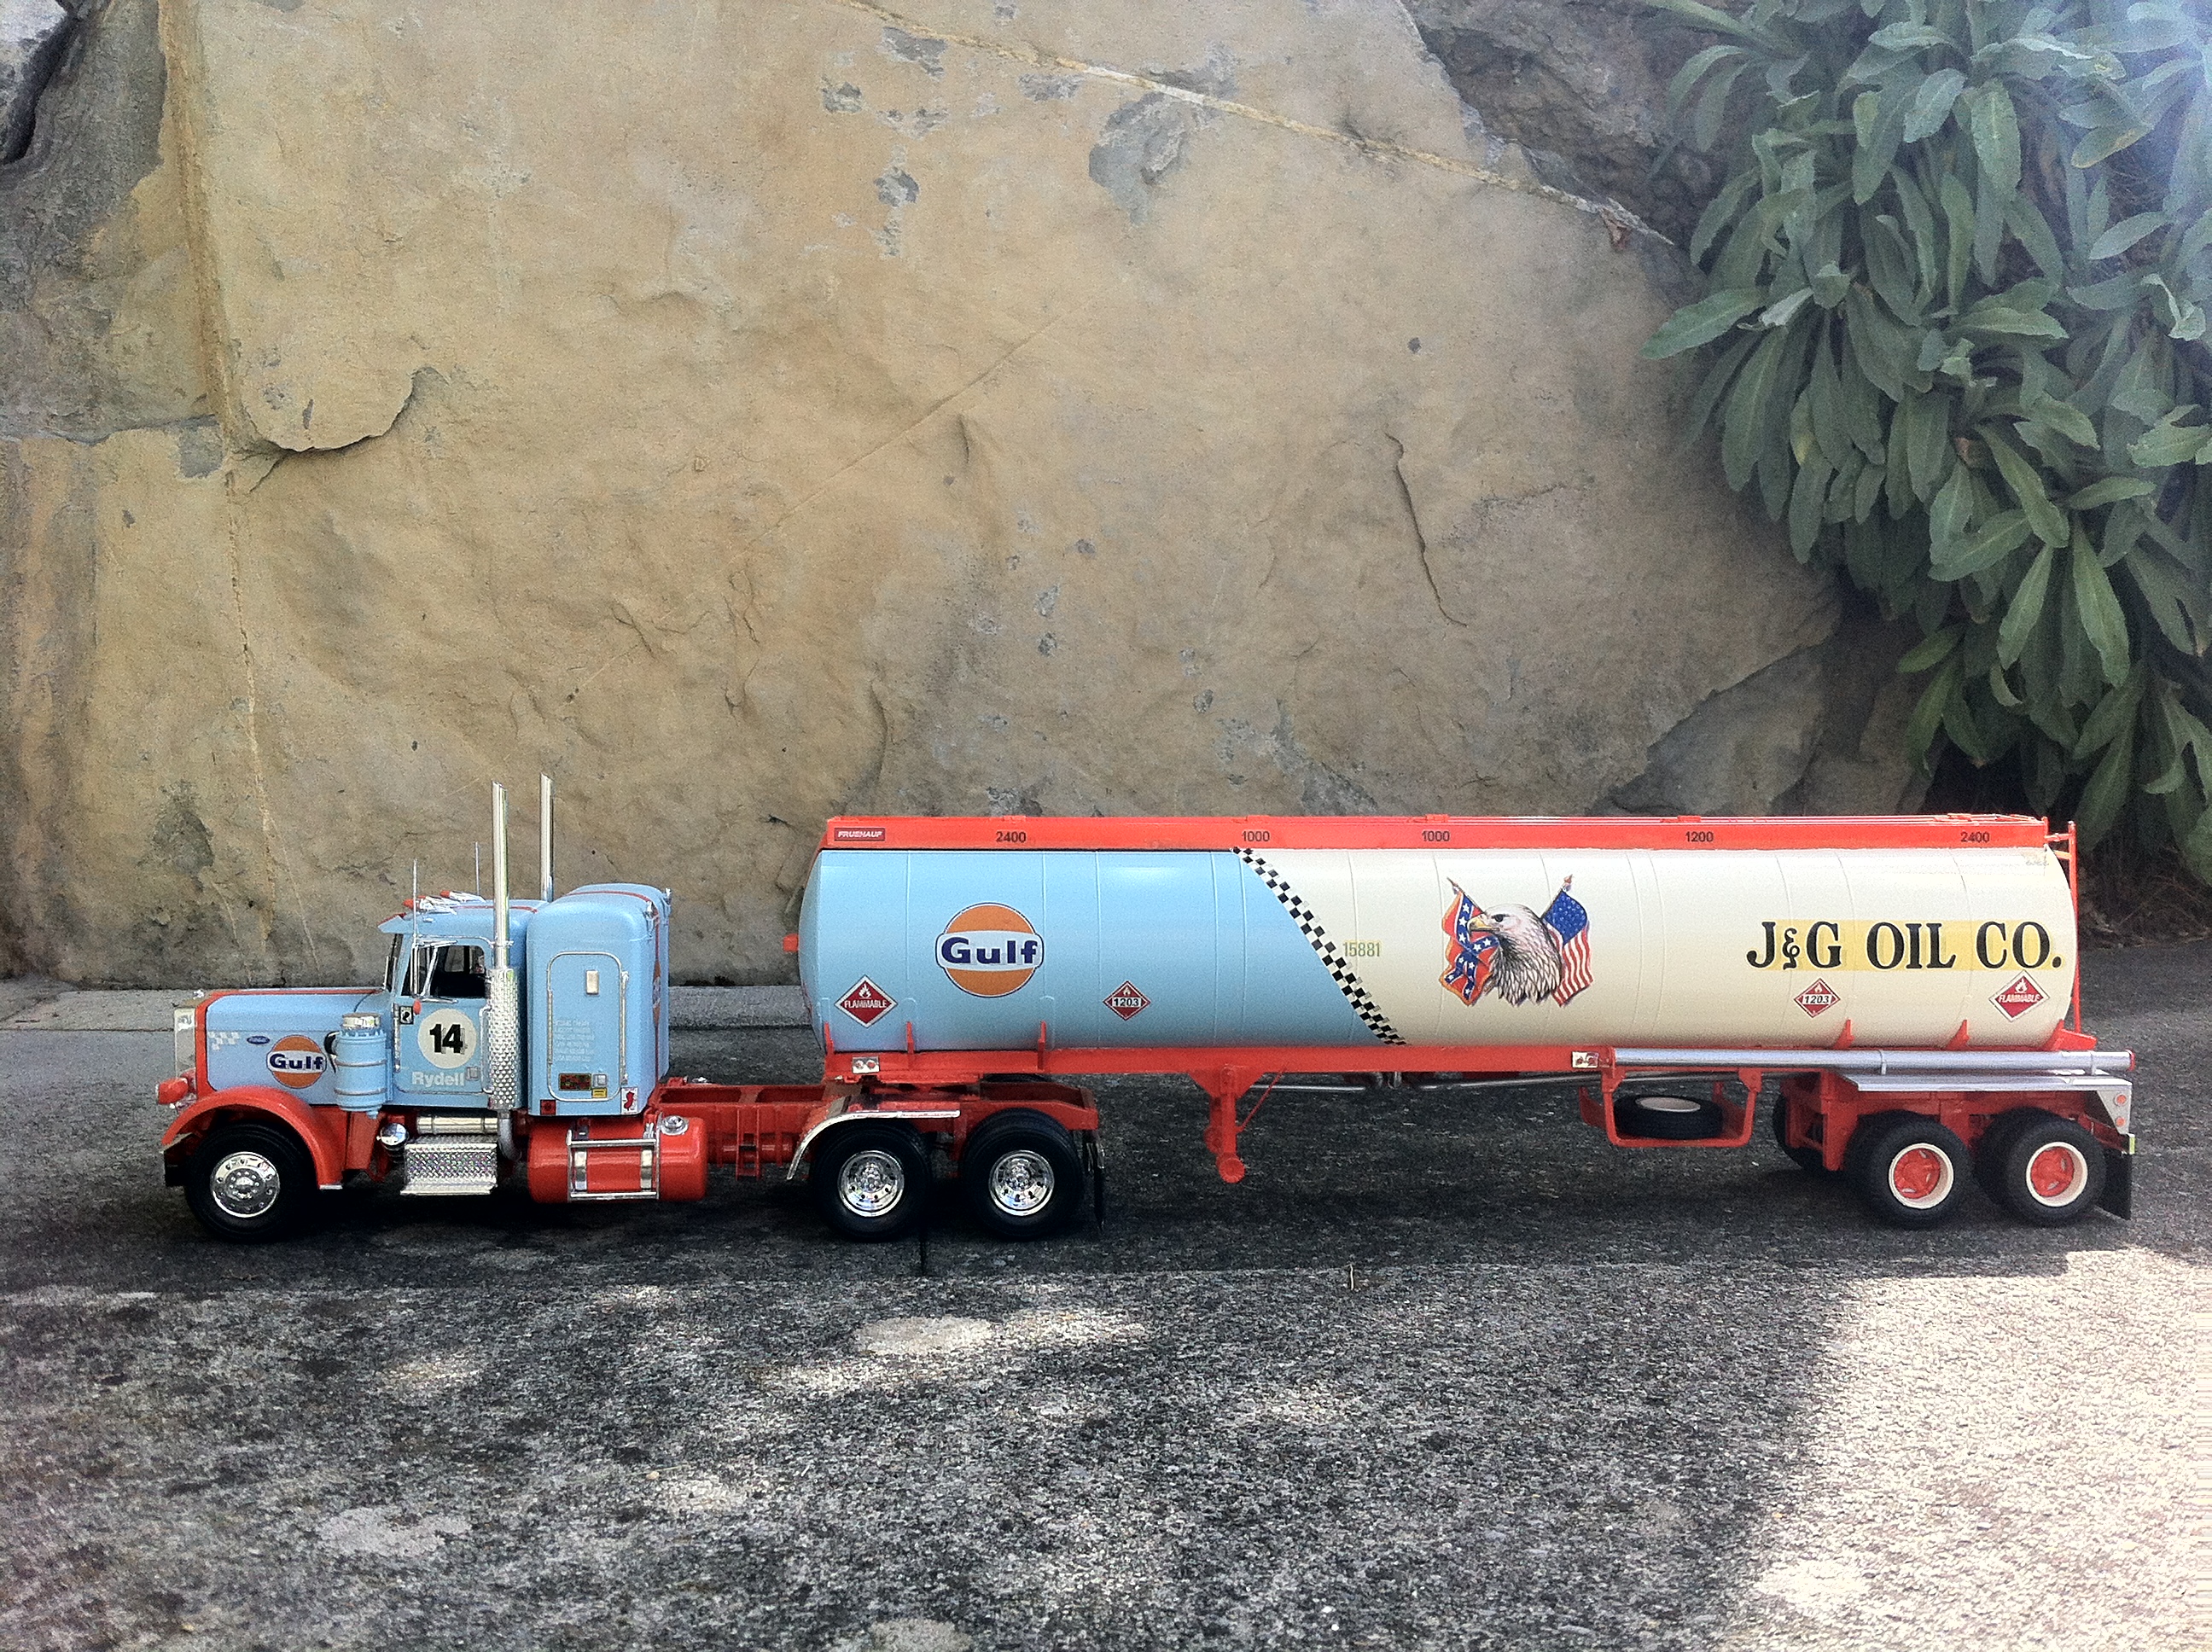
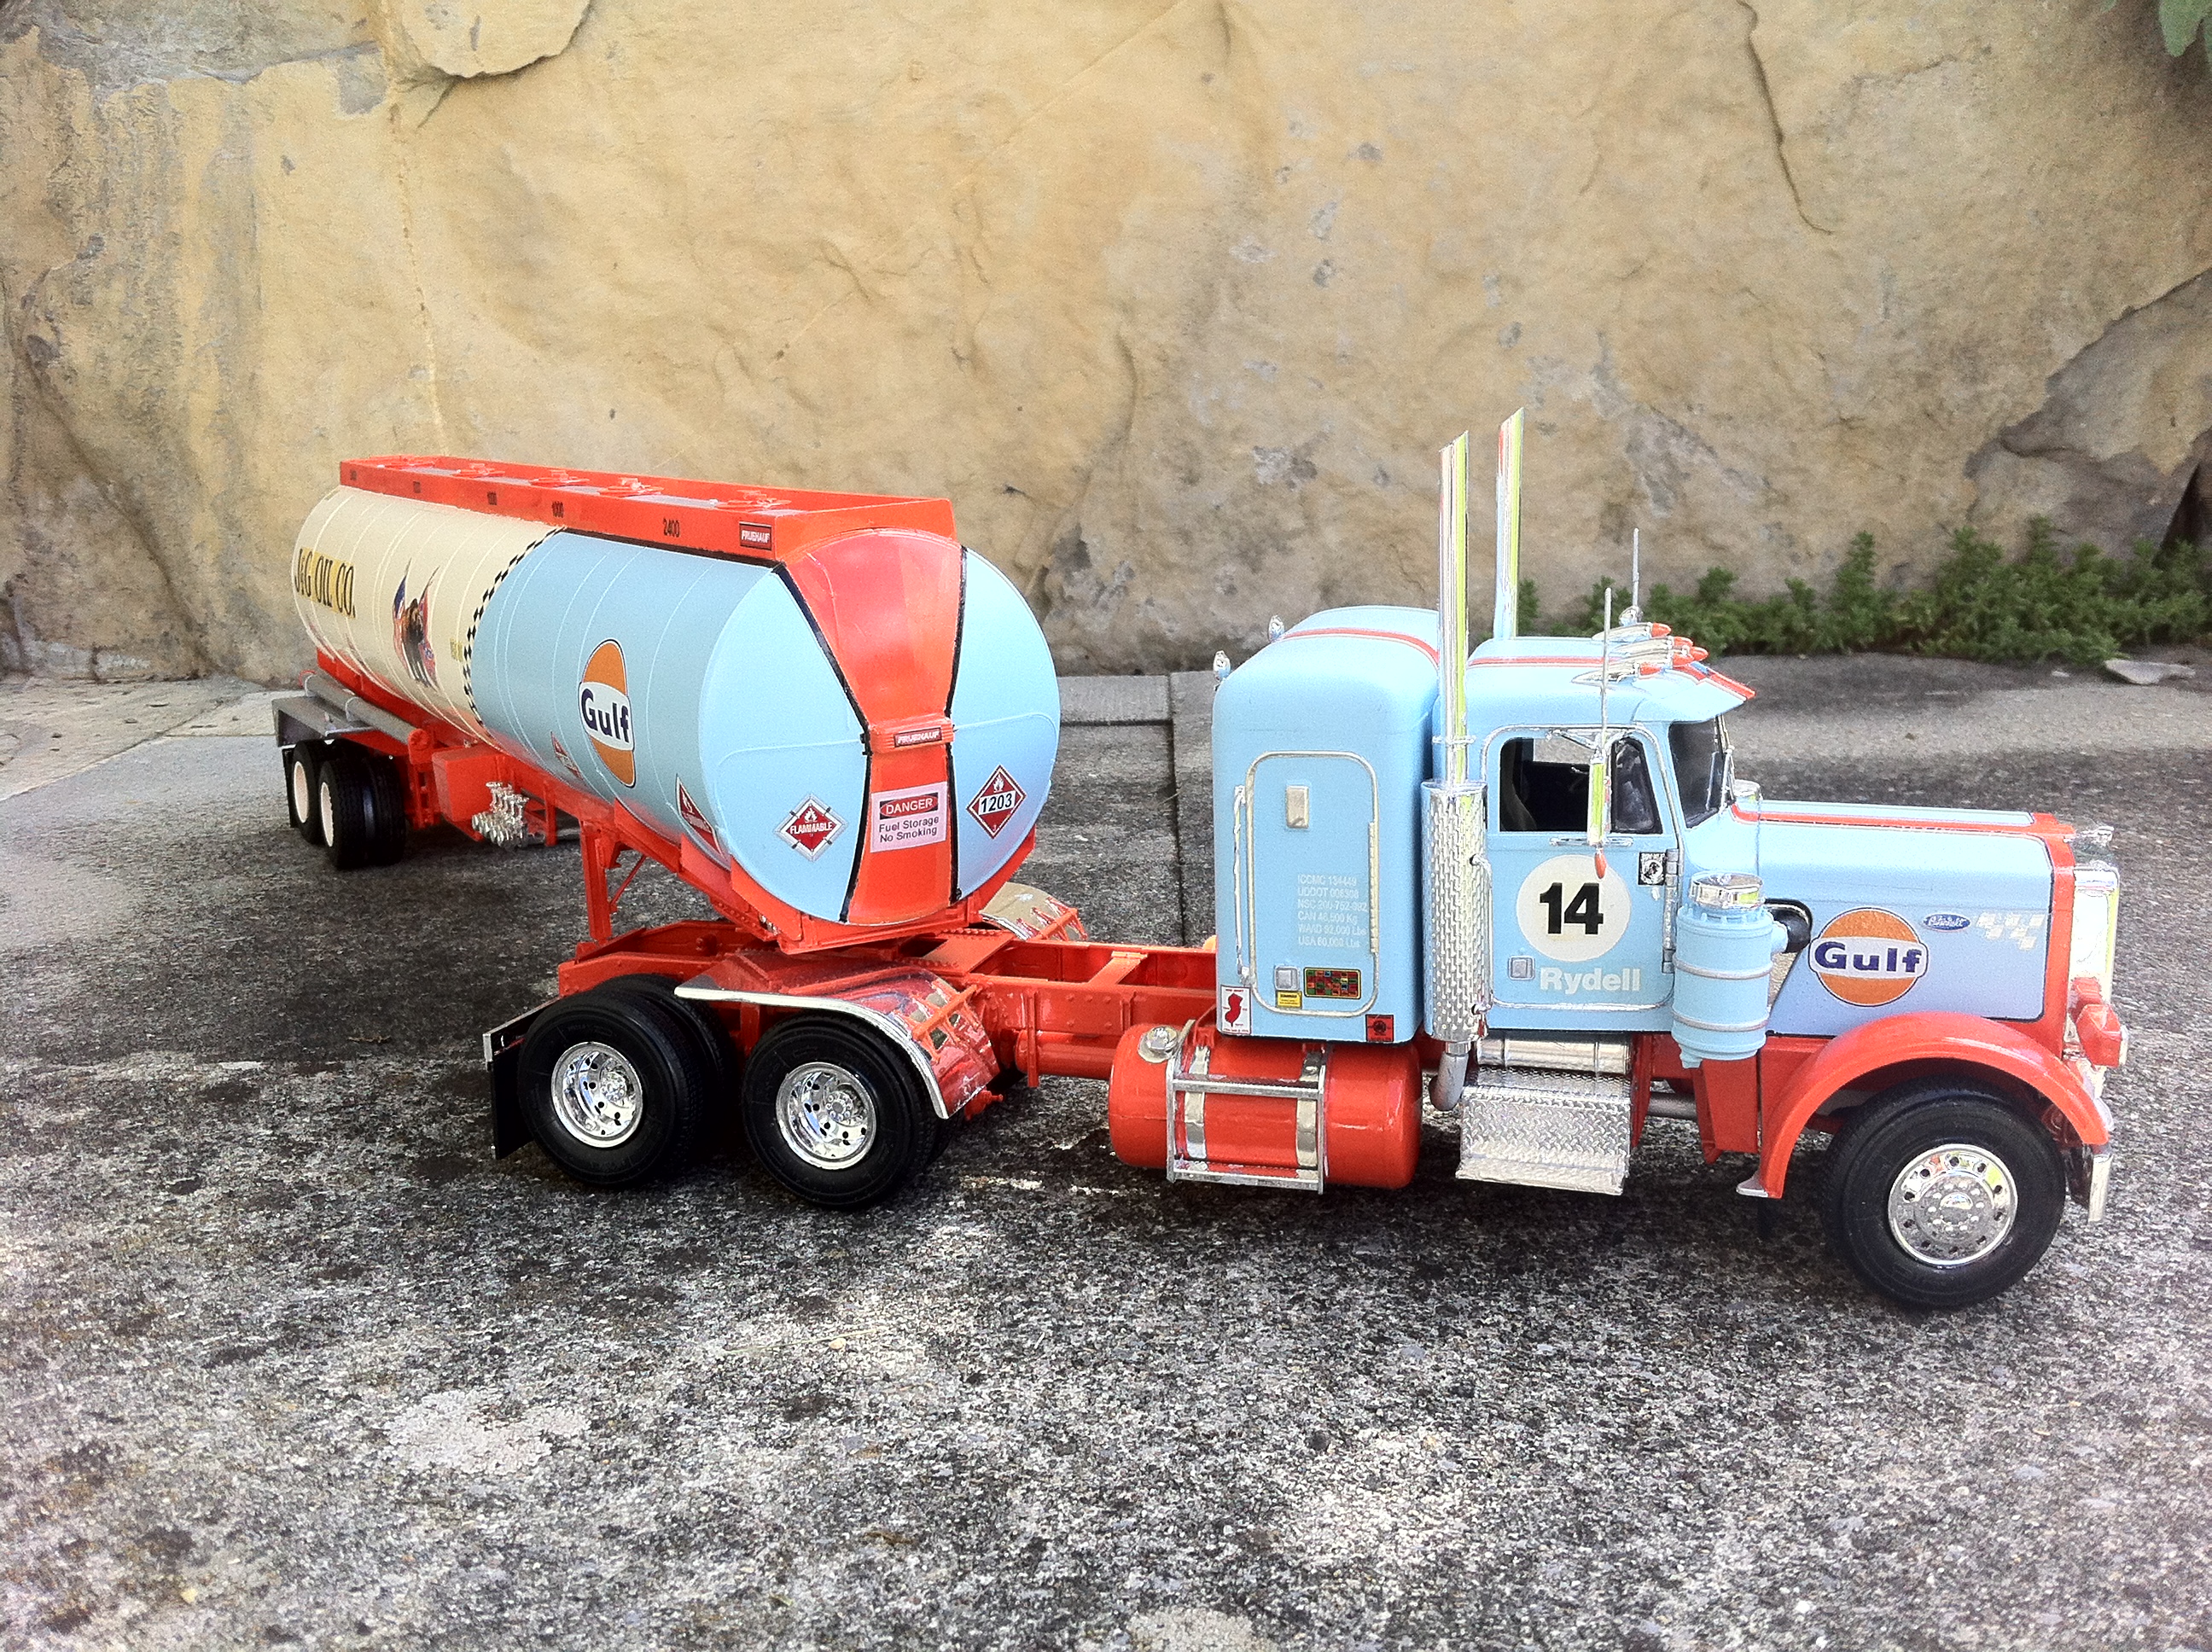
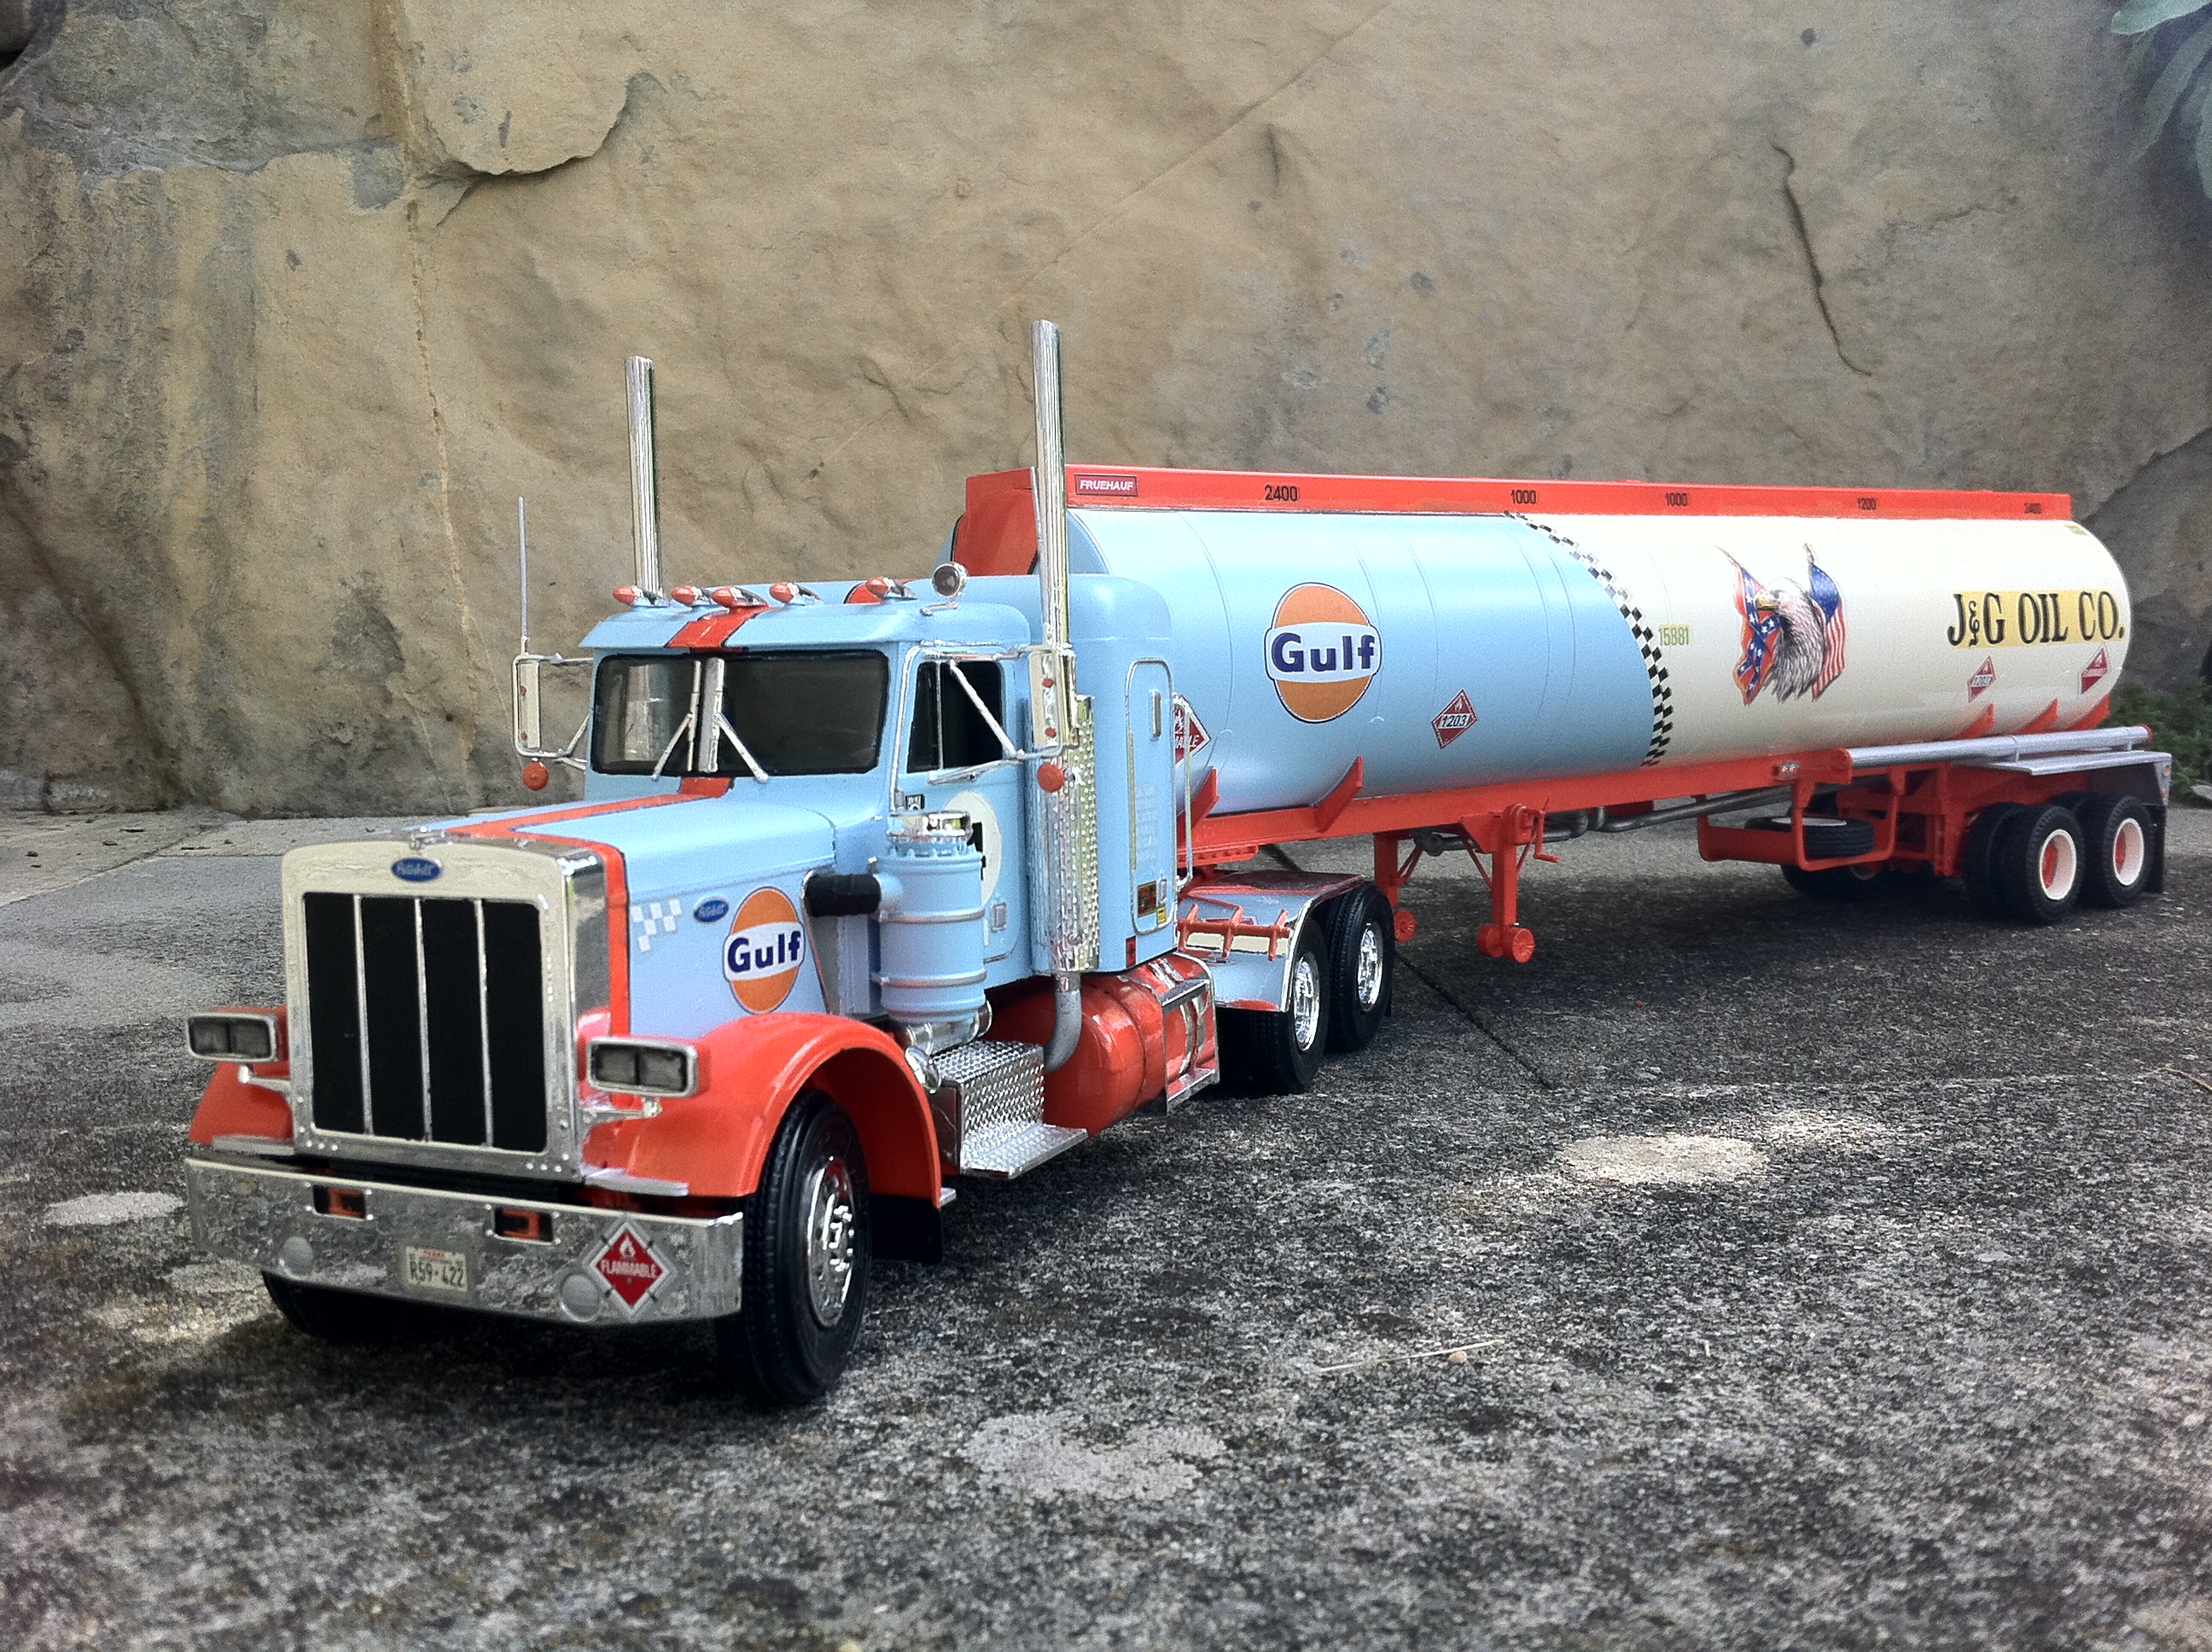
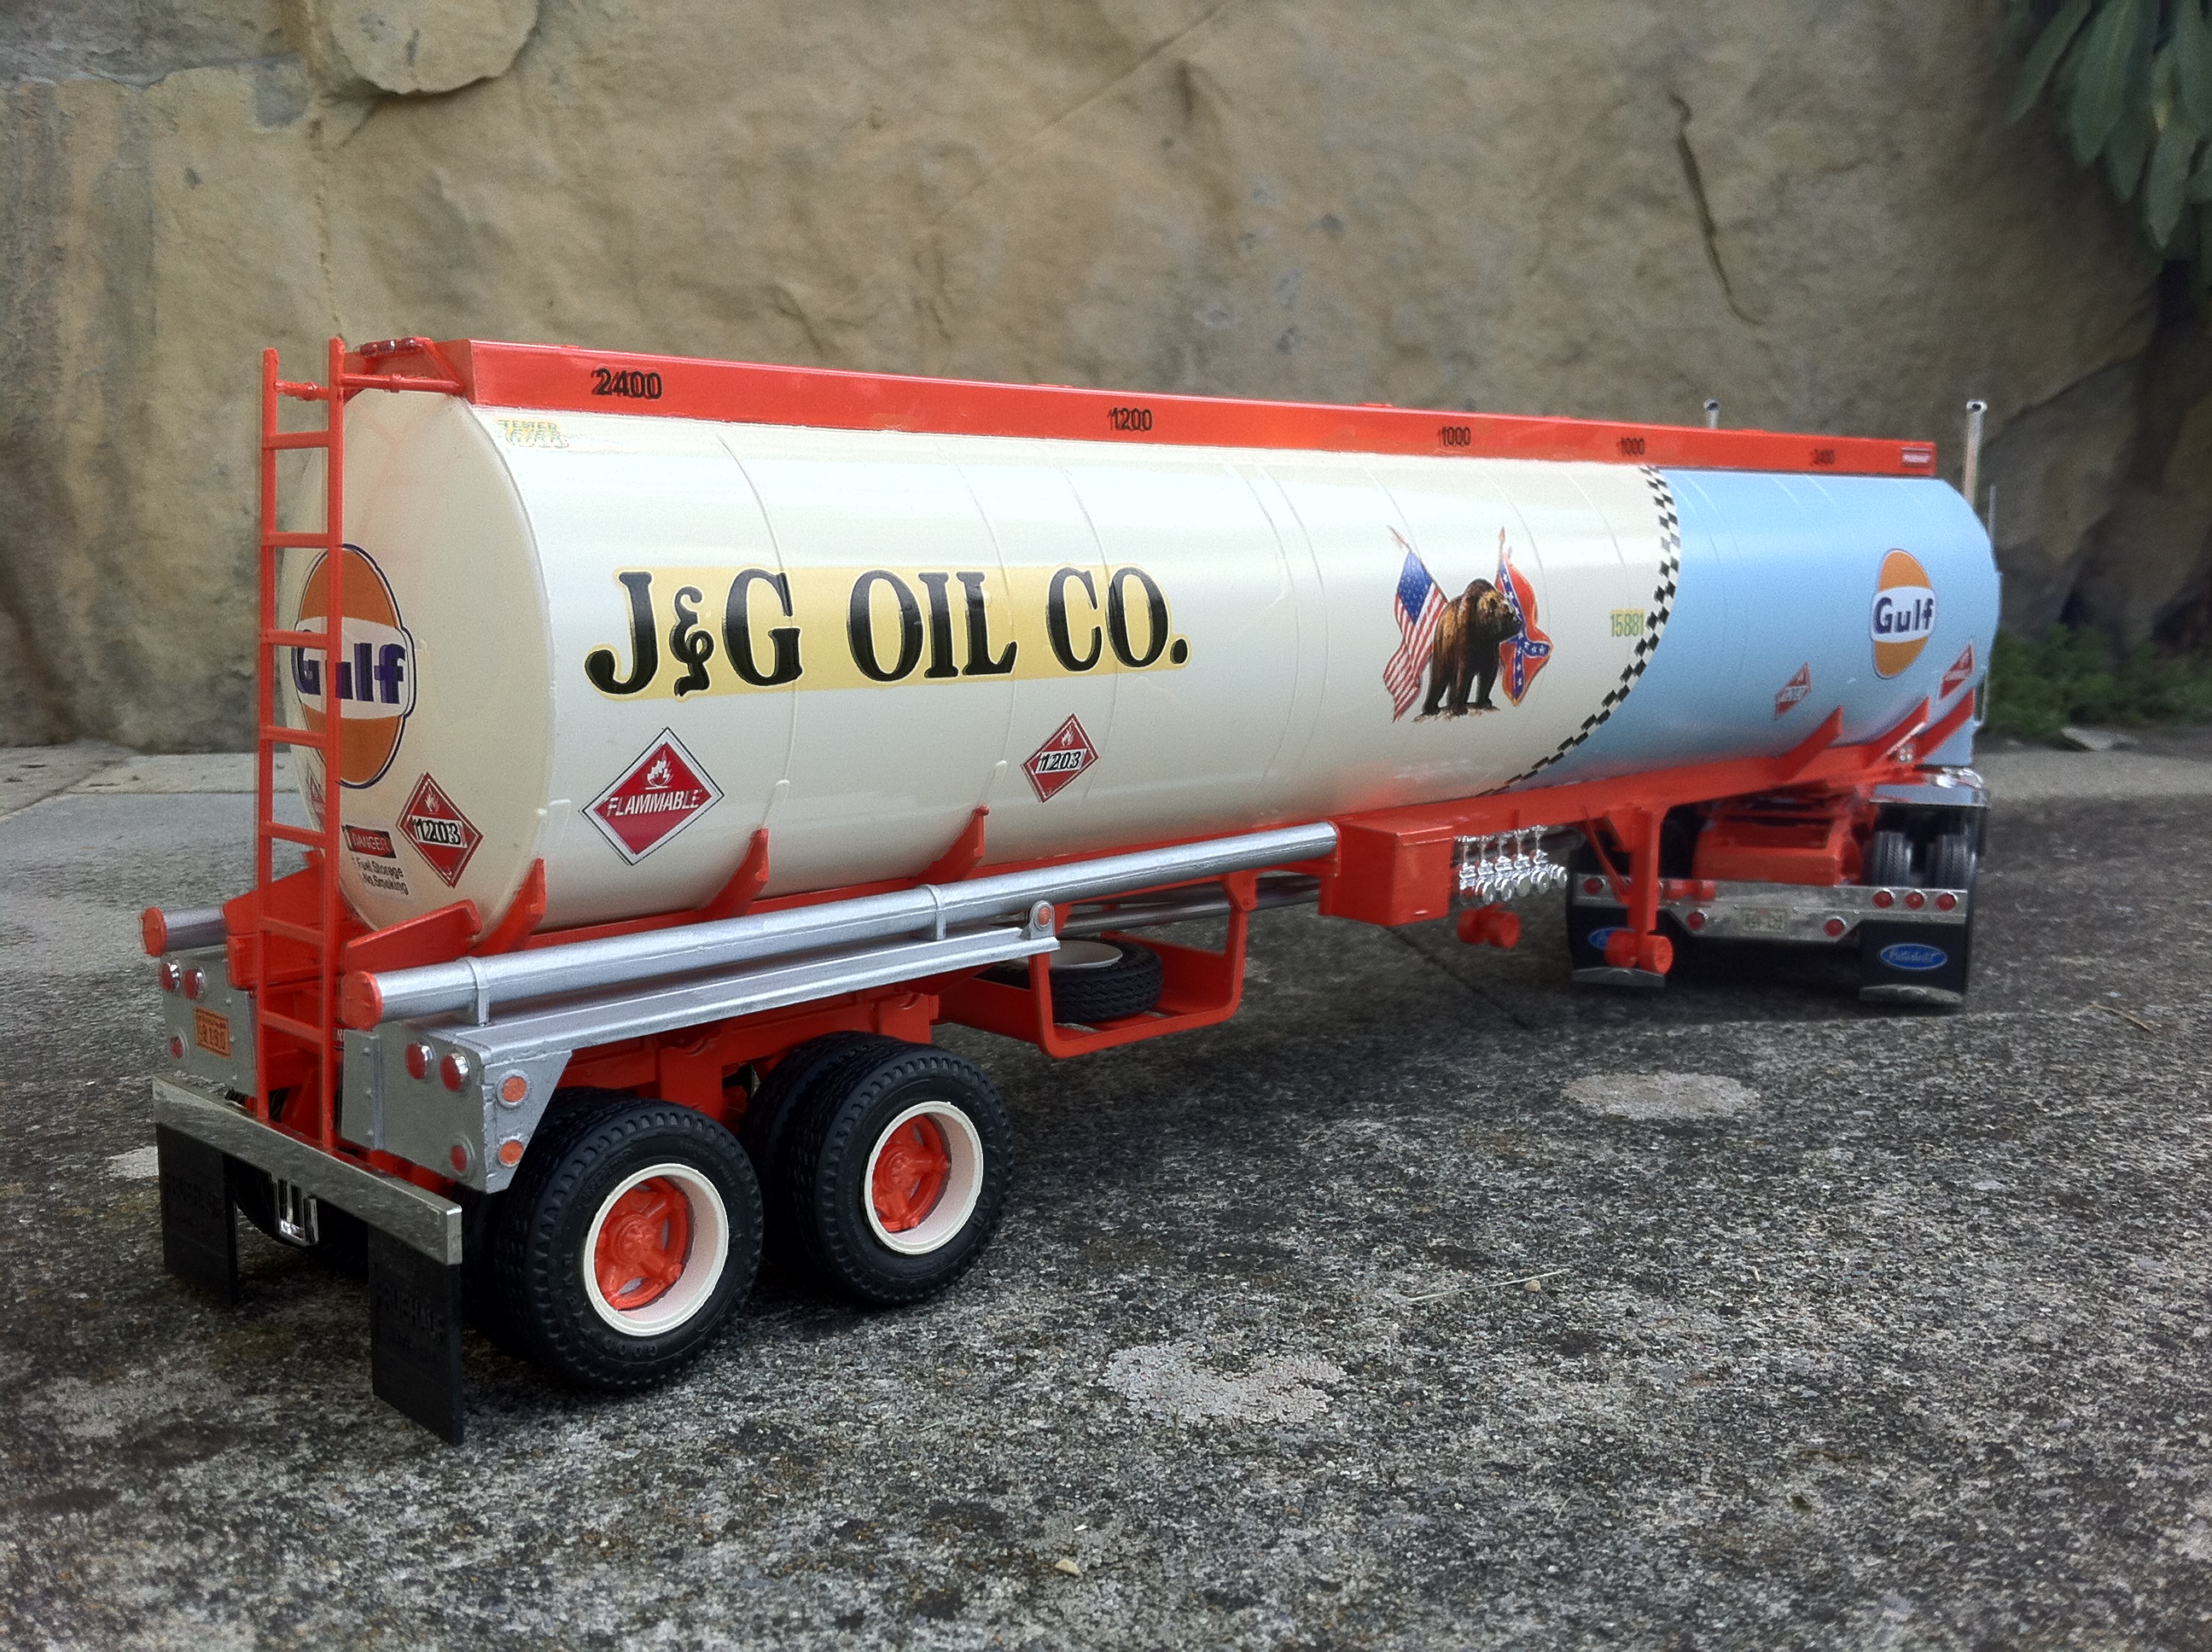
For a build-off on a facebook page I built this combo in the Spring/Summer of 2015. Just your standard Revell of Germany Peterbilt 359 kit with AMT Fruehauf Tanker. I contended in the box-stock class, and of course I had to skate the rules a little by cutting down the 63" sleeper on the truck to a 36" coffin. Also I omitted the air horns, flimsy kit headache rack and the Varashield air spoiler.
The Gulf theme has been in my head for years, on and off. Inspired by the 60-ies era Le Mans racer, the epic Ford GT40. A good buddy sent over the Blue Ovals, keeping it a little Ford-looking.
The AMT kit had 40 year-old decals, which quickly dissolved as soon as they hit the water; darn… I got replacement decals from www.modeltruckin.com, which totally did the trick. For the rest, the decals are a mix from various kits and brands.
I got second place with this build.


Peterbilt 359 David Webb Trucking
in Model Truck Show Room
Posted
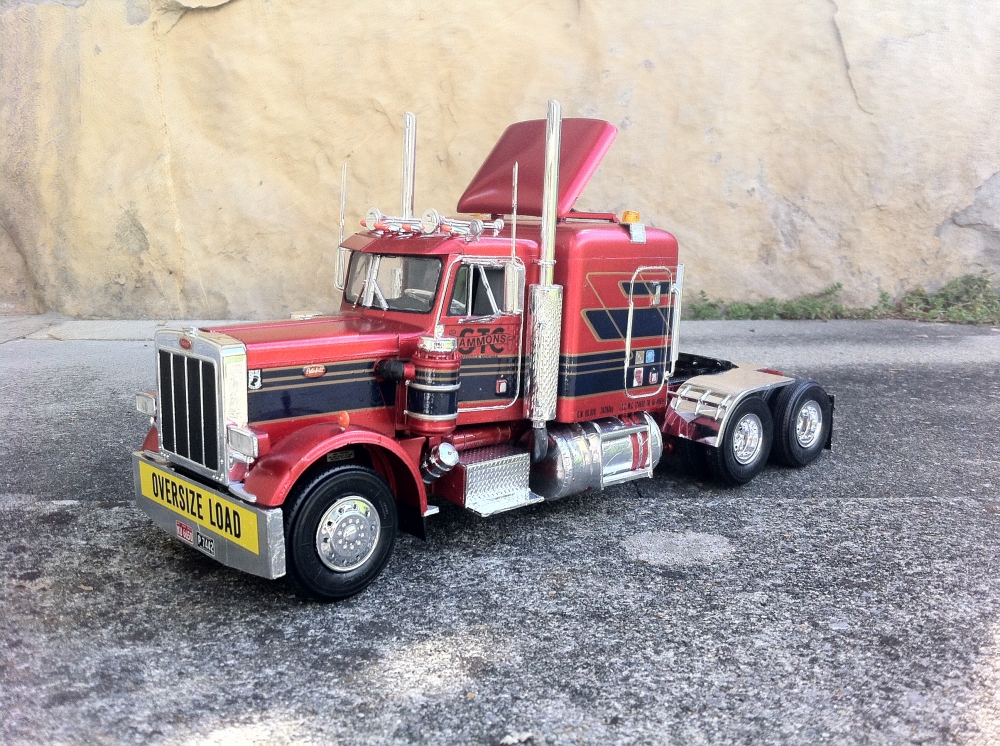
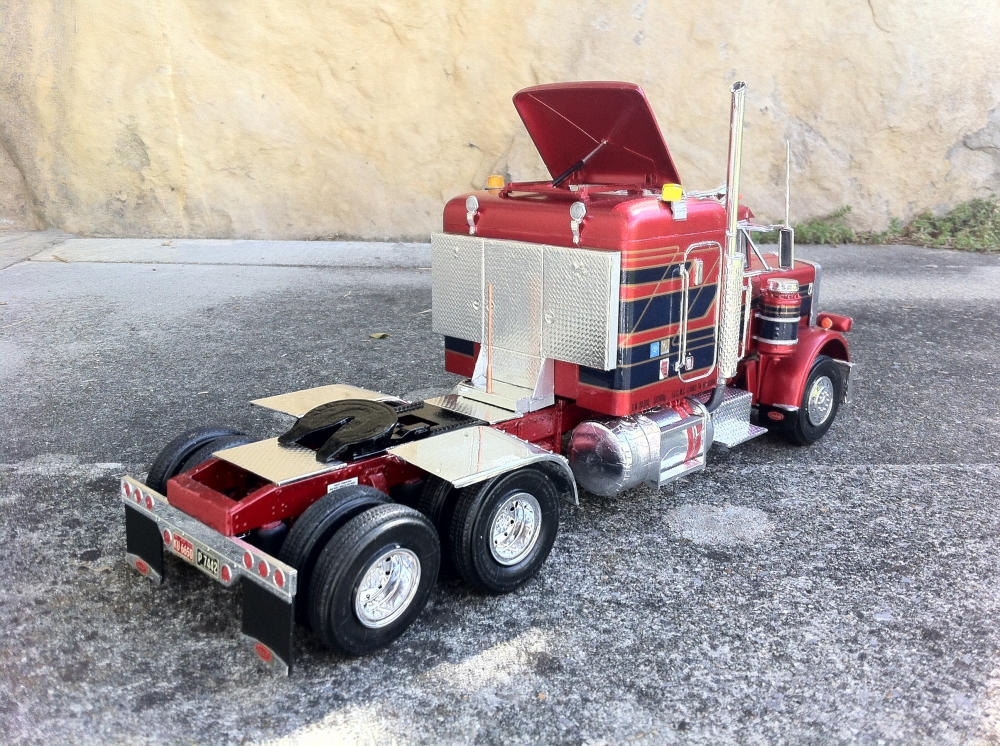
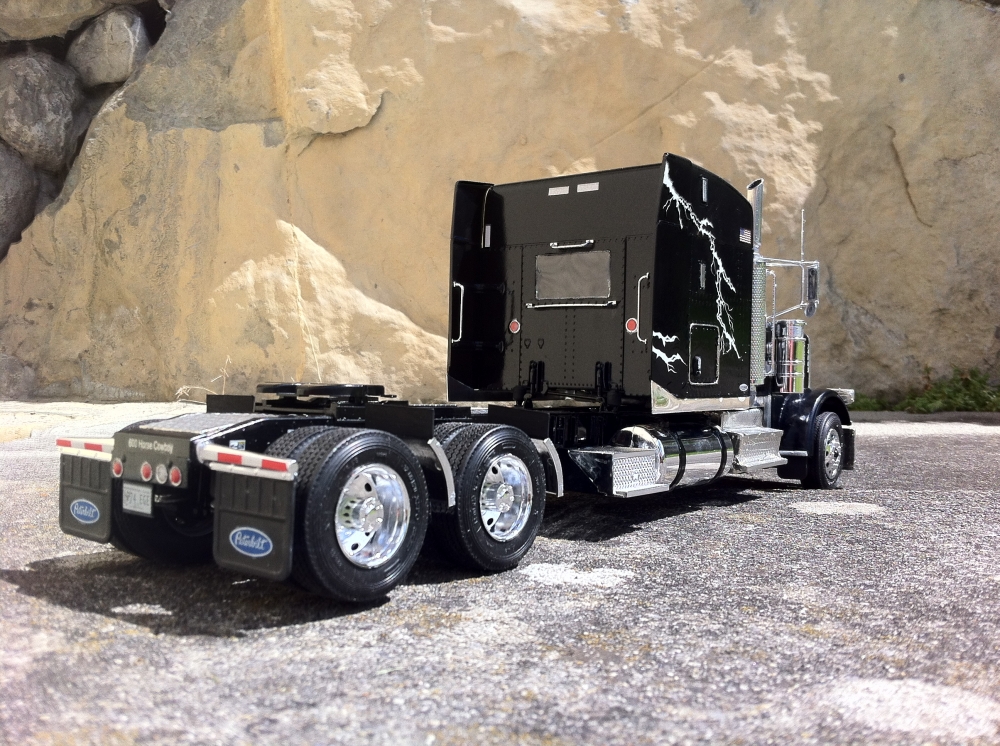
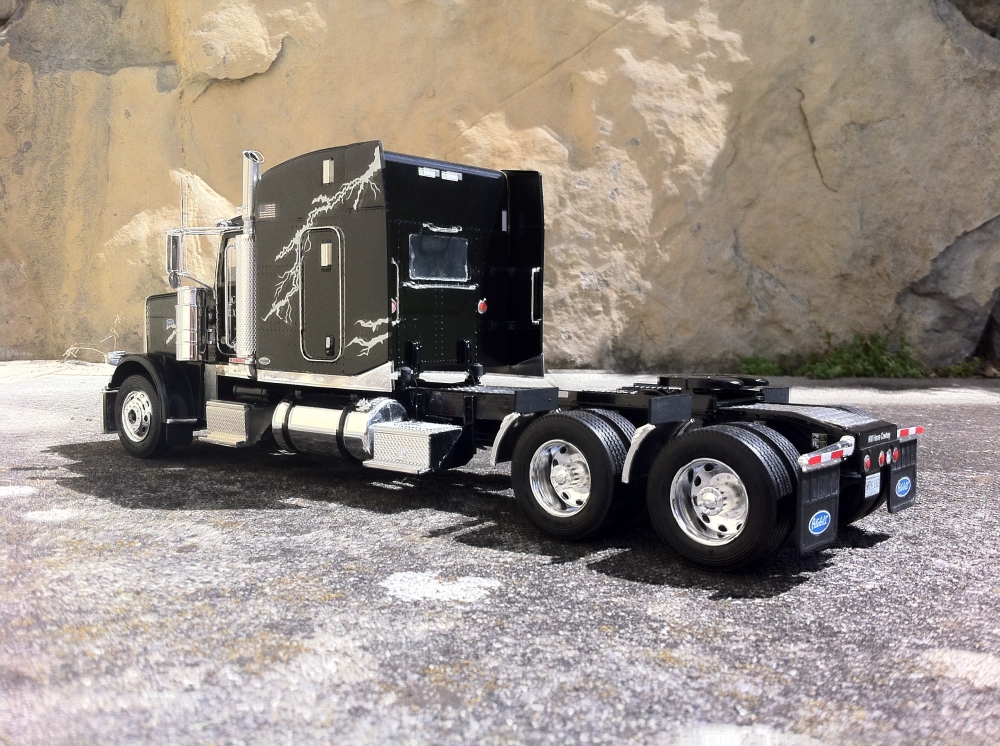
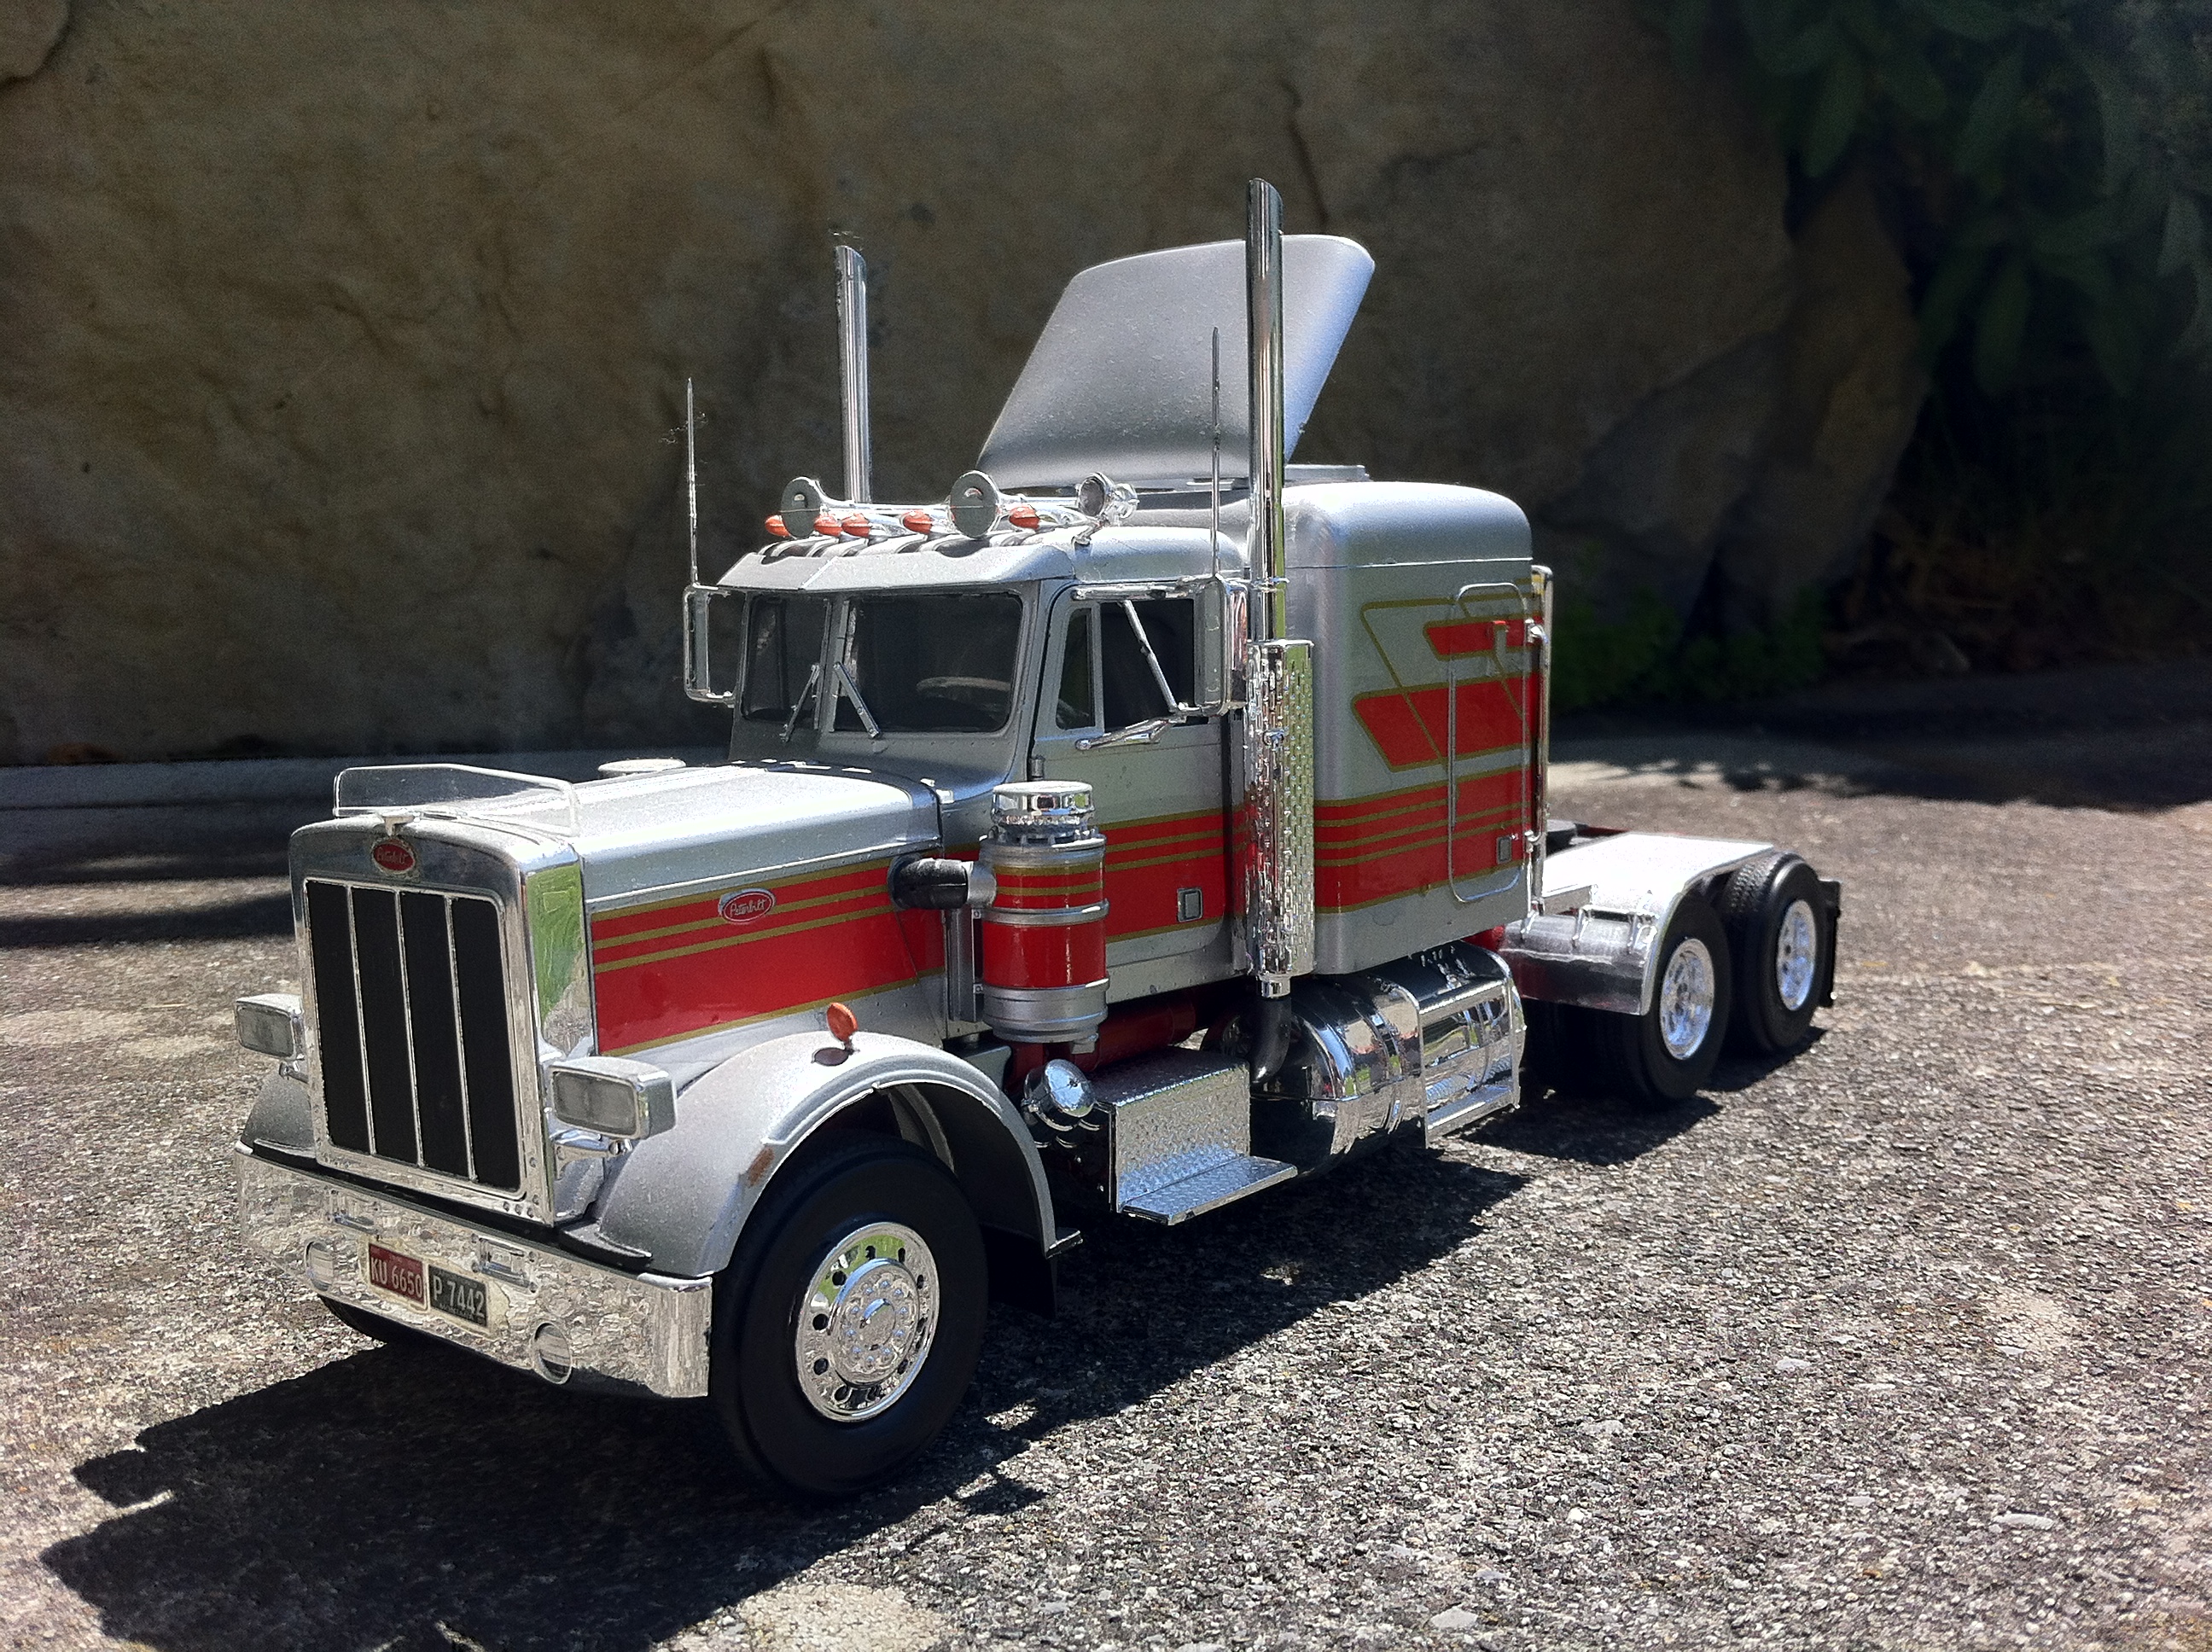
Ah yes, another revamping of the old Peterbilt 359 kit by Revell of Germany…
The basic idea is good, but I can " improve" it a little.
Frame stretch, tool box on the frame, stand-up sleeper top (from P&P Vintage kits), rear window cut in, Vortec breathers and beacons on the sleeper roof, chicken lights all around, yeah that'll work…!