
Gary Chase
-
Content count
165 -
Joined
-
Last visited
-
Days Won
29
Posts posted by Gary Chase
-
-
16 hours ago, Brian Conn said:THANKS! It's almost a shame that I will end up weathering the chassis with rust and stains, but it is what it is. My wife is concerned that the trash truck wont look the part of a trash truck that see's a daily route up and down alleys and trips to the land fill.....
That’s a tuff call, I like enough weathering to showcase normal wear but when I see these builds from a junkyard perspective, I am amazed and intrigued how they make it look so real. Honestly I enjoy all levels of weathering and wish I had better skills at applying those techniques. I will be watching your build so give us some details as you move forward.
-
10 hours ago, Brian Conn said:...Would Oatey PVC cement work?
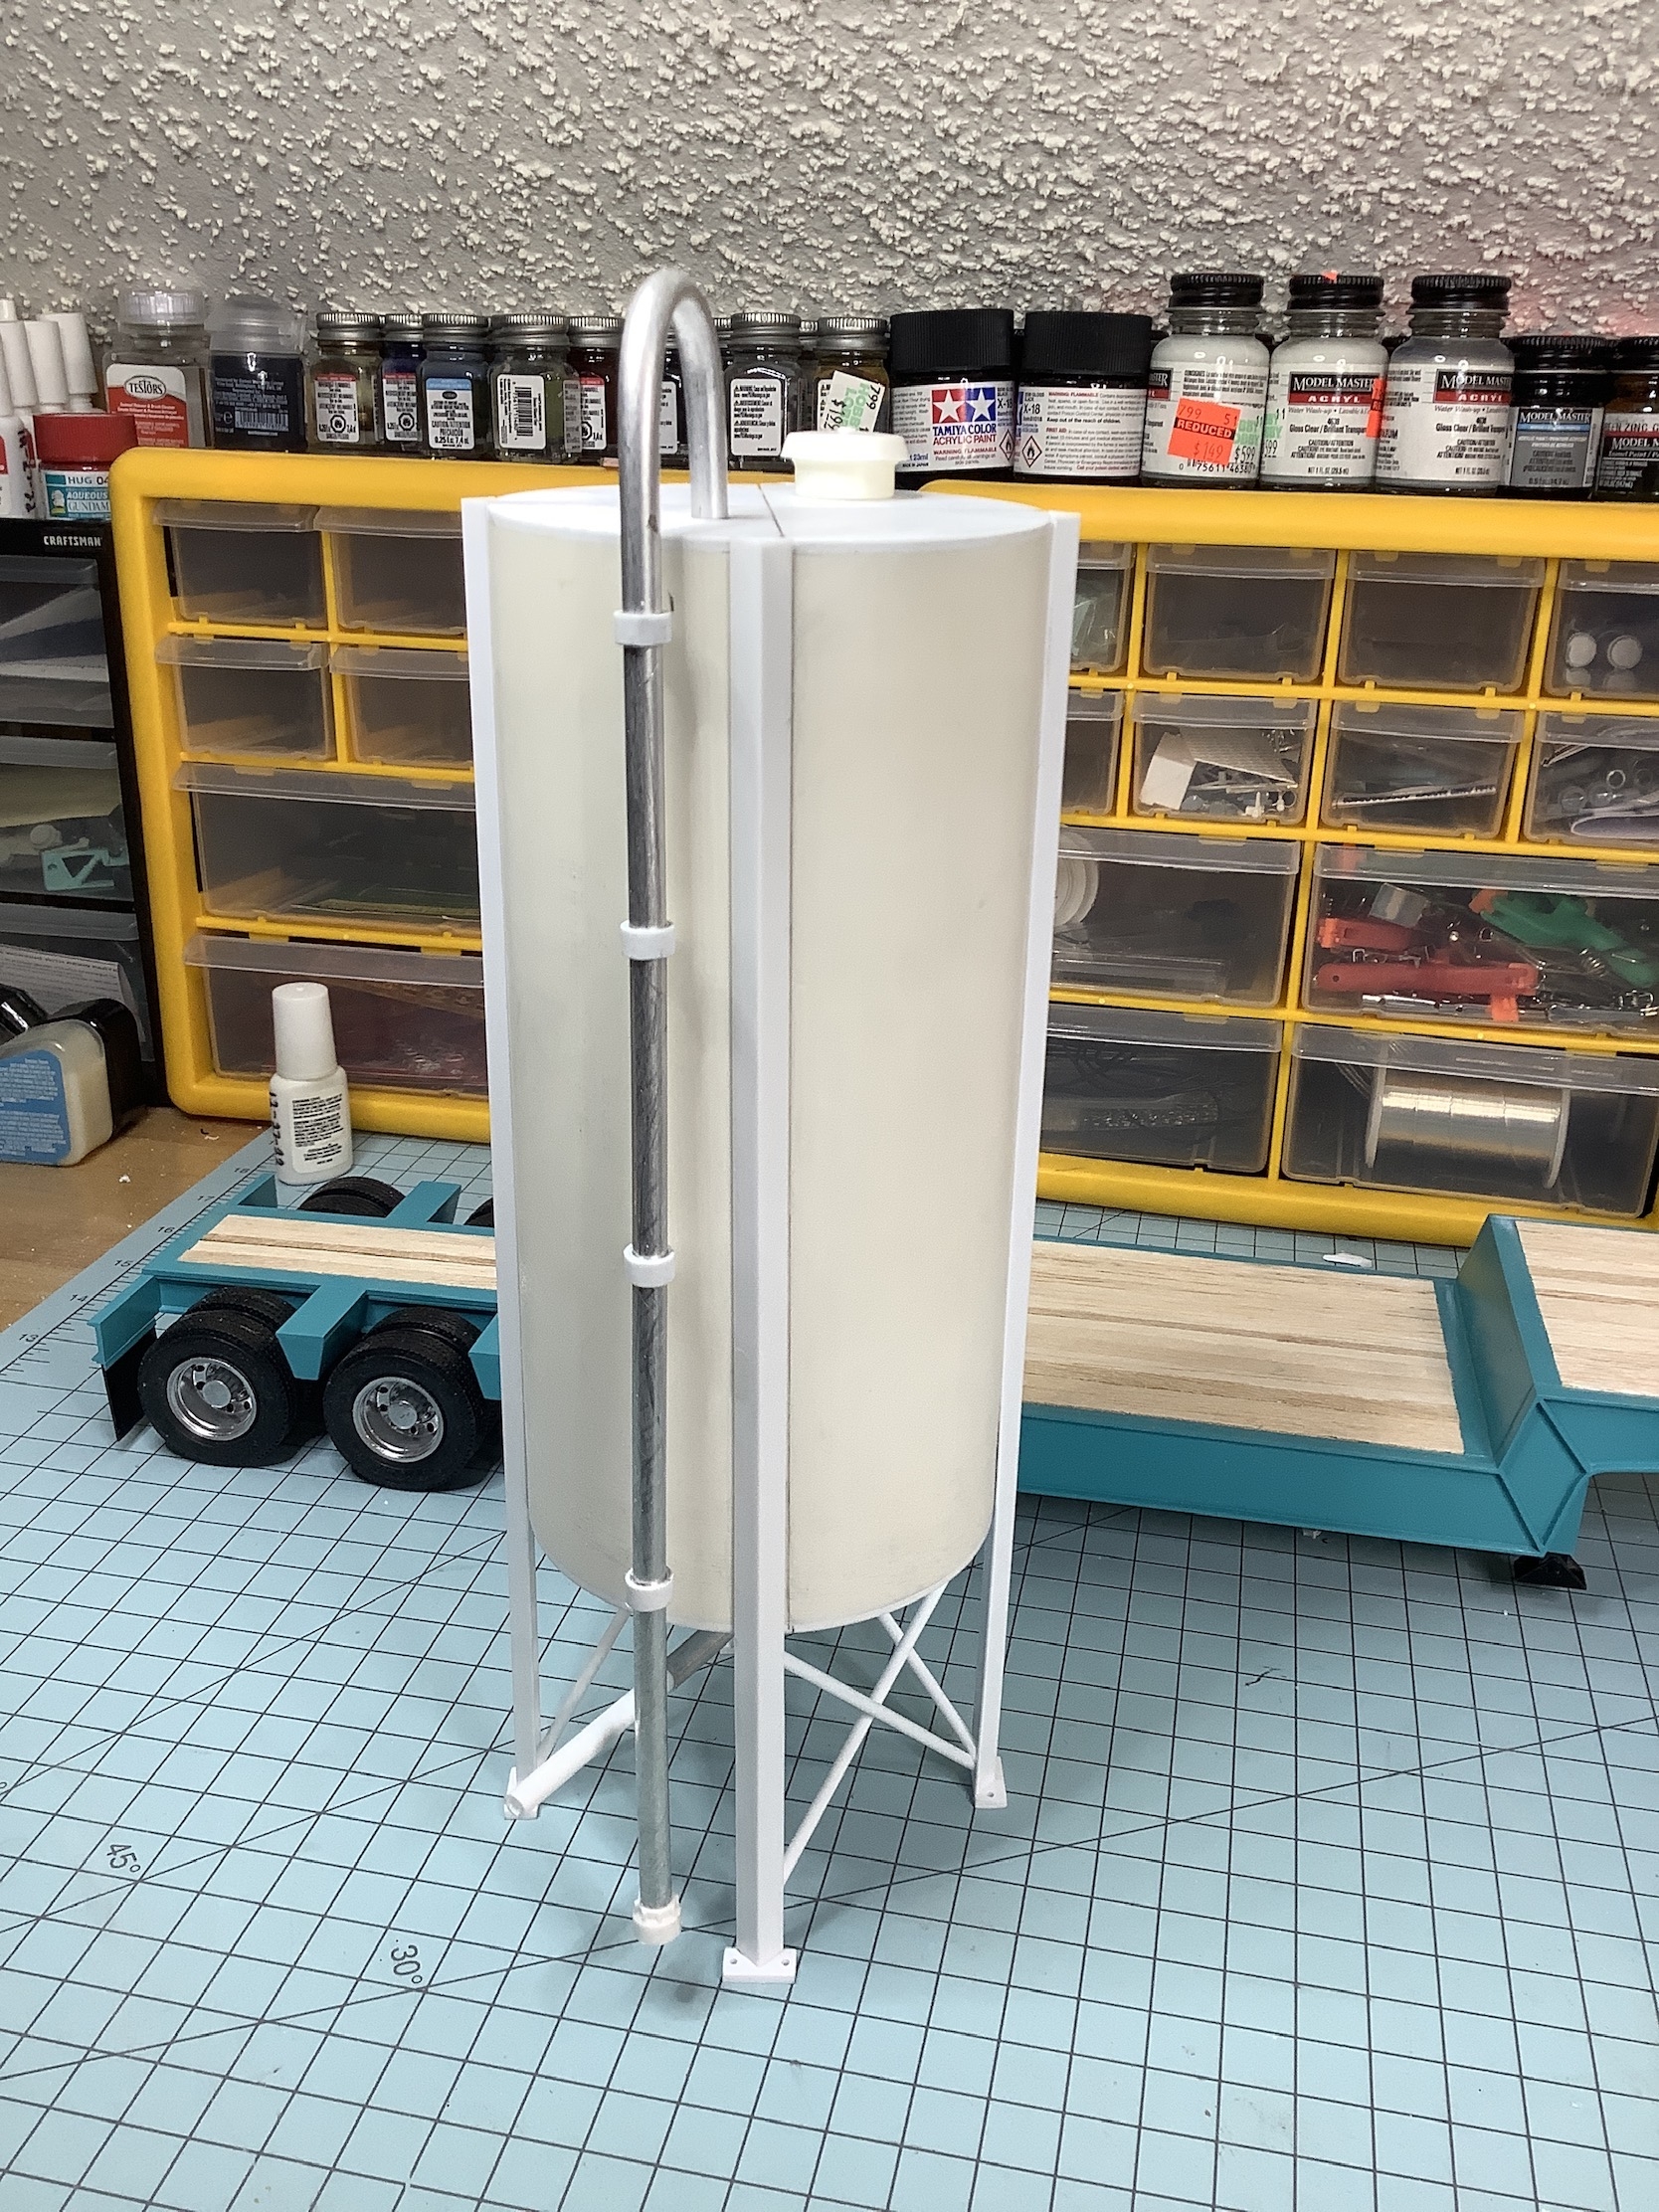
I will need to get some and try it next time, it was the funnel that looks to be made of polypropylene that didn’t stick.
-
1 hour ago, Brian Conn said:...been fallowing your progress with interest.....looks as if that tank was a build unto itself.
This was built as a medium duty tank, similar to what we used in the injection molding industry. I think if I did another tank, I would change the design some to reflect the size I built. I wanted to do a hopper bottom although I tried several funnels. None of my glues would adhere to the PVC walls.
-
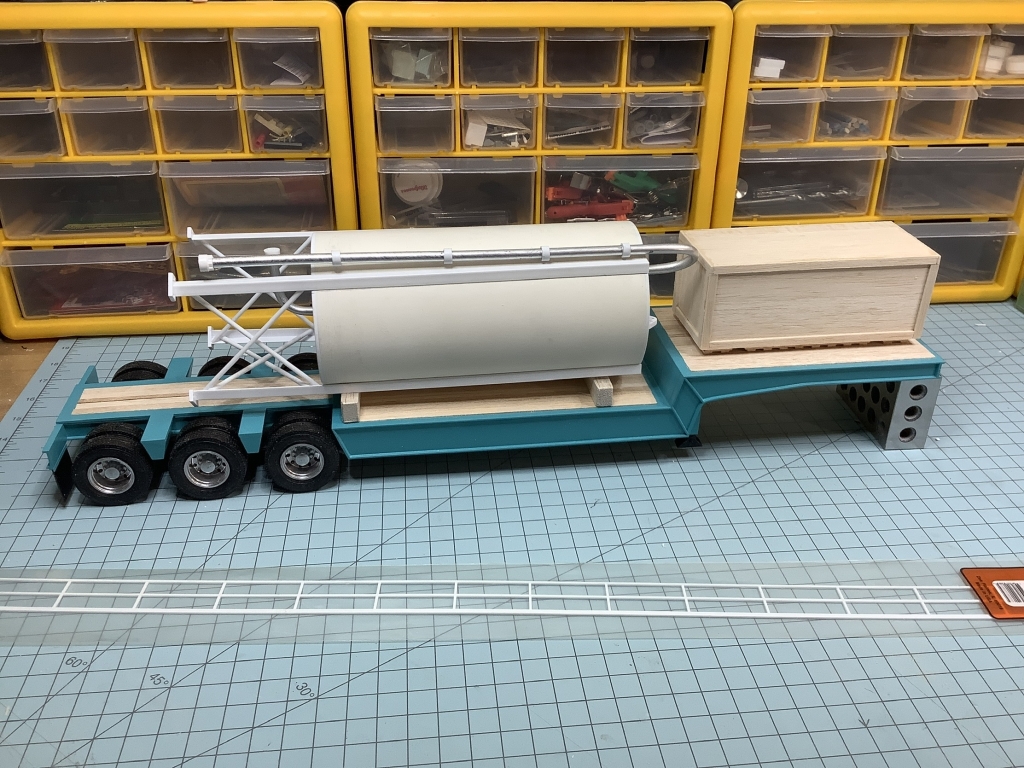
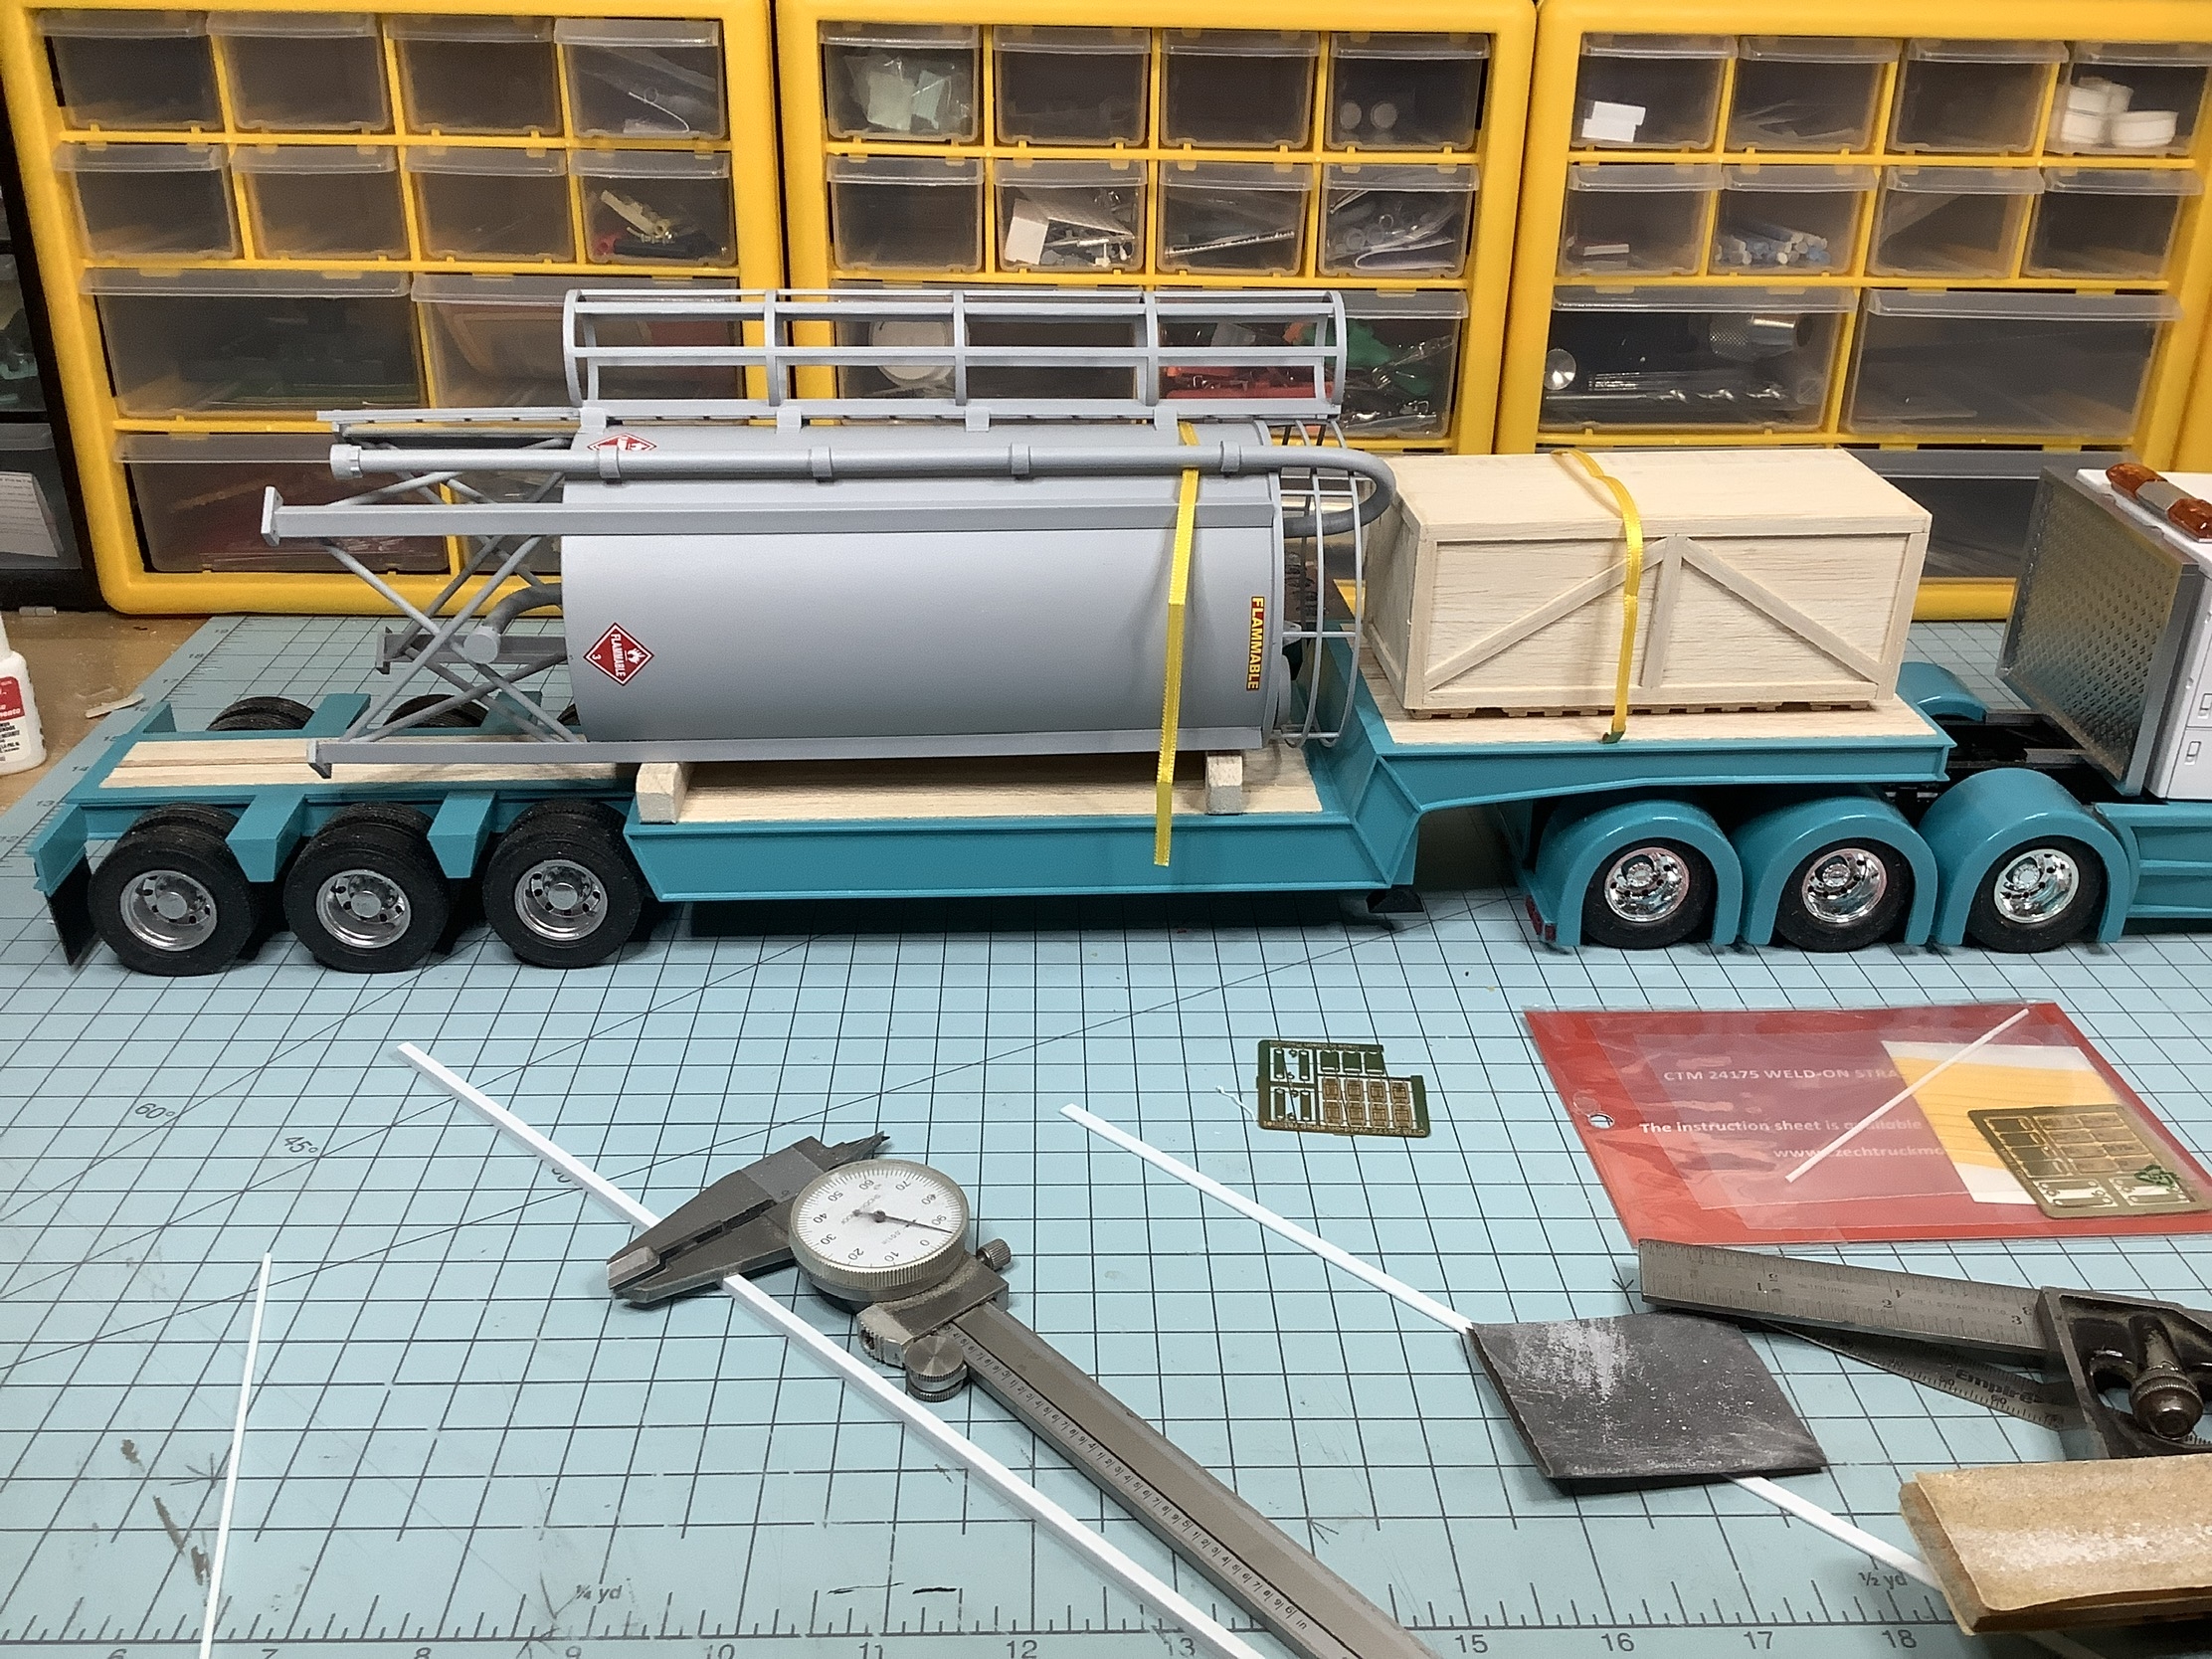
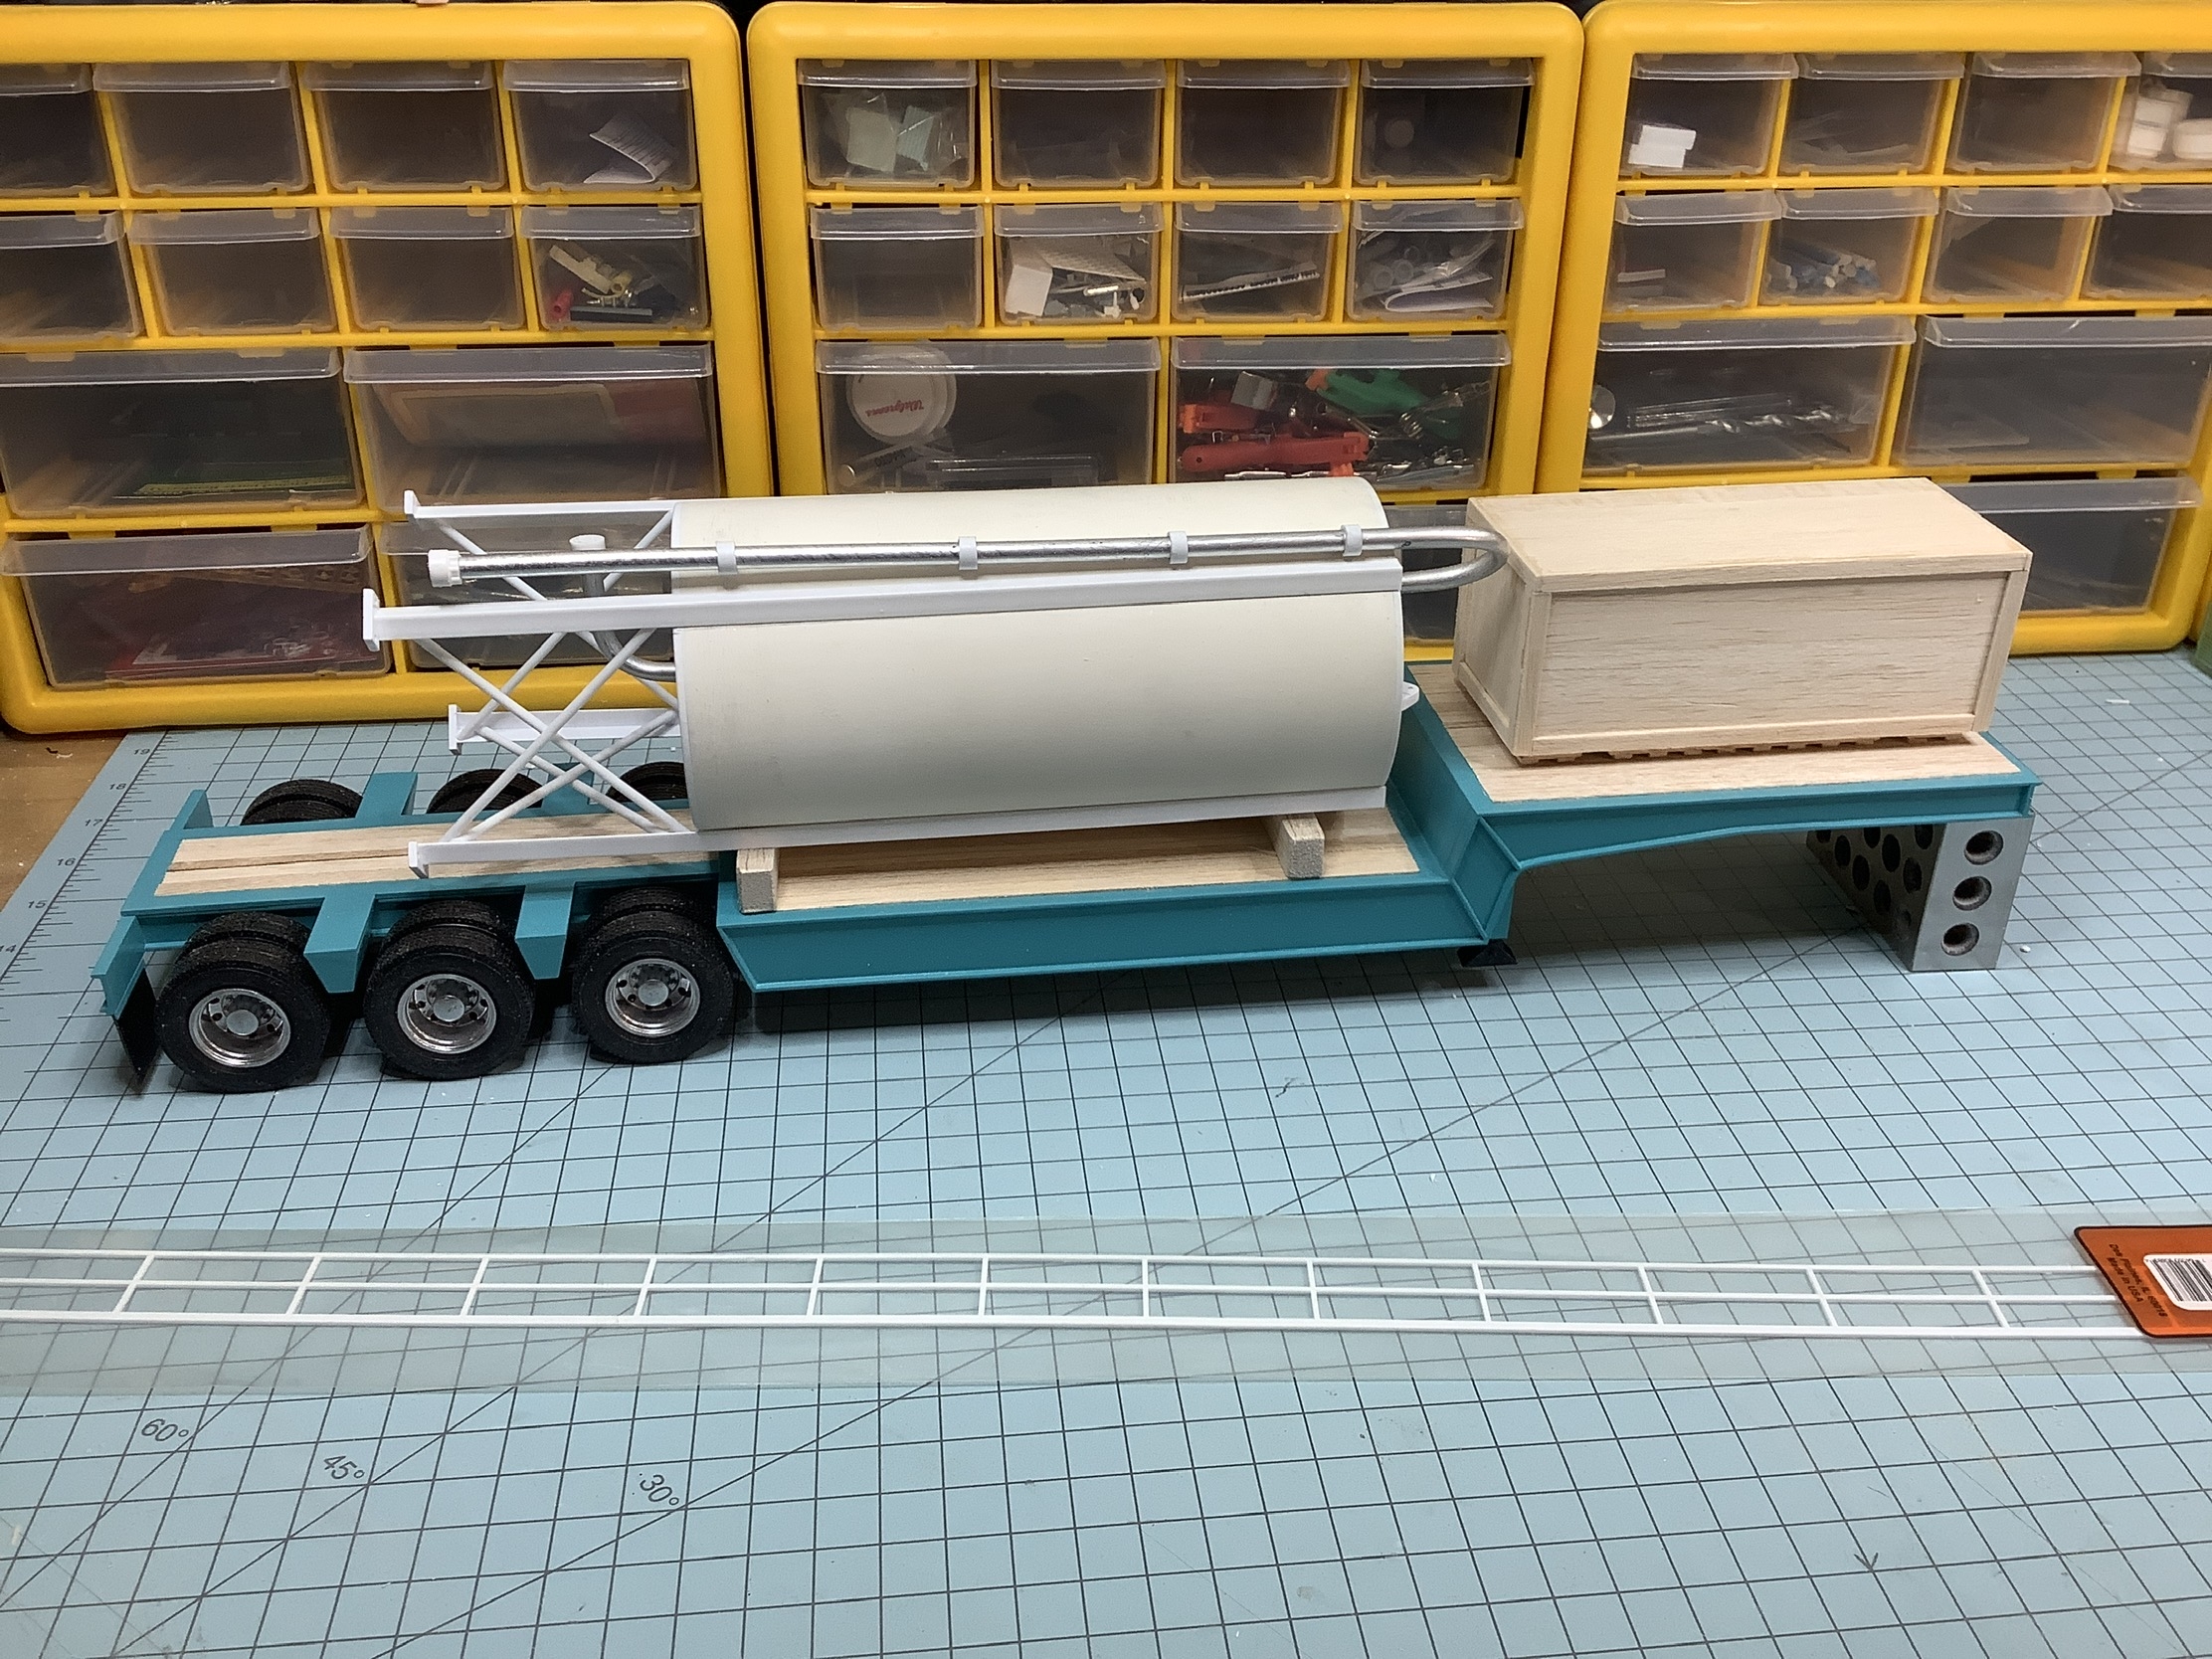
Tank is finished, maybe a couple detail things, but done. Now to make up straps and add strap bars to the trailer.

-
 1
1
-
-
9 hours ago, vincen47 said:Wow, that tank is impressive!
Thank you
-
Looking really good.
-
 Tank is together and in primer, tomorrow sand and finish color.
-
1
-
-
Some progress today, still waiting on ladder and safety cage.
-
1
-
-
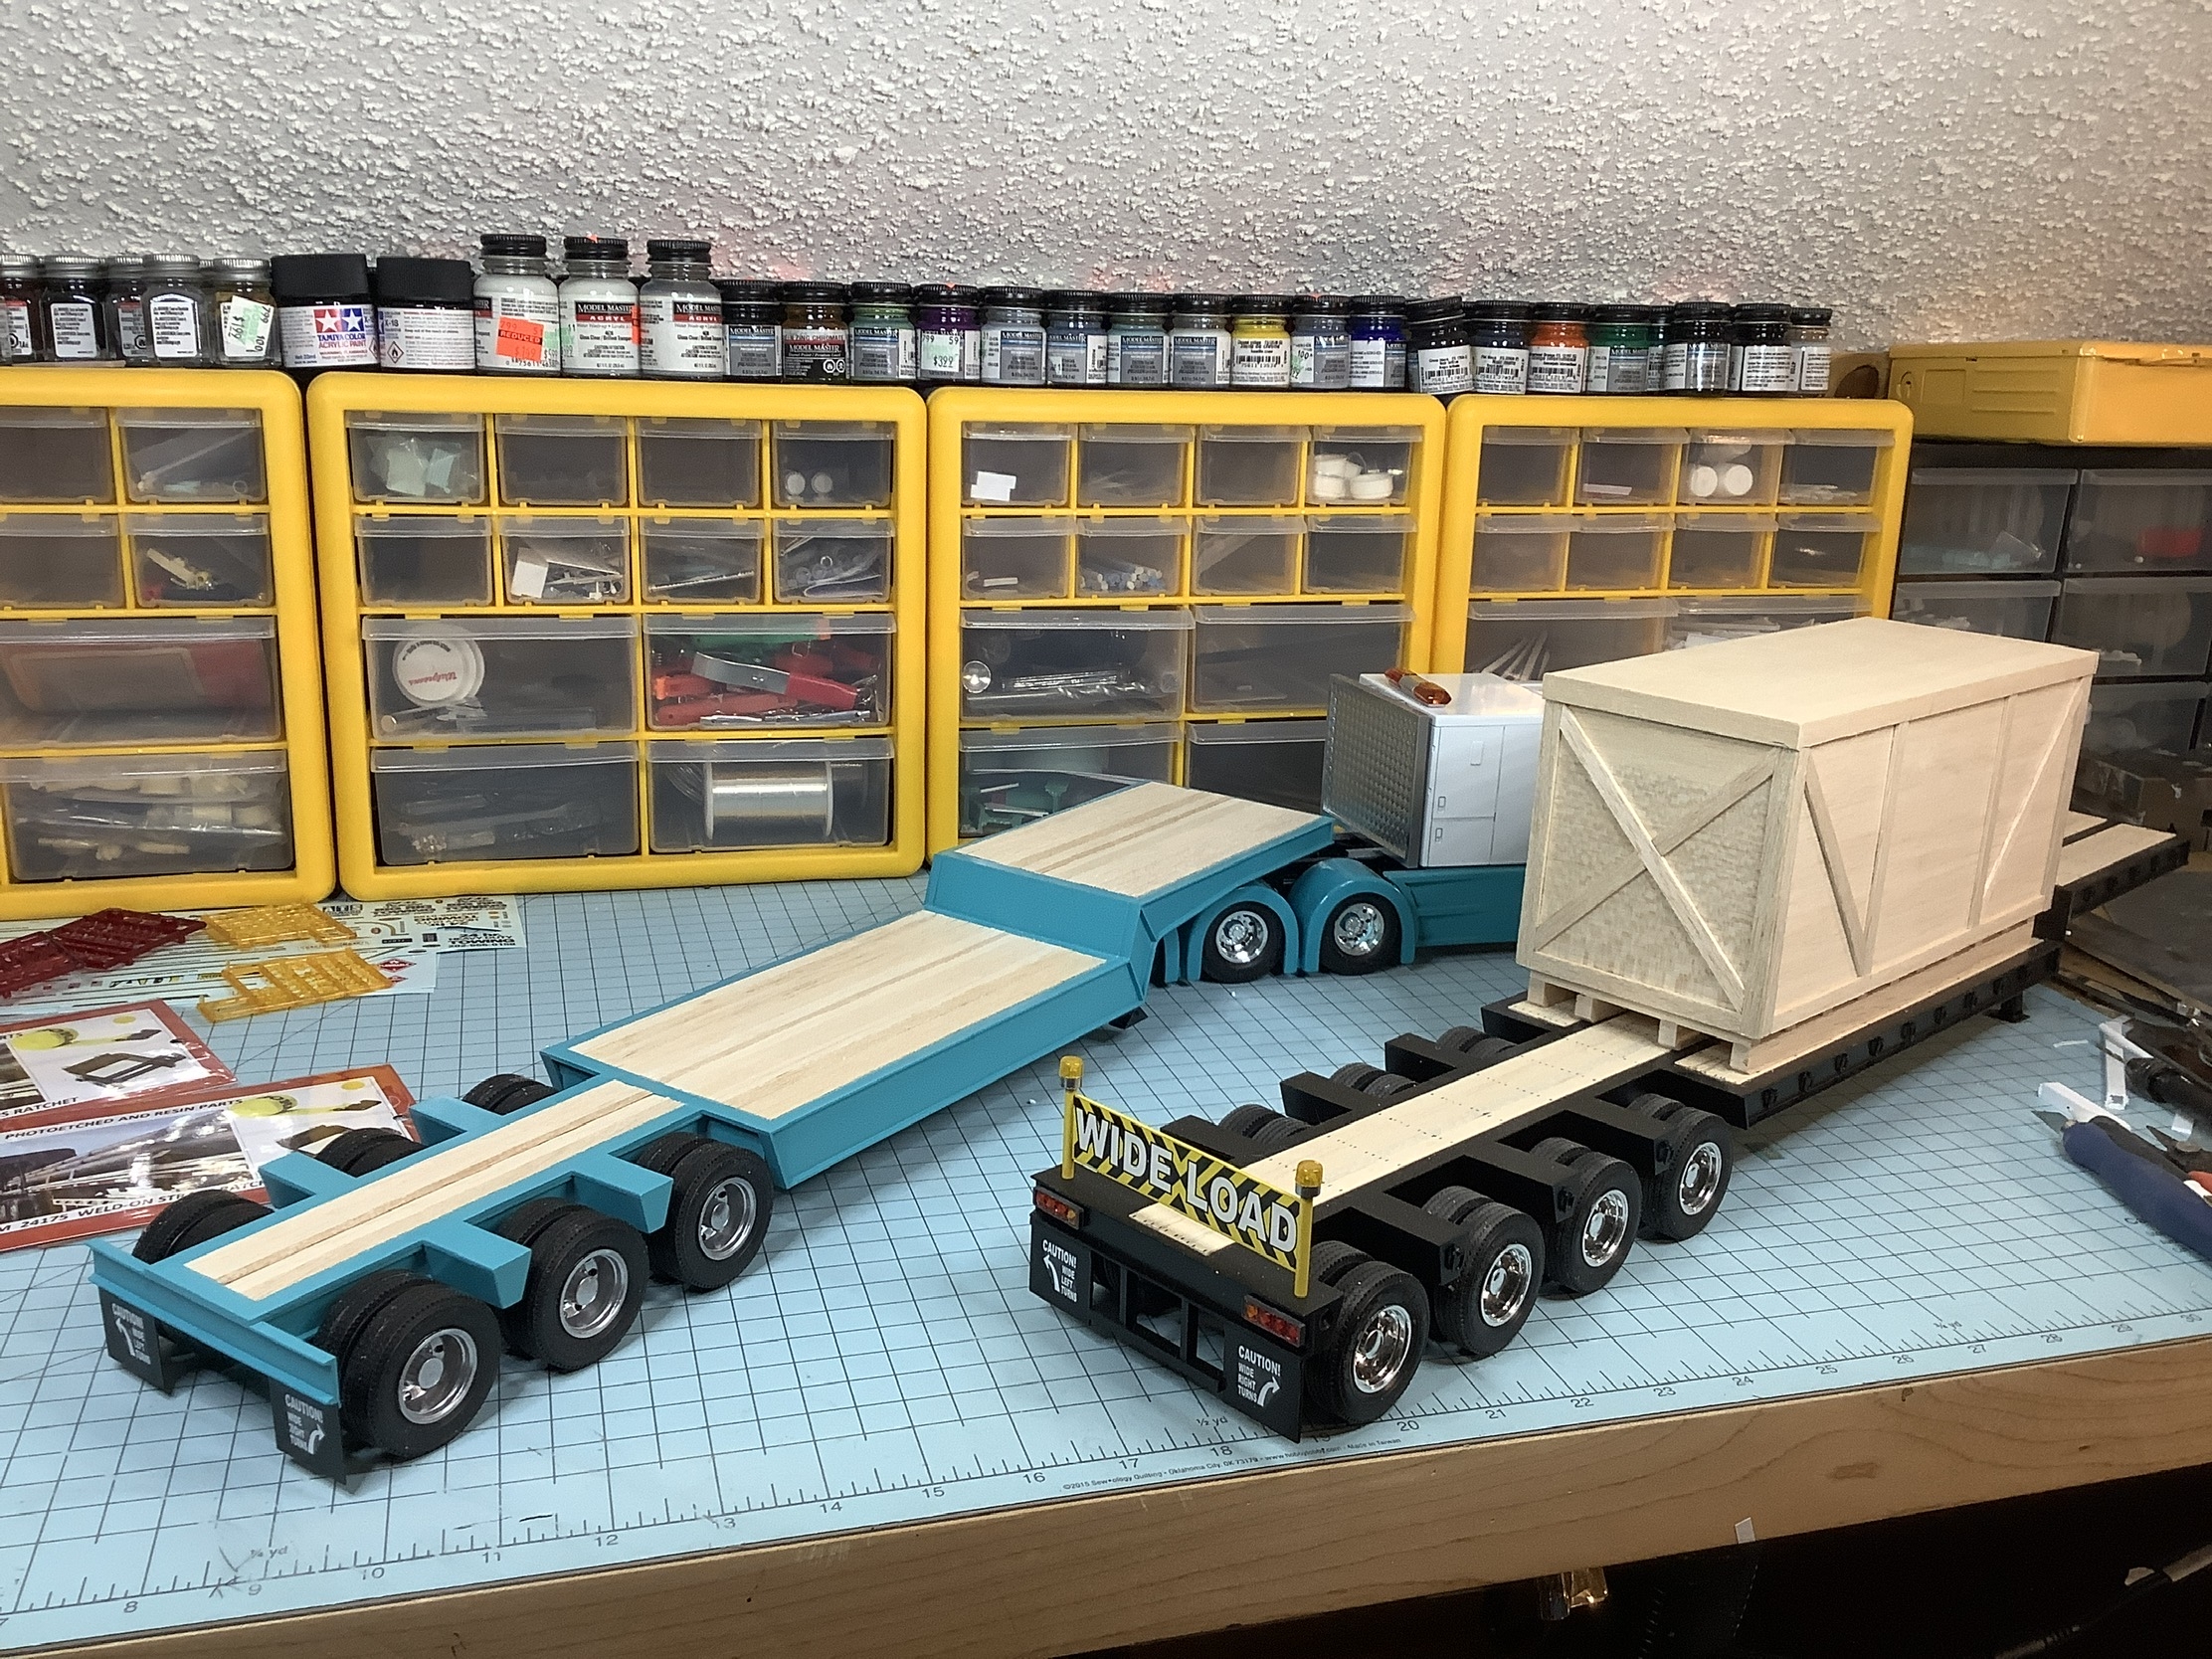
Started building a tank that will be used as the trailer load.

-
1 hour ago, Johnny M said:Ooo -- lovin' the emergency lights on the roof!
Johnny
Thanks, probably going to do something on the rear of the trailer as well for a flashing yellow light. Similar to me 53ft trailer.

-
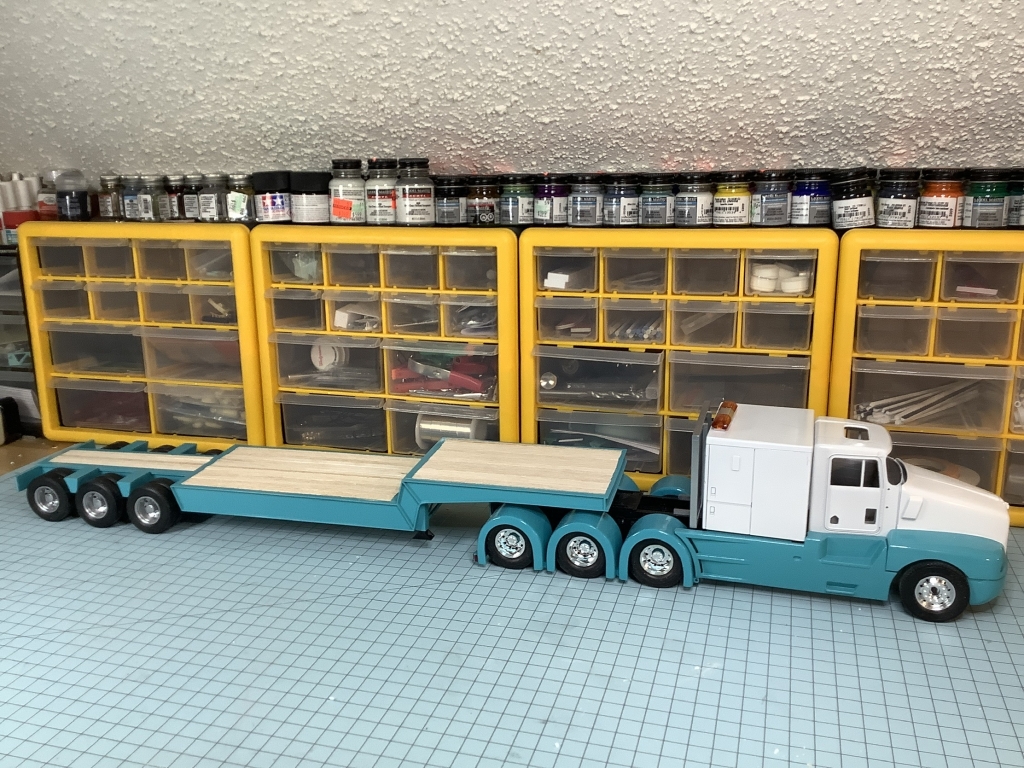 Decking cut but needs some fine tuning, paint on. Next, lights, decals and some additional details then back to truck.
-
1
-
-
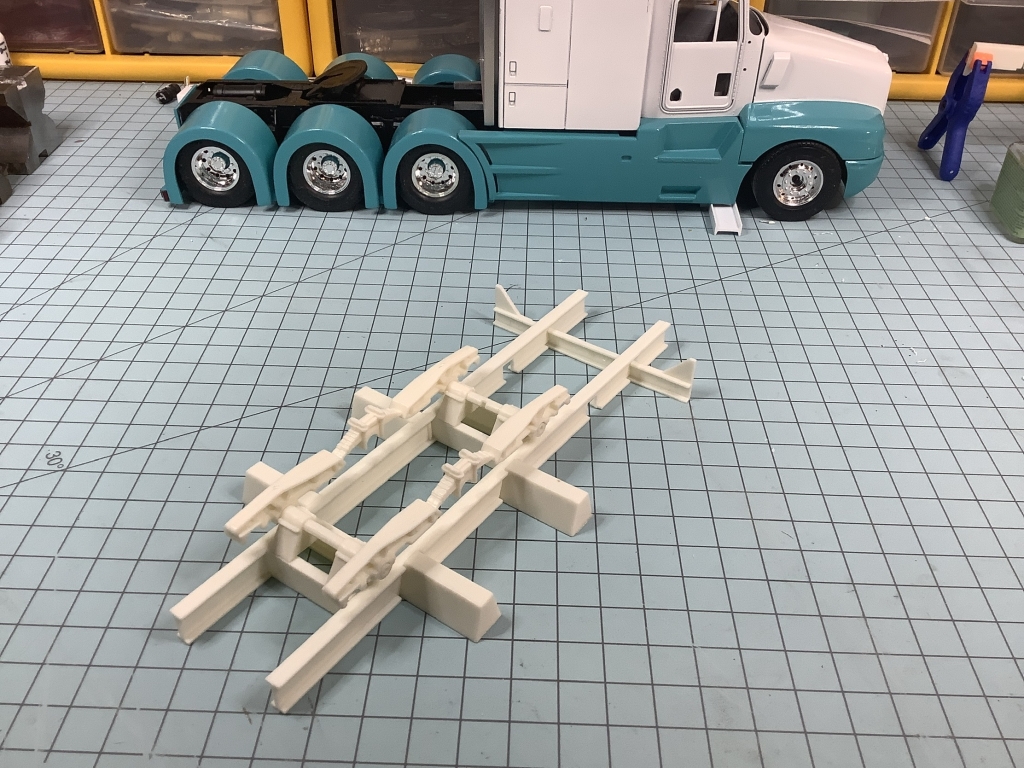
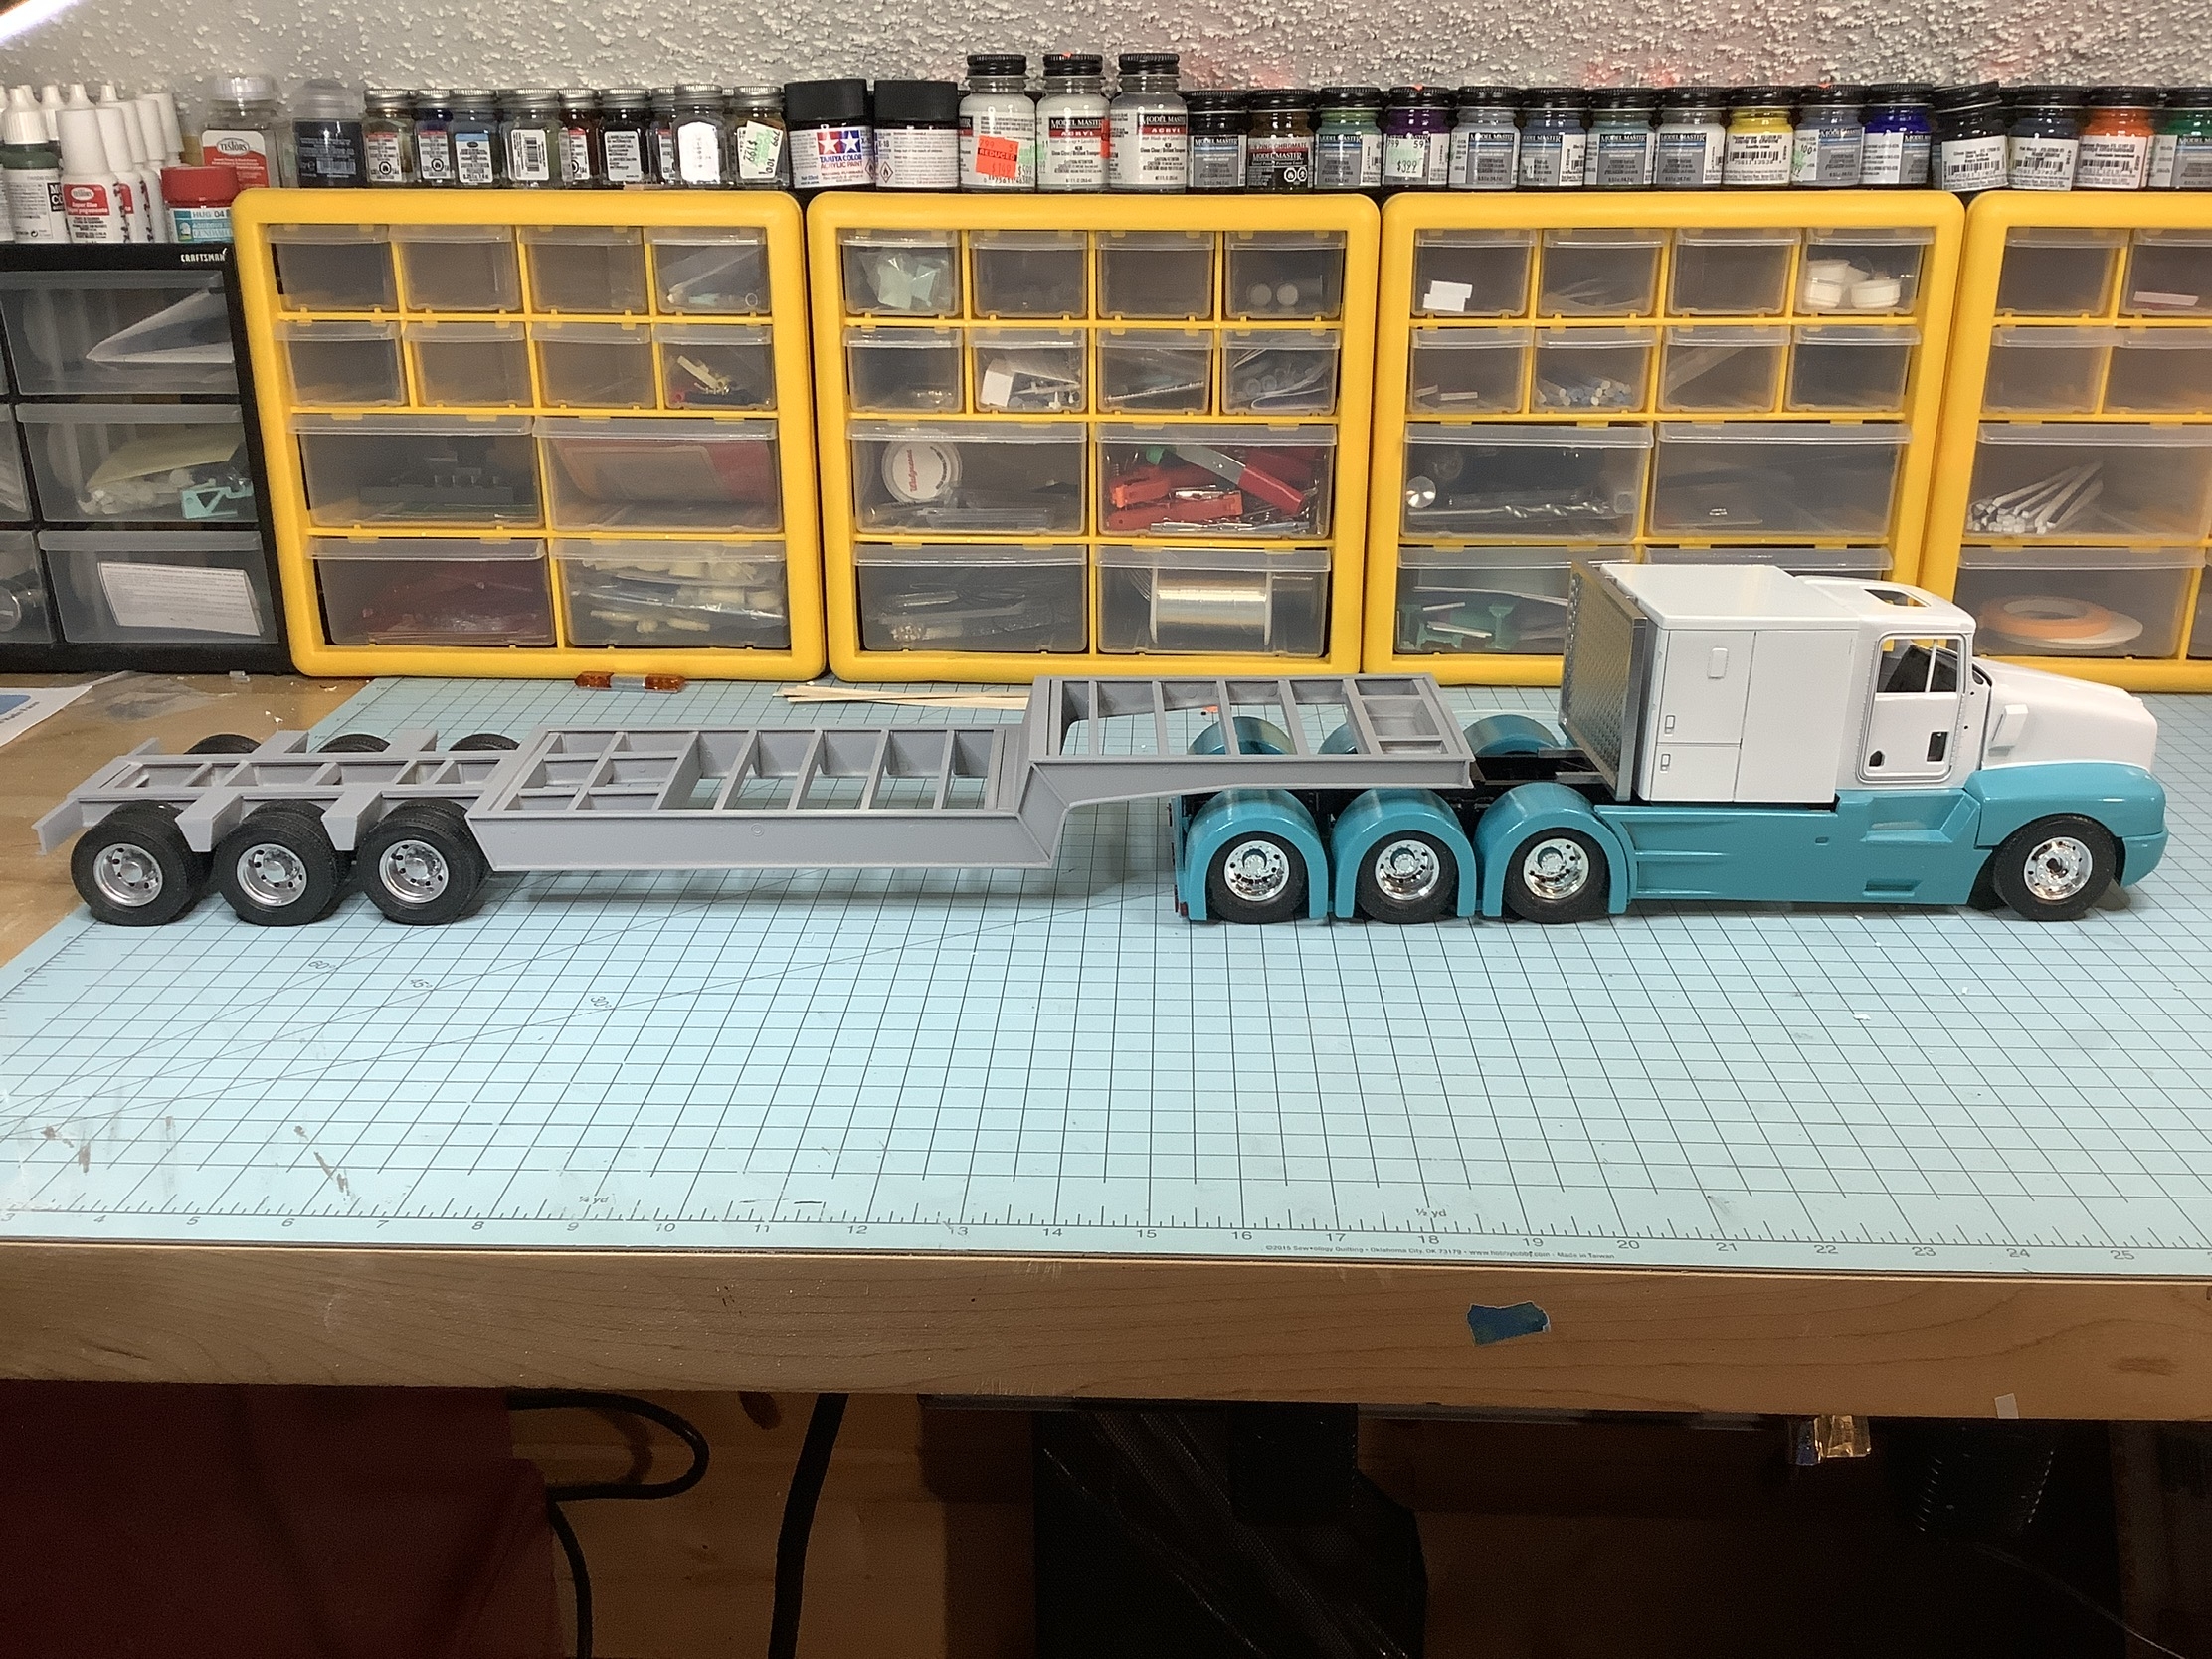
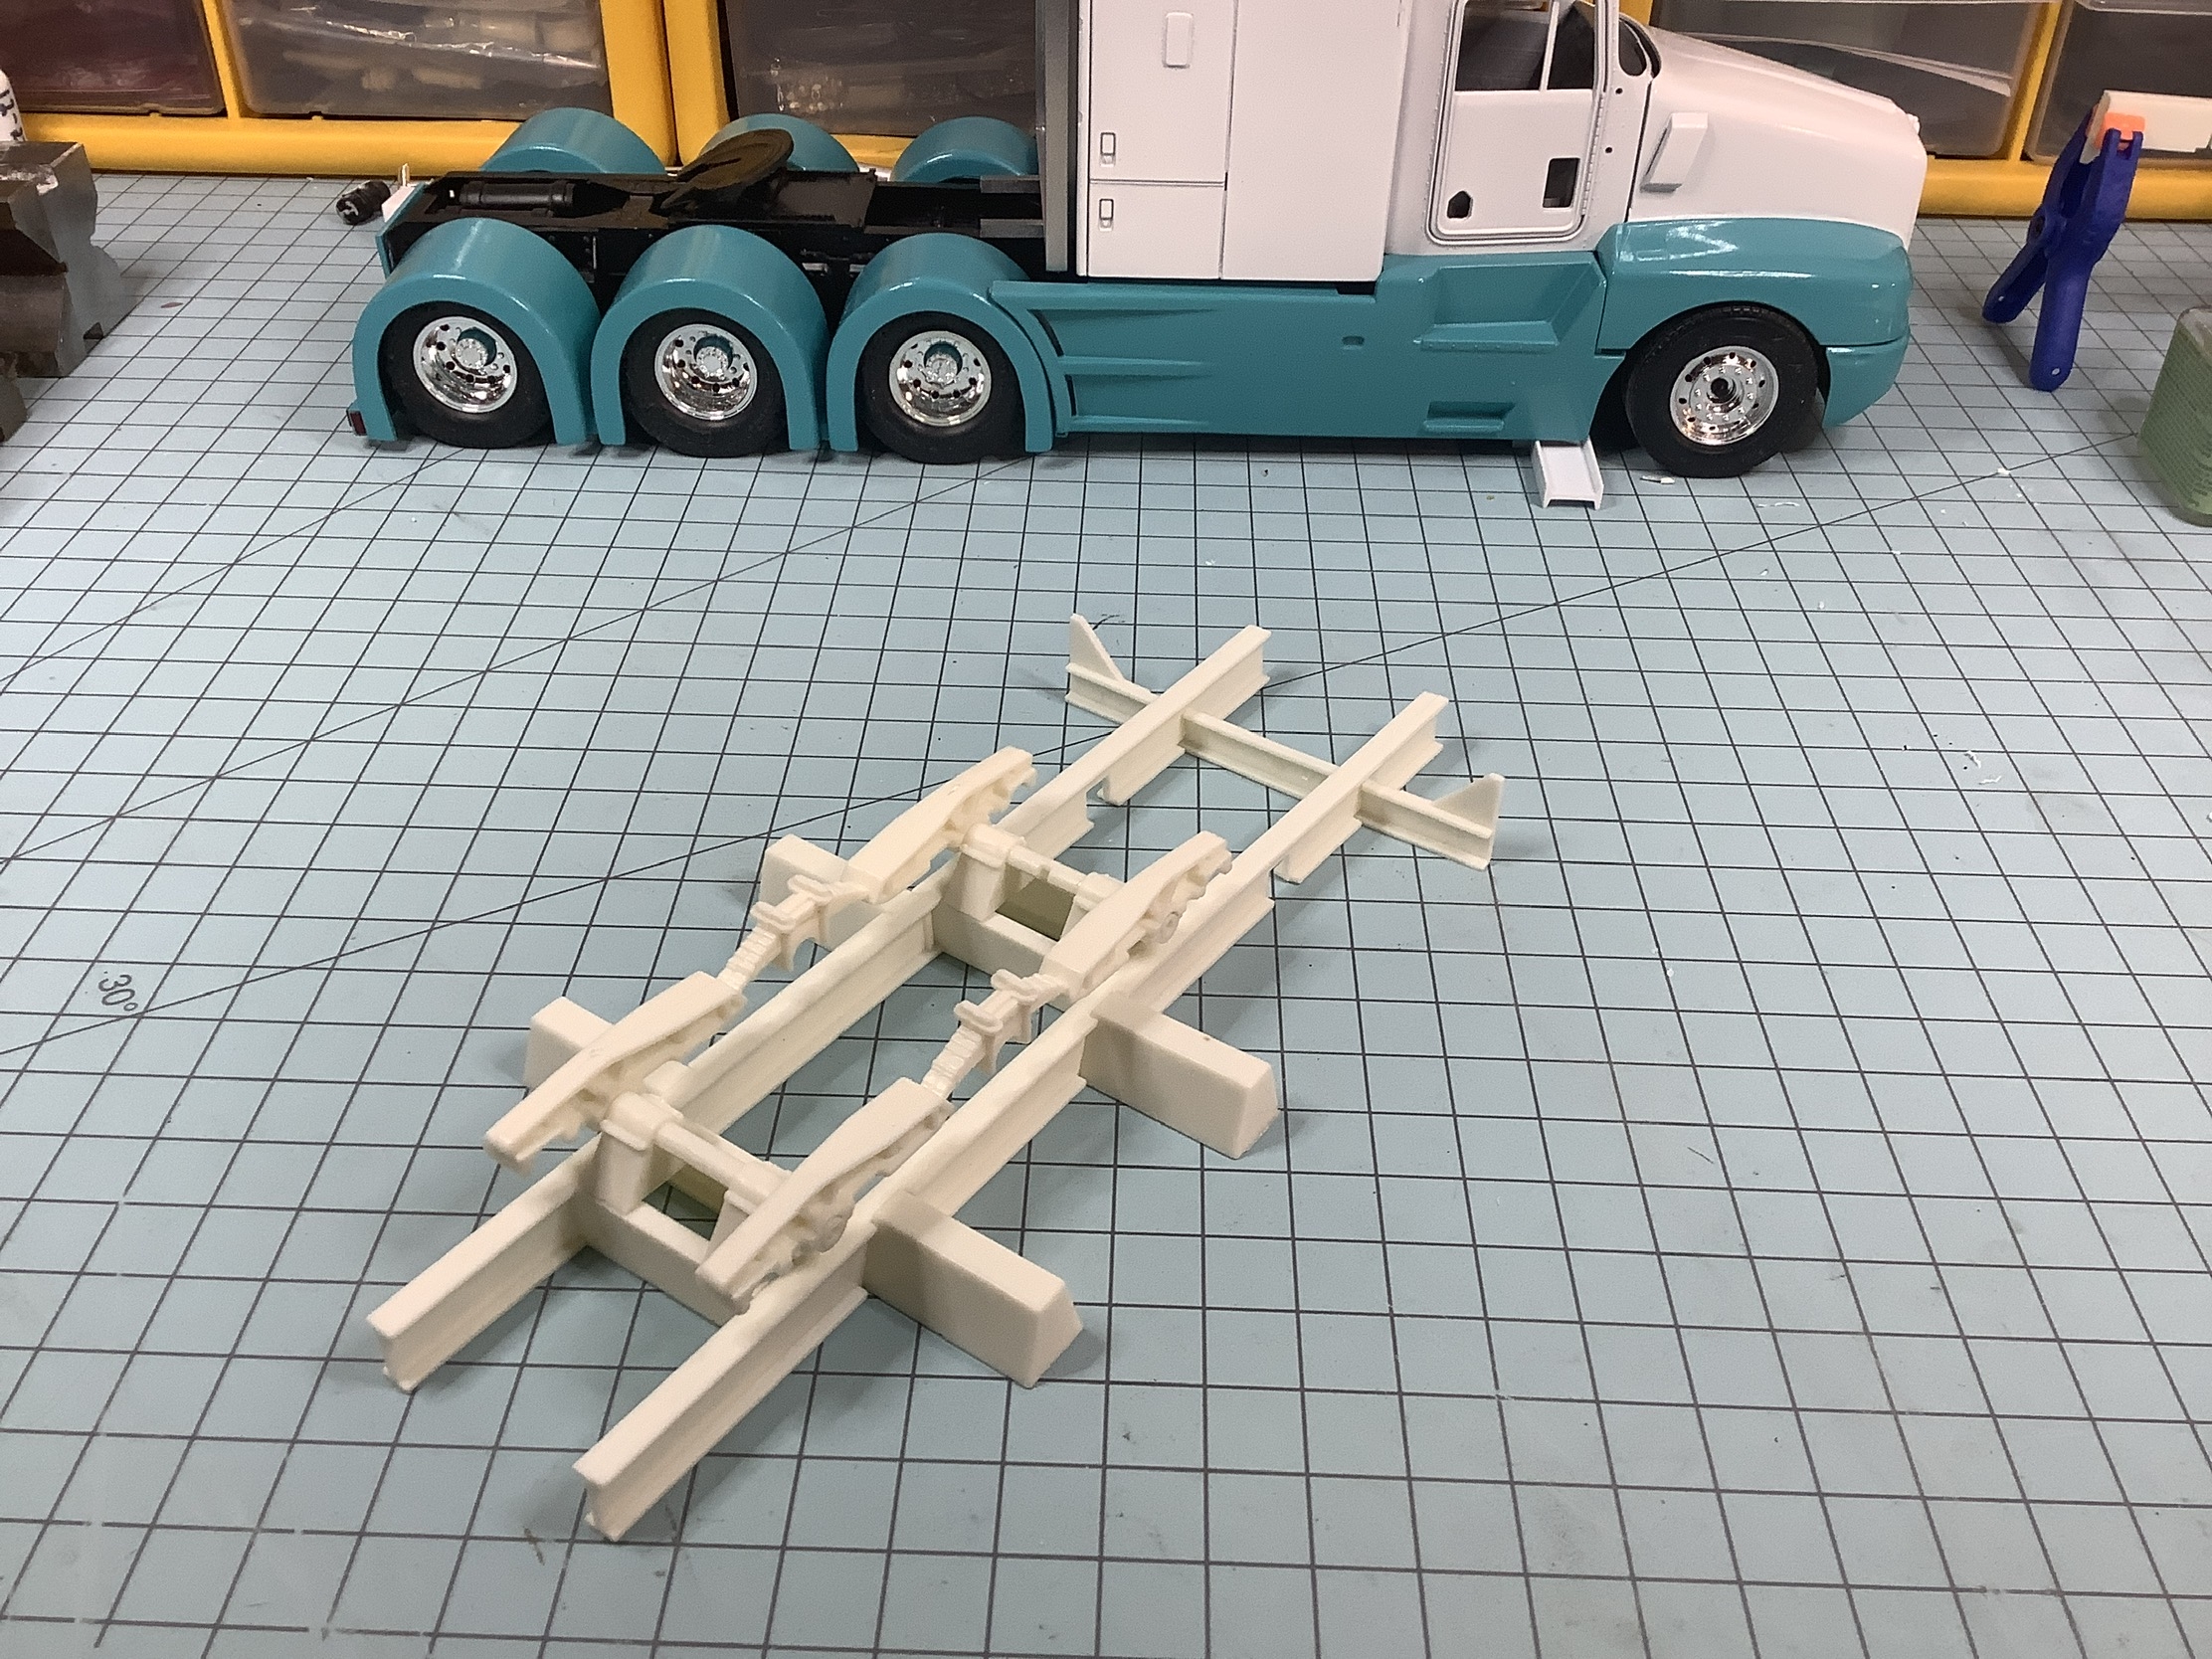
Fab work nearly completed, didn’t realize the kit has no dolly legs so I got to fab some up. Some finish work on the frame then color.

-
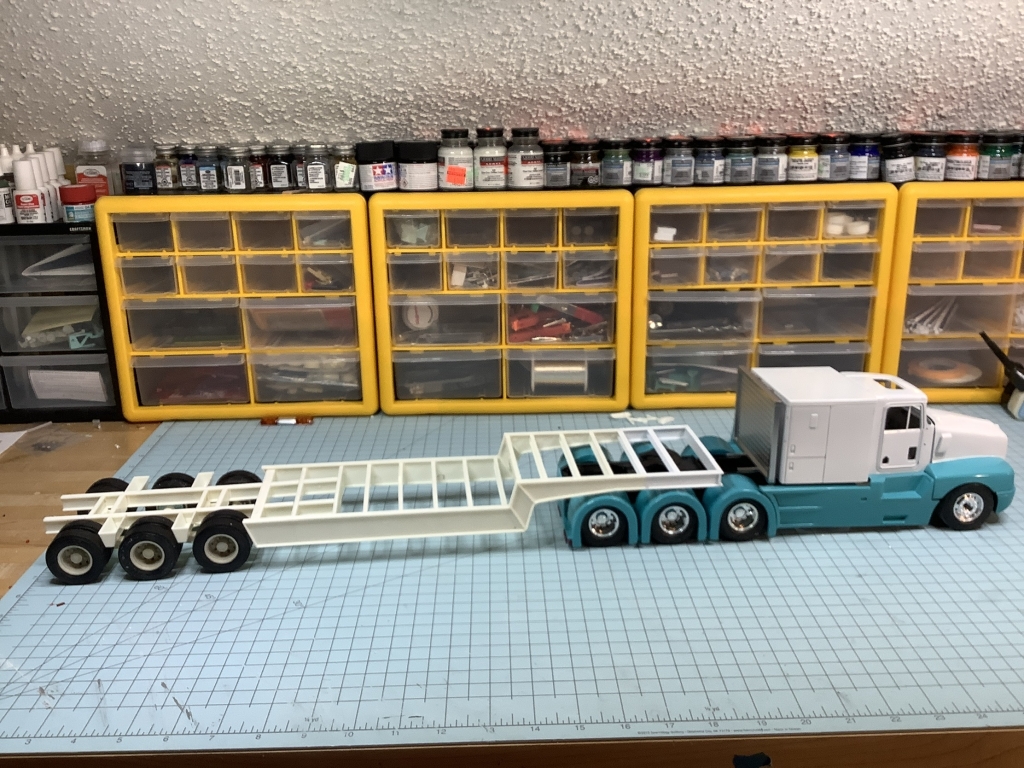
Trailer frame coming together, wheelset built.
-
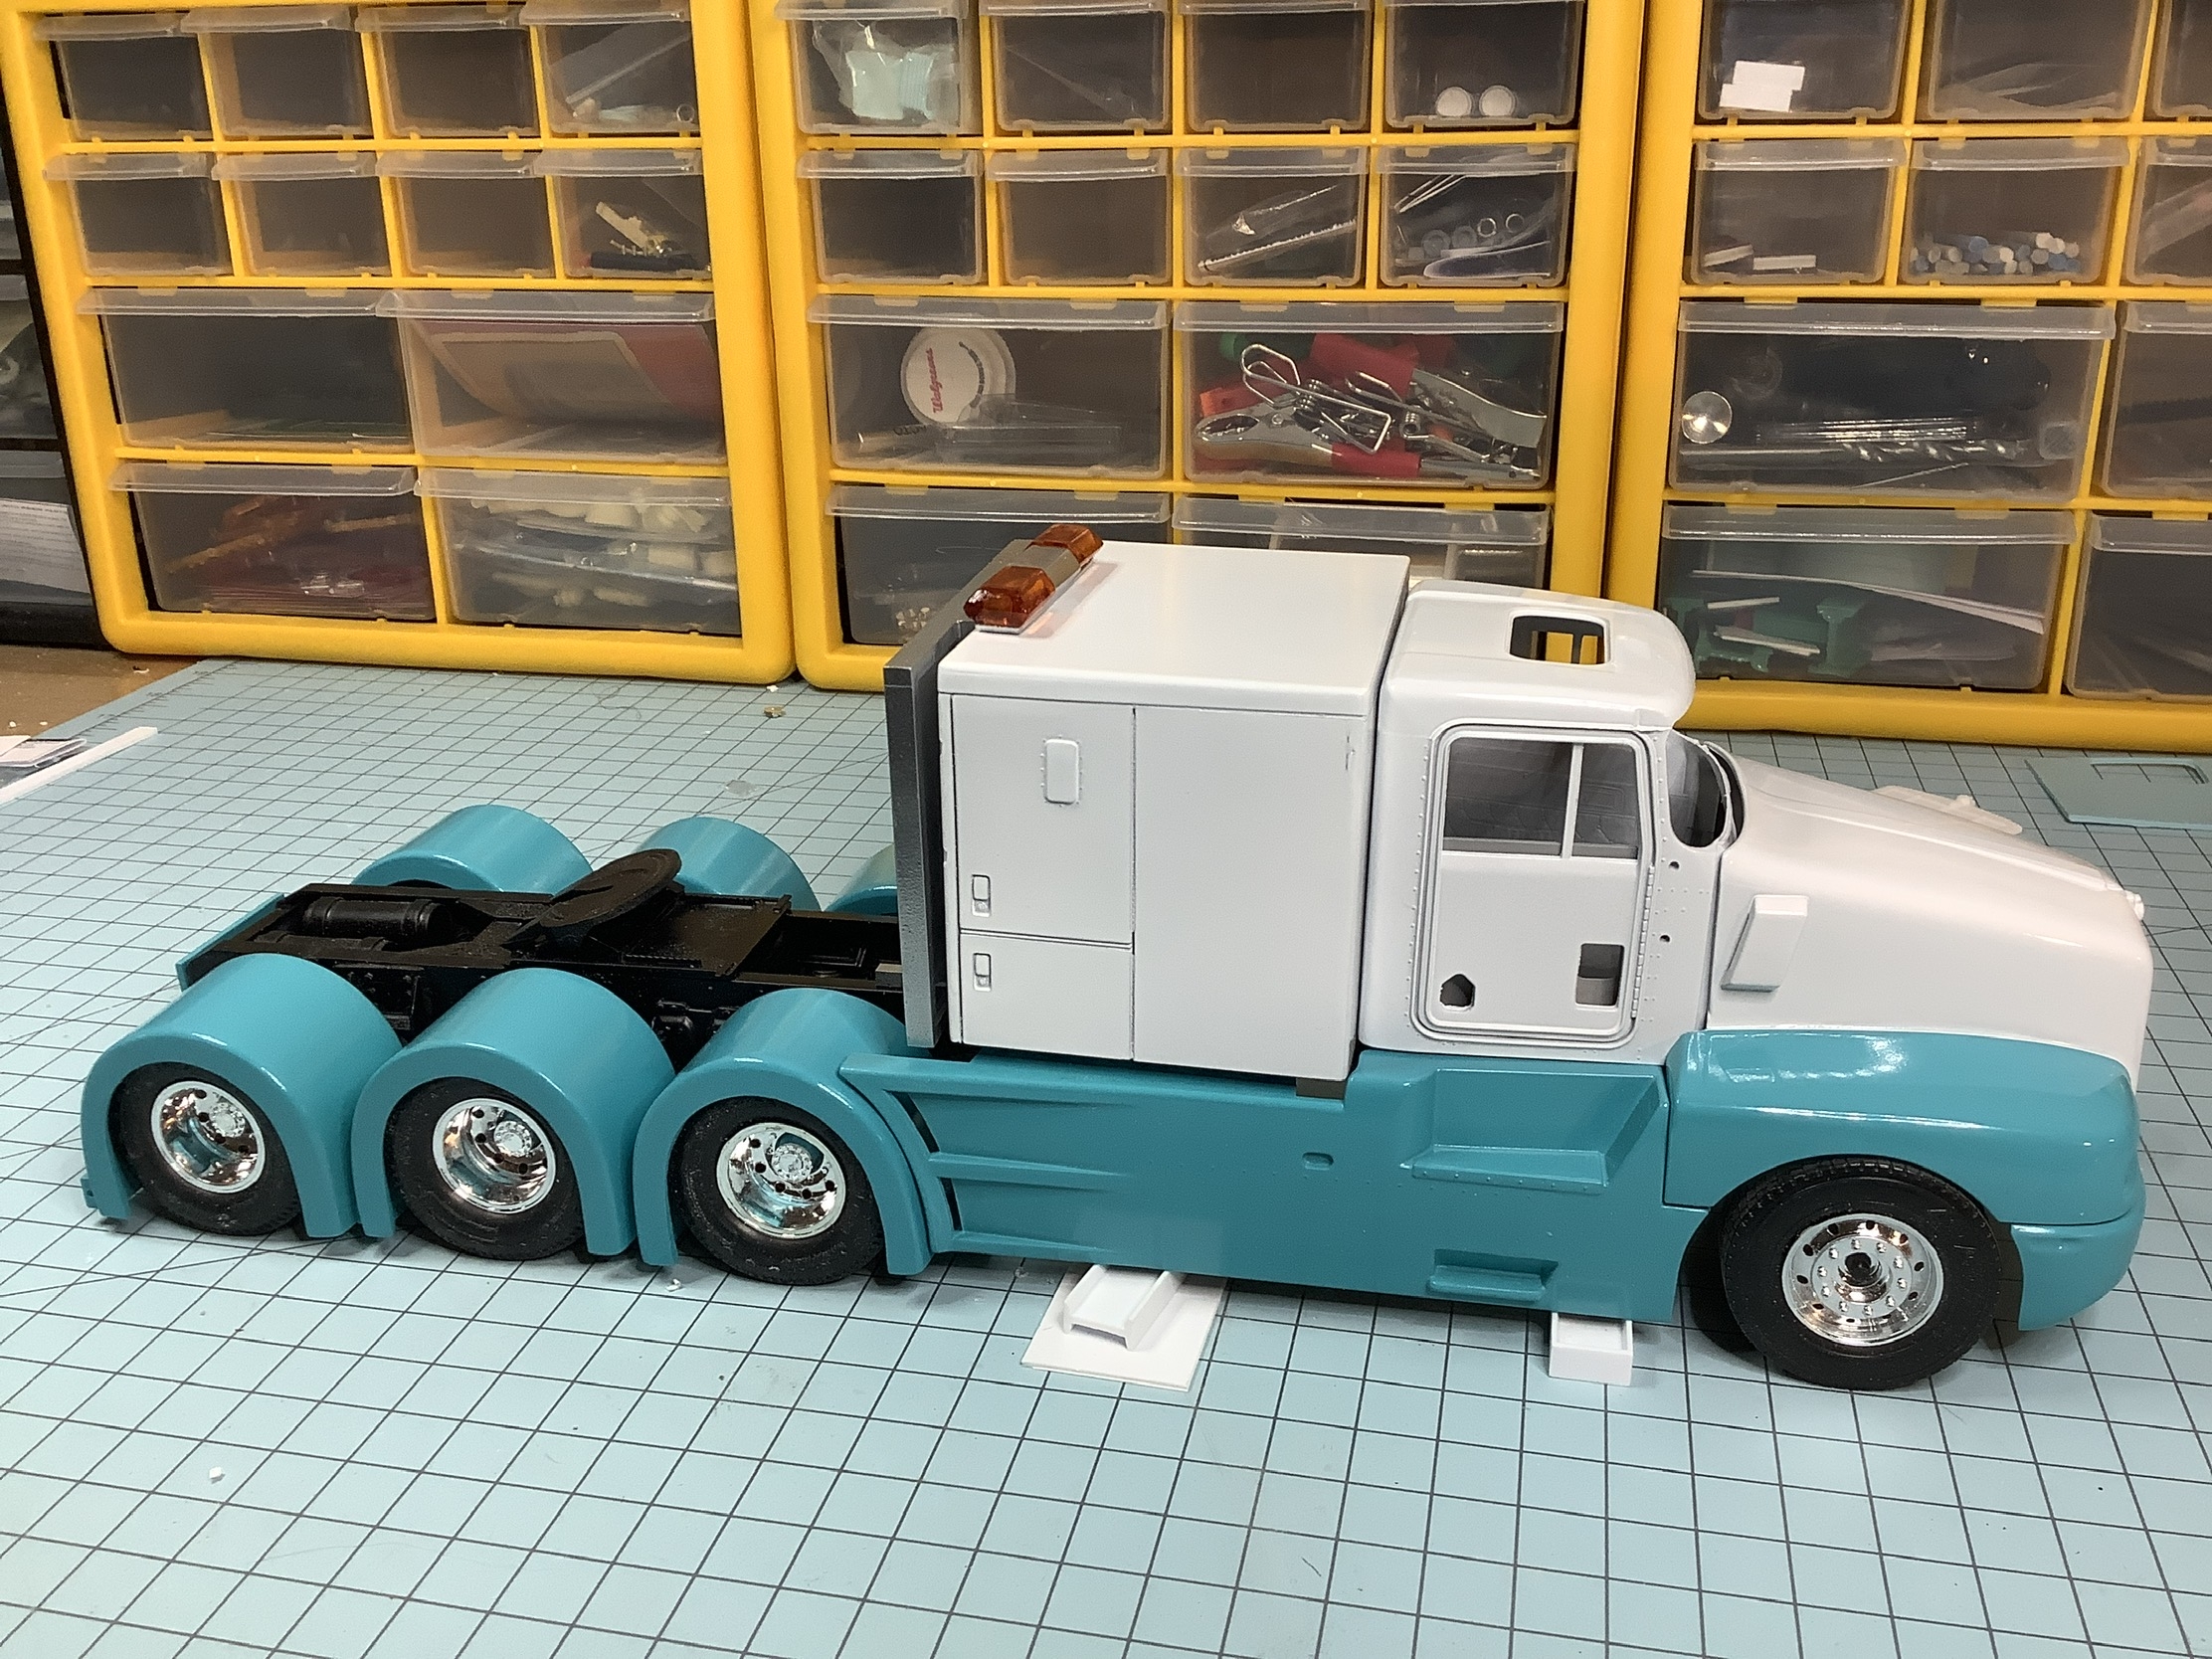
Took a break from the truck today and started the trailer build. Using the AMT Lowboy kit as the donor. Will not use the beaver tail, will stretch to 40ft. Build a set of 10 hole wheels. Paint will be turquoise for the frame and semi gloss black for suspension/axles.
-
1
-
-
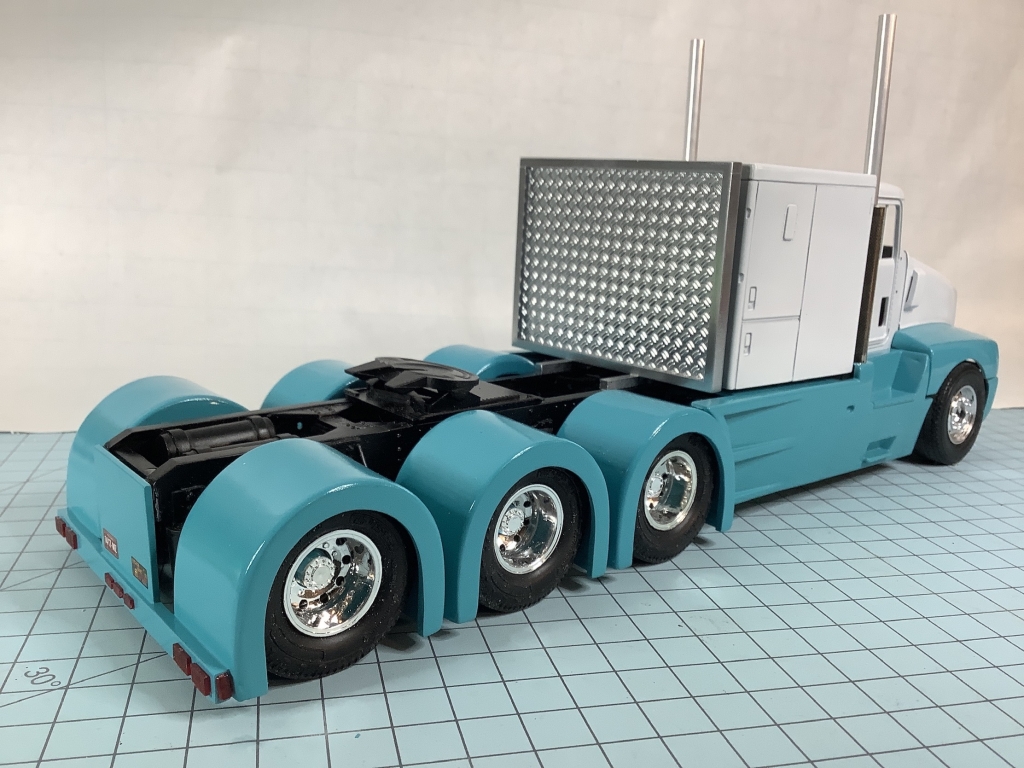
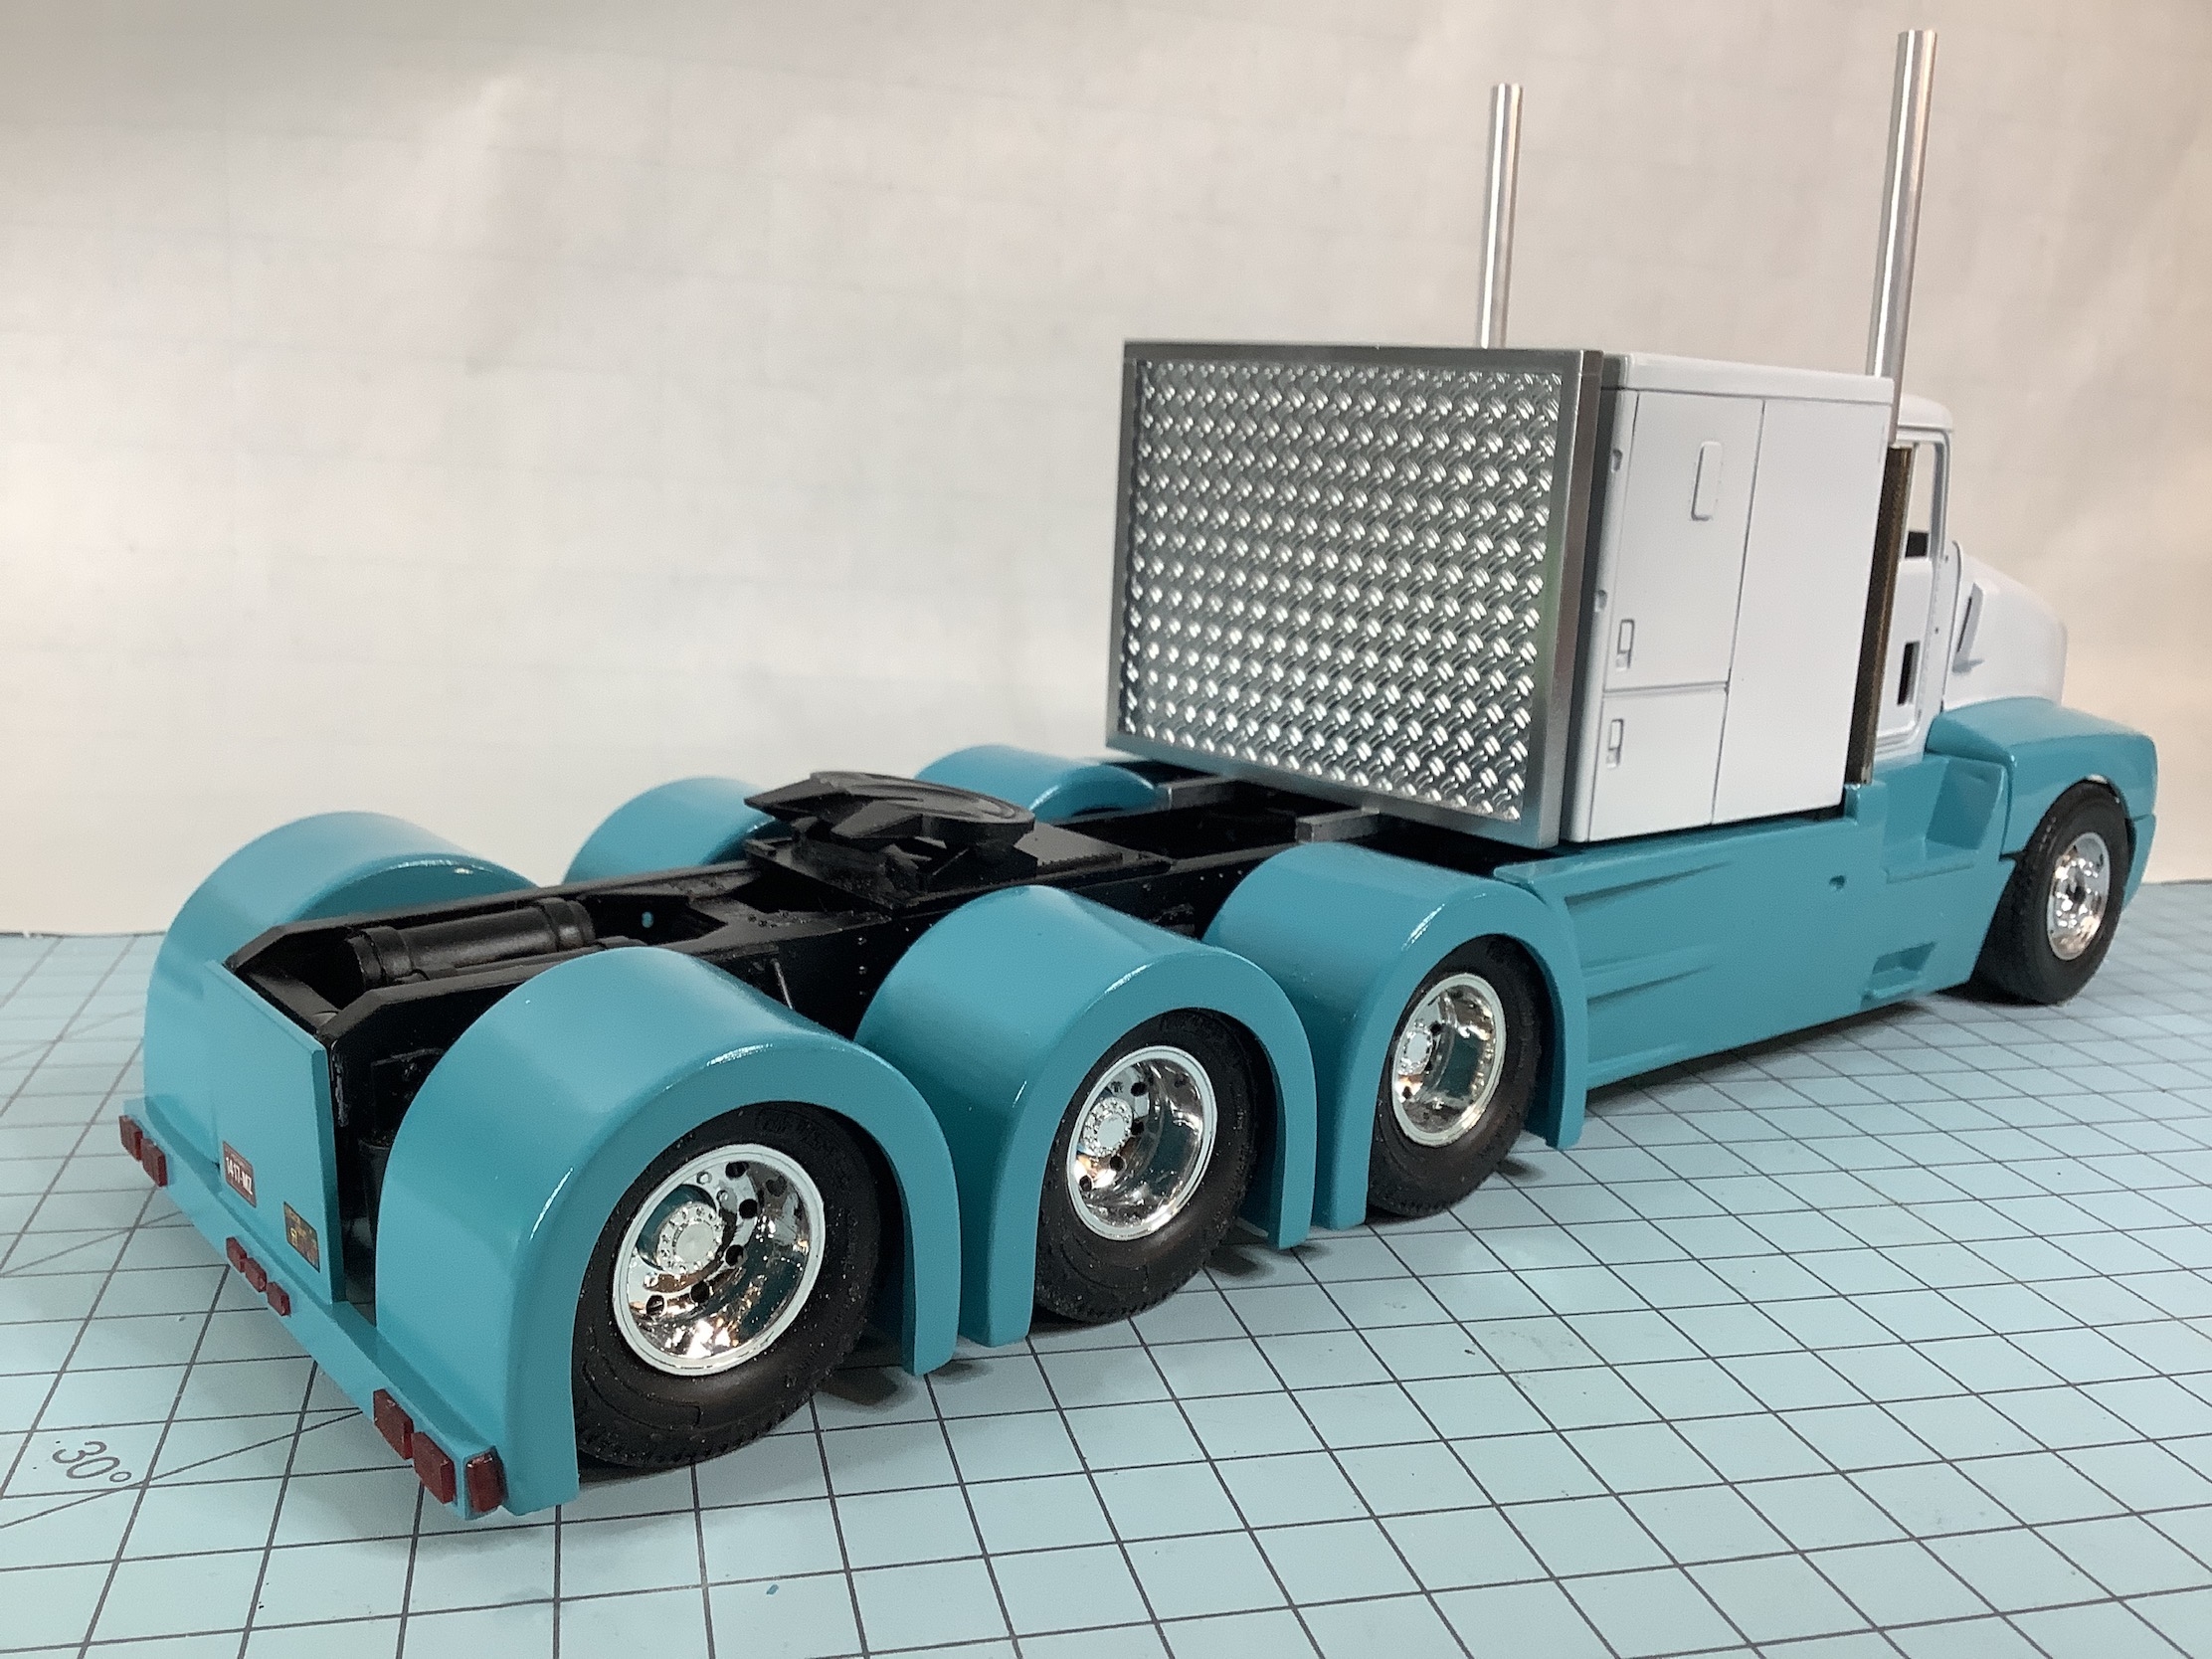
Rear fenders mounted, lights on, custom fuel tanks mounted, built aero skirt supports and mounted them. Think I will shorten the exhaust, but making progress. Finish up interior and cab next.
-
3 hours ago, Brian Dutz said:Super sharp build Gary!
Thank you
-
2 hours ago, Brian Dutz said:This truck is an absolute beauty!
Thank you
-
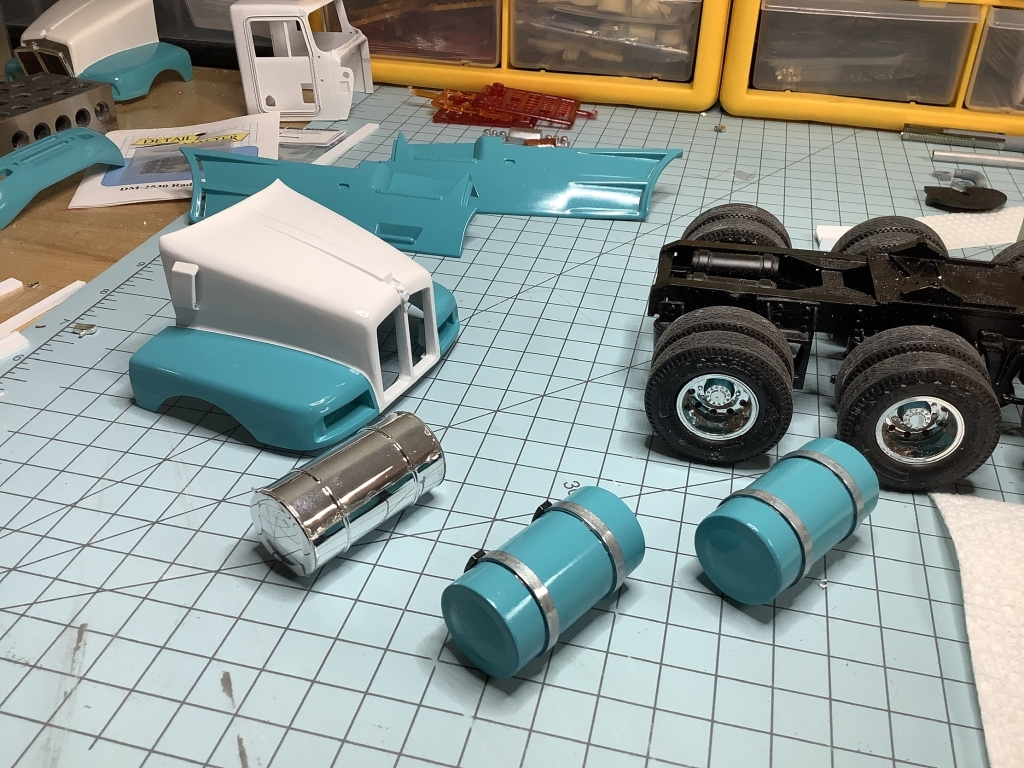
Quick mock-up to locate fuel tanks

-
1
-
-
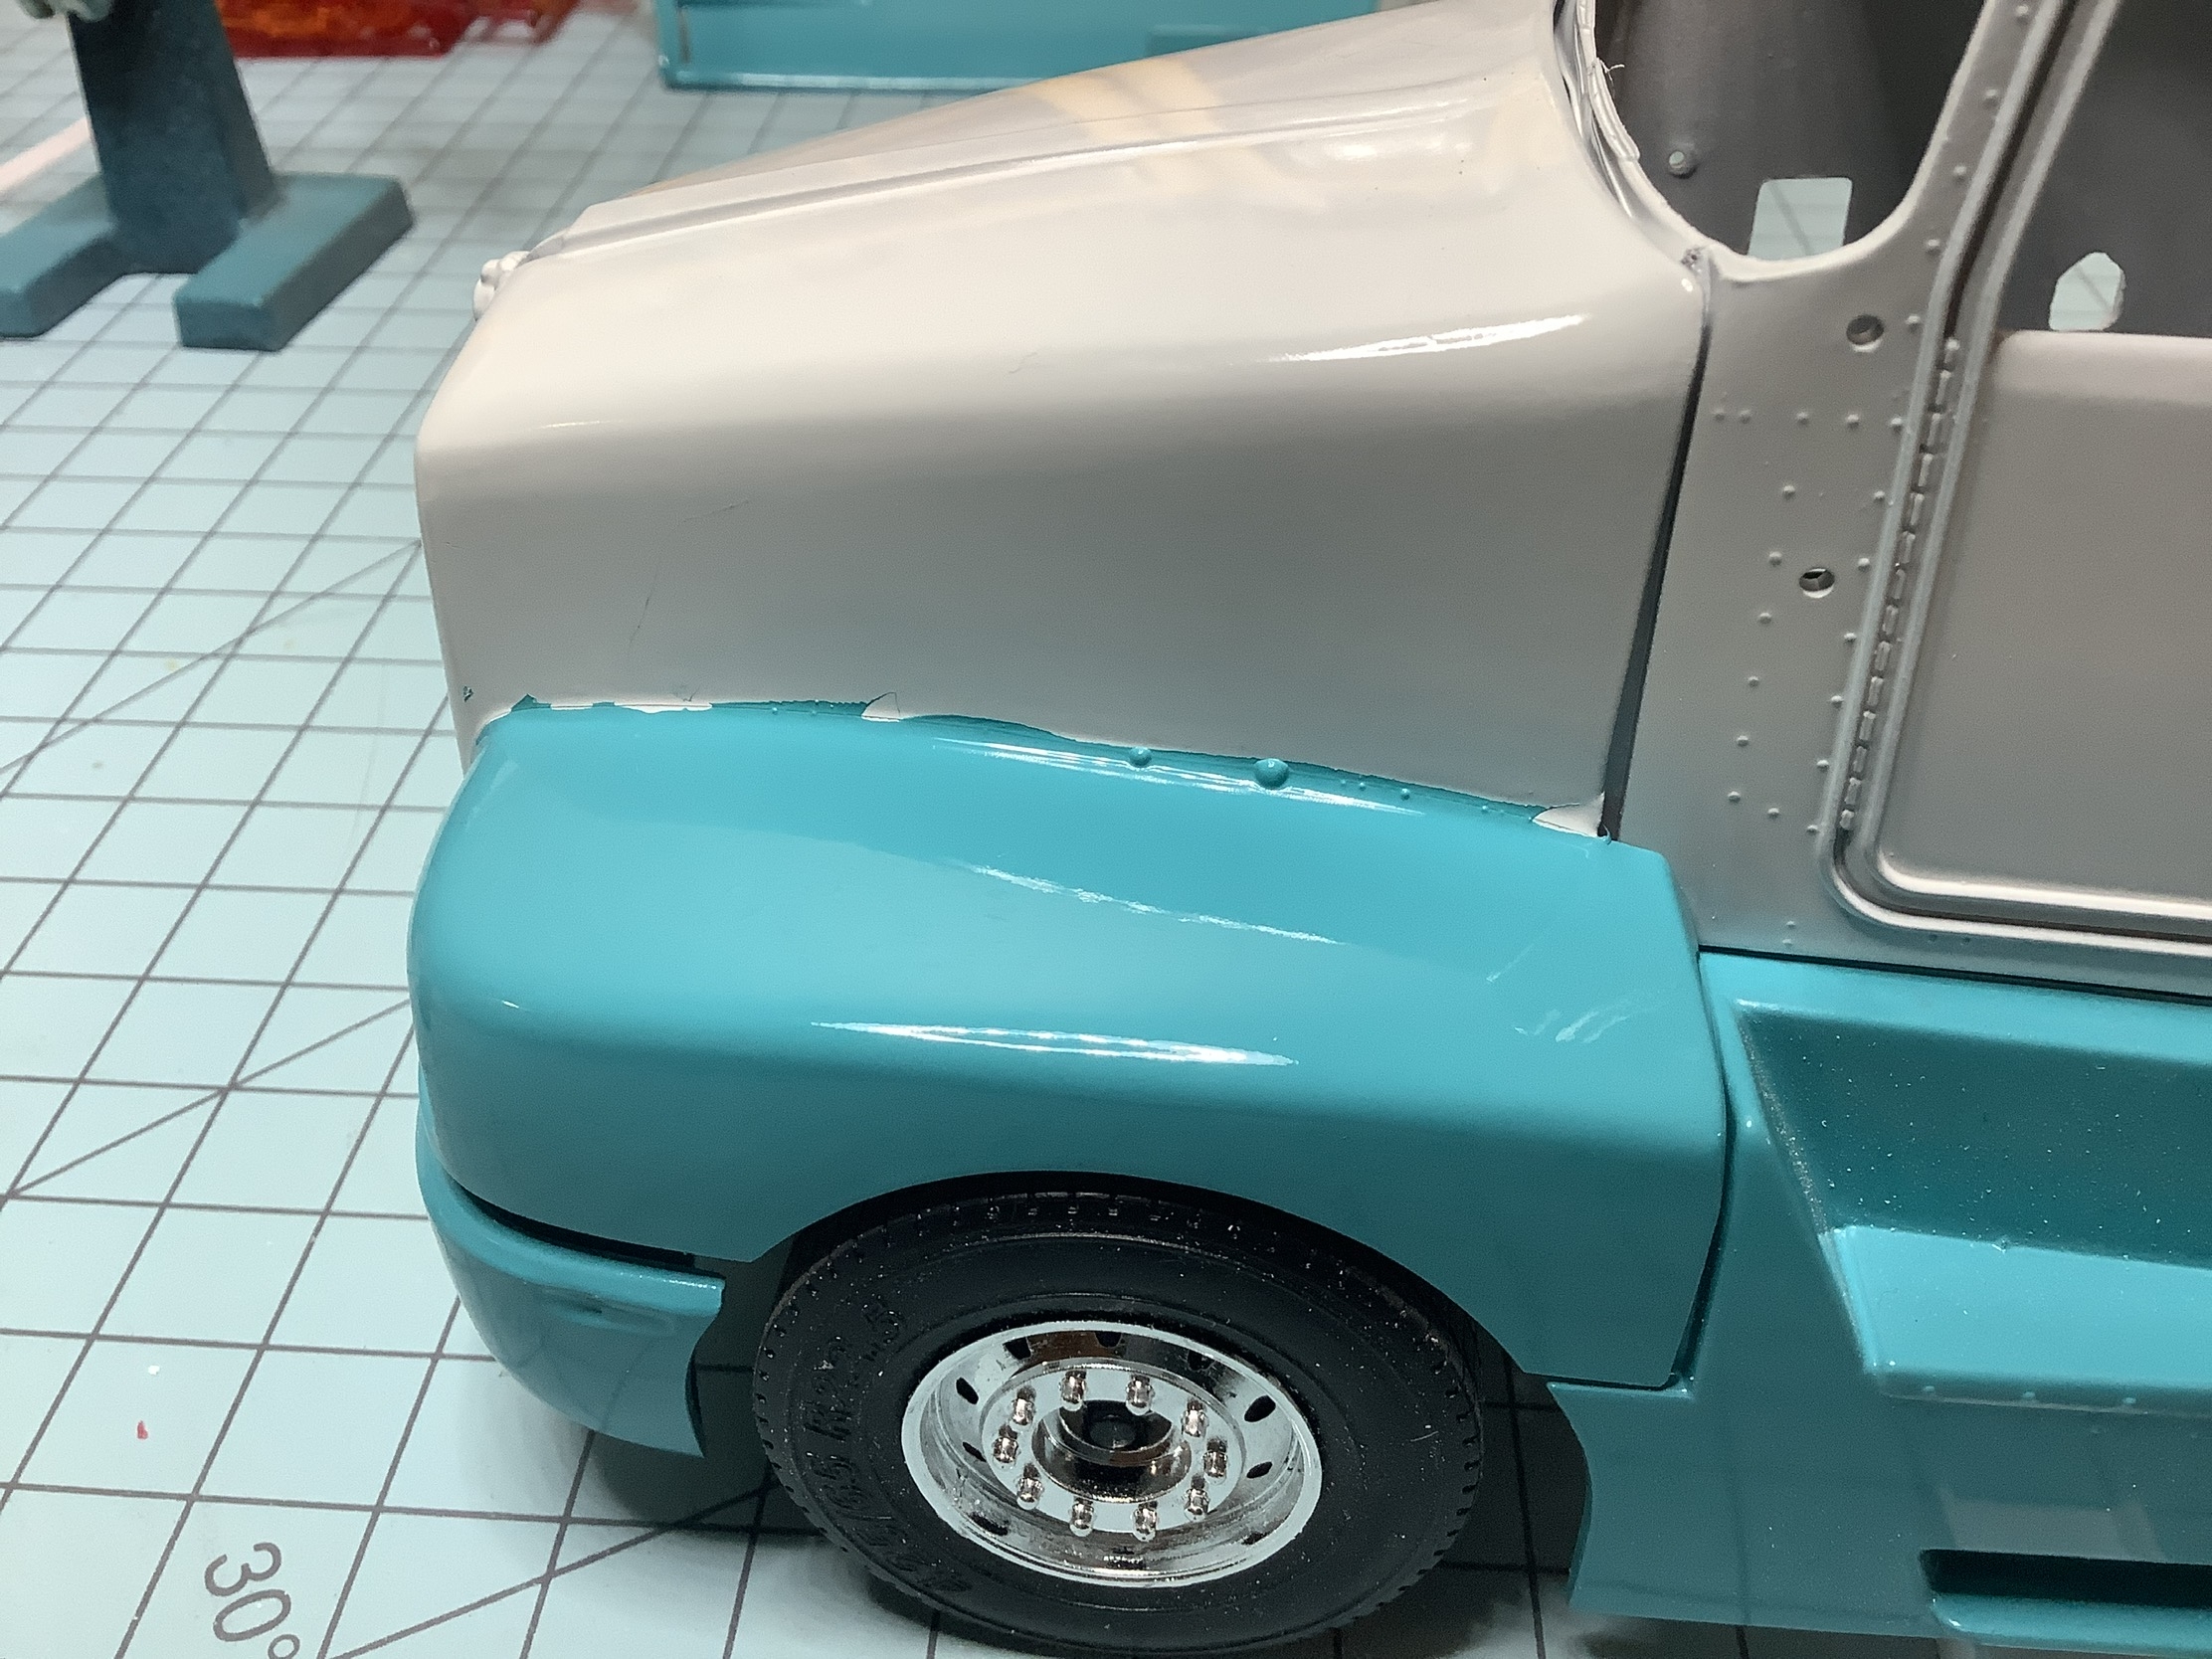
Tanks will be only partially visible with the aero skirts on but I just couldn’t use them as is. They just don’t look good. Getting the paint on the hood repaired as well.
-
Outstanding, love the fleet🏆
-
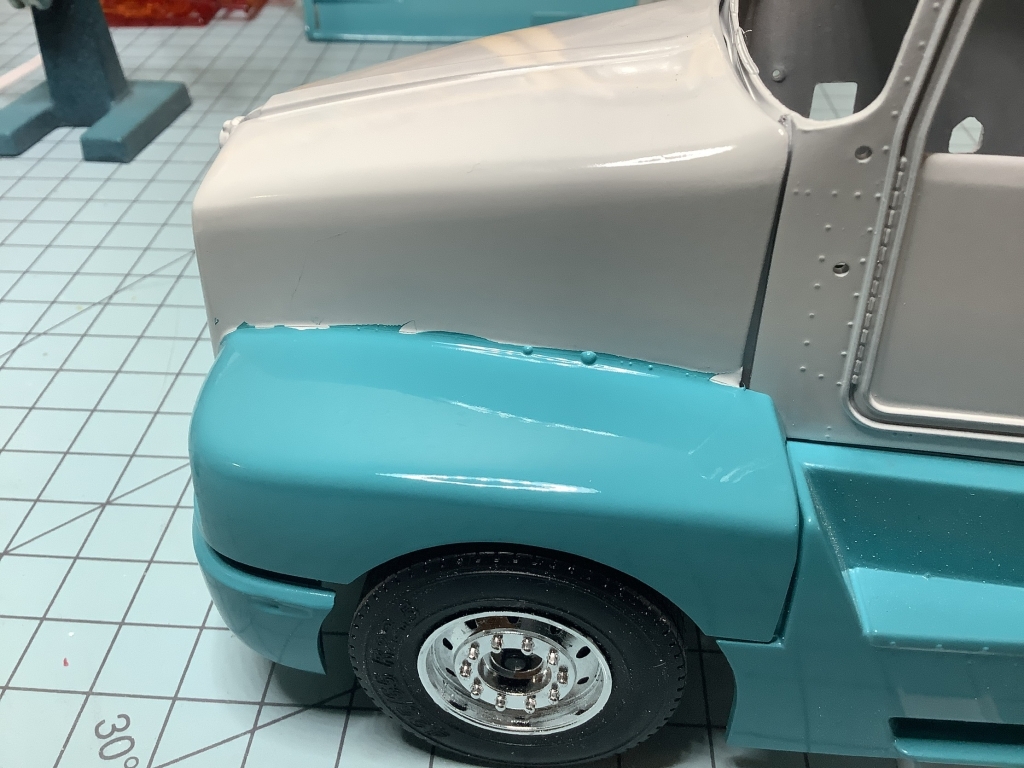
22 hours ago, Brian Conn said:That transition from a vertical surface (hood) to a horizontal surface (fender) can be tricky, especially since there is a slight curve and not a 90 degree angle to work with....might try the sealing of the tape method that I previously mentioned.
Yes, will give it a try. I still have the other hood (grill not molded in) and paint work is complete. Will try to save the hood first but have a backup plan.
-
14 hours ago, Brian Conn said:...Which tape did you use? Reason I asked is that I had the same issue a couple of times doing two tone colors. I was told to use Tamiya Yellow 10 mm. tape for the wider areas and the White 2 mm. tape for curves, etc. I have not had any issues, so far, with the Tamiya tapes so long as they are burnished before applying any paint. If I still have any doubts, I'll shoot a light clear coat or the color that is being covered up,...... in the case of your KW a light coat of the lighter color that will be under the Blue.... on the tape to seal the edges so as not to allow any seepage and it also seems to help prevent paint from being peeled off when removing the tape.
Tamiya 2mm white for the paint line. , I have yellow but never used it as a paint line. I just finished my International 5600 build using the same process with no issues with paint line but this time , no success.
-
Well this didn’t go well, let dry and start over.
-
Outstanding build, love those old Mack trucks.


Redo of a Kenworth T600
in Model Truck Workbench
Posted
😂🤣😂🤣……I definitely will get some of that